A Retention Policy in Fluix Tasks defines how long forms and processes will remain on Fluix servers. You may set the retention policy for the following options before their automatic removal:
Deleted Fluix Storage documents determine how long they remain on Fluix Storage and can be restored. Check the tutorial on How to Restore Deleted Documents in Fluix Tasks during your retention period.
Deleted workflow processes in Dashboard. If you need to restore the deleted process during the retention period, contact us at support@fluix.io, and we will assist you.
Key Benefits of Retention Policy:
Manage data efficiently and maintain compliance with company policies
Get outdated form/process versions automatically deleted
Be ready for audits
Note: once the retention period has expired, the document or workflow process will be permanently deleted and cannot be restored by the Fluix team. Therefore, we suggest regularly reviewing and adjusting the policy if needed.
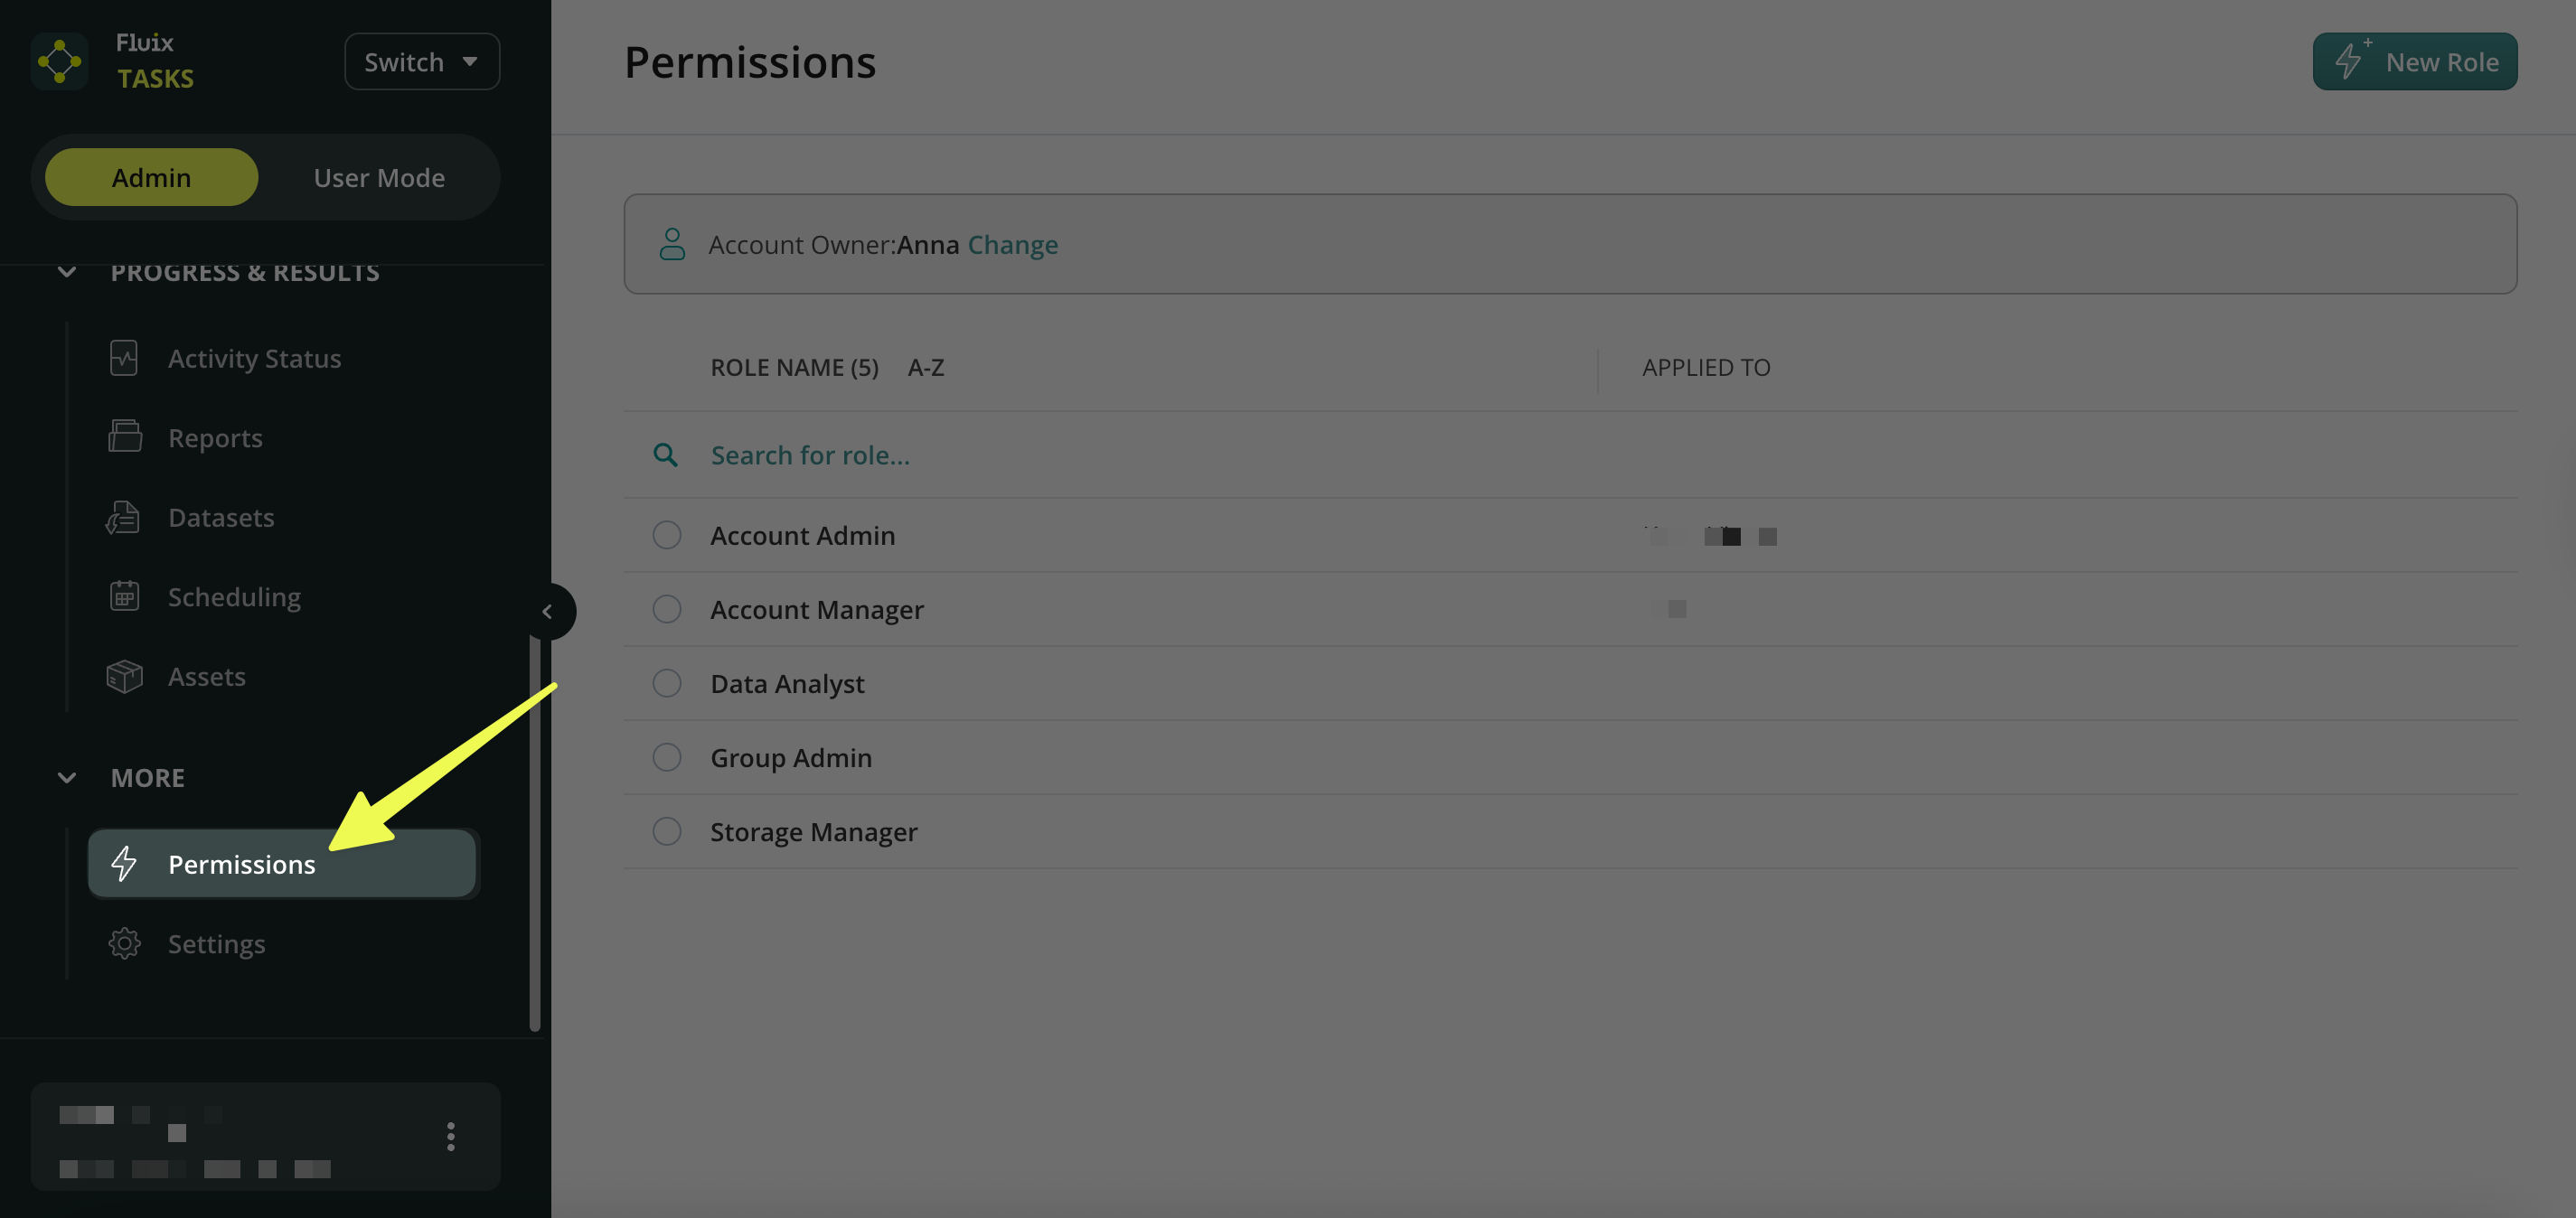
To manage the Retention Policy settings, you should have the permission to access the Security Settings, which your account admin can grant by following the guidelines below:
Log in to the Fluix Admin Portal.
On the left-side menu, scroll down and navigate to Permission under the More section.
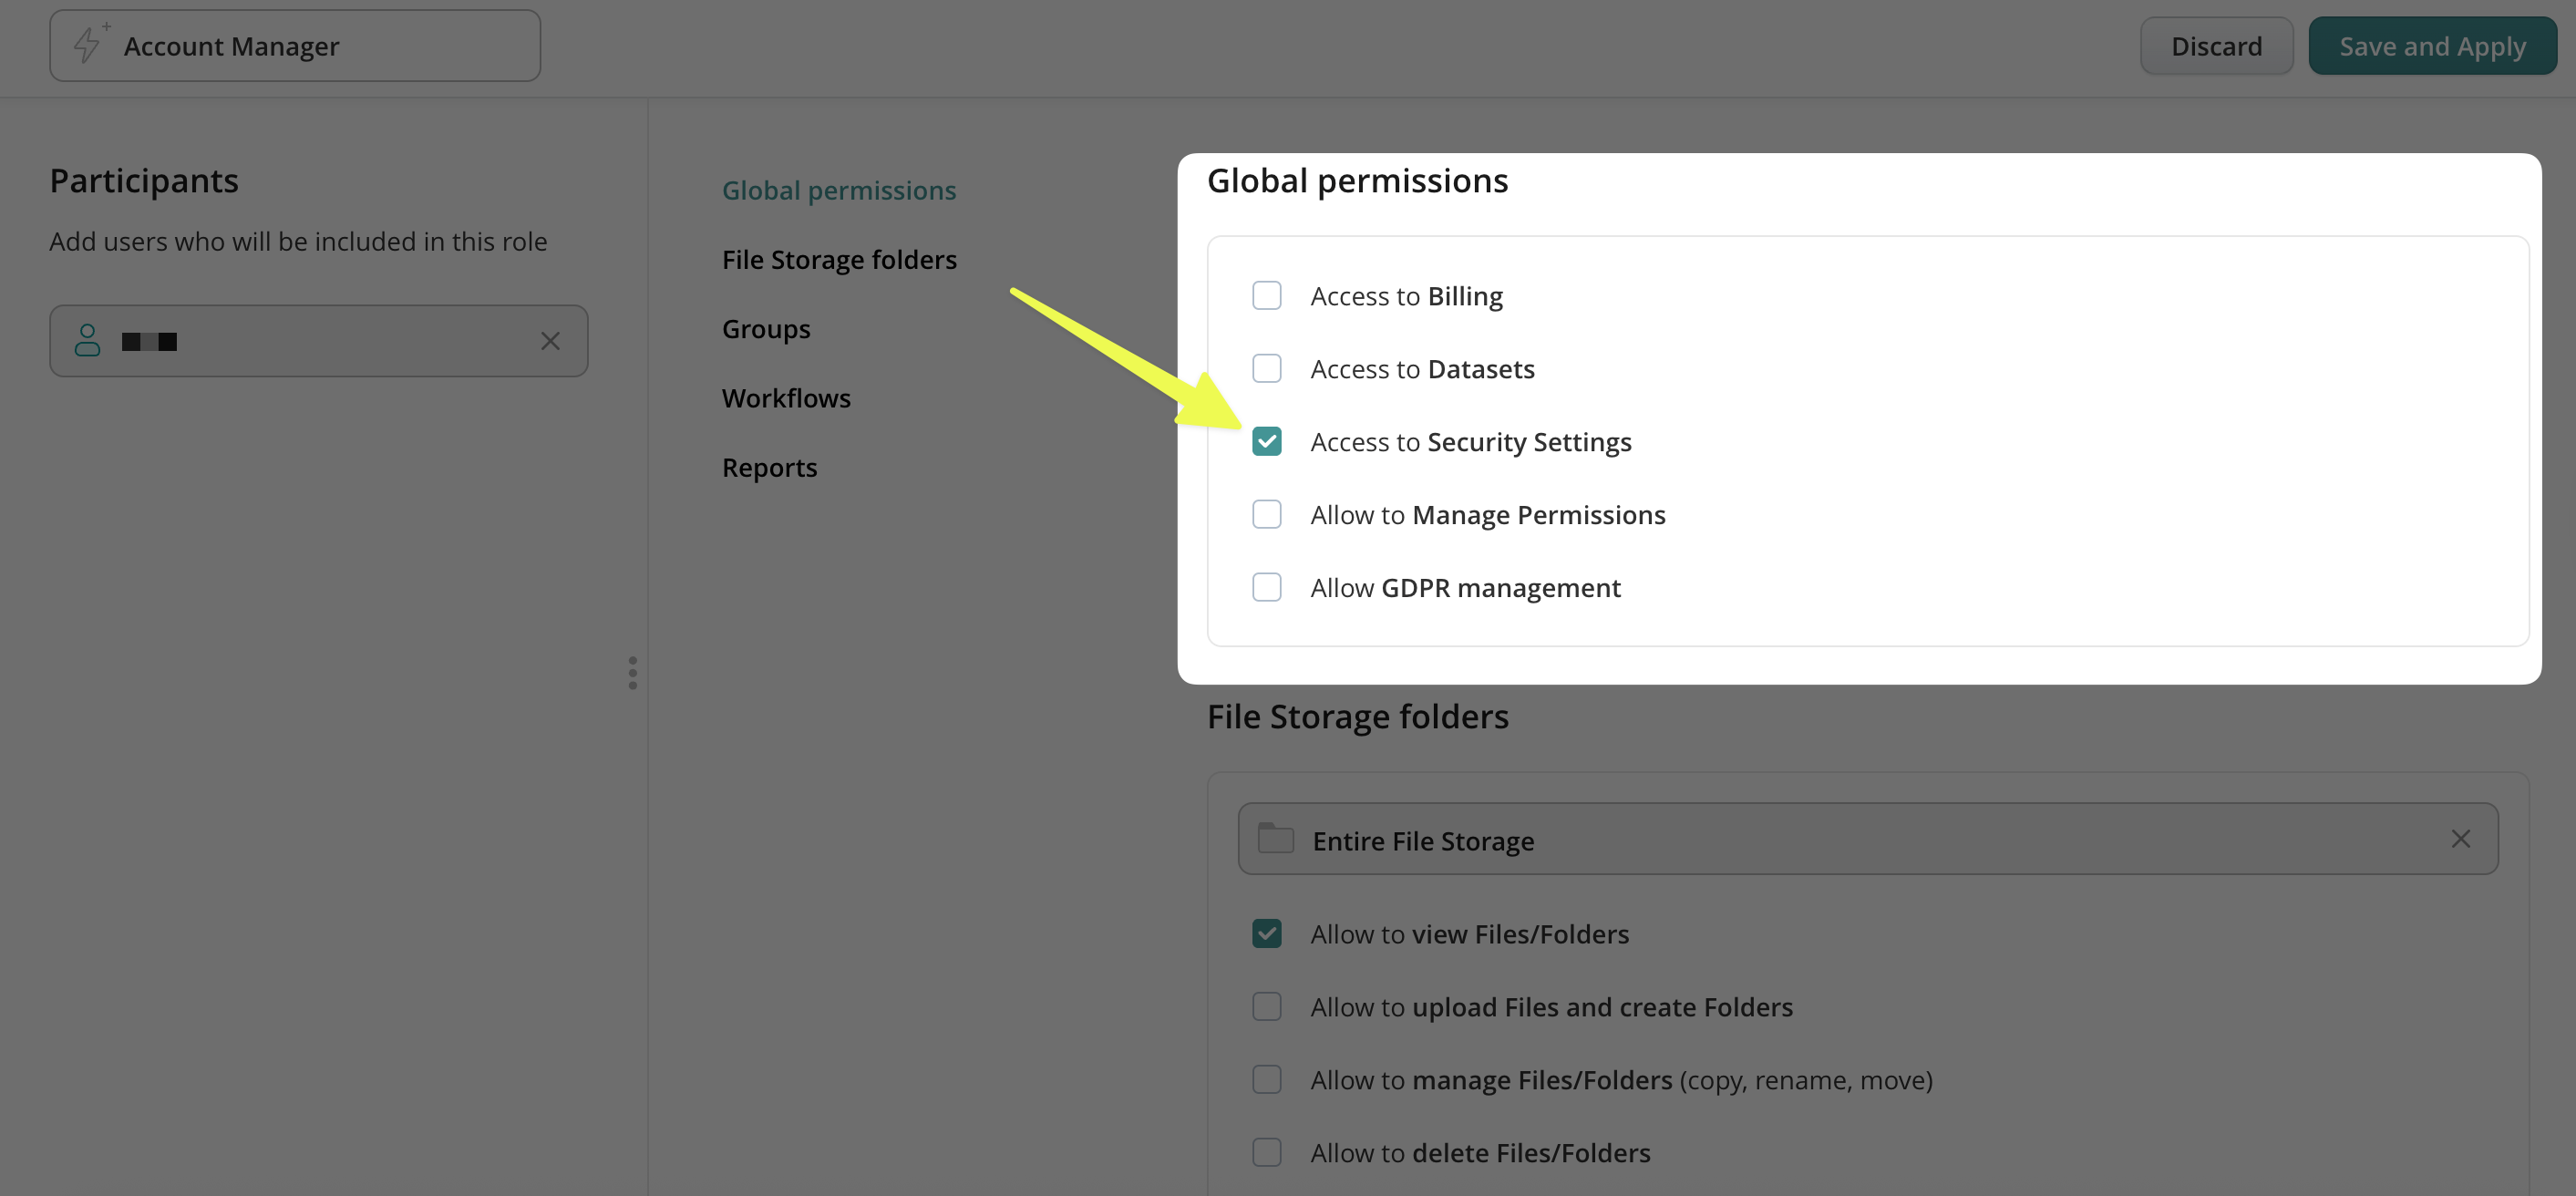
Select the respective role → click “Edit Role.”
In the Global Permissions, select the “Access to Security Setting” permission by placing a check mark next to it.
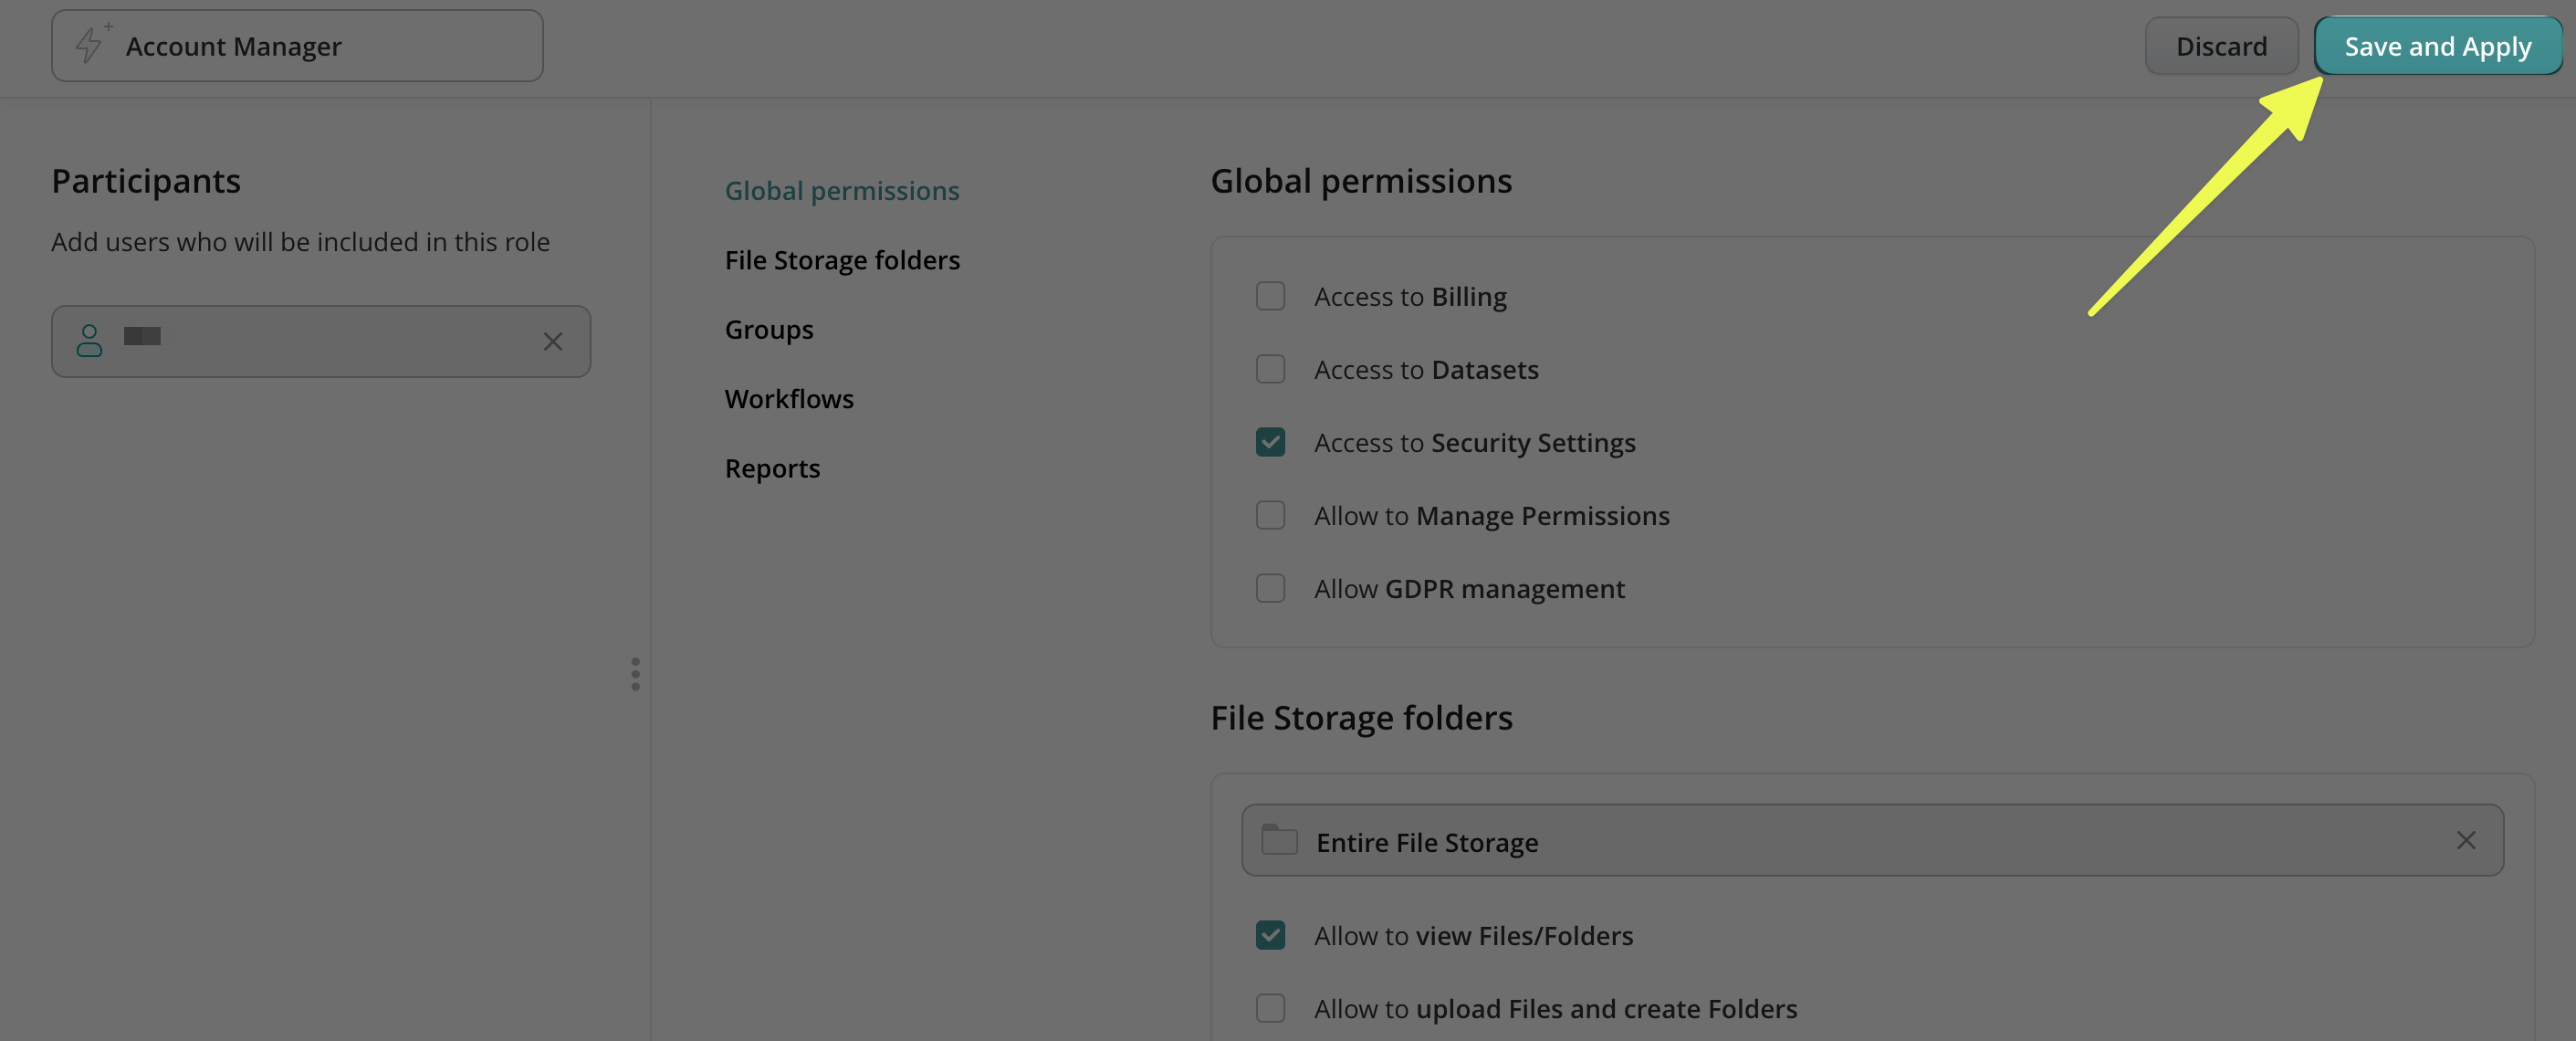
Click Save and Apply.
How to Set the Retention Policy in Fluix Tasks?
Log in to Fluix Admin Portal.
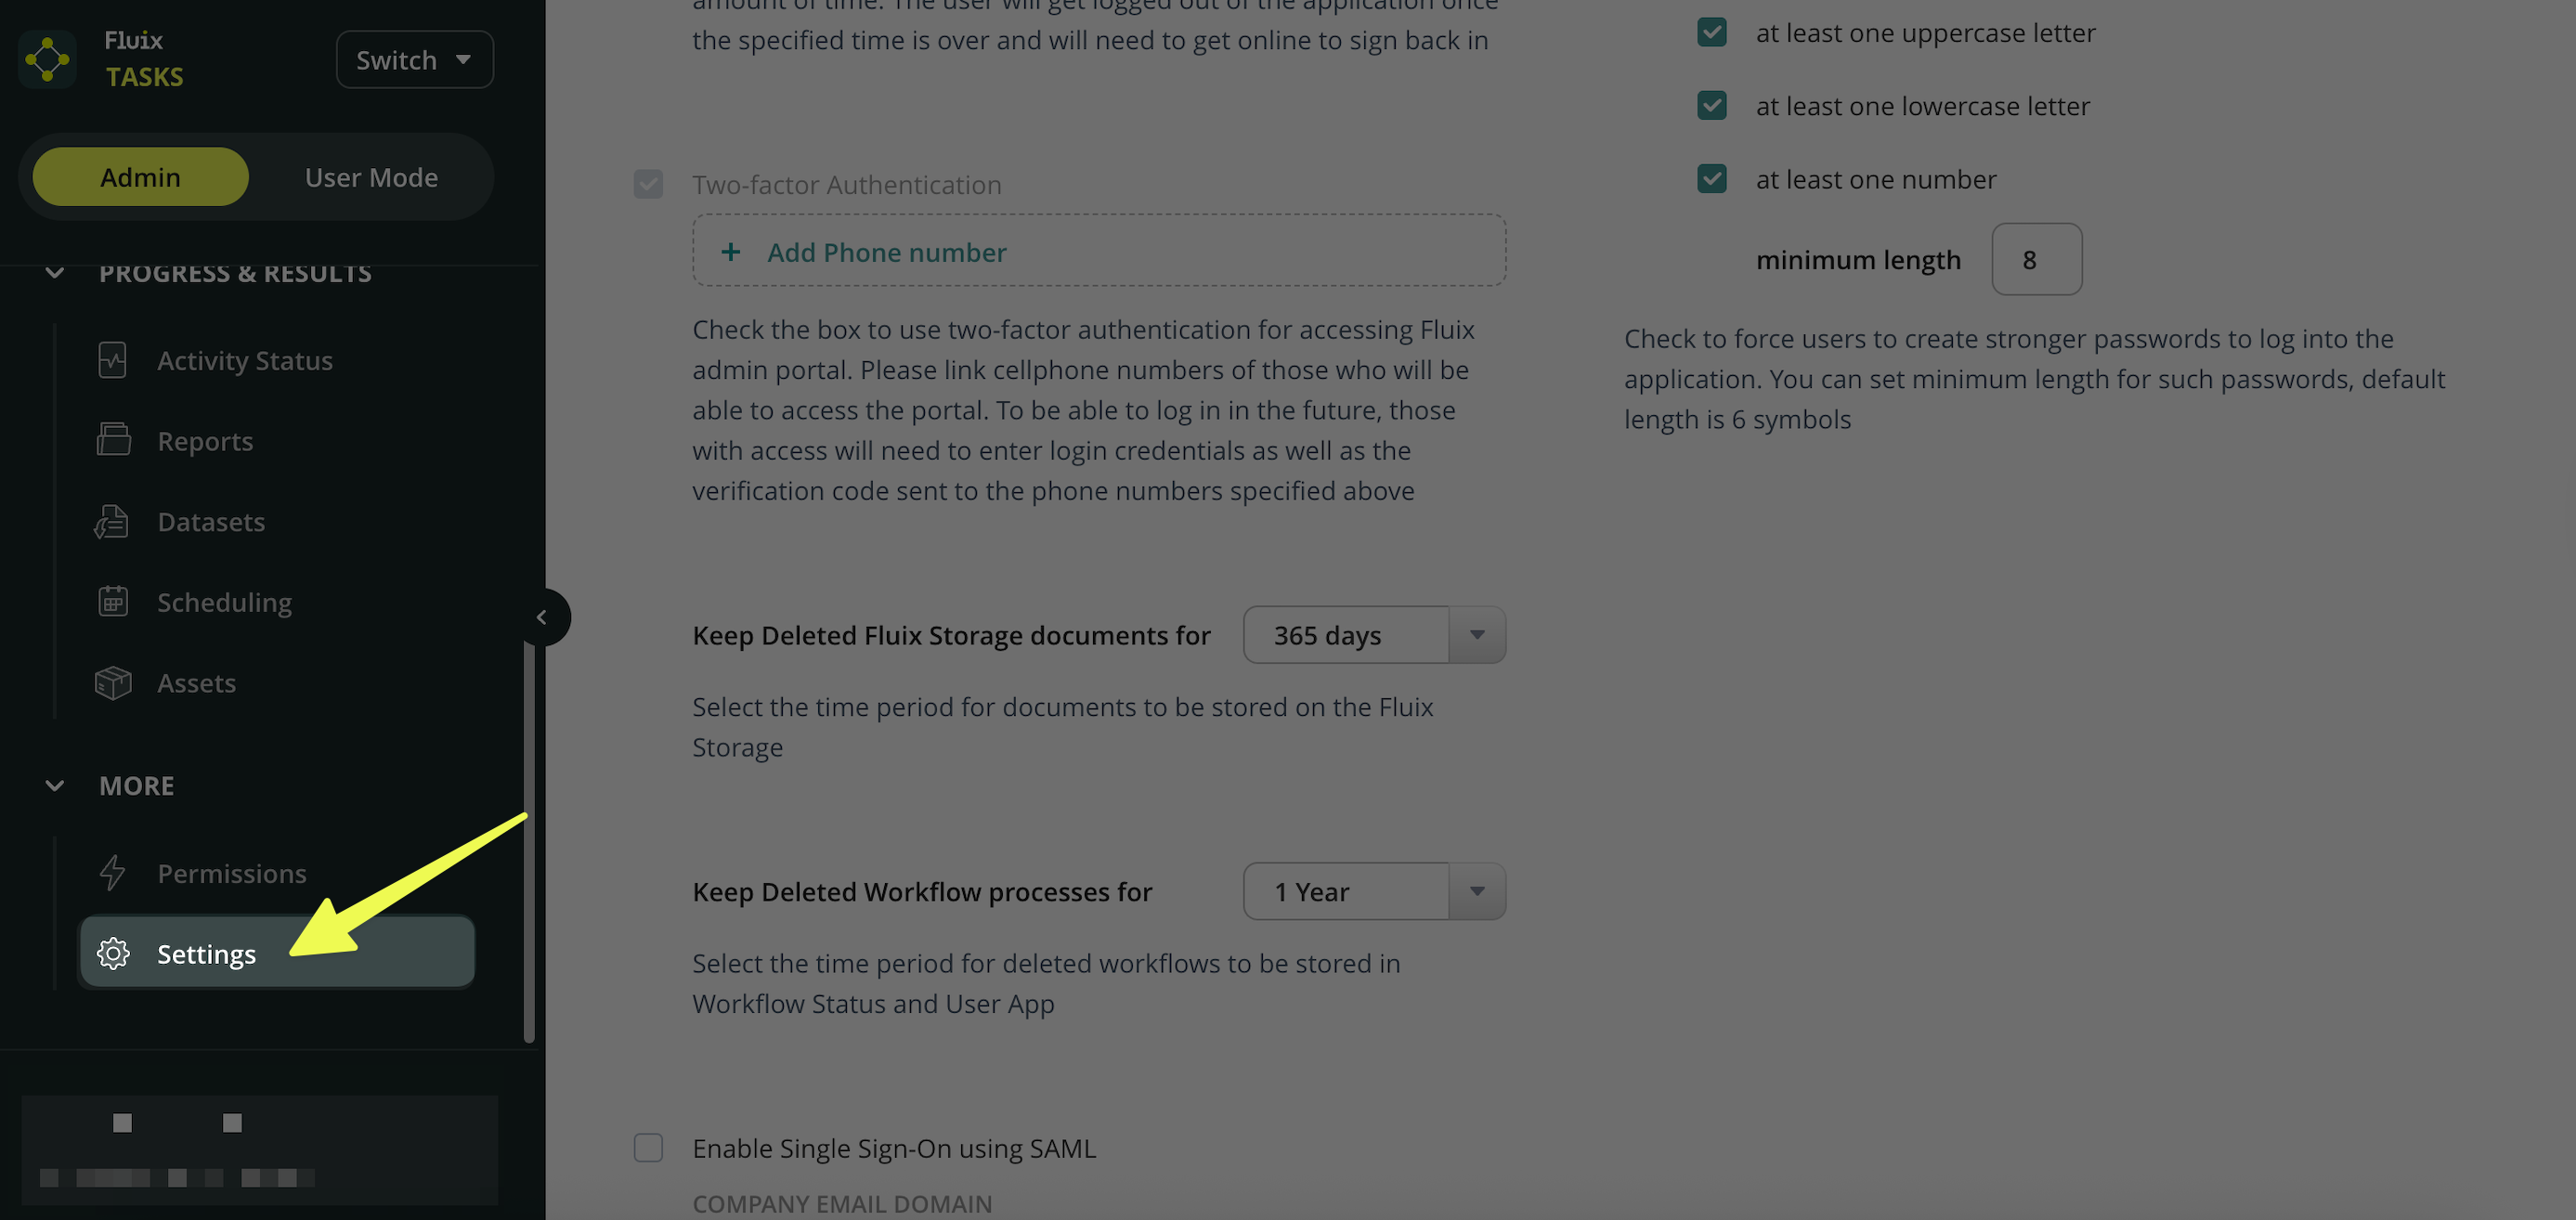
On the left-side menu, scroll down and navigate to Settings under the More section.
In the Settings section, find the following options:
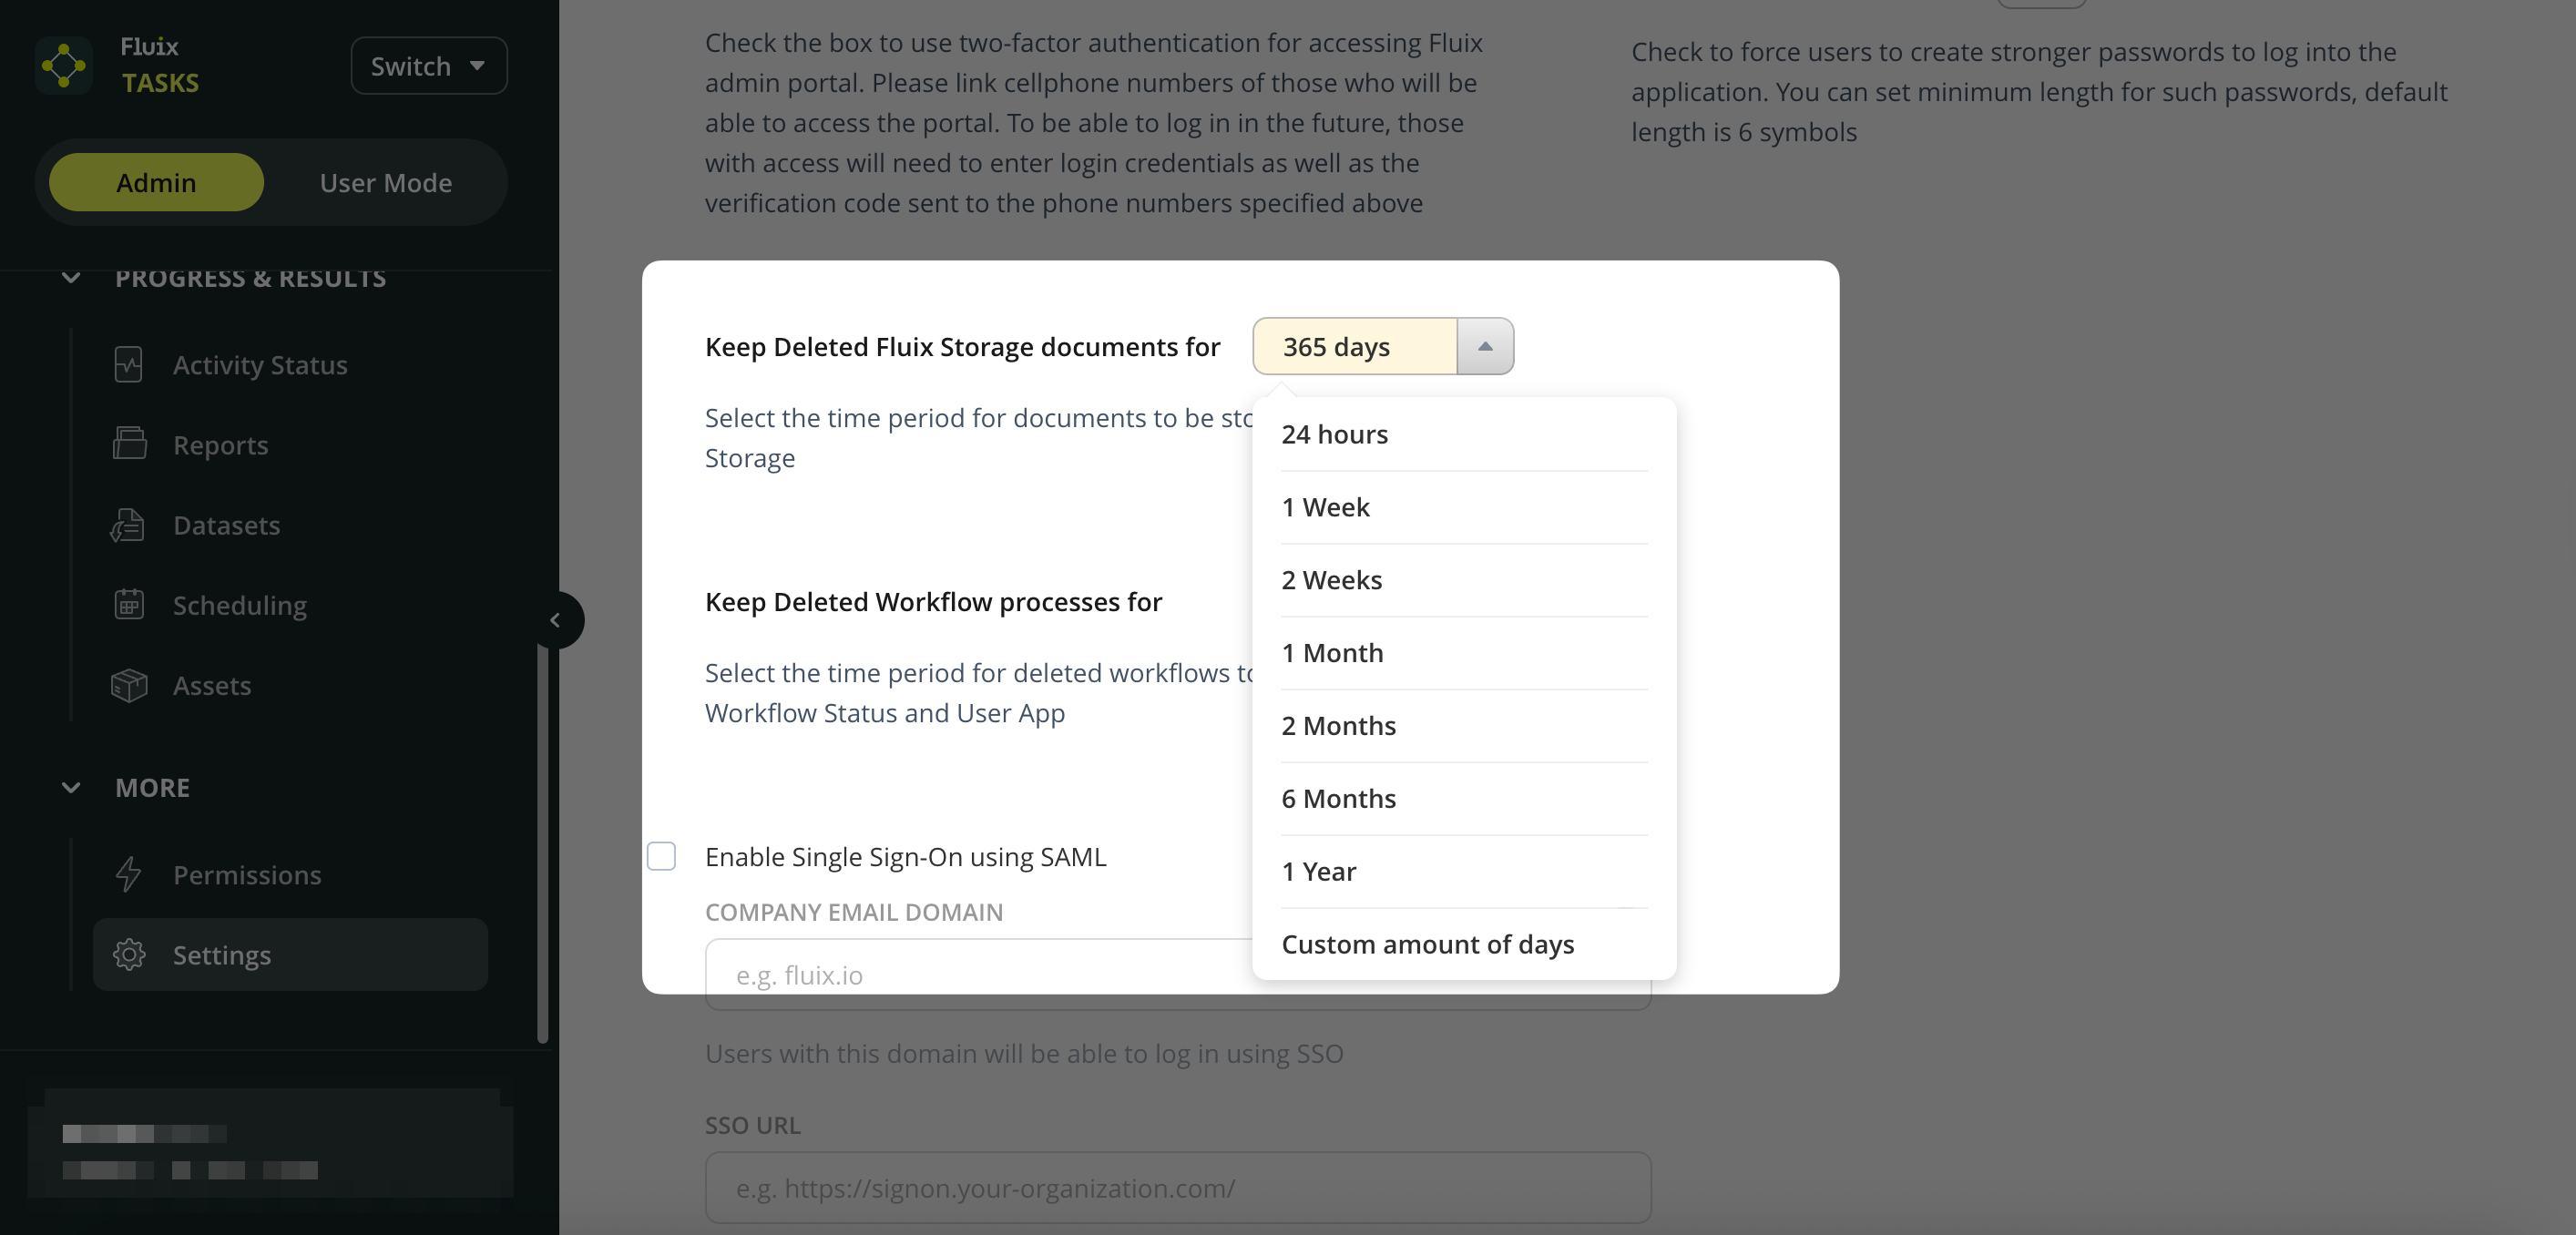
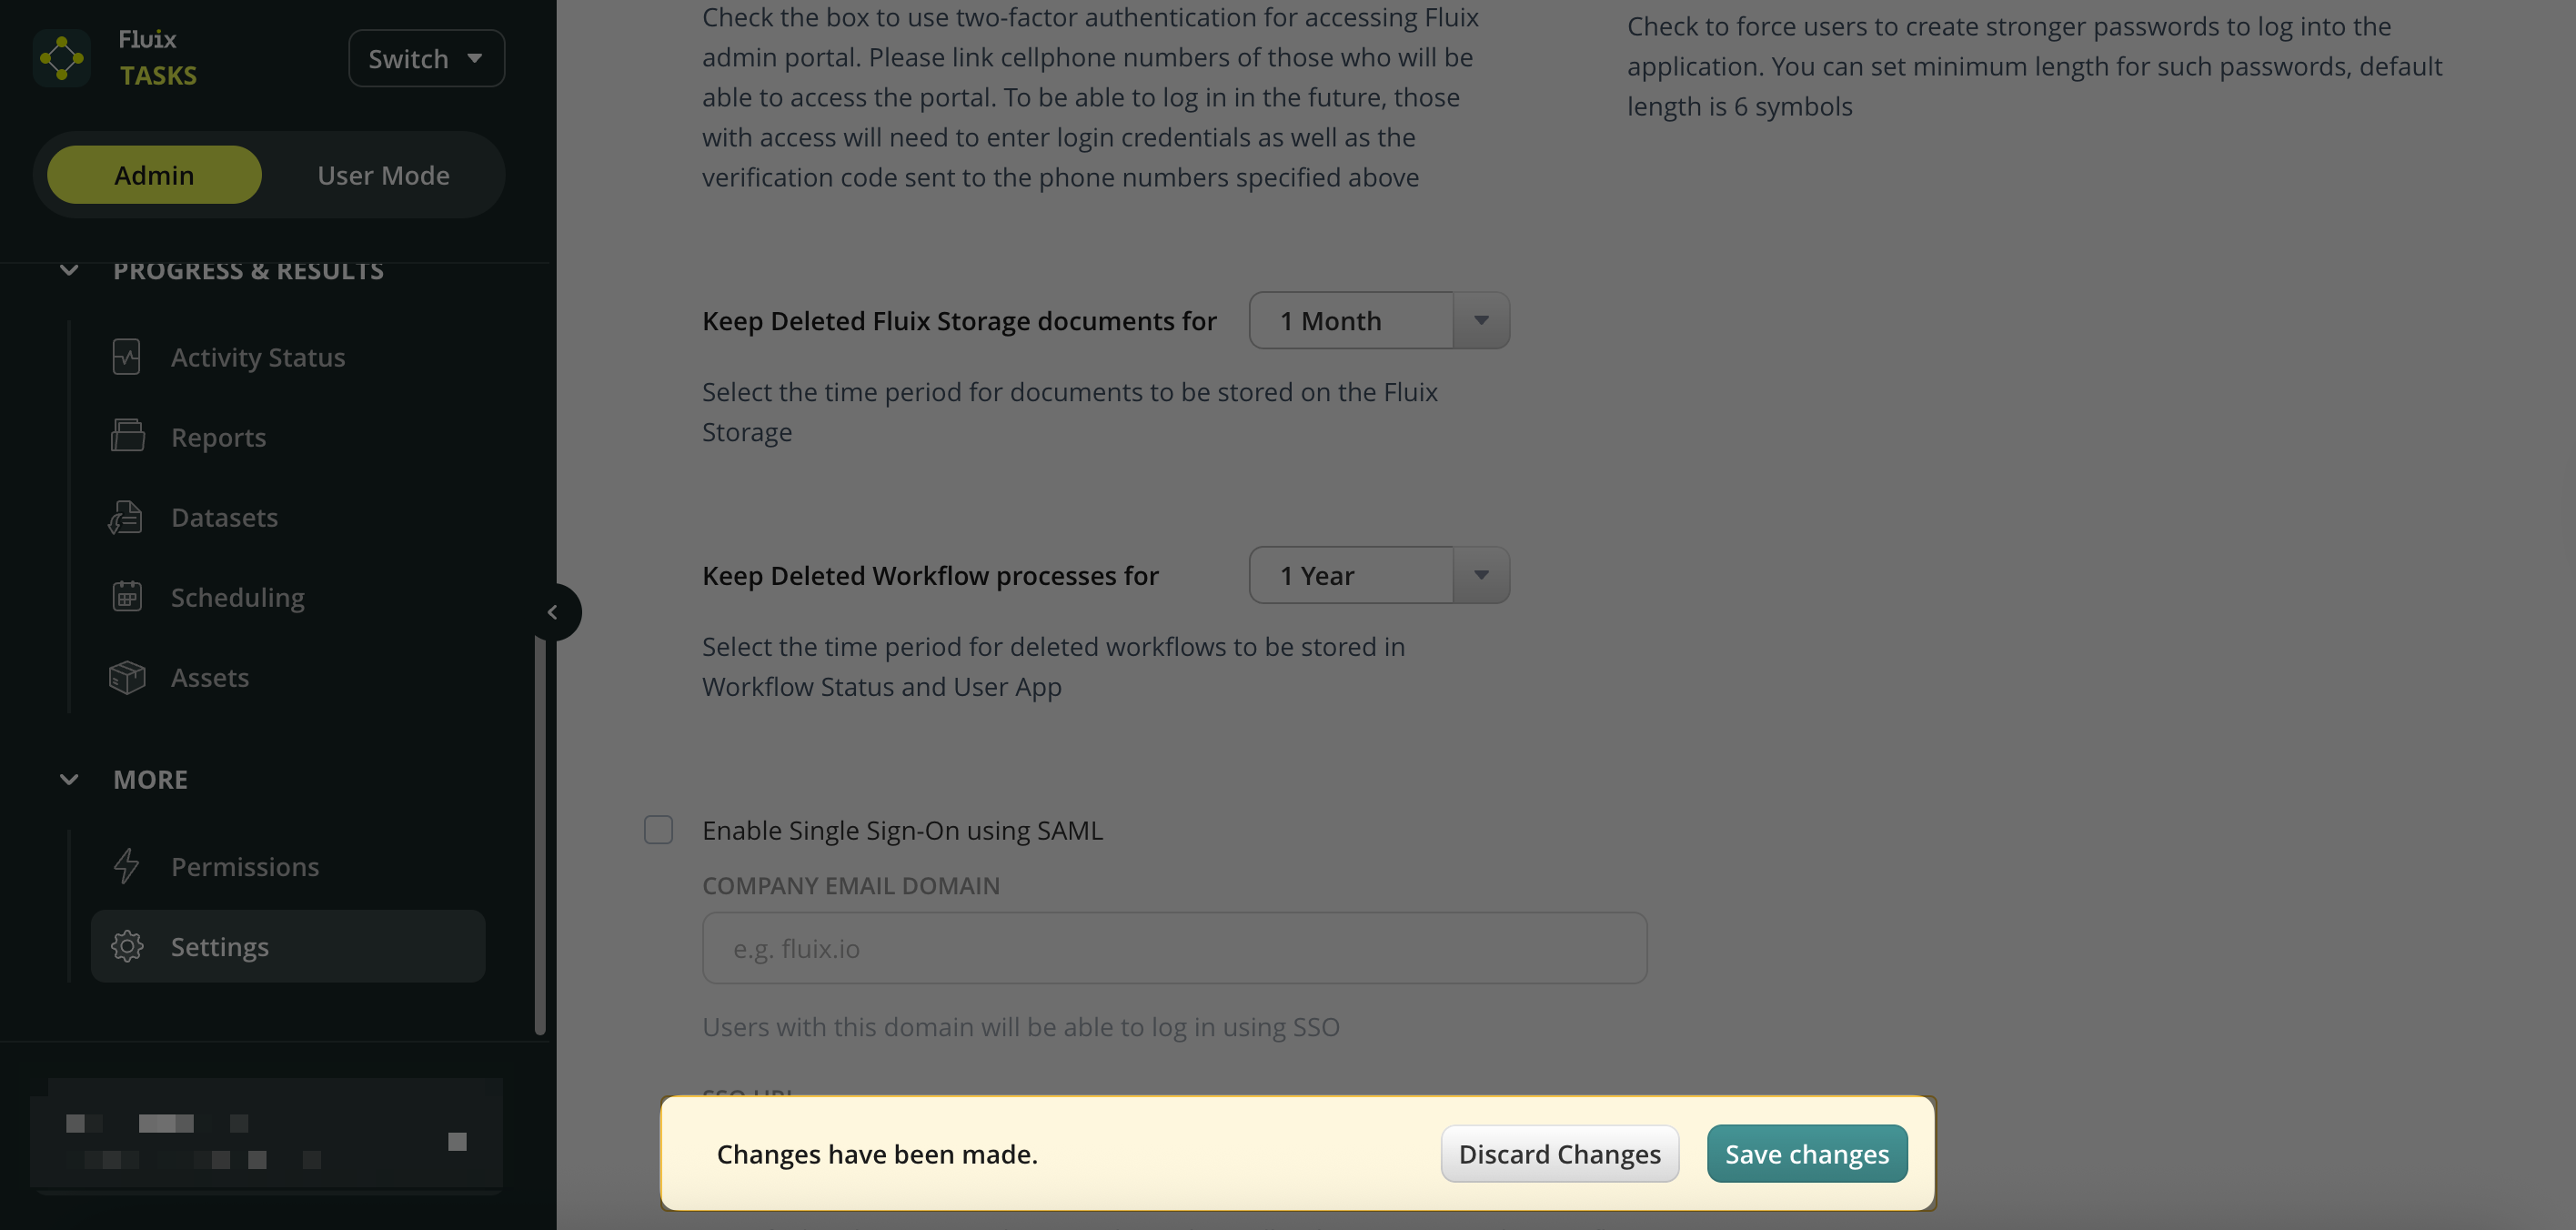
Keep Deleted Fluix Storage Documents For Keep Deleted Workflow Processes For
Select the Retention Period → use the dropdown menu to select the desired time frame (e.g., 1 week, 1 month, 1 year, etc.). Note: the maximum period you can choose is 999 days.
Save Changes.
Feel free to contact us at support@fluix.io if you have any questions or comments.
Was this article helpful?
Thanks for your feedback!
Oops, something went wrong. Please, try again later.
Thank you!
What details or examples would have made this article more helpful for you? We appreciate your insights!
To manage access to the account, please open Admin Tab -> More -> Settings tab:
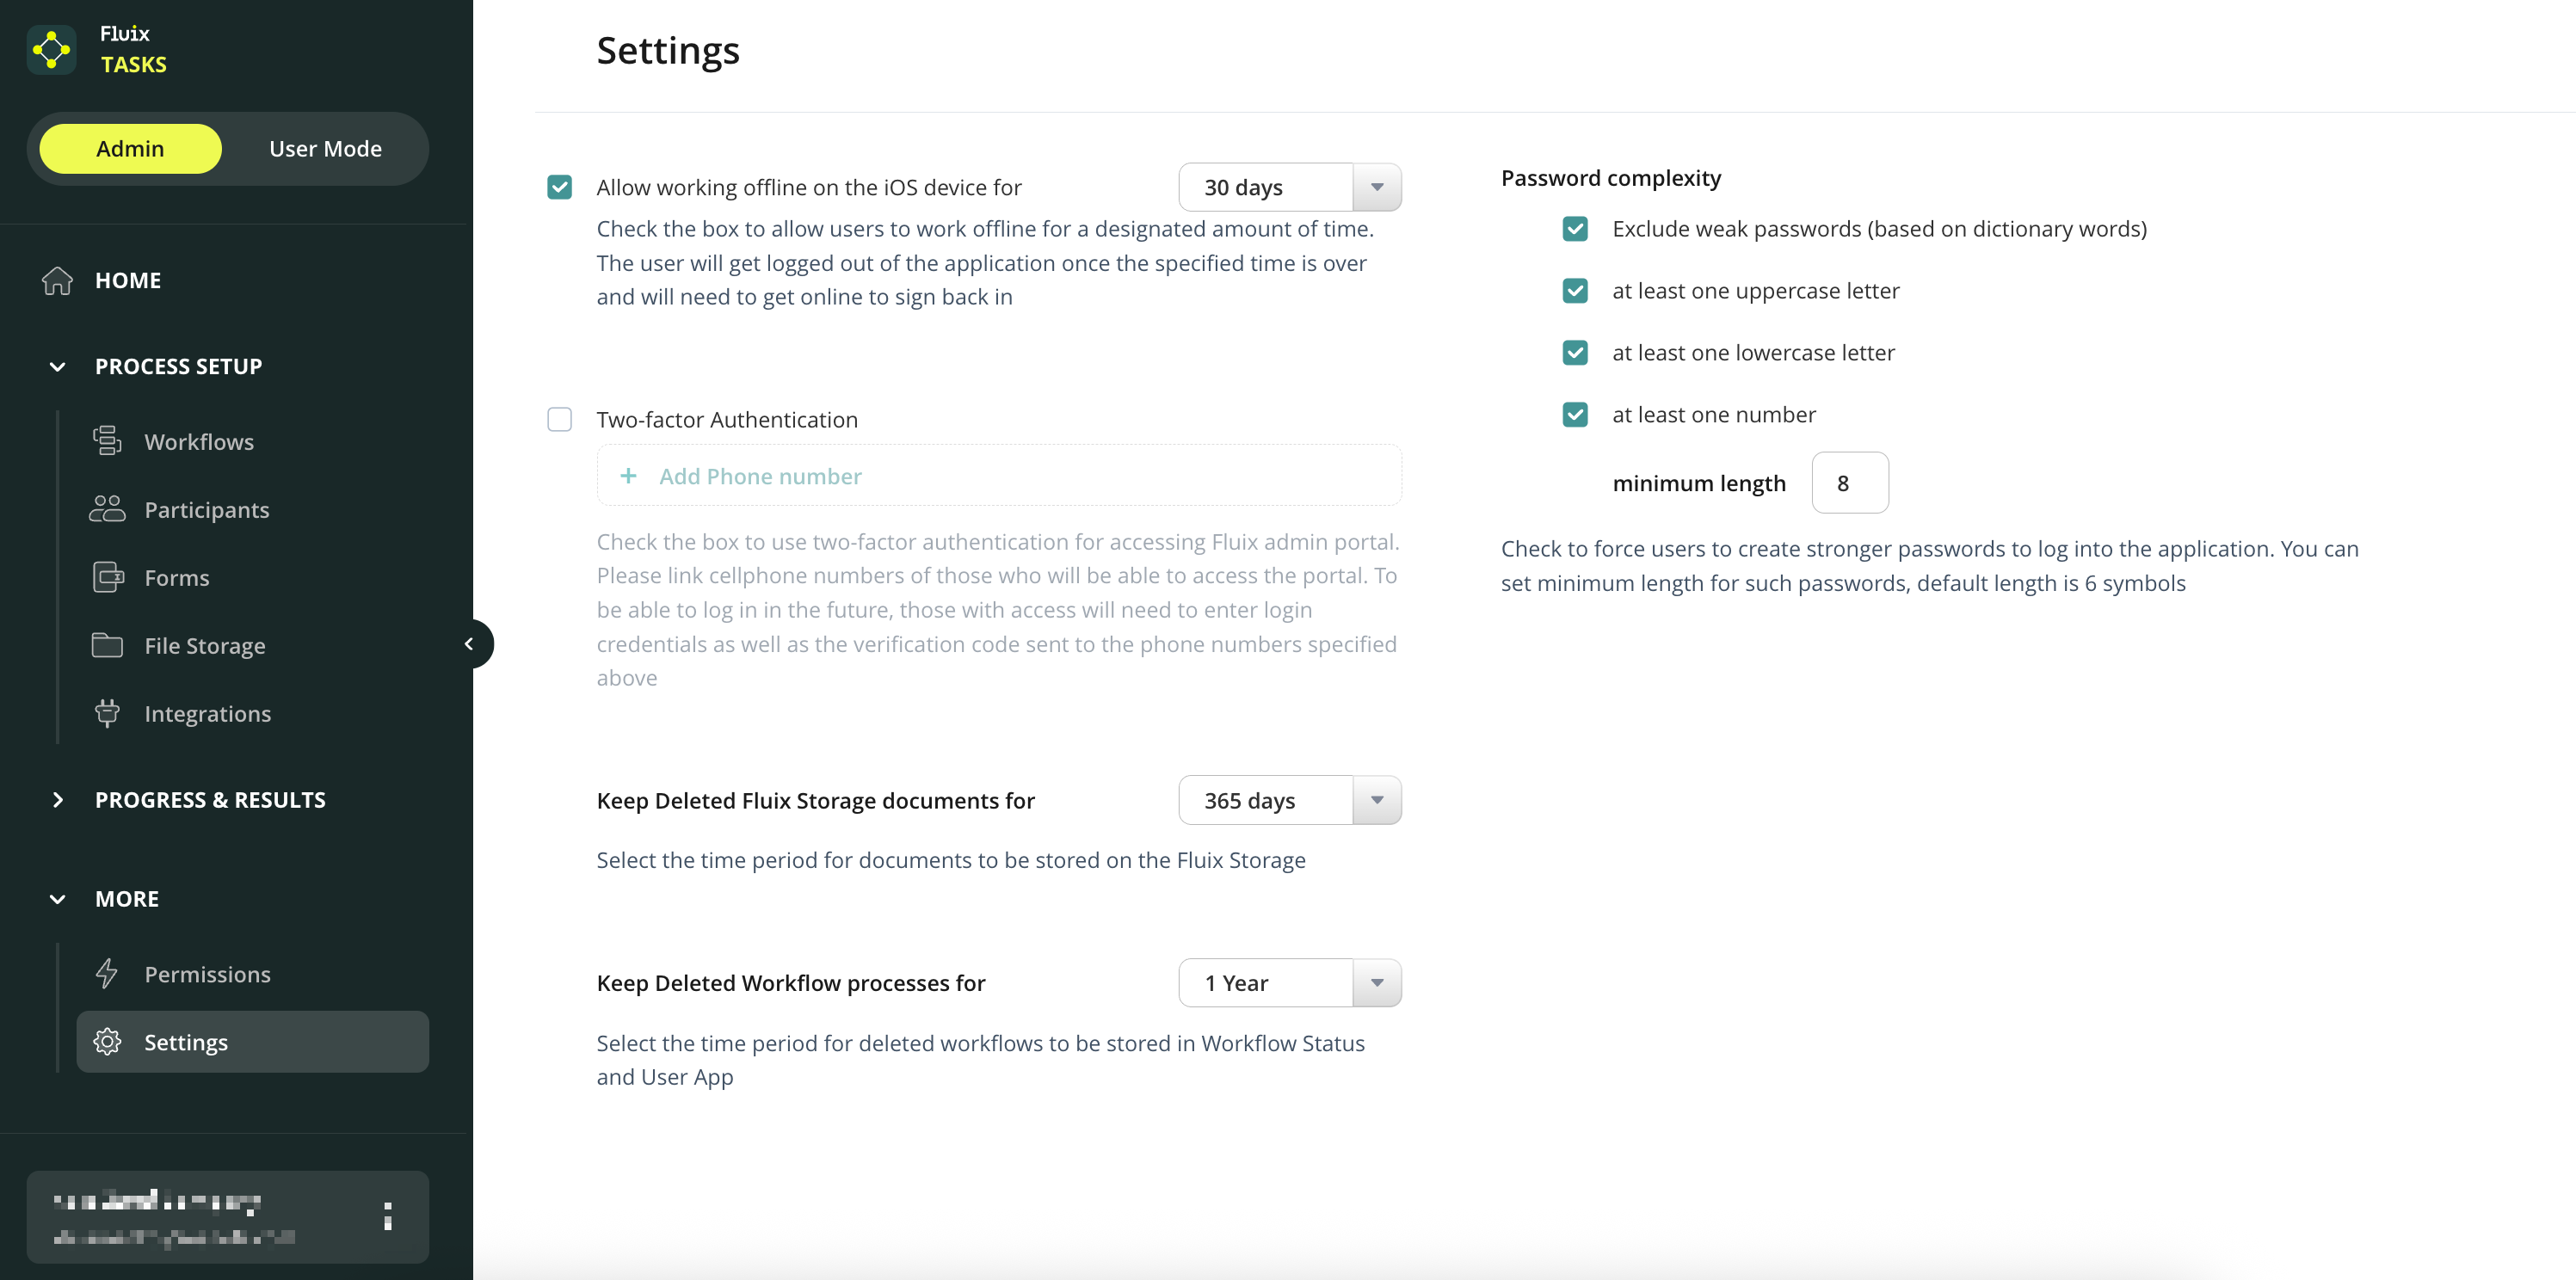
Allow working offline for the iOS device—This feature allows you to determine whether your end users can work on their mobile devices offline. If activated, users can open the app with no Internet connection and access documents they’ve previously synced. The setting allows working offline for the number of days you determine, past which users will be logged out of the application and will need to connect to the Internet to sign back in.
Two-factor Authentication is an extra level of security for Fluix account admins. If enabled, Admins will be prompted to enter a login, password, and unique PIN sent to a cell phone each time they try to access the Admin Portal.
Keep Deleted Fluix Storage Documents for.. is the setting that controls the period during which you’d like Fluix to keep documents that were deleted from Fluix cloud storage on our servers.
Keep Deleted Workflow Processes for...is the setting that defines the period during which the processes related to the deleted workflows will be stored on our servers.
Password complexity — allows you to define the level of complexity of passwords that end users choose to log into the app.
Enable Single Sign-On (SSO) using SAML — allows users to use one set of login credentials to securely access multiple applications. To enable SSO for your account, contact your Success Manager or write to us at support@fluix.io.
After SSO functionality is enabled for your account, the checkbox for selecting SSO will become active, and the fields will become fillable:
Company email domain — the name of the sign-in URL, which is used for logging in using SSO.
SSO URL — the identity provider URL to which the user will be redirected from Fluix upon selecting the SSO authorization.
User ID Attribute — the field name in the response of the identity provider that contains the user’s email.
Certificate — a certificate file used to verify the identity provider’s request.
On the right, you may find links that should be implemented in your SSO solution, such as the ACS URL and the Entity ID.
Once the changes are made, to save and implement them, click the Save changes button that will be displayed on the screen.
If you have any questions about setup, contact our team at support@fluix.io, and we’ll be happy to help.
Was this article helpful?
Thanks for your feedback!
Oops, something went wrong. Please, try again later.
Thank you!
What details or examples would have made this article more helpful for you? We appreciate your insights!
Sign Up to Our Product Newsletter
The latest updates from our Product team, straight to your inbox