The Form Library consists of a list of templates created by Fluix and forms that you, as an admin, can build in Fluix Form Builder.
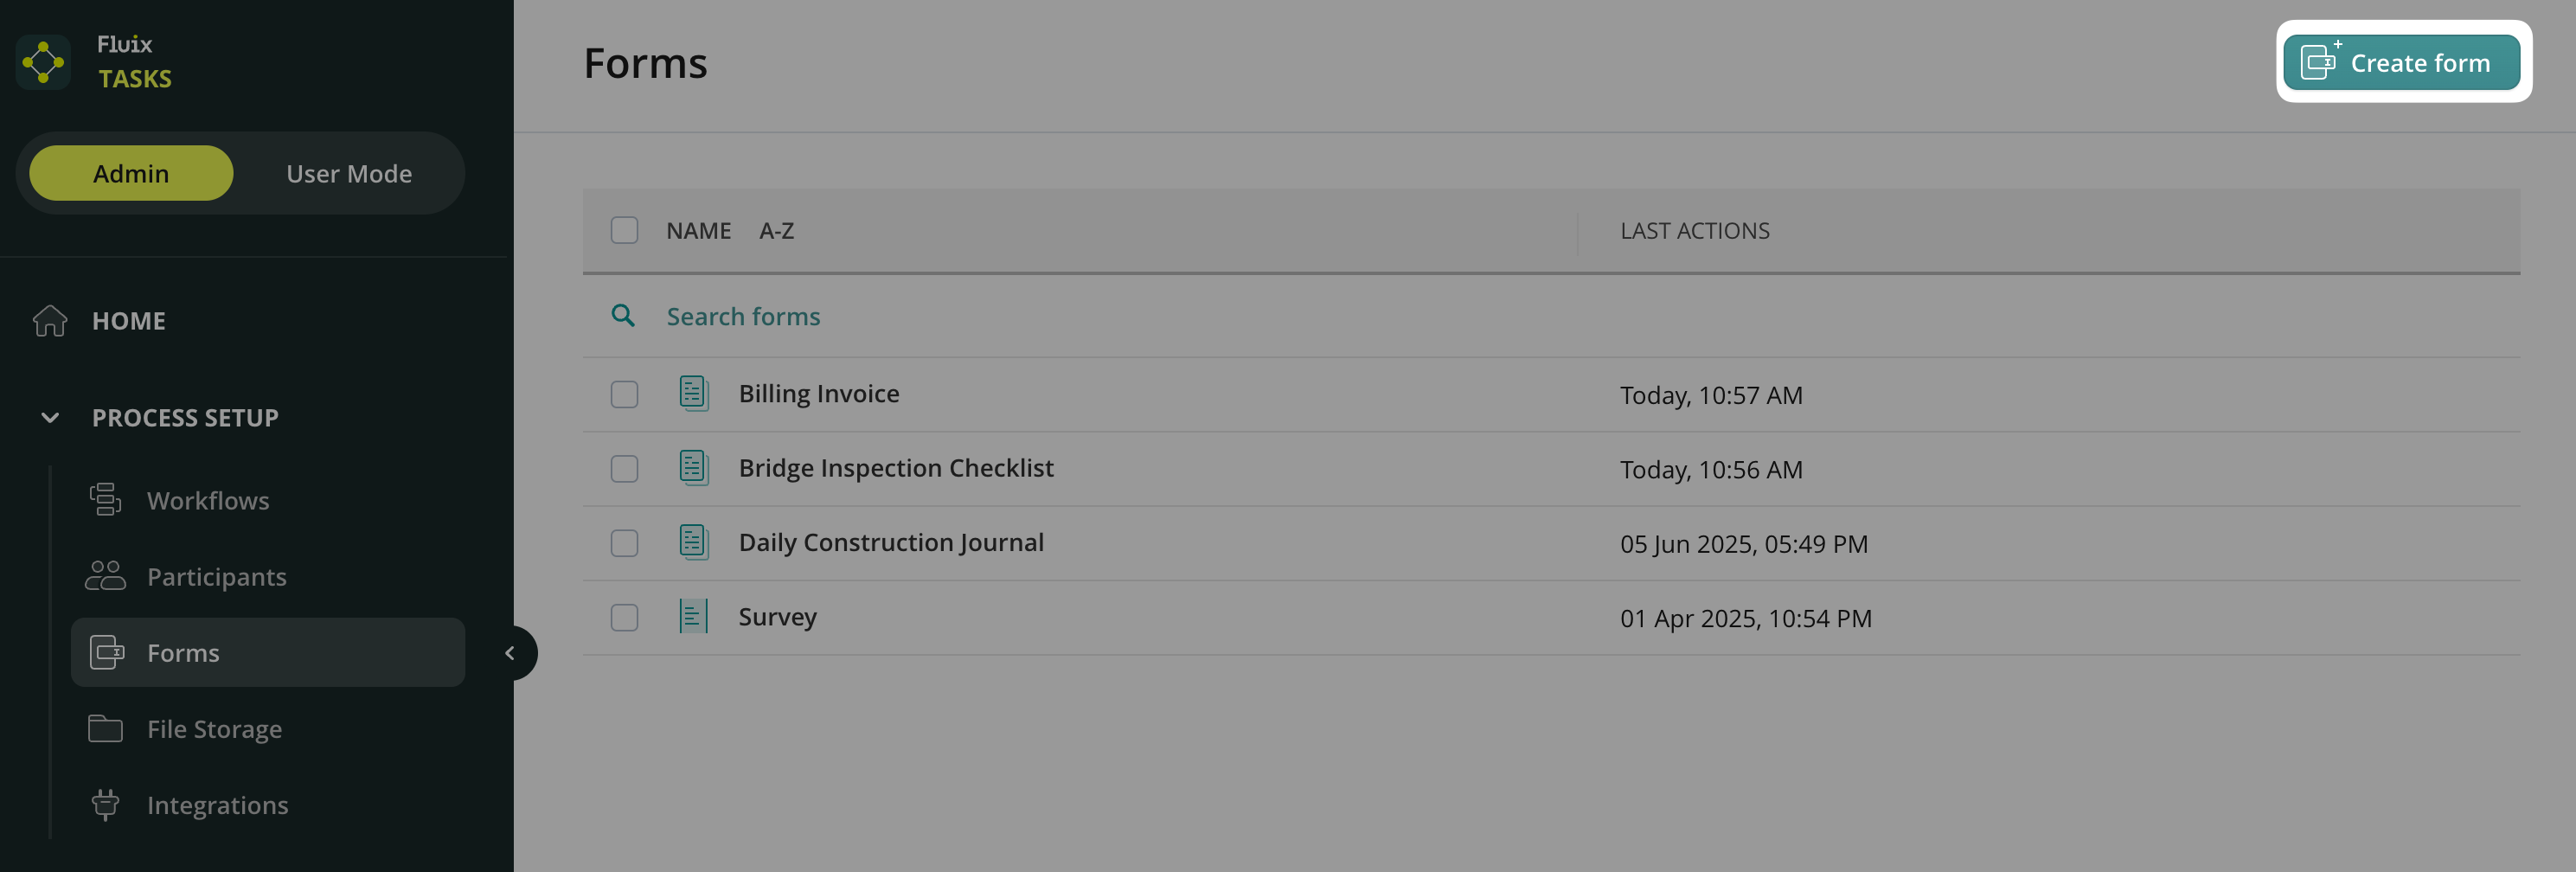
To create a new form, navigate to the Admin Tab -> Process Setup -> Forms section. Click Create form in the upper right corner. Later, you will be able to use it while creating a workflow.
Upon selecting any form, you will see the list of available actions that you can perform with a form. In particular, you will see Edit, Rename, Duplicate, and Delete actions.
Edit, Duplicate, and Rename actions will be helpful if you plan to build a variety of workflows that need a similar form included. Create one form from scratch or adjust one from the template library and edit it according to the specific workflow. Duplicate it and edit it to suit the other workflows related to your processes.
Use Fluix Templates or Create Your Own Forms
Ready-to-Use Fluix Templates
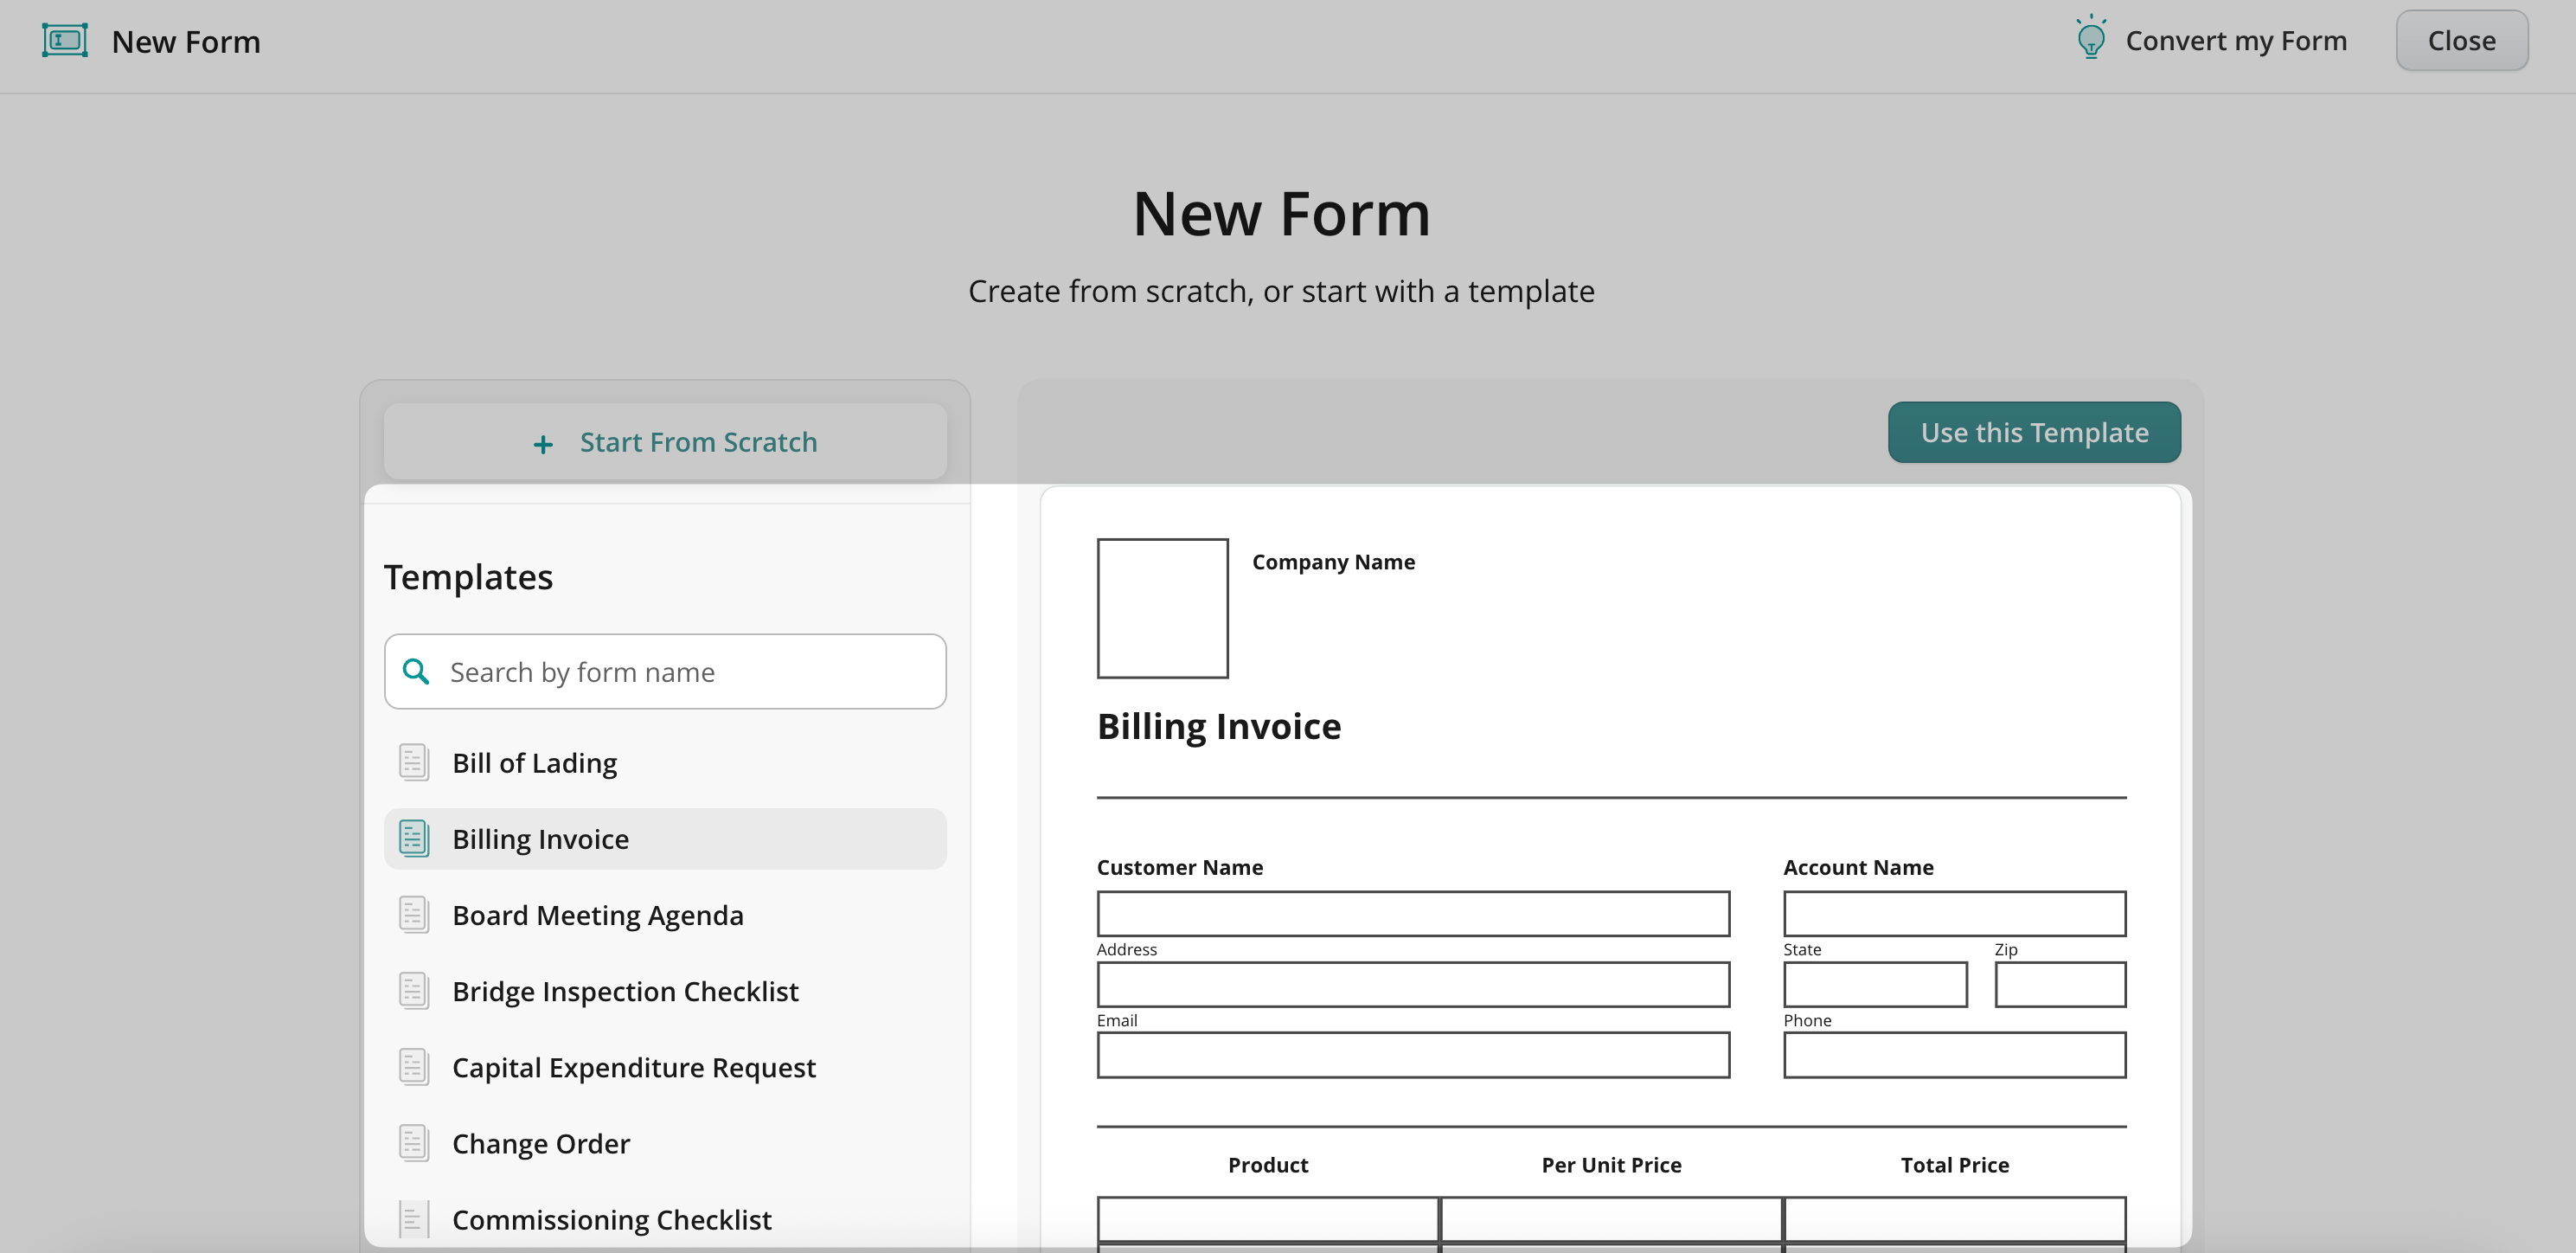
On the next page, you’ll see a list of templates created by Fluix. Browse the catalog, choose any template, and click Use this Template to customize it for your workflow.
Create a Form from Scratch
Click Start From Scratch above the templates list to build your own form. You can create either a classic static form or a dynamic one. We’ll guide you through using the Form Builder in the next article.
Convert Your Existing Form
Need to digitize your existing document? Use the Convert my Form option to send us your file (accepted formats: PDF, PNG, JPG, DOC, DOCX, XLS) up to 5 MB.
Once submitted, our experts will turn your document into a fillable Fluix form and contact you to walk you through using it in your process.
In case of any questions, feel free to contact us at support@fluix.io
Was this article helpful?
Thanks for your feedback!
Oops, something went wrong. Please, try again later.
Thank you!
What details or examples would have made this article more helpful for you? We appreciate your insights!
In the Fluix Forms section, you can create fillable and dynamic forms and add them to the Workflow. This way, your team can collect data on mobile devices and submit it further according to the preconfigured flow.
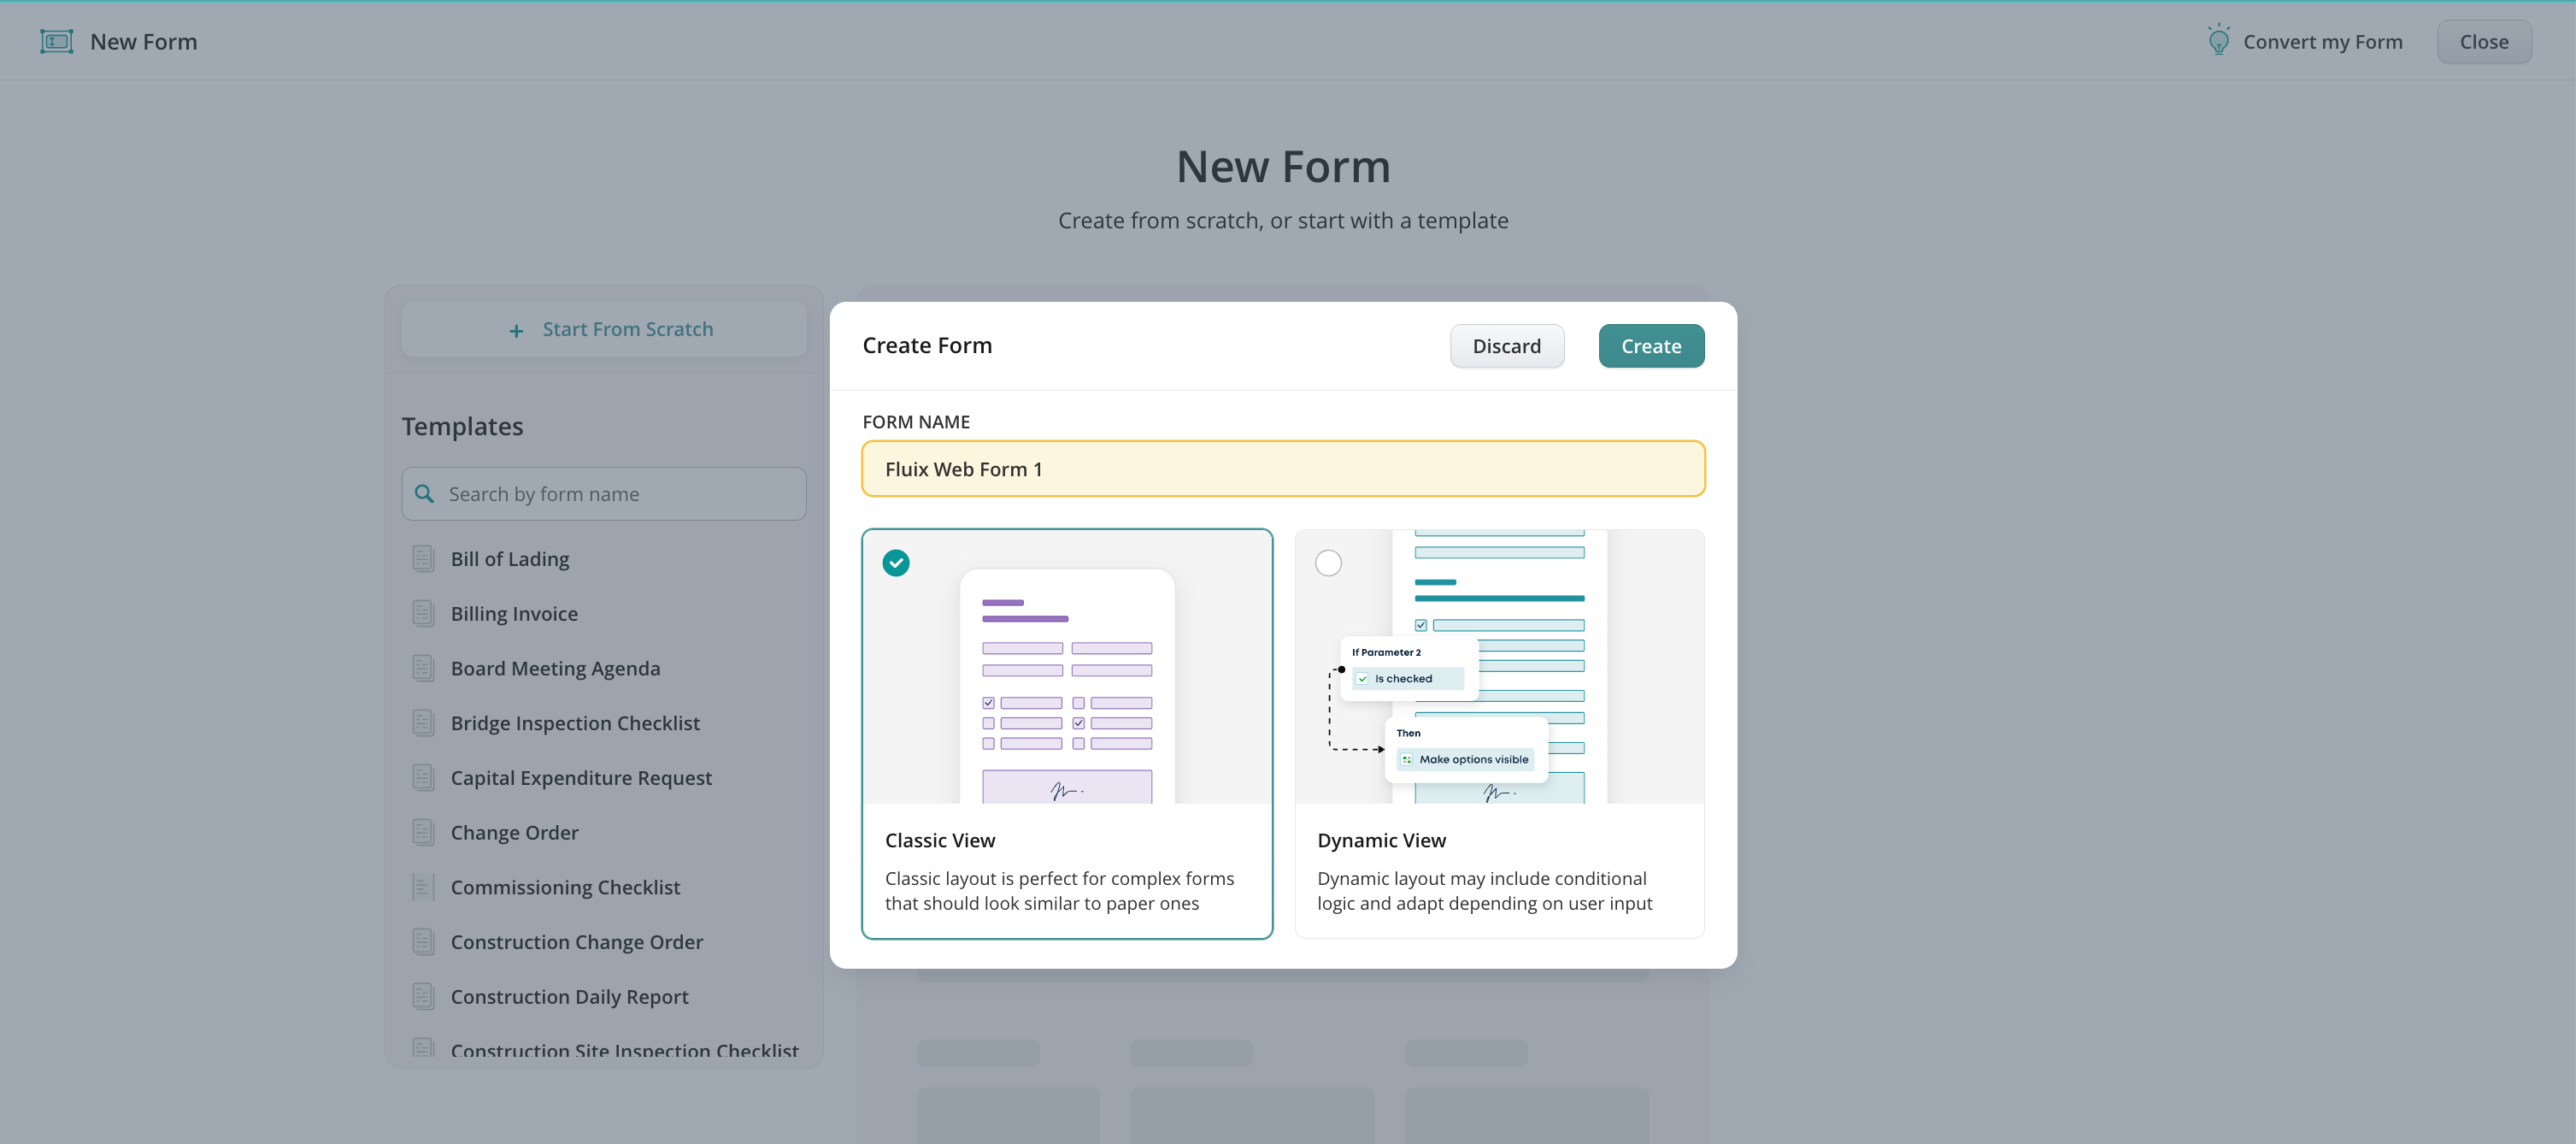
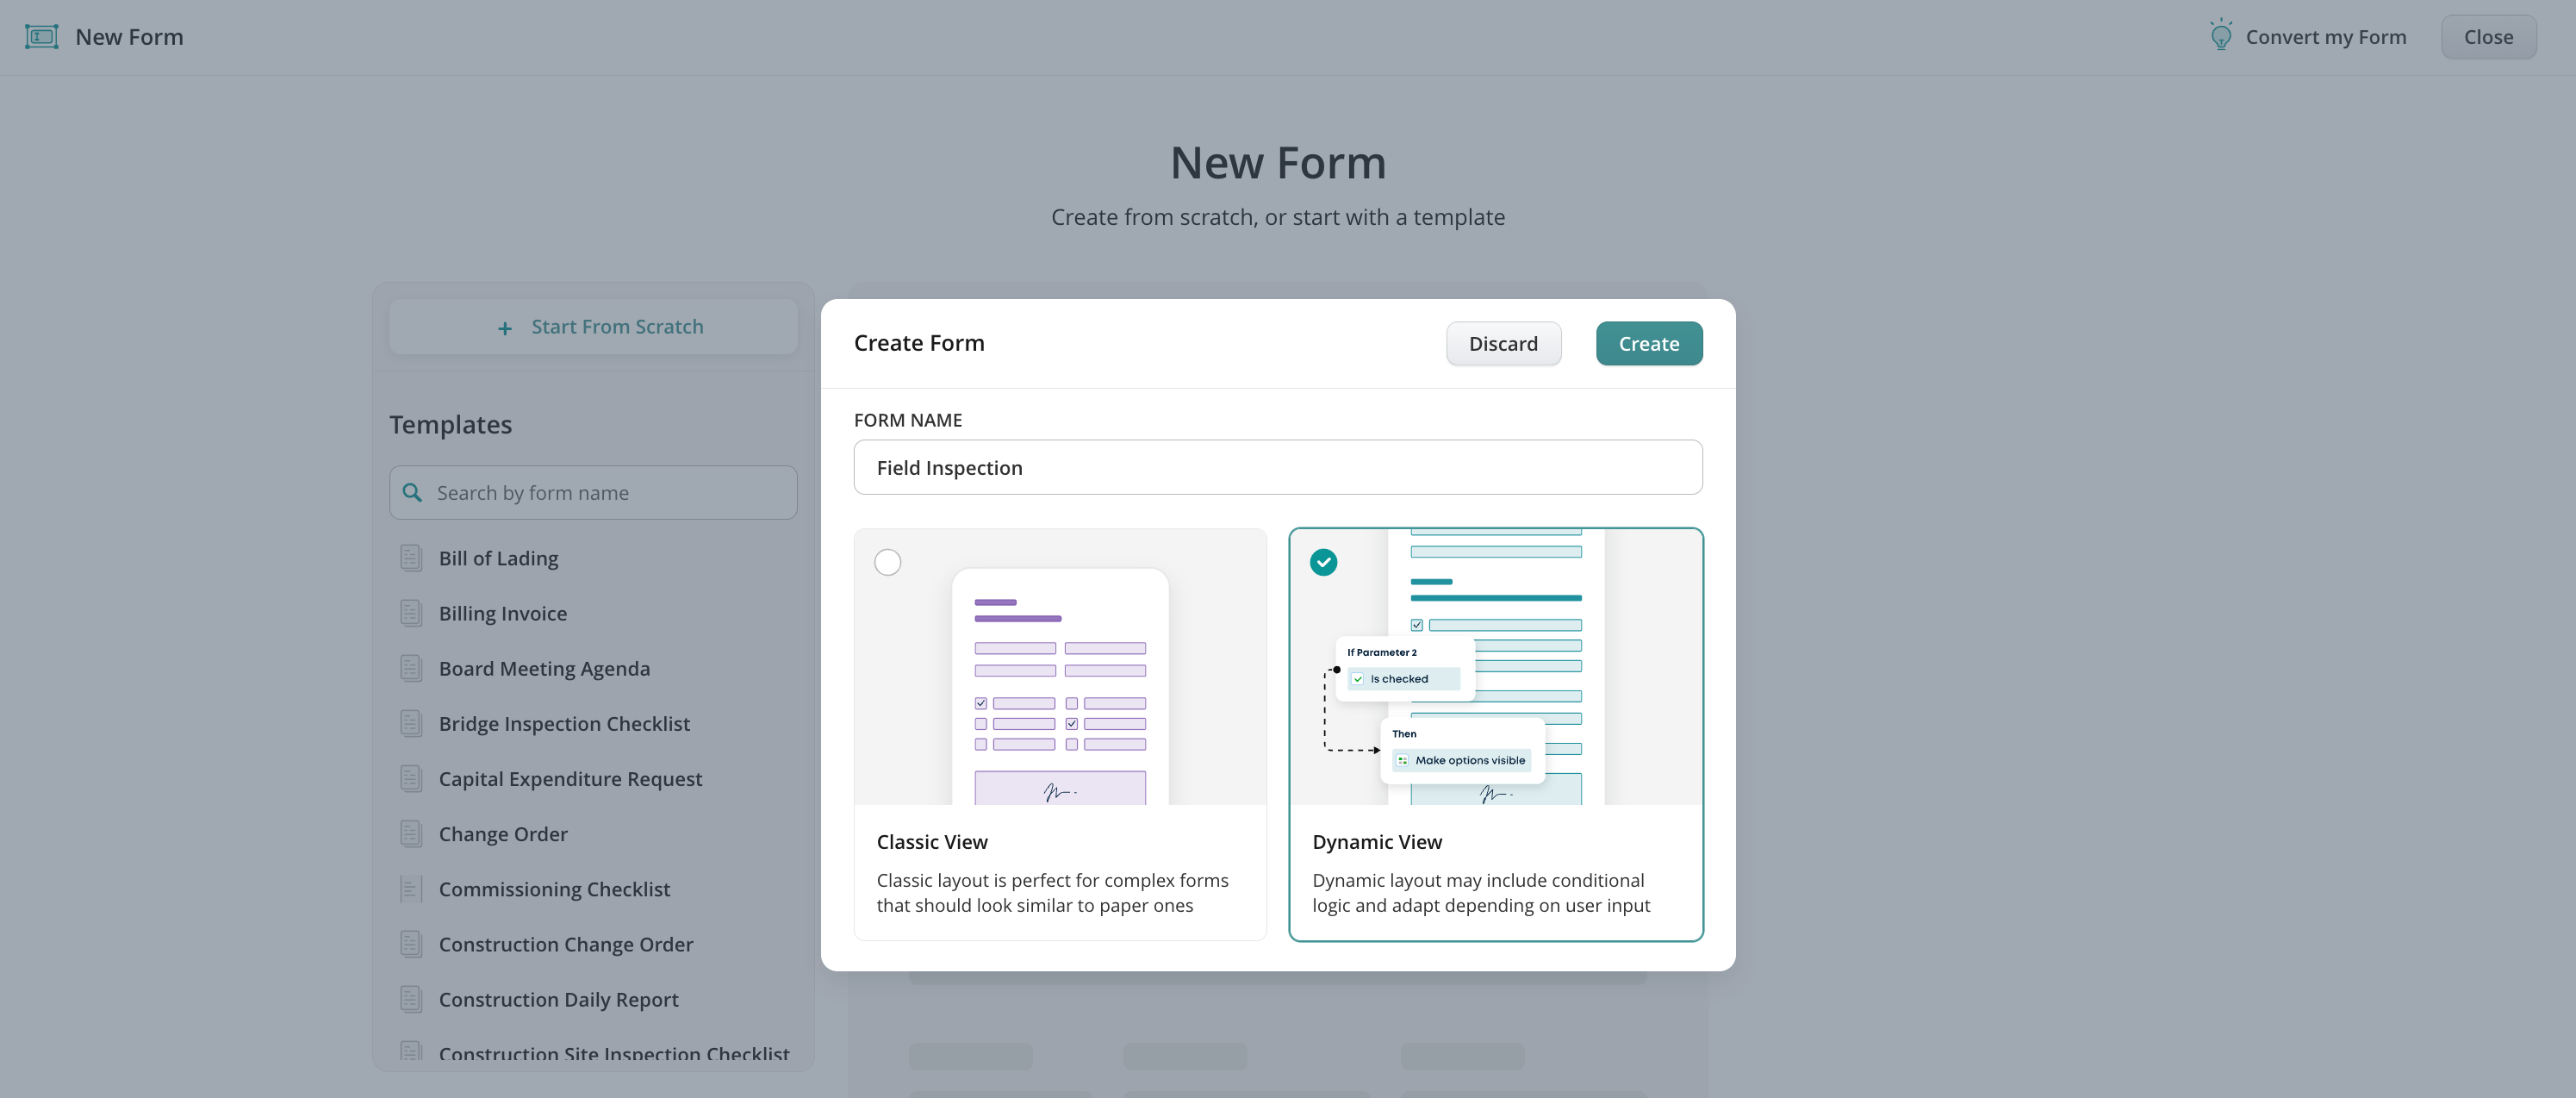
To create a form, navigate to the Admin tab -> Process Setup -> Forms, and click Create Form. In the opened window, you will see two options to select from:
Classic View – a static fillable form;
Dynamic View – a fillable form with dynamic layouts and the possibility to add conditions to the fields in the form;
Upon selecting the form’s view and typing the form’s name, the form builder will open, allowing you to start building the form.
In the next tutorials, we will guide you on creating a Web form with a static or dynamic view.
Was this article helpful?
Thanks for your feedback!
Oops, something went wrong. Please, try again later.
Thank you!
What details or examples would have made this article more helpful for you? We appreciate your insights!
To create a form, navigate to the Admin tab -> Process Setup -> Forms, and click Create Form. On the left, click Start from Scratch, select Classic View in the opened window, and name your form.
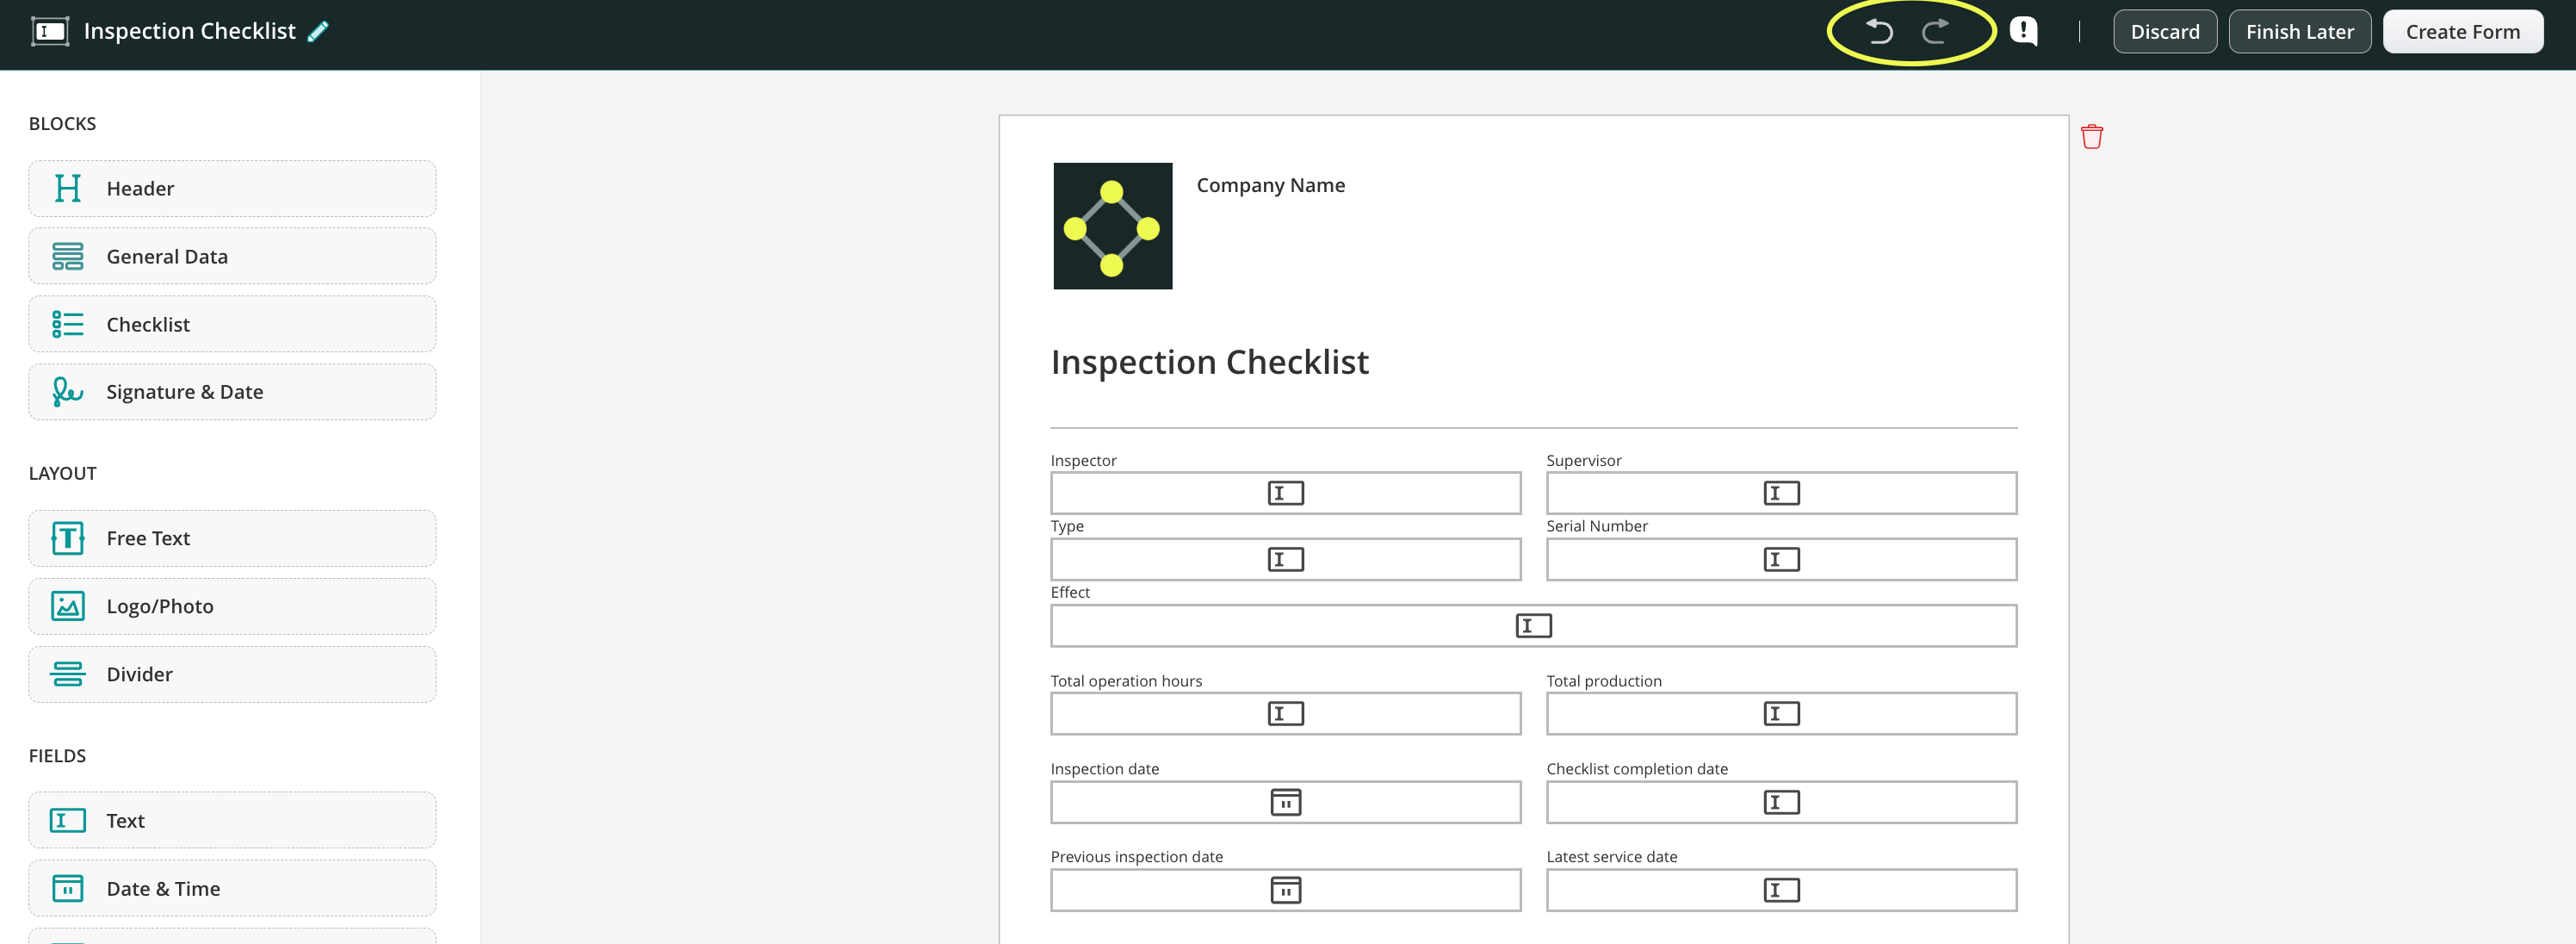
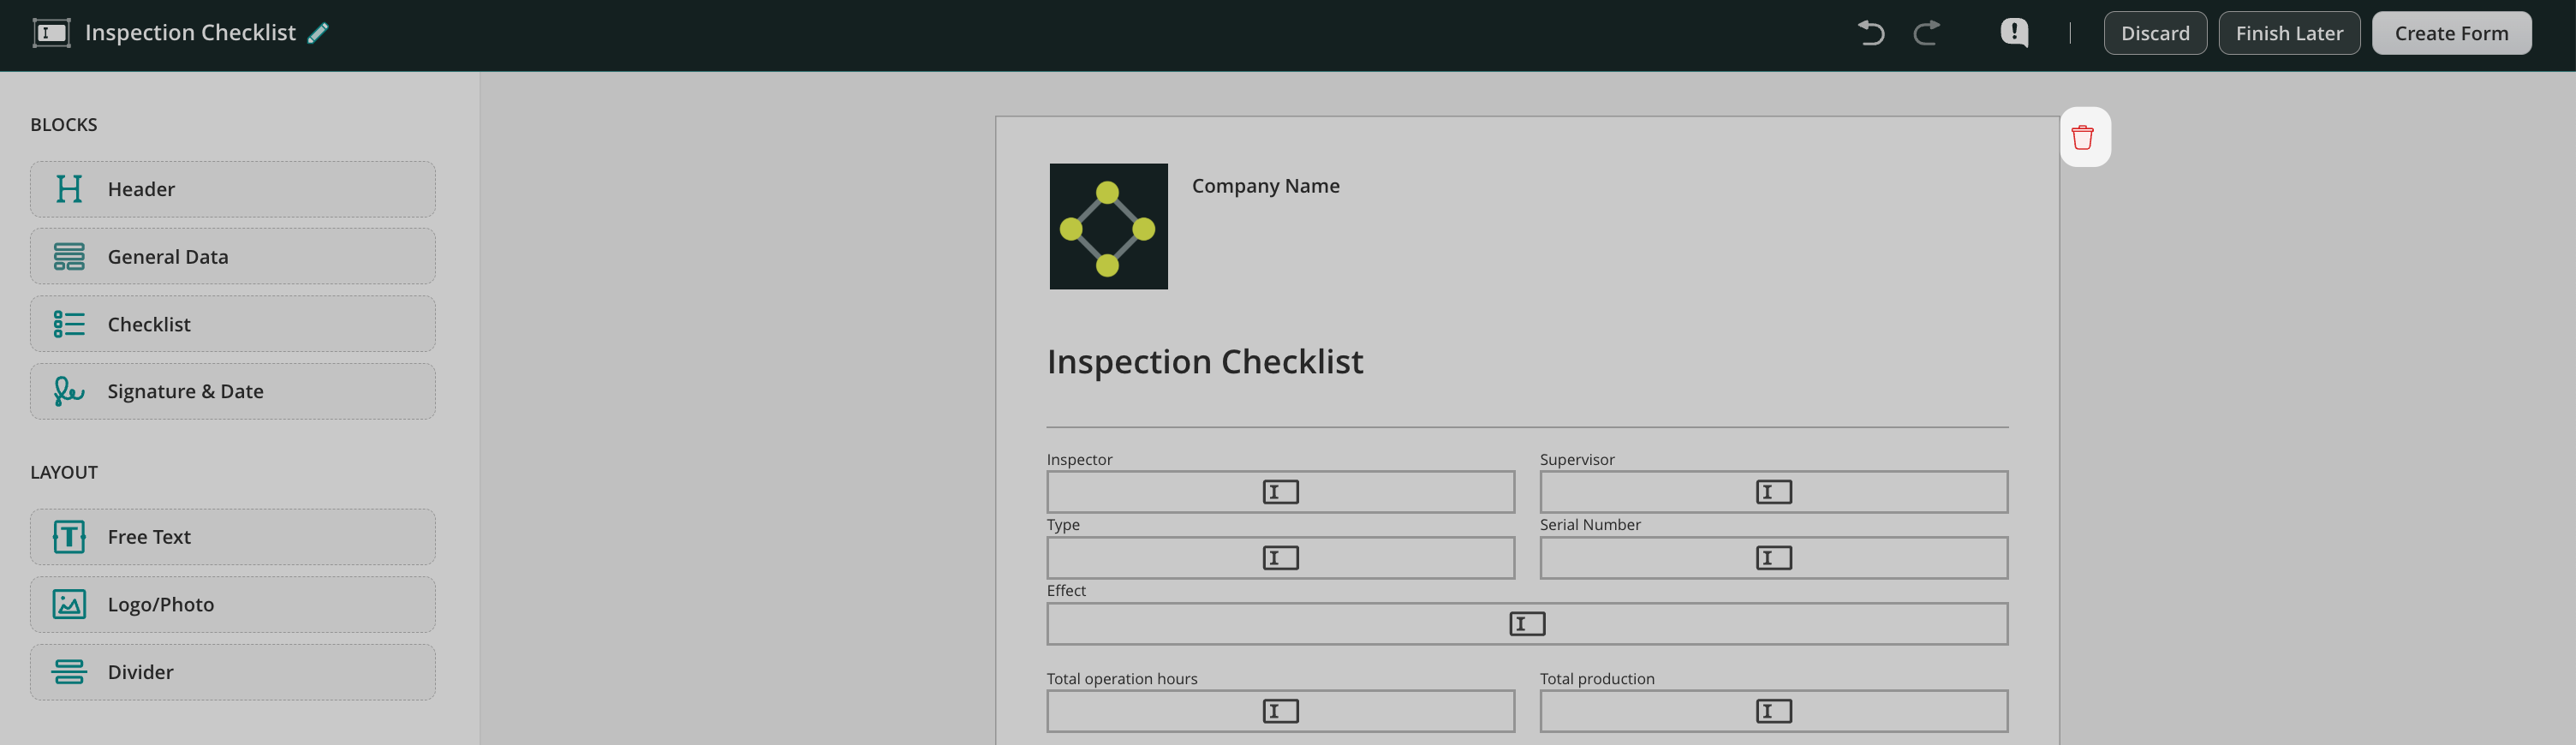
Menu of the form elements
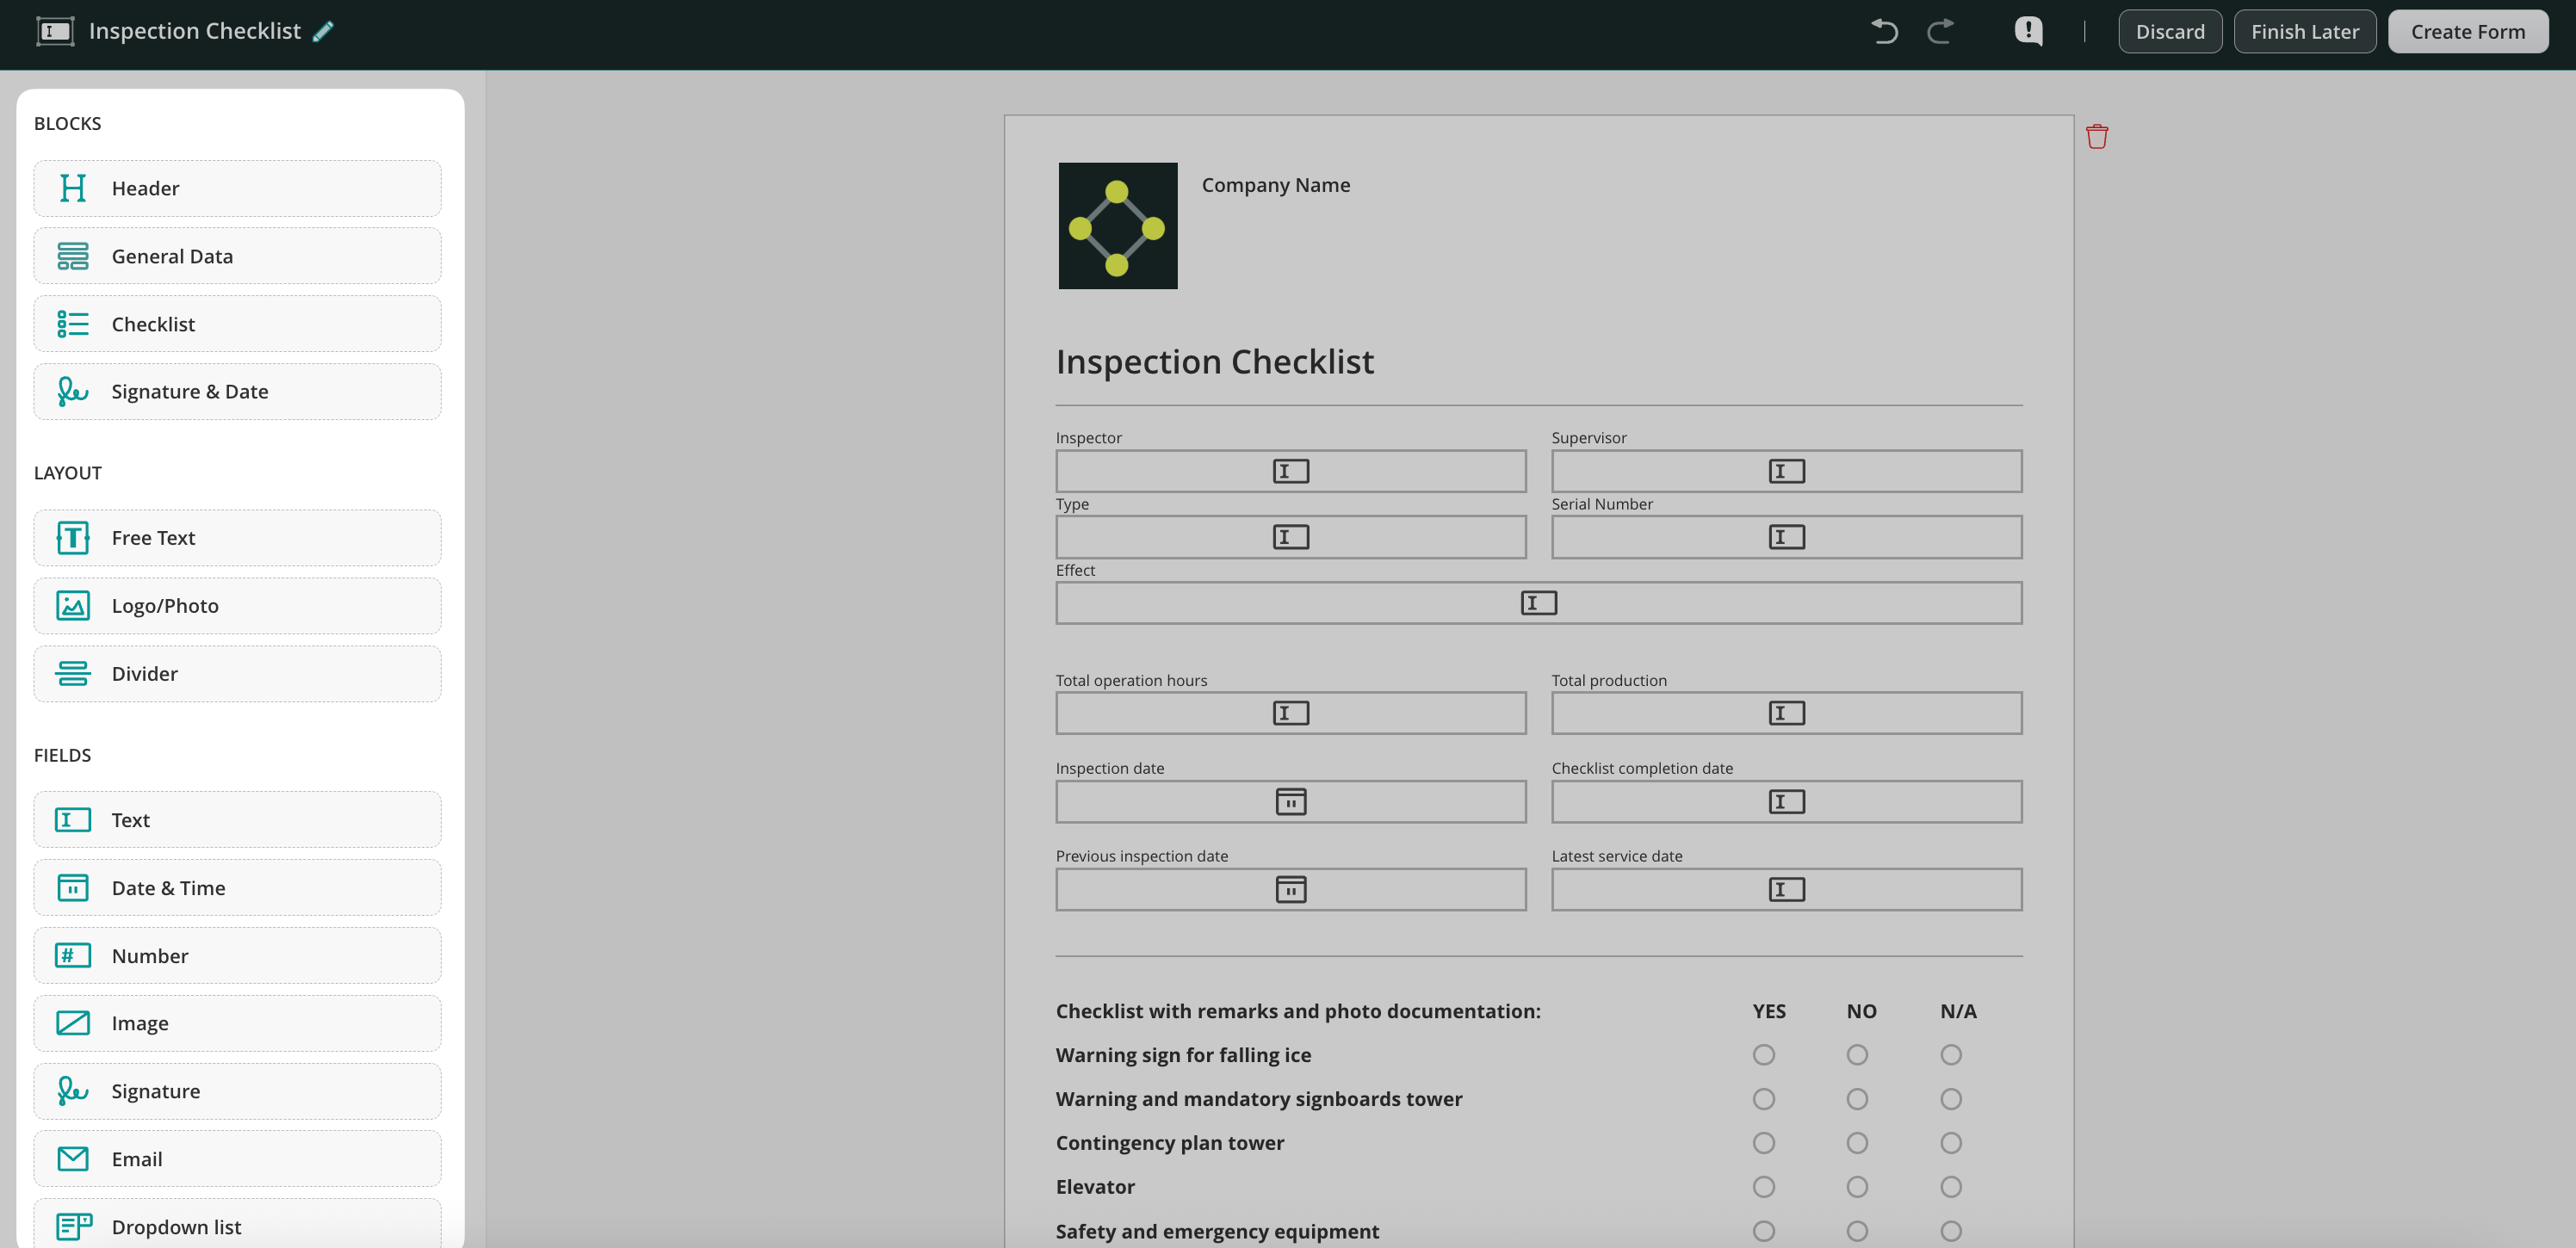
On the left, you will see a menu with a list of elements that can be used to create a form. Click on the element to add it.
The elements are divided into three different groups:
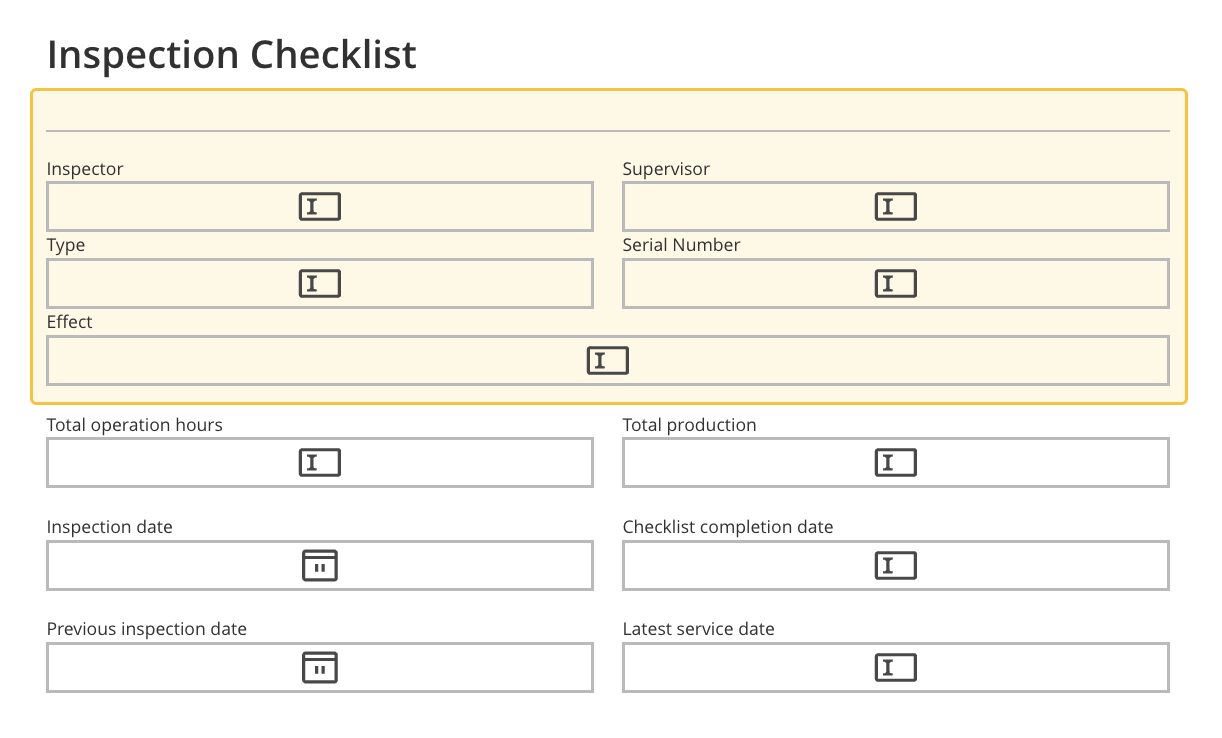
Blocks – use presets of the most commonly used fields combined into blocks for your convenience.
Layout – customize your forms by adding the text, your company’s logo, and divider.
Fields – the different types of fields to add to the forms to collect the most relevant data in the forms.
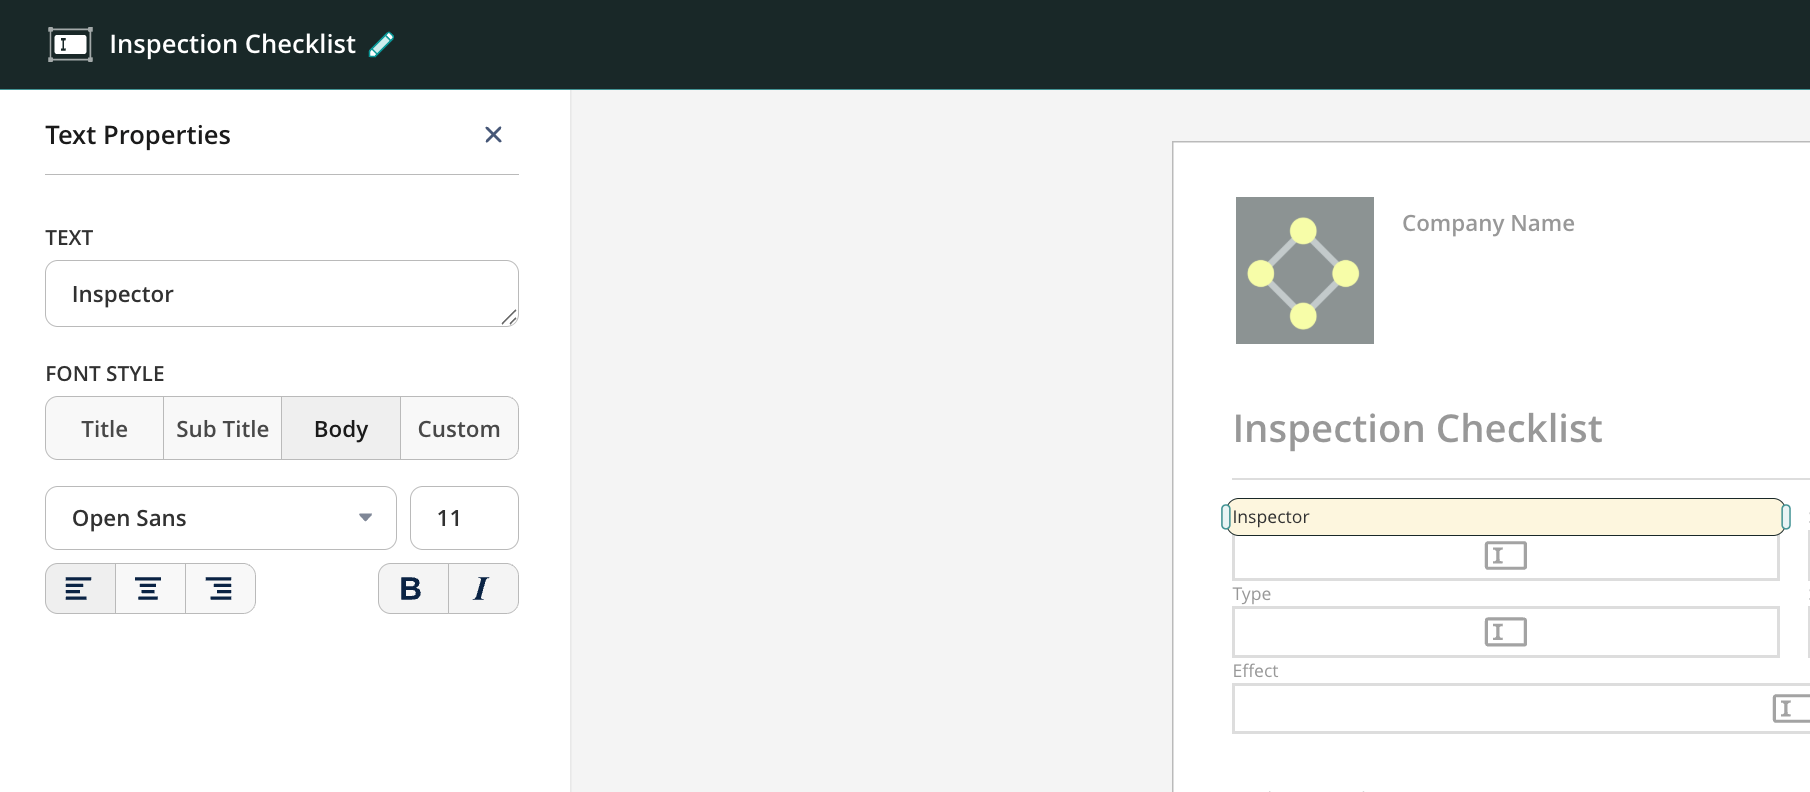
Actions that can be done with the fields
Modify its properties by clicking on the added field on the page. Please note: depending on the field’s type (e.g. text field, number field etc), different modifications will be suggested.
Duplicate or delete the element by hovering it over and selecting the option.
Select one or multiple elements by clicking on it/them, continuing to hold down to draw a selection box, and selecting the necessary element(s).
Move one or multiple elements through the page by a simple drag-and-drop.
Undo the action done earlier or redo it to discard the results of the last Undo action by clicking on the arrows.
Report a problem by clicking on the exclamation mark near the Discard button.
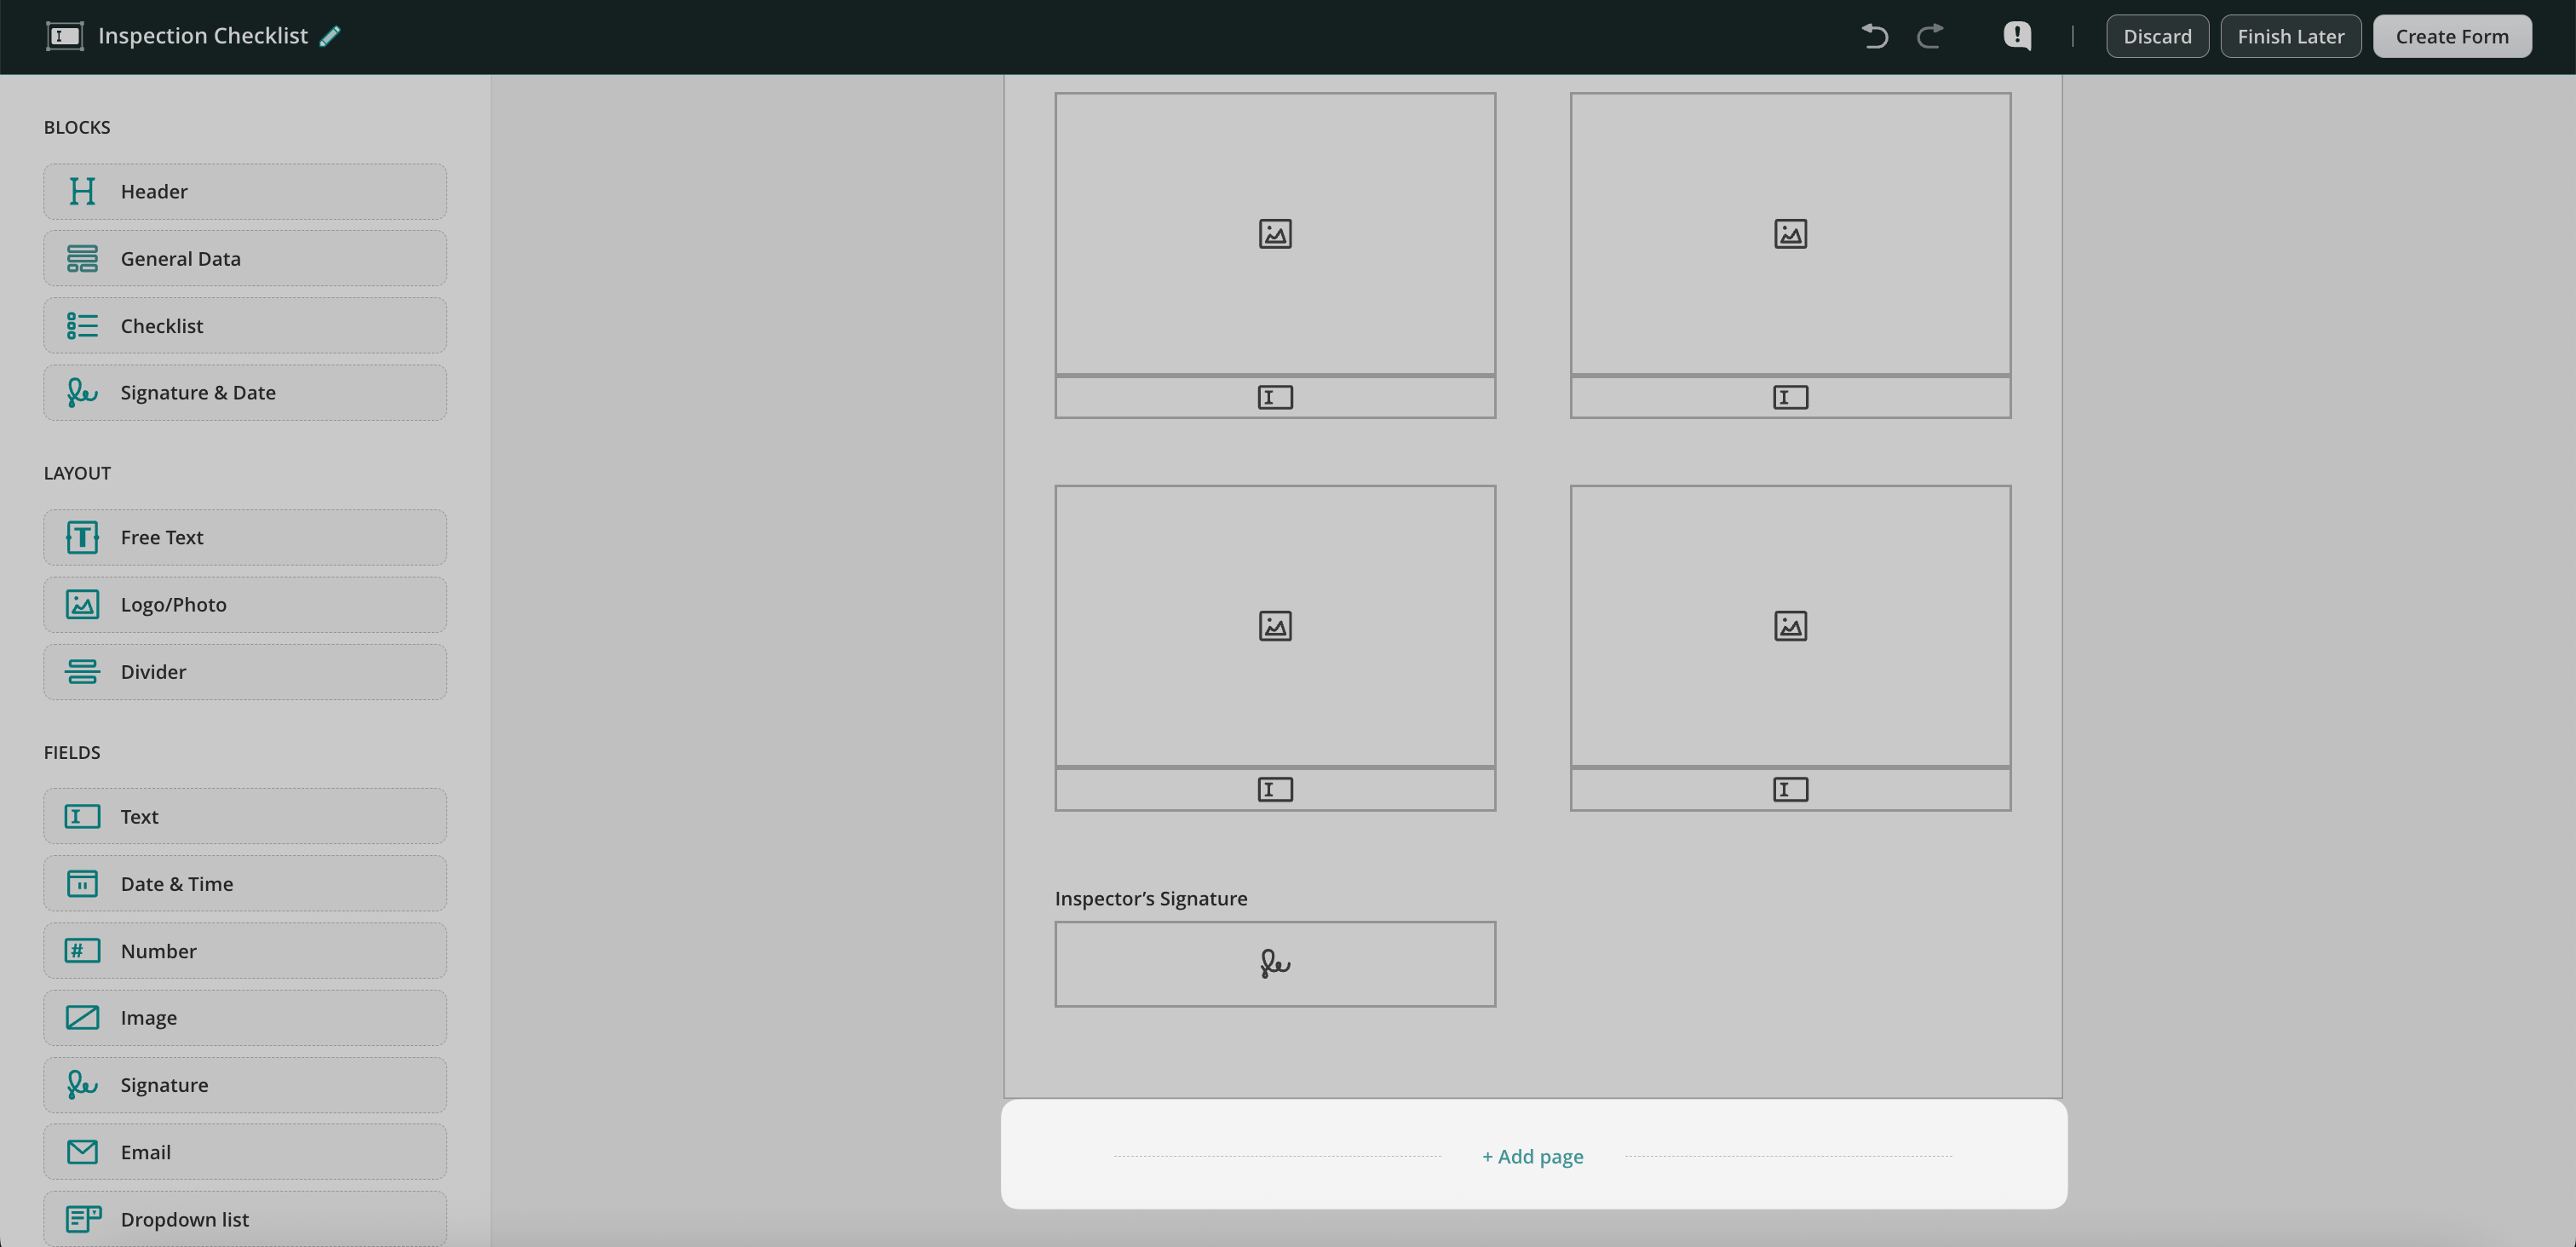
Modifying pages of the form
To add a new page, click Add Page at the bottom of each page.
To delete the page, click the garbage icon on the top right side of the page.
Once the form is ready, click Create Form in the upper right corner to save the form. Once done, the form will appear in the Forms section, from where you may select it while building a workflow.
Was this article helpful?
Thanks for your feedback!
Oops, something went wrong. Please, try again later.
Thank you!
What details or examples would have made this article more helpful for you? We appreciate your insights!
Dynamic forms in Fluix are mobile-friendly and designed to adapt to user input. You can set conditions so that specific fields appear, become required, read-only, or hidden based on what users select in the form. With unlimited photo uploads, users can attach as many images as needed for each task, without predefining a fixed number of image fields as an admin.
To create a dynamic form, navigate to the Admin tab -> Process Setup -> Forms, and click Create Form. On the left, click Start from Scratch, select Dynamic View in the opened window, and name your form.
The Dynamic Form Builder works similarly to the classic one but offers more flexibility. It allows you to configure advanced settings for each field, such as applying conditional logic to show, hide, or change field behavior based on user input.
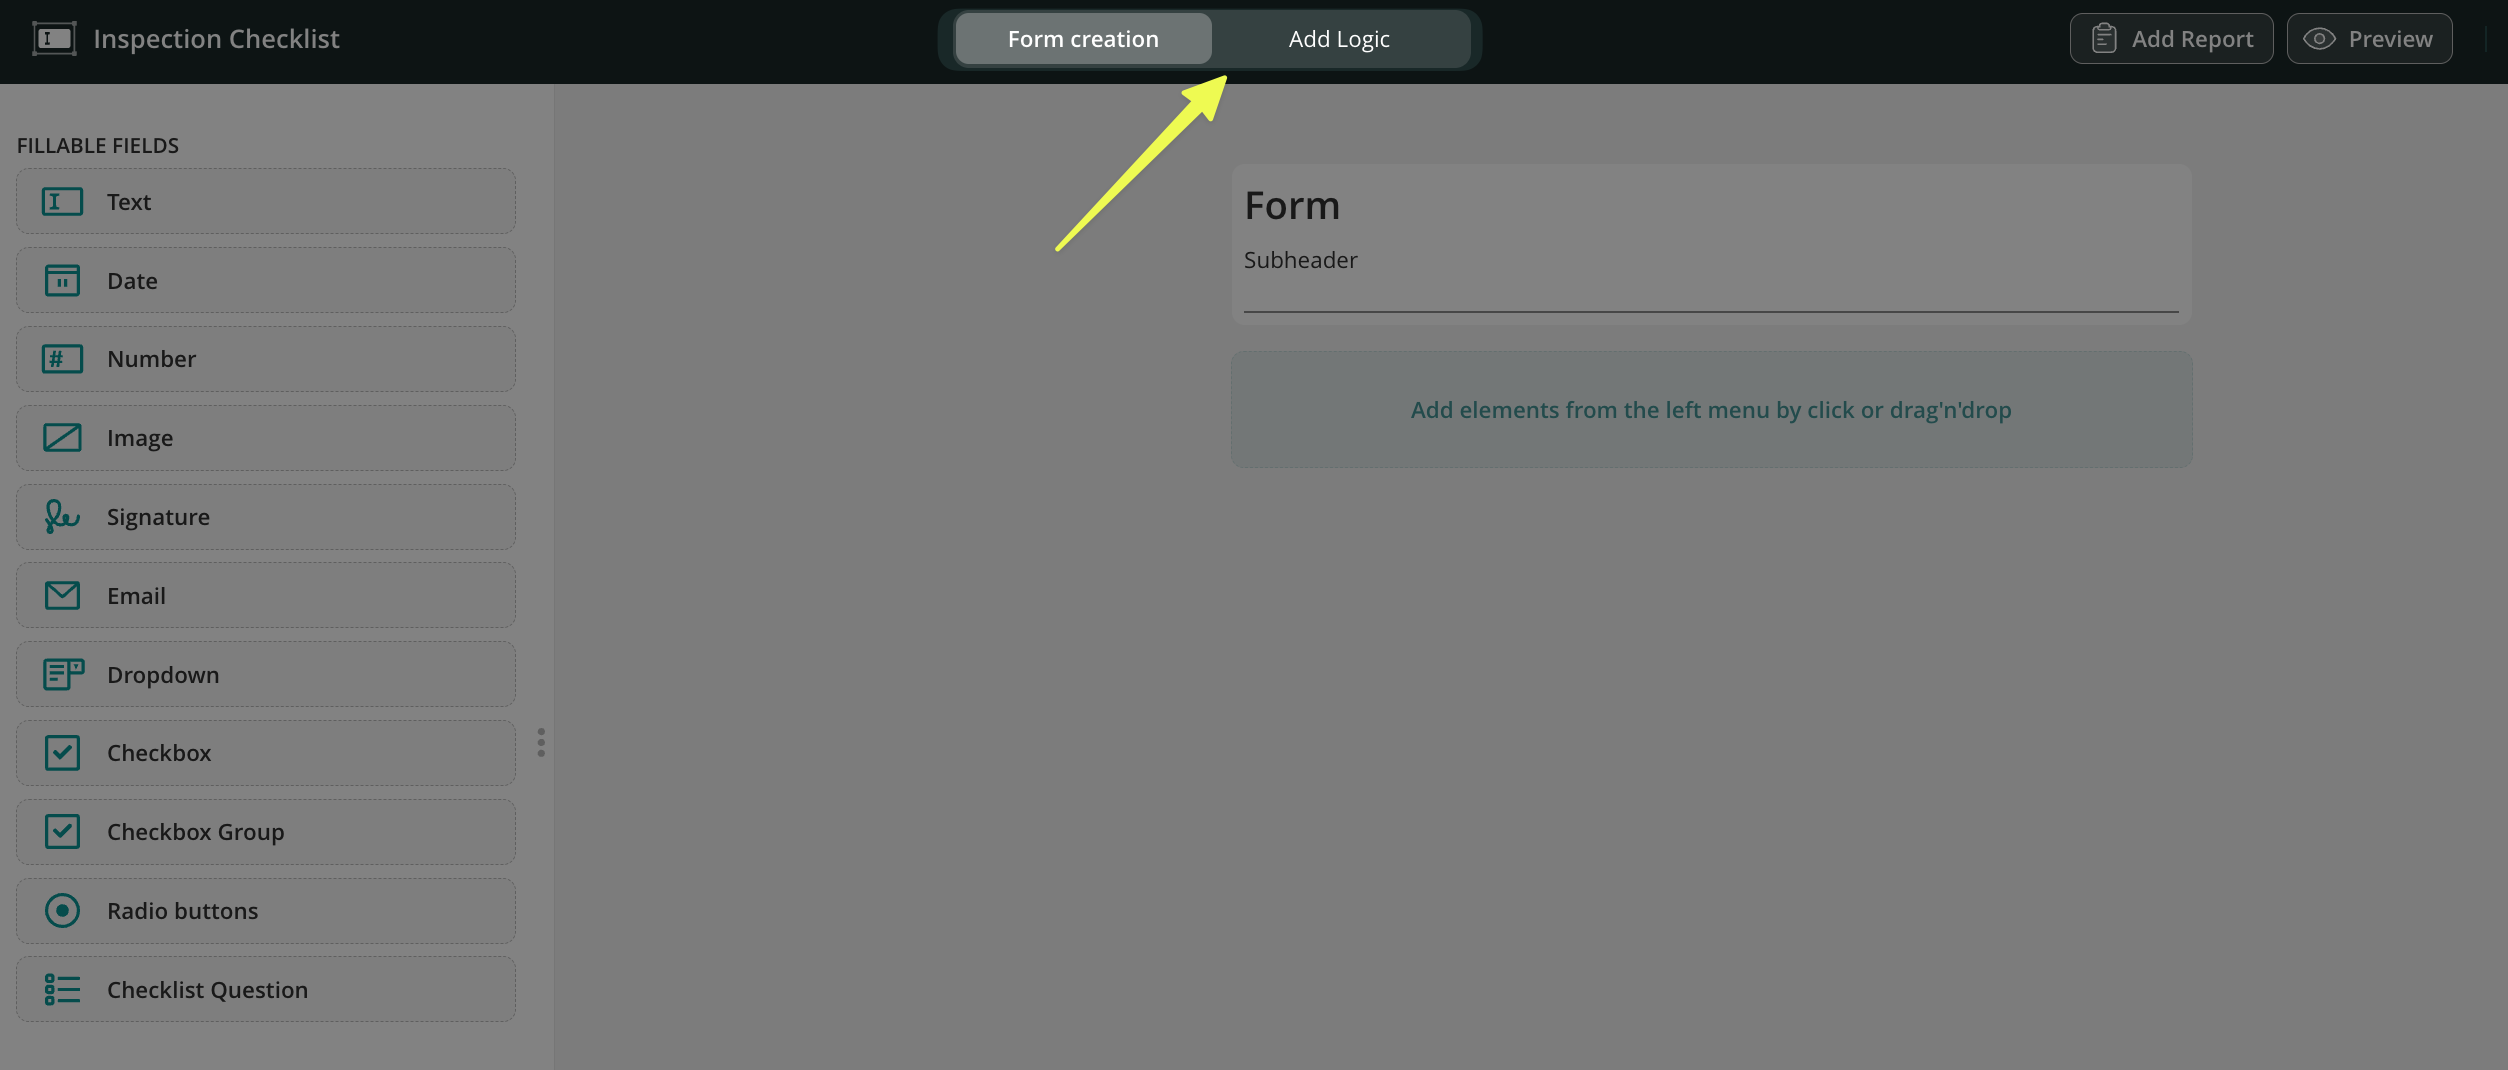
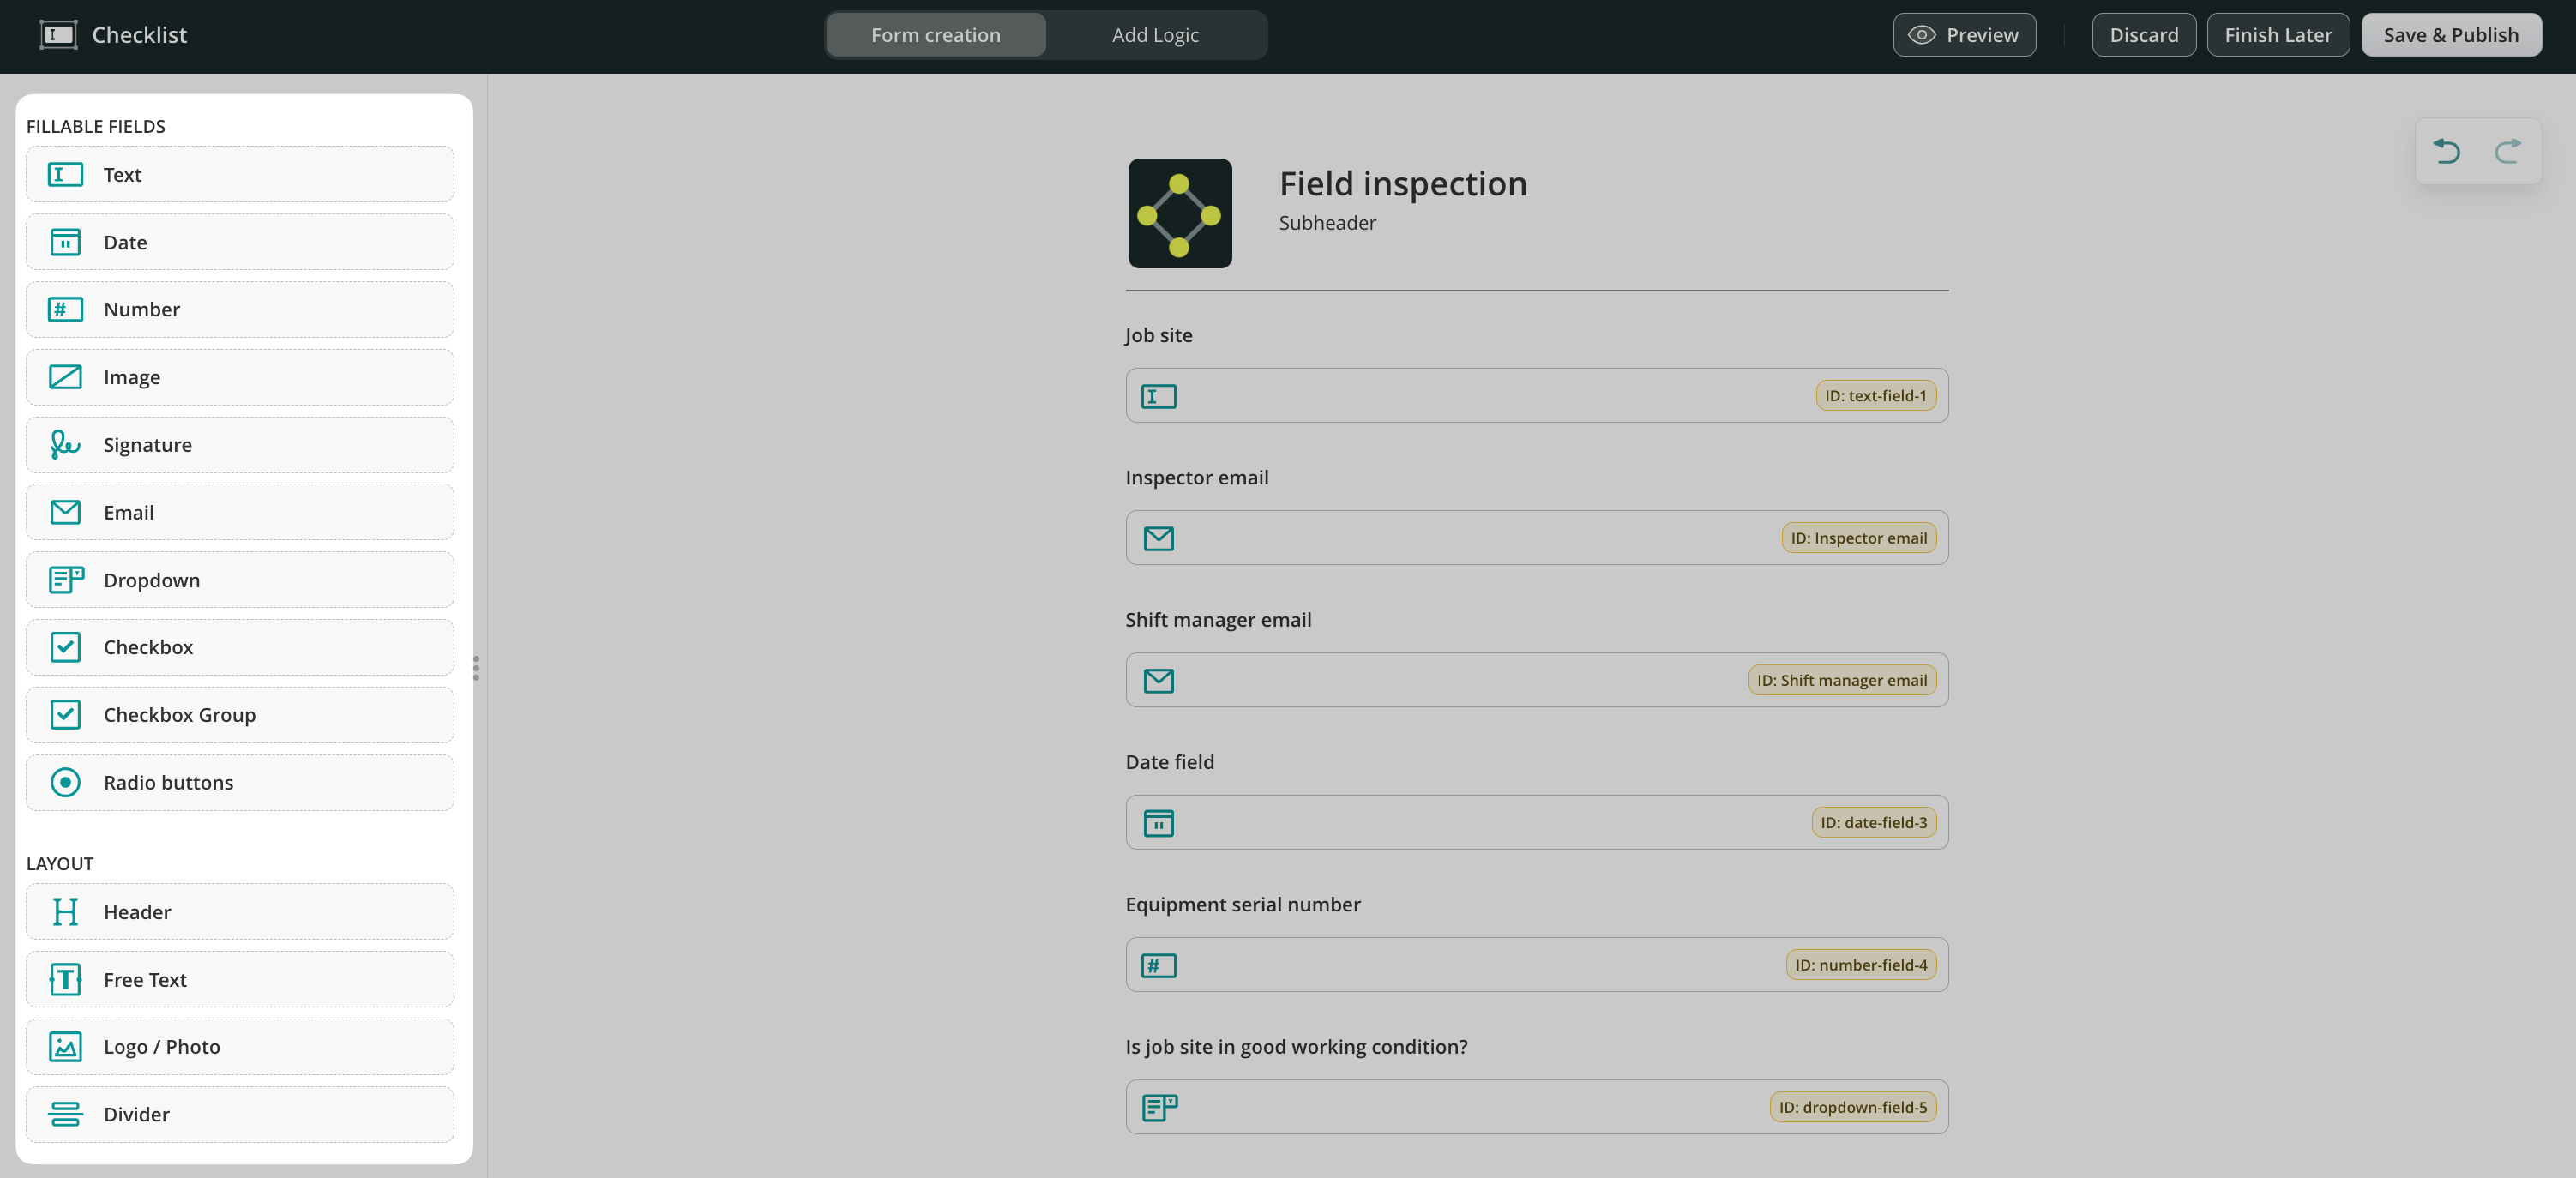
In the upper panel of the Dynamic Form Builder, there are two tabs:
Form creation tab – displays a menu with a list of elements that can be used to create a form. Click on the element to add it or drag and drop it to the centre to start creating your form.
Add Logic tab– here you can configure the conditions for fields in the form to make them required, read-only, and hidden dynamically based on the options the users select in the form.
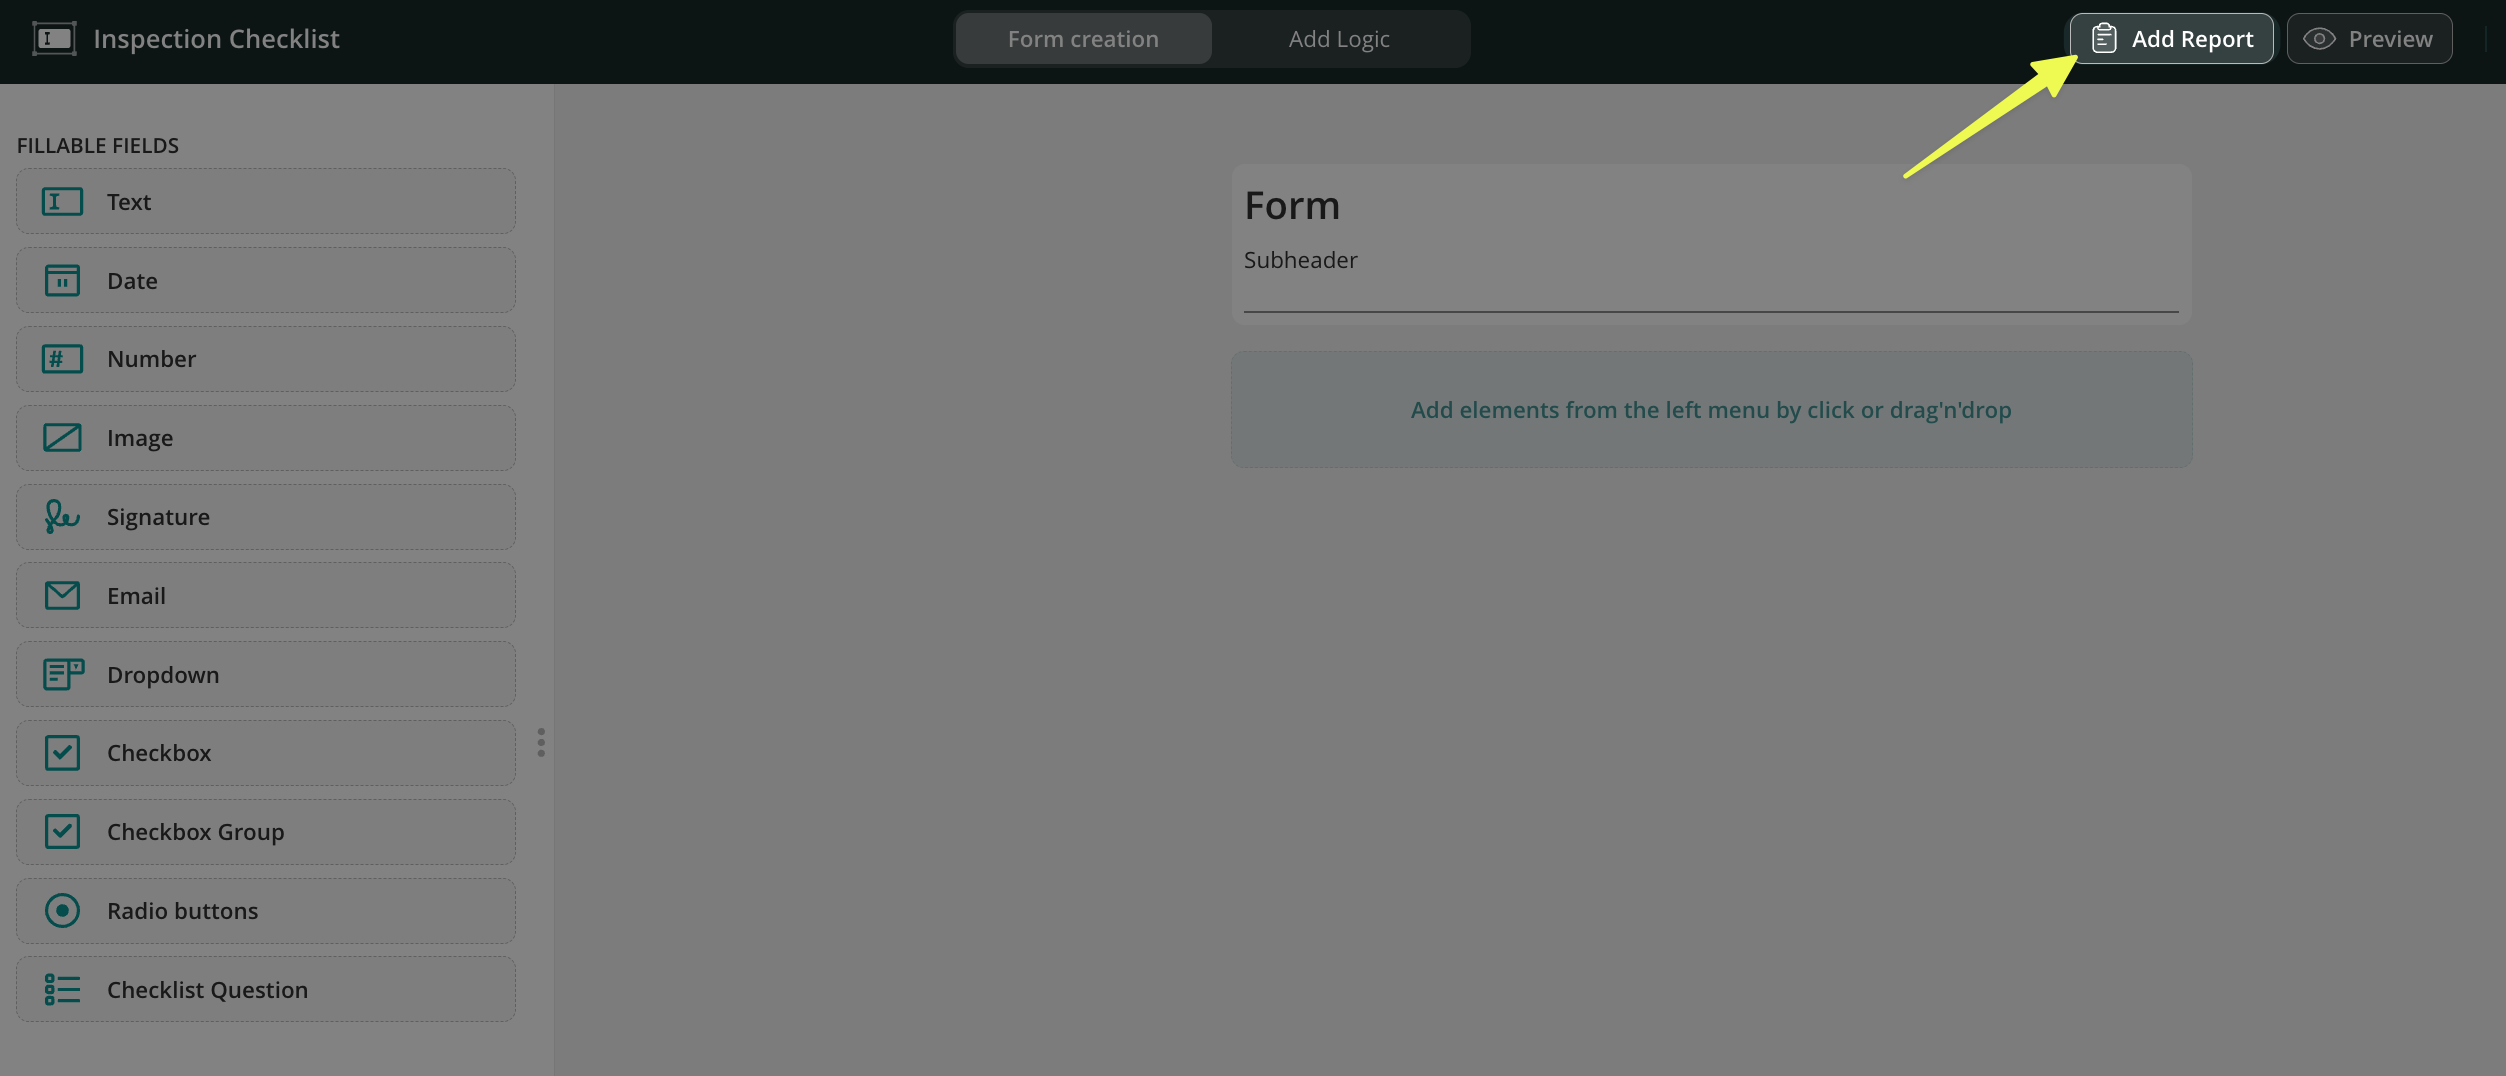
In the upper-right panel, you will see the Add Report tab. Here, you can configure the generation of reports from completed checklists, eliminating the need for manual copying and pasting, as well as double data entry.
Note: The Issue report is available starting from the Operations Plan.
To learn more about IssueReport and how it can benefit your business, please check our How to Use Issue Report article.
Menu of the form elements
On the left, you will see a menu with a list of elements that can be used to create a form. Click on the component to add it.
Fillable fields – the different types of fields to add to the forms to collect the most relevant data.
Layout – helps you customize your forms by adding a header, text, your company’s logo, and a divider.
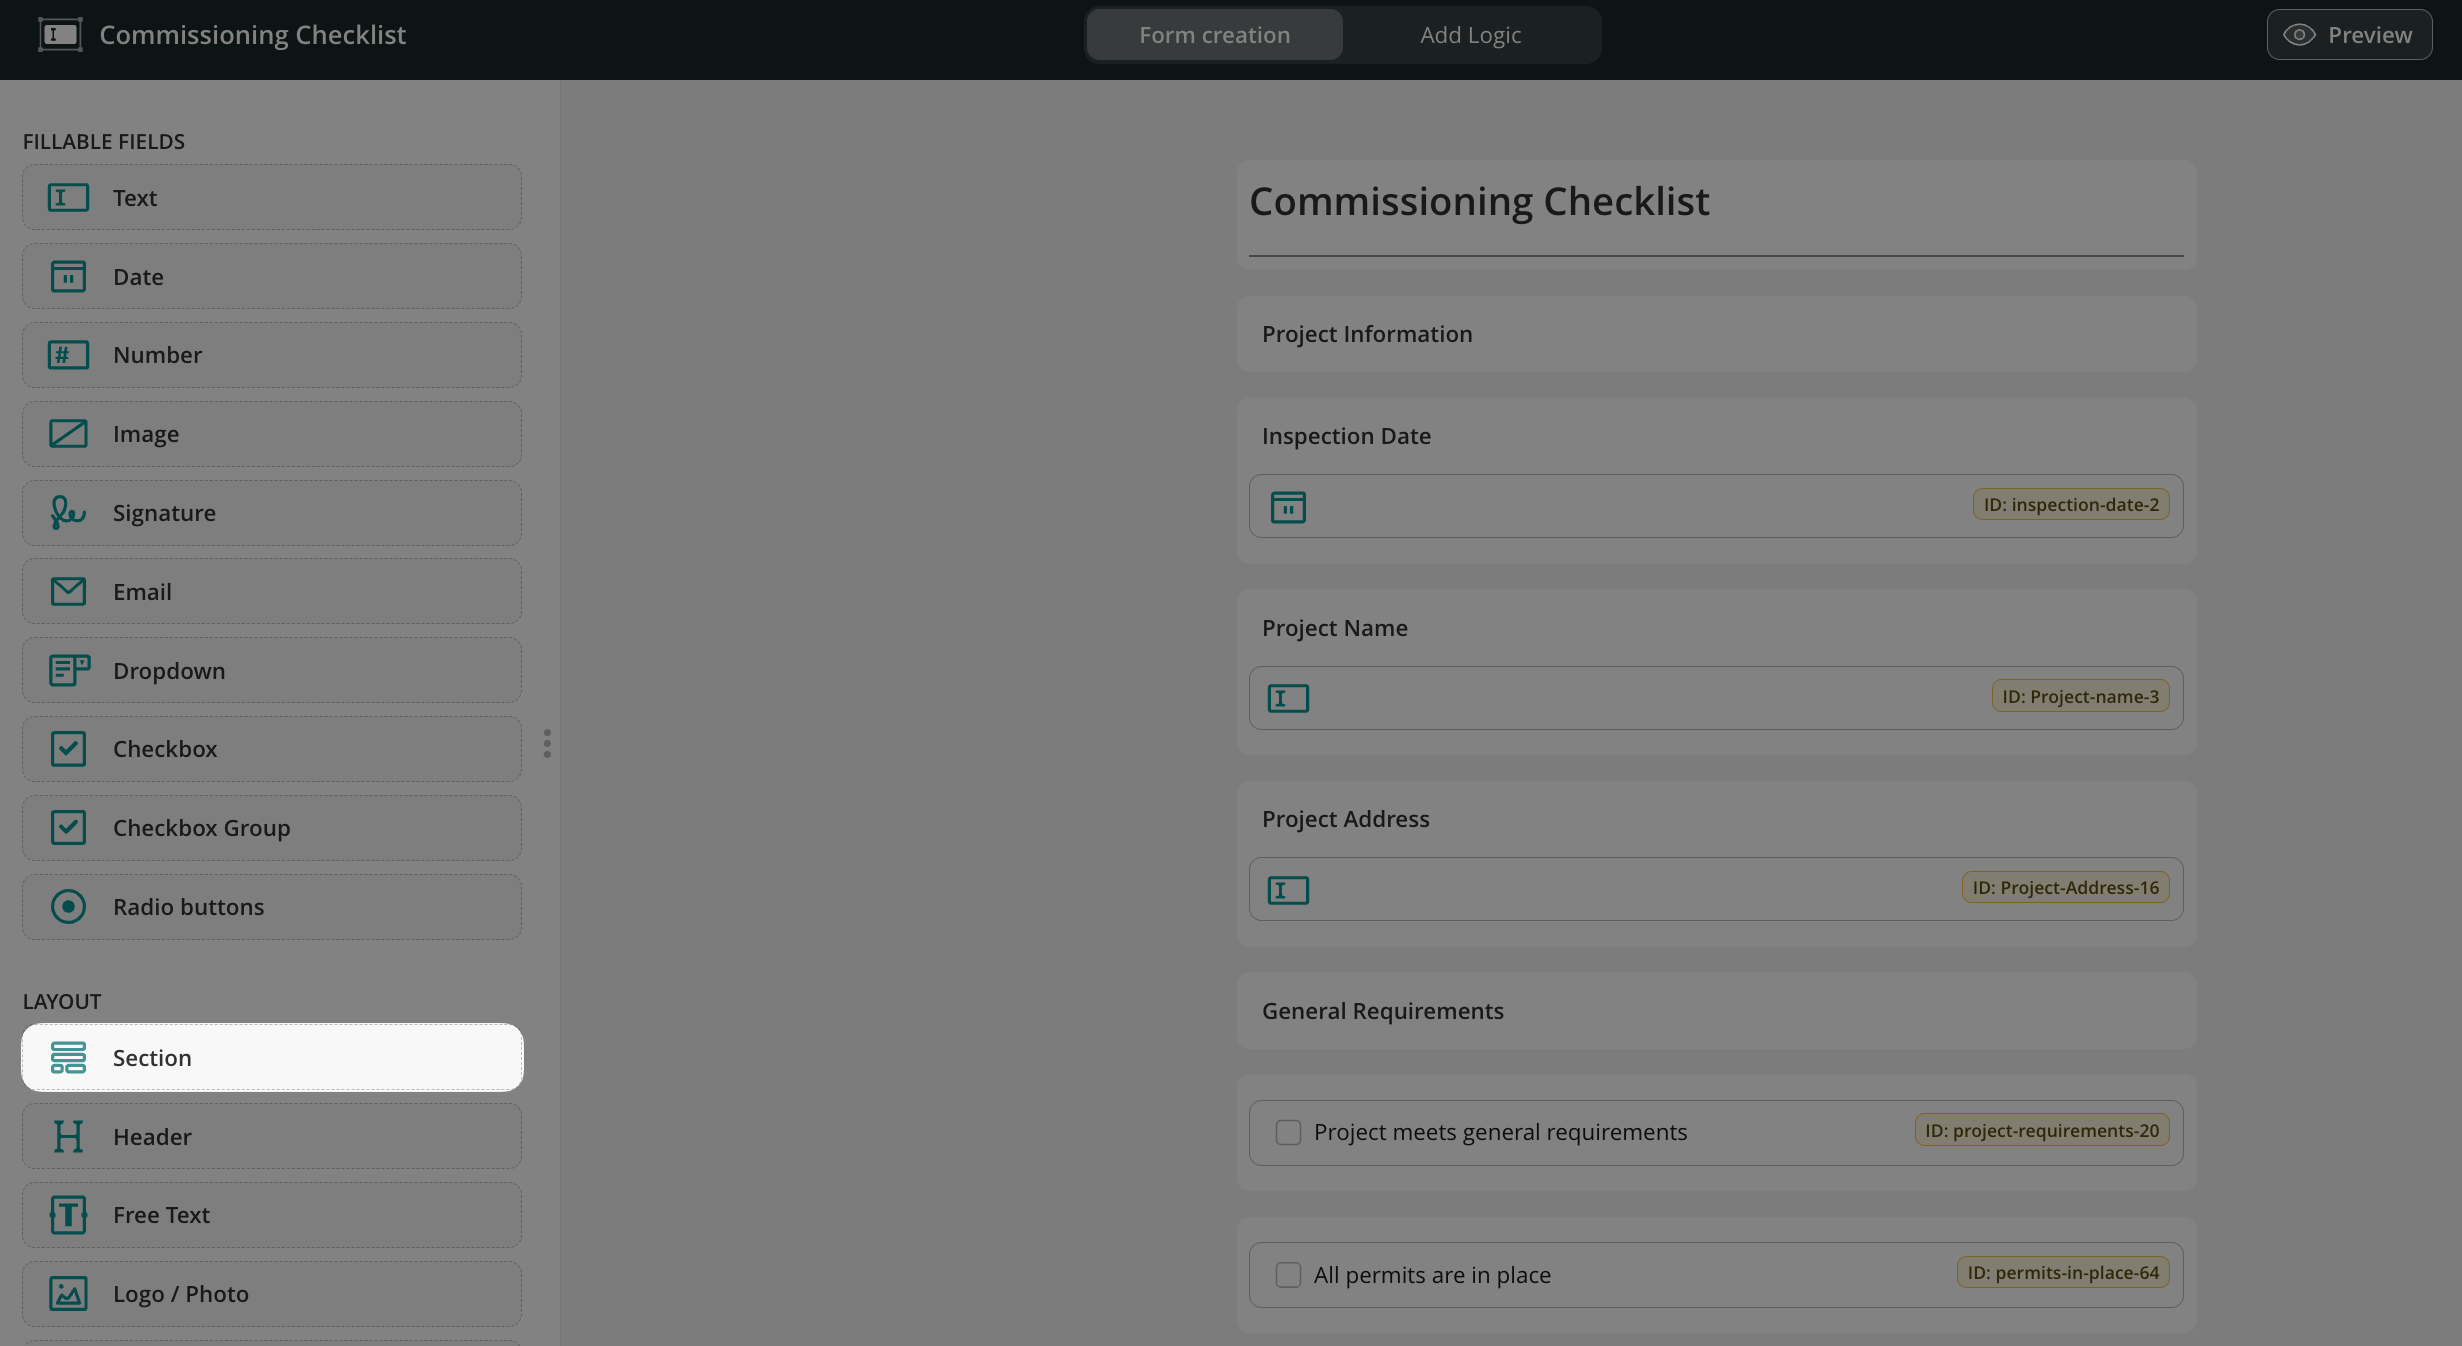
The Section element makes dynamic form building more efficient by organizing repeated fields, supporting conditional logic, and improving usability in long forms.Instead of recreating the same fields, you can create one section and duplicate it anywhere in the form, ideal for repeating checklists like room inspections. This approach keeps forms easy to navigate by collapsing completed sections to reduce scrolling.
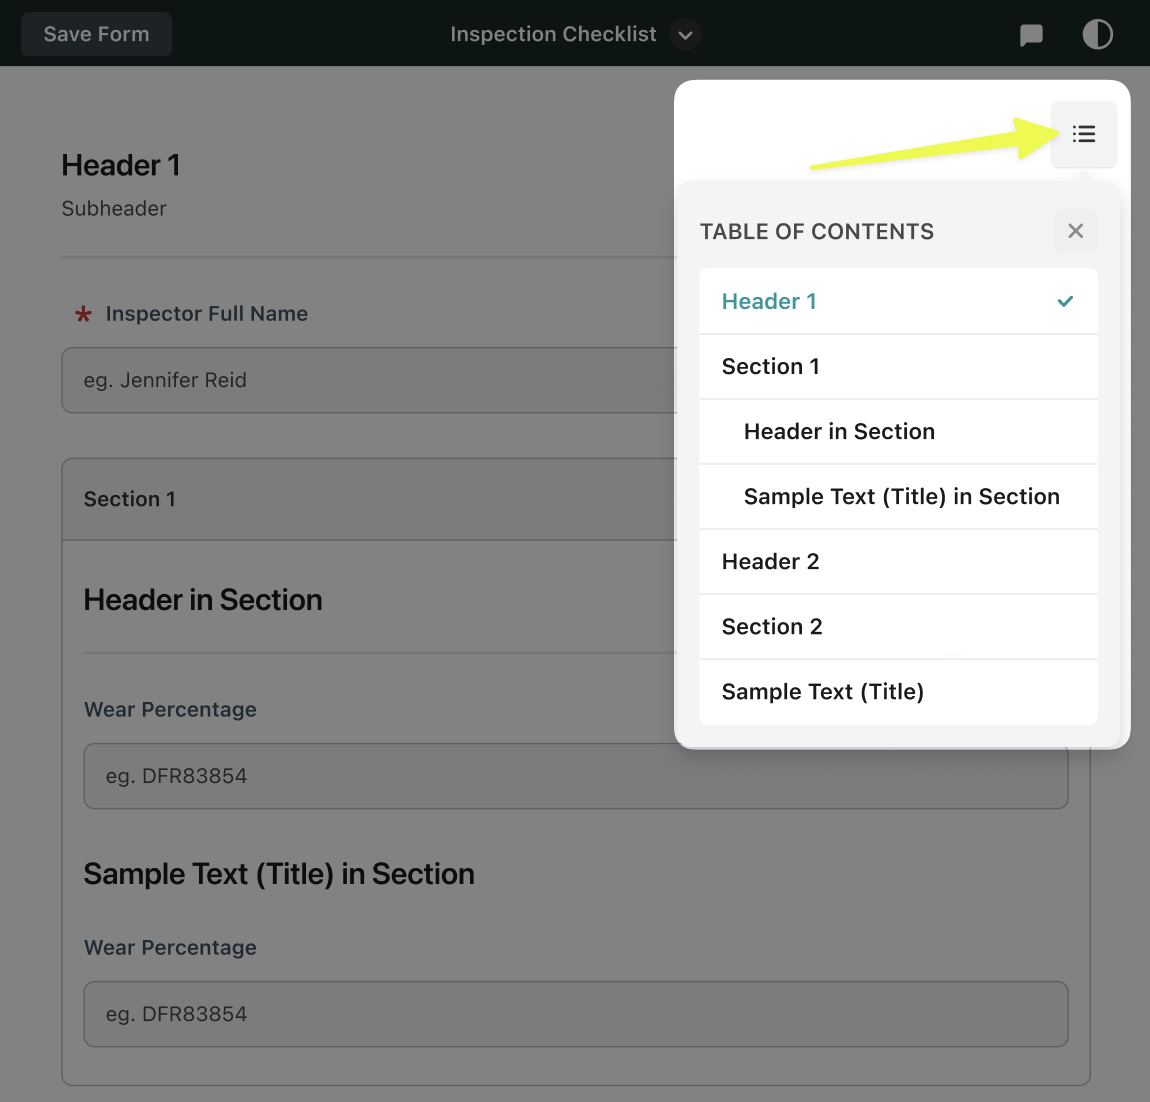
When working with long dynamic forms, it can be challenging to quickly locate the section you need. The Table of Contents helps by providing fast navigation to specific parts of the form.
The Table of Contents is generated automatically based on the structure of the dynamic forms. It includes the following elements:
Header
Section
Free text (with style: Title)
If a section contains elements inside it, those elements appear indented under the section name. Clicking any item in the Table of Contents takes you directly to that part of the form. Below, you can see how this function will look for the field team in the Fluix Task app:
To learn more about building Dynamic forms from scratch, visit our Feature Tutorial Center.
If you have any questions about setup, contact our team at support@fluix.io, and we’ll be happy to help.
Was this article helpful?
Thanks for your feedback!
Oops, something went wrong. Please, try again later.
Thank you!
What details or examples would have made this article more helpful for you? We appreciate your insights!
In Fluix, you can easily manage the forms your field team works on in their daily workflows. In this article, we will dive into how you can:
Add new forms to existing workflows;
Replace forms already in use;
Bulk edit a form used across multiple workflows.
Types of Forms You Can Utilize in Fluix
Before you start, choose the form type that best suits your needs:
Dynamic Forms – Smart, mobile-friendly forms with logic, created in Fluix Form Builder.
Static Web Forms – Simple fillable forms, also built in Fluix Form Builder.
Fillable PDFs – Forms created outside Fluix (e.g., in Adobe Acrobat), with editable fields added.
If you are unsure which option to select, contact us at support@fluix.io, and our product experts will guide you through the most appropriate option based on your use case.
How to Add a Form to the Existing Workflow
Example Use Case
Provide your field managers with an extra checklist to complete during the field technician’s job review.
Important
To ensure the form is saved & stored after the user in Fluix submits it (e.g., for audits or storage):
Add it not only to the task the user fills out
But also to the final action step (e.g., Submit by Email, Upload to Storage)
To add an extra form to a workflow:
1. Go to Admin Portal > Workflows -> select the workflow you want to edit. 2. Click the task where the new form should be added. 3. In the Forms & Attachments section, click + Add New Form.
4. Choose your form type (Dynamic, Static, or Fillable PDF)
How to Replace a Form in Your Workflow
You can replace a form in any existing workflow without disrupting current operations.
To replace a form:
1. Go to Admin Portal > Workflows ->open the workflow you’d like to update; 2. Open the first task in the flowchart -> in Forms & Attachments, click three dots next to the form -> select Replace:
3. Then choose:
Choose from Forms – Pick an existing Fluix web form.
Import Fillable PDF – Upload a form from your computer.
Create New Form – Build one (dynamic or static) directly in the Fluix Form Builder.
4. Check Replace in all tasks and actions to apply the new form across the entire workflow in one click.
5. Click Save & Publish in the upper right corner to publish the changes to the respective workflow.
Important:
Changes only apply to newly started tasks. Any task already in progress will continue using the old form.
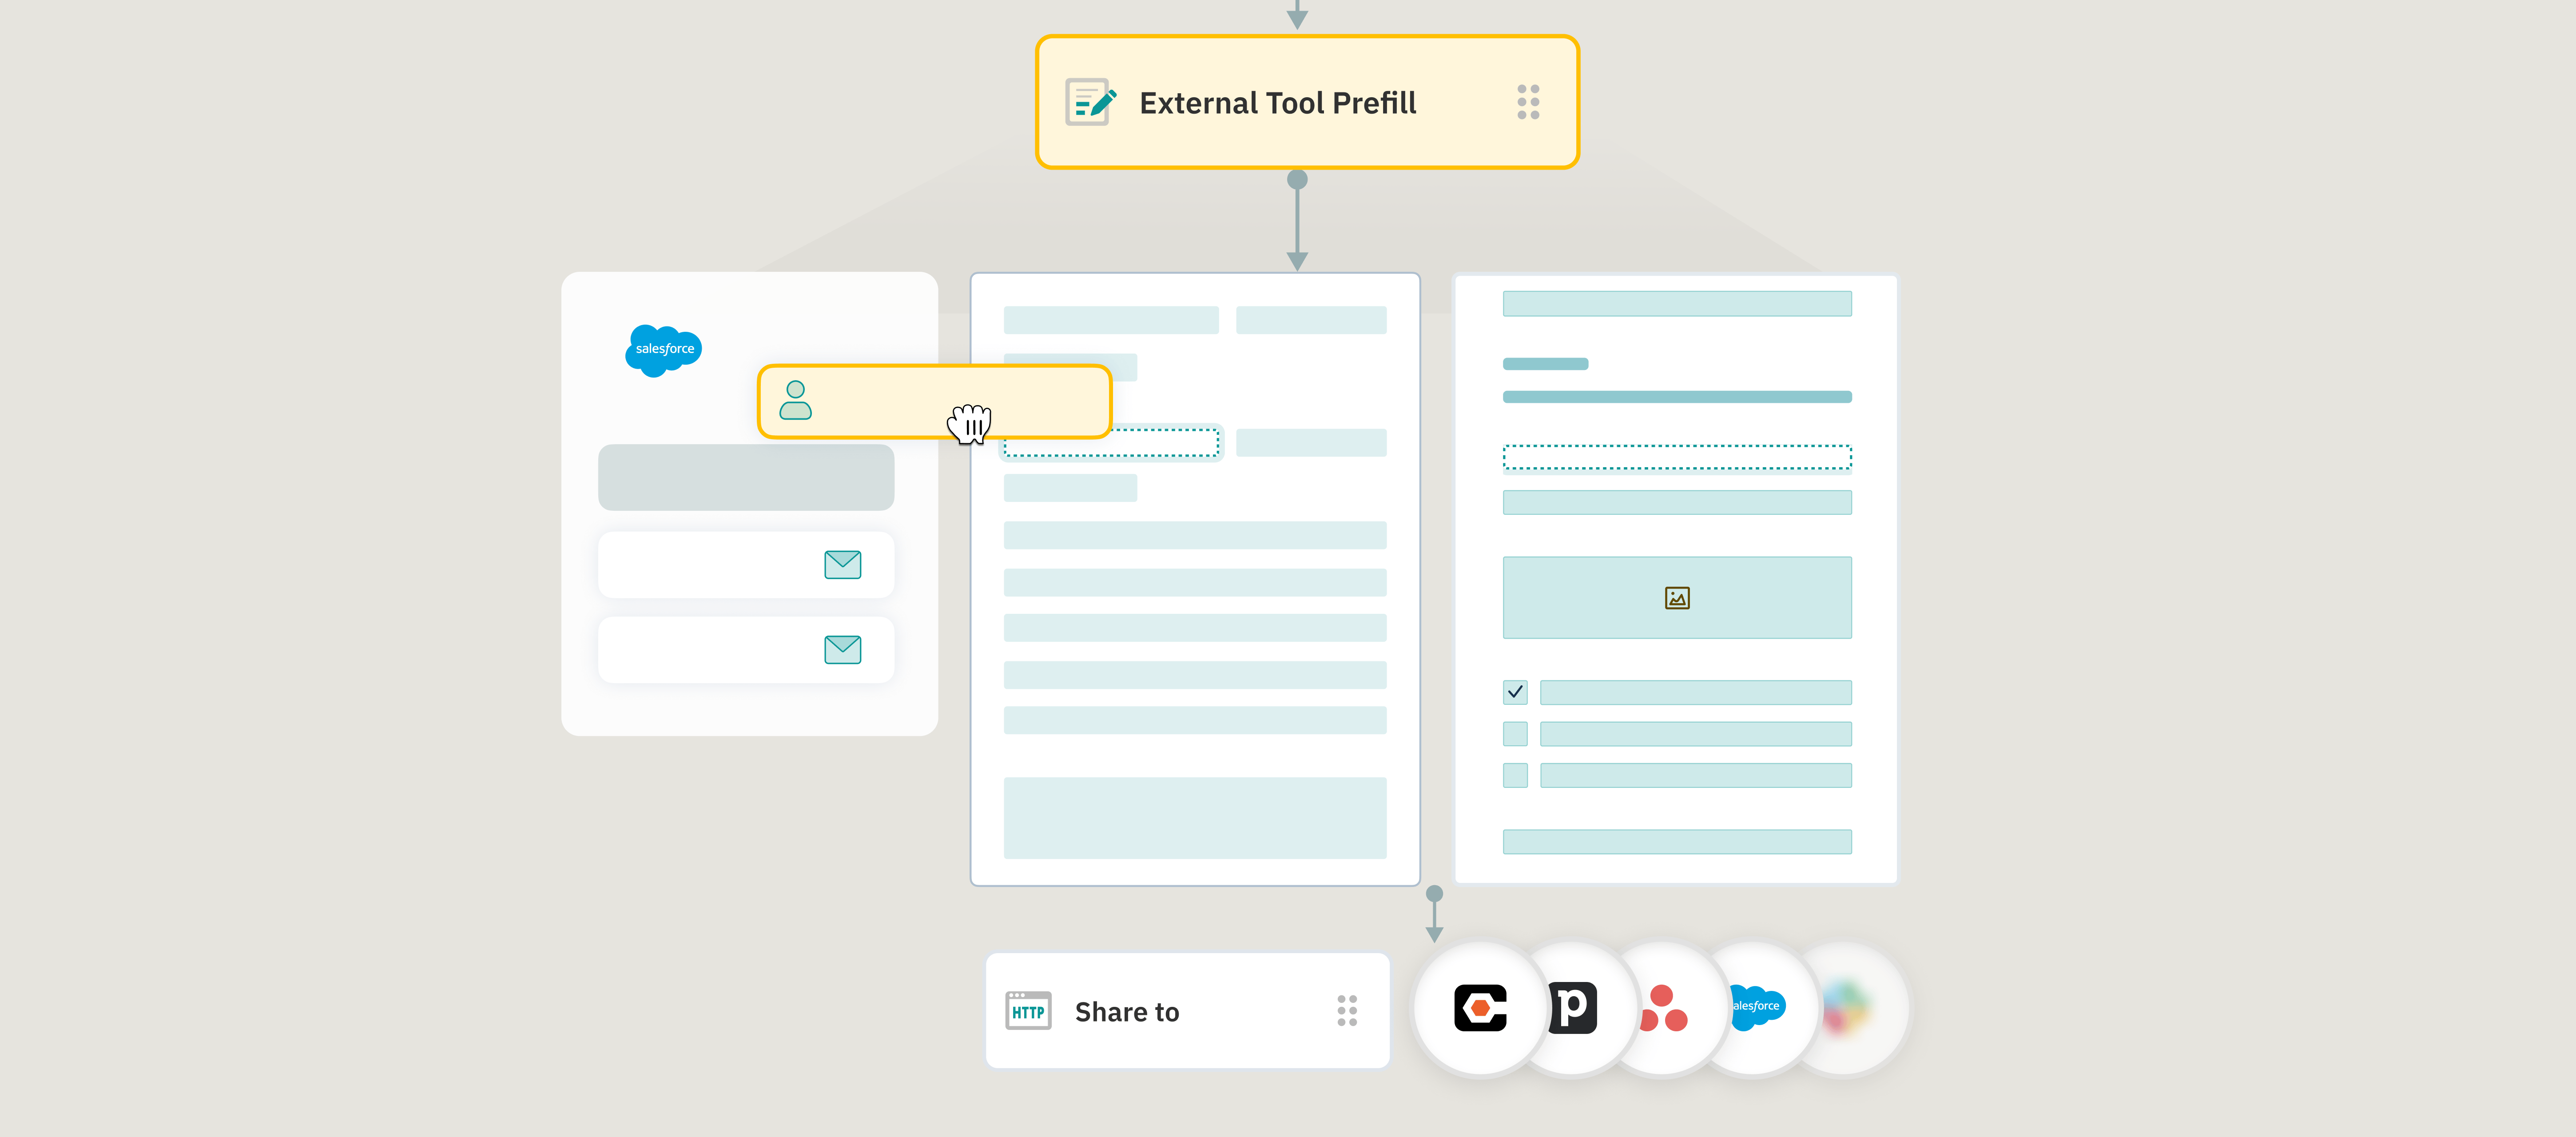
What to Know About Dynamic Values
If you use dynamic valuesin your workflow(e.g., auto-filled project names, dates, or user data), and your new form has different field names or logic, you’ll need to:
Review affected elements like:
User Tasks
Prefill Tasks
Submit Actions
Remap the dynamic values in those steps.
Fluix will display a warning prompt to guide you through the remapping process after replacing the form.
How to Bulk Edit a Form Across Multiple Workflows
If one form is used across several workflows, Fluix helps you update it everywhere in just a few clicks, saving admin time and ensuring consistency across field teams and workflows.
Here’s how you can achieve this:
1. Go to Admin Portal > Forms -> select the form you want to update;
2. Make changes in Form Builder -> click Save & Publish in the upper right corner. Fluix will prompt you to select one of the options:
Update this form version only in Forms – Changes are saved in the form, but you’ll manually update it in each workflow.
Update form in Forms and the workflowsabove – Changes are automatically applied to all workflows that use this form.
3. Select the preferred option and click Proceed.
Important:
Please note that changes only apply to newly started tasks. Any task already in progress will continue using the old form.
Reach out to us anytime at support@fluix.io and we’re here to guide you through your setup.
Was this article helpful?
Thanks for your feedback!
Oops, something went wrong. Please, try again later.
Thank you!
What details or examples would have made this article more helpful for you? We appreciate your insights!
You can now link PDF documents stored in Fluix Storage directly to the sections within a dynamic form. This way, your Fluix app users can access the exact page of a manual, policy, or standard operating procedure directly from a checklist.
This allows app users to open the relevant reference material with a single tap, without having to manually search through attachments or switch between multiple applications.
This functionality is especially useful when working with lengthy technical documents (100+ pages) during inspections or audits. Linked PDFs can point to a specific page, giving app users instant access to the exact section they need.
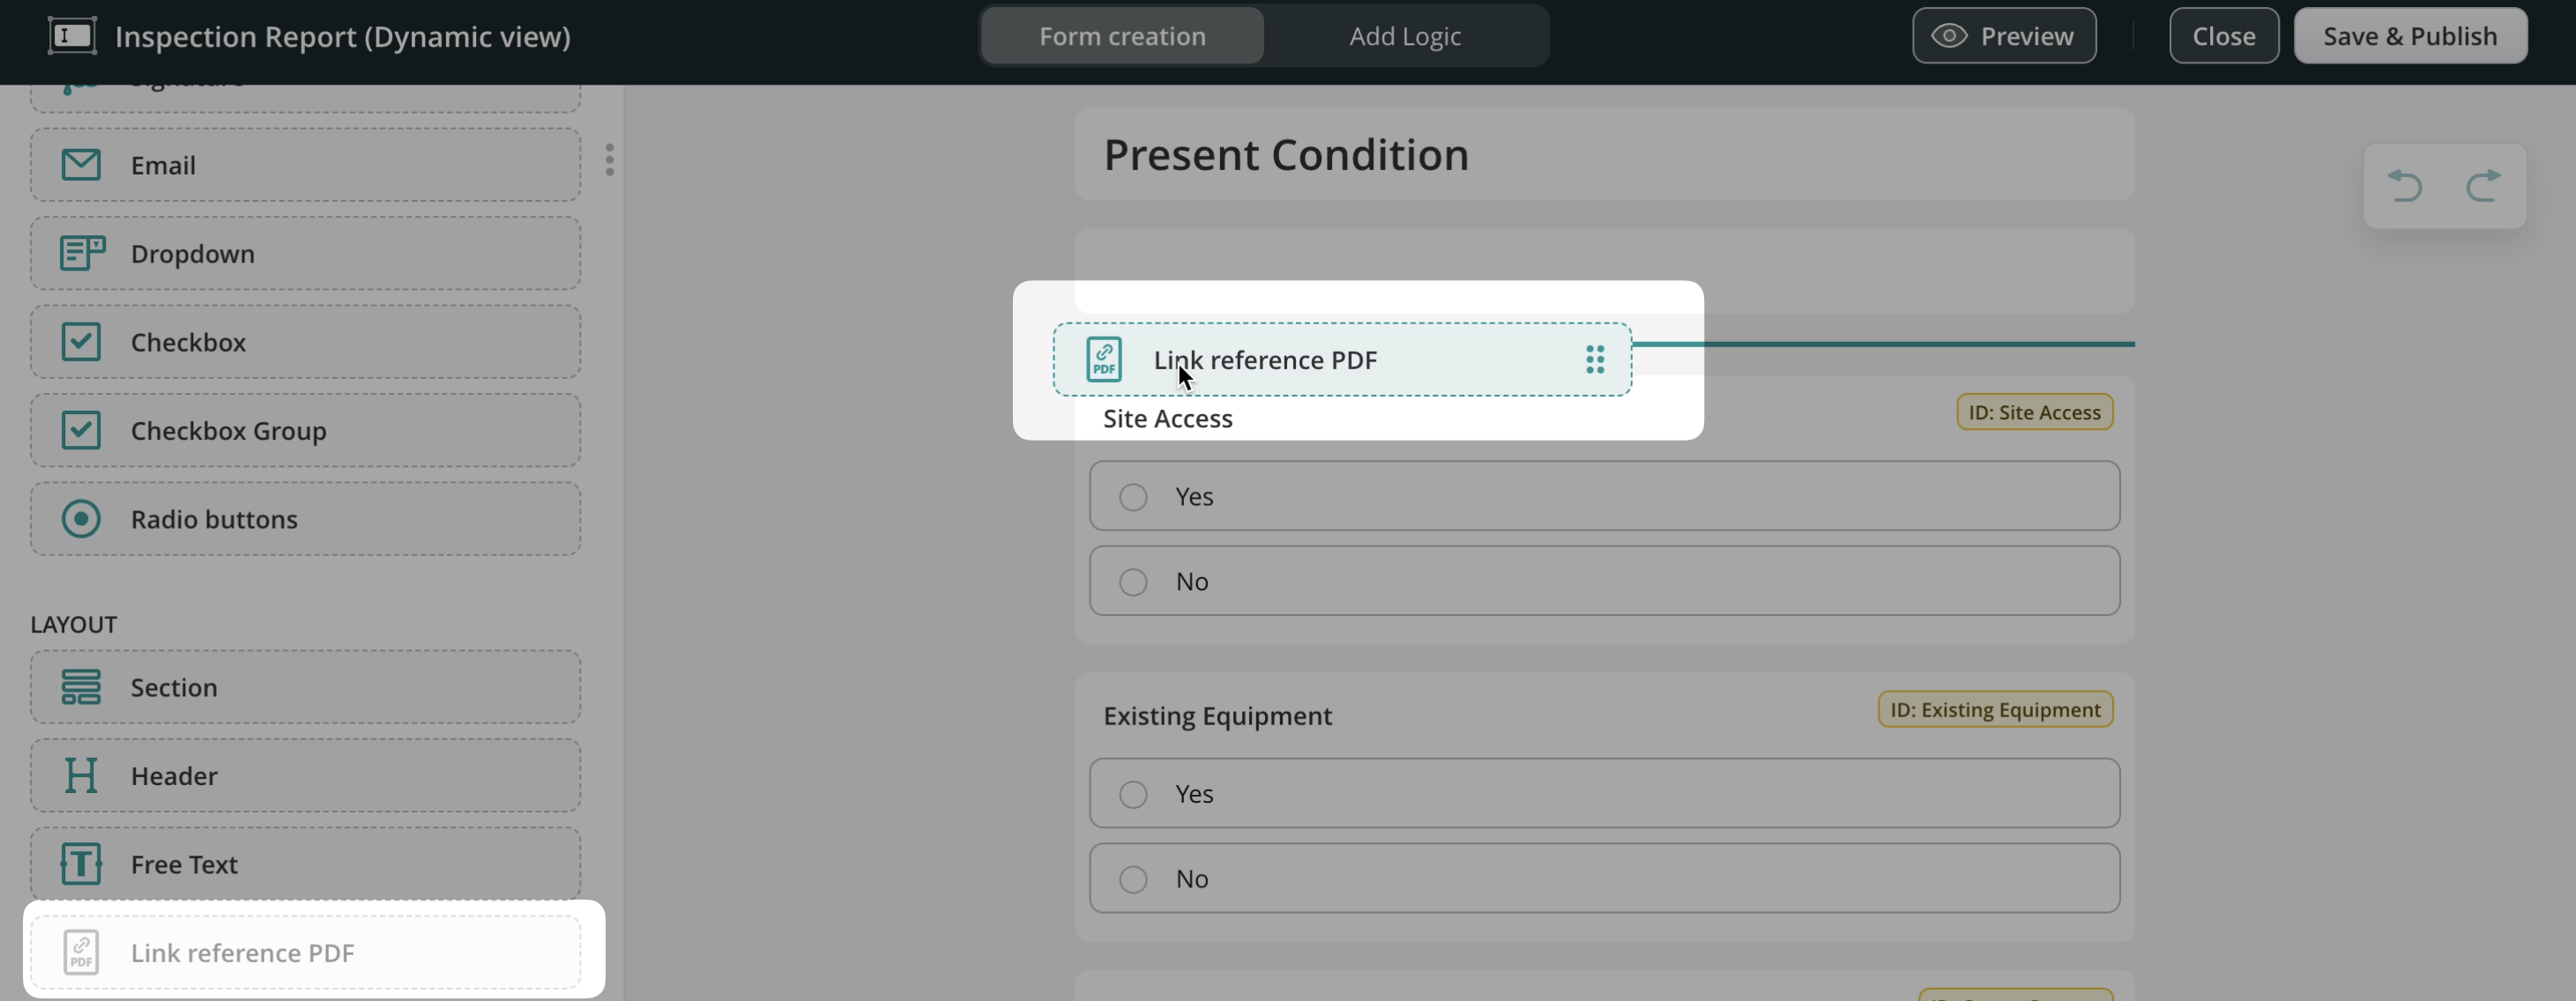
Setting Up PDF Links in Form Builder
Open your dynamic form in Form Builder and locate a Link Reference PDF element. Drag it where you want the link to appear.
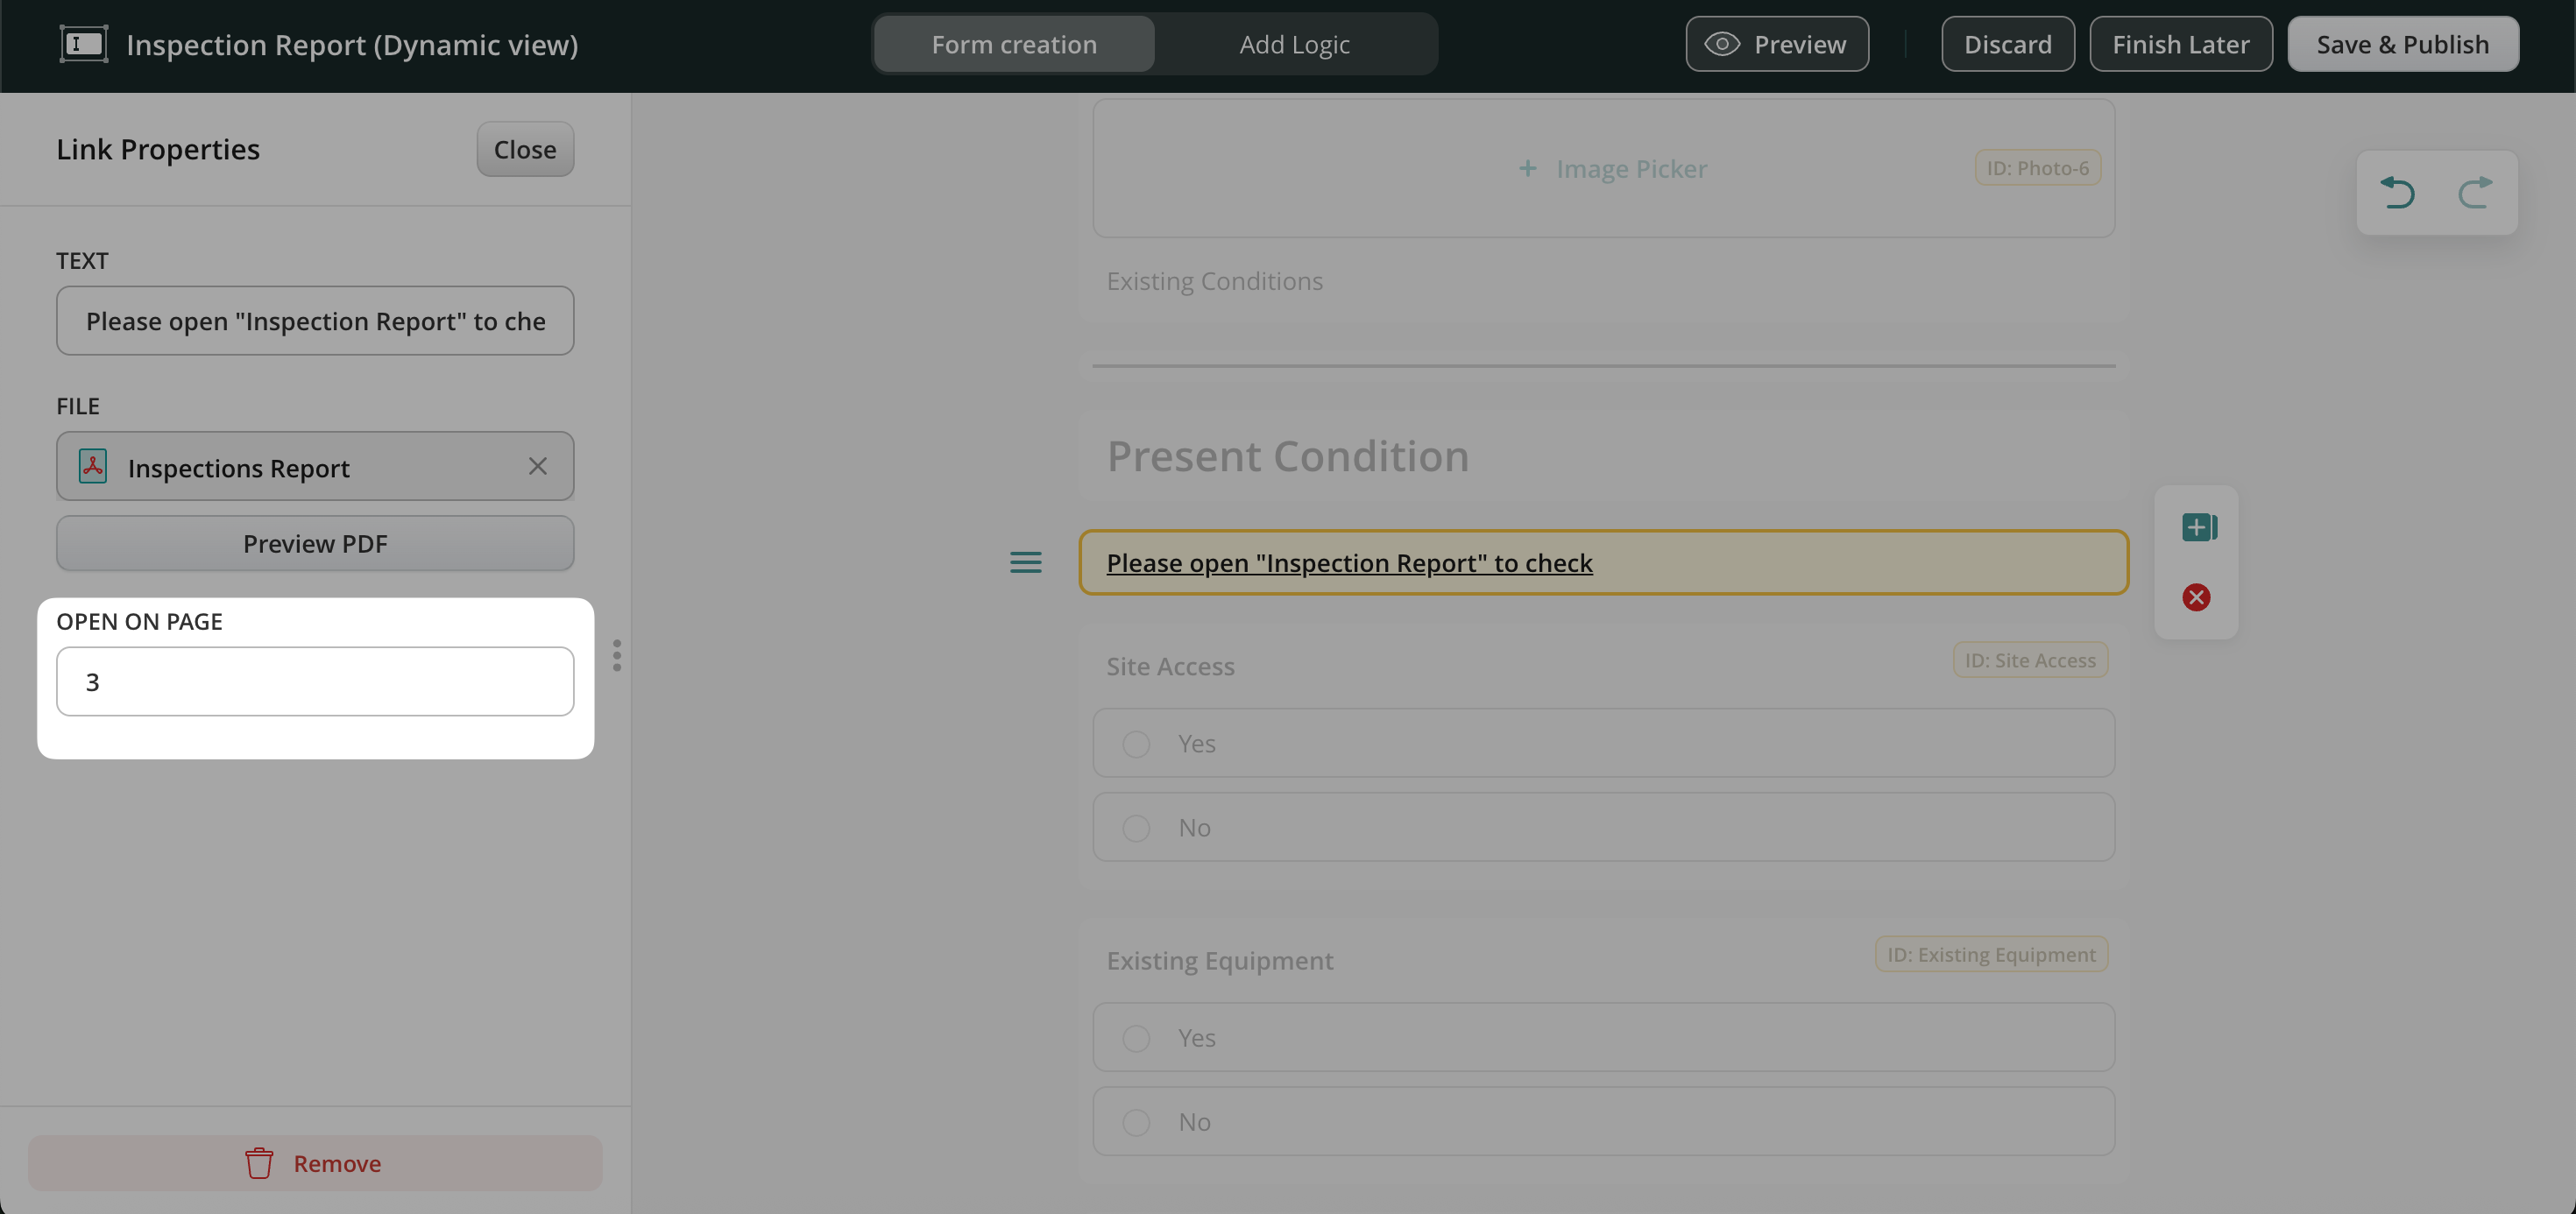
Inside the Free Text element, select Link and choose a PDF from Fluix Storage.
Optionally, specify a page number to open the document at a particular section. If no page is specified, the PDF will always open on the first page.
Repeat as needed – you can add multiple links within a single form and link multiple different PDFs.
Note: All linked PDFs are automatically added to every task that includes this form, appearing in the Attachments for review section. You may not be able to remove linked PDFs at the individual task level.
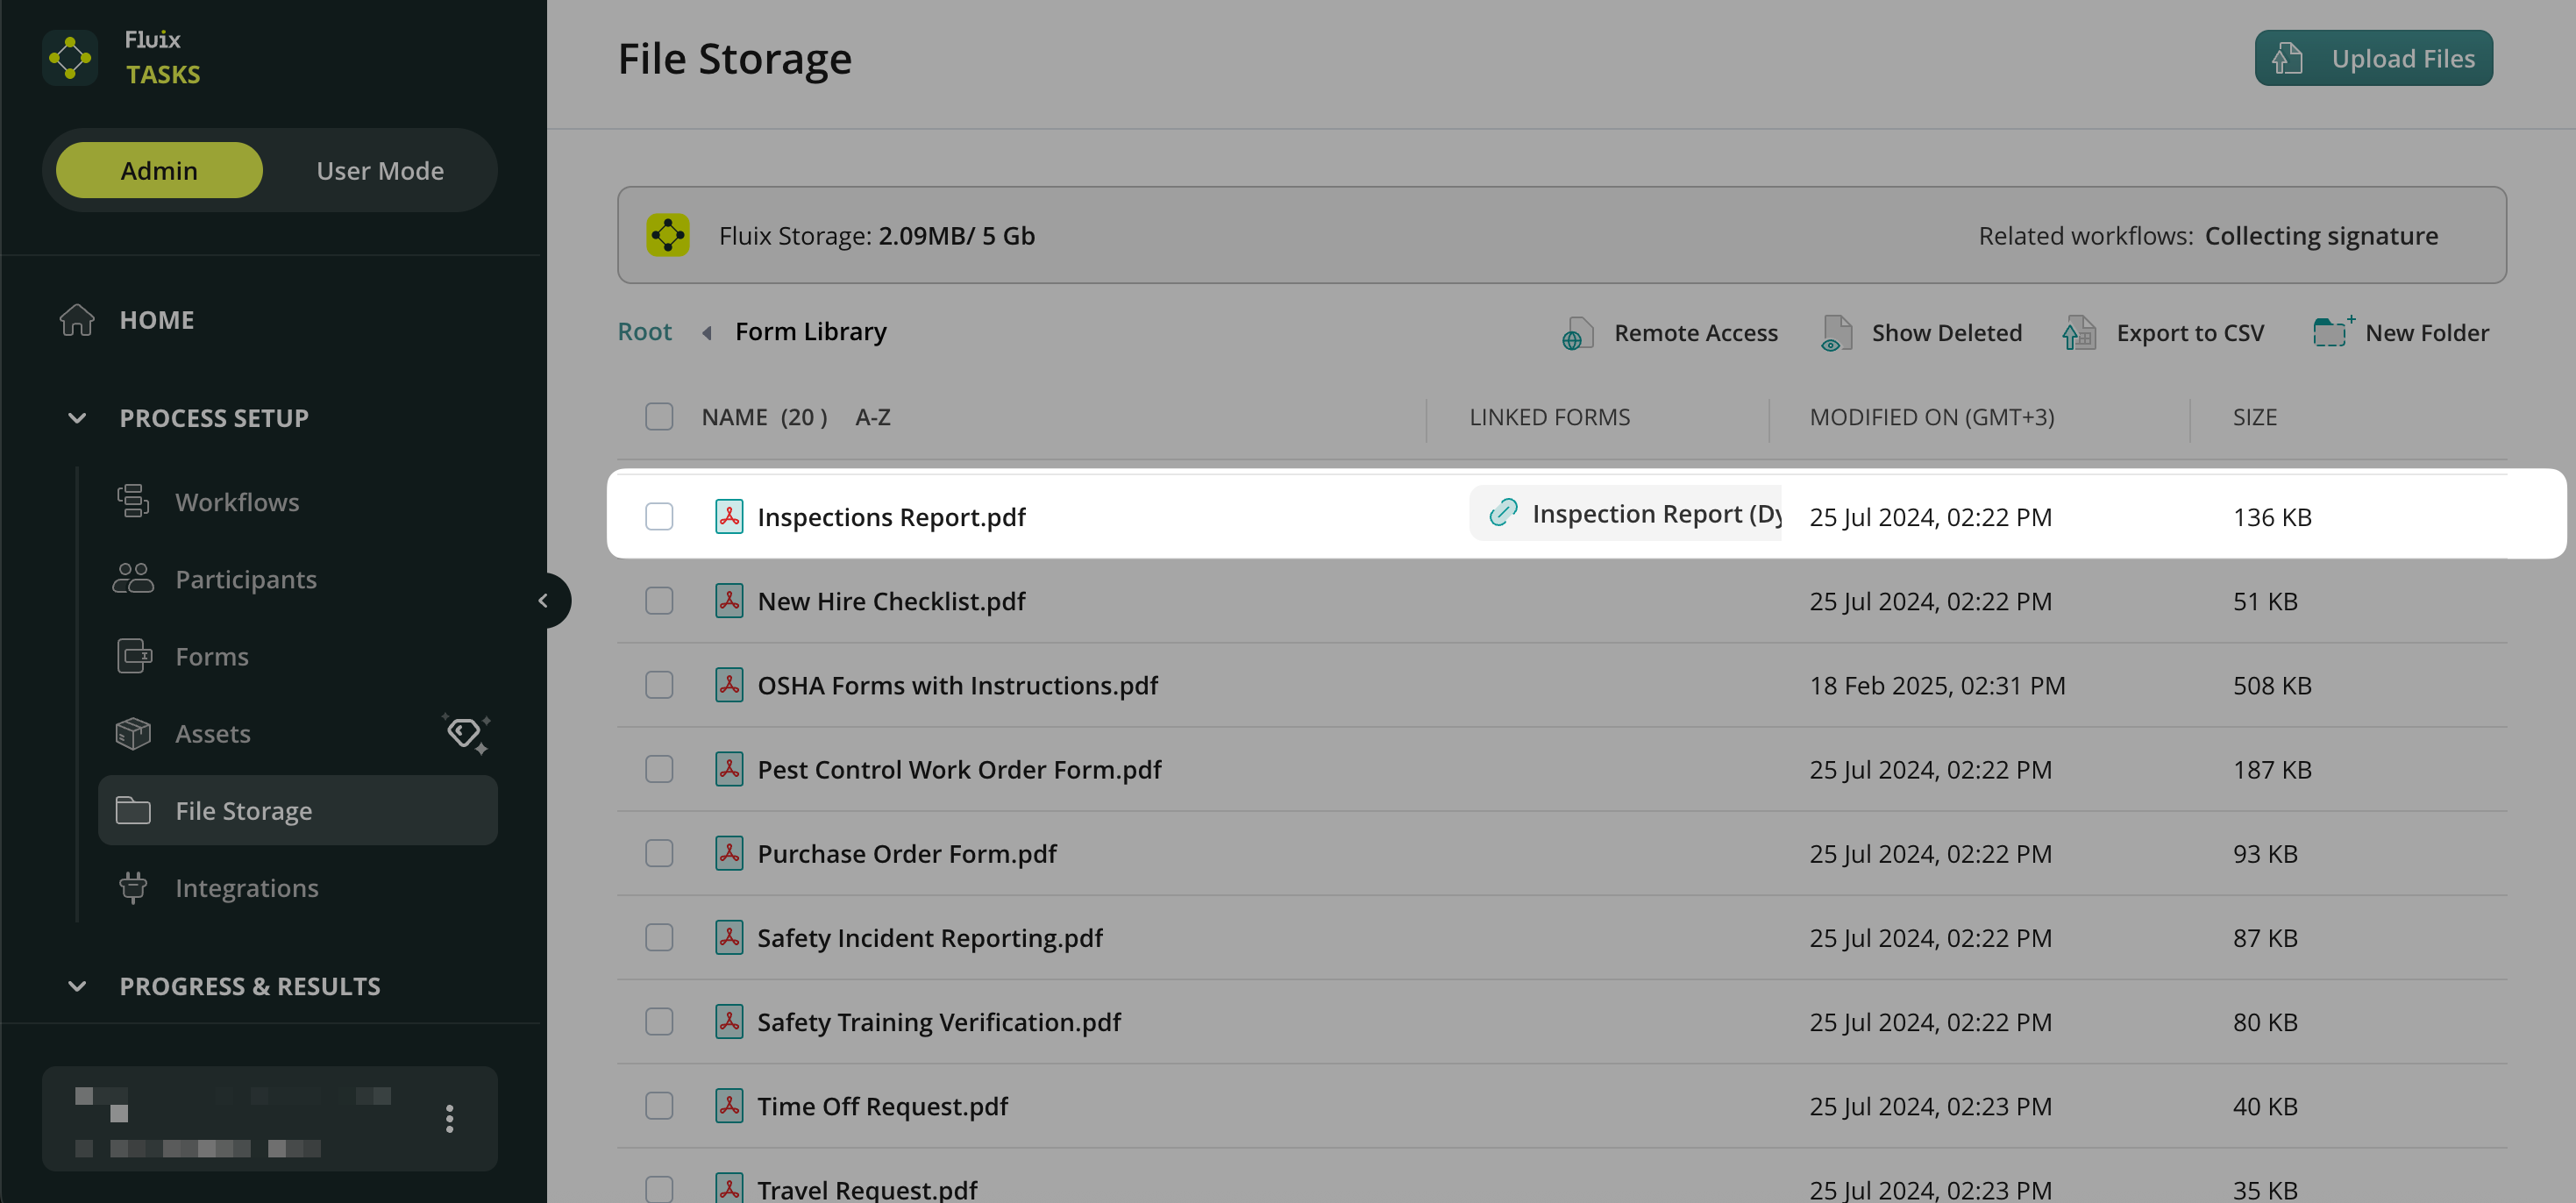
How Linked PDFs Appear in Fluix Storage
When a PDF is linked to a form, it will display a linked indicator in File Storage. This helps quickly identify which files are referenced in dynamic forms, making it easier to decide when an update is needed.
Note: Updating a linked PDF in File Storage will automatically reflect the change for all forms and tasks that reference it.
If you have any questions about setup, contact our team at support@fluix.io, and we’ll be happy to help.
Was this article helpful?
Thanks for your feedback!
Oops, something went wrong. Please, try again later.
Thank you!
What details or examples would have made this article more helpful for you? We appreciate your insights!
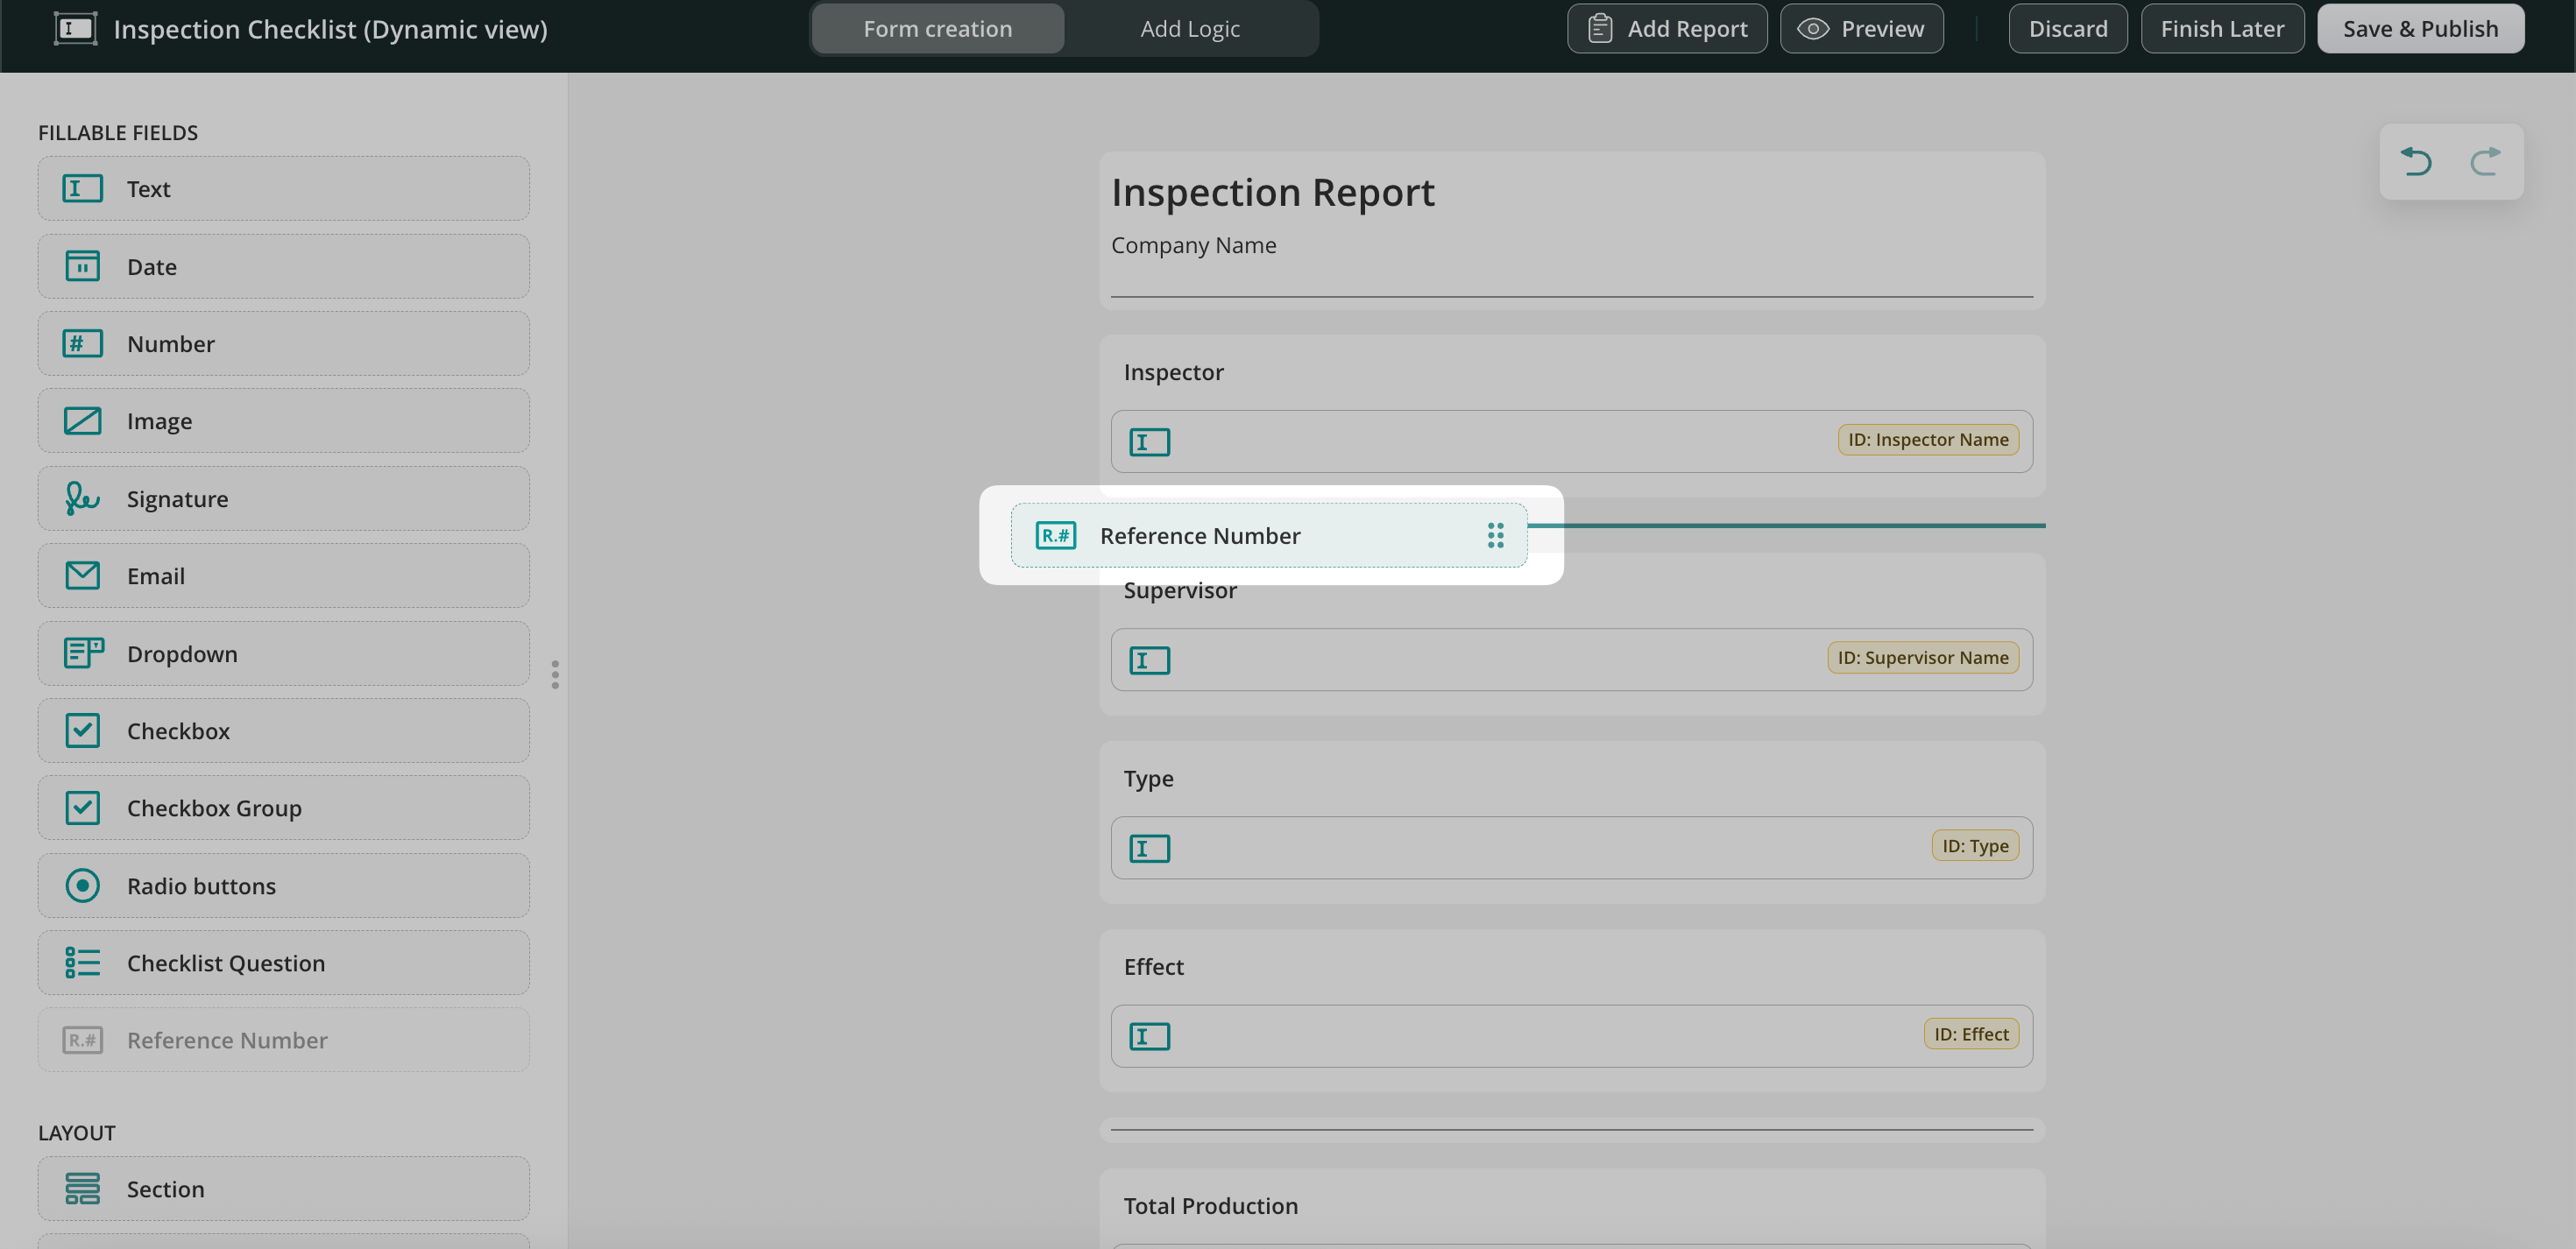
Introducing the Form Reference Number Auto-Generation, which helps automatically assign a unique reference number to the form. This feature eliminates the need for manual numbering, reduces the risk of duplicate or inconsistent document IDs, and makes it easier to track, organize, and identify submissions across your workflows.
How it works
Once the feature is configured by an admin, Fluix automatically generates a unique reference number when a user opens a form in the web or mobile app. The generated reference number:
Is unique for each form.
Automatically populated in the designated Reference Number field.
Displayed as a read-only value and cannot be modified by the user.
Can be used for document tracking, compliance, and reporting.
Note: Only one Reference Number field can be added to a form.
View and Analyze Reference Numbers
The Reference Number field can be used in the Dashboard to:
Search for specific submits.
Filter documents by reference number.
Create charts and reports using the Reference Number field.
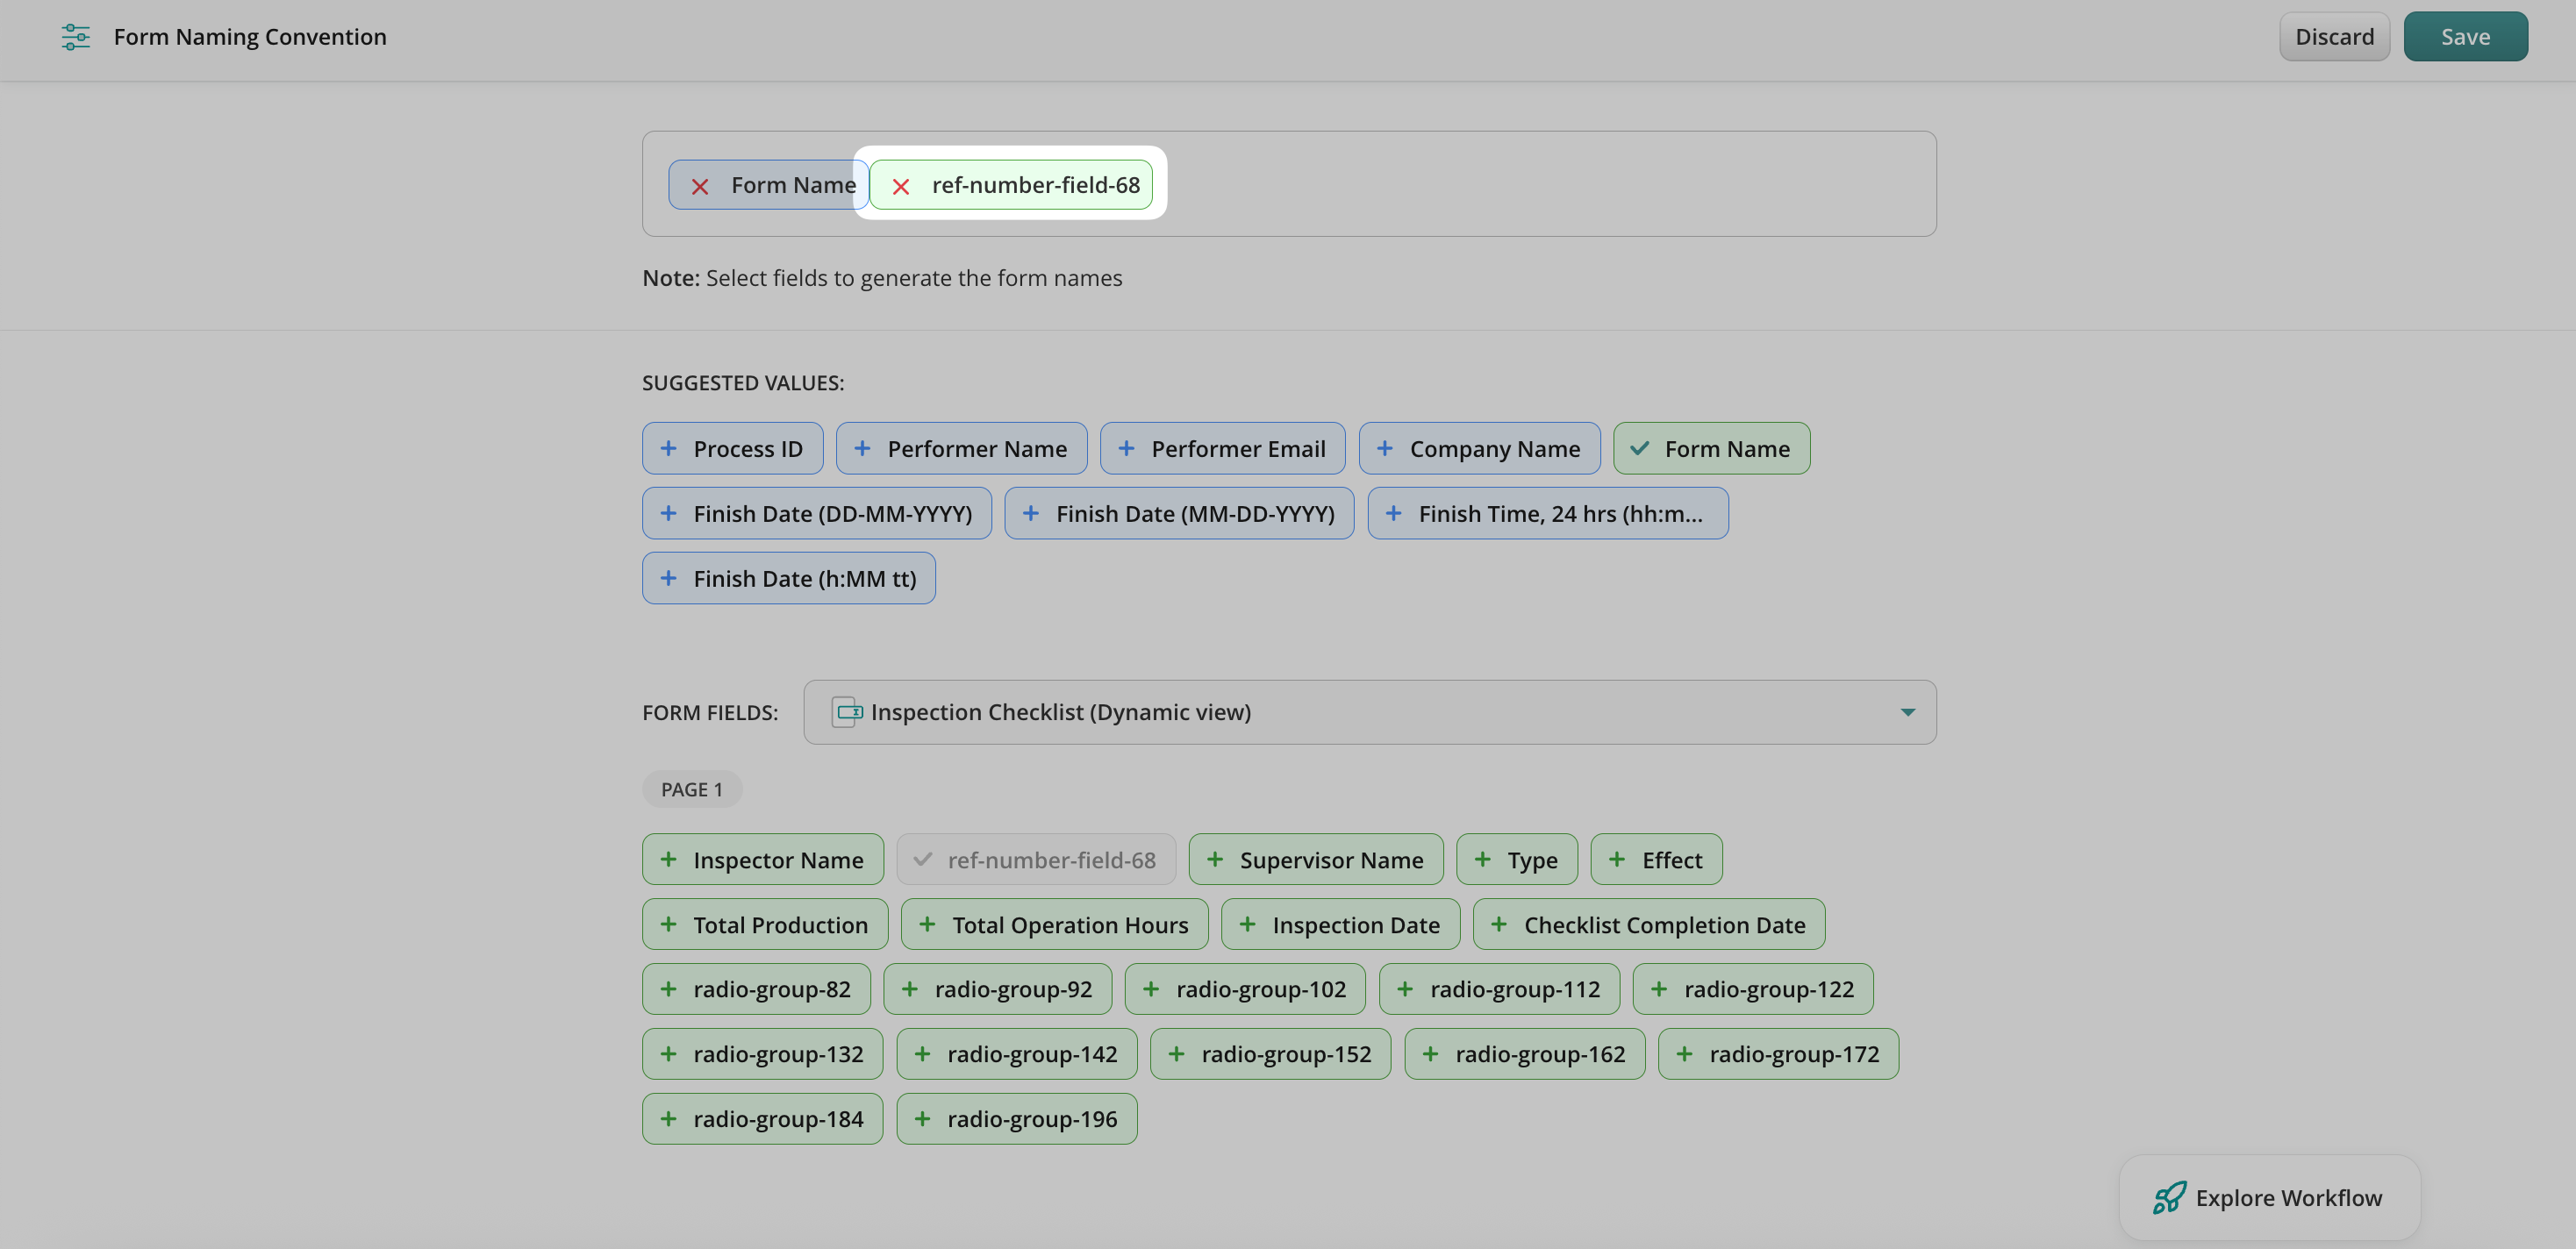
The generated Reference Number can also be used in the document naming convention. This means that once the form is submitted, the reference number can be automatically included in the file name. As a result, admins can easily locate the submitted document in Fluix Storage or connected cloud storage by searching for the reference number:
Feel free to contact us at support@fluix.io if you have any questions or comments.
Was this article helpful?
Thanks for your feedback!
Oops, something went wrong. Please, try again later.
Thank you!
What details or examples would have made this article more helpful for you? We appreciate your insights!
Sign Up to Our Product Newsletter
The latest updates from our Product team, straight to your inbox