Google Calendar is a time-management and scheduling tool. It allows users to create and manage events, set reminders, and schedule meetings across devices, making it easier to stay organized.
Fluix is a web and mobile-based cloud platform that helps teams set up digital document management and workflow automation. In this integration, Fluix serves as a mobile app for data capture, review, and approval.
What integration Fluix + Google Calendar does
By integrating Fluix with a Google Calendar, teams can streamline document-related tasks alongside their daily schedules. Fluix enables the capture and organization of important documents, while Google Calendar keeps team members on track with deadlines, meetings, and task notifications.
Picture this: You can use Google Calendar to schedule client meetings, demos, and follow-ups. Fluix can be used to manage contracts, quotes, and proposals, allowing clients to sign documents digitally. As deadlines approach, calendar reminders ensure the sales team follows up promptly with clients or gets contracts signed. The integration between Fluix and Google Calendar ensures timely communication and prevents delays in closing deals.
In order to set up a Google Calendar integration in Fluix, please follow the steps below.
Step 1 – Create a Taskstream
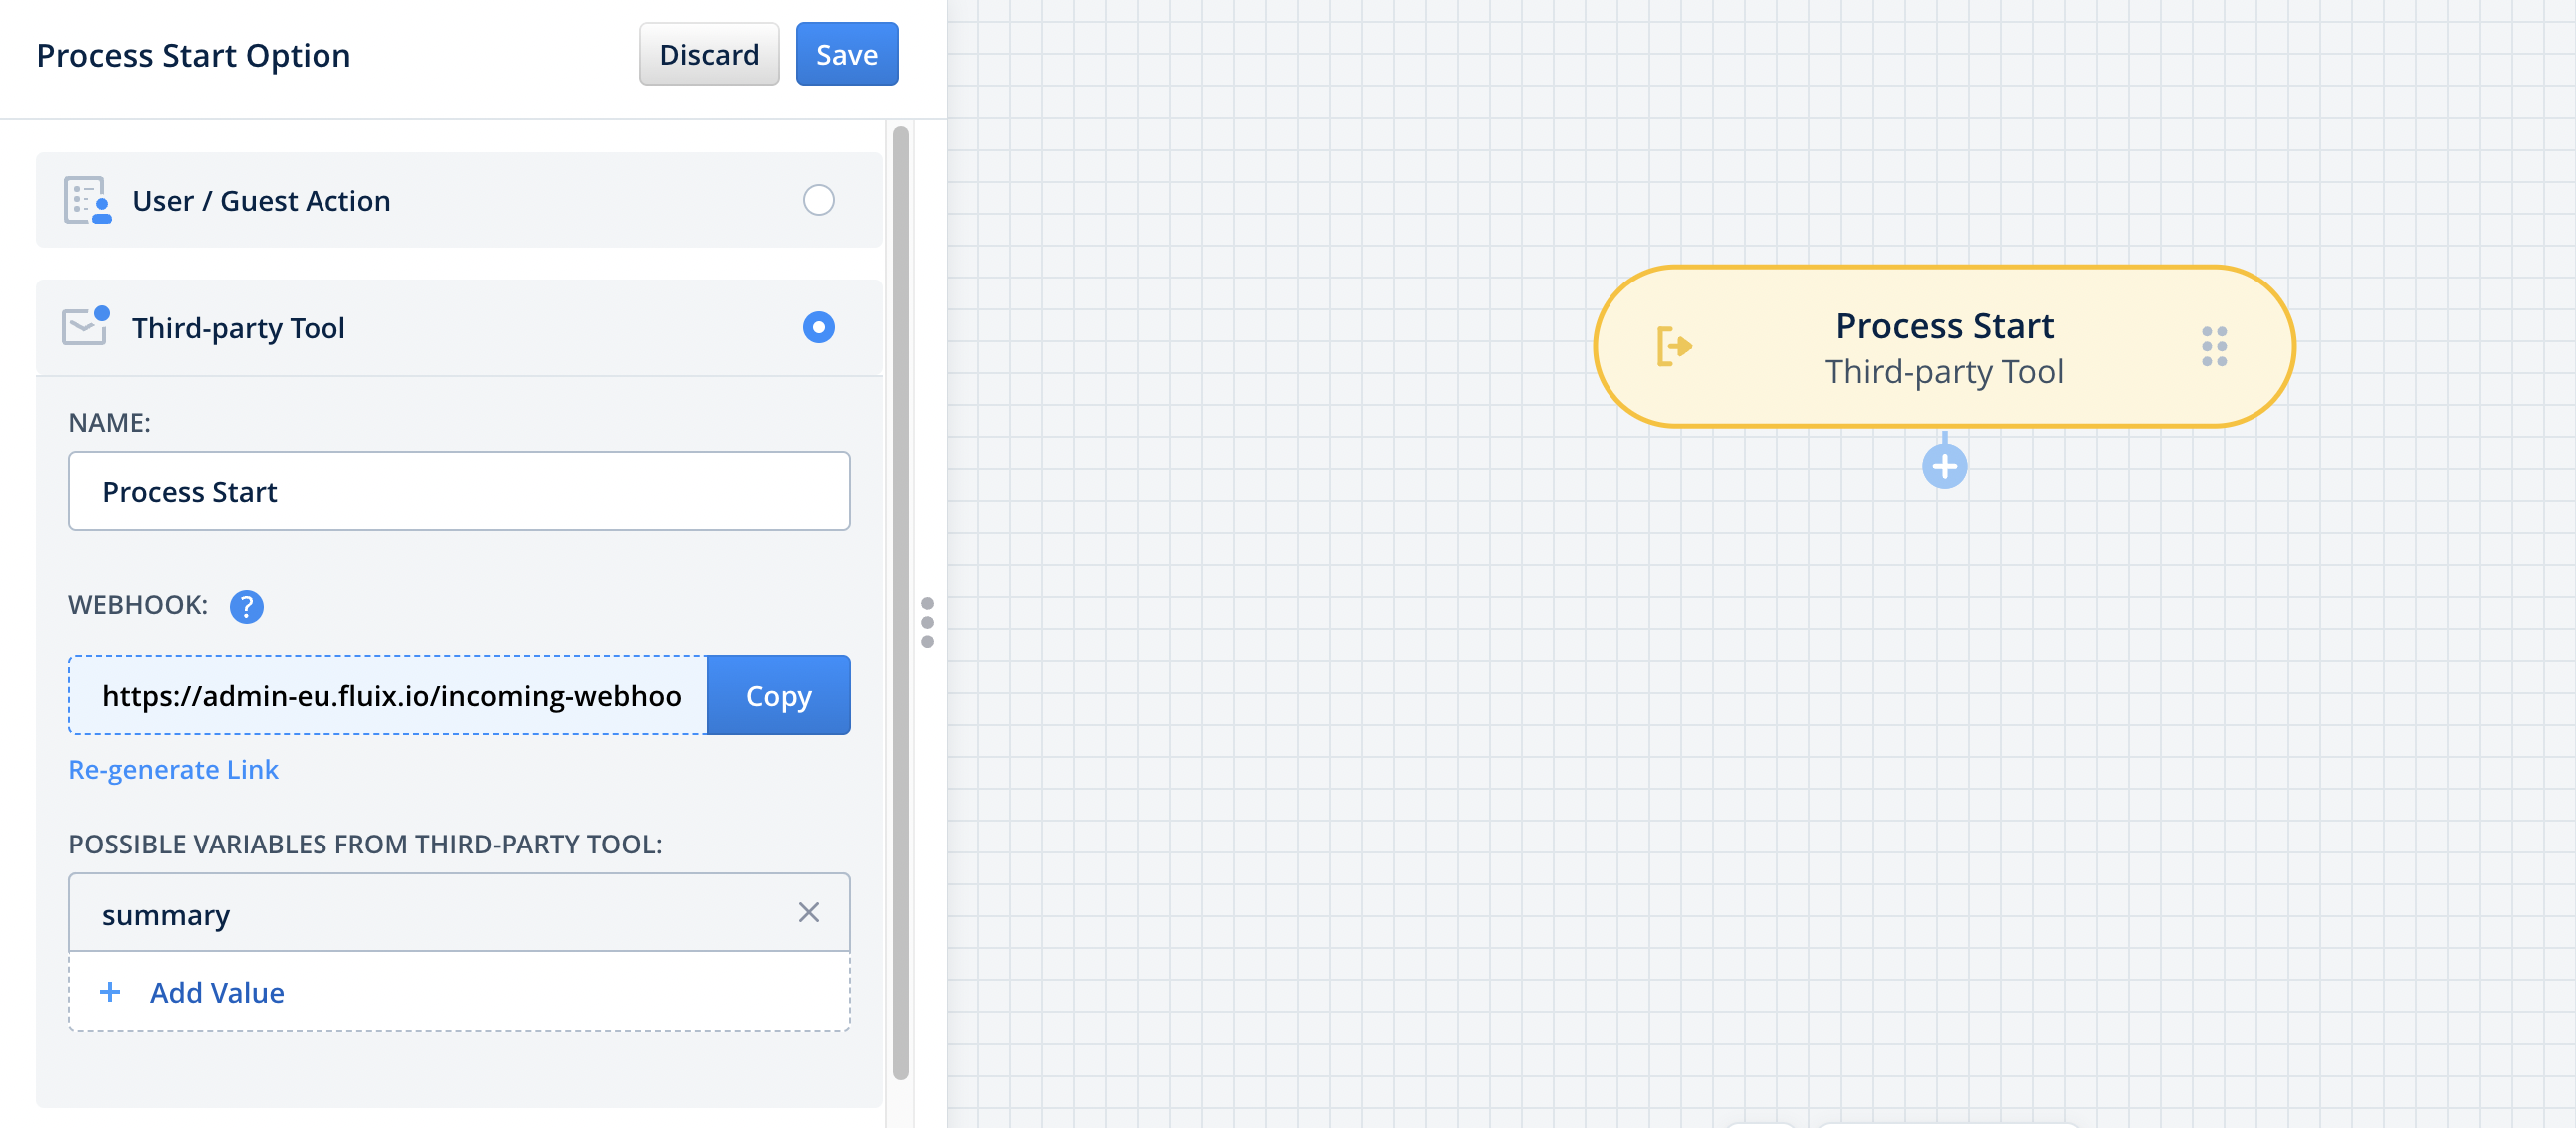
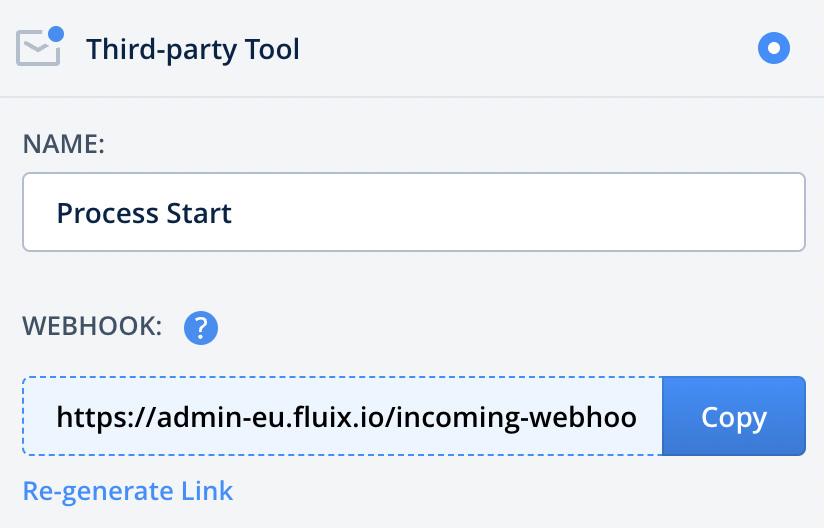
Navigate to the Fluix admin portal, Taskstreams section, click the New Taskstream button, and select Blank template. Name your Taskstream and click the Next button. Drag and drop the Process Start element, click to open it, and select the Third-party Tool option from the list. Add the value “summary” to the Possible Variables From Third-Party Tool field.
Step 2 – Configure Prefill of the form
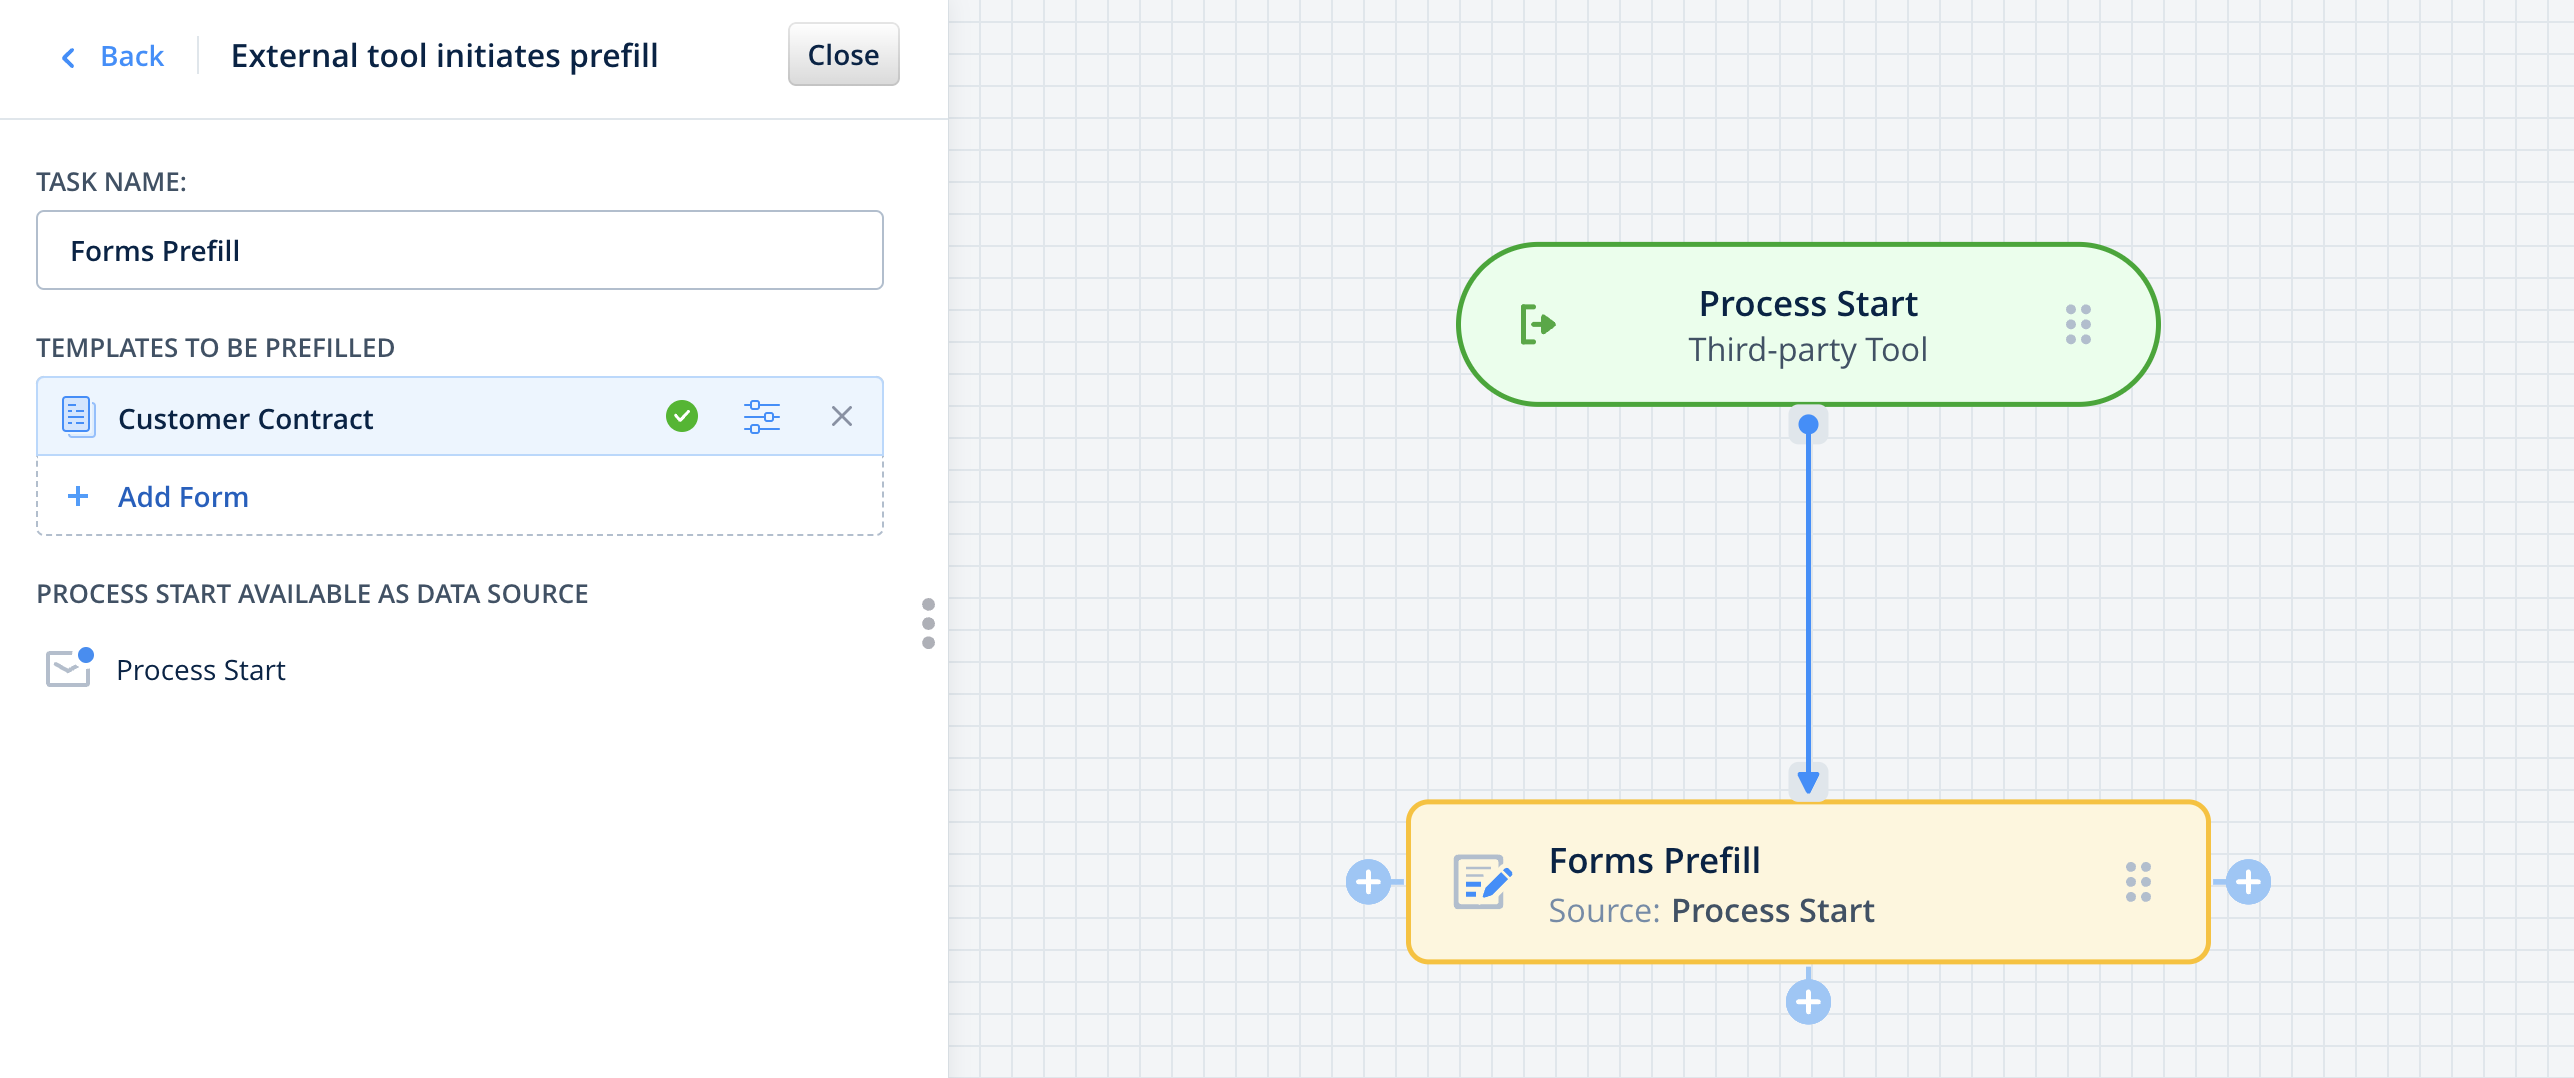
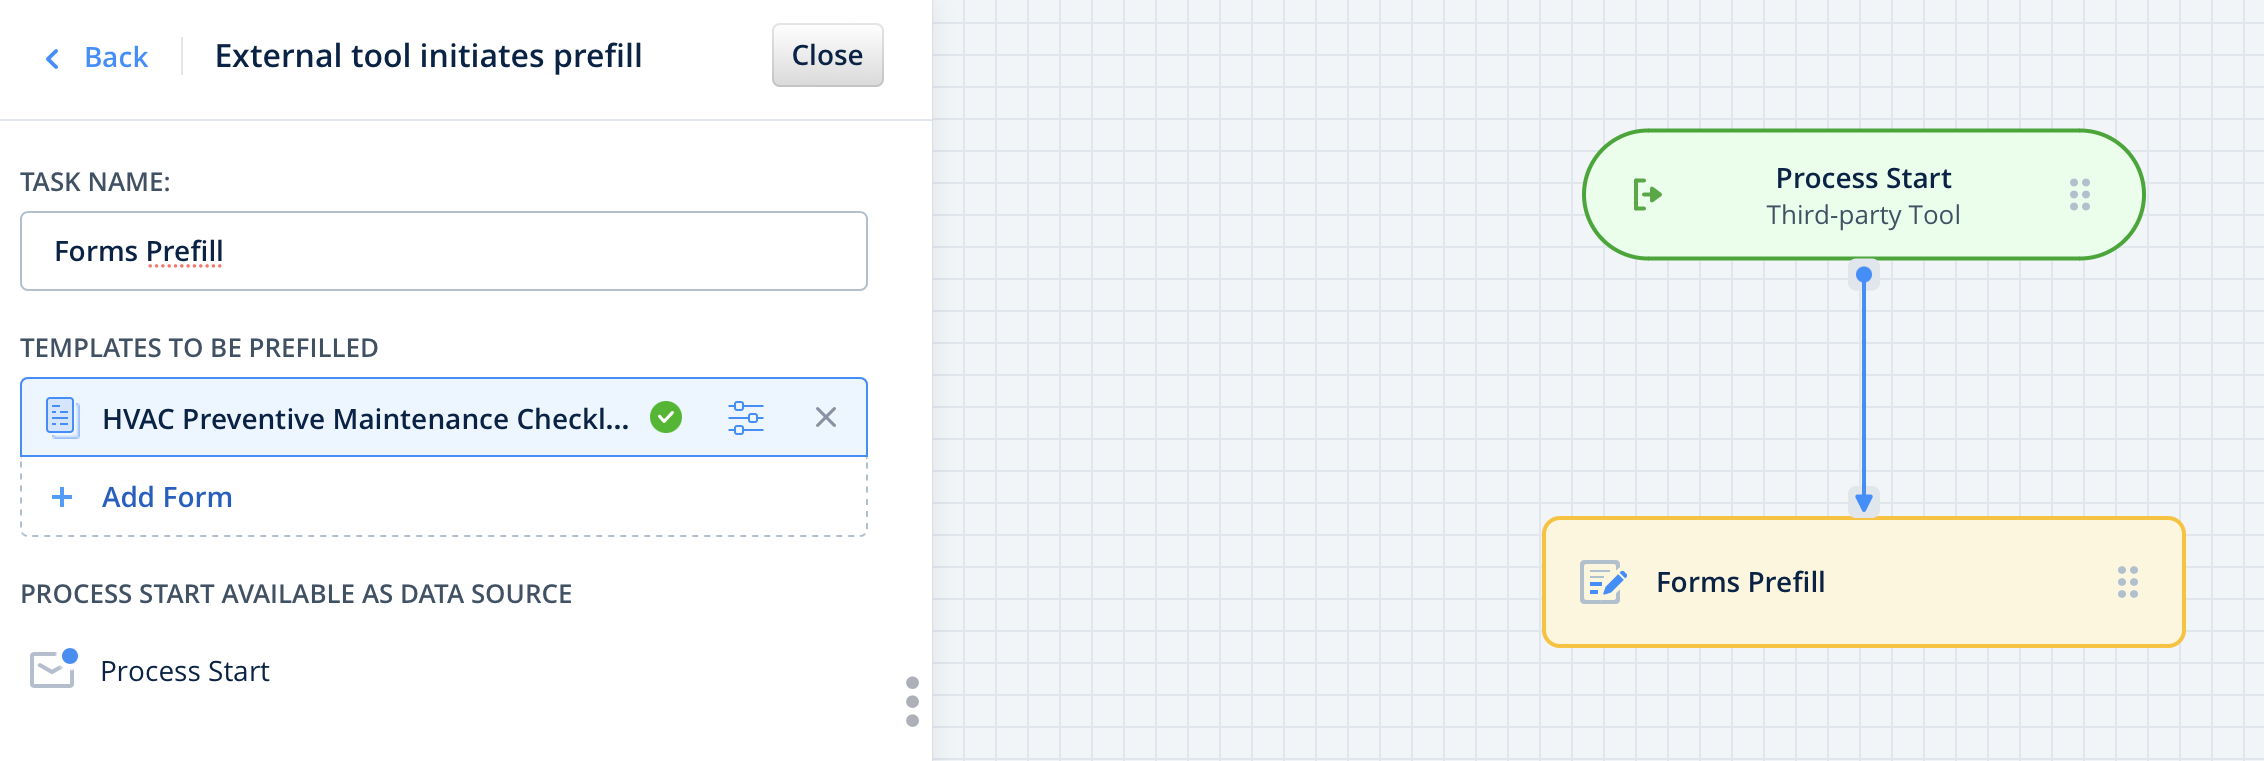
Drag and drop the Forms Prefill task and link it to Process Start. In the configuration settings, select the External tool initiates prefill option, and choose the form that your team will later complete.
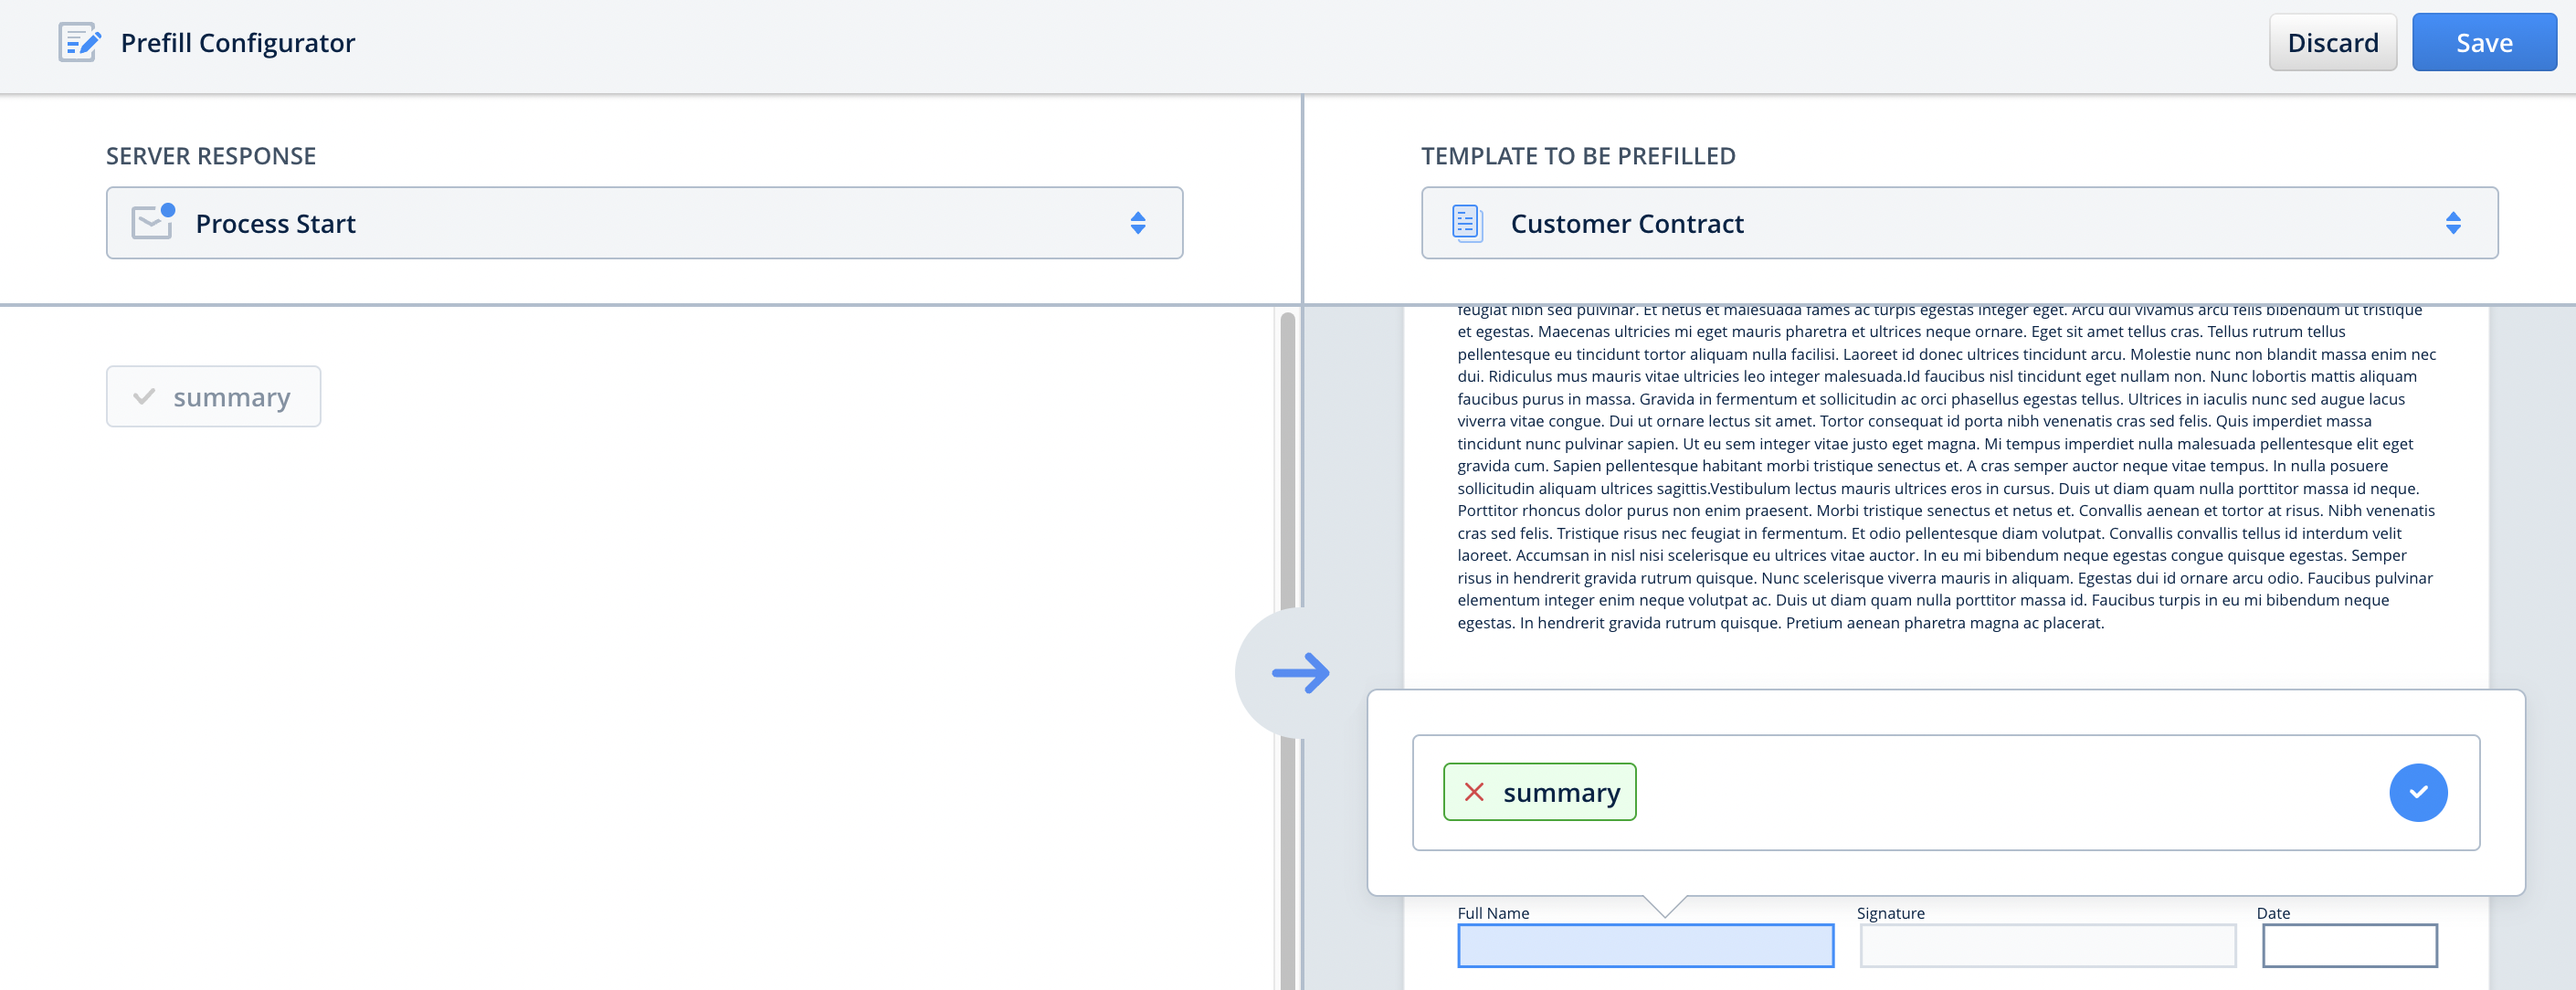
In the Prefill Configurator, map the fields in the form that should be filled with data from the Google Calendar. In our case, the meeting title will be pulled to the field we select.
Step 3 – Finish the process mapping
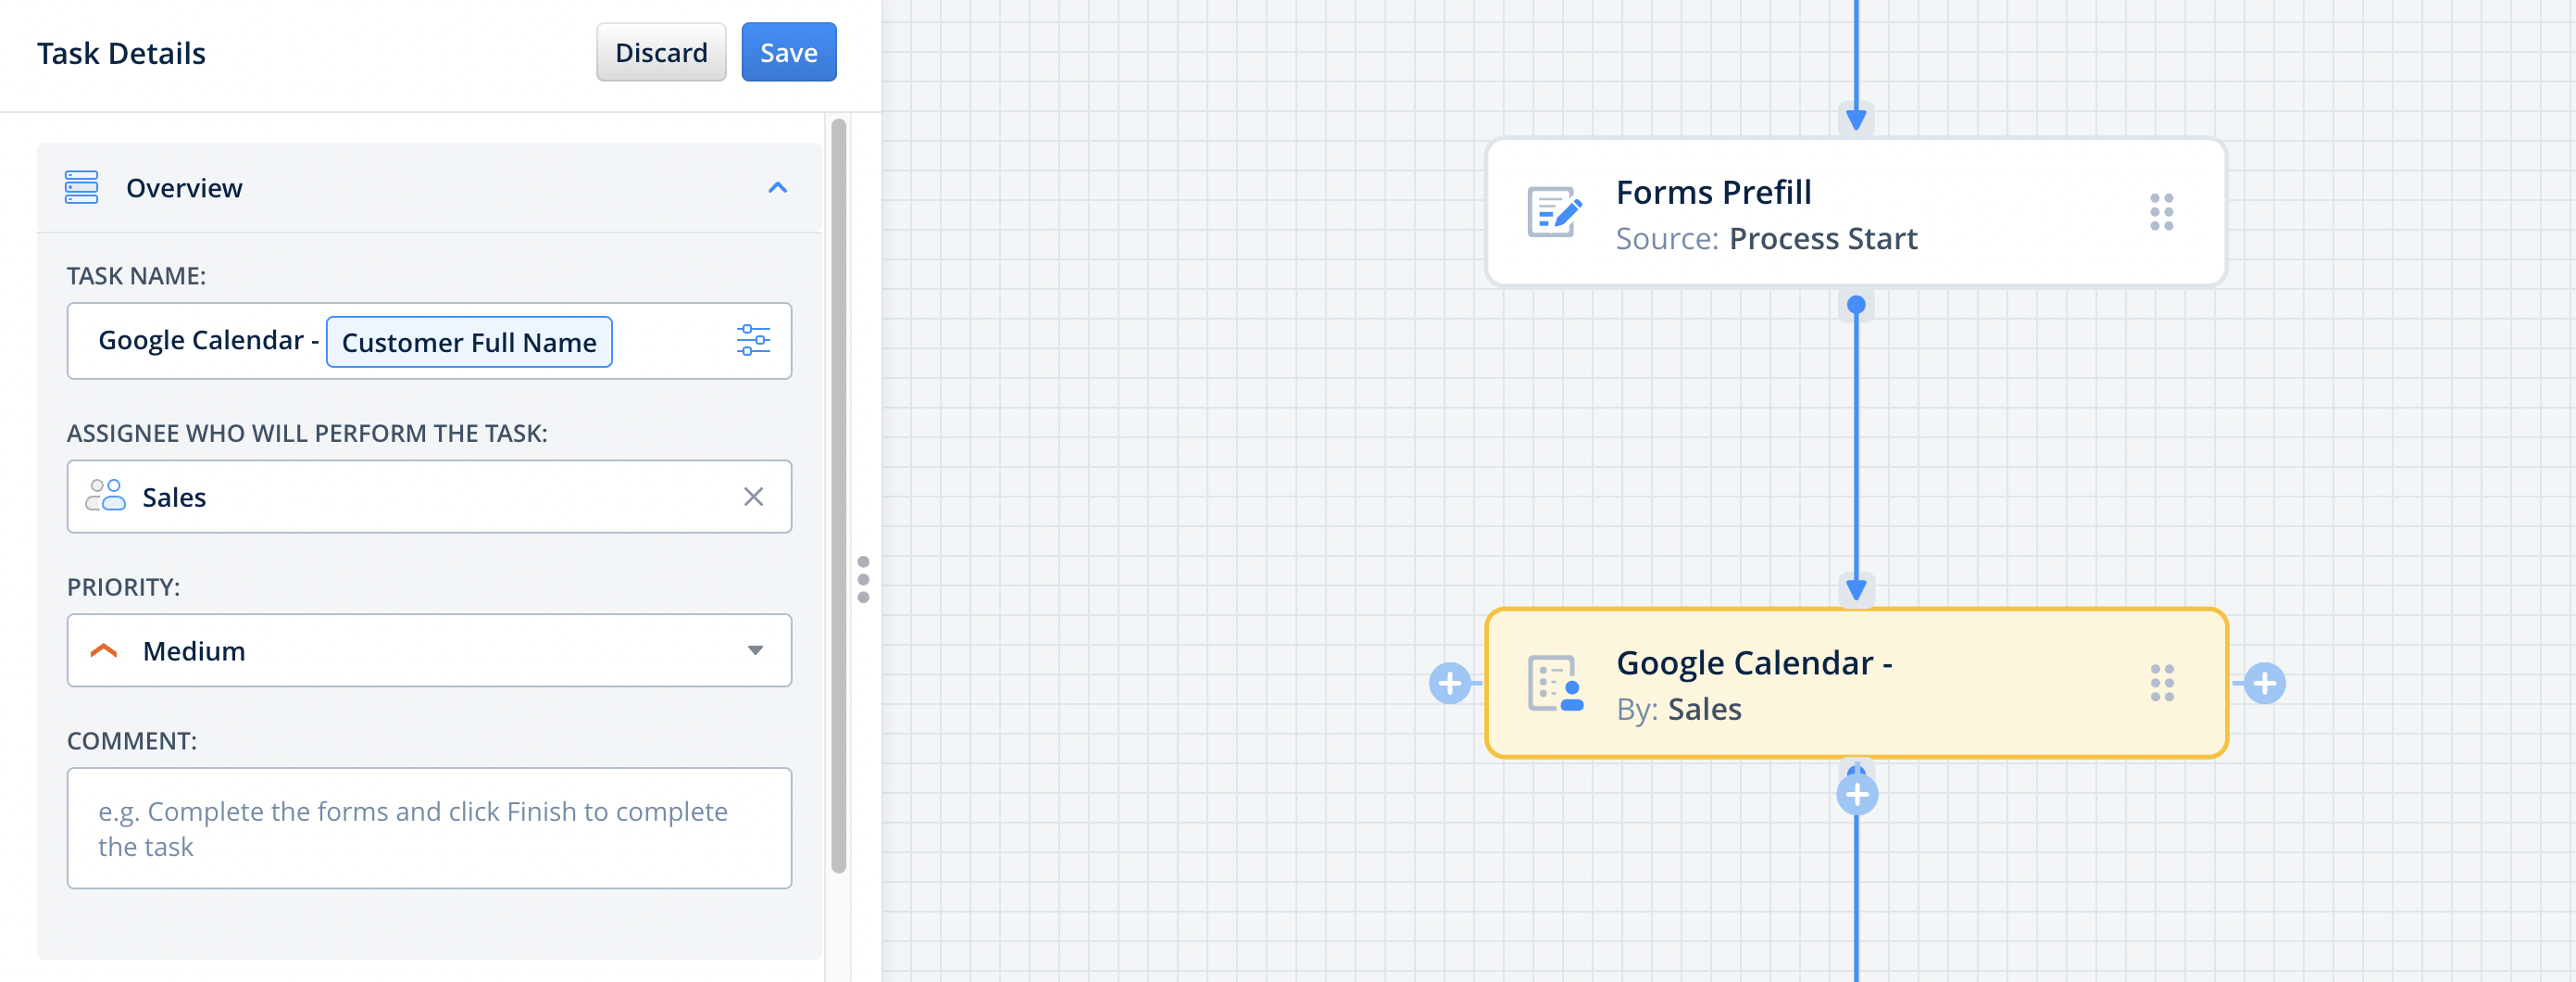
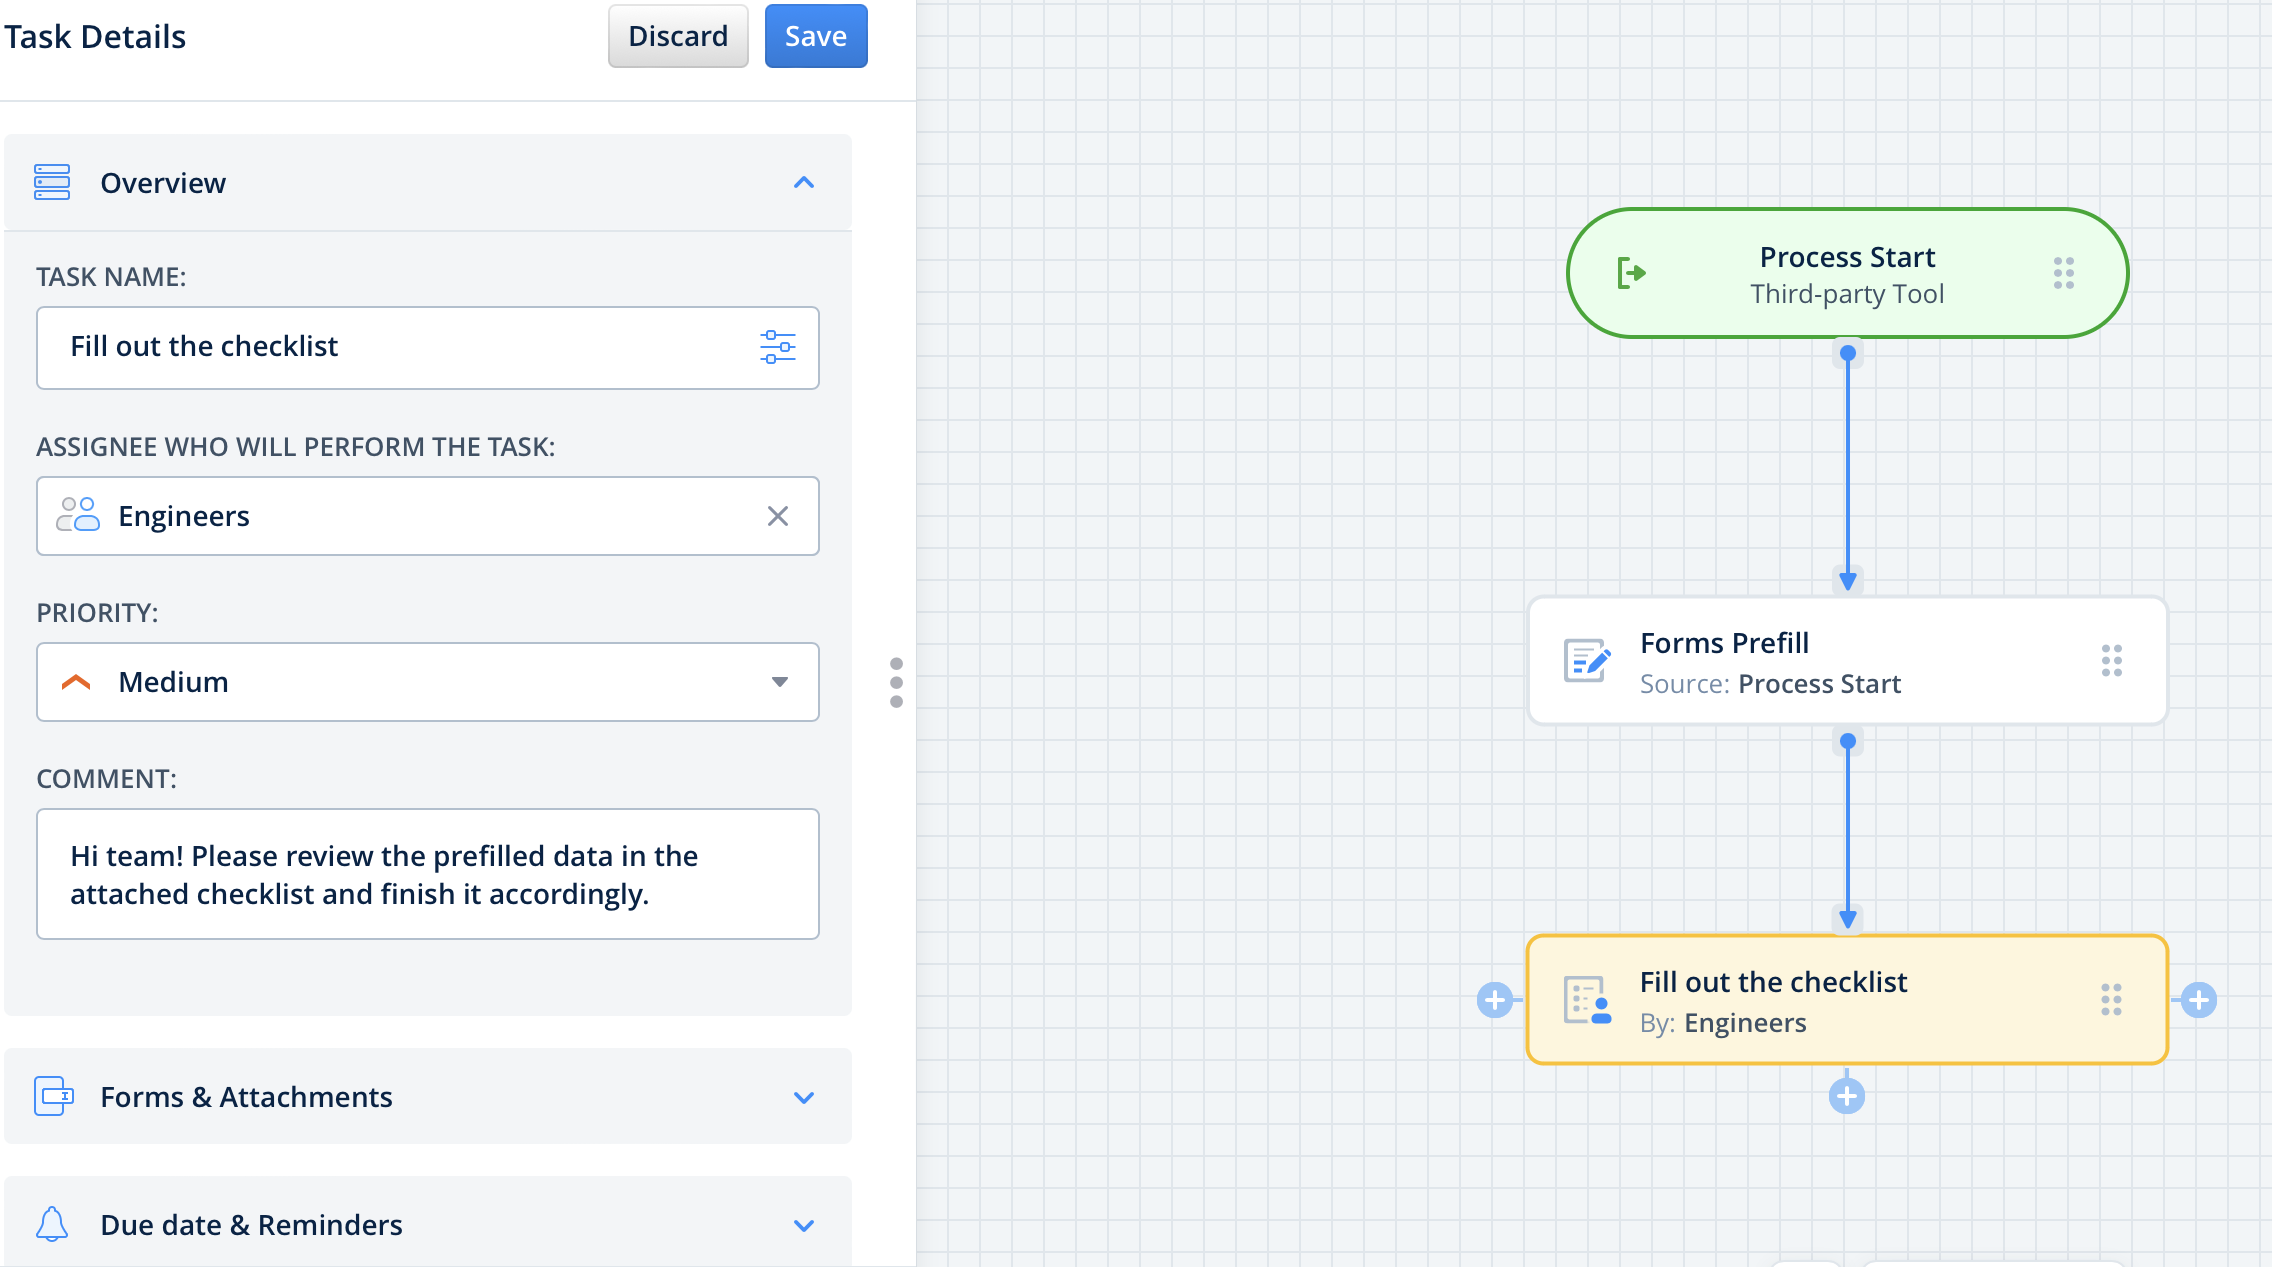
Add the necessary elements to complete your business process. Drag and drop the User Task, then configure the Task Name by adding the Naming Convention, and select the field that will be populated with data from Google Calendar.
To finish the process, add the submit action: Upload to Storage, Send by Email, or Share to, depending on your business logic.
Step 4 – Create a New Google Apps Script Project to connect the Google Calendar
1. Navigate to Google Drive and log in with your Google account. 2. Click on the + New button, select More at the bottom of the dropdown menu, then choose Google Apps Script. 3. Once you are in the editor, click on New Project at the top and give your project a name (e.g., “Fluix Calendar Integration”).
4. In the code editor, you’ll see the default code: function myFunction(). Delete it so you can start with a fresh code. 5. Paste the code below into the editor:
6. Replace “YOUR_WEBHOOK_URL” – copy the webhook link from the created Taskstream by clicking on the Process Start.
7. Replace “YOUR_CALENDAR_ID” – with the ID of the Google Calendar you want to monitor (the email associated with the calendar). 8. Click on the floppy disk icon or press Ctrl + S to save the script.
Step 5 – Set Up Triggers
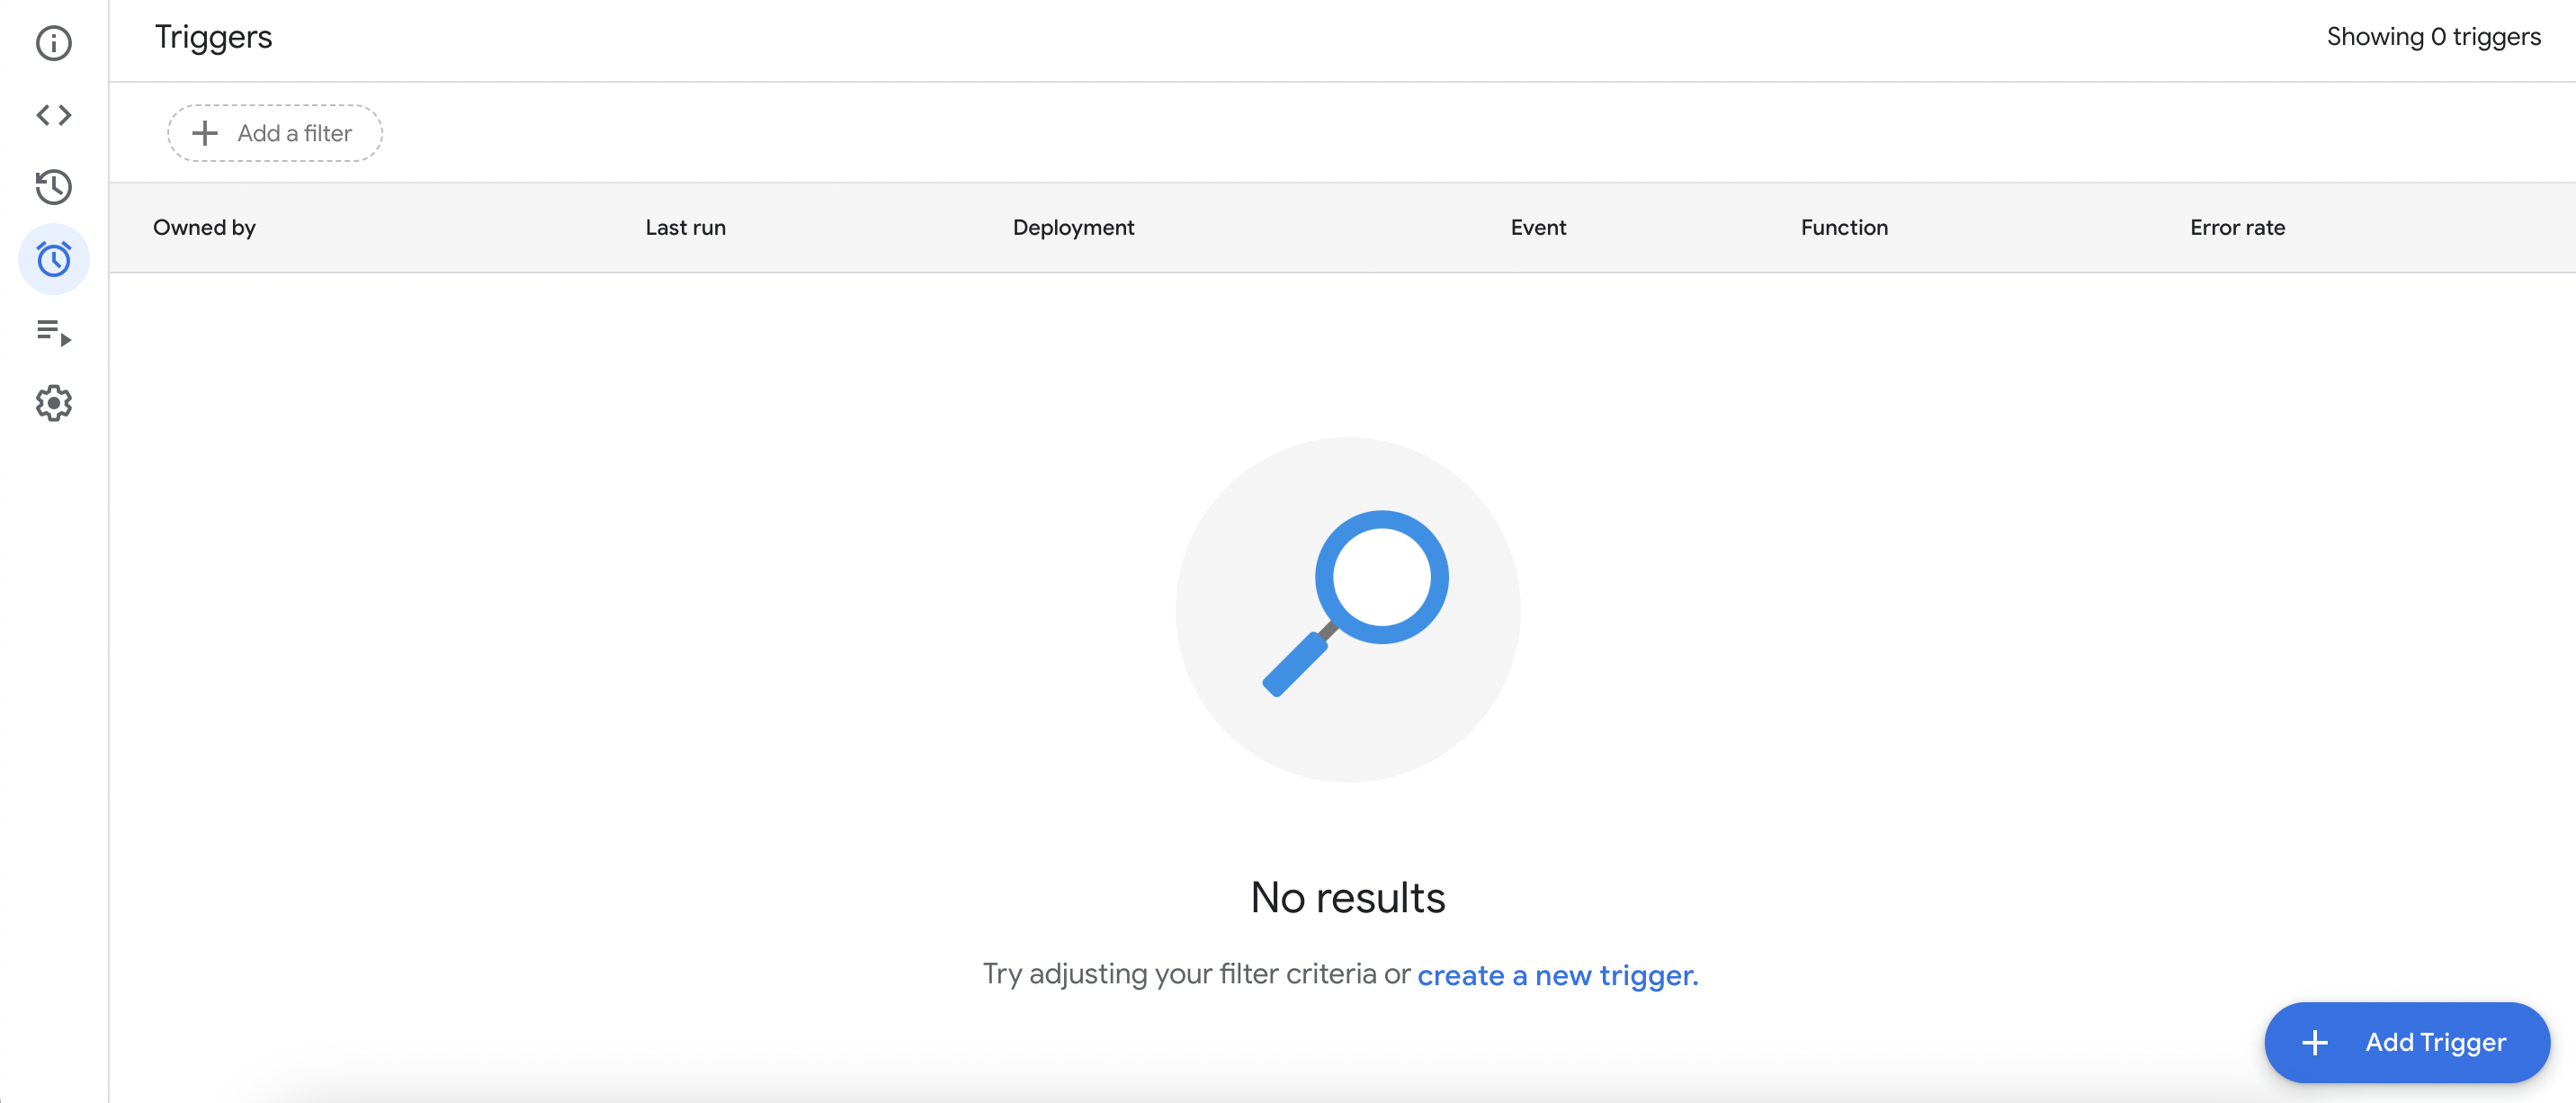
9. Click on the clock icon (Triggers) in the left-hand sidebar and click Add Trigger at the bottom right.
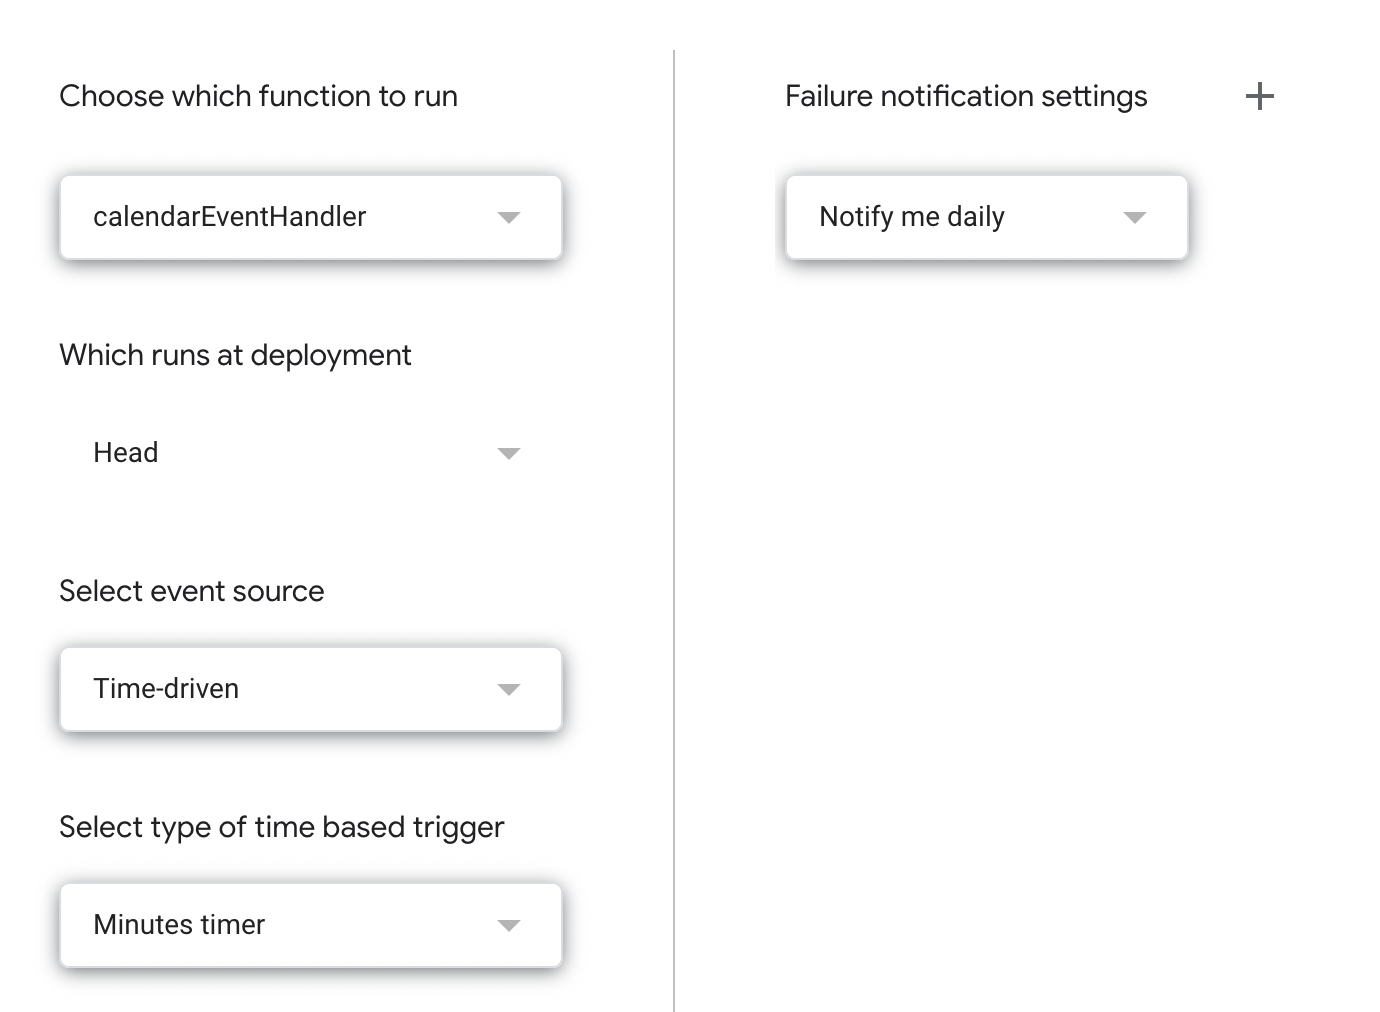
10. Set the following options:
• Choose which function to run: calendarEventHandler • Select event source: Time-driven • Select type of time-based trigger: Minute timer • Select minute interval: Every minute
11. Click on the Save button.
Step 6 – Create an event and test the setup
Click Save & Publish in the upper right corner to save the taskstream. Make sure that you have added yourself to the group of users so that you can test the setup later.
Open the Google Calendar and create a New Event. Click on the “+” icon located in the top-left corner. Enter a title in the Event name field (e.g., customer’s name), set the Start time and End time, then save the event.
The task will be initiated according on the time selected when creating an event. Open the Fluix Tasks app or the User App from the top-right corner of the Admin Portal. Go to the Assigned section to locate the new task. Complete the form and submit it once you have finished. The form will then be sent to its preconfigured destination.
In case you have any questions or difficulties with setup, contact us at support@fluix.io and we’ll be happy to help you.
Was this article helpful?
Thanks for your feedback!
Oops, something went wrong. Please, try again later.
If you didn’t find your software service on the list, please contact us at support@fluix.io.
Overview of the Fluix Webhook
Fluix webhooks enable external systems to trigger specific events within Fluix by sending data via an HTTP POST request. This allows for automation, integration with third-party systems, and pre-filling forms or initiating taskstreams based on external input.
The flow
Your team member creates a task, enters data, or makes another action in external software.
This action triggers the start of the new process in Fluix. It might also include pre-populating data from your software into forms that will be completed in Fluix.
In order to set up the webhook integration in Fluix Taskstream, please follow the instructions below.
Step 1 – Configure Process Start in Fluix
Navigate to the Fluix admin portal, Taskstreams section, click New taskstream button, and select Blank template. Name your Taskstream and click the Next button. Drag and drop the Process Start element, click to open it, and select the Third-party Tool option from the list.
Copy the webhook link and paste it into the software in which you would like to trigger the start of the process.
Please note: Different tools may have different logic behind activating webhooks in their Settings. We recommend getting acquainted with your software’s respective documentation to understand how to correctly configure the Fluix Webhook’s activation. In the Possible variables from third-party tool section, add values to export data from your tool to Fluix.
Step 2 – Configure Prefill of the form if pre-population of data is needed
Drag-n-drop Forms Prefill task and connect it with Process Start in the working area. Configure it by selecting the External tool initiates prefill option from the list and adding the form that will be later on filled out by your team.
In the Prefill Configurator, map the fields in the form that should be filled with data from your tool.
Step 3 – Finish the process mapping
Add other elements that will cover your business process. Drag and drop the User task and configure it: add fillable forms and assign the task to the team that will complete it regularly.
Add an action after the User task is completed: Upload to Storage,Send by Email, or Share to, depending on your business logic. The Integrations section of our Help Centre explains the different platforms Fluix can integrate.
Step 4 – Save and test the setup
Click Save & Publish in the upper right corner to save the taskstream. Once you perform the specific actions you configured in the Process Start event in your external platform, it will trigger the creation of the new task in Fluix.
Open the Fluix Tasks app or the User App in the right corner of the Admin Portal. Navigate to the Assigned section to find a new task. Fill in the form and finish it once it is ready. The completed form will be submitted according to the preconfigured destination.
In case you have any questions or difficulties with setup, contact us at support@fluix.io and we’ll be happy to help you.
Was this article helpful?
Thanks for your feedback!
Oops, something went wrong. Please, try again later.
Microsoft Teams (MS) is a team collaboration application developed as part of the Microsoft 365 family of products. It offers workspace chat and video conferencing, file storage, and integration of proprietary and third-party applications and services.
Fluix is a web—and mobile-based cloud platform that helps teams set up digital document management and workflow automation on projects in various industries.
In order to set up MS Teams integration in Fluix, please follow the steps below.
Use Case Example
Let’s check a real-life scenario that you may cover within your company processes.
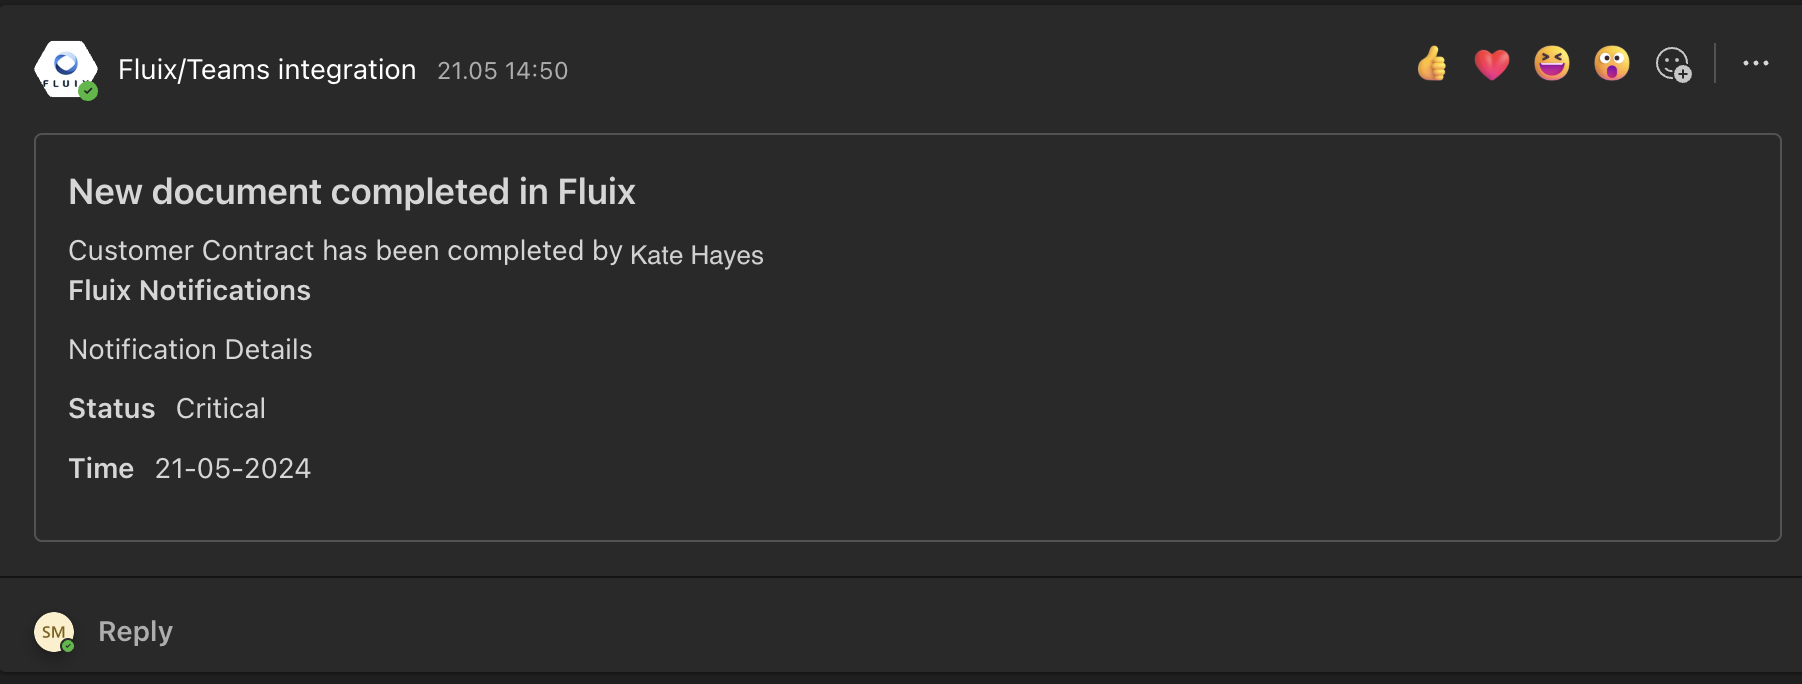
The Service Technicians fill out the checklist in Fluix. Upon submission of the form in Fluix, a new notification in the channel in MS is created for your team with certain data filled out in Fluix.
Step 1 – Create the recurrent business process for your team in Fluix.
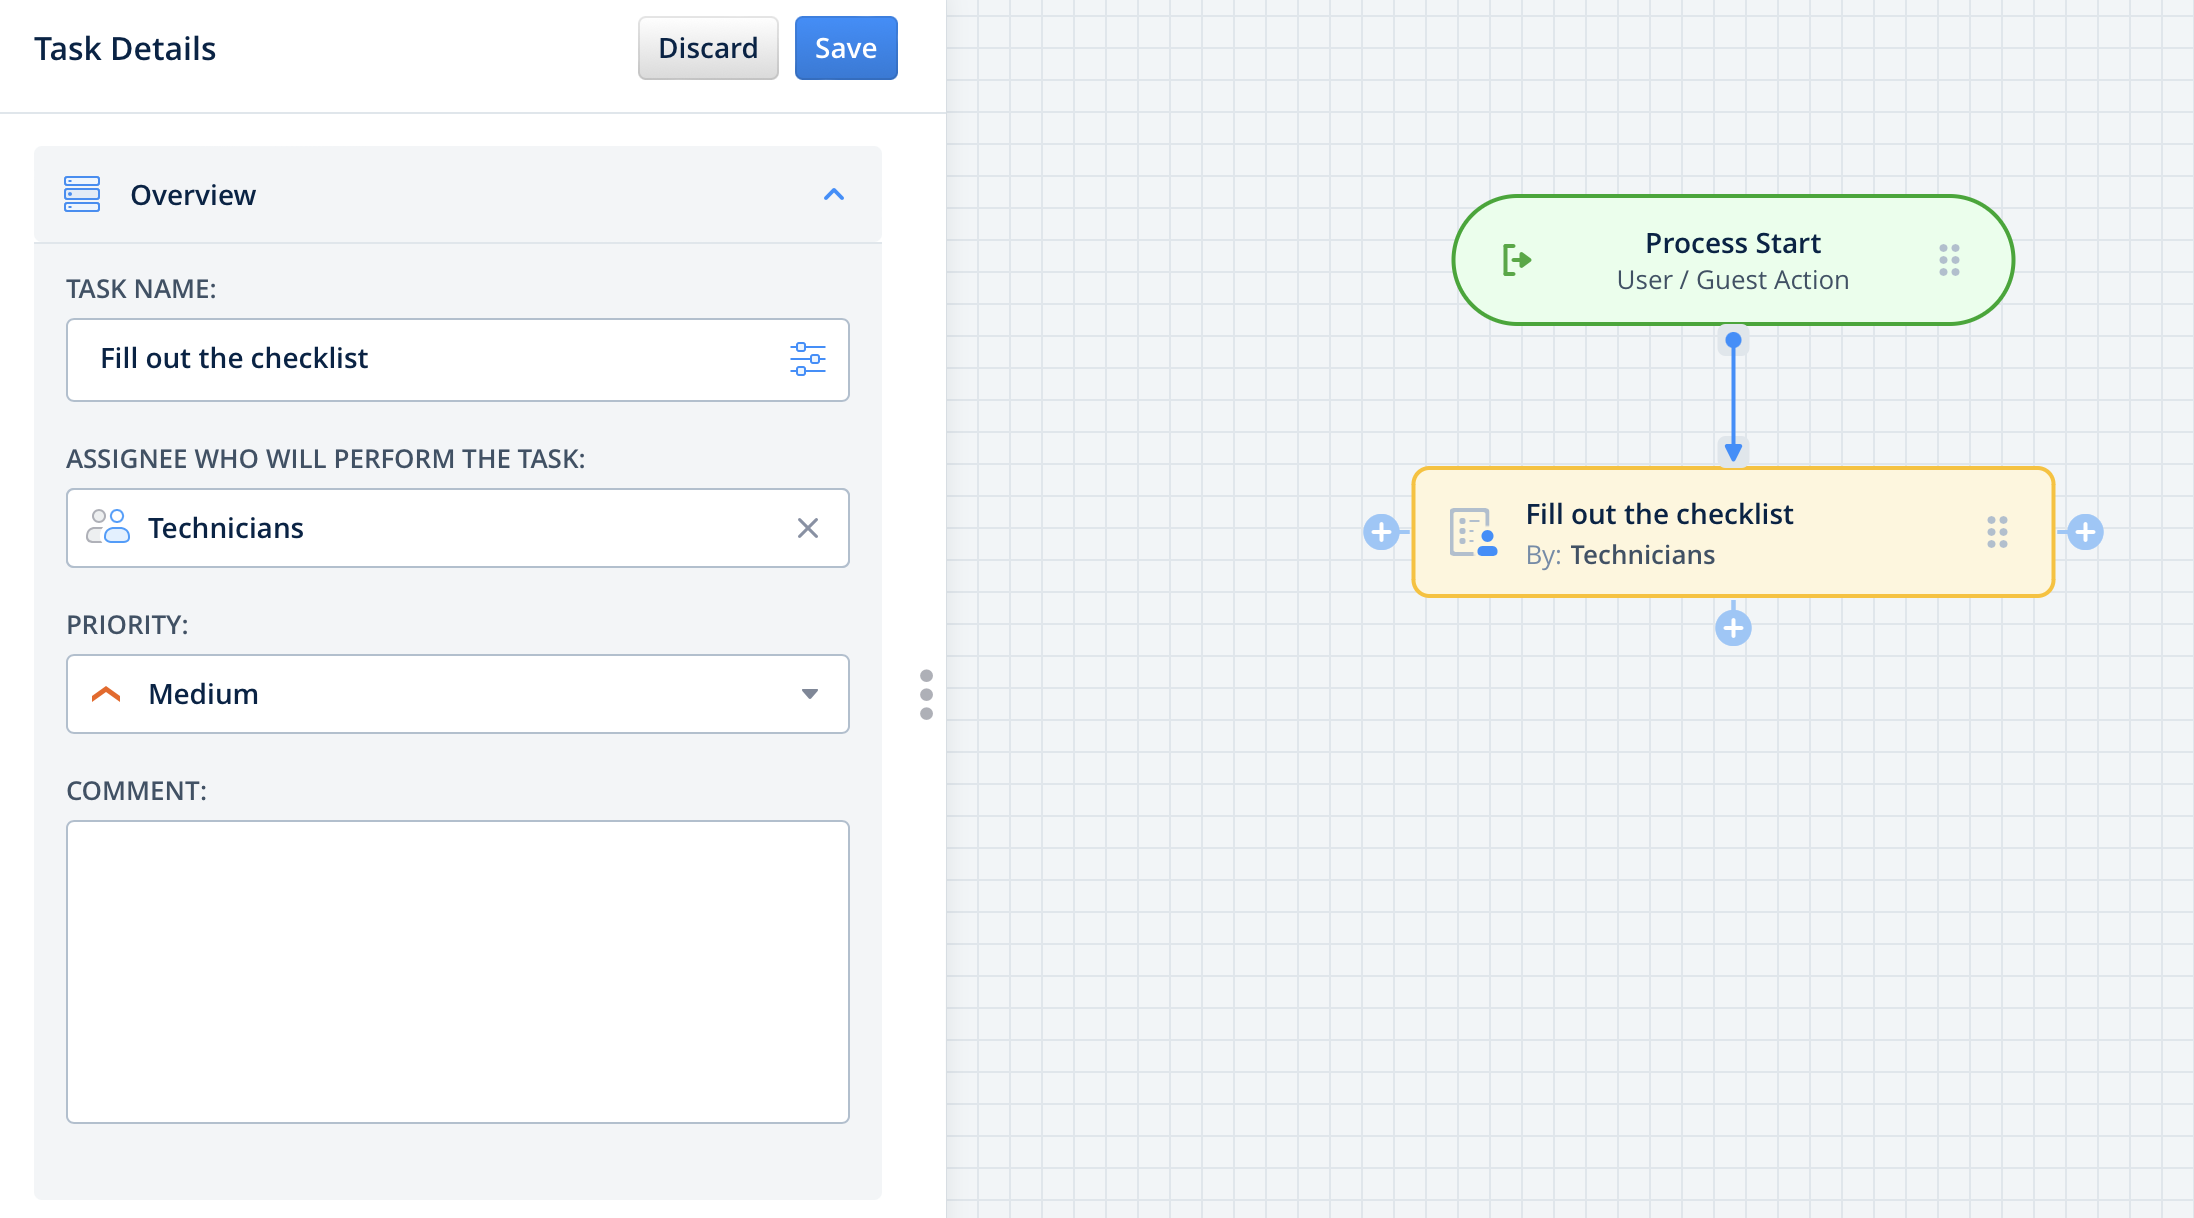
Navigate to the Taskstreams section in the Fluix admin portal to create a new taskstream. Drag-n-drop a Process Start—User / Guest Action eventandthe User task to the working area. Configure it by adding fillable forms and assigning it to the team that will work on it regularly. Make sure that you have added yourself to the group of users so that you can test the setup later.
Step 2 – Connecting Fluix with MS Teams.
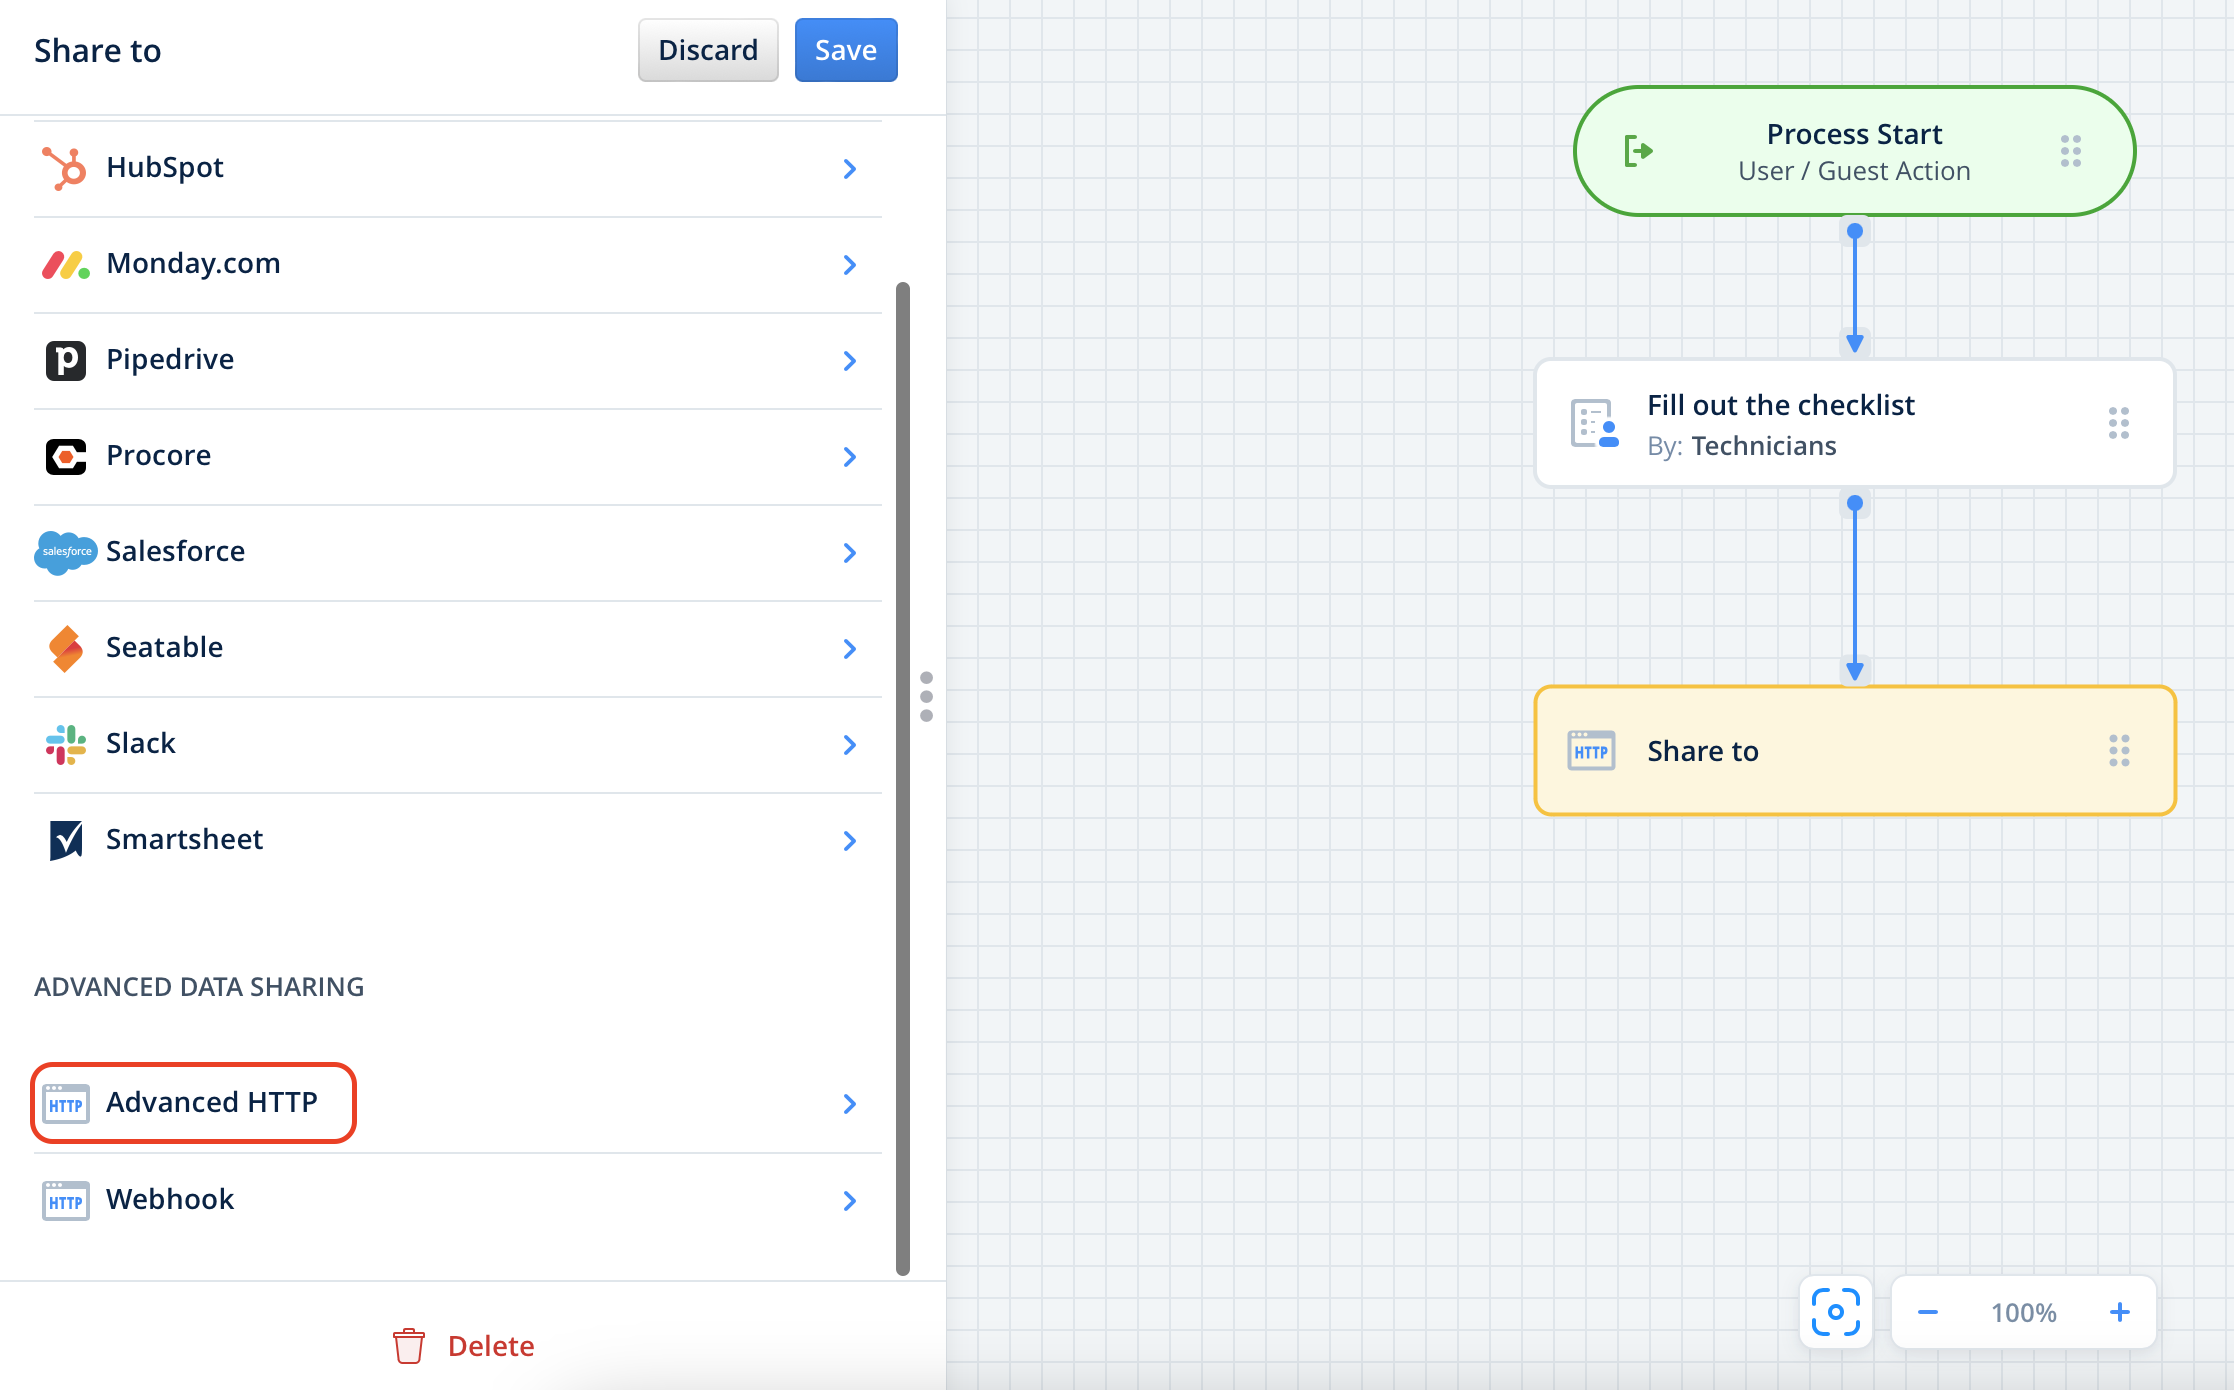
Drag and drop Share to submit action to the Taskstream chart and connect it with the User task that your team will be working on.
Click on the Share to element, select Advanced HTTP from the options in the Advanced Data Sharing section, and click Configure.
In the opened Advanced HTTP Request Builder, configure the request name, let’s say “Fluix/Teams integration”, select ‘POST’ as the request type, and add the request URL. The respective URL can be found in your company’s Teams account by the following steps:
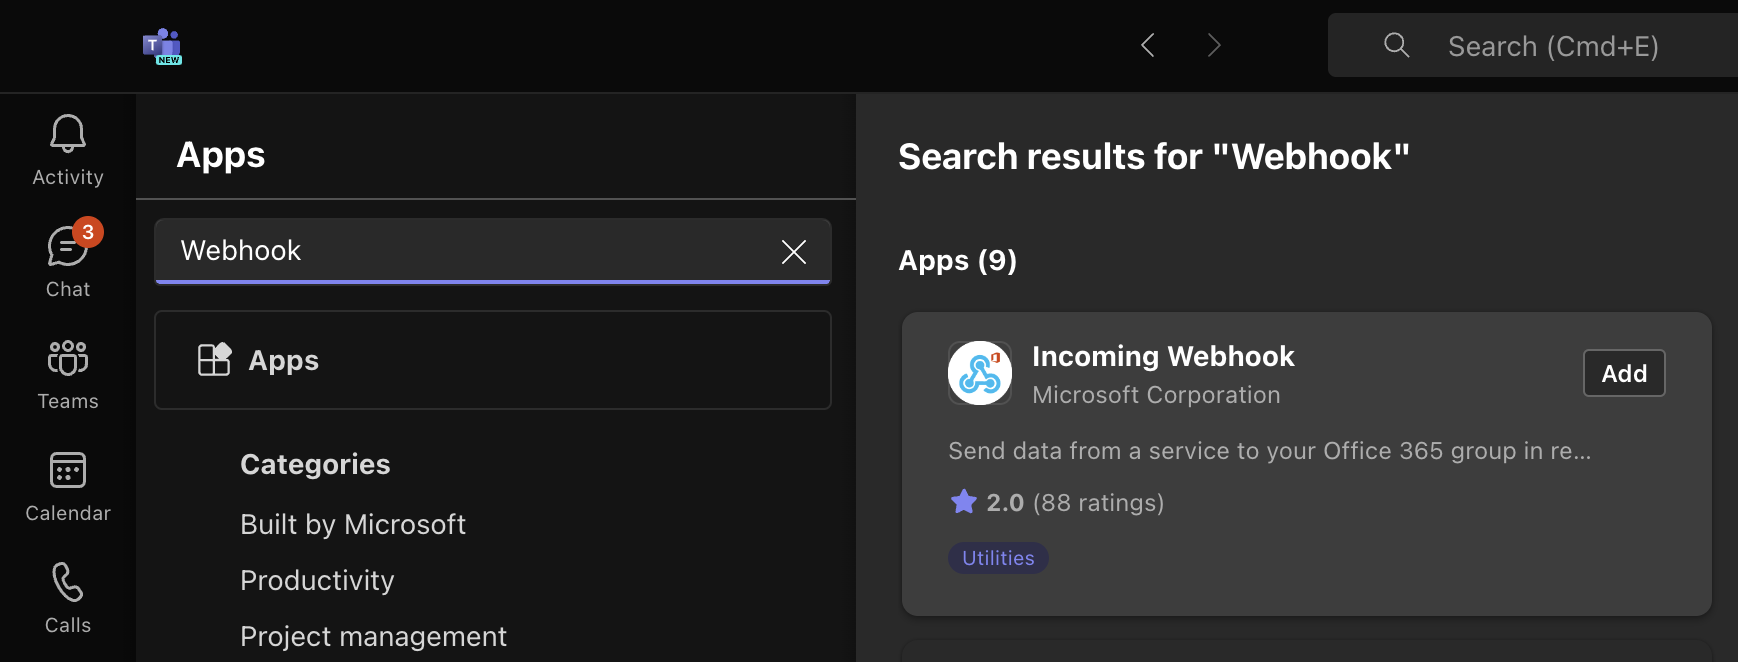
1. Click on the Apps section on the left panel and search WebHook -> click Add next to the Incoming Webhook that will appear on the screen.
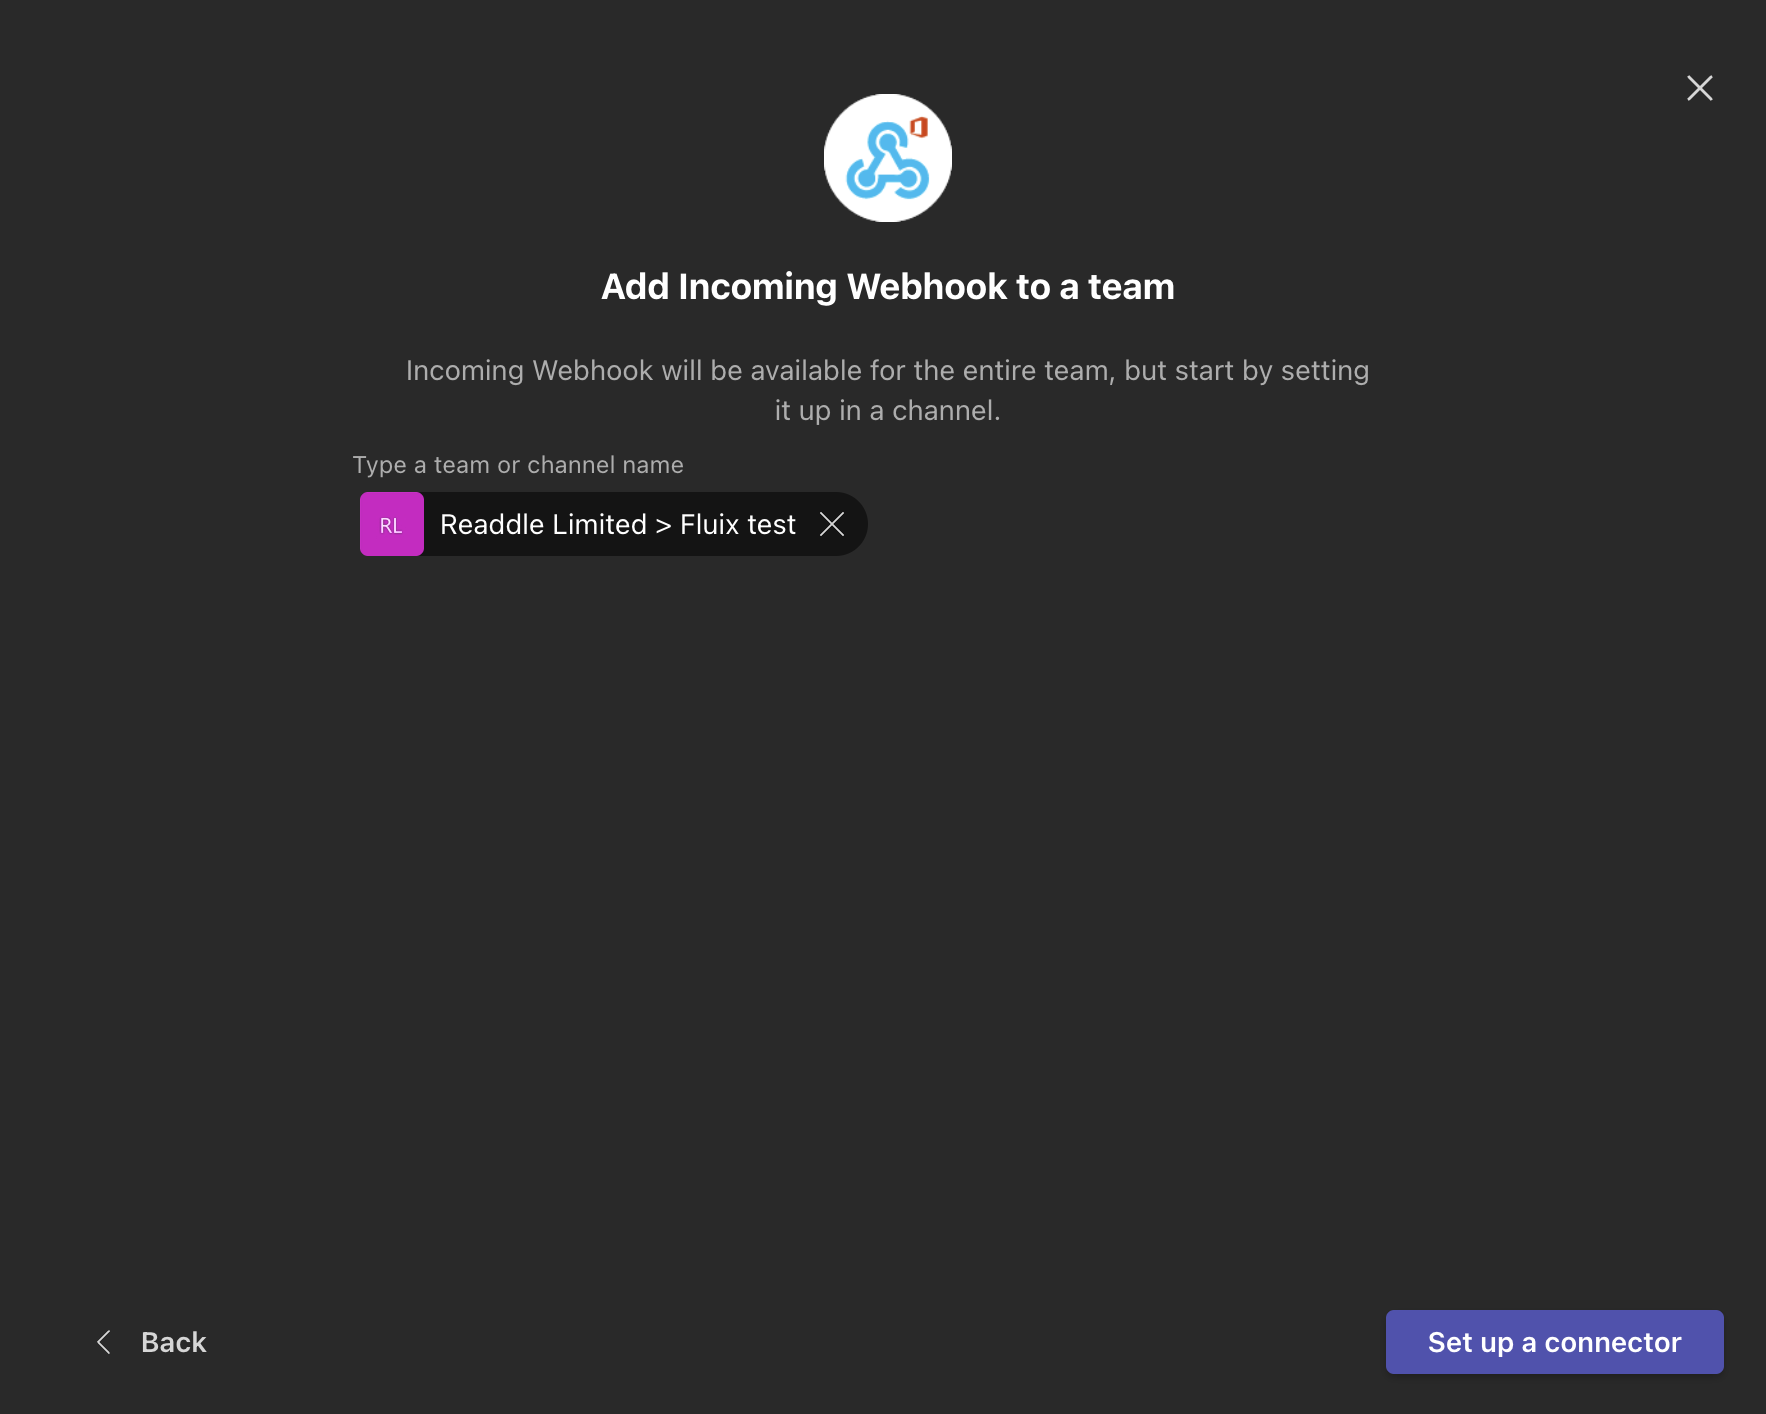
2. In the opened window, click Add to a team and then select the channel from the list to which the notification will be send out from Fluix through webhook. Then, click Set Up a connector.
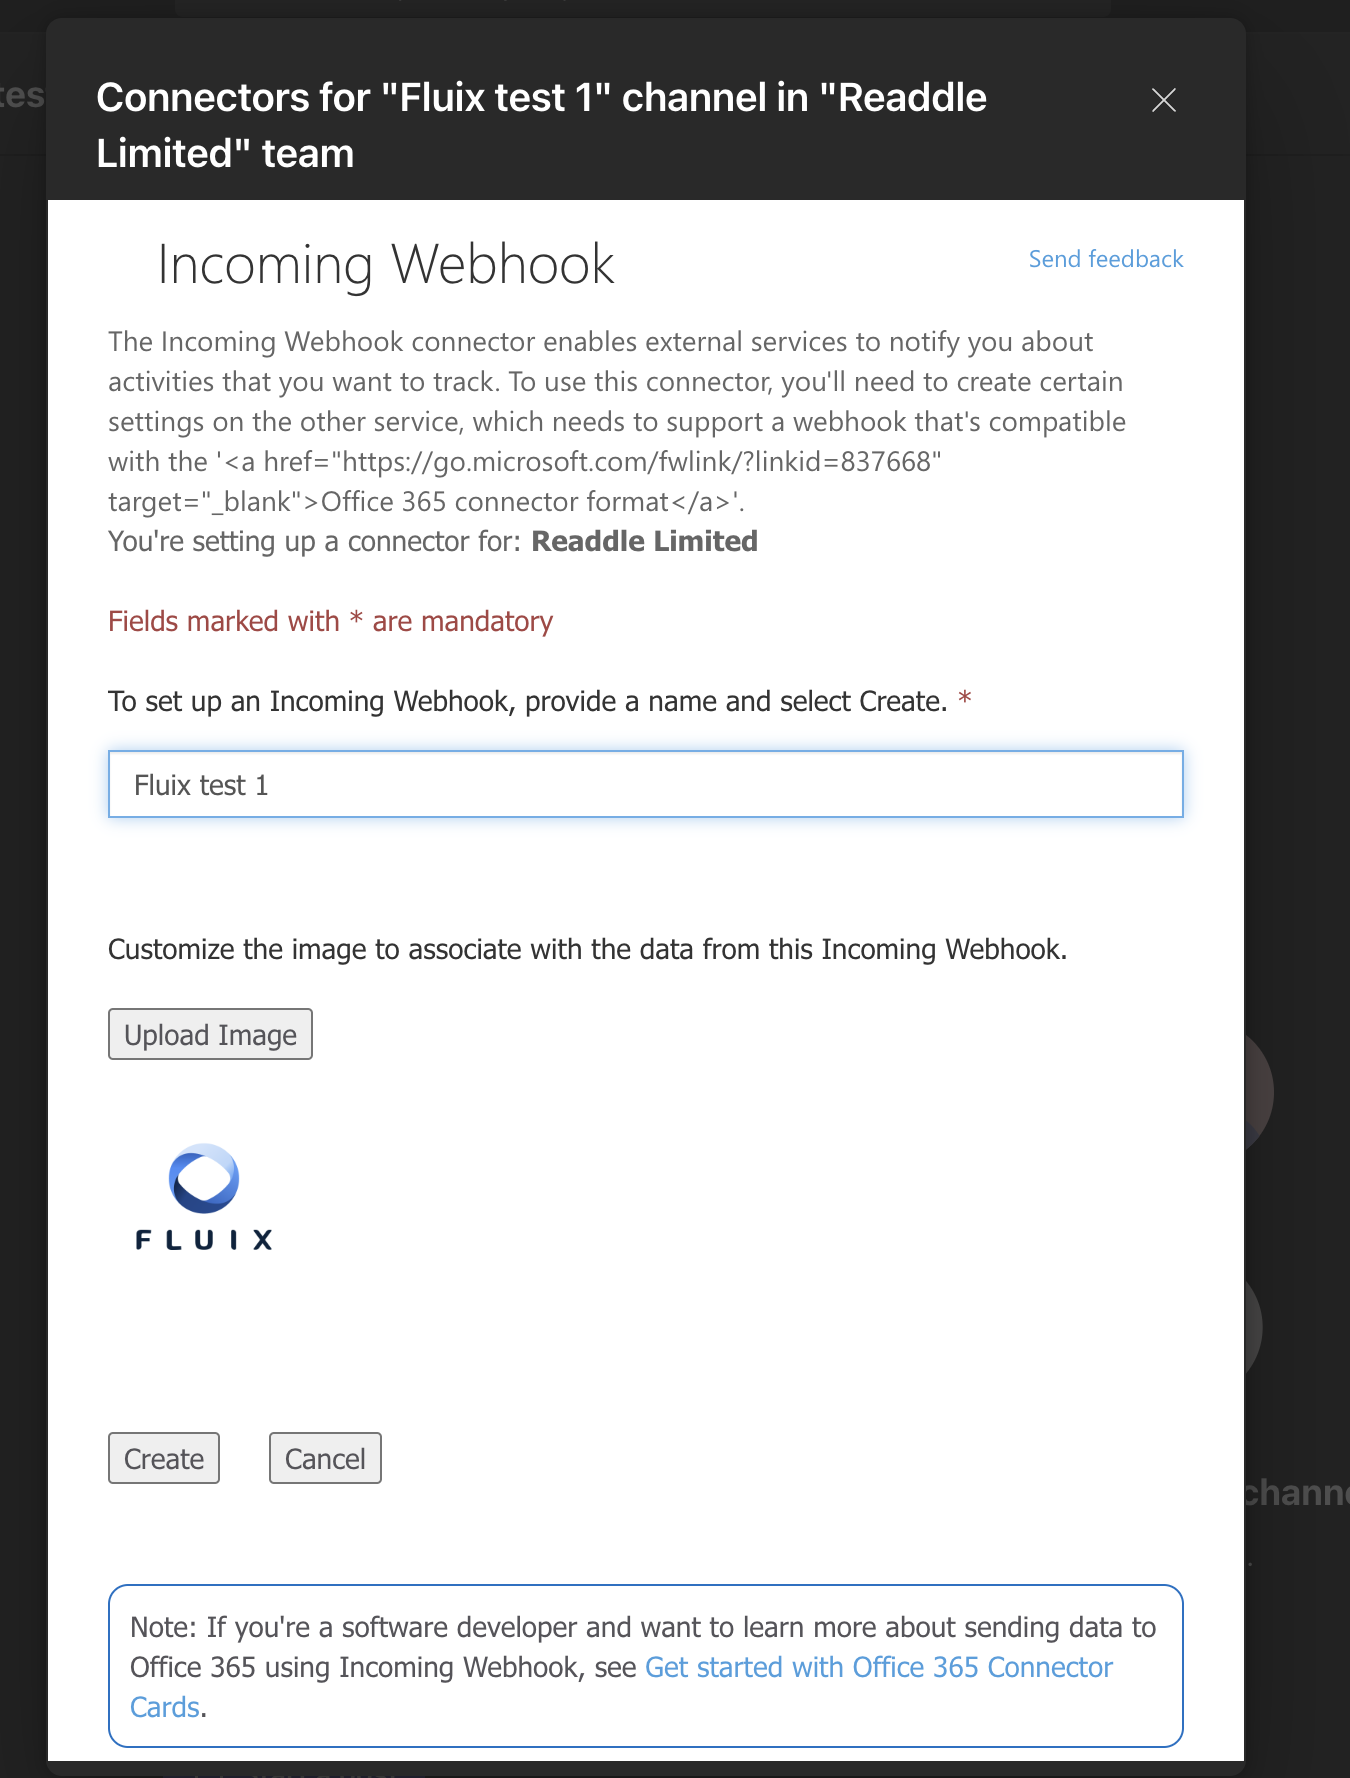
3. The window Incoming Webhook will open. Here, we’ll receive the webhook that will later be added to Fluix Advanced HTTP Request Builder. Name this webhook and upload the image to customize the association regarding the data that will be pulled through the webhook, then click Create. In a couple of seconds, the new field with the URL will appear on the screen. Click to copy it and click Done.
Step 3 – Configure the message.
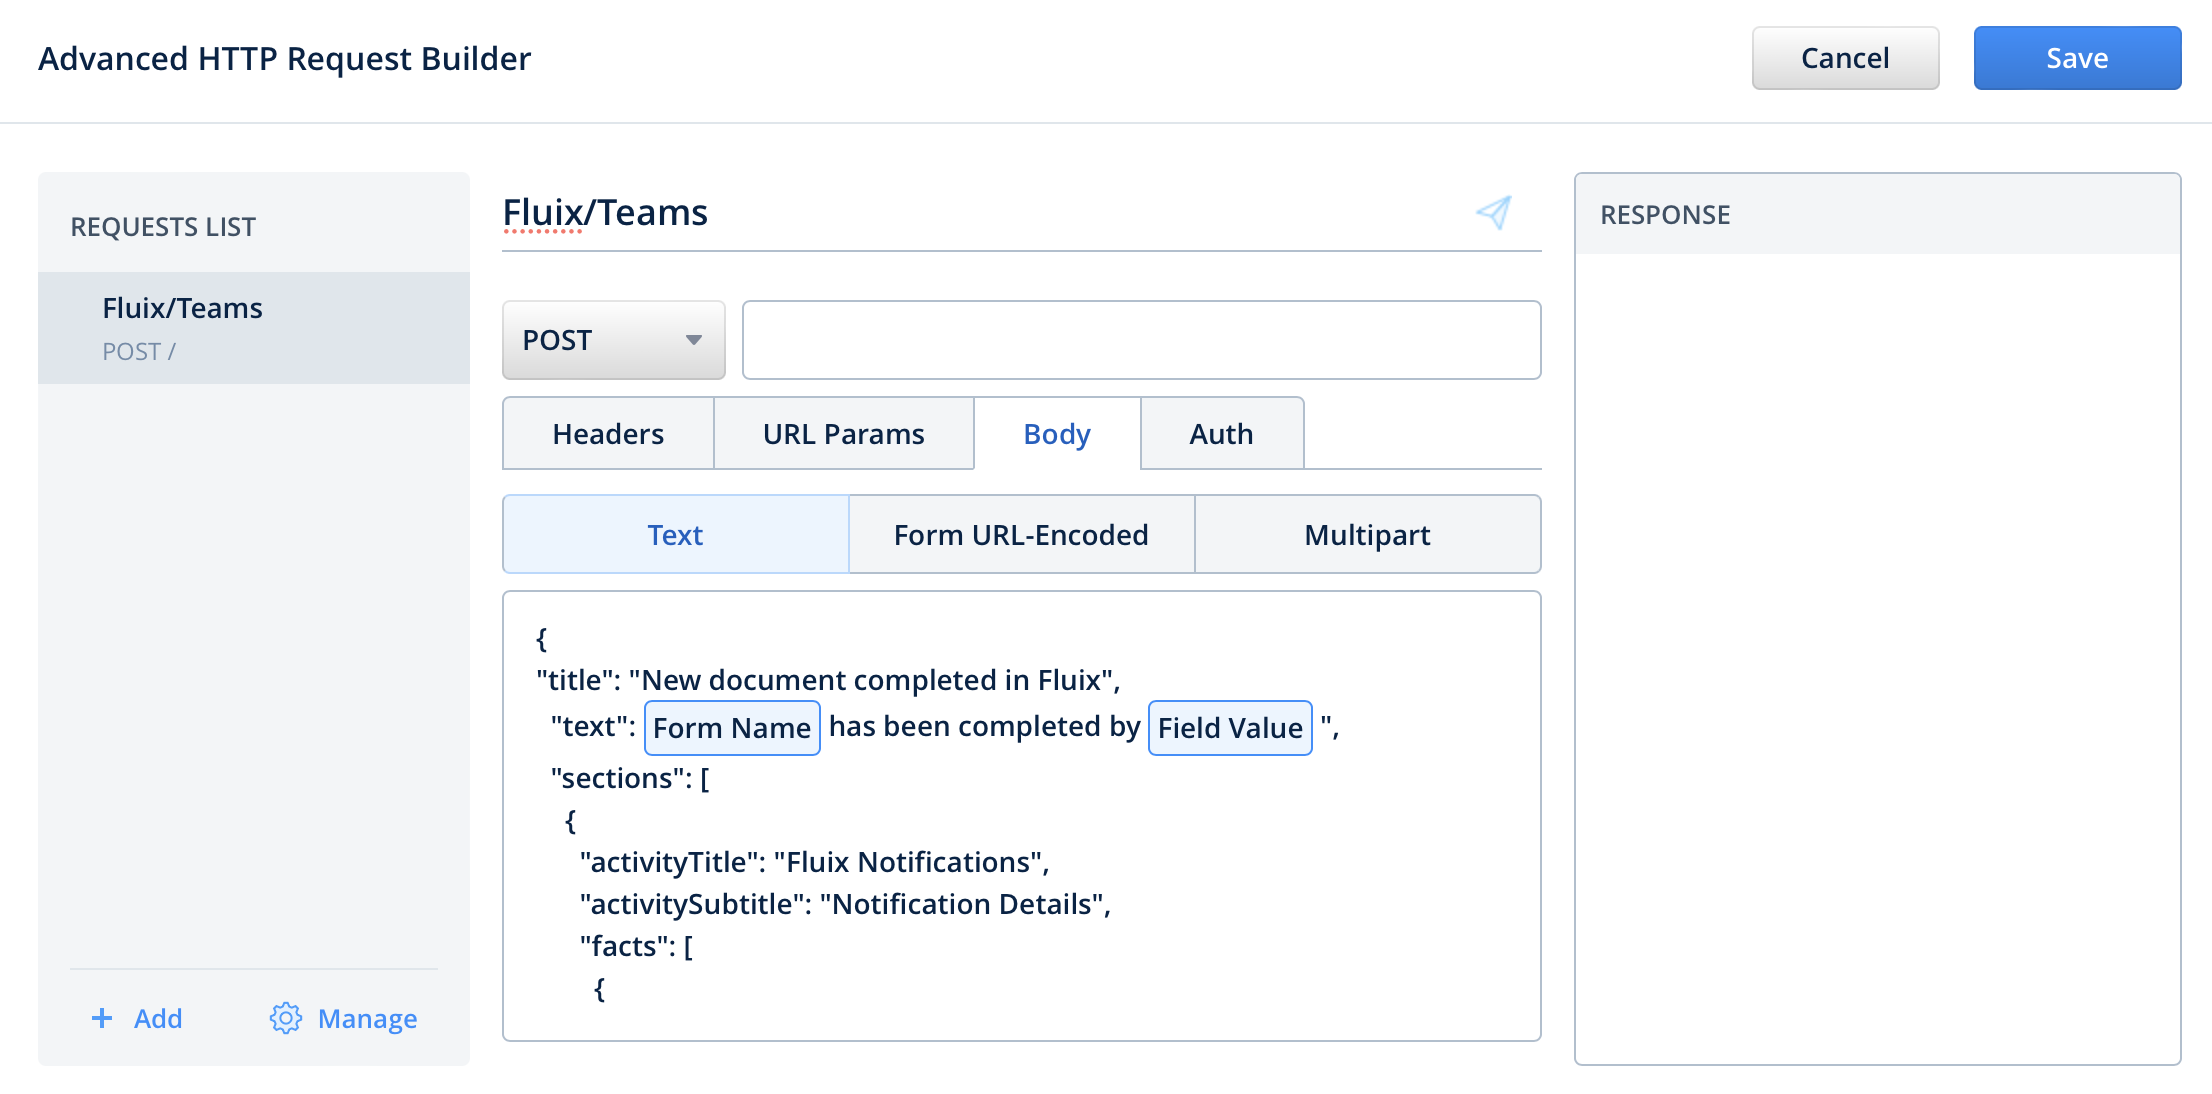
Paste the webhook to the request URL field in the Advanced HTTP Request Builder. In the Headers section, add the following information: Header name as Content-Type Header value – application/json.
In the Body section, paste the following script.
{
“title”: “New document completed in Fluix”,
“text”: “[Form Name] has been completed by [Field Value]”,
“sections”: [
{
“activityTitle”: “Fluix Notifications”,
“activitySubtitle”: “Notification Details”,
“facts”: [
{
“name”: “Status”,
“value”: “[Field Value]”
},
{
“name”: “Time”,
“value”: “[Finish Date (DD-MM-YYYY)]”
}
],
“markdown”: true
}
]
}
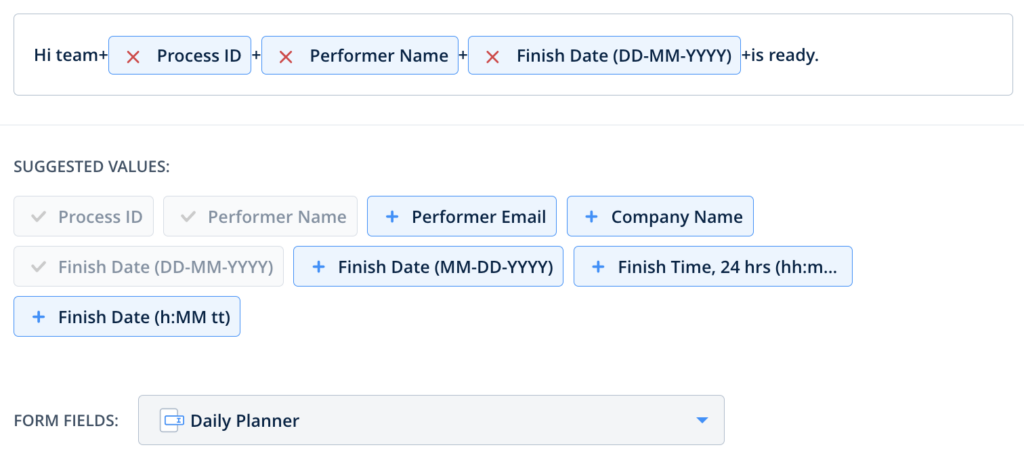
Please note: the data put in the square brackets [] is the dynamic values from the Taskstream and the Form. To add them, simply start typing the word e.g. Form, and the builder will suggest the respective dynamic value as demonstrated on the example below.
Step 4 – Save and test the setup.
Once you fill out all the fields, click Save and then Save & Publish to activate the Taskstream. Open the Fluix Tasks app on the mobile device, or click User App in the right corner of the admin portal. Navigate the task that you created, fill in the form, and finish it. Once the task is submitted in Fluix, a new notification will be created in the Teams channel informing the team about the new checklist that was filled out in Fluix.
In case you have any questions or difficulties with setup, contact our support at support@fluix.io and we’ll be happy to help you.
Slack is a communication app where your team can exchange messages, files, and media, and call each other.
Use case example
Let’s look at a real-life case:
The engineering team fills out the customer visit form in Fluix
The notification on the finished process is submitted to the respective Slack channel.
In order to set up Slack integration in Fluix Taskstream, please follow the instructions below.
Step 1 – Create the repetitive process in Fluix
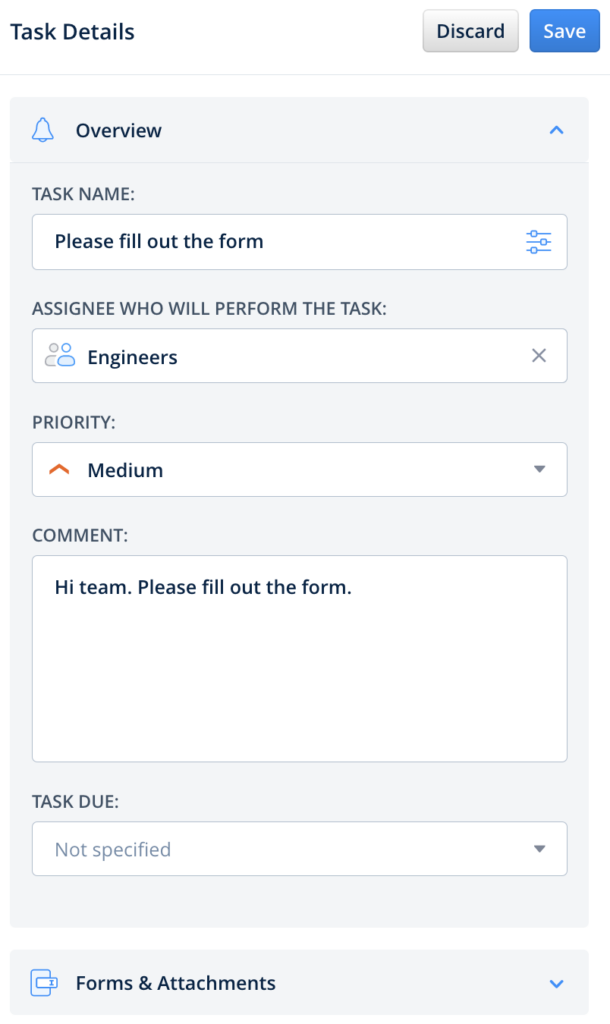
Navigate to the Fluix admin portal, Taskstreams section, to create a new Taskstream. Drag and drop User task and configure it: add fillable forms and assign the task to the team that will complete it on a regular basis. Make sure that you have added yourself to the group of users in order to test the setup later.
Step 2 – Configure Share to Integration in Fluix
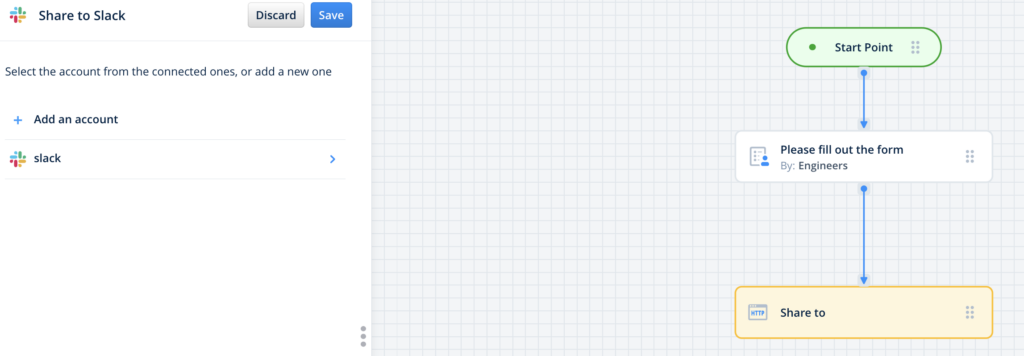
Drag and drop Share to submit action to the Taskstream chart and connect it with the User task that your team will be working on.
Click on the Share to element and select Slack among the list of third-party tools.
Upon redirecting to the Slack authorization page, fill out your workspace name. Click on the button Allow in order to give Fluix permission to access your workspace. The connected Slack account will be automatically added to the accounts:
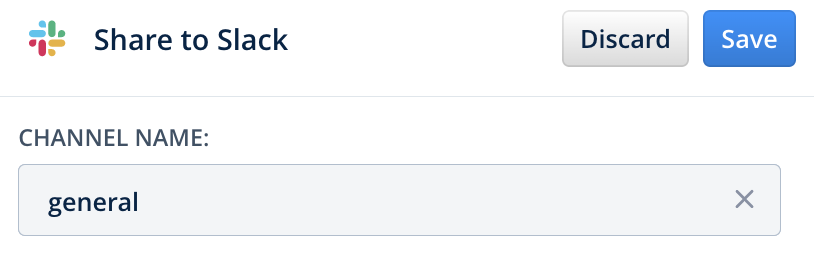
Tap on the connected Slack account and select the Channel name to which you would like to post the details of the submitted form.
Step 3 – Configuring the message to Slack
Click on the configuration icon in the Message section to open a dynamic values configurator. Select the values from the suggested list and connect them with the + element.
Click Save in the upper right corner.
Step 4 – Save and test the setup
Click Save&Publish in the upper right corner to save the Taskstream. Open the user app on the mobile device, or click User App in the right corner of the admin portal. Open the task that you configured, fill in the form, and finish the task.
Once the task is finished, it will appear in the respective Slack channel taking into consideration the dynamic values pre-configured in the Taskstream. Here is an example of the posted message to the Slack channel below.
Feel free to contact us at support@fluix.io if you have any questions on setup.
Was this article helpful?
Thanks for your feedback!
Oops, something went wrong. Please, try again later.
Procore is a leading construction management cloud-based platform used to manage all phases of the projects.
Fluix is a web and mobile-based cloud platform that helps teams with setting up digital document management and workflow automation on projects in various industries.
Usually, construction projects involve cooperation between different internal departments, multiple subcontractors, and vendors. Such flow inevitably creates fragmented processes and chaos when it comes to document distribution between different parties.
The integration of Fluix and Procore allows you to automatically upload drawings, checklists, and other project-related documents into the Documents section of the specific project in Procore. This way, construction companies can stay productive and keep all the documentation generated from various tools aligned and properly managed in order to save the priceless time of employees and avoid discrepancies at different stages of the project.
How it works
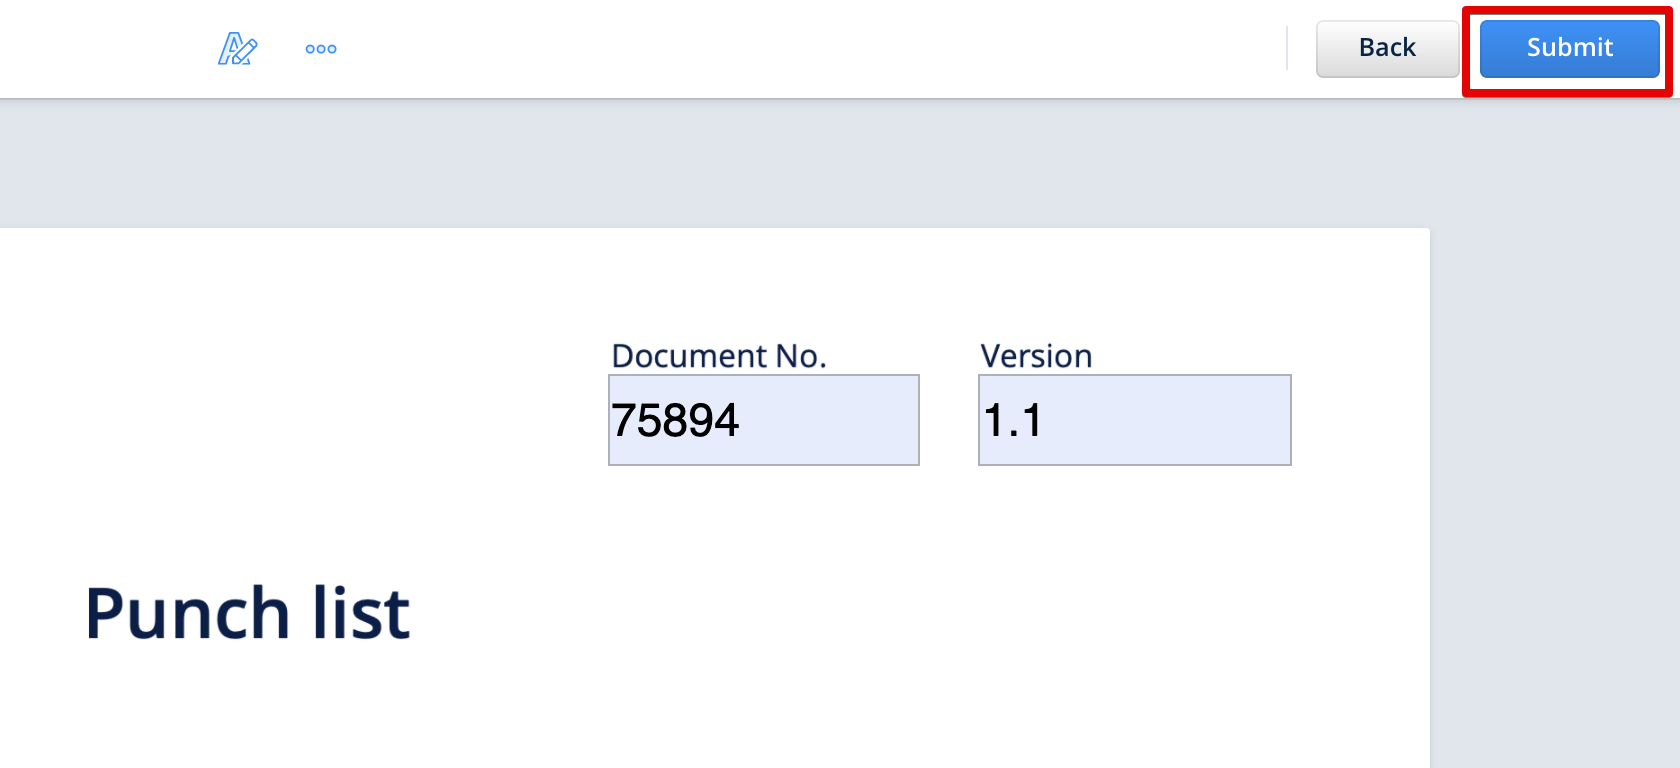
As an example, in the Fluix app, project executives may fill in a punch list, add images, comments, eSign and send a completed form down the workflow. With Fluix/Procore integration the punch list can seamlessly appear in the Documents section of the specific Procore project for reference or further processing within Procore. Each workflow in Fluix can lead to the specific Procore project that will ensure a proper track record of documentation on each project.
Example of a form that is filled out in the Fluix app:
The list of forms that automatically appear in Procore, under the Documents section:
How to start
The integration doesn’t require special technical skills. Contact the Fluix team and we’ll help you to set up the integration taking into account your project-specific requirements.