Fluix integrates with different categories of software services, such as:
- Сalendars (e.g. Google Calendar);
- CRMs (e.g. HubSpot, Salesforce);
- Task & Project Management tools (e.g. monday.com), Procore;
- Communication tools (e.g. Slack);
- Asset management (e.g. UpKeep), and others.
If you didn’t find your software service on the list, please contact us at support@fluix.io.
Overview of the Fluix Webhook
Fluix webhooks enable external systems to trigger specific events within Fluix by sending data via an HTTP POST request. This allows for automation, integration with third-party systems, and pre-filling forms or initiating taskstreams based on external input.
The flow
- Your team member creates a task, enters data, or makes another action in external software.
- This action triggers the start of the new process in Fluix. It might also include pre-populating data from your software into forms that will be completed in Fluix.
In order to set up the webhook integration in Fluix Taskstream, please follow the instructions below.
Step 1 – Configure Process Start in Fluix
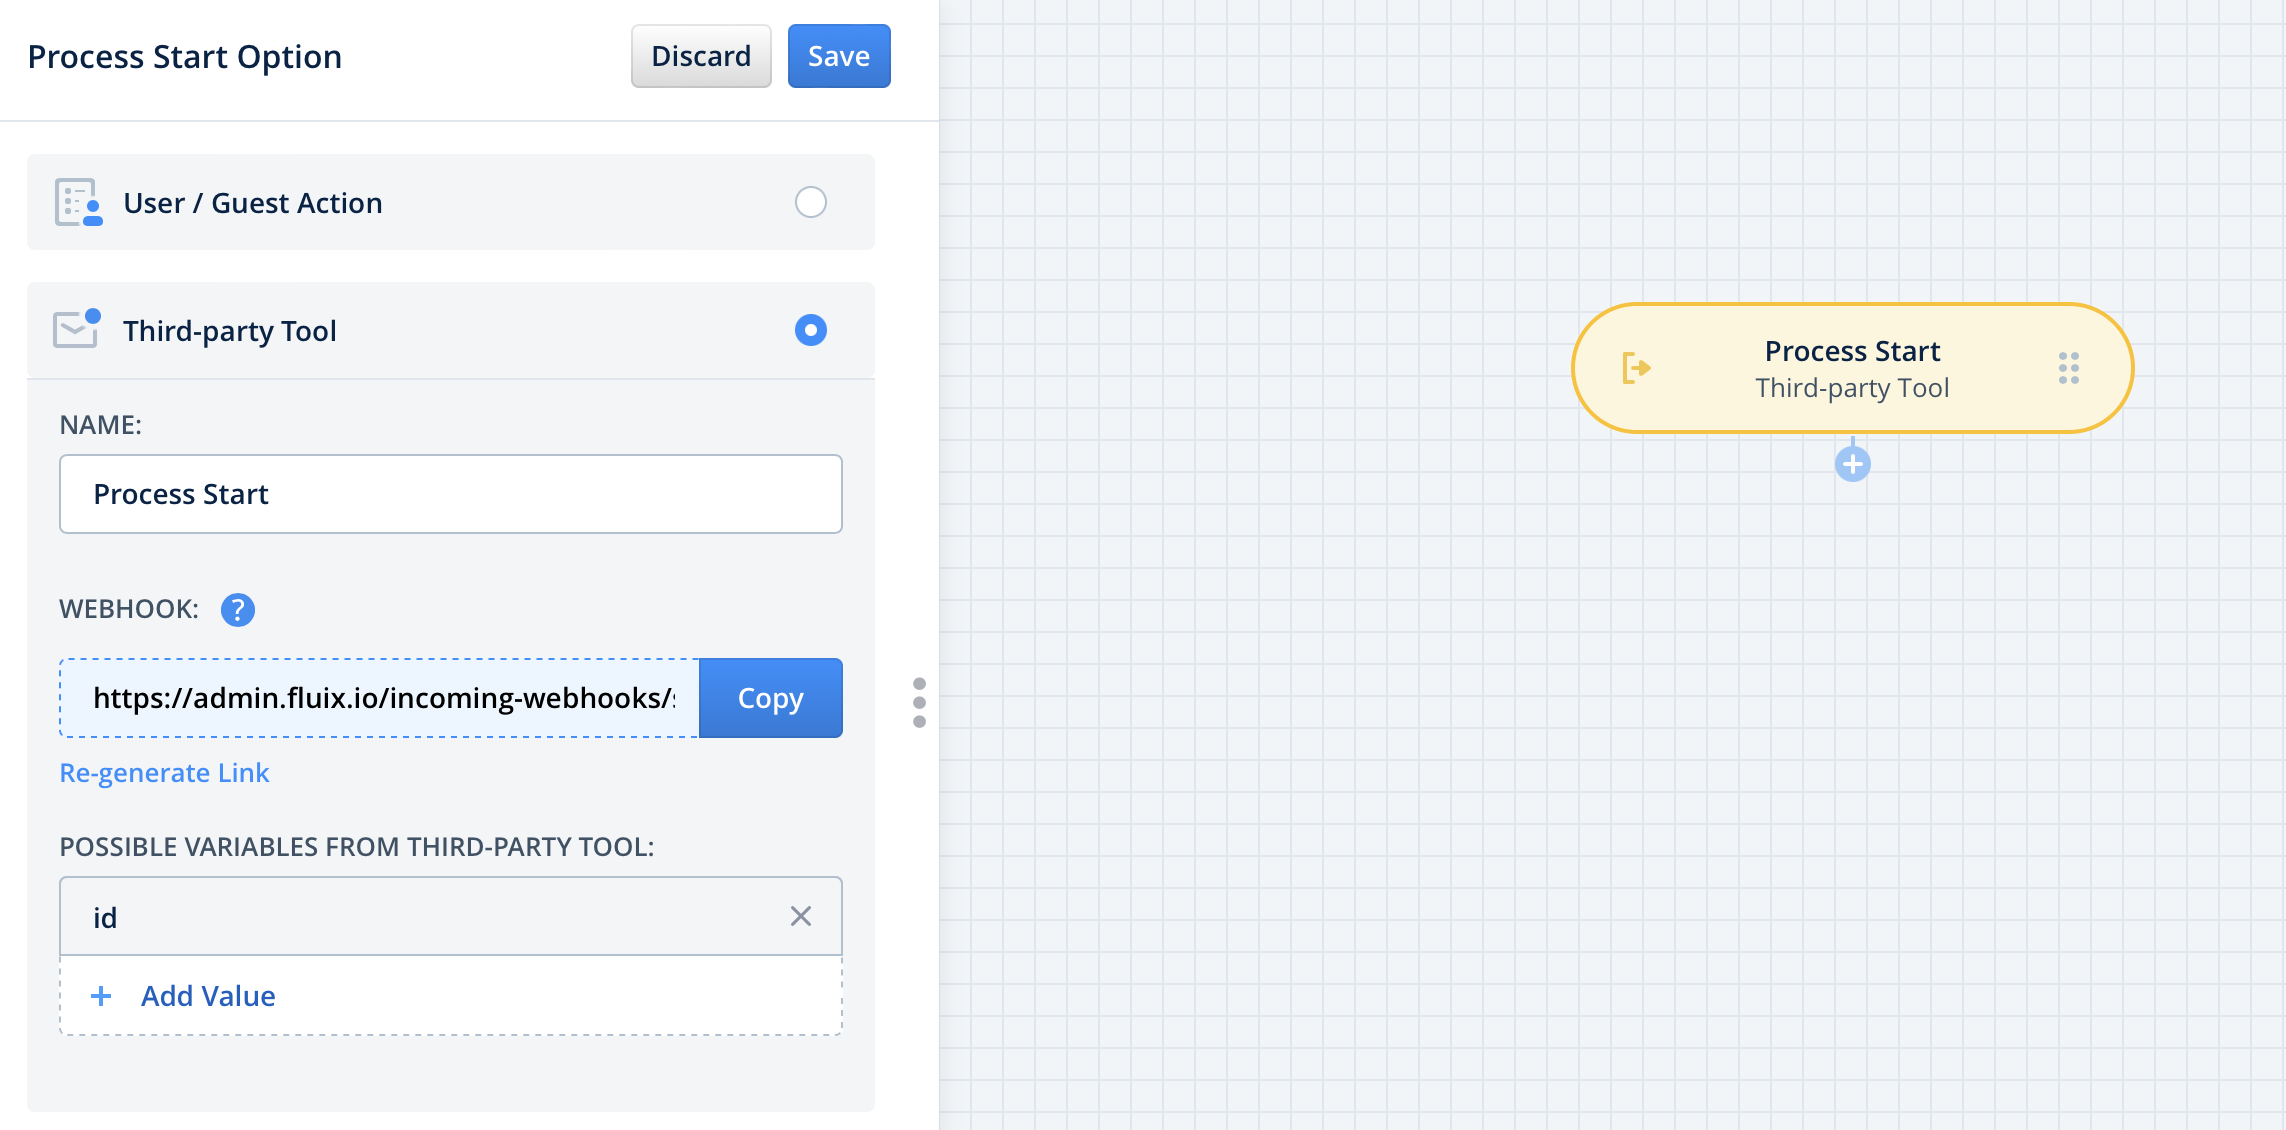
Navigate to the Fluix admin portal, Taskstreams section, click New taskstream button, and select Blank template. Name your Taskstream and click the Next button. Drag and drop the Process Start element, click to open it, and select the Third-party Tool option from the list.

Copy the webhook link and paste it into the software in which you would like to trigger the start of the process.
Please note: Different tools may have different logic behind activating webhooks in their Settings. We recommend getting acquainted with your software’s respective documentation to understand how to correctly configure the Fluix Webhook’s activation. In the Possible variables from third-party tool section, add values to export data from your tool to Fluix.
Step 2 – Configure Prefill of the form if pre-population of data is needed
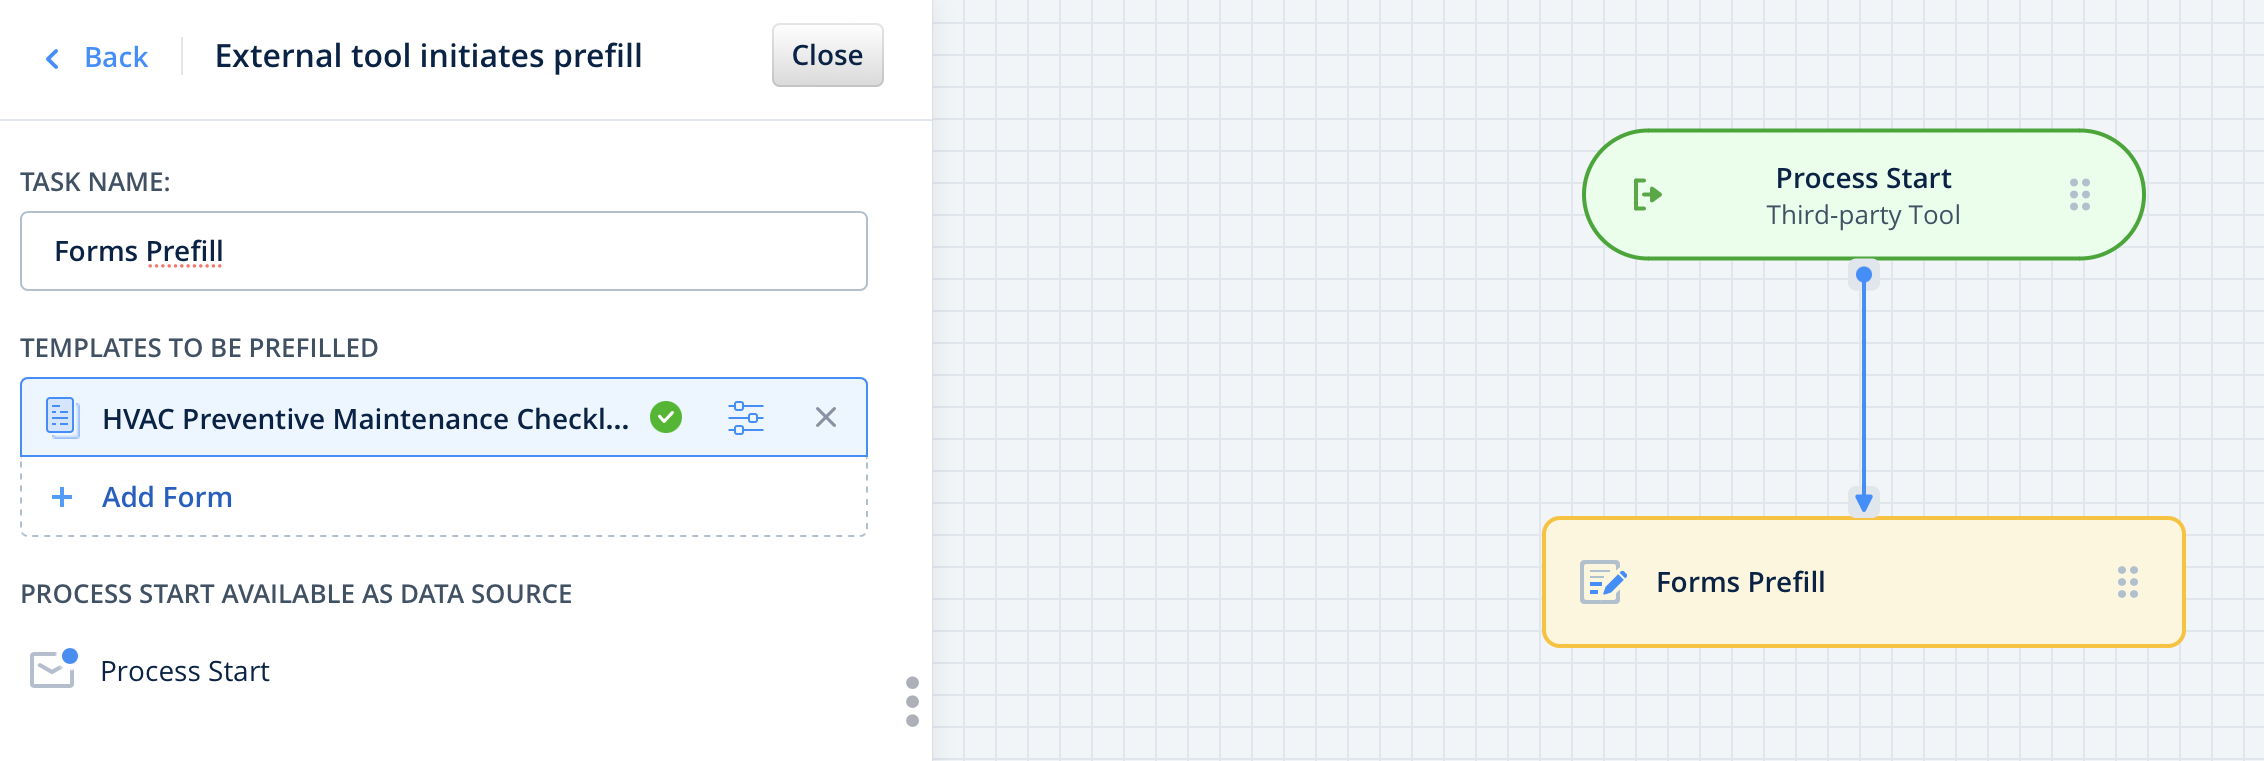
Drag-n-drop Forms Prefill task and connect it with Process Start in the working area. Configure it by selecting the External tool initiates prefill option from the list and adding the form that will be later on filled out by your team.

In the Prefill Configurator, map the fields in the form that should be filled with data from your tool.
Step 3 – Finish the process mapping
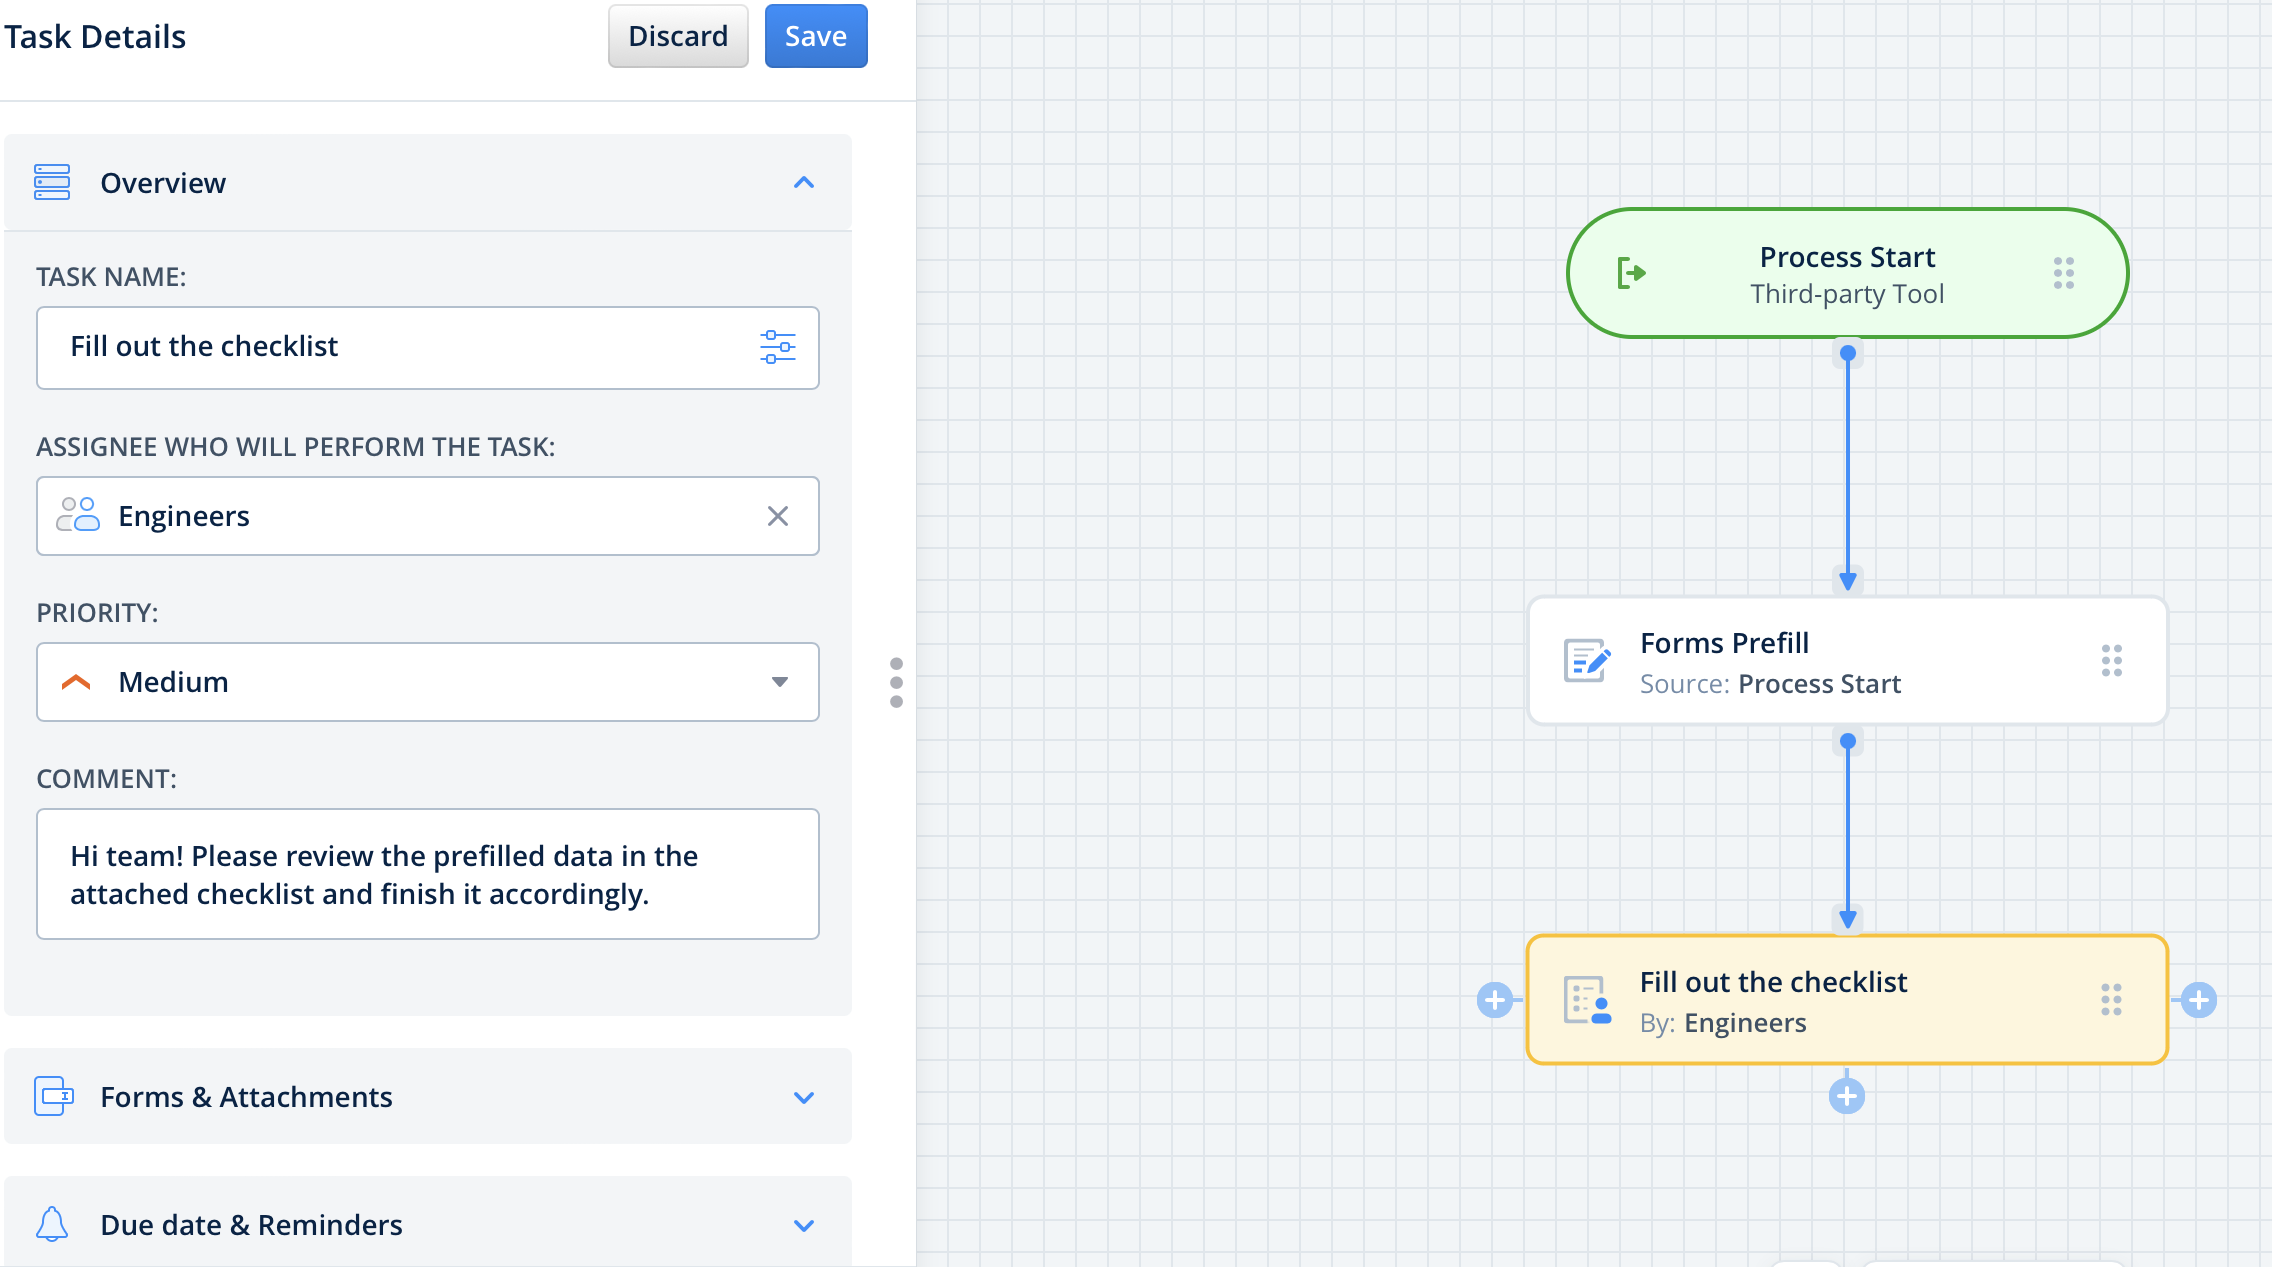
Add other elements that will cover your business process. Drag and drop the User task and configure it: add fillable forms and assign the task to the team that will complete it regularly.

Make sure that you have added yourself to the group of users in order to test the setup later.
Add an action after the User task is completed: Upload to Storage, Send by Email, or Share to, depending on your business logic. The Integrations section of our Help Centre explains the different platforms Fluix can integrate.
Step 4 – Save and test the setup
Click Save & Publish in the upper right corner to save the taskstream. Once you perform the specific actions you configured in the Process Start event in your external platform, it will trigger the creation of the new task in Fluix.
Open the Fluix Tasks app or the User App in the right corner of the Admin Portal. Navigate to the Assigned section to find a new task. Fill in the form and finish it once it is ready. The completed form will be submitted according to the preconfigured destination.
In case you have any questions or difficulties with setup, contact us at support@fluix.io and we’ll be happy to help you.