To start building a workflow chart, go to the Admin Tab -> Process Setup -> Workflows section and click New Workflow in the upper right corner of your screen.

Here, you may create a chart from scratch or use the template of the preconfigured Workflows, which you can later customize according to your business process.
Click Blank Template to map your process from scratch, name a Workflow, and click Next. The abbreviation (ABBR) will be automatically generated and later displayed next to the user’s task name in the Fluix app.
Once your users start working on the recurring tasks, the respective number will be displayed next to the Workflow‘s abbreviation. For example:
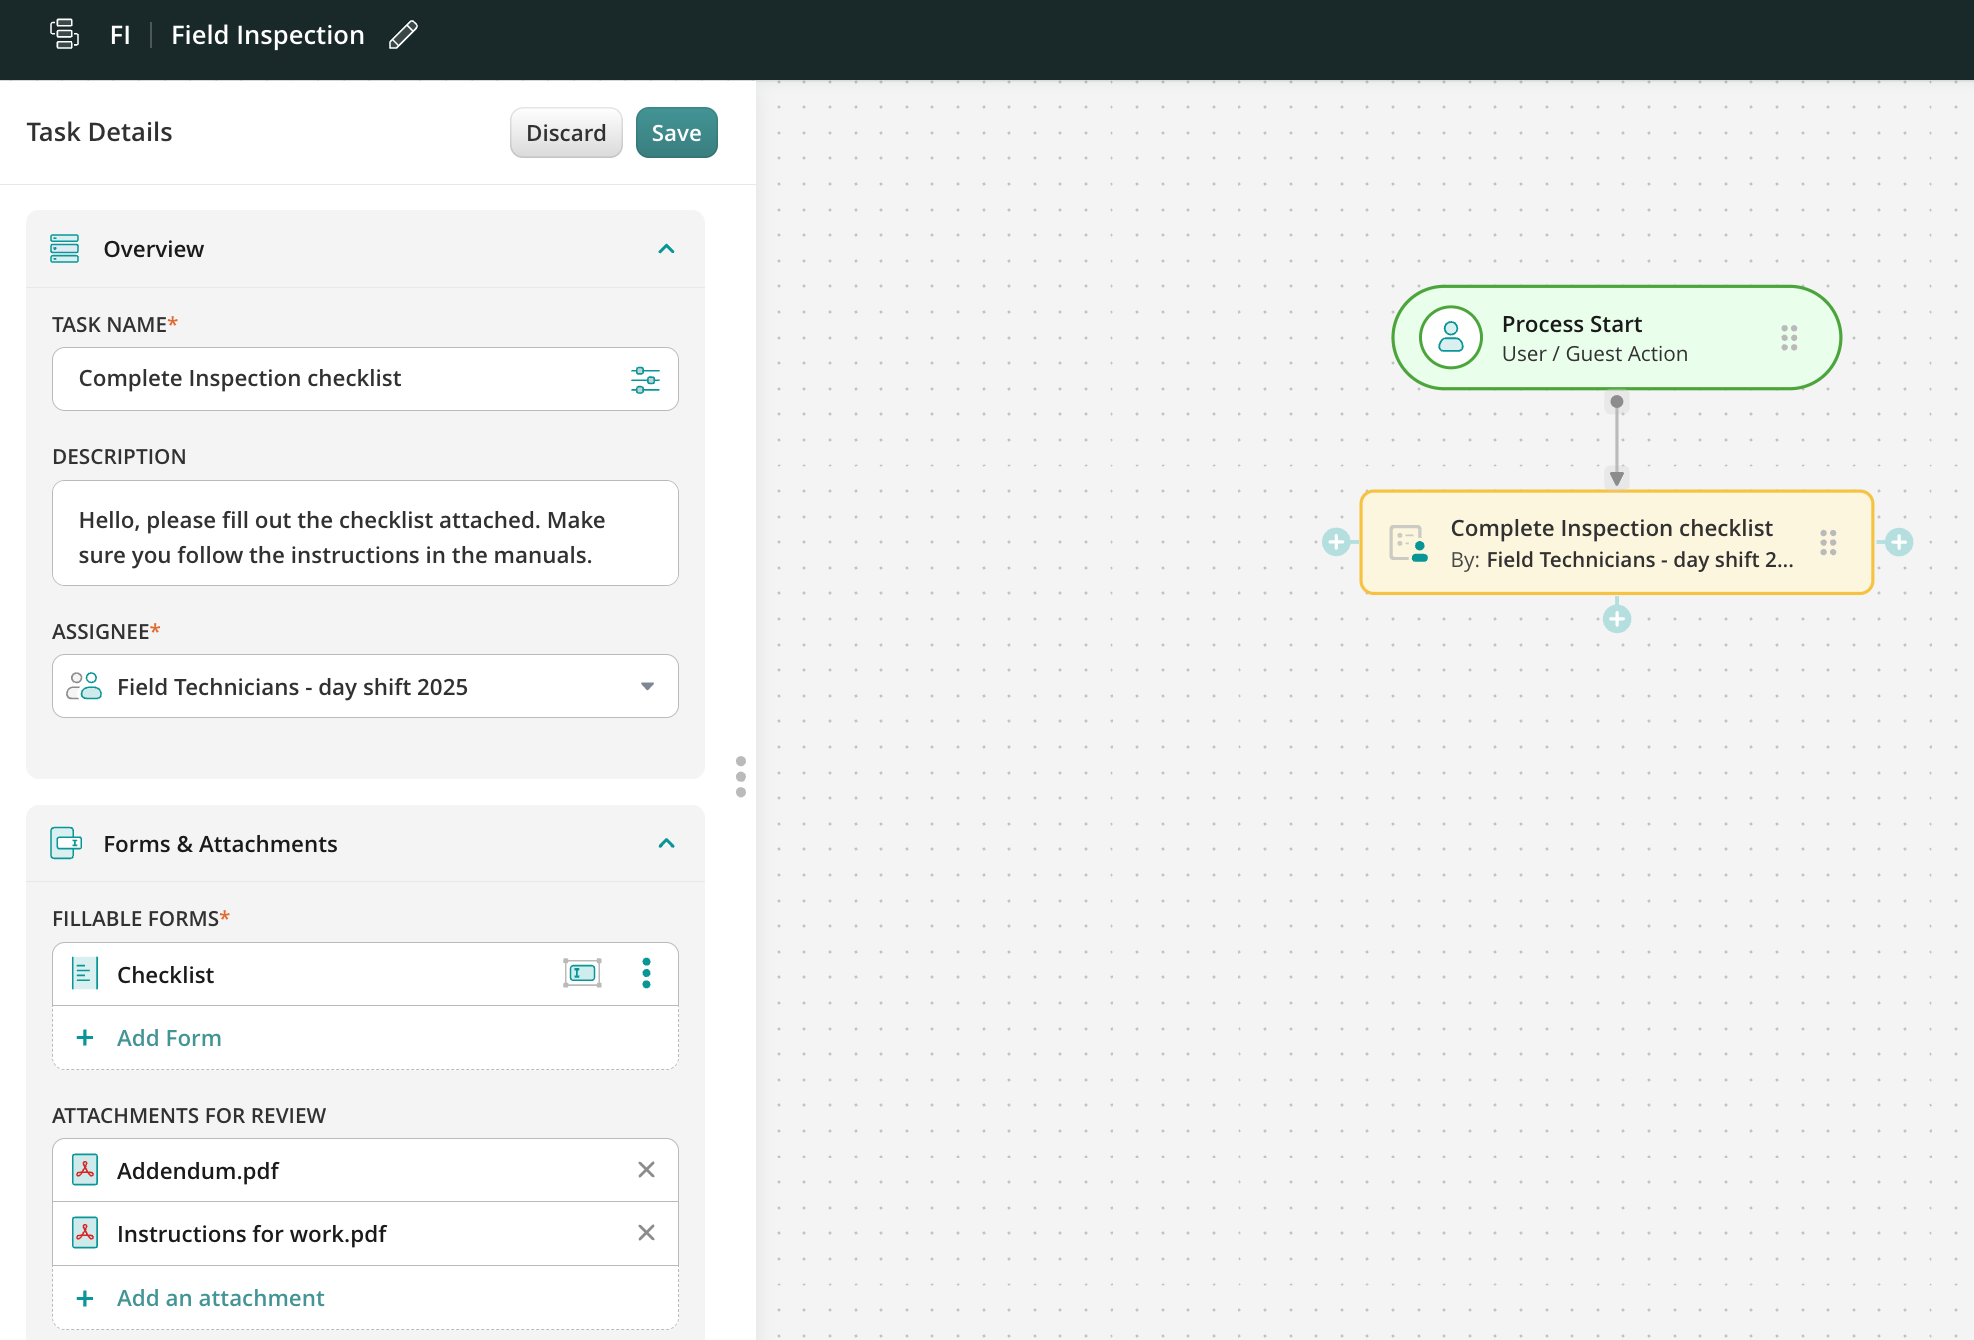
- Your Workflow name is “Field Inspection”, the abbreviation is FI.
- When your users start working on the first task from this Workflow, it will obtain the name FI-1, when the second process is started – FI-2 etc.
In the Workflow builder, you will see the menu of elements on the left. In the previous article, you can check what each element does.
Drag and Drop Process Start from the left sidebar to the chart. To create the first task, drag and drop the User task under Process Start and connect it.
Click on the User task to open the menu that will appear on the left. We’ll return to the Task details in the next article.

You will see blue “+” plus icons surrounding the task. By clicking and dragging, you can add and connect any other workflow elements.
Use shortcuts to speed up the creation of the Workflow. By clicking on the green “+” icon, you can connect or add elements to the Workflow.

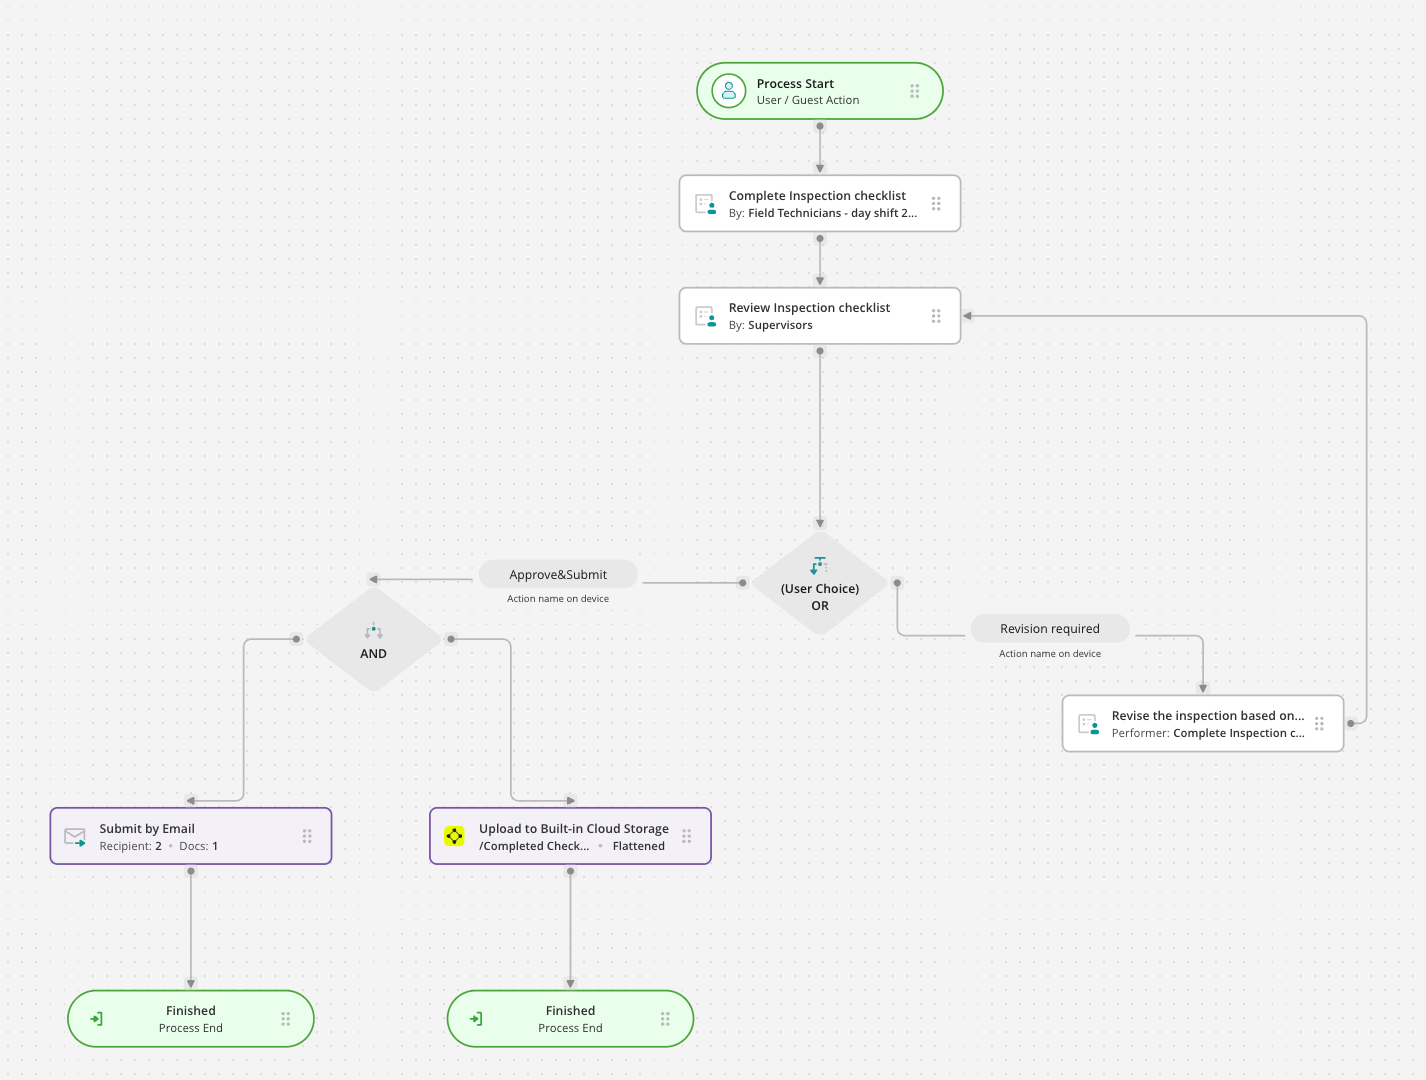
Example of the fully configured Workflow setup:

Now let’s see how to configure User Task.