
Dynamic values in naming forms and tasks, as well as customizing emails with completed forms, are aimed to:
- Eliminate human error in the field
- Help email recipients grab all the needed information even without opening the attachment
- Minimize administrative work.
Dynamic values in workflows allow you to automatically name the submitted documents and customize the email recipients, subject, and body based on the information your remote team enters into the forms while working in the app. Let’s explore these capabilities in a bit more detail.
1) Automated document naming
Keep the document names consistent with the dynamic values. Upon task completion, field data is automatically pulled from the predefined fields in the form to name the document correctly.
Steps from setup to end result:
1. The form naming pattern is configured in a recurring task in the workflow chart.
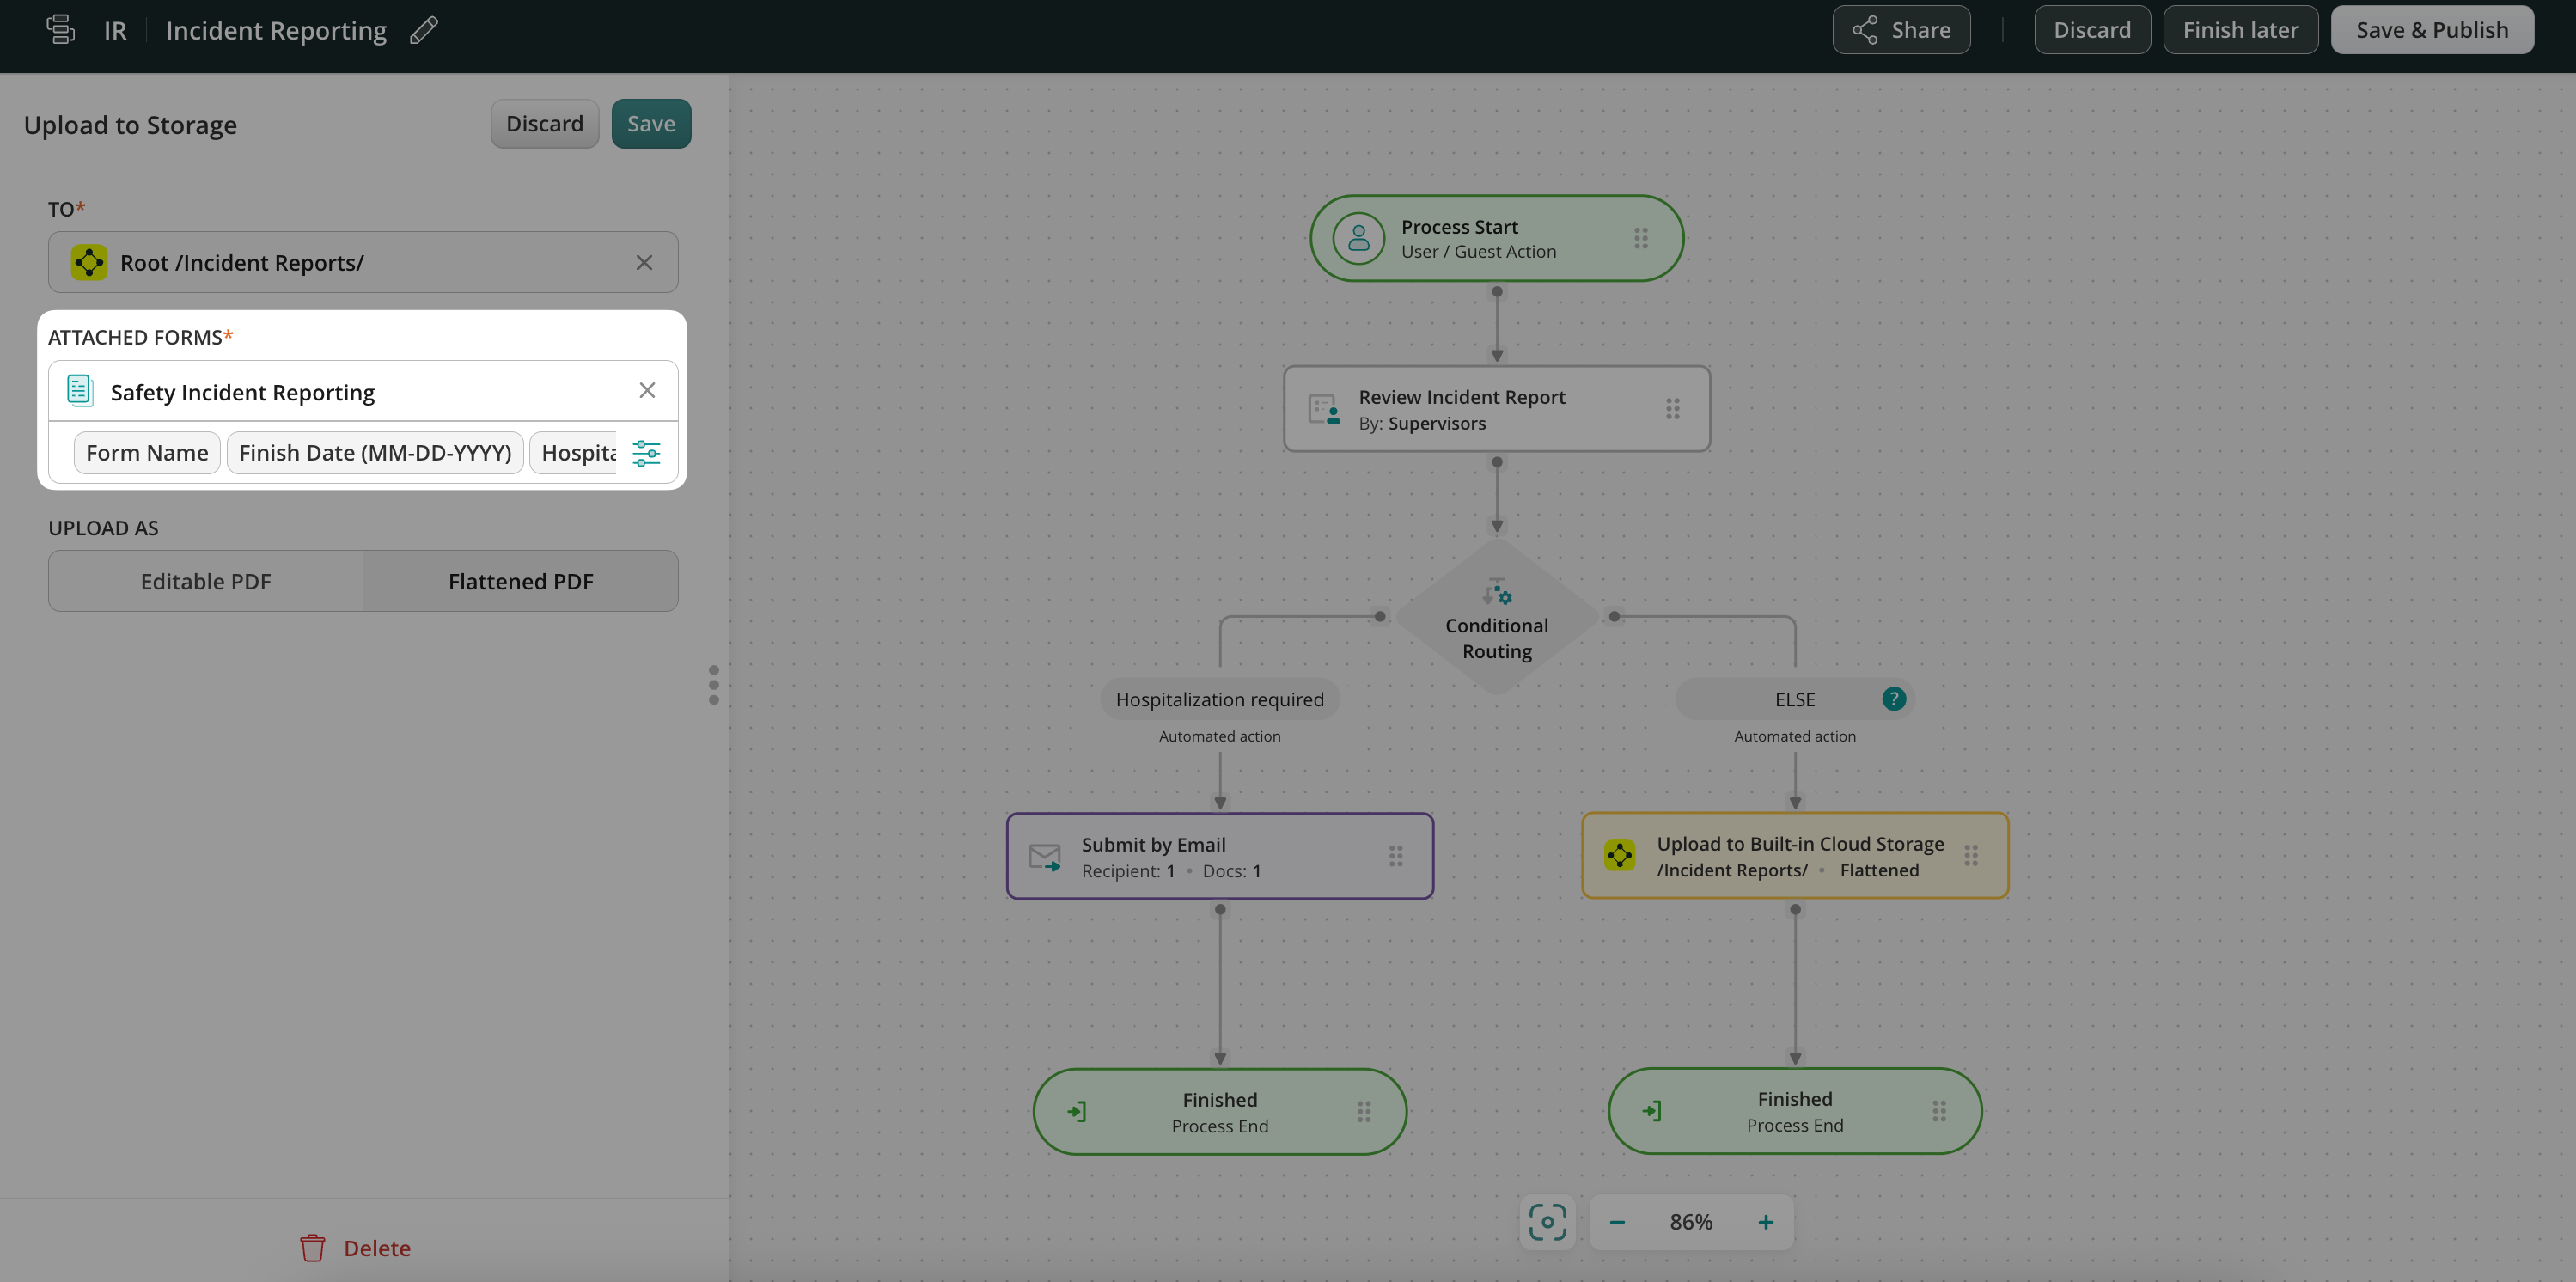
Upon submission, the form names were generated using the Form Name, Finish Date, dropdown option from the field Hospitalization Required, and Incident Location values.
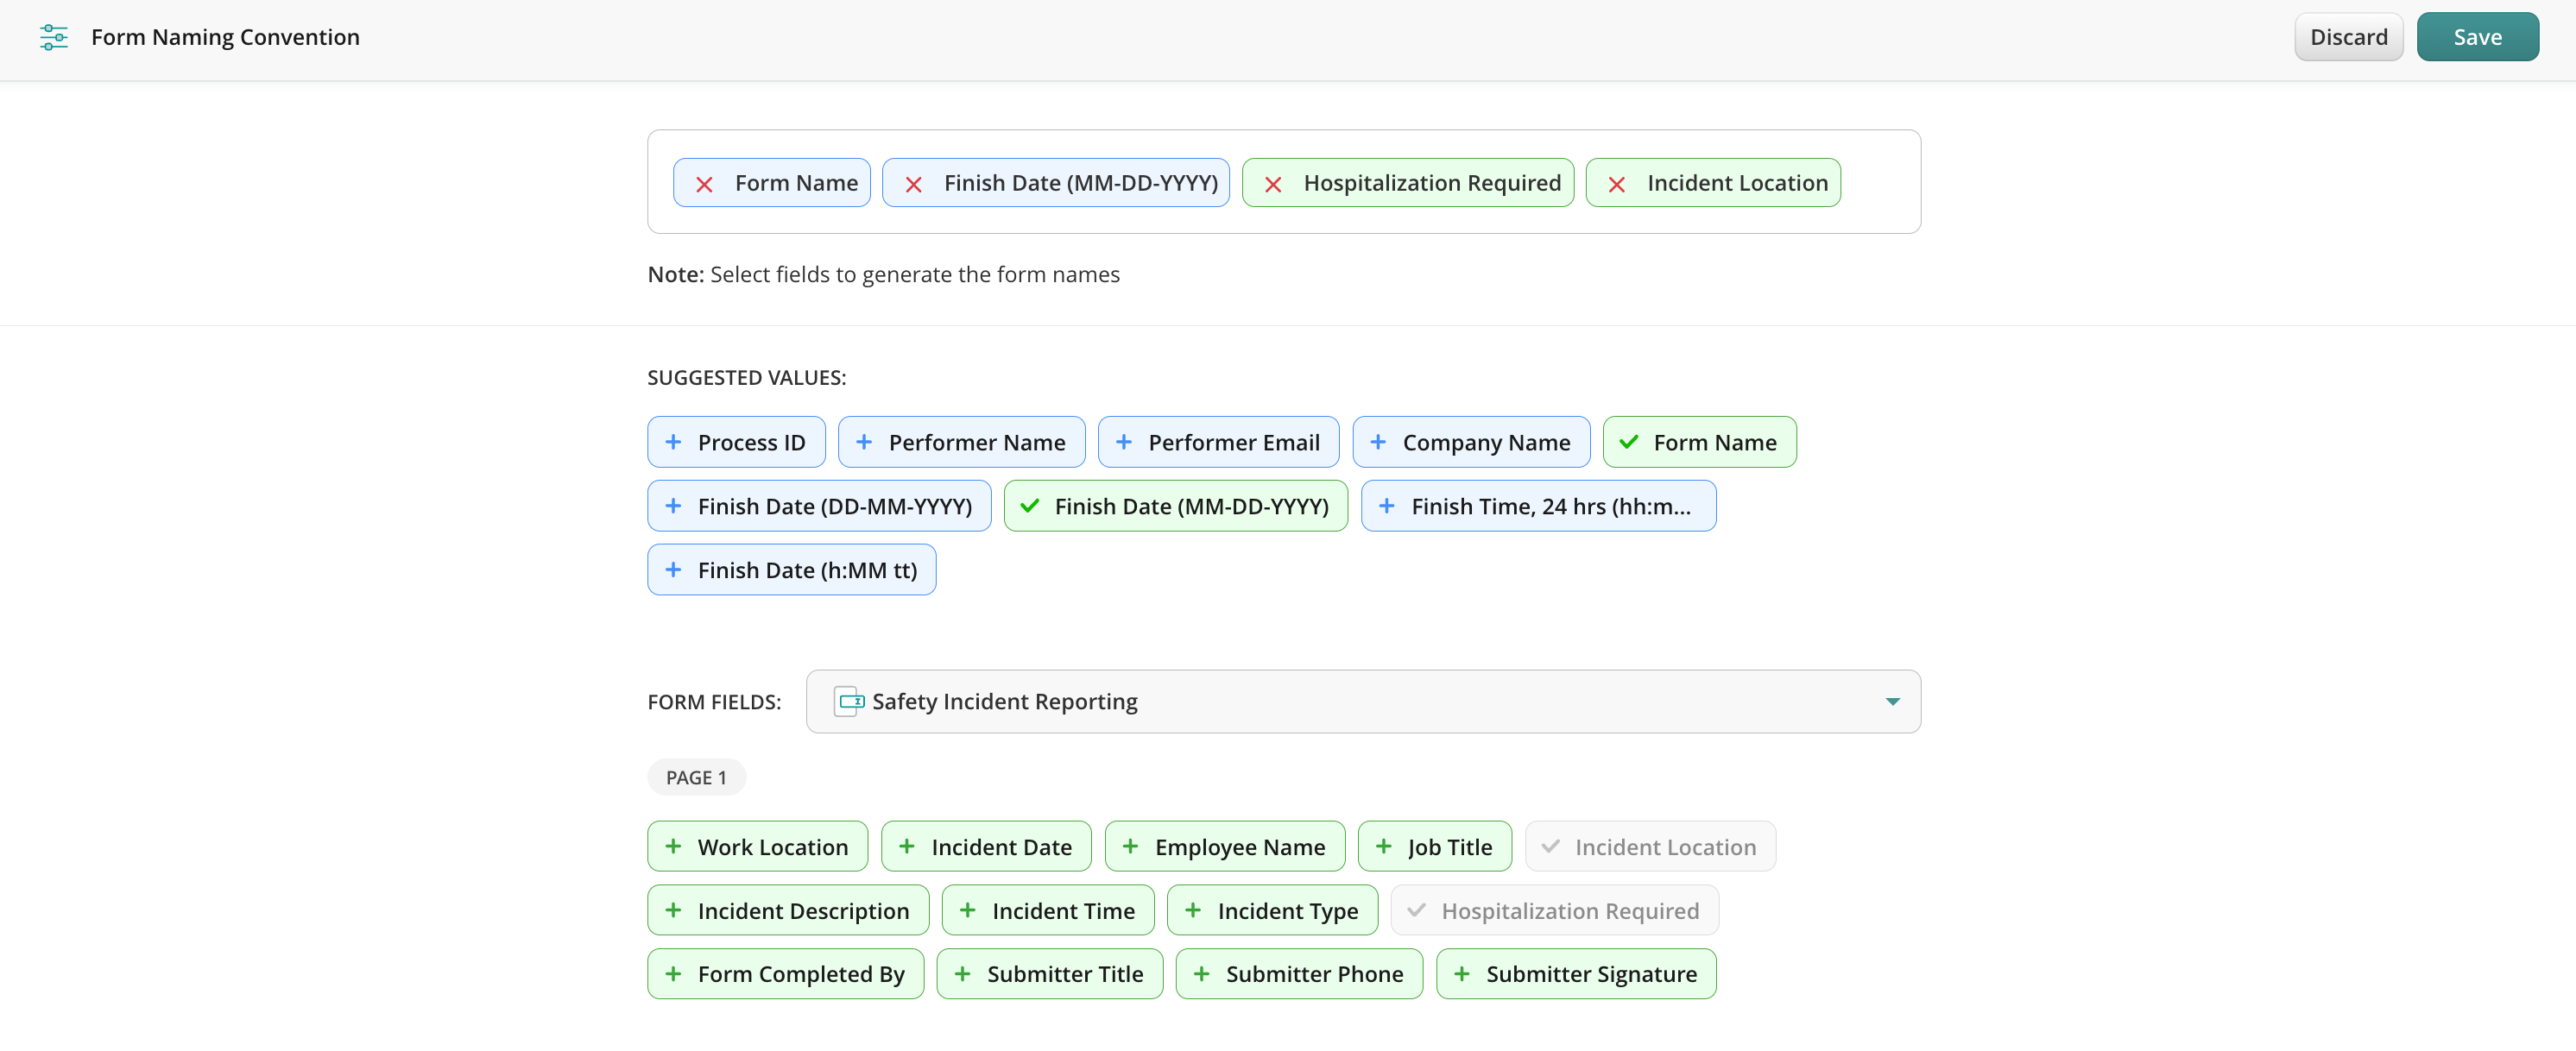
2. A form completed by a team member on the device: The preconfigured fields in the setup have been filled out.
3. The form with a proper name is submitted to the cloud storage:

The submitted form contains the following values: Form Name, Finish Date, selected option from the field Hospitalization Required, and Incident Location.
2) Customization of the Submit by email action
In addition, dynamic values can help you customize the emails that are sent out upon task completion. Hence, email recipients, subjects, and bodies can be created based on the recent data input made by a user in the related form on the device or web app.
Flow from the setup to the received email:
1. Configured Submit by Email action for your workflow:
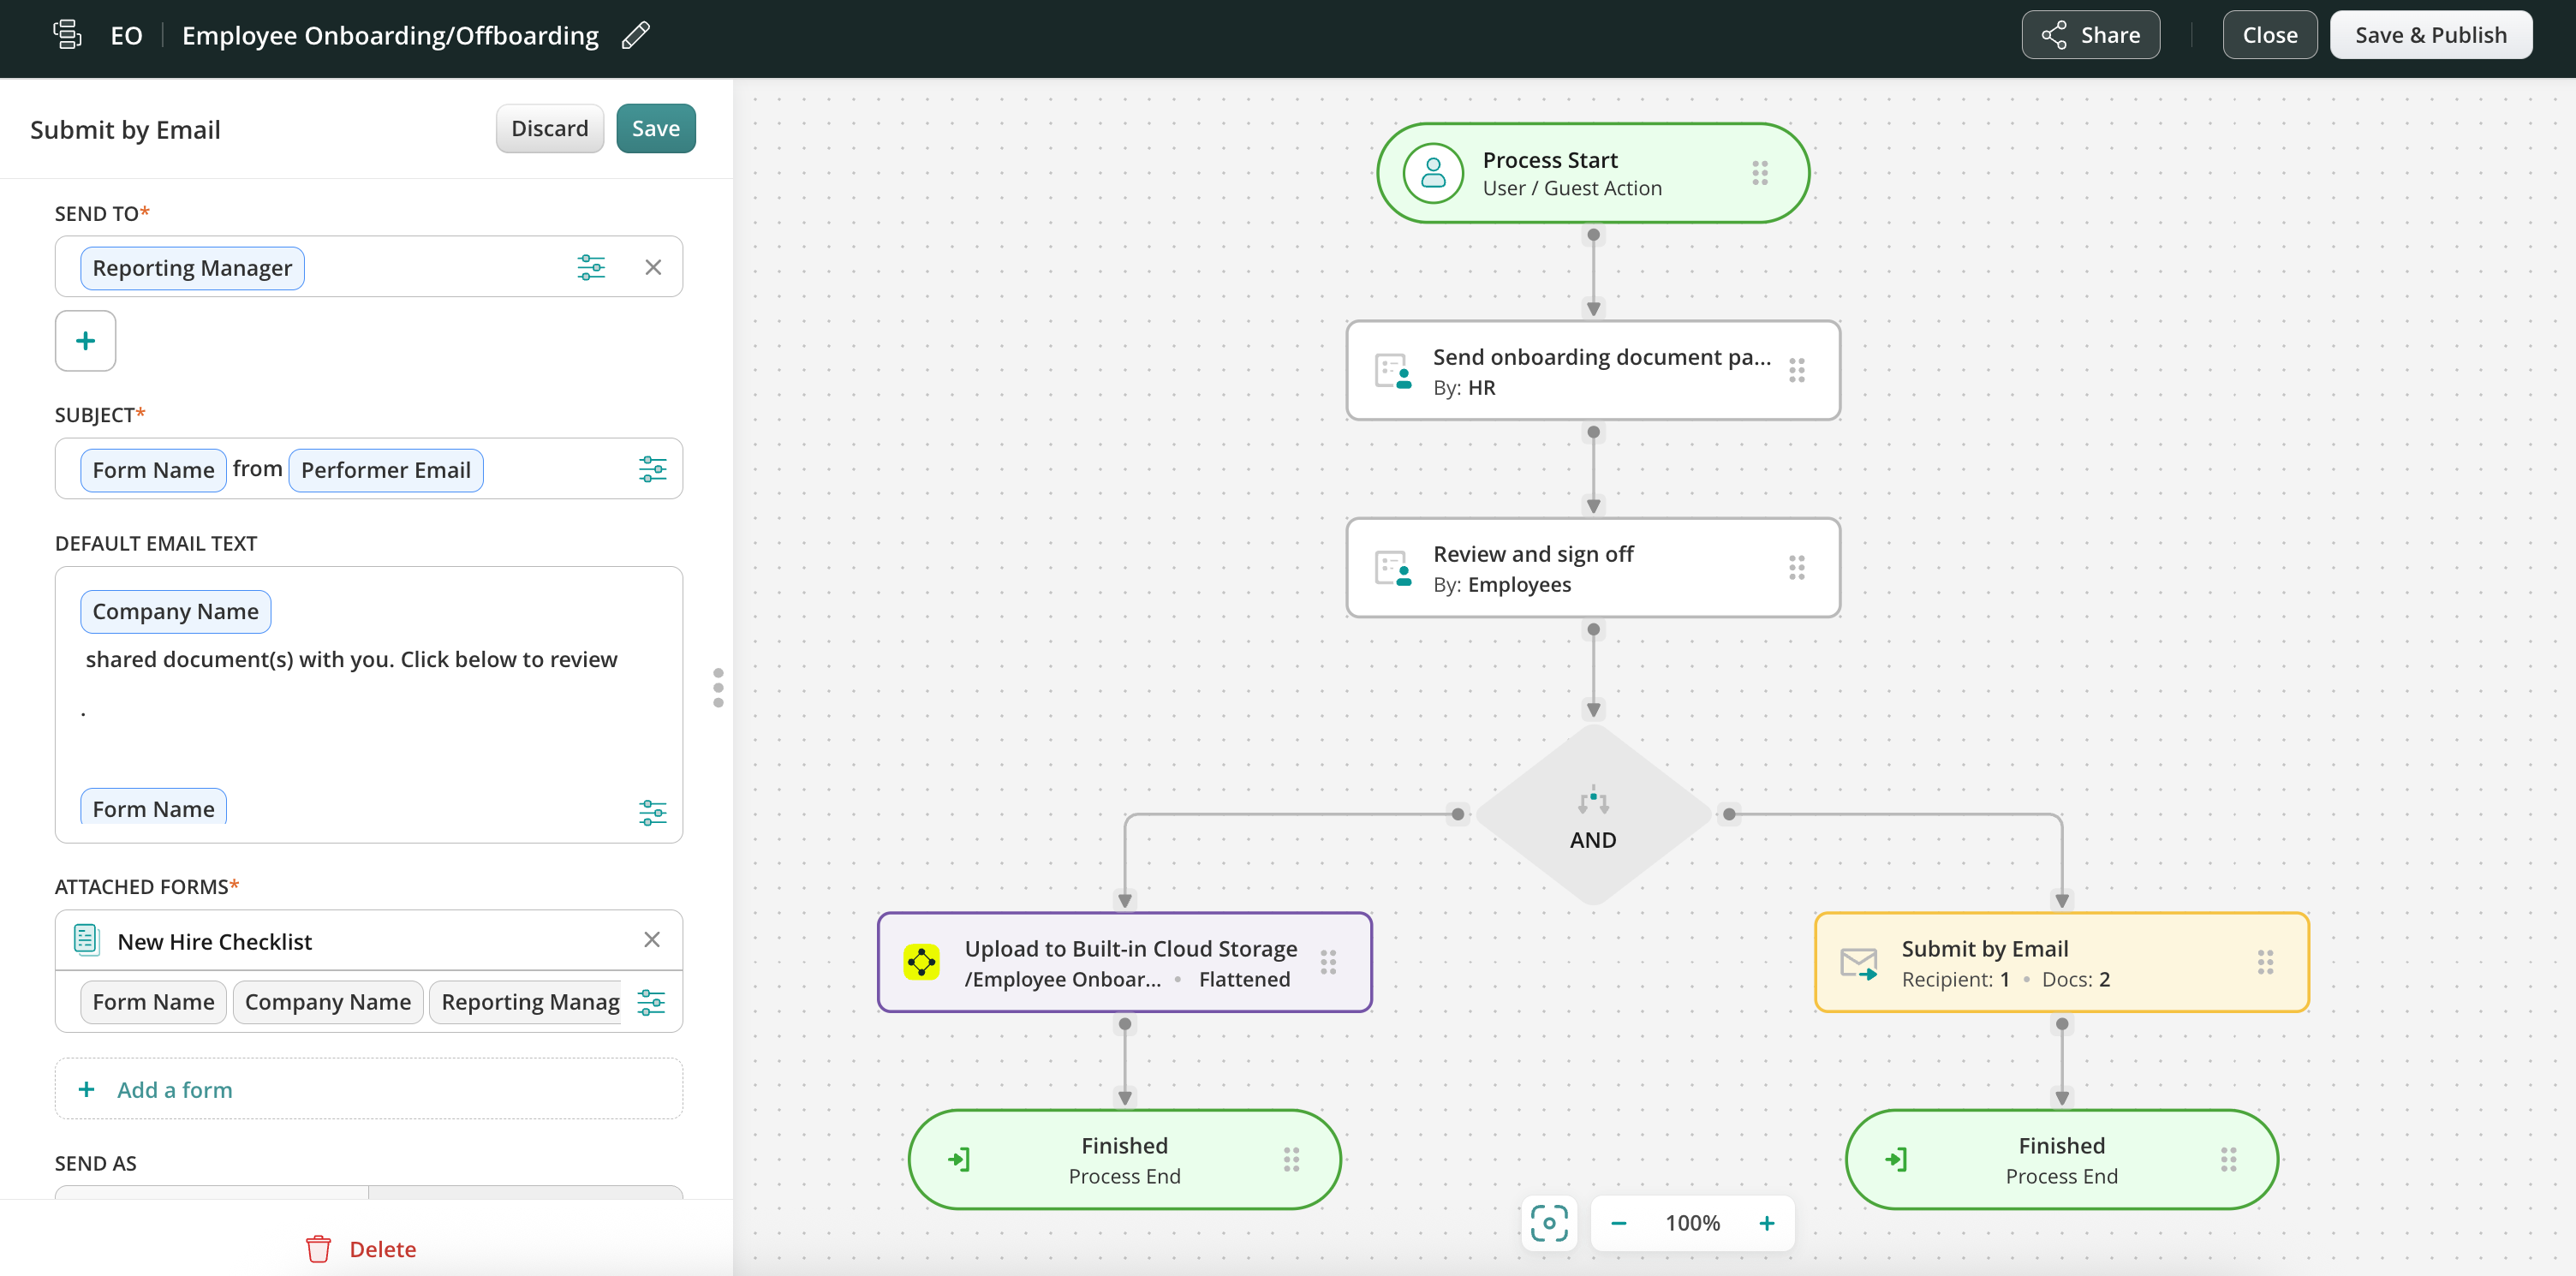
The Reporting Manager value is used to generate recipients’ emails.
Form Name and Performer email – values are used for the email subject. In addition, the list of values was added to the email text.
2. The new hire checklist was filled out by the field user on the device. The email address mario.wanner@fluix.io was entered into the Reporting Manager field in the form.
3. An email received by the defined person – mario.wanner@fluix.io is the recipient, the email subject contains the form name and performer name, and finally, the email text contains all expected values.

3) Automated task naming
For your users’ convenience, you may also set up dynamic values to name the task on the user’s device upon its completion based on the values entered by the user in the form.
Once the task is finished, a user will be able to easily distinguish it from the finished ones.
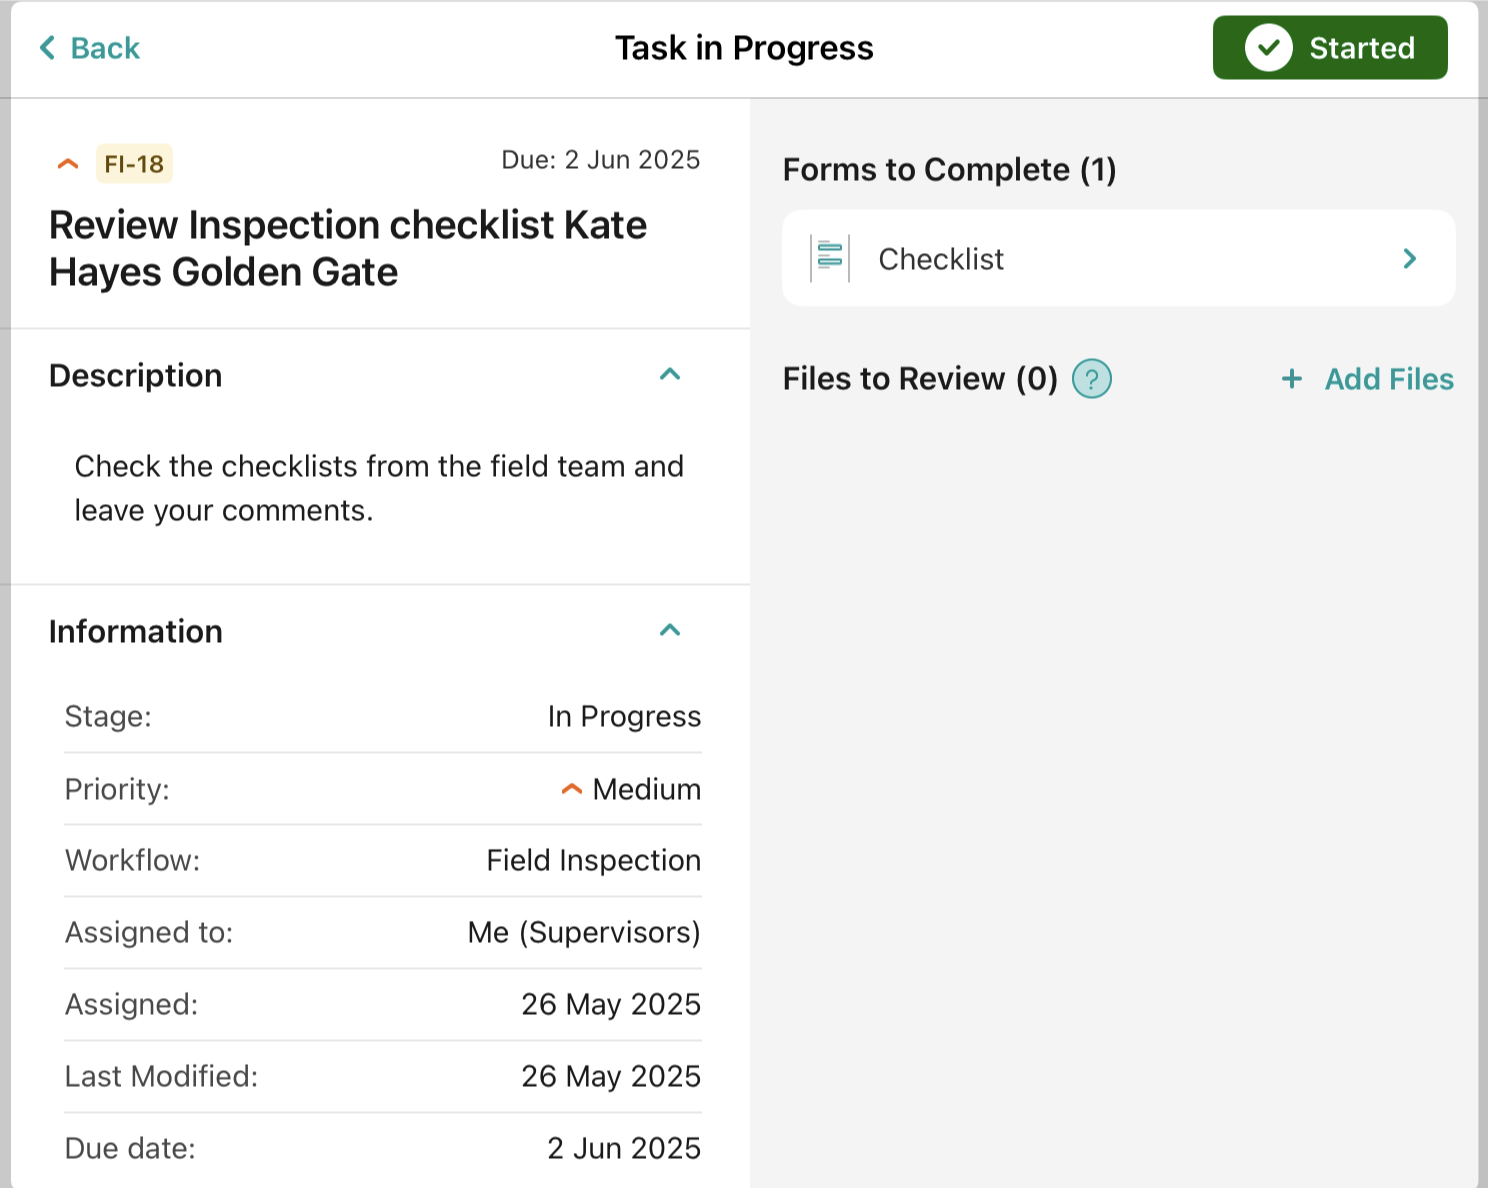
Setup Steps For Automated Task Naming
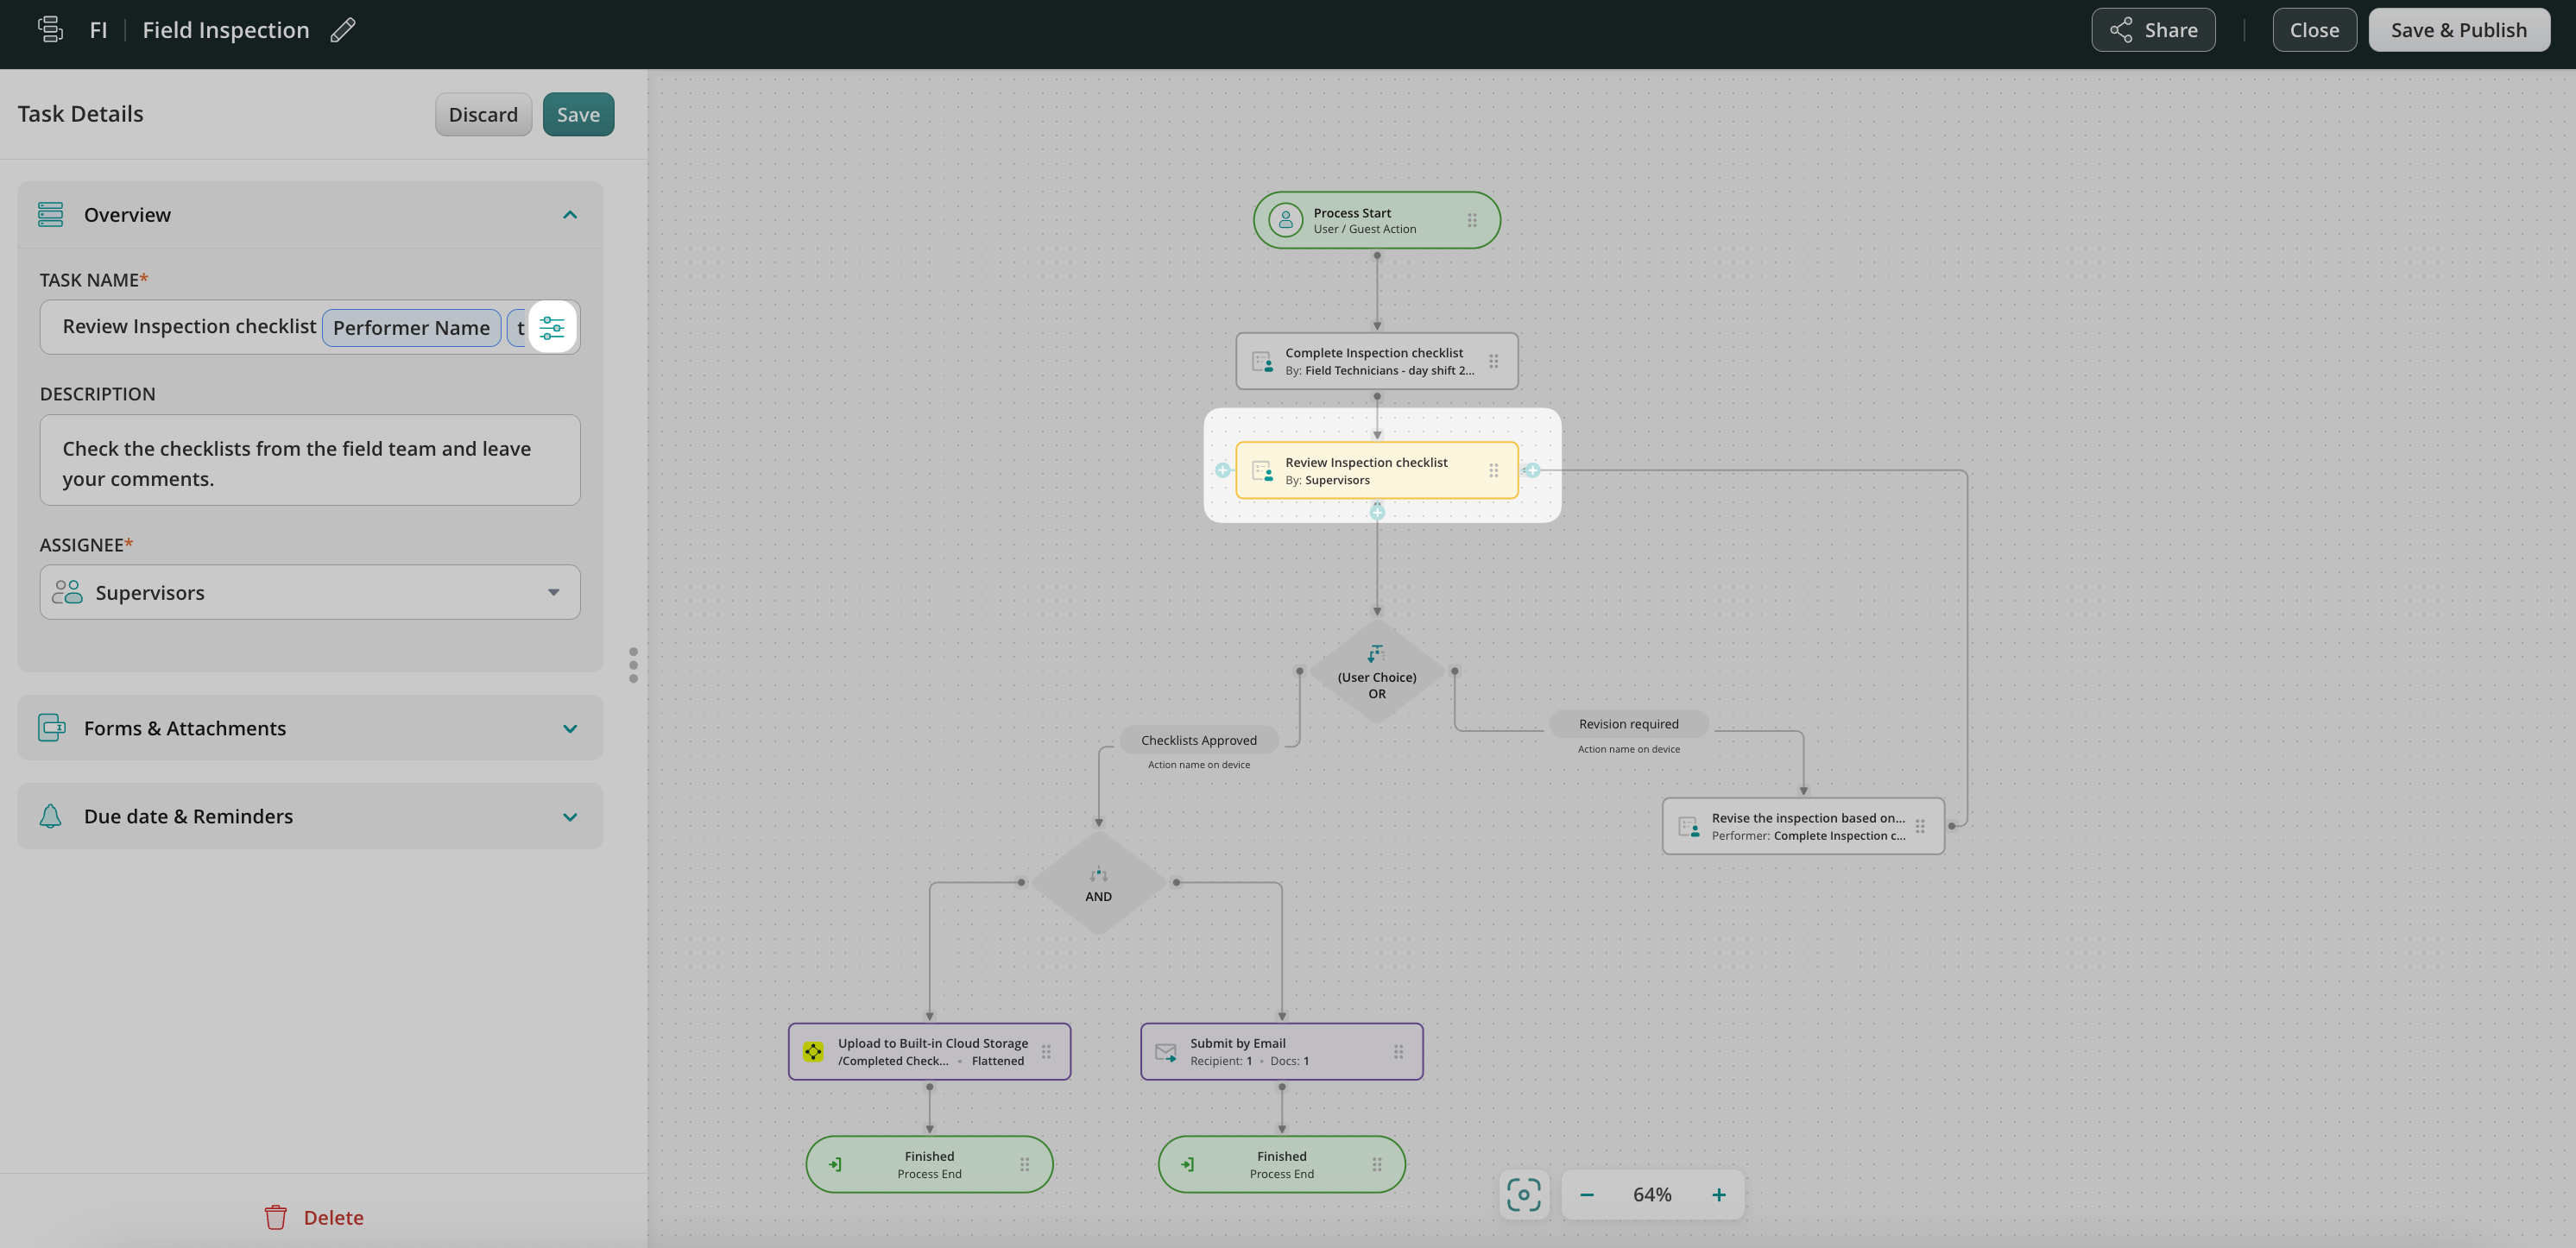
1. Go to the preferred workflows in the admin portal and click on the task where you would like to customize form naming. In the Task Details, click on the configuration icon:
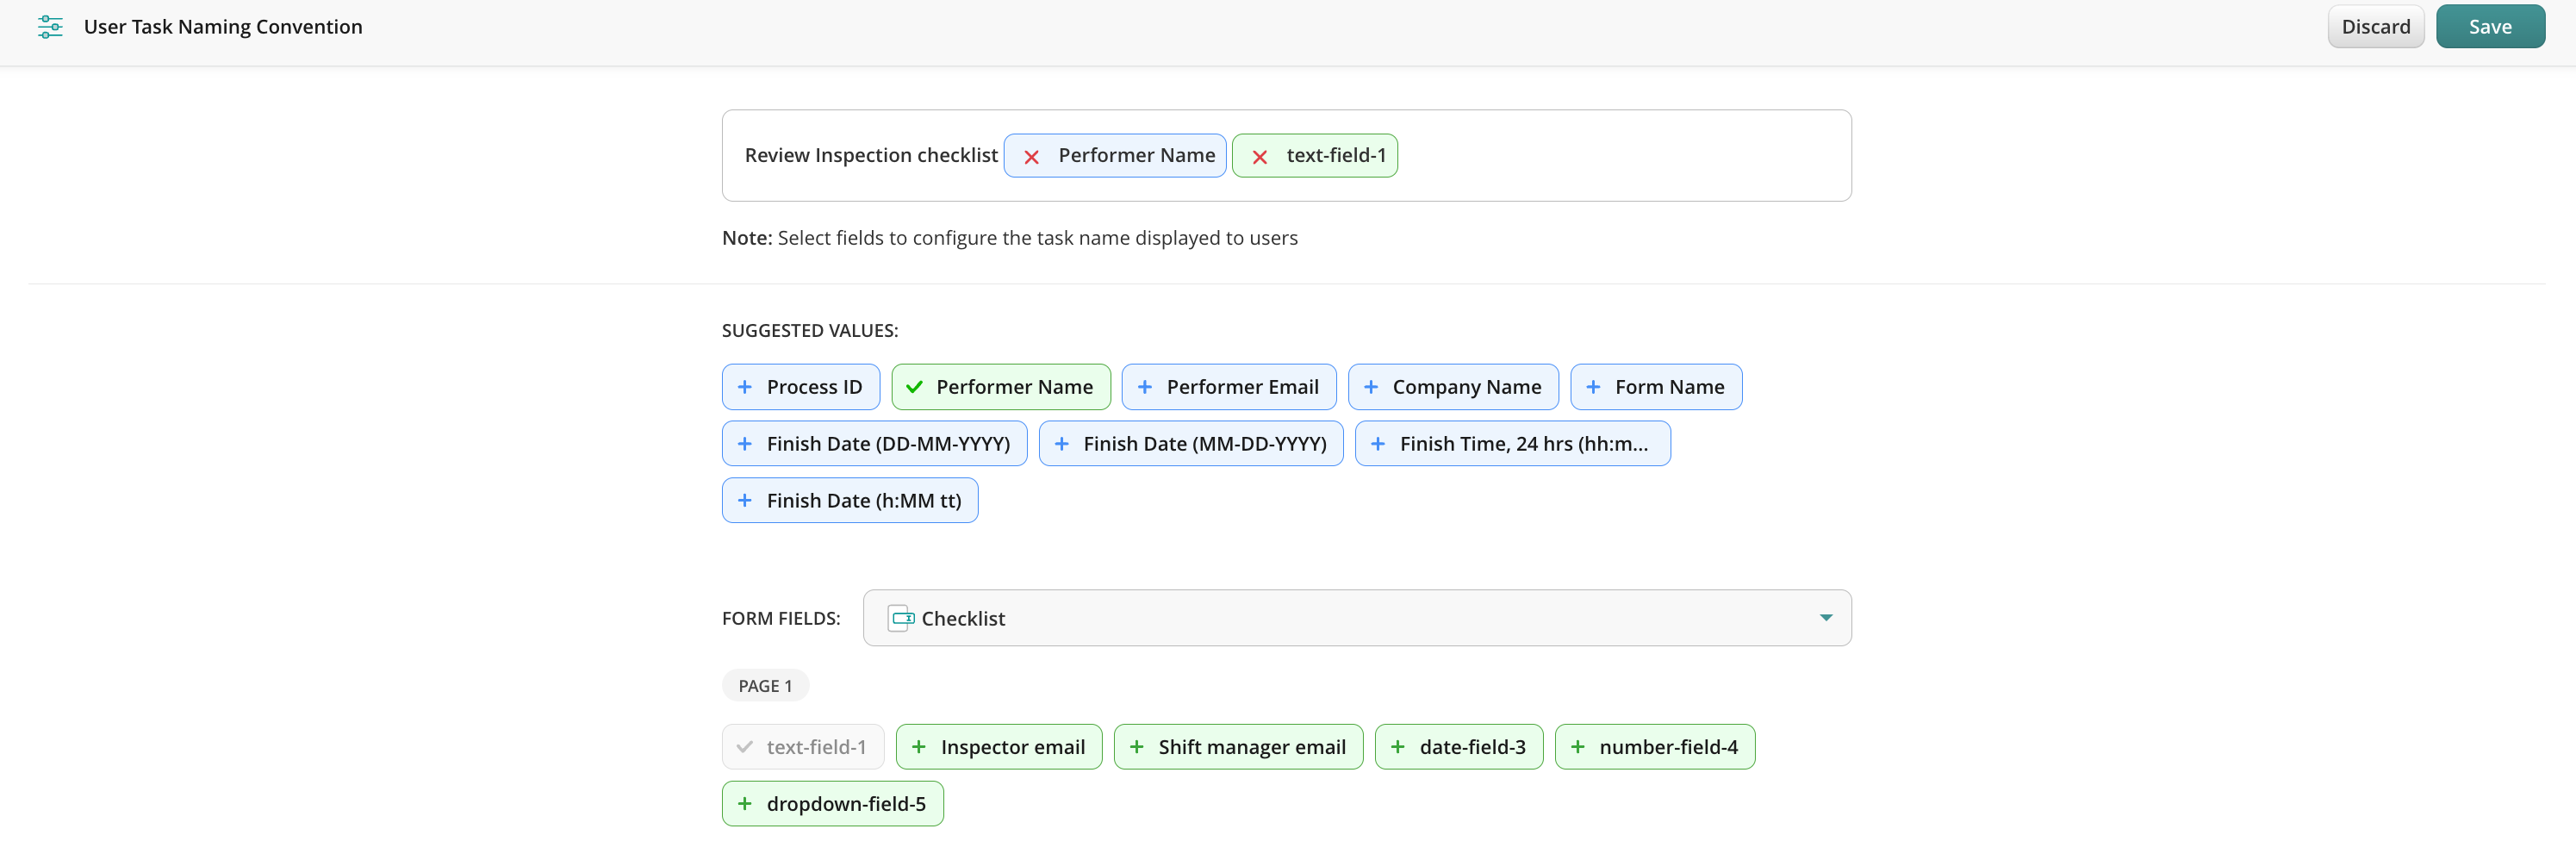
2. In the input configurator that appears, choose the required form and pick the fields and values you want to see in the form name after it is completed by the user.
3. Save changes.
4. To test the naming, add yourself to the Group of assignees in the workflow where you configured the naming, open the app either on a device or the User app in the web, and complete the task.
Conclusion
As you can see, dynamic values are very handy for both those who perform the job on-site and managers who supervise the process. Dynamic values save time and cut off manual effort while tasks, submitted forms, and email data are being named and filled accurately without employee involvement.
Feel free to contact us at support@fluix.io if you have any questions or comments.