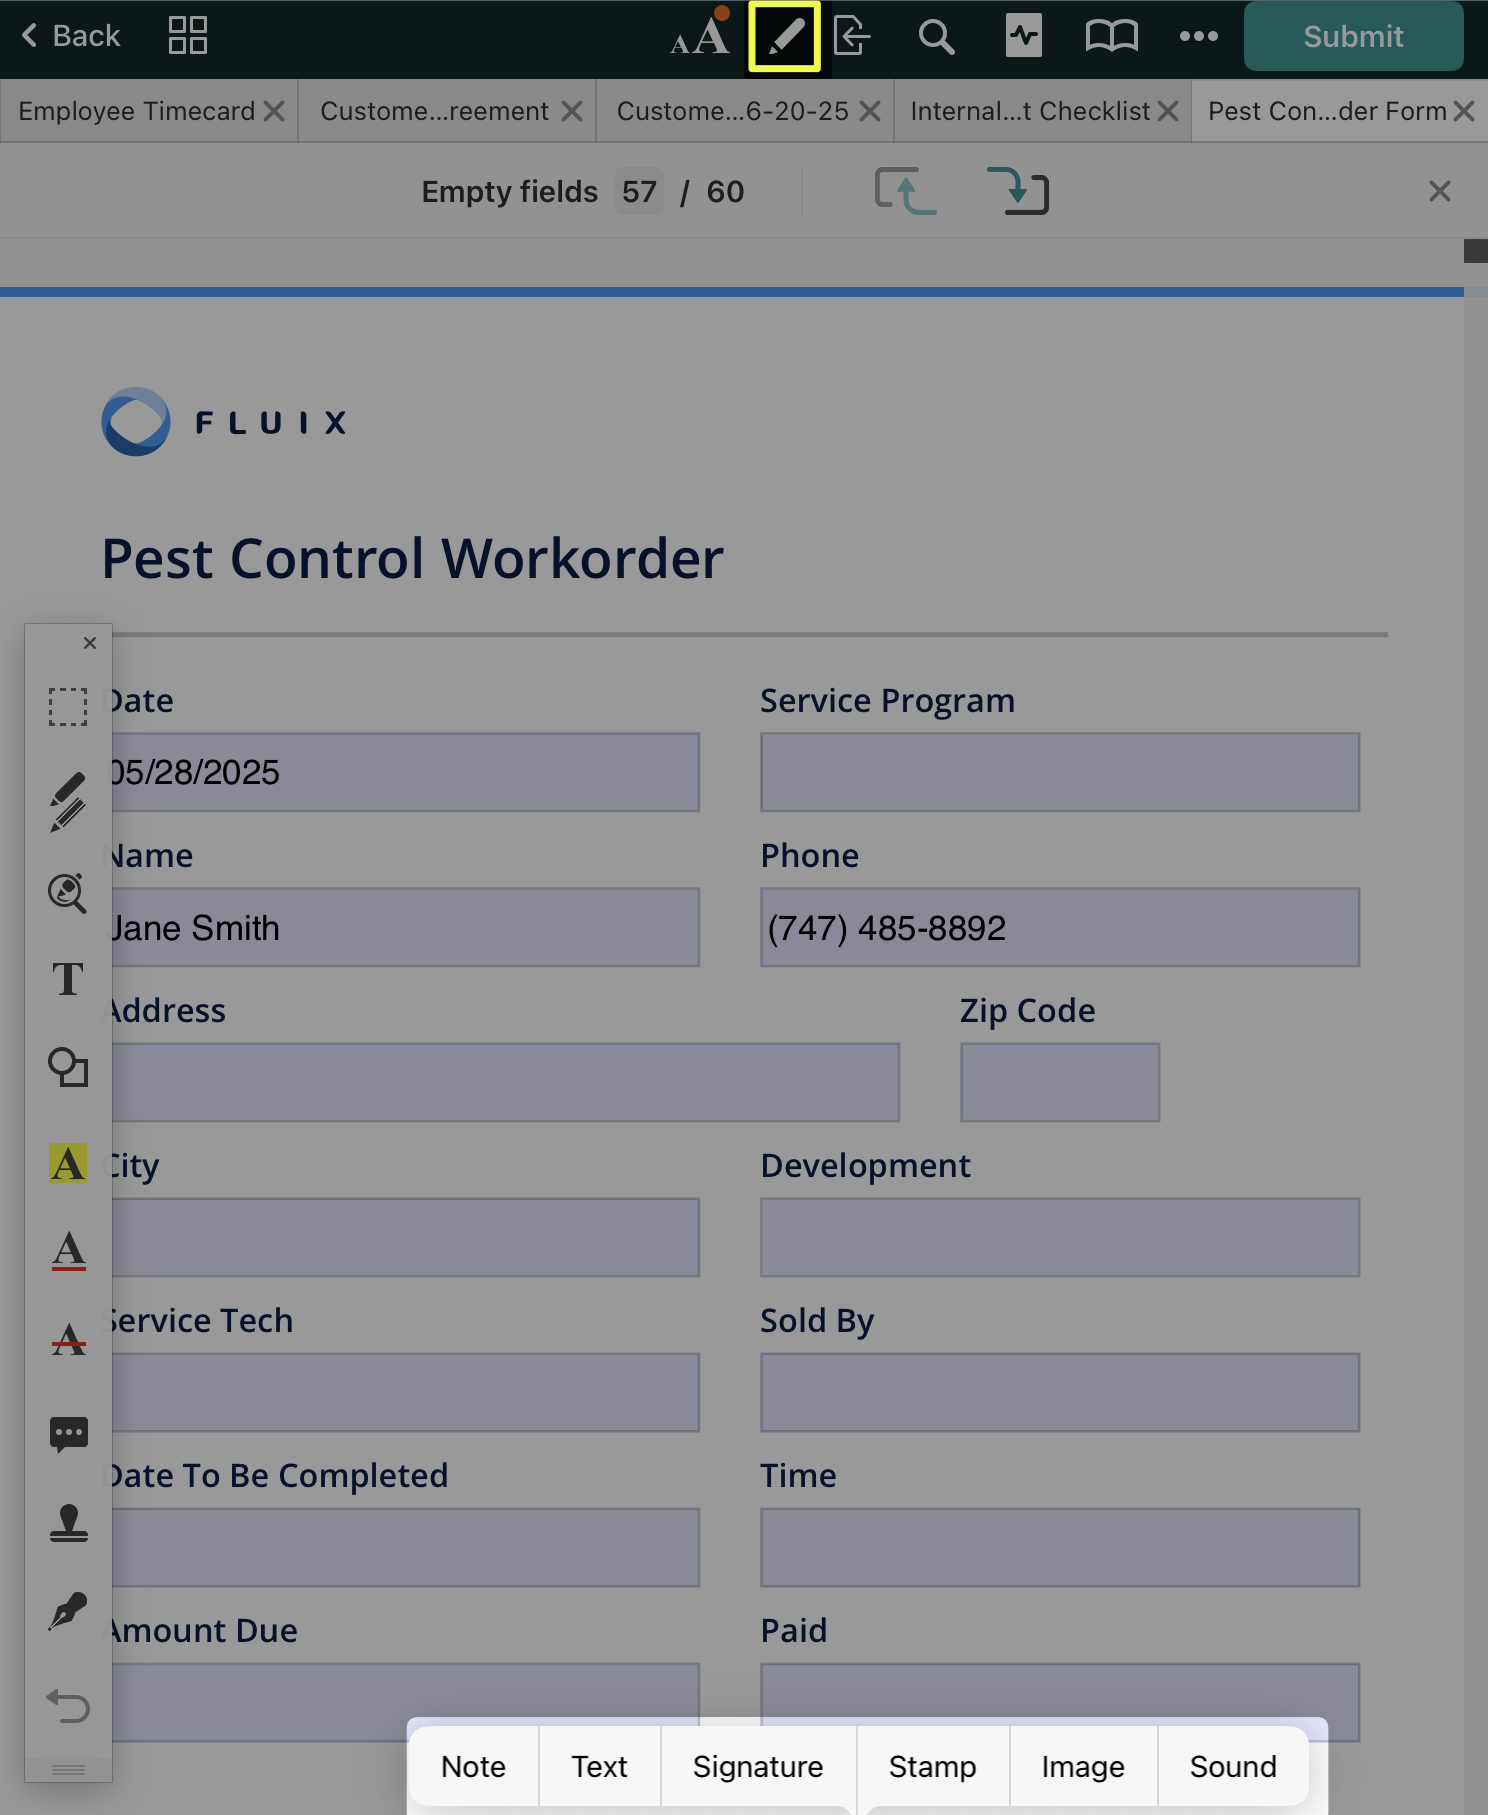
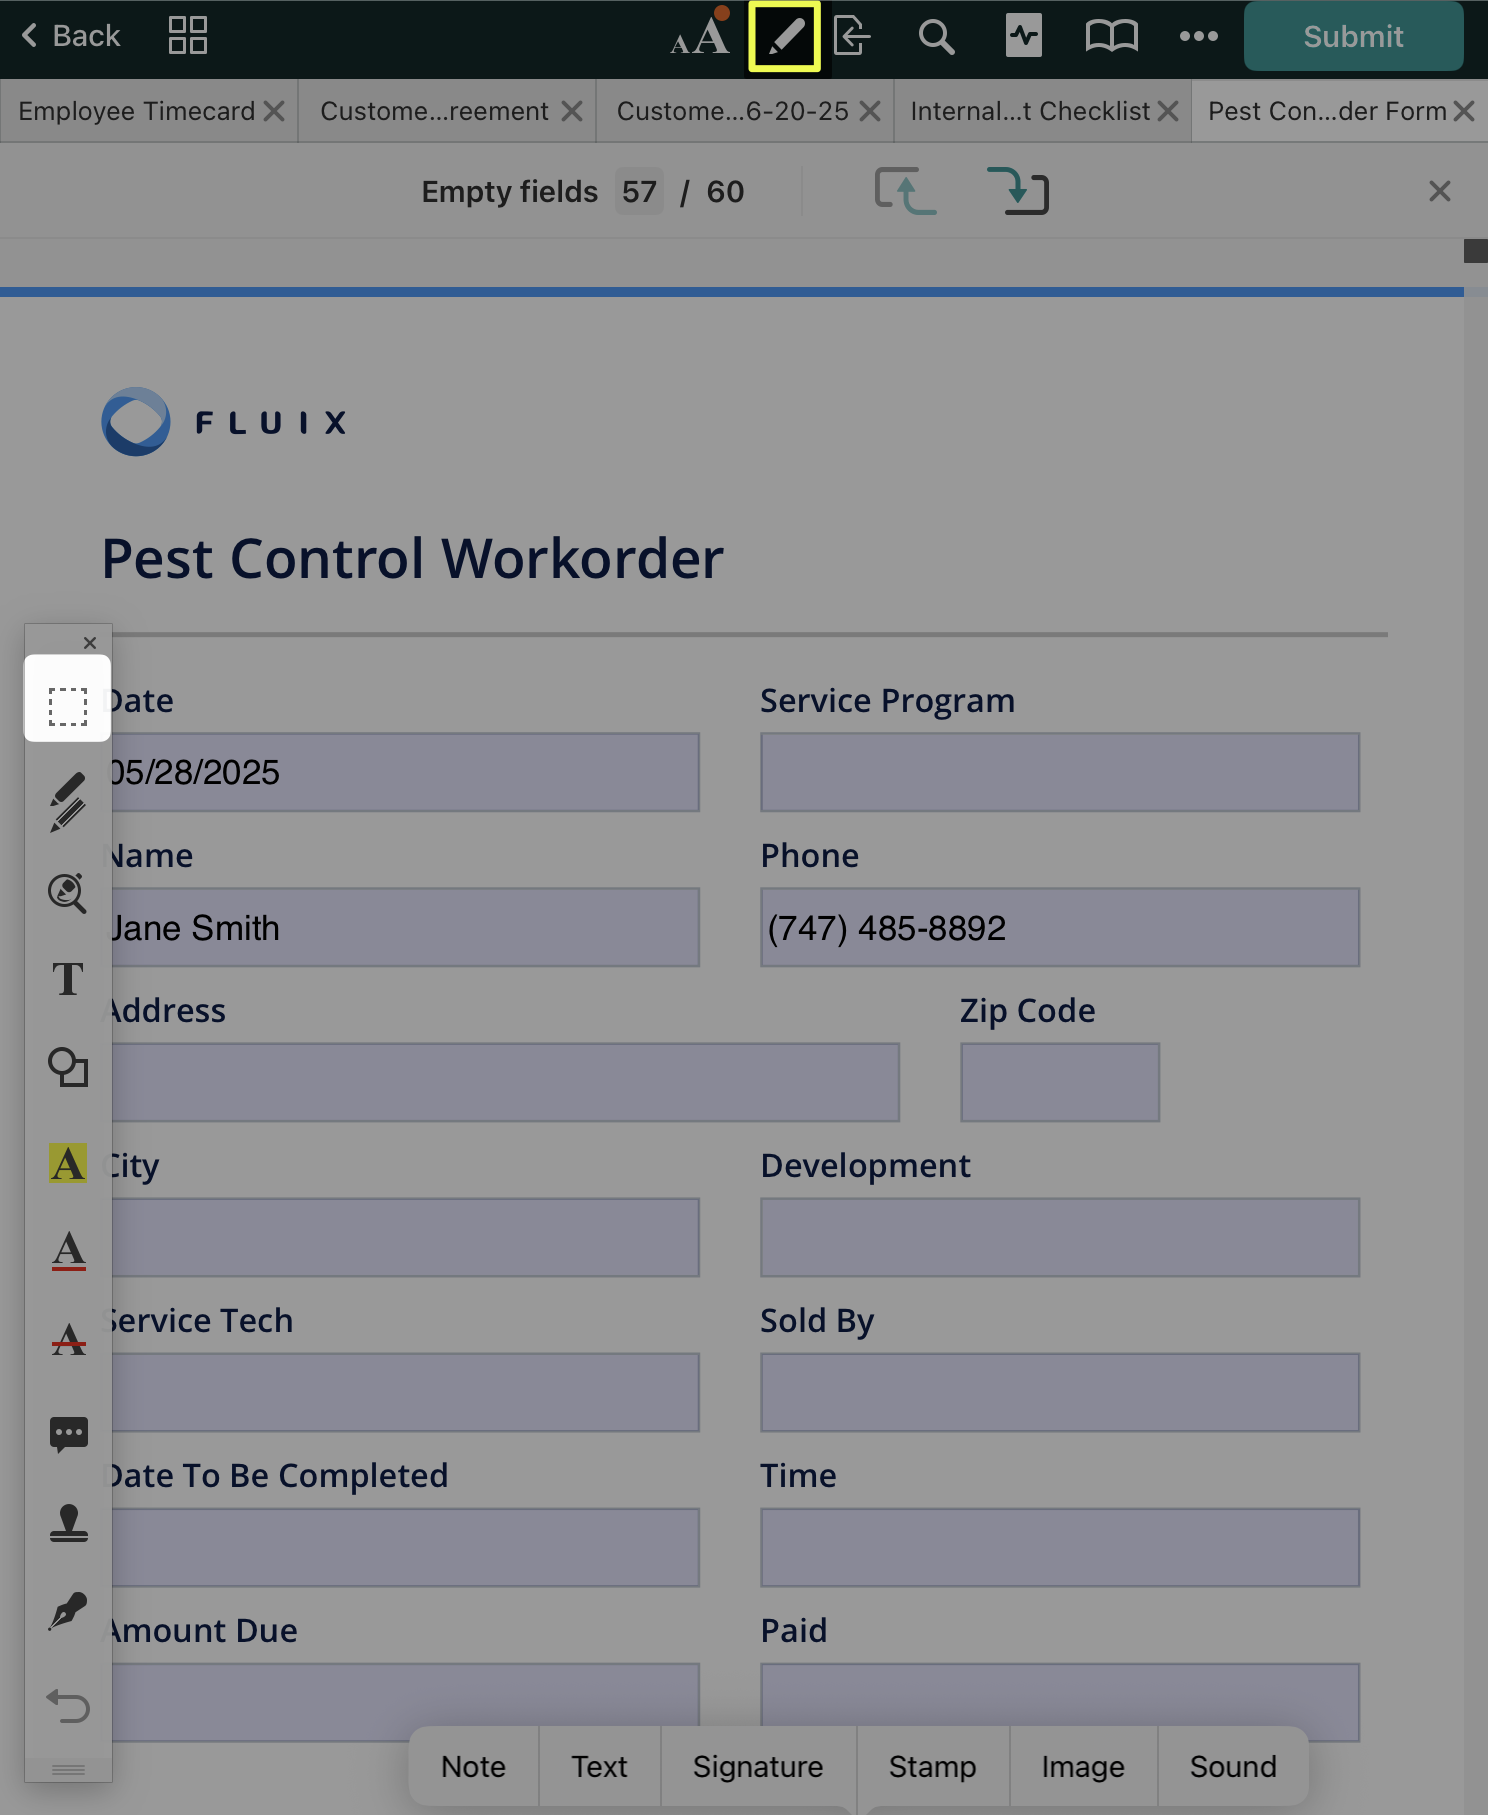
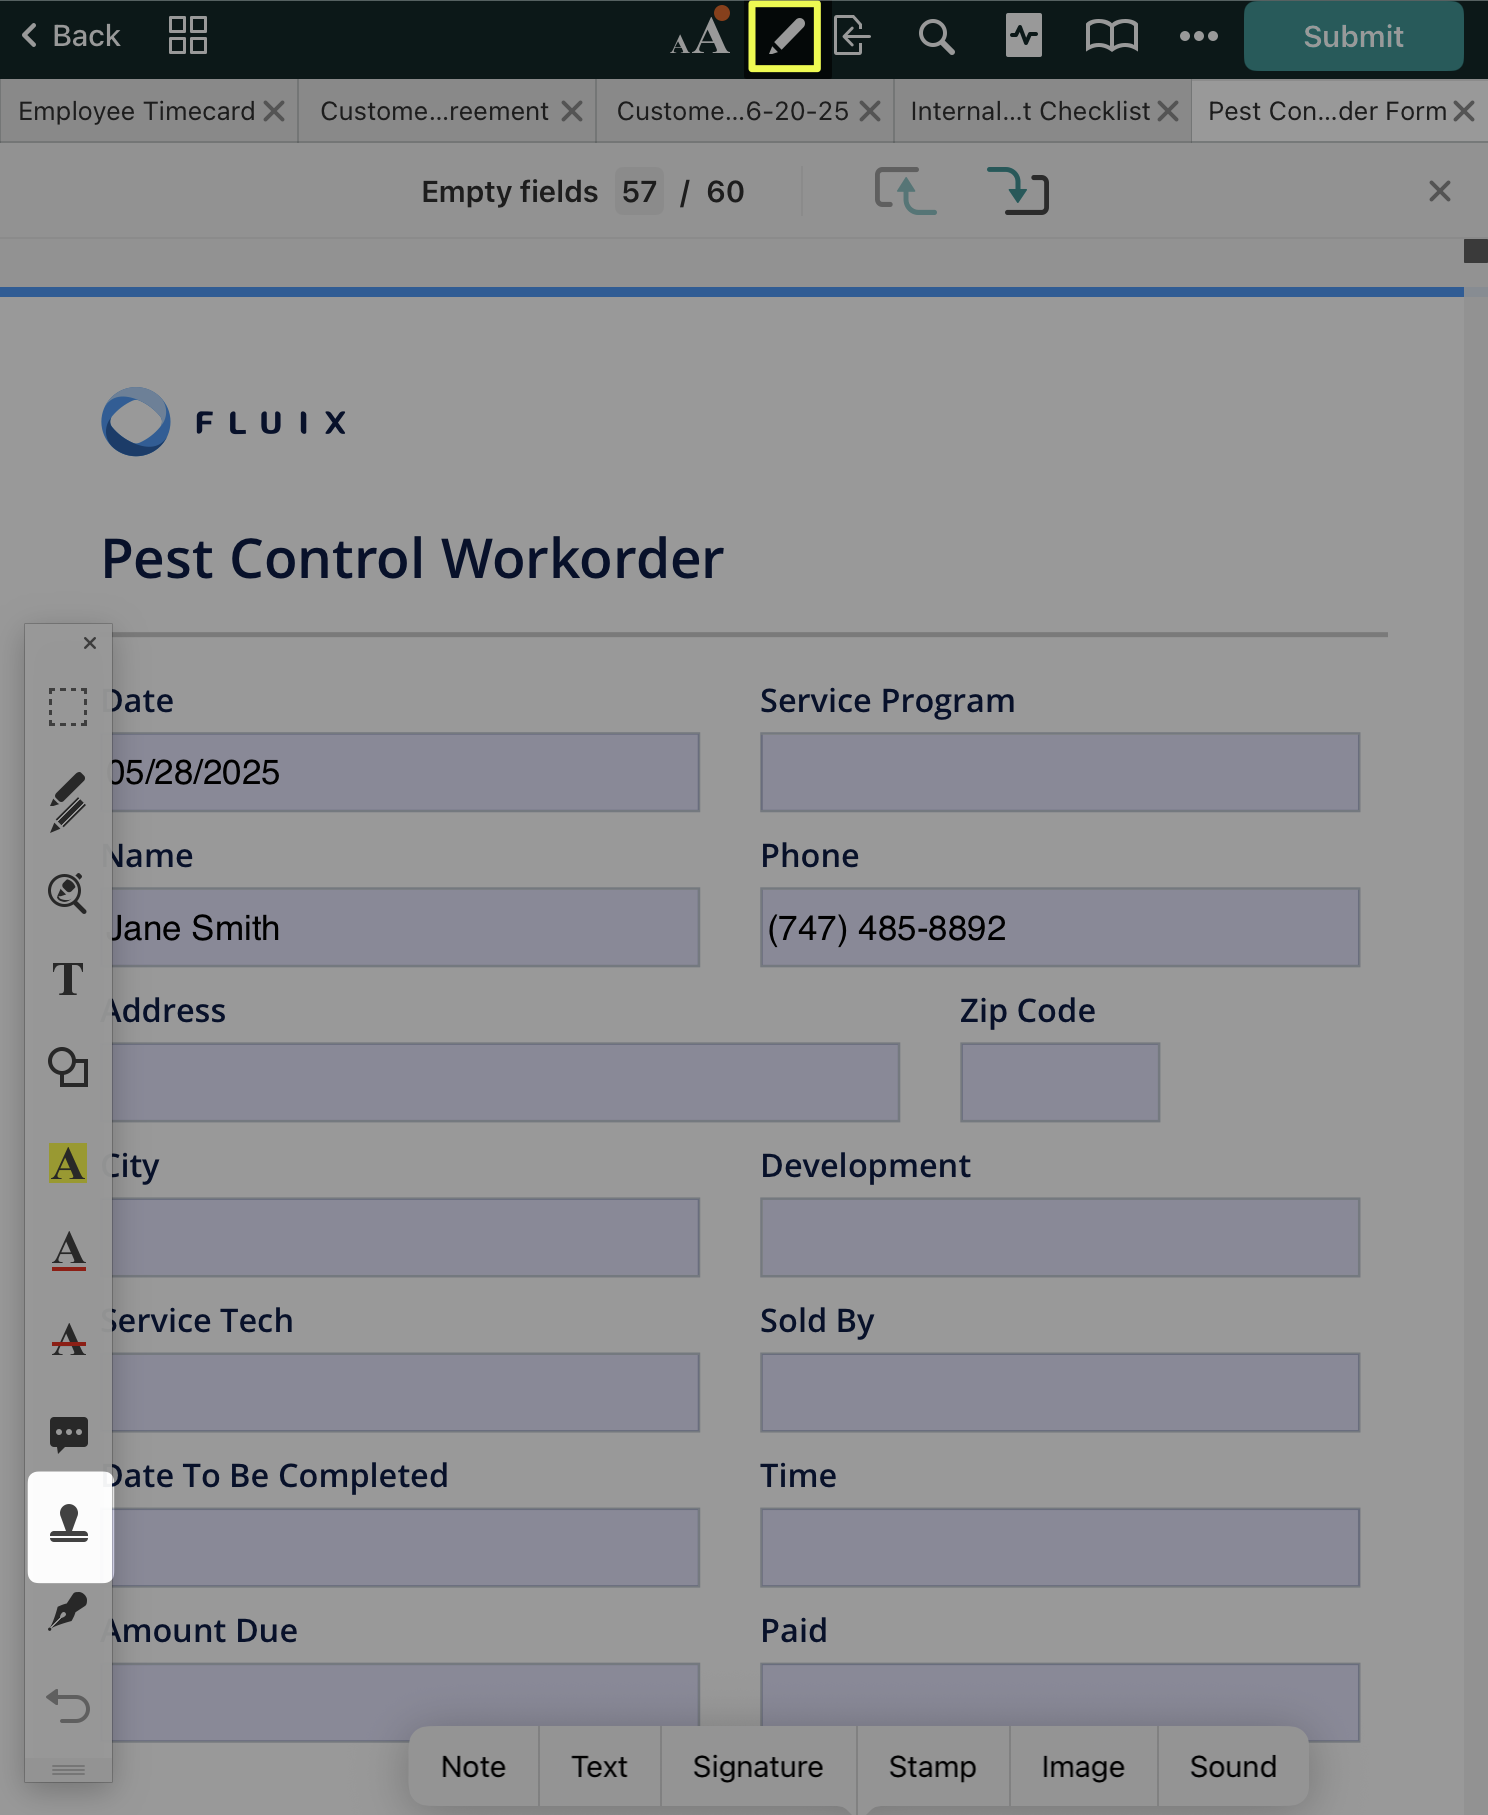
In the Fluix app, open the PDF you want to annotate and tap the icon at the top. On the left side of your screen, the annotation toolbar will appear. To hide the annotation toolbar, tap again.
Let’s dive deeper and check the tools you may use to work with your PDFs.
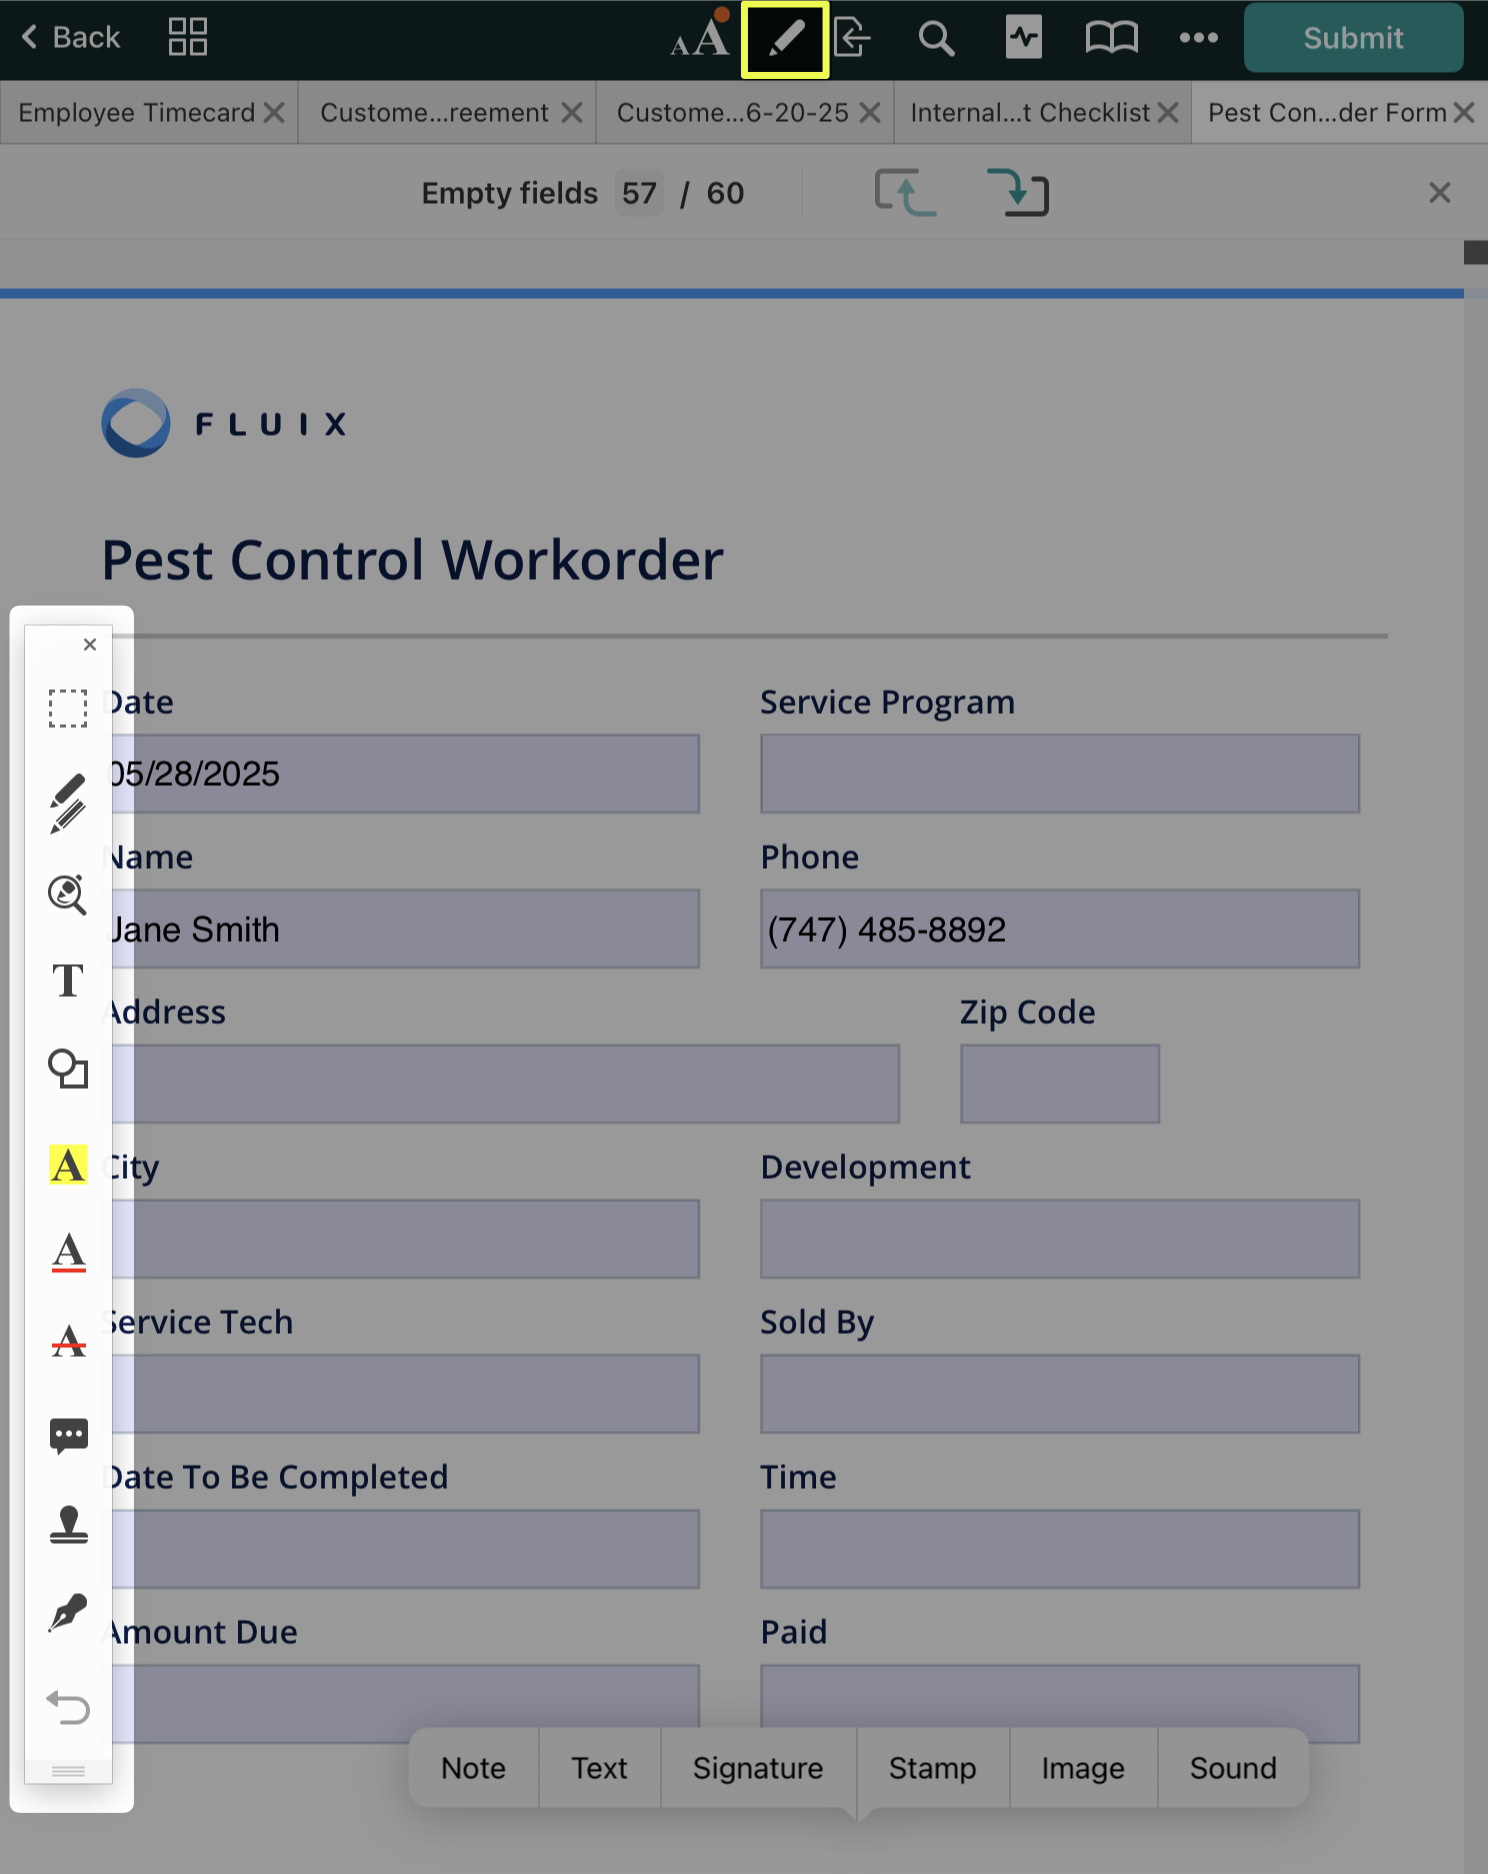
Draw, highlight, and sketch on your PDFs.
With the tool , you will get a selection of four configurable pencils: two thick and two thin. Each has adjustable color, opacity, and line thickness. Select one of the pencils or markers to start drawing on your PDF.
The eraser removes parts of the drawing and can be adjusted in size. The hand allows dragging the document around. When you have added the necessary annotations to your PDF, tap the green checkmark at the top of the toolbar to exit the selection.
Zoom writing mode on PDFs.
With the tool , you may access a zoom writing mode and select one of the pencils or markers to start drawing. You will get the two configurable pencils: one thick and one thin. Each has adjustable color, opacity, and line thickness.
The eraser is used to remove parts of the drawing and can be adjusted in size. The zoomed and full view can also be adjusted in size. Arrows help move the zoom window around.
When the document is close up, the pitch-to-zoom mode is activated automatically. It allows controlling the editable area with two adjustable screens at the top and bottom of the document.
Adjust your annotation property.
With the tool , you can adjust the annotation (object) colors, opacity, line thickness, and move, copy, or delete them.
Create a text note in your PDF.
The tool lets you add specific notes to your PDFs on the spot. Select a place in the PDF where you want to add text, type it, and feel free to move it by holding the note and then dragging it.
Add a shape element to your PDF.
Tap , tool to select a shape and add it to the PDF.
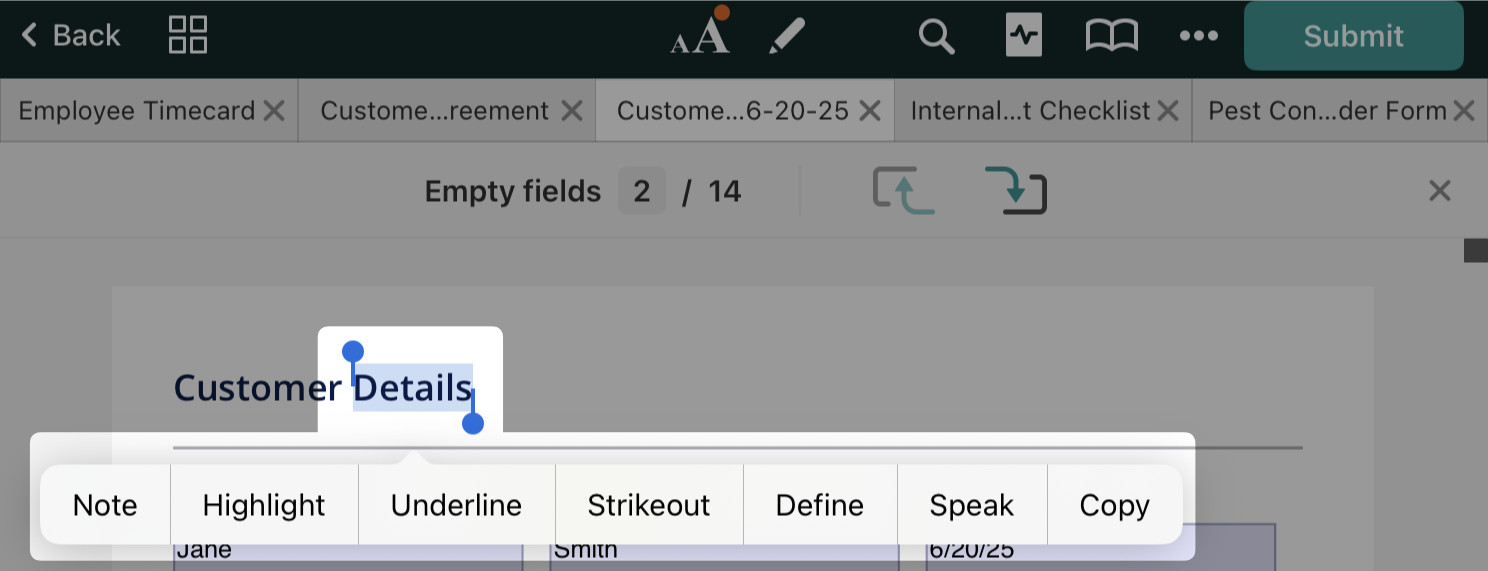
Highlight important text in your PDF
The tool will help you highlight the needed text in your form to draw more attention to it. To change the color of the highlight, tap and hold the icon . Pick ‘Color’ from the pop-up.
Underline text in your PDFs.
With the tool , you can easily underline text. To change the color of the underline, tap and hold , and pick ‘Color’ from the pop-up.
Strike out text in your PDFs if necessary.
With the tool , you may strike unnecessary data from your PDF. To change the color of the strike, tap and hold the tool and pick ‘Color’ from the pop-up.
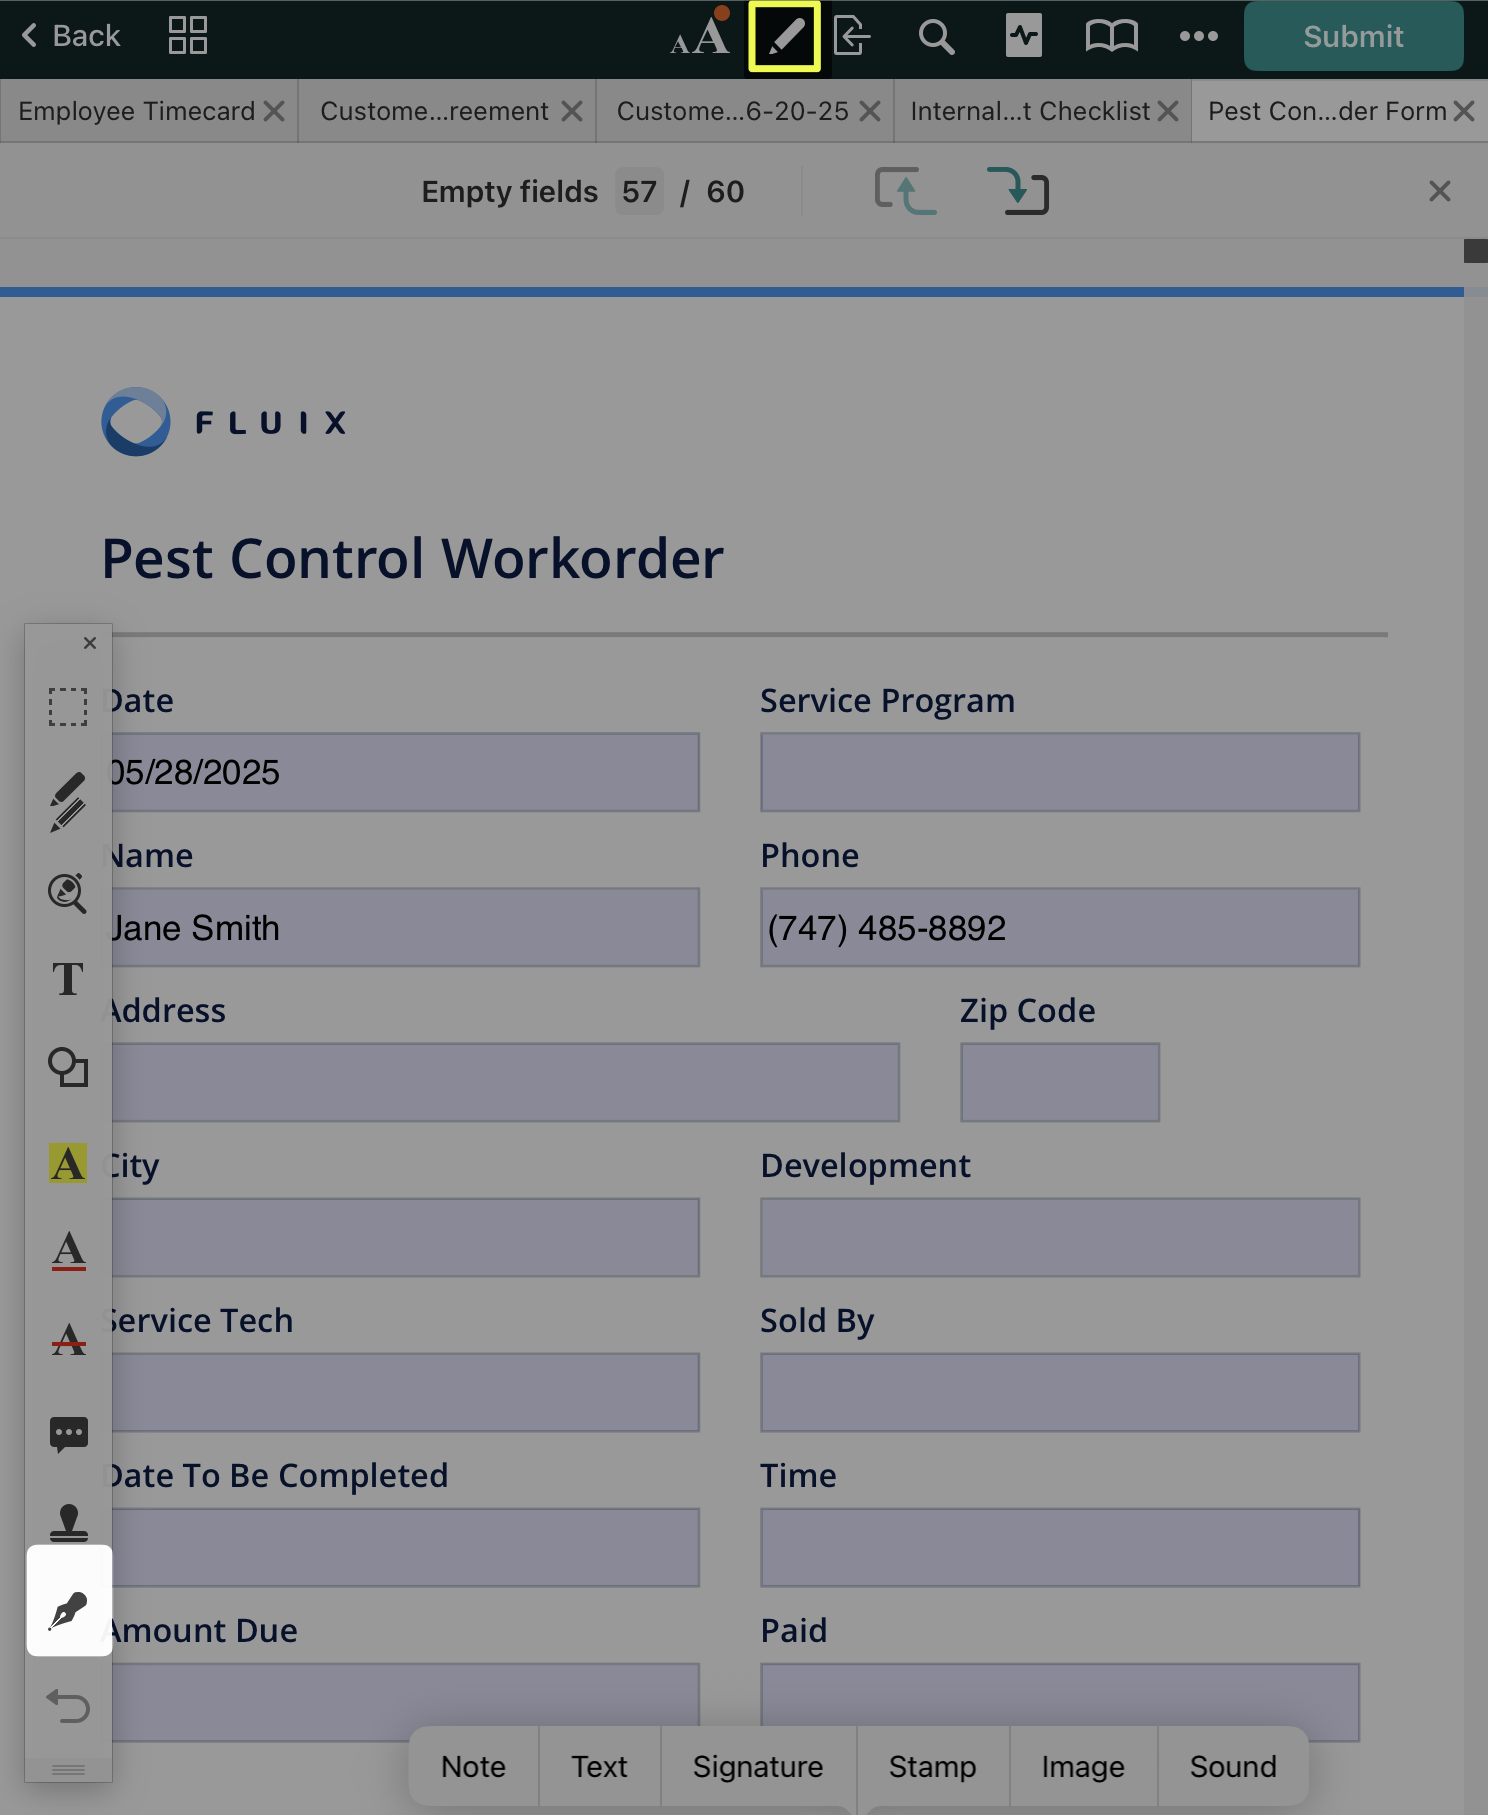
Create pop-up notes for your teammates.
With the tool , you can add a pop-up note that will be saved in the PDFs for your teammates working with the respective PDFs. Tap on the place in the PDF you’d like to add the note and type some text. You can move the pop-up note by holding it and then dragging it.
Add a standard or custom stamp to your PDFs.
Tap or select ‘Stamp’ from the tap and hold popup menu. Select a stamp from the ‘Standard’ list to add to your form.
To create a custom stamp, open the ‘Custom’ tab and tap the ‘+ ’.
Choose ‘Text Stamp’ to create a stamp with any text you’d like, as well as the current date and time.
Choose ‘Image Stamp’ to create a stamp of an image from your iPad’s Camera Roll.
Manage your signatures easily.
With the tool , you can add a signature to the document and edit it accordingly in the dedicated section. You can also draw a signature to be included in the document. Up to four signatures can be stored in the app and adjusted in color and line thickness, or removed at will.
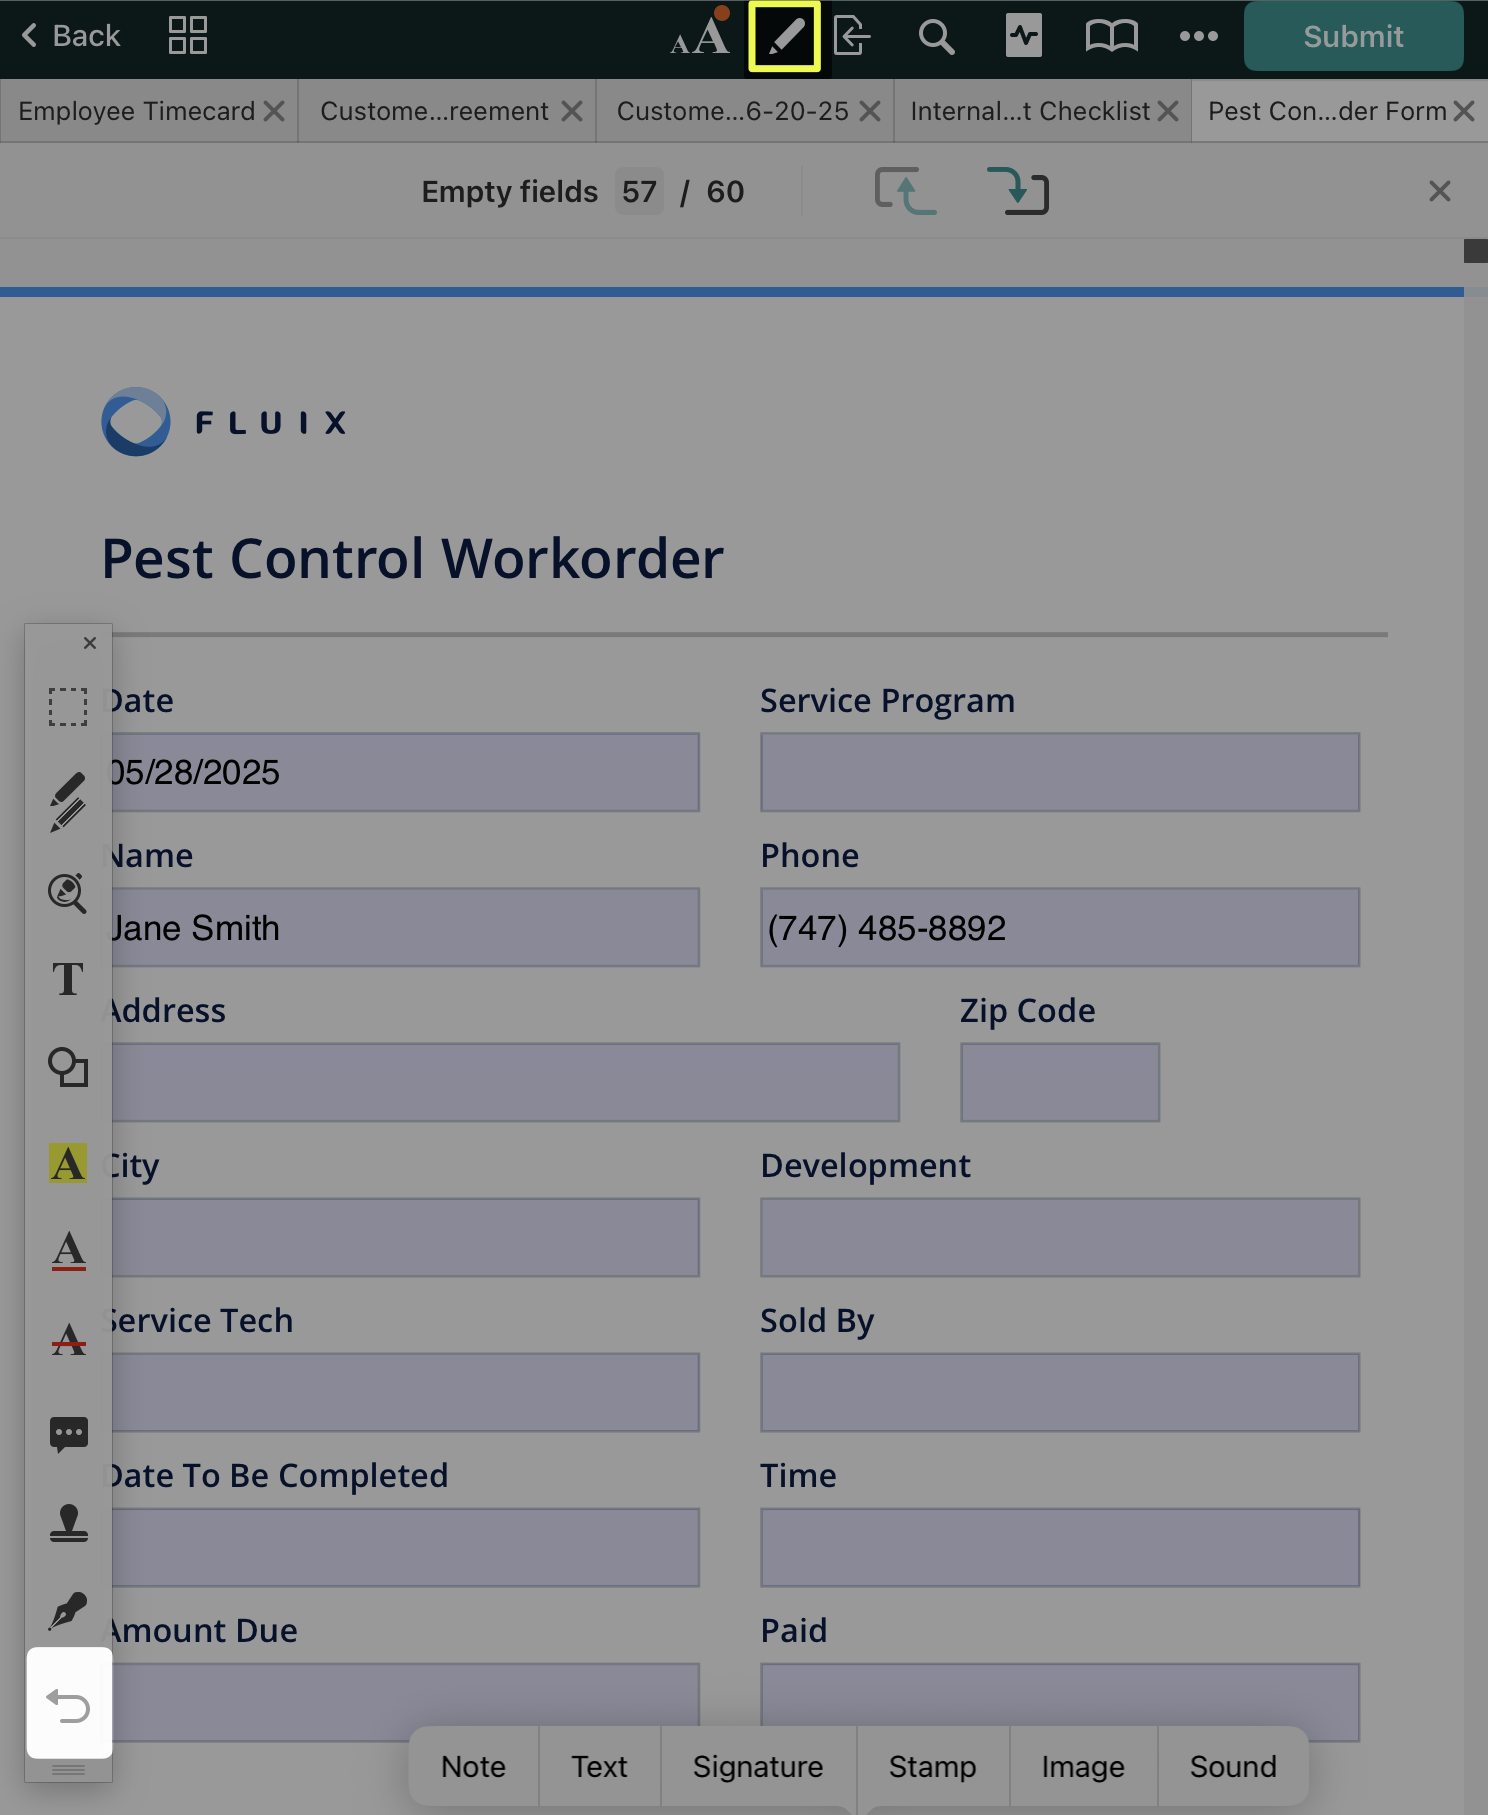
Undo or redo your annotations.
Tap the tool to undo the previous annotation. To redo your annotations, tap and hold the icorn.
Additional annotation options.
Another way you can add annotations to your PDFs is by tapping and holding on the document to display a pop-up menu that shows select annotation tools:
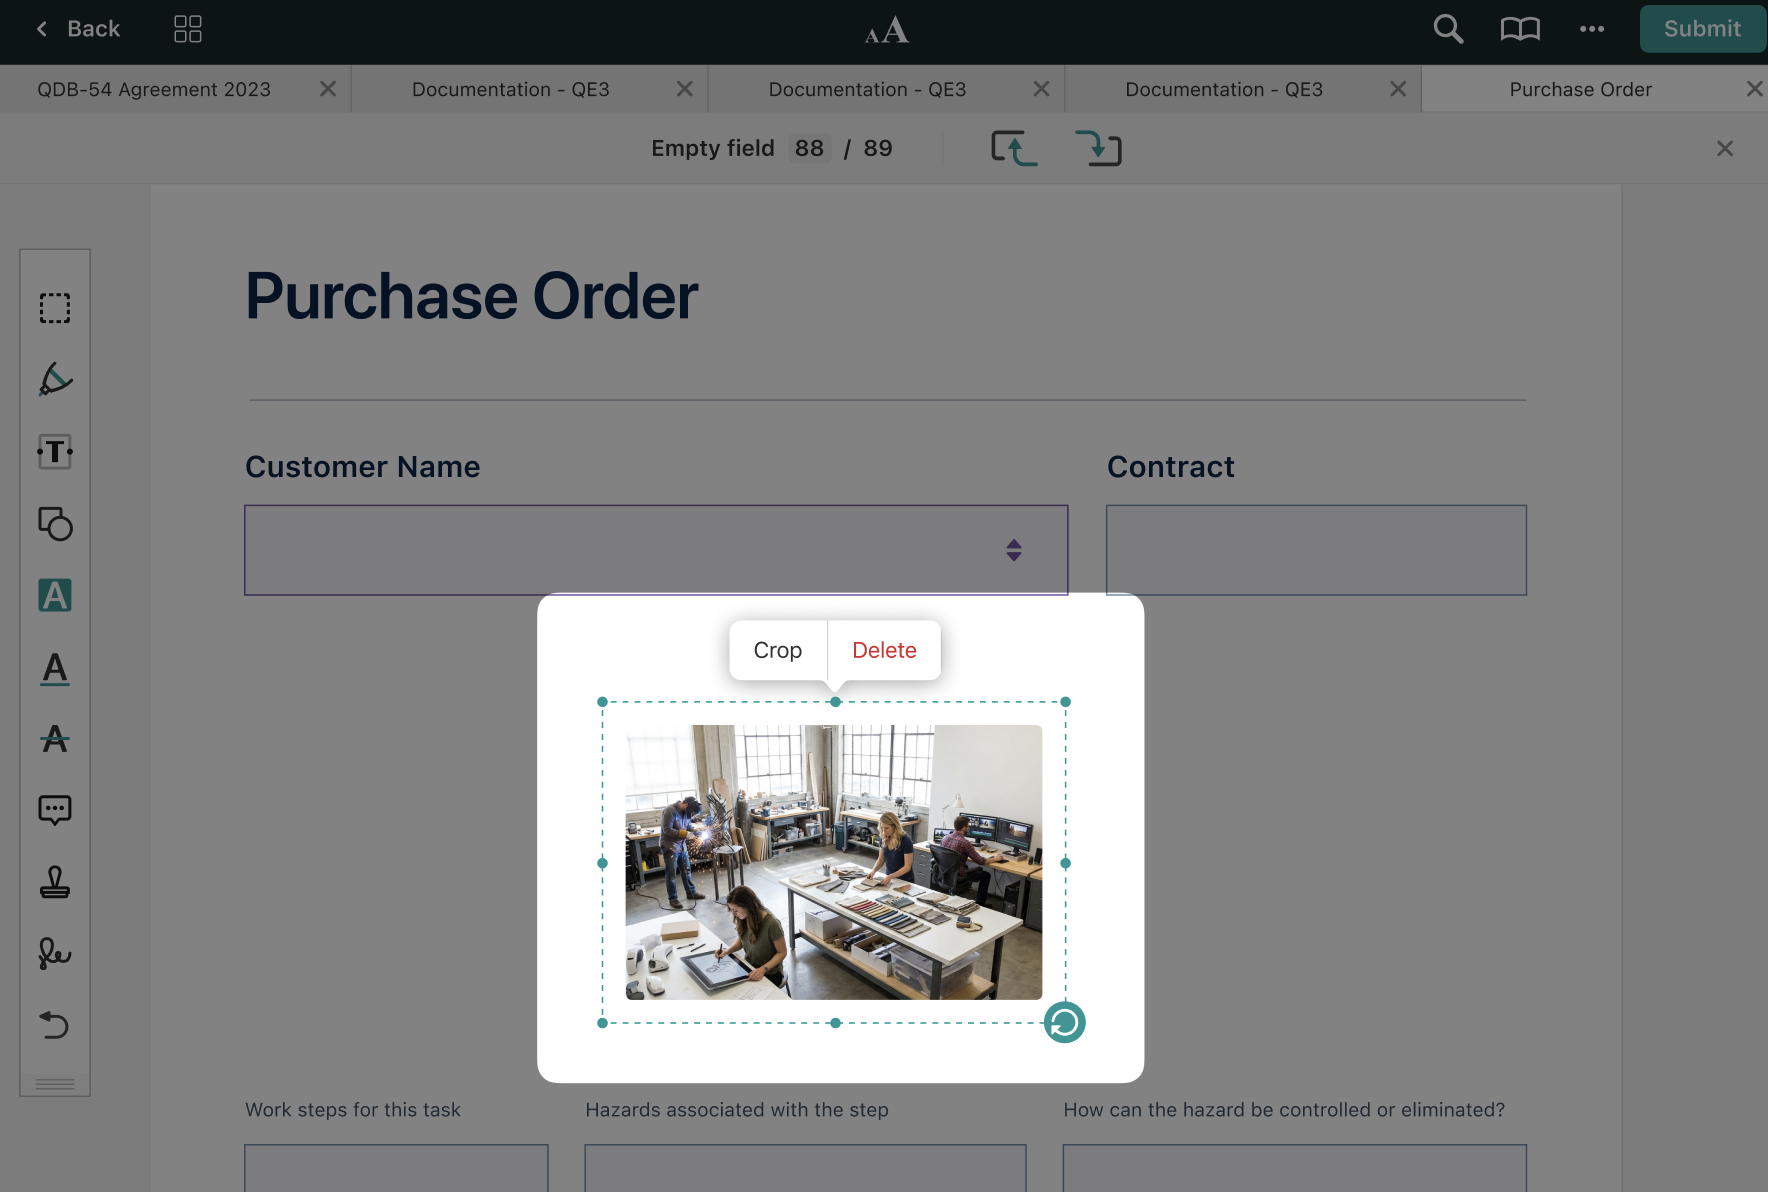
Add an image option. Select ‘Image’ from the pop-up menu, and then choose a picture from your iPad’s Camera Roll or take a photo. Tap on the picture to move, crop, or delete it. Tap and hold on the image to scale it.
The crop functionality is available for both Photos and Stamps.
Note: You need to have your camera enabled in iPad Settings > Privacy & Security > Camera > Fluix as follows:
Add an audio note. Tap and hold on the PDF to create an audio note with ‘Sound’ option.
If you tap and hold on the text, a pop-up menu with text-specific annotation tools will appear.
Feel free to contact us at support@fluix.io if you have any questions or comments.
Was this article helpful?
Thanks for your feedback!
Oops, something went wrong. Please, try again later.
Thank you!
What details or examples would have made this article more helpful for you? We appreciate your insights!
To sign a form, tap and hold on any place in the document to display the pop-up menu, or tap icon in the annotation toolbar.
Then select ‘My Signature’ or ‘Customer Signature’:
When ‘My Signature’ is selected, a previously saved signature will be placed on the document.
When ‘Customer Signature’ is selected, a signature can be created for one-time use. This signature is not saved within Fluix and cannot be copied to another document.
Please note: this feature is active only if configured by your company’s Fluix account admin.
After signing, you can make the whole document, or part of it, read-only so that the signature cannot be deleted.
To edit a signature, tap on it once to:
Change its color,
Change its line width,
Delete it.
To move or scale a signature, just tap and hold it.
Was this article helpful?
Thanks for your feedback!
Oops, something went wrong. Please, try again later.
Thank you!
What details or examples would have made this article more helpful for you? We appreciate your insights!
To send a document for online signing, please follow the next steps:
Log in to Fluix on your iPad, iPhone, or web browser.
Open a document to be signed, fill it out, and tap the Submit button in the top right-hand side corner.
Only documents containing a valid digital signature field can be sent for signing. If such a field is not present in the form, you won’t be able to email the document for signature, and you’ll see the error message: ‘There is no signature field in this document, hence the recipient won’t be able to sign it and return to you afterward.’
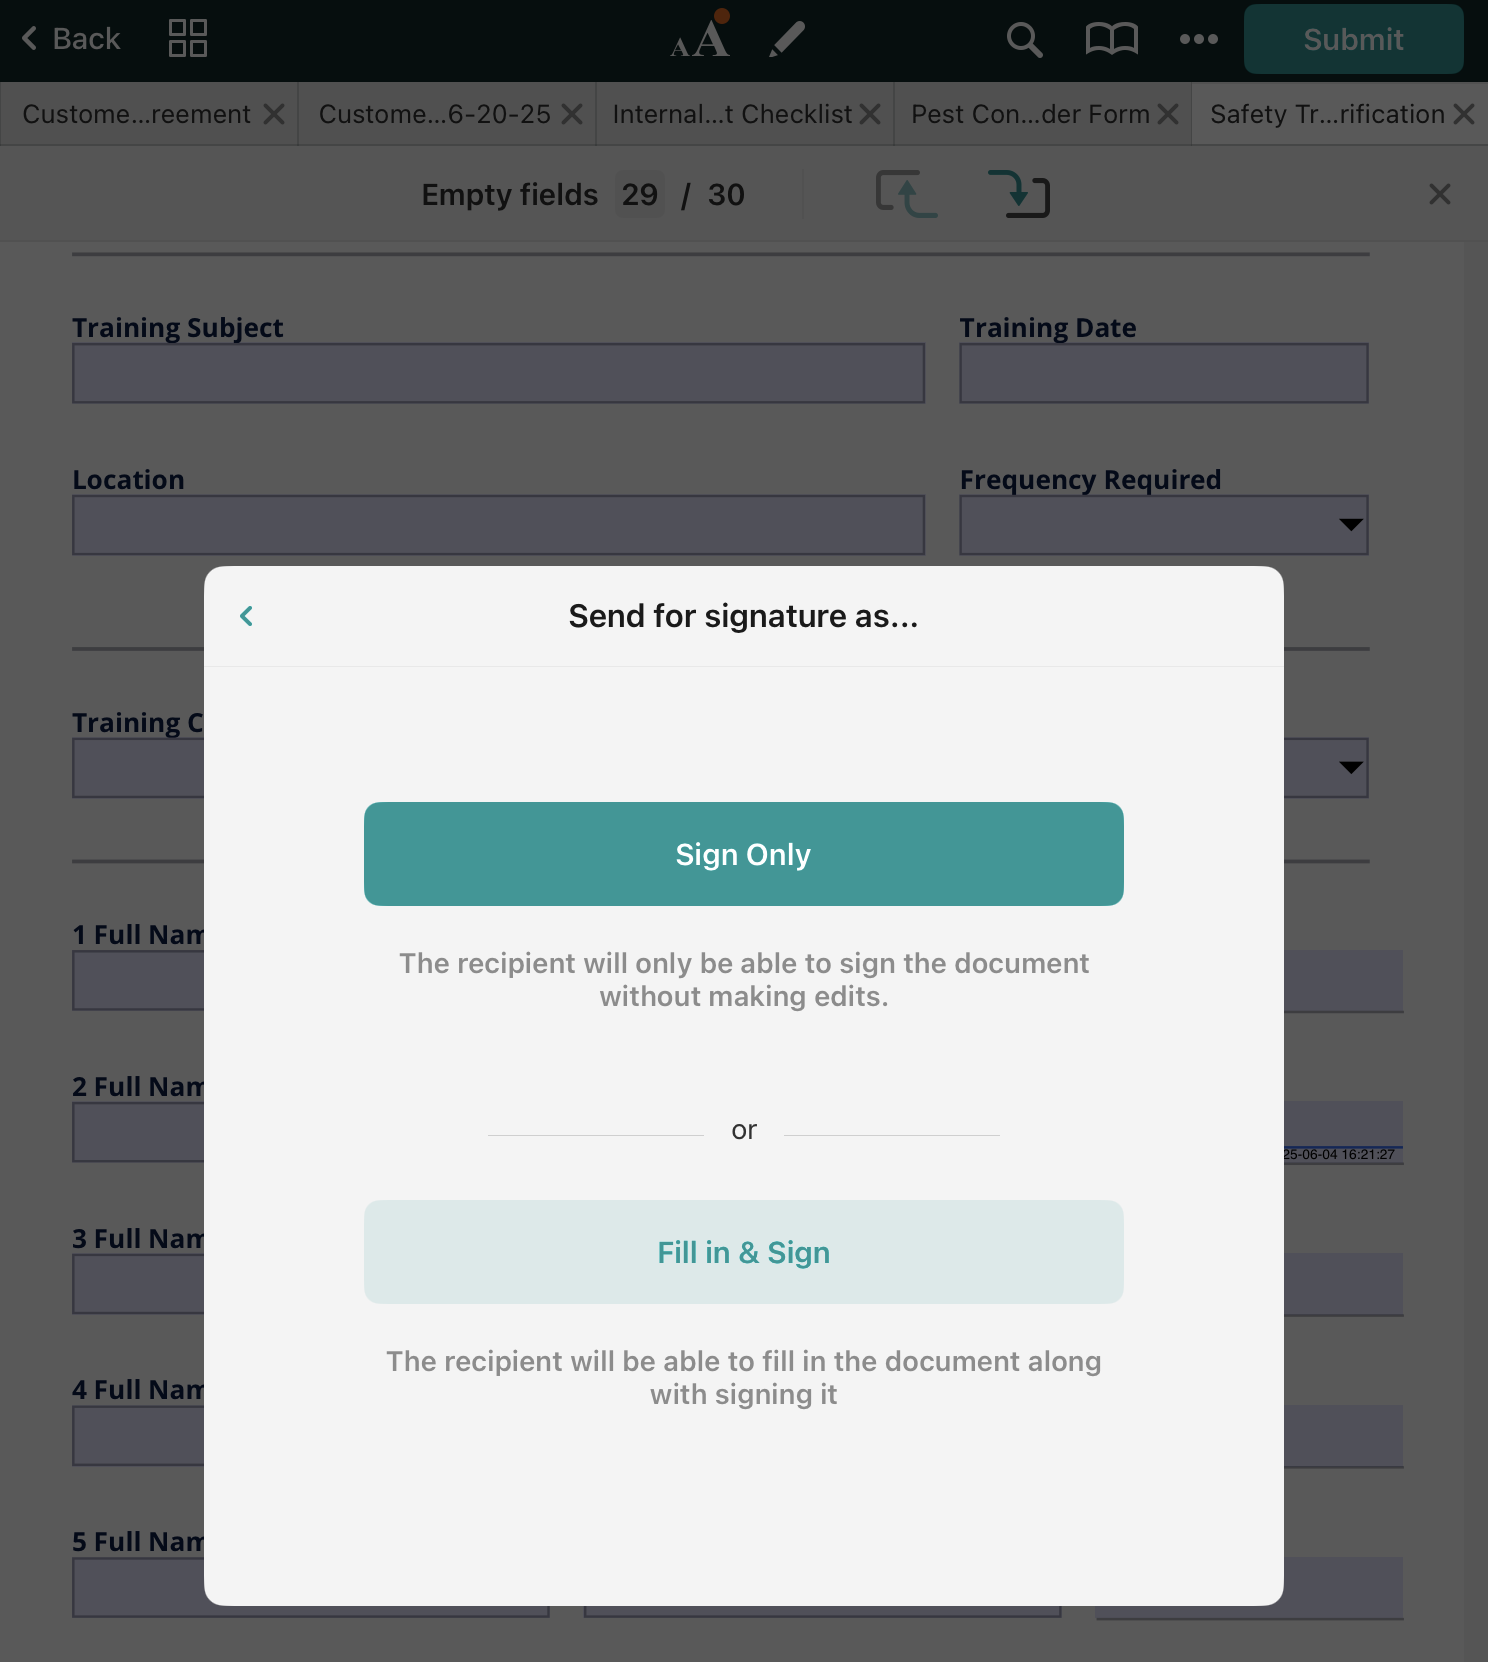
In case a signer has only to sign a document and is not expected to make any changes, choose Sign Only to restrict editing of the document. If you want the signer to fill out other fields, select Fill in & Sign.
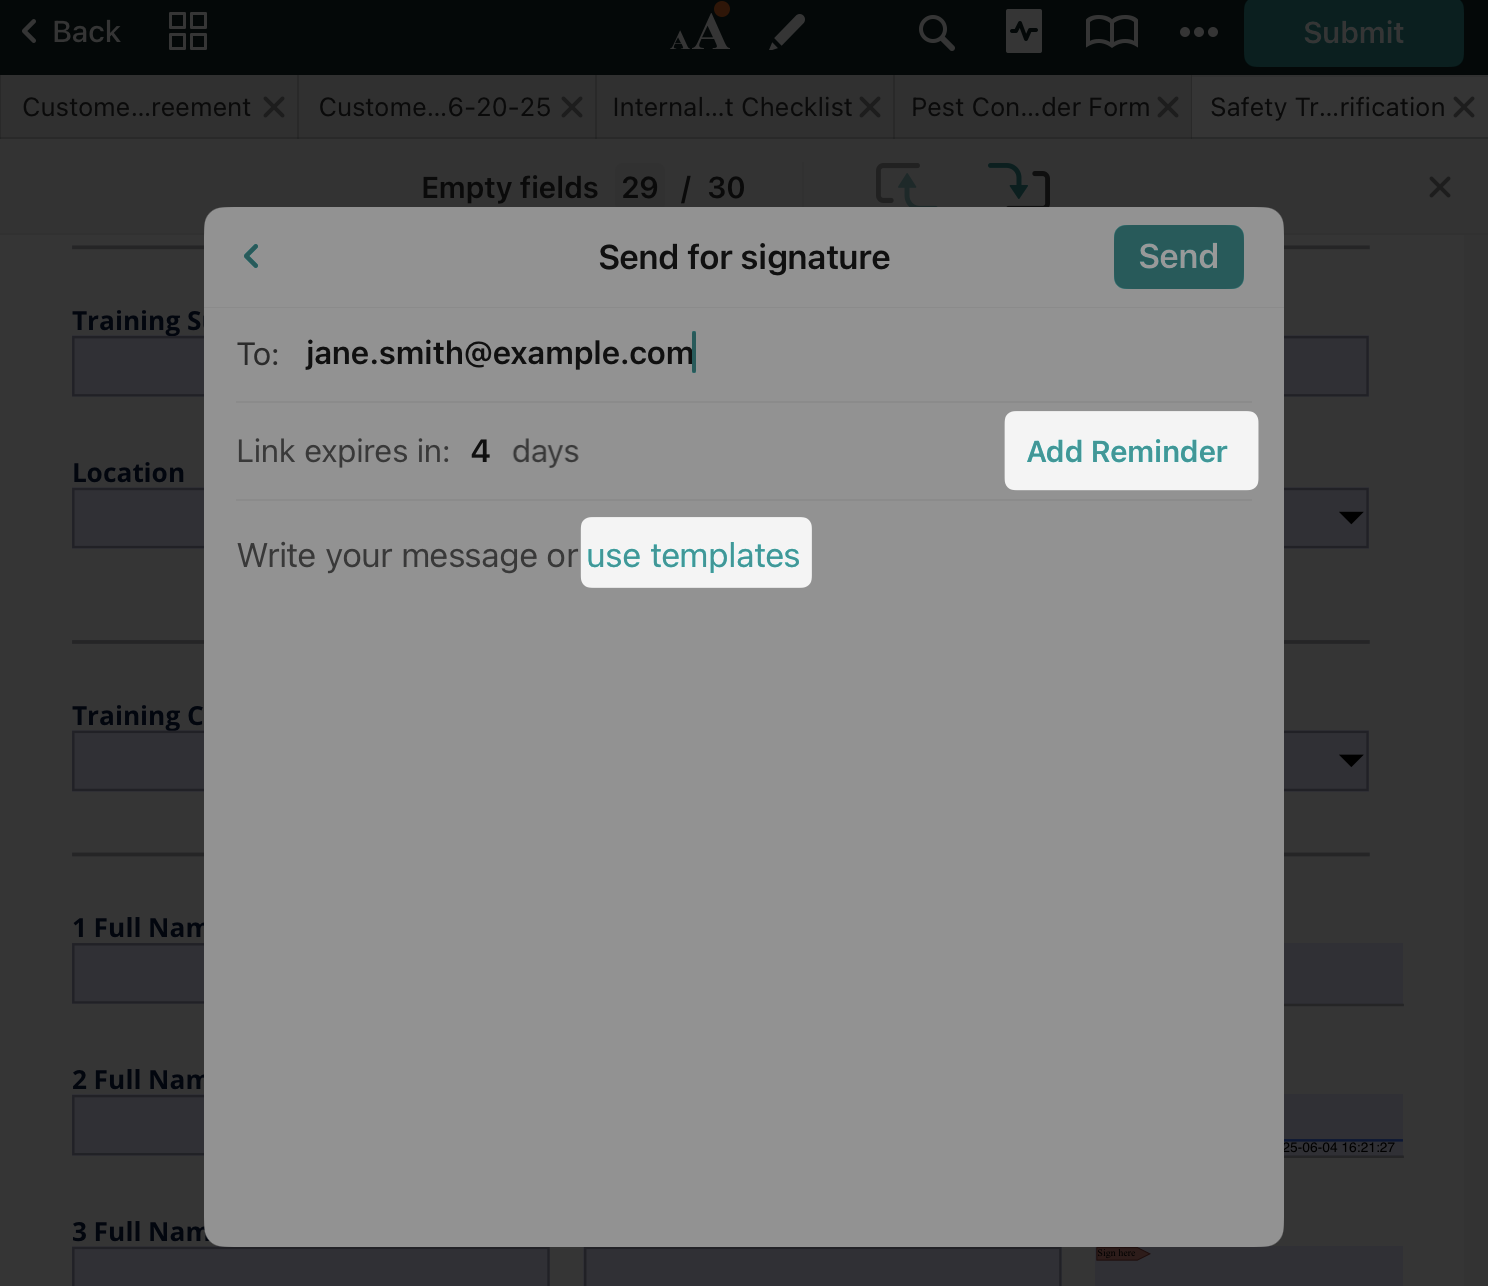
In the popup window, enter the signer’s email address. Please note that only one recipient can be added per document. If you made an error in the email address, upon every next entering of address the dropdown list will include it. To avoid that, you can delete it by swiping left on the address.
The signer will receive an email with the link to the document to be signed. By default, the link is available for 4 days. One day prior to expiration, the reminder will be sent to the signer. However, you can add a custom period for reminders by tapping on AddReminder.
You can also add a personal comment to accompany the document. If you send similar comments to your customers, you can save them to Templates and use them each time you send a document. Please note that the templates are saved on the device locally and are not synced between your devices used to work with Fluix.
Tap Send.
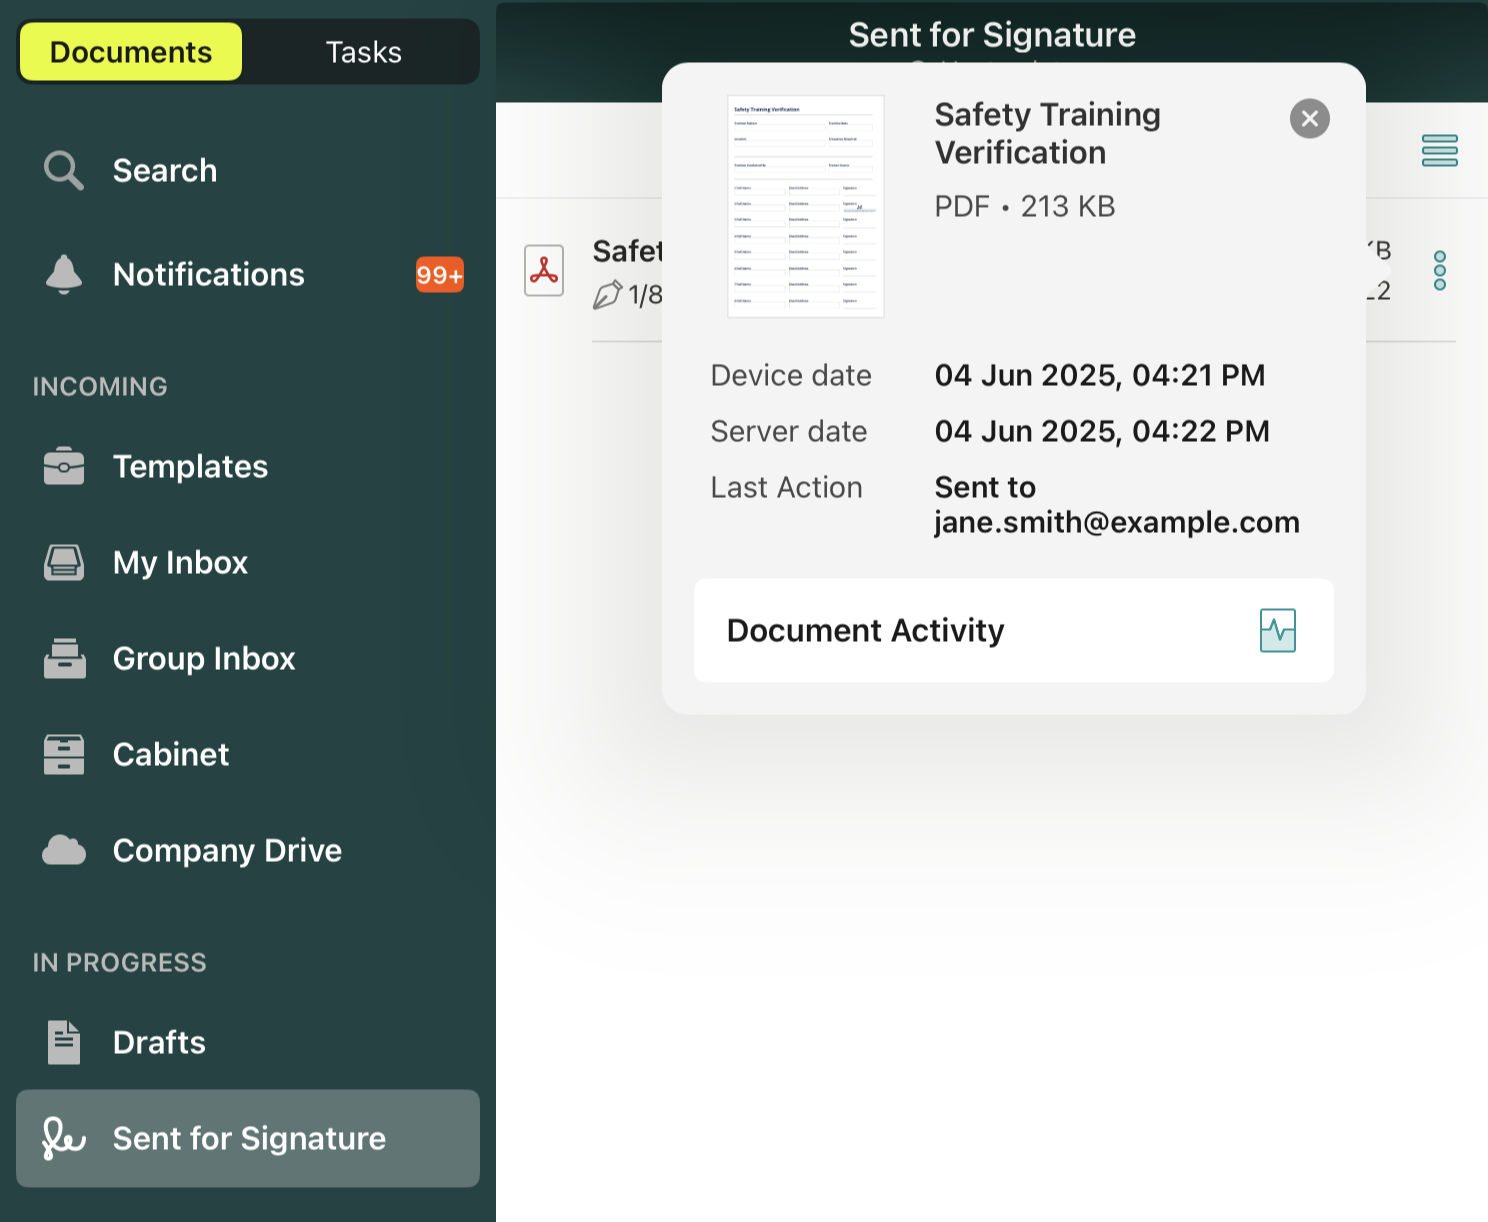
After the document is dispatched, you will see a new tab, Sent for Signature, where a copy of the sent file is stored:
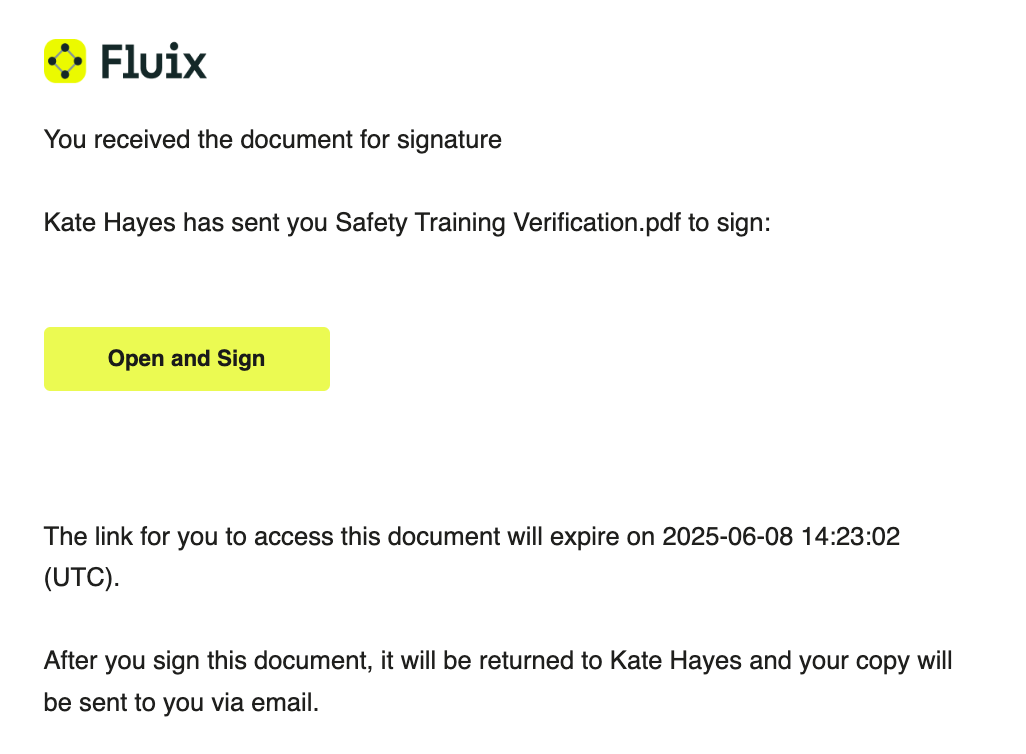
A signer will receive the following email about a document that needs to be signed:
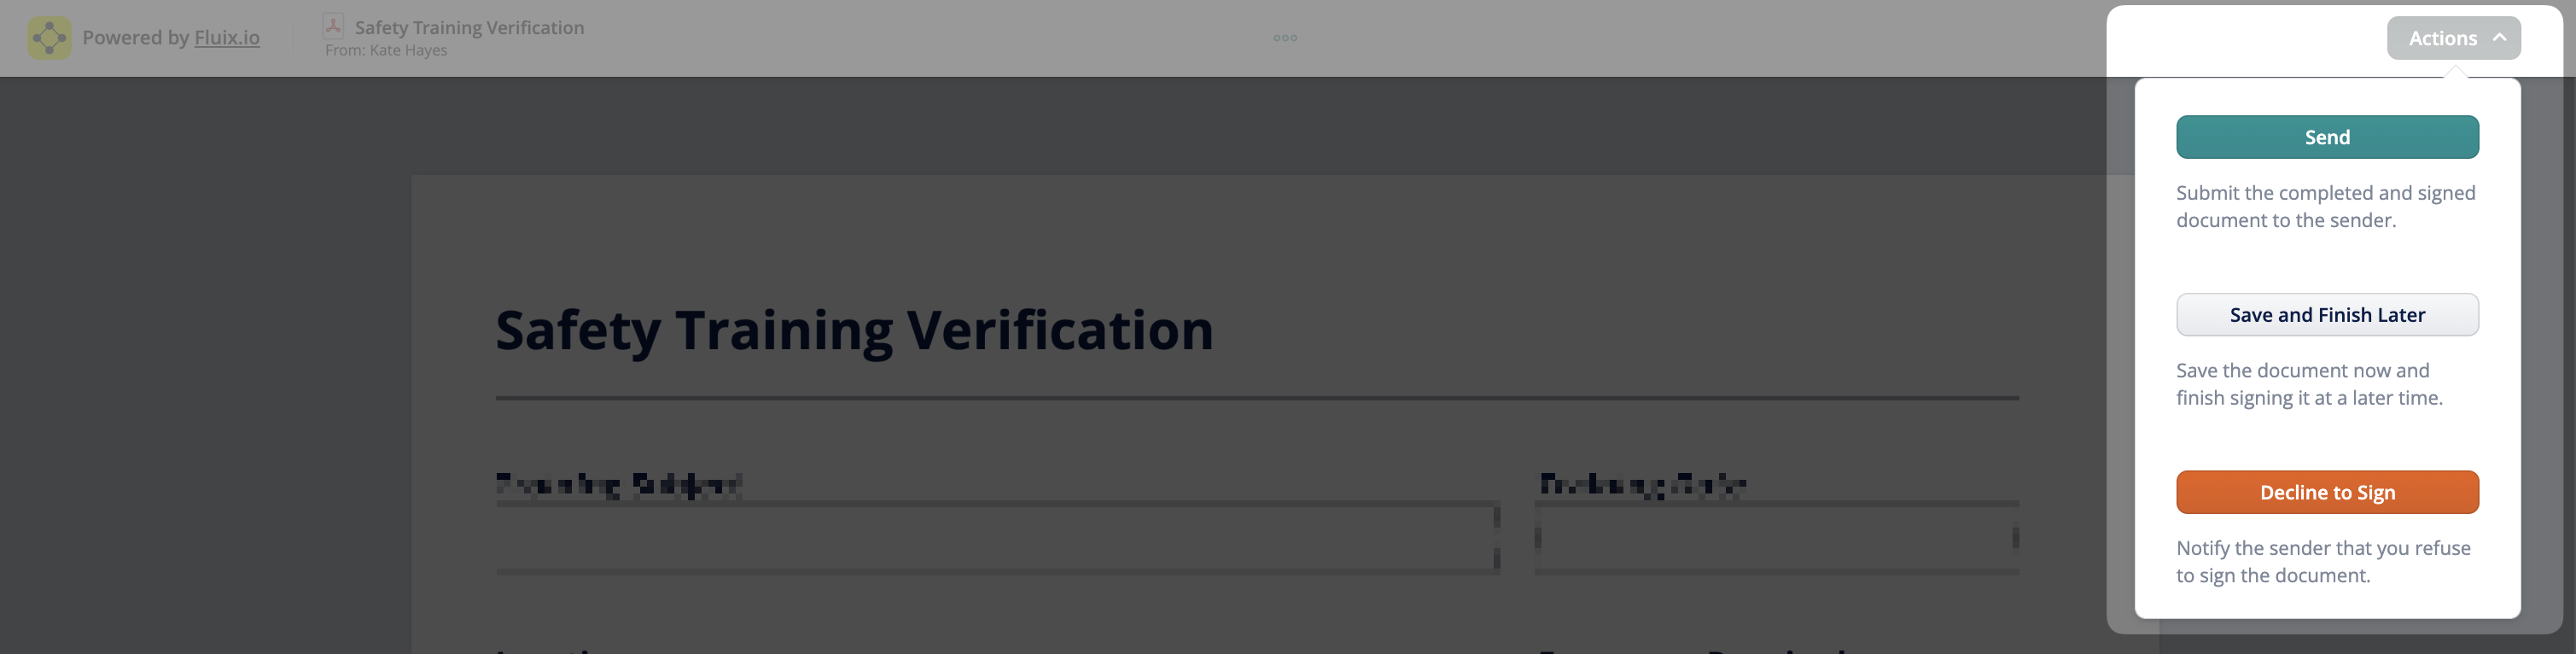
Once the signer clicks Open and Sign, they can open the document in the browser on any device. To sign a document, the signer taps on the respective signature field in the form and draws their signature. From there, the signer has three choices under Actions: Send the document back to the sender, Save and Finish Later, or Decline to Sign.
After the document has been successfully signed, a signed version is returned to Fluix and marked as signed in My Inbox of the user who initially sent the document for signature.
The confirmation email is sent to both the signer and the sender of the document.
If the signer declines signing the document, it is pushed back to the sender’s My Inbox and marked as Declined.
If the signer didn’t have a chance to sign and return the document before the link in the email expired, the document will be returned to the sender’s app’s My Inbox section, with the status Expired displayed under the three dots under Document Activity. In that case, a user can send the document for signature once again.
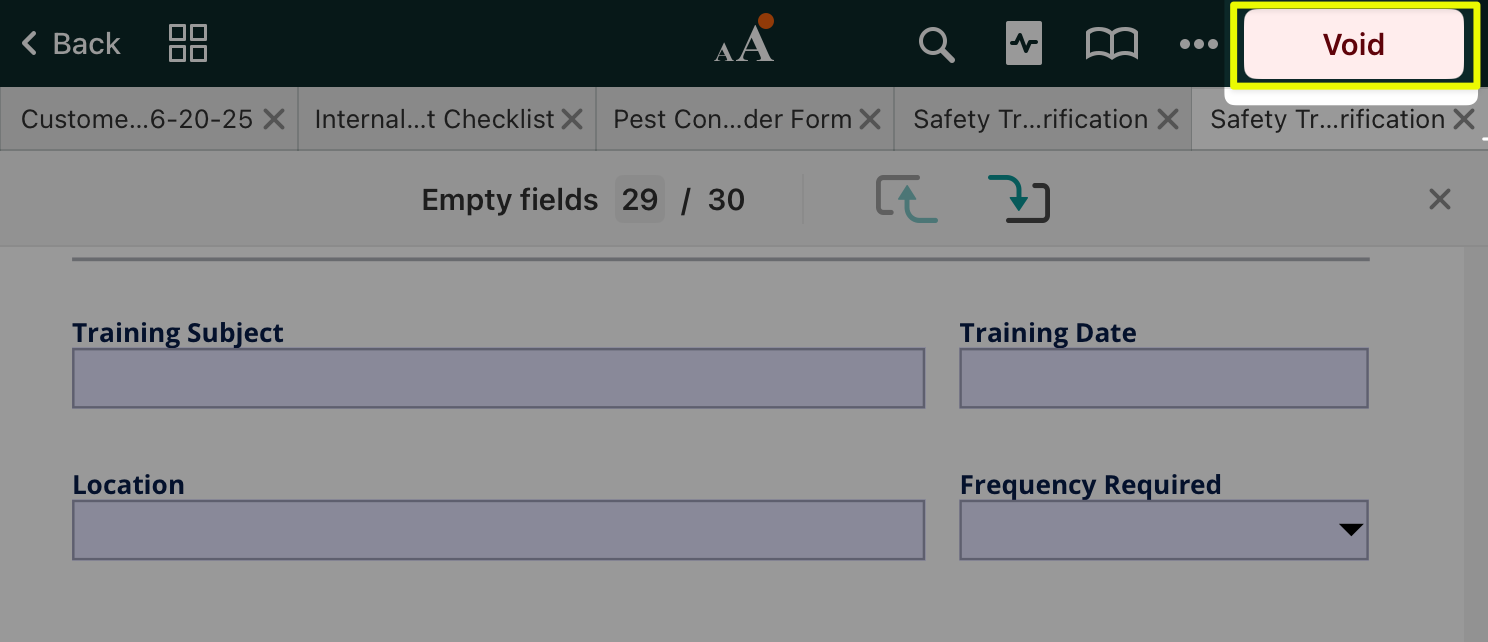
Document retraction
If a document needs to be retracted, proceed to the Sent for Signature section -> select the file -> tapVoid:
The admins can also void the documents from the Admin Portal, in the Document Status section. The retracted file will no longer be available for the signer and will appear in the sender’s My Inbox section.
Continue with signed documents in the workflow
Once the document returns to the sender in the sender’s My Inbox section, it can be sent further as per the pre-configured workflow rule: emailed to other participants of the workflow, uploaded to company storage, etc. Once the document is submitted to its final destination, it will land in the Completed tab on the device.
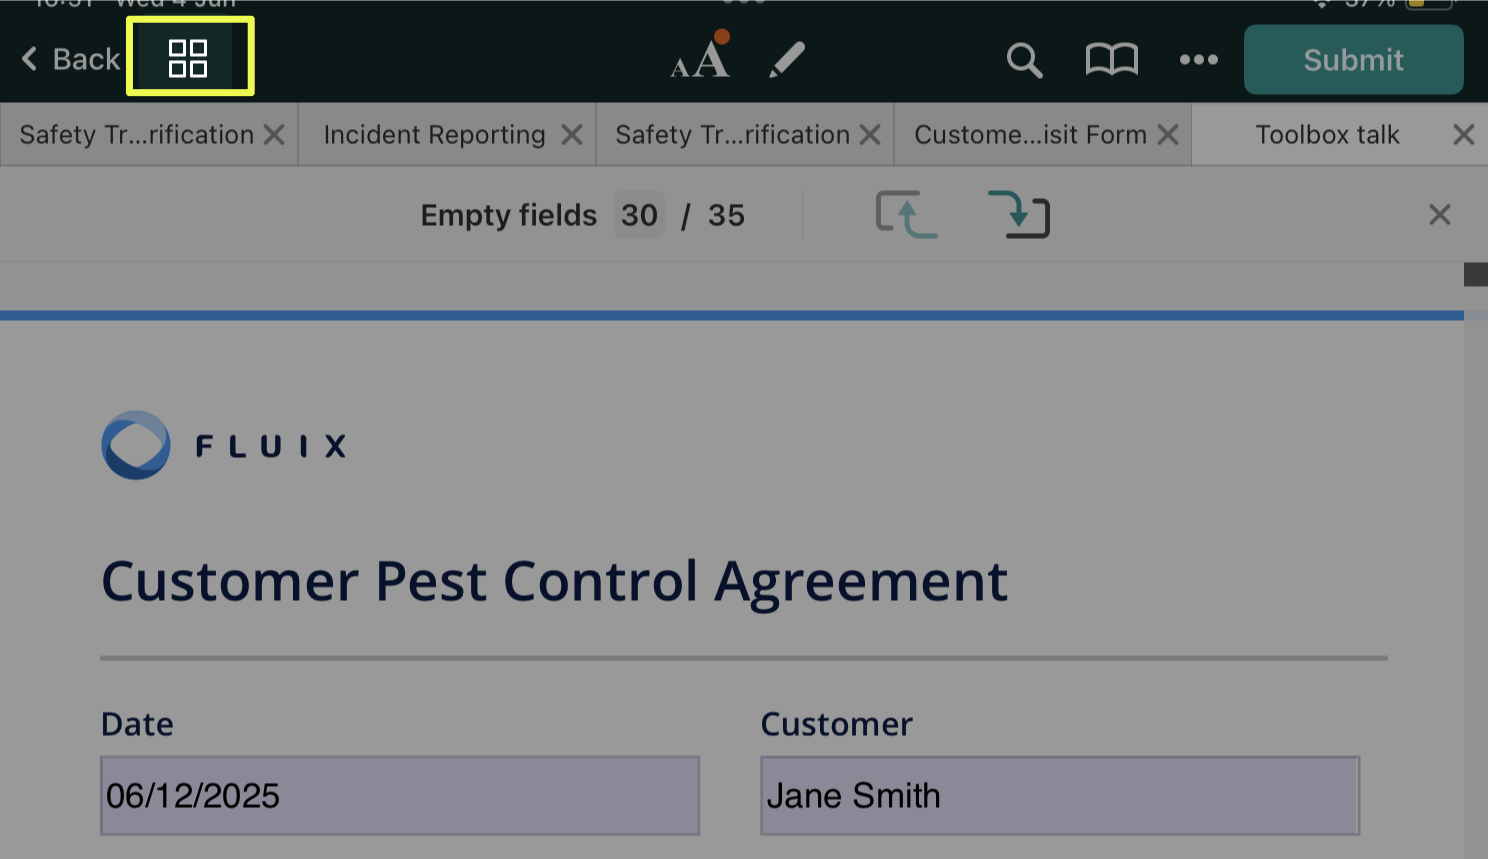
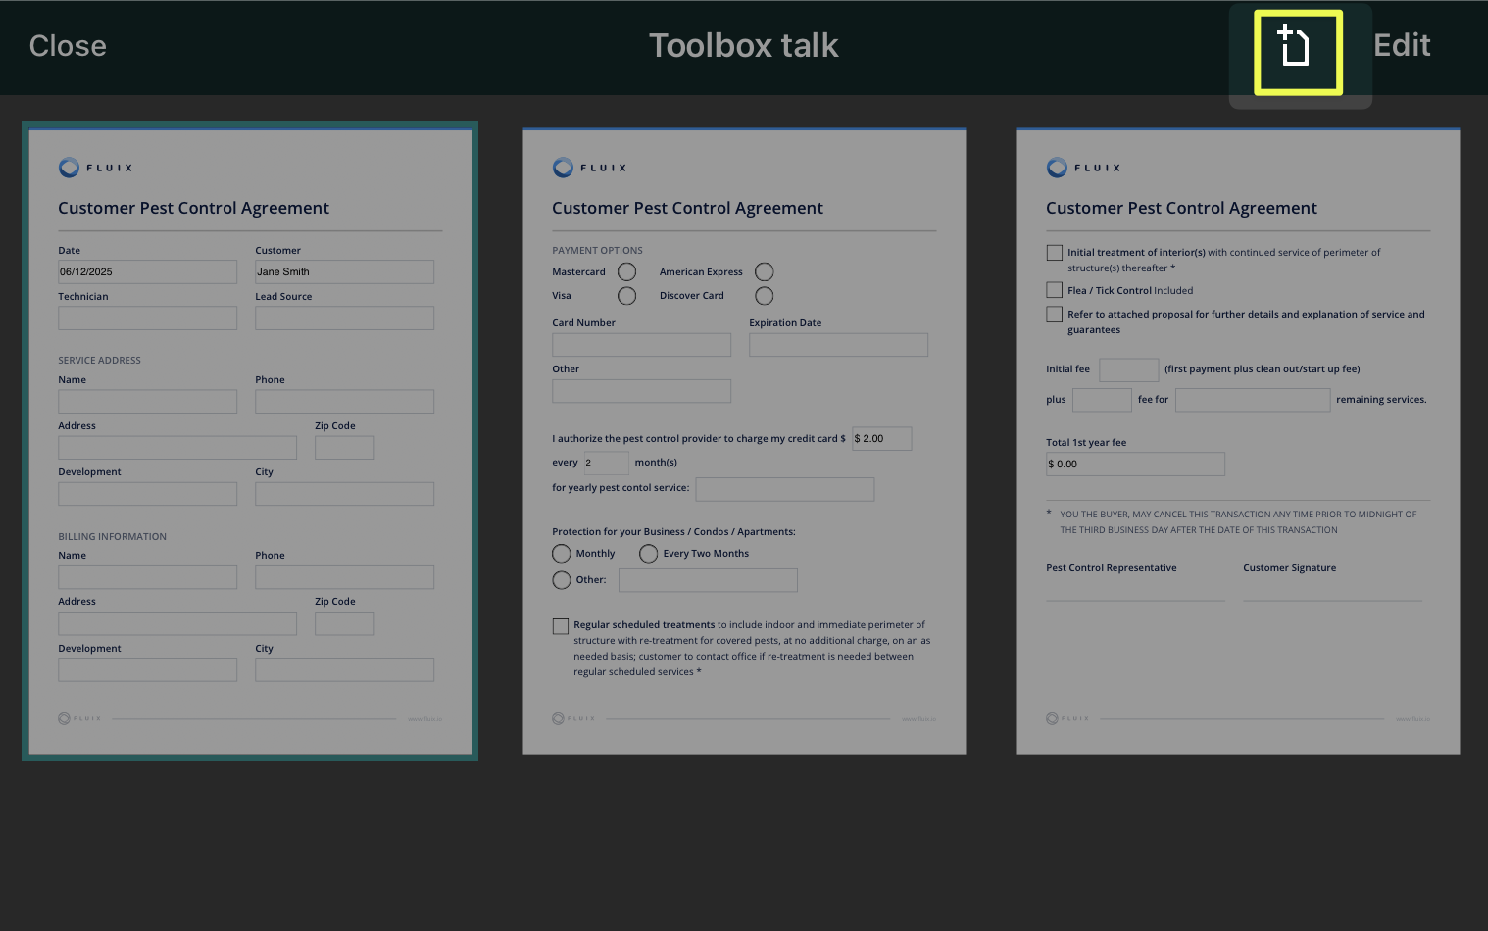
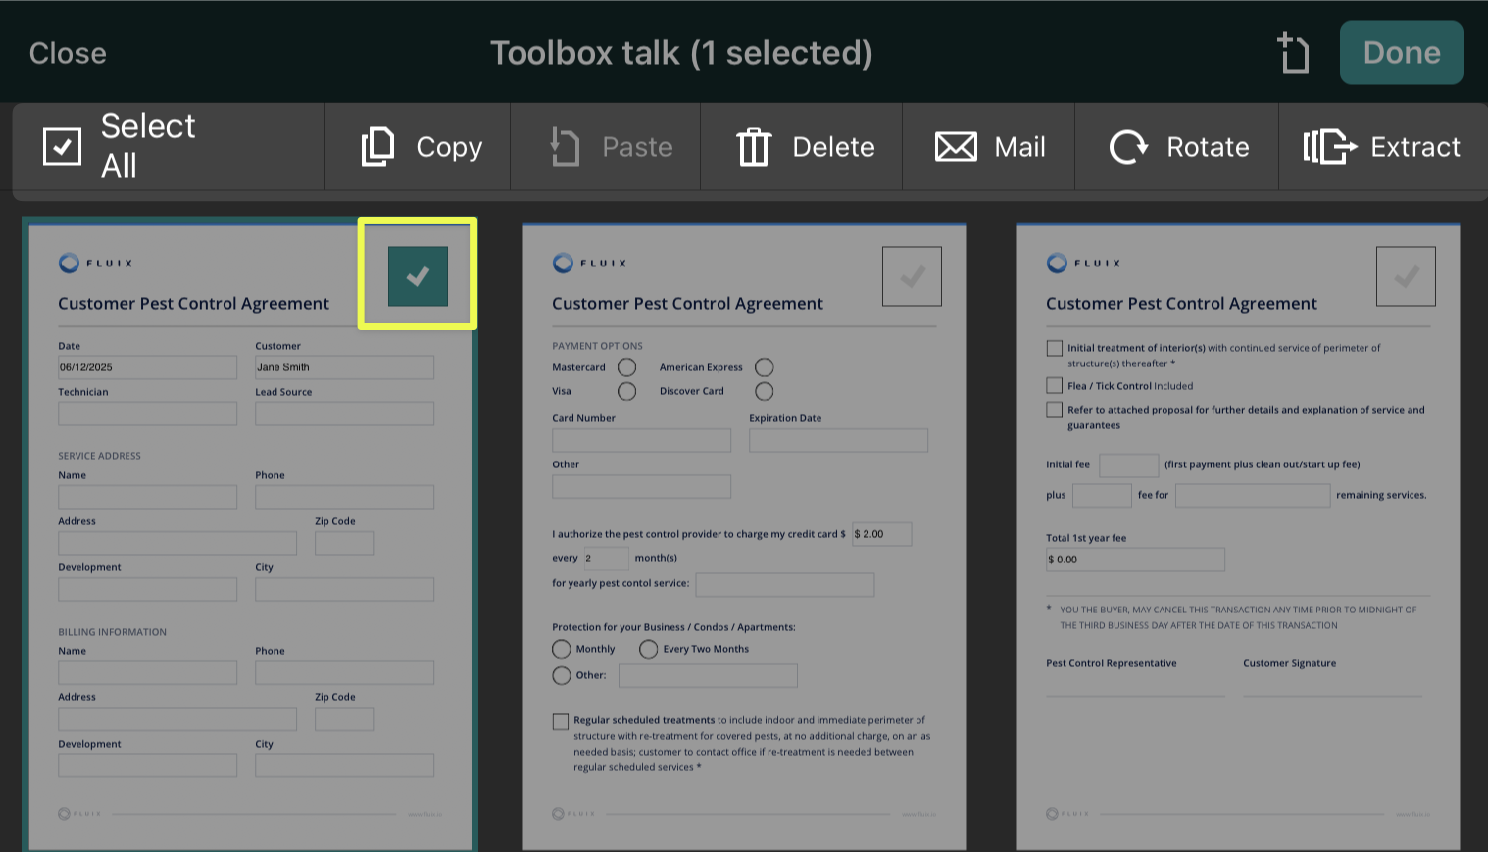
You can check all the pages of a PDF as thumbnails by tapping on the main toolbar:
In this view, you can also do the following actions with your file:
Navigate to a page. Tap on the thumbnail of the page you want to check.
Add a page to the PDF. Tap to add a new empty page.
Move a page within the PDF. Tap ‘Edit’ in the top right corner, then tap and hold on the page, and drag it to the new location in the PDF.
Additional ways to edit your PDF
Once you tap ‘Edit’ in view mode, you will see a panel with a list of actions you can take with the selected PDF. For example:
Copy a page to the clipboard. Tap ‘Edit’, select the page, and tap ‘Copy.’
Paste a page from the clipboard. Tap ‘Edit’ and then tap ‘Paste.’ Drag the white sheet to the place in the PDF where you want to paste the page and tap it.
Delete a page from the PDF. Tap ‘Edit’, then select the page or pages you want to delete. Tap ‘Delete.’
Rotate a page in the PDF. Tap ‘Edit,’ then select the page or pages you want to rotate. Tap ‘Rotate.’ You can also rotate a page by selecting its thumbnail, then tapping and holding with two fingers to rotate.
E-mail a page or multiple pages. Tap ‘Edit’, then select the page or pages you want to mail. Tap ‘Mail.’
Please note: this feature is active only if configured by your company’s Fluix account admin.
Extract a page from the PDF. Tap ‘Edit’, then select the page or pages you want to extract. Tap ‘Extract’ to create a new document with those selected pages and save.
Feel free to contact us at support@fluix.io if you have any questions or comments.
Was this article helpful?
Thanks for your feedback!
Oops, something went wrong. Please, try again later.
Thank you!
What details or examples would have made this article more helpful for you? We appreciate your insights!
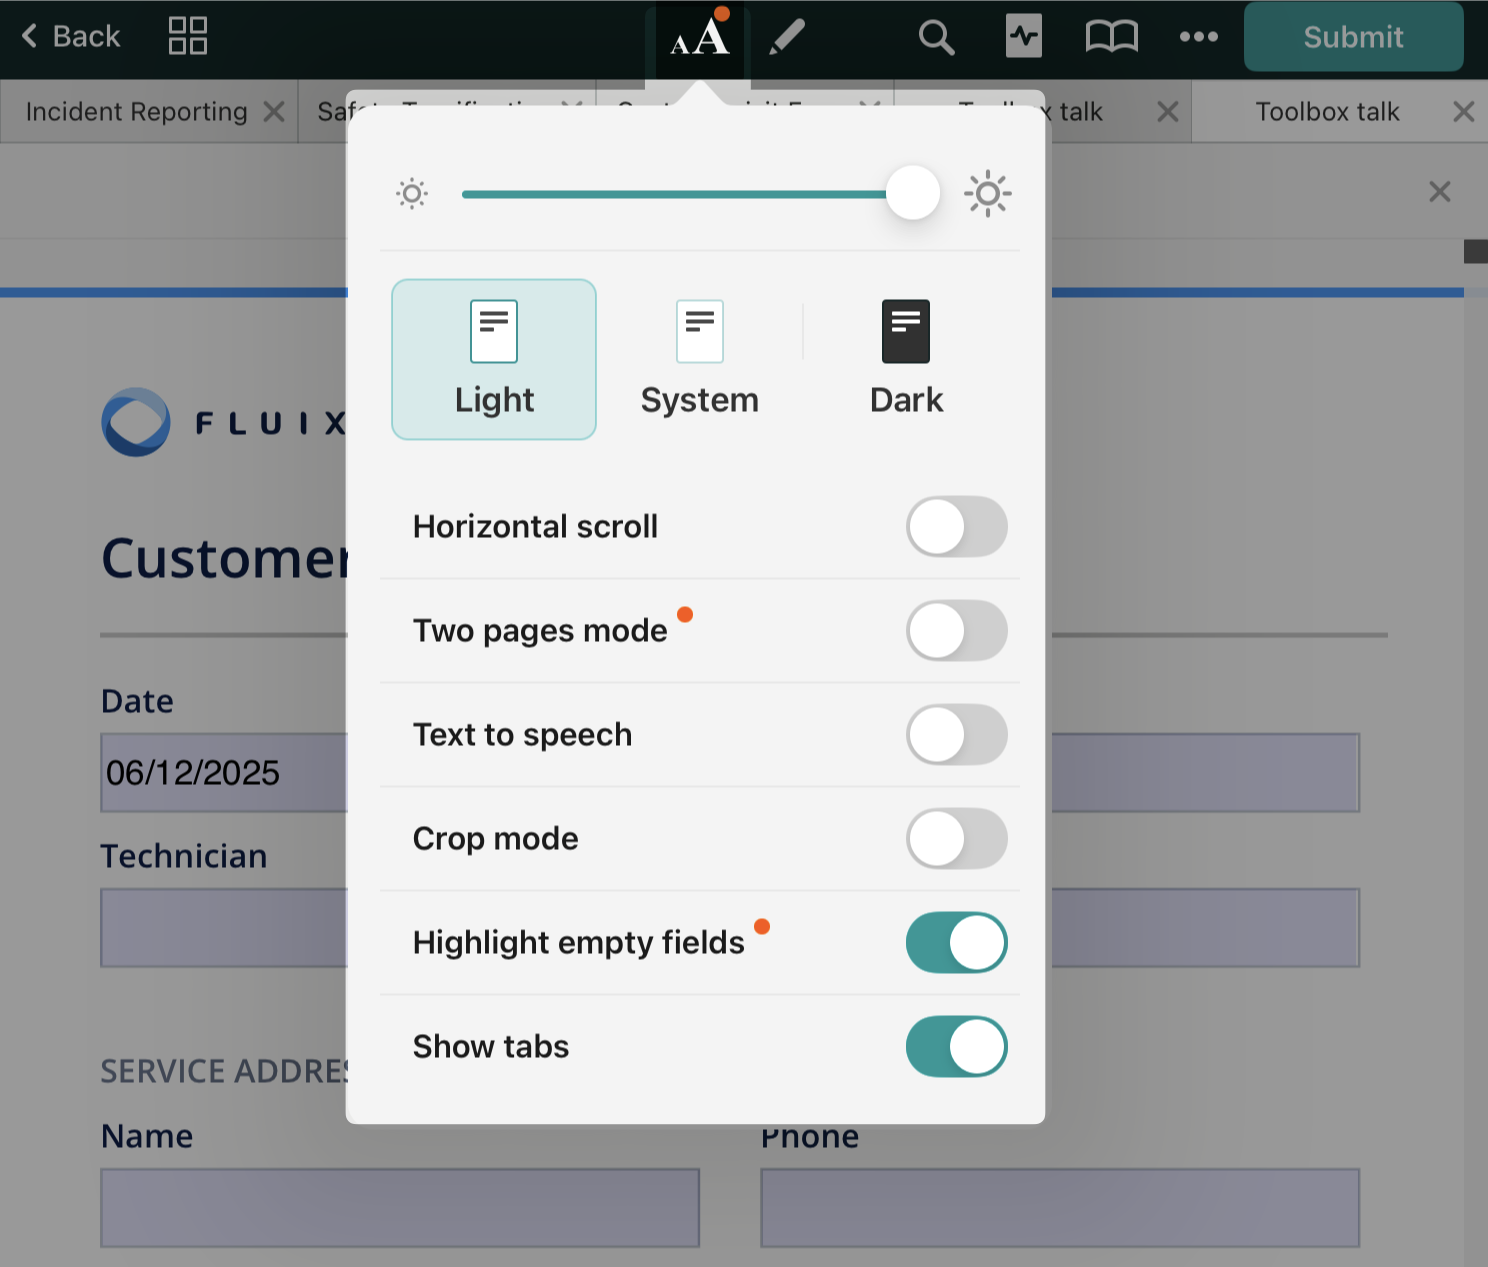
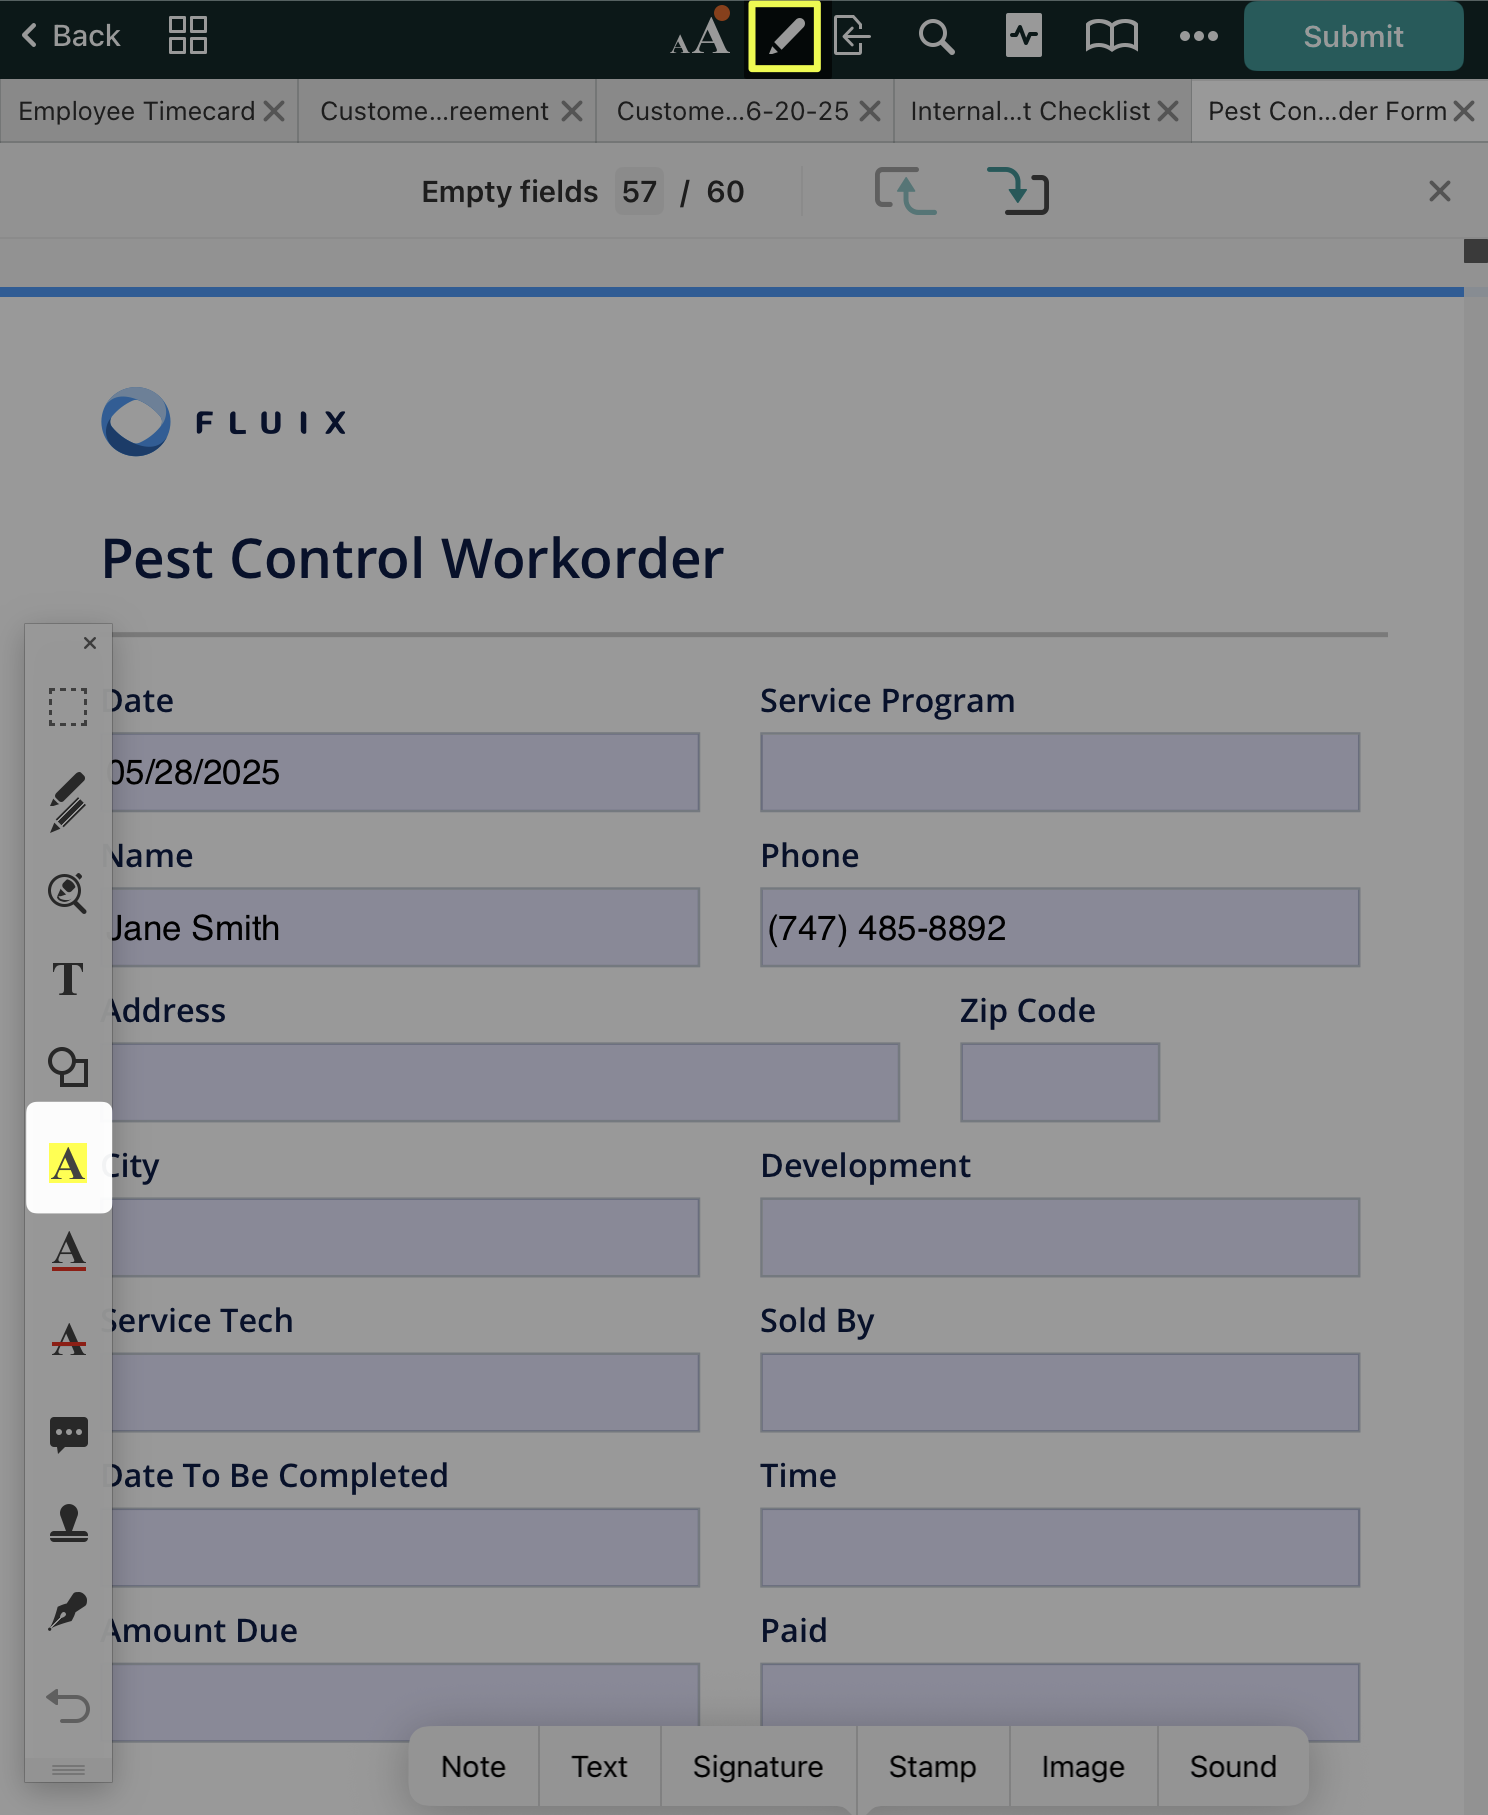
In the Fluix Docs app, when you open the PDF, you may see the ‘aA’ icon at the top. Tap on it to explore additional actions that you may configure to improve your daily work with PDFs. For example:
Zoom
To zoom in, bring your two fingers in a pinch gesture. To zoom in instantly, double-tap on the area of interest.
Control the brightness of the document display.
Moving the toggle towards the right will increase brightness, while moving it towards the left will decrease brightness.
Color themes
These themes improve your reading experience at different times of the day. You may select from three available modes:
Dark
Light
System – will adjust the appearance based on your device settings.
Select a scrolling mode.
Enabling a horizontal scroll allows you to scroll through documents like a book, while disabling it allows vertical scrolls that provide a traditional scrolling experience.
Two pages mode.
In this mode, the Fluix app splits your document into pages and allows you to see more document pages in one go.
Text to speech.
Enable this option to get a voiceover of the data in your form.
Crop mode
Tap on the AA icon to enable or disable ‘Crop mode.’ Fluix will automatically analyze a document and hide the margins by enabling crop mode.
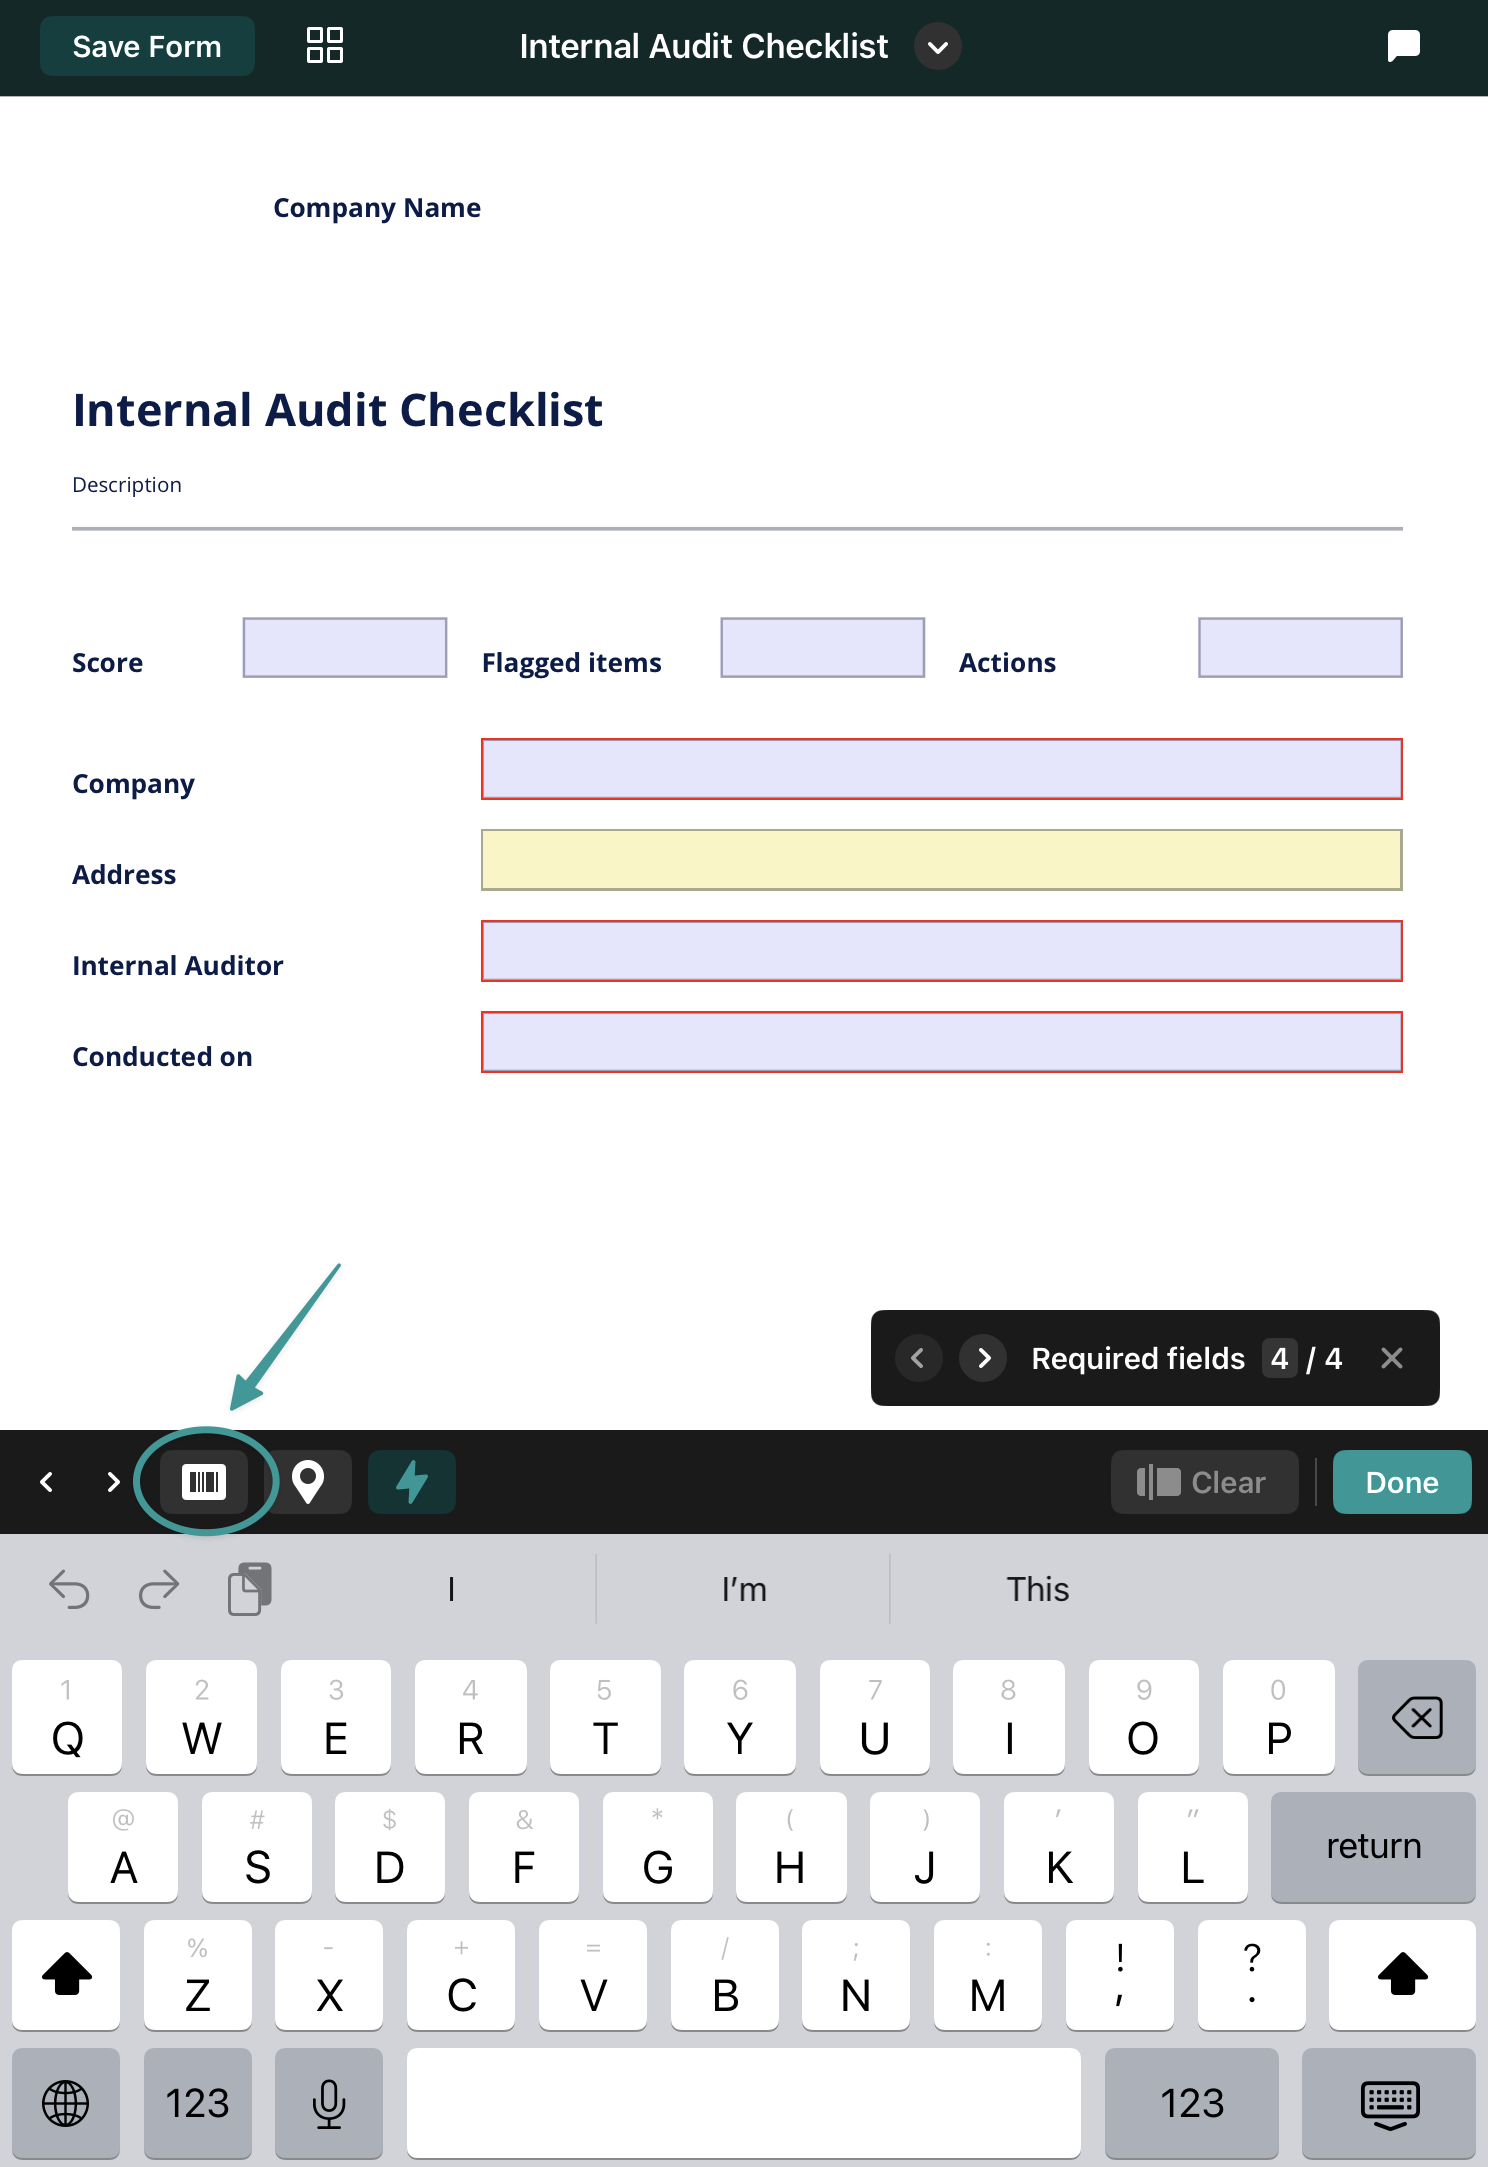
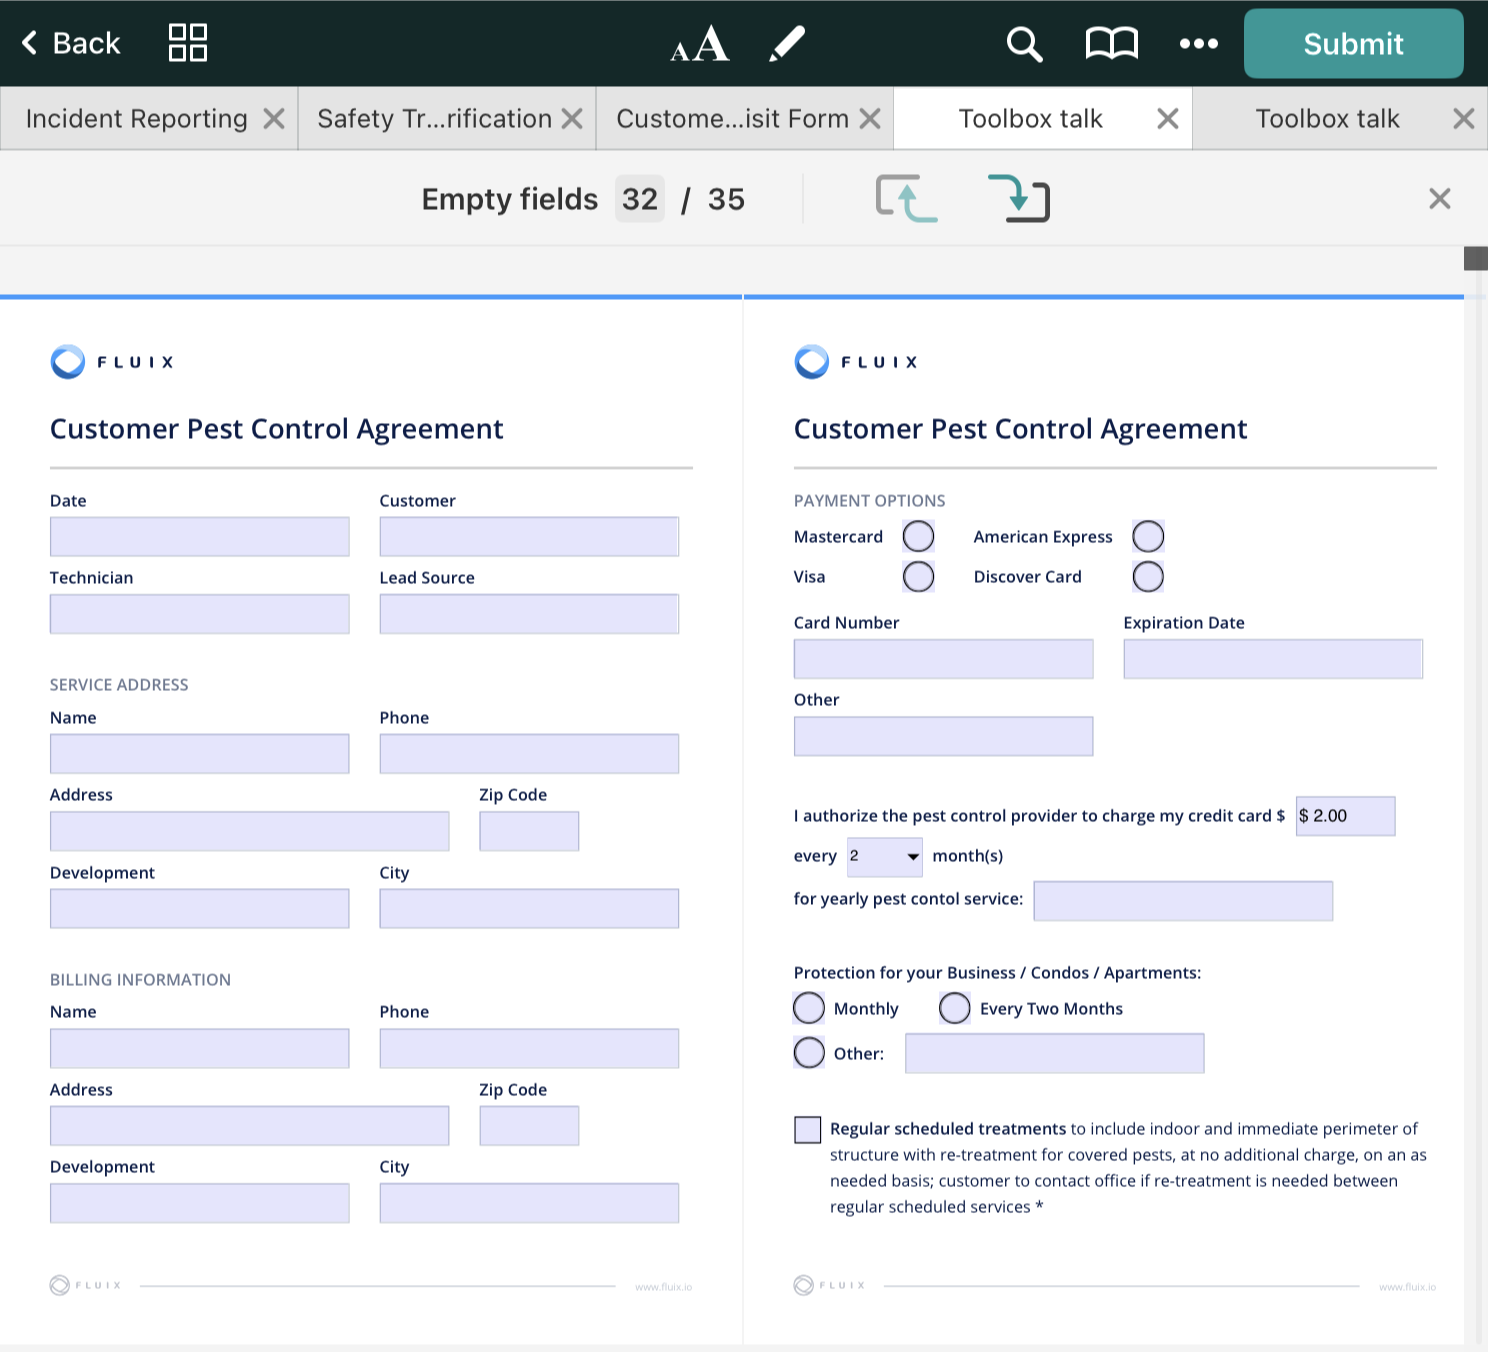
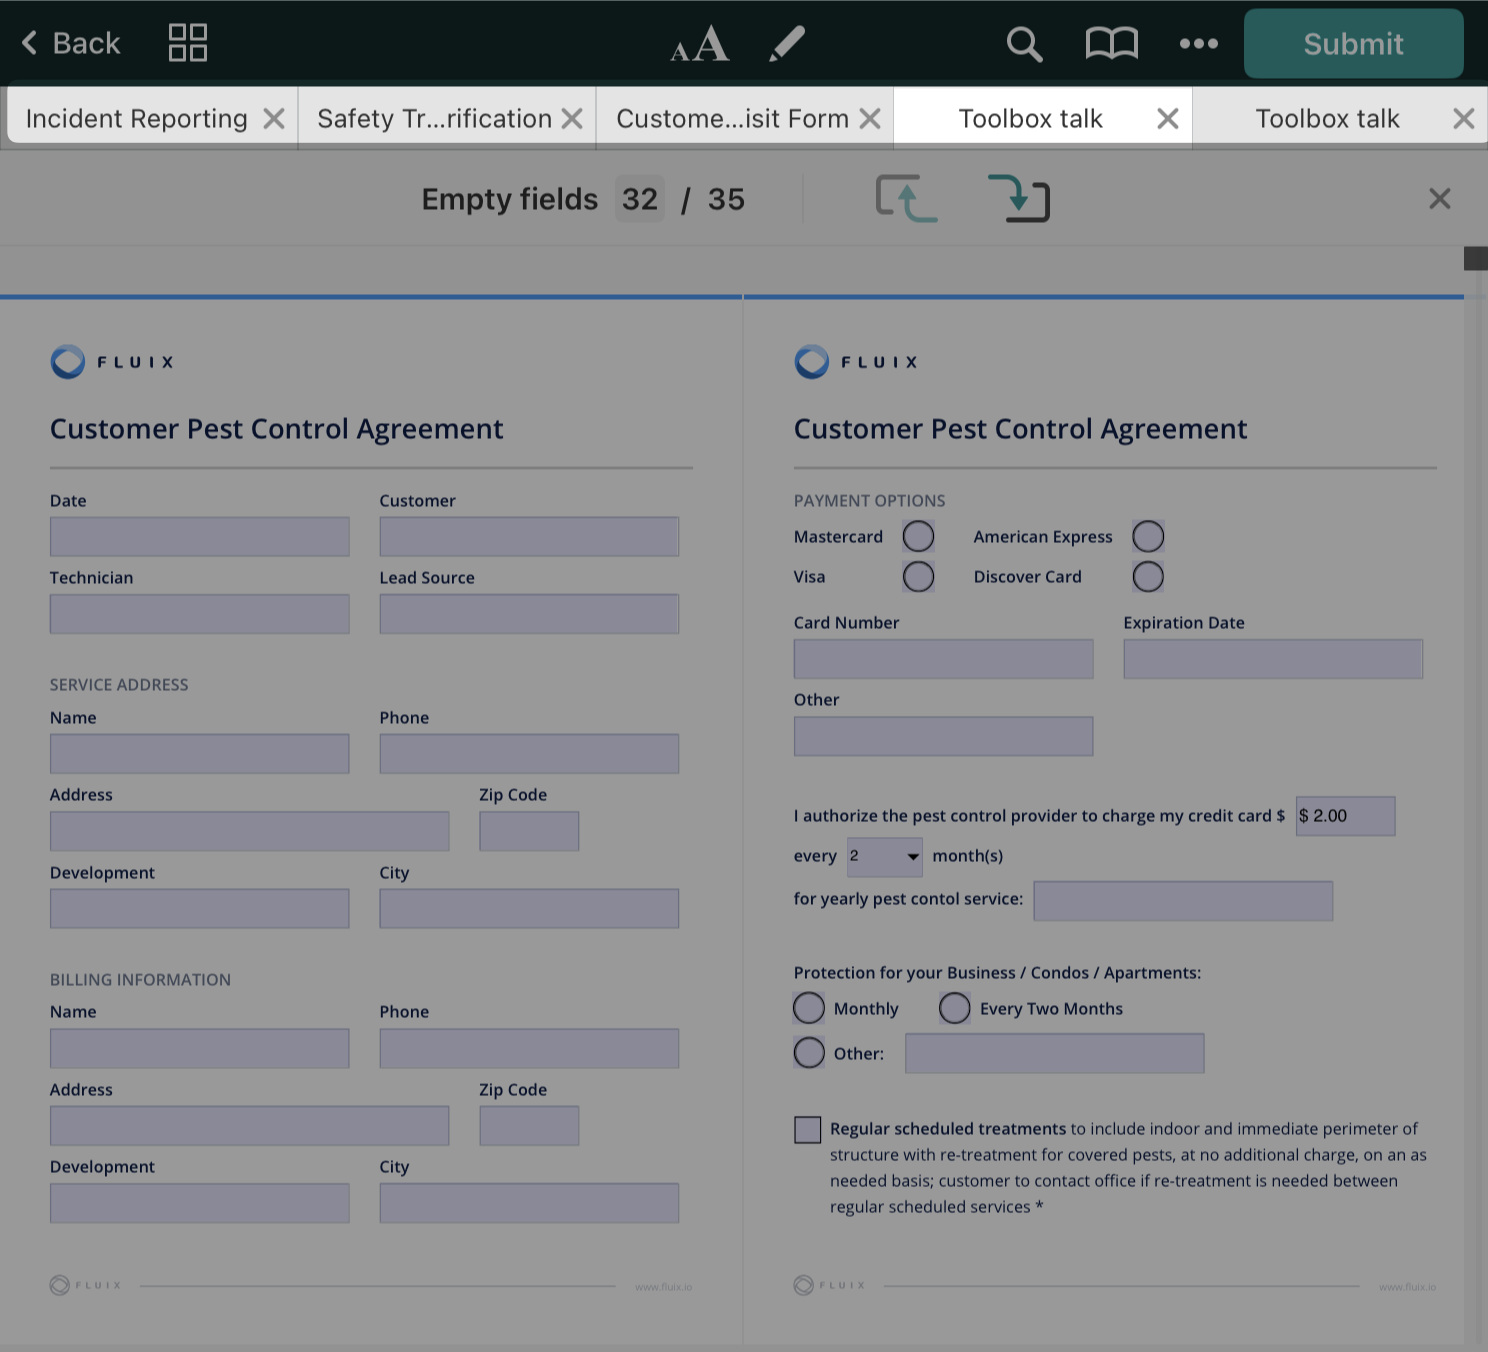
Highlight empty fields
This function highlights the fields that remained empty and shows the number of empty fields. You may use the arrows to switch between the fields.
Show Tabs
Enable this mode to see the other documents you previously opened and switch between them easily.
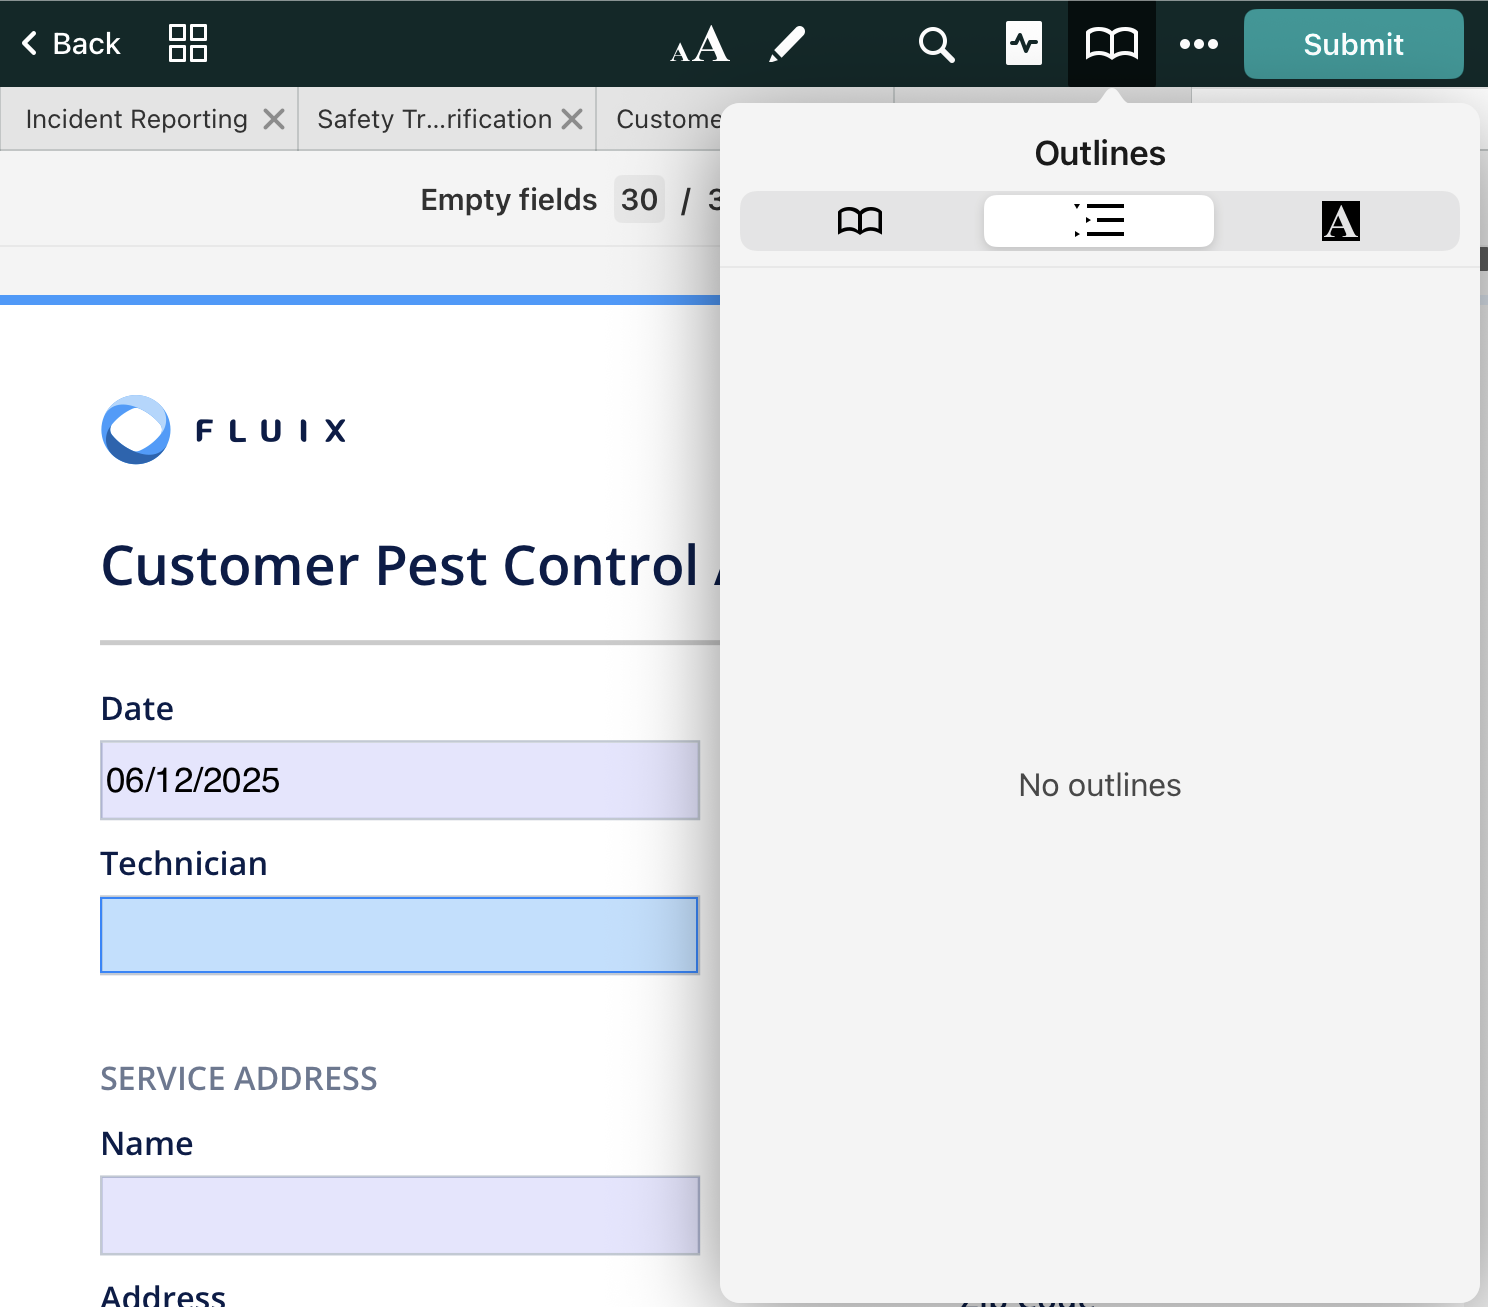
Navigate a document using outlines.
Tap on the ‘Bookmark’ icon and select ‘Outlines.’ Then select the chapter you are interested in, and tap the arrow to expand it.
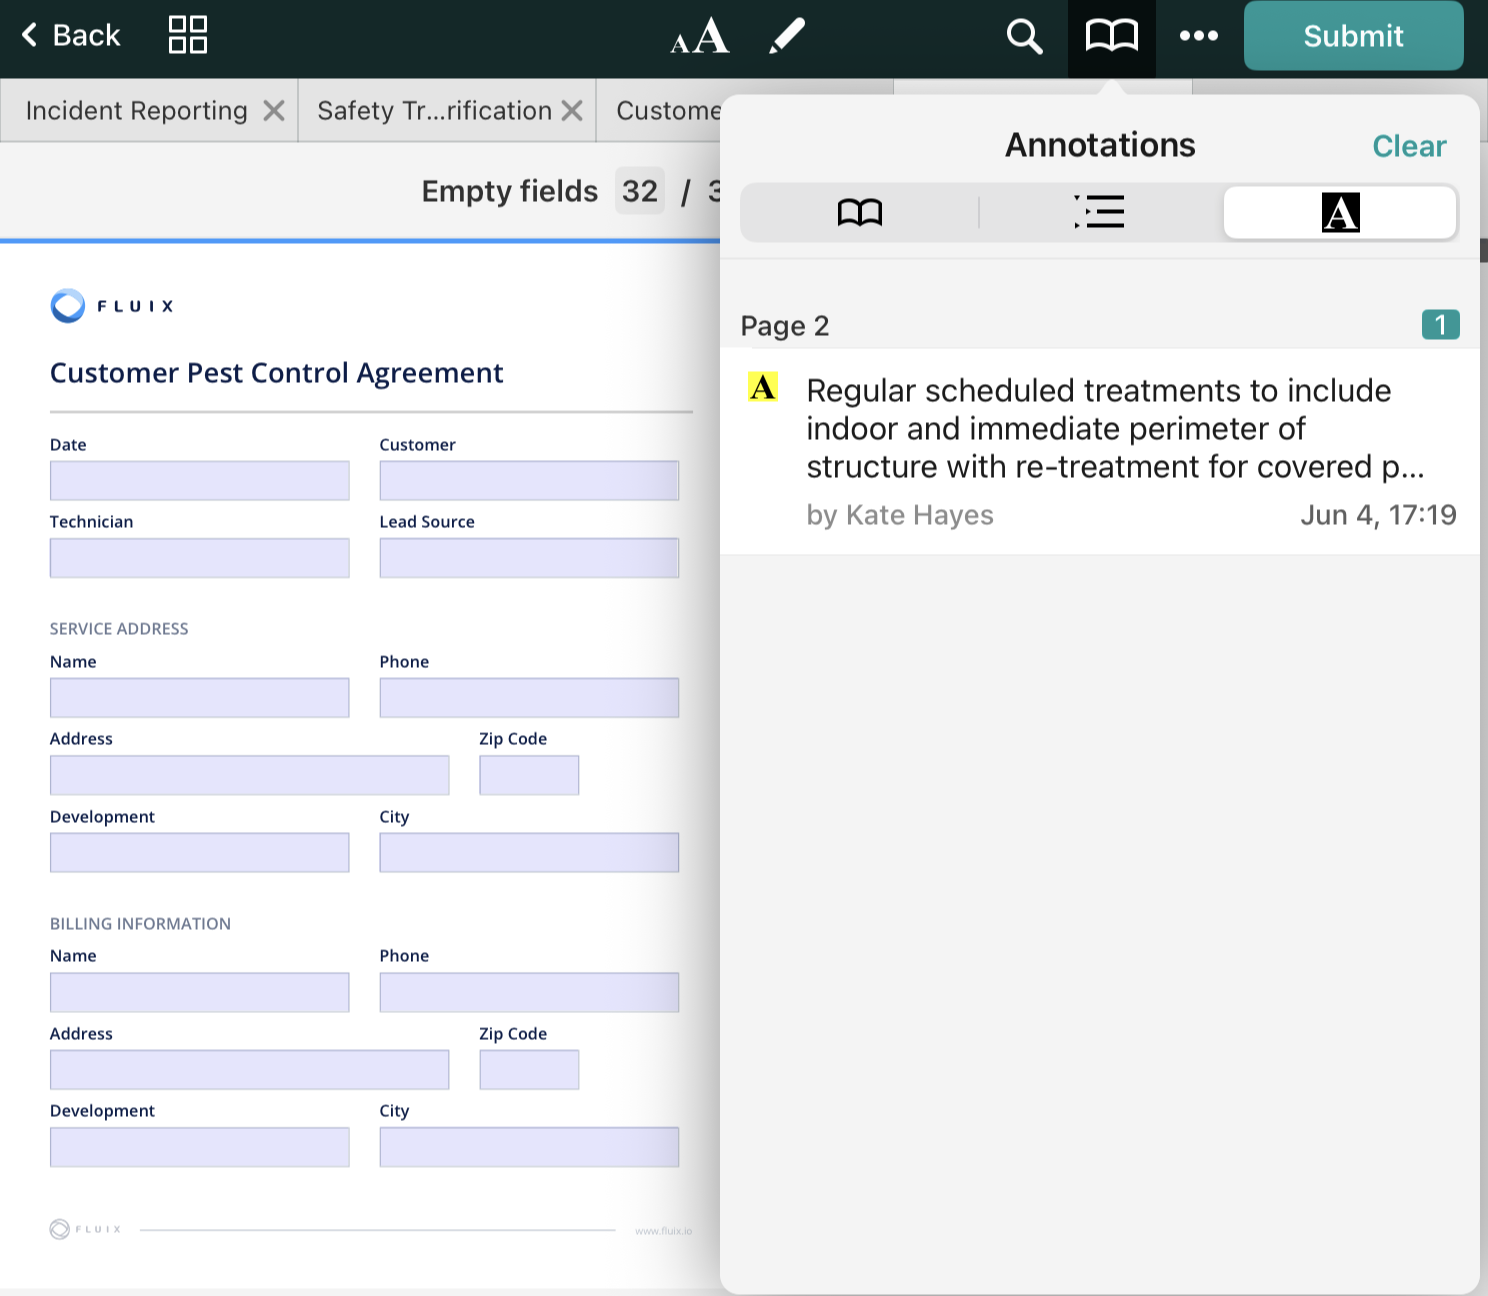
Review annotations
To review annotations, click on the ‘Annotations’ to see a list of all annotations in a PDF.
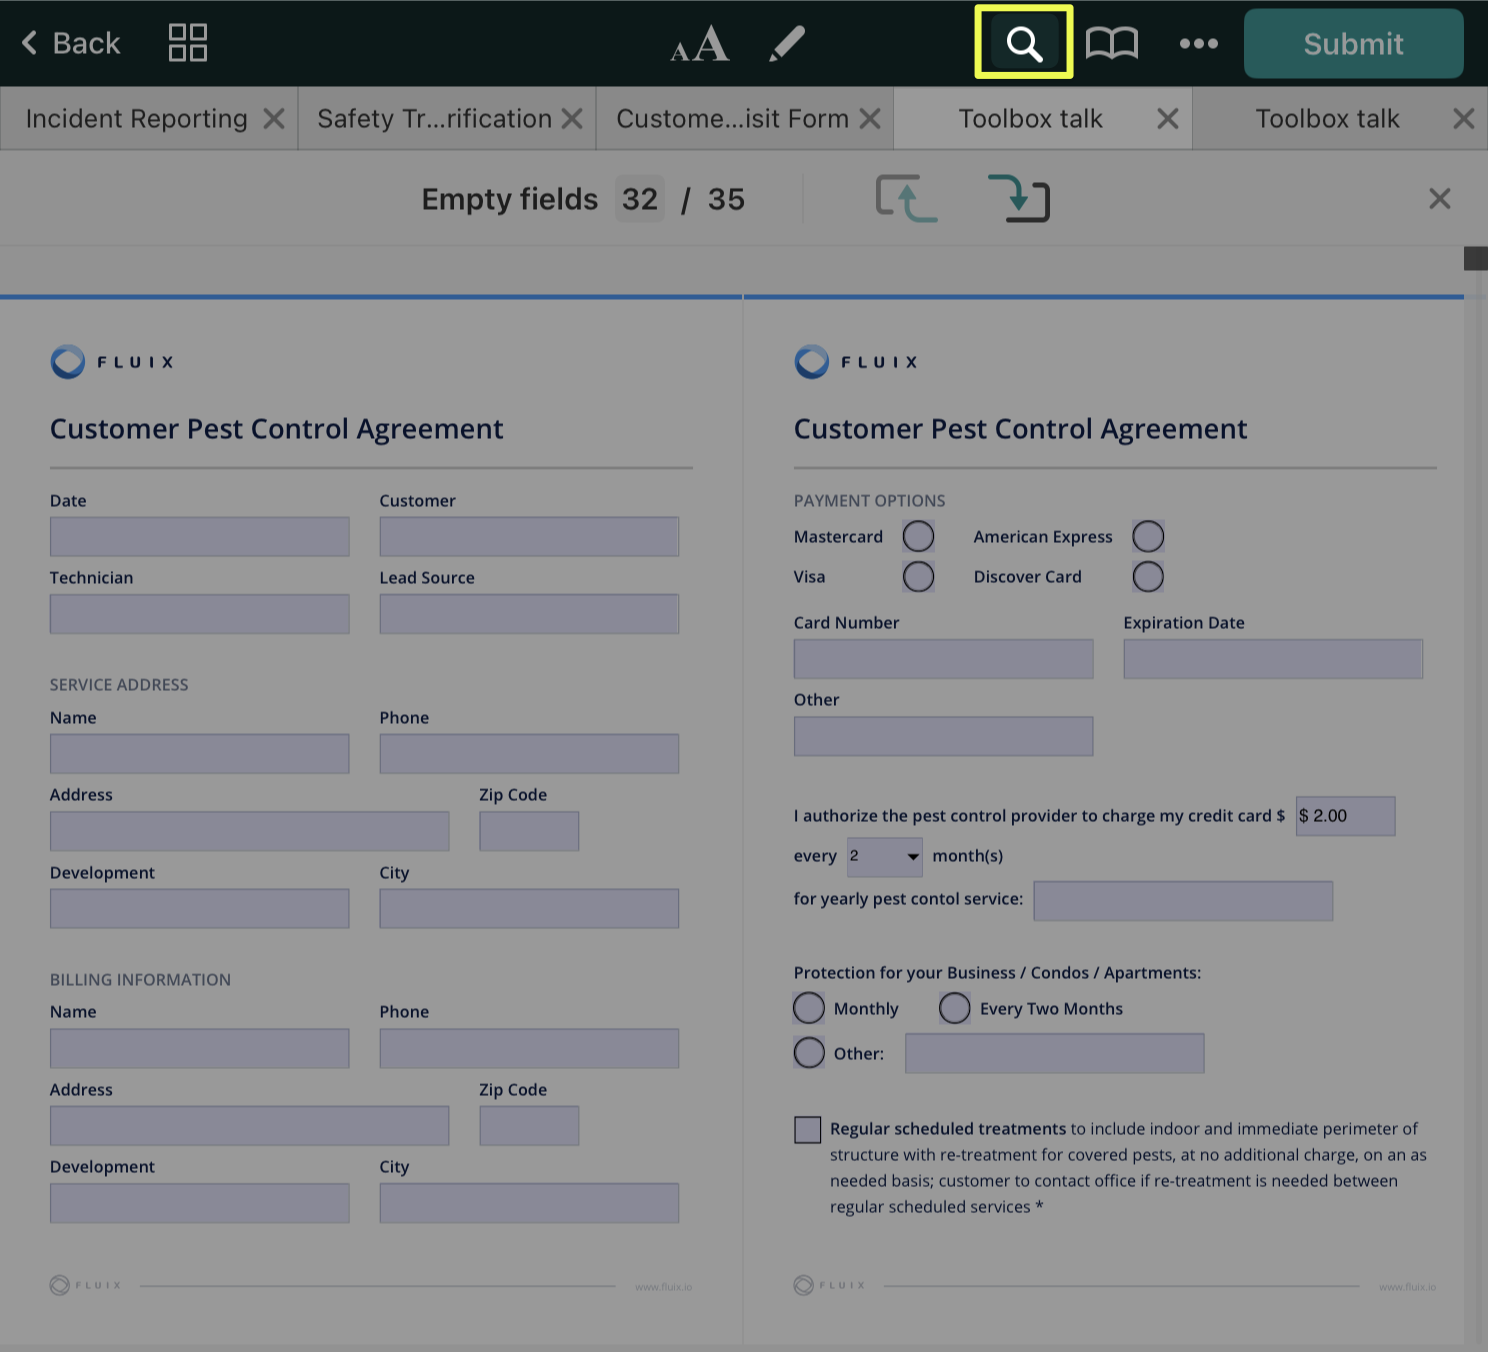
Search in a document
Click on the search icon and type the word or phrase you would like to find in the form. You will then see a list of results, starting from the current page. Tap on any item from the list to be redirected to the page listing its location. Tap on the page number to see all the search results on a particular page.
Navigate to a specific page in a document
Tap on the icon with four squares to select a page you would like to open.
Feel free to contact us at support@fluix.io if you have any questions or comments.
Was this article helpful?
Thanks for your feedback!
Oops, something went wrong. Please, try again later.
Thank you!
What details or examples would have made this article more helpful for you? We appreciate your insights!
When working with multiple documents in the field, it’s important to ensure that all modifications and signatures are duly saved. At Fluix, our primary concern is ensuring data integrity and the timely delivery of workflow documents. Starting from Fluix app version 2.6, all documents being edited are automatically backed up to the Drafts section.
Autosave files from Templates with preconfigured submit rules:
1. After you pick up a new template from Templates and make any modifications (fill in a form field or add an annotation), Fluix will automatically save this draft to Drafts.
2. When working on files opened in the Fluix app, you don’t need to save changes manually. When you tap the Back button, the Fluix app will automatically save the edited file to Drafts.
3. Each file is saved to Drafts with the original file name (as in the Templates) unless it contains a naming convention created by the Admin. If a form contains a custom naming string or the Default file naming setting is enabled on the Admin Portal, then the file name will include data from the specified form fields.
4. After you submit the file, it will follow preconfigured submit rules and will be saved in your Completed or Reassignedsection.
Please note that if NO changes were made to a file opened from Templates, no drafts will be saved to Drafts. By tapping Back button, the user will merely go back to Templates.
Saving files from Templates without any preconfigured submit rules:
If there are no submit rules configured for Templates, all files originated from these Templates can be saved to the Personal section. In Personal, users can rename, delete, or move files to another local subfolder.
In Personal, you can also move the file to another folder by tapping the three dots next to the file name. You will see the Move option, and you can select the folder to which you want to move the file.
Feel free to contact us at support@fluix.io if you have any questions.
Besides the submit option, you can also share the document in the ways, configured by your company’s Fluix account admin:
Clear form fields
Tap and select ‘Clear form.’ This option is available only for fillable PDF forms.
Open a document in another app
Tap and select ‘Open in.’ You can then choose to send the document in its editable form or as a flattened copy.Please note: this feature is active only if configured by your company’s Fluix account admin.
Print a document
Tap and select ‘Print.’ A dialog will pop up, in which you can select which printer to use and the number of copies you want to print.Please note: this feature is active only if configured by your company’s Fluix account admin.
Email a document
Tap and select ‘Send by e-mail.’ You will then be prompted to choose what format you would like the file to be sent in:
Document – Send in an editable form.
Flattened Copy – Send in a non-editable form, but can be accessed by most PDF viewers. Pop-up notes are not added to a flattened copy.
Annotations Summary – Send as a document with a list of annotations in the email body.
Can’t find what you’re looking for? Feel free to contact us at support@fluix.ioif you have any questions or comments.


 , you will get a selection of four configurable pencils: two thick and two thin. Each has adjustable color, opacity, and line thickness. Select one of the pencils or markers to start drawing on your PDF.

 , you may access a zoom writing mode and select one of the pencils or markers to start drawing. You will get the two configurable pencils: one thick and one thin. Each has adjustable color, opacity, and line thickness.
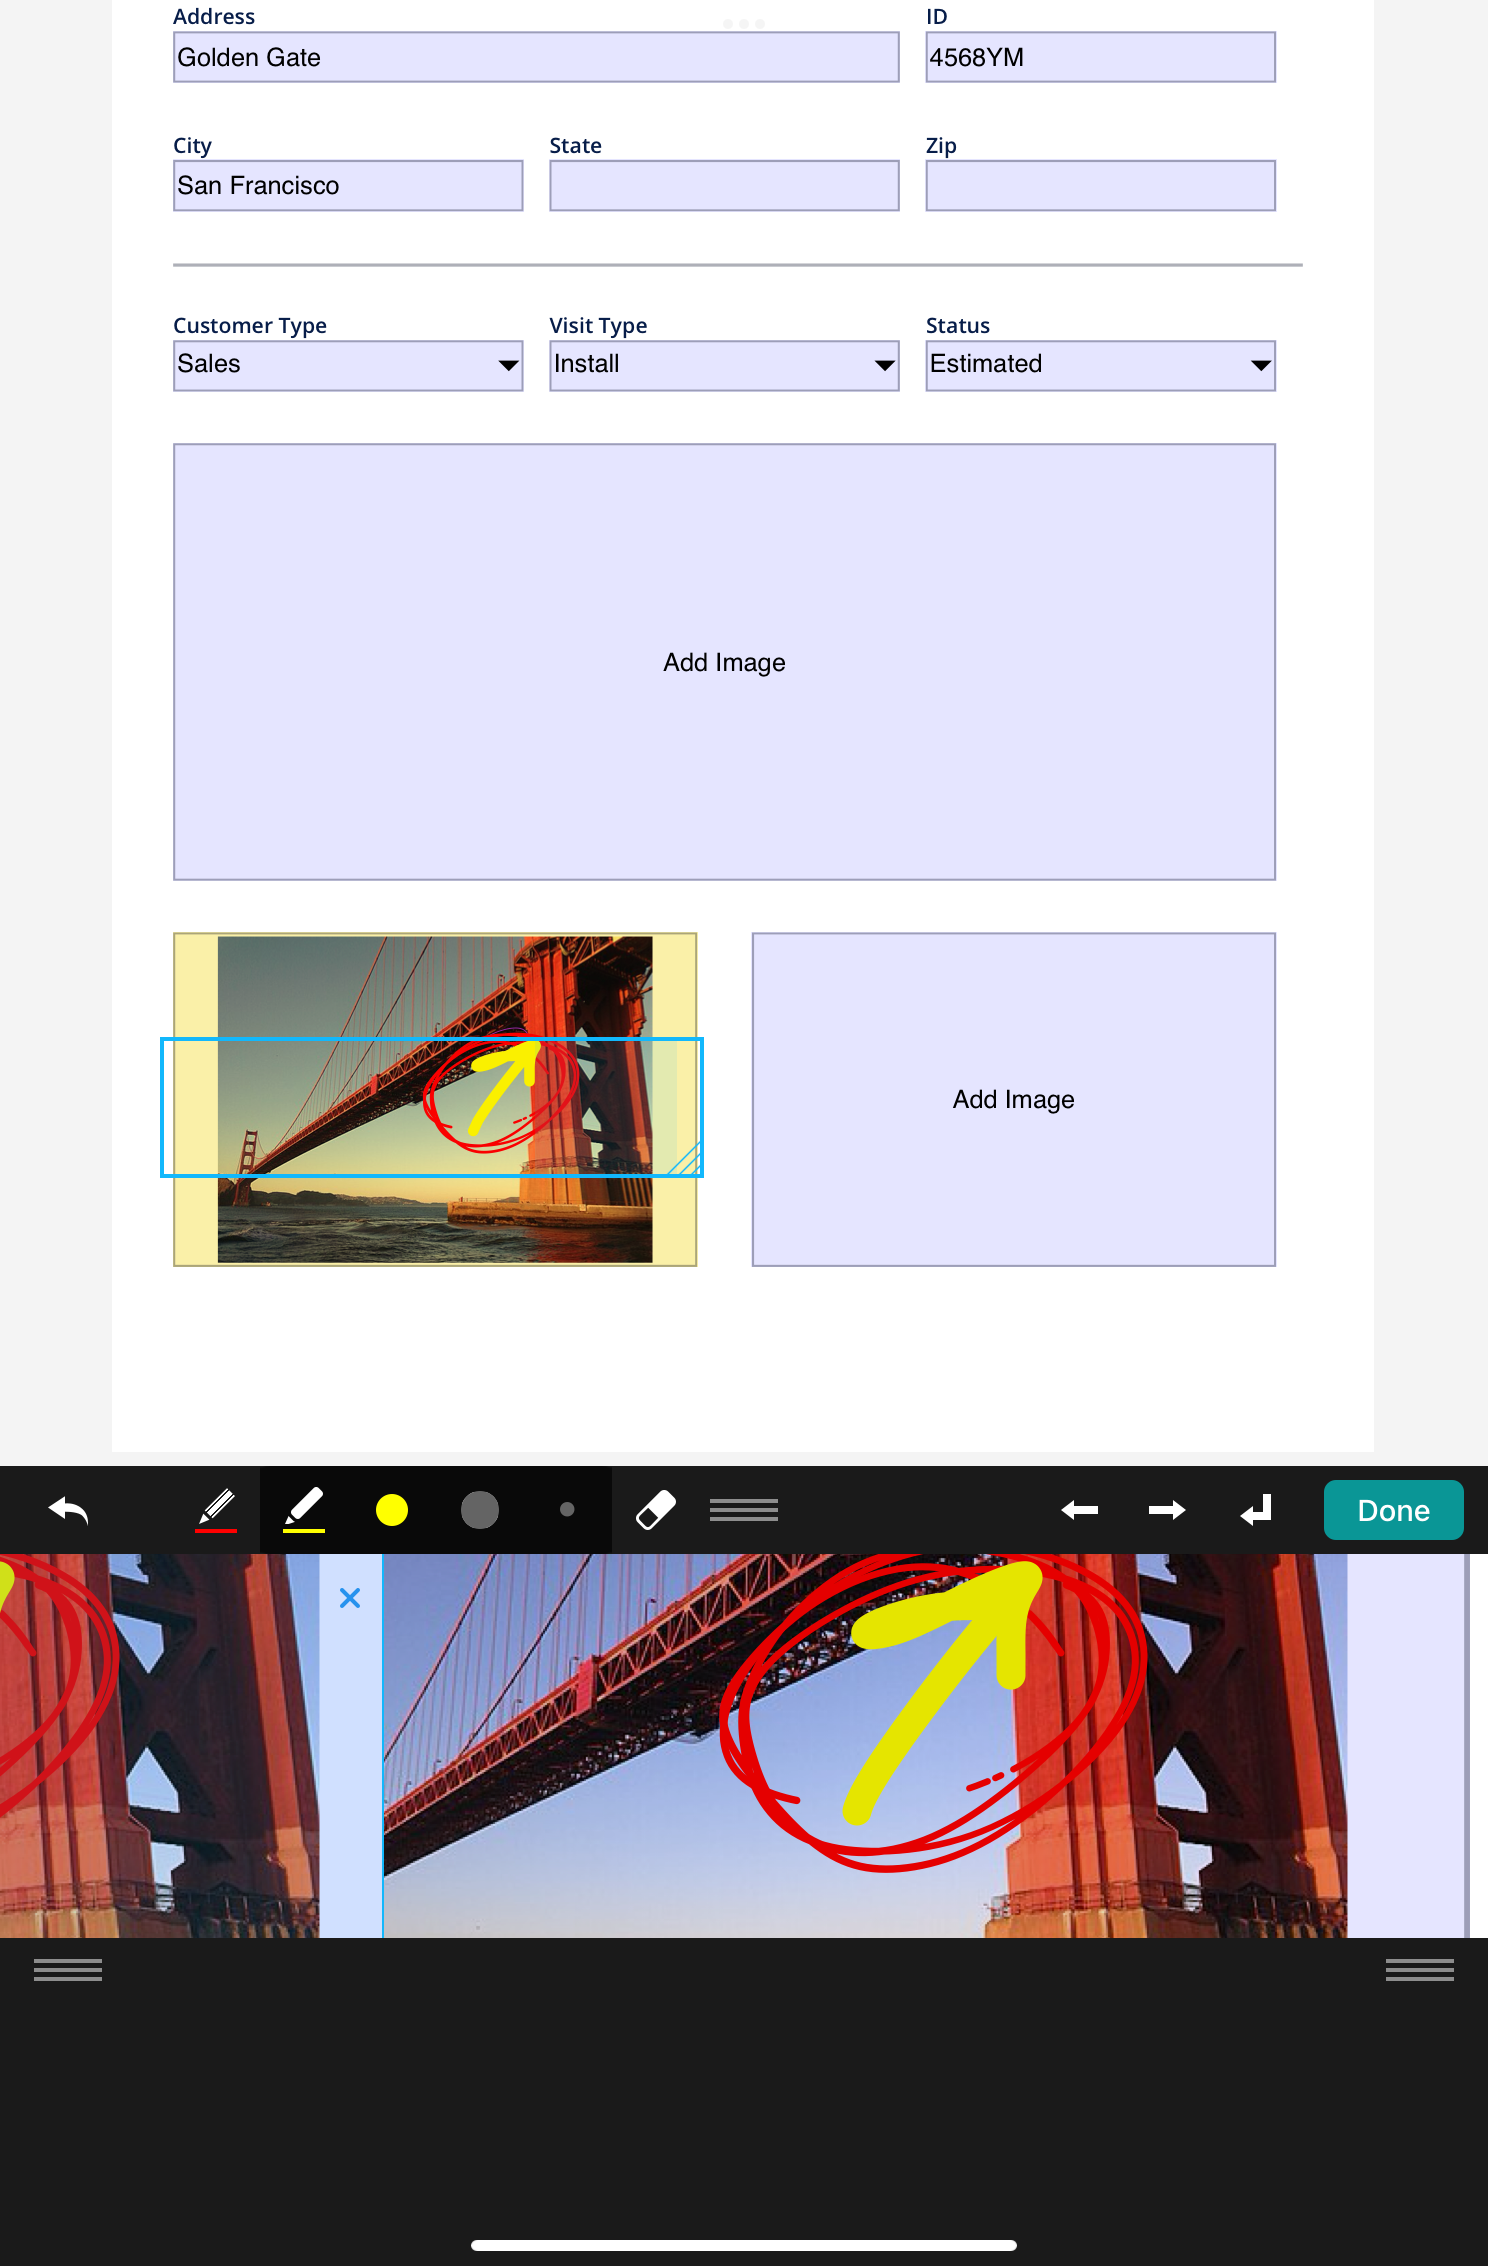
 , you can adjust the annotation (object) colors, opacity, line thickness, and move, copy, or delete them.
 lets you add specific notes to your PDFs on the spot. Select a place in the PDF where you want to add text, type it, and feel free to move it by holding the note and then dragging it.
 , tool to select a shape and add it to the PDF.
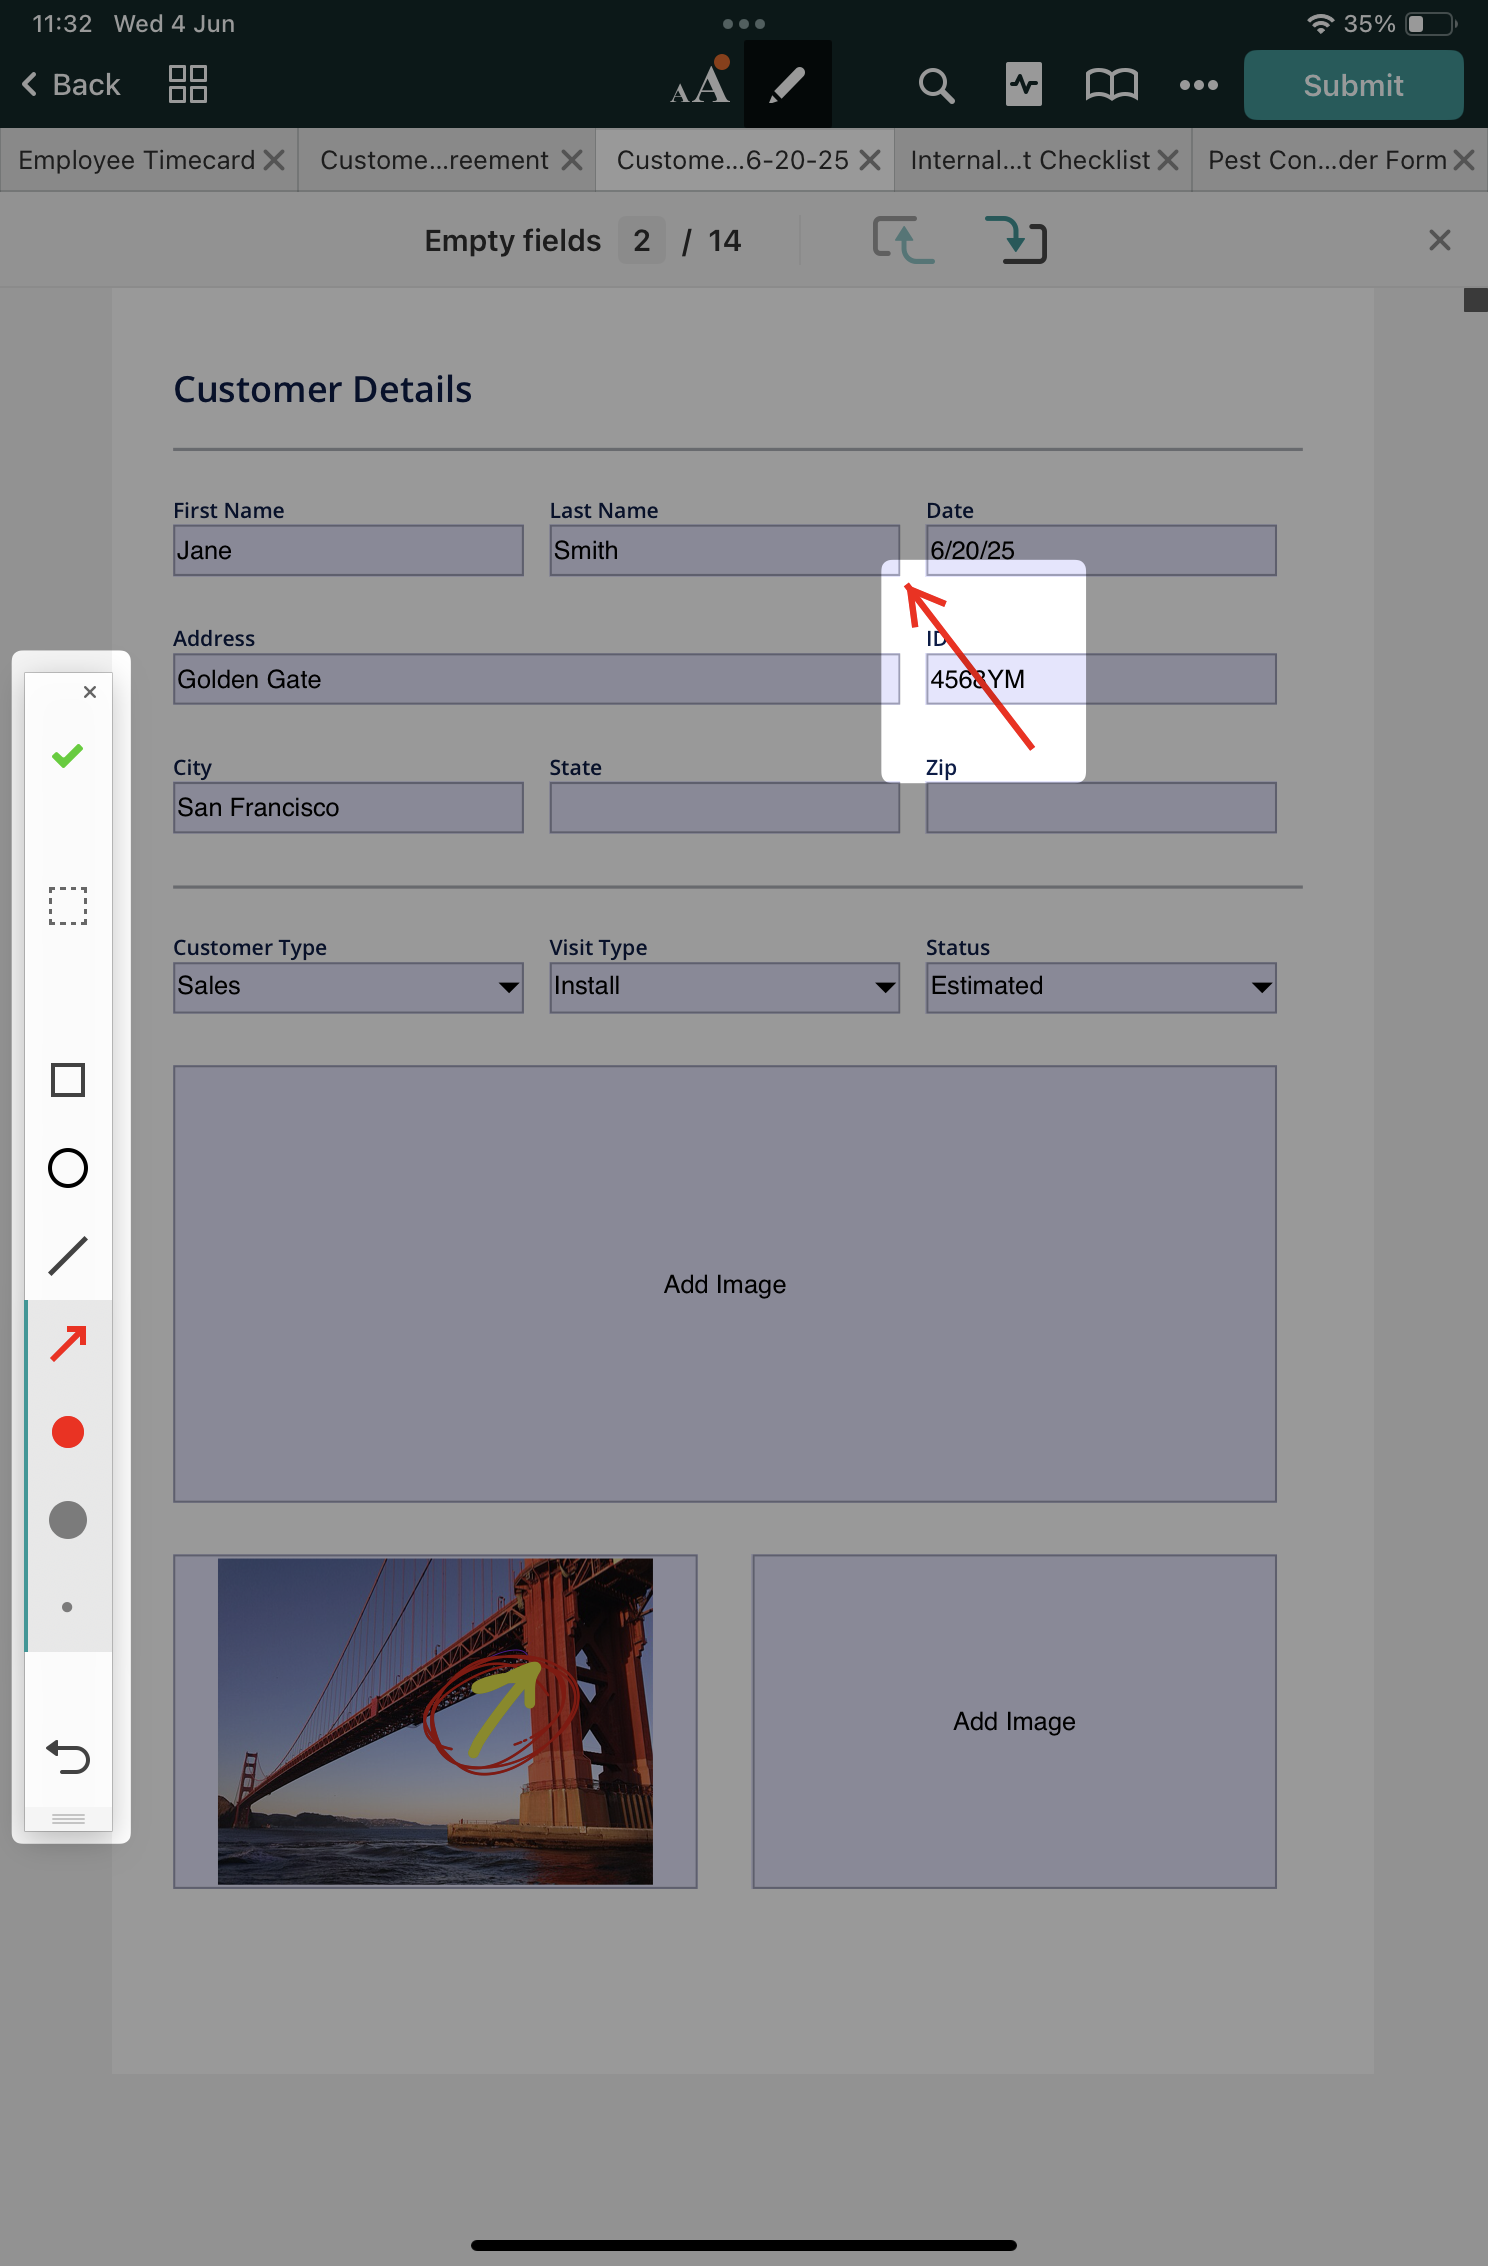
 will help you highlight the needed text in your form to draw more attention to it. To change the color of the highlight, tap and hold the icon
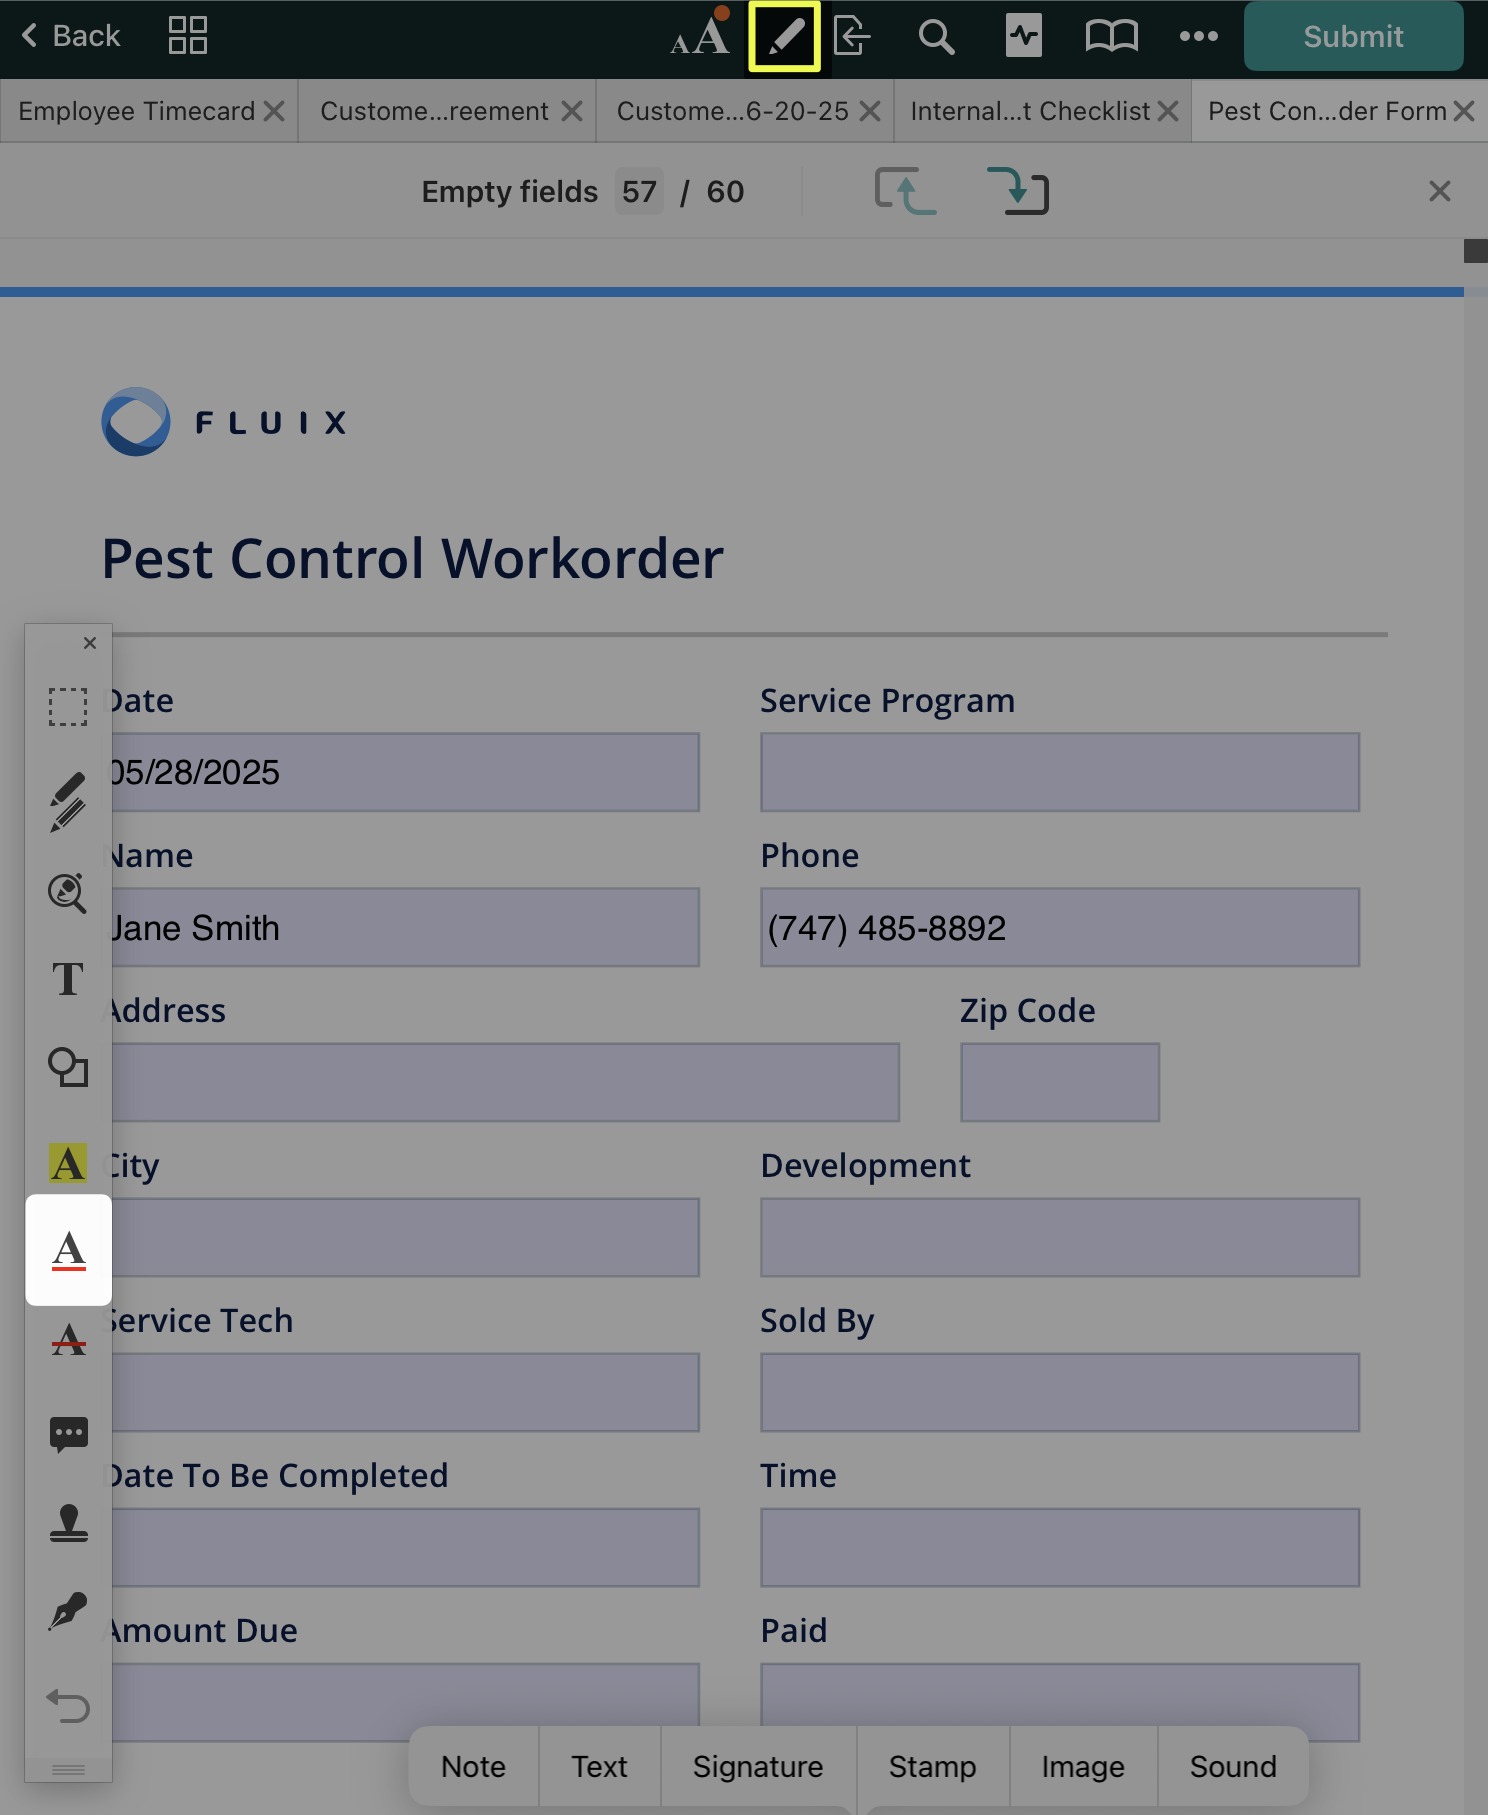
 , you can easily underline text. To change the color of the underline, tap and hold
 , you may strike unnecessary data from your PDF. To change the color of the strike, tap and hold the tool
 , you can add a pop-up note that will be saved in the PDFs for your teammates working with the respective PDFs. Tap on the place in the PDF you’d like to add the note and type some text. You can move the pop-up note by holding it and then dragging it.
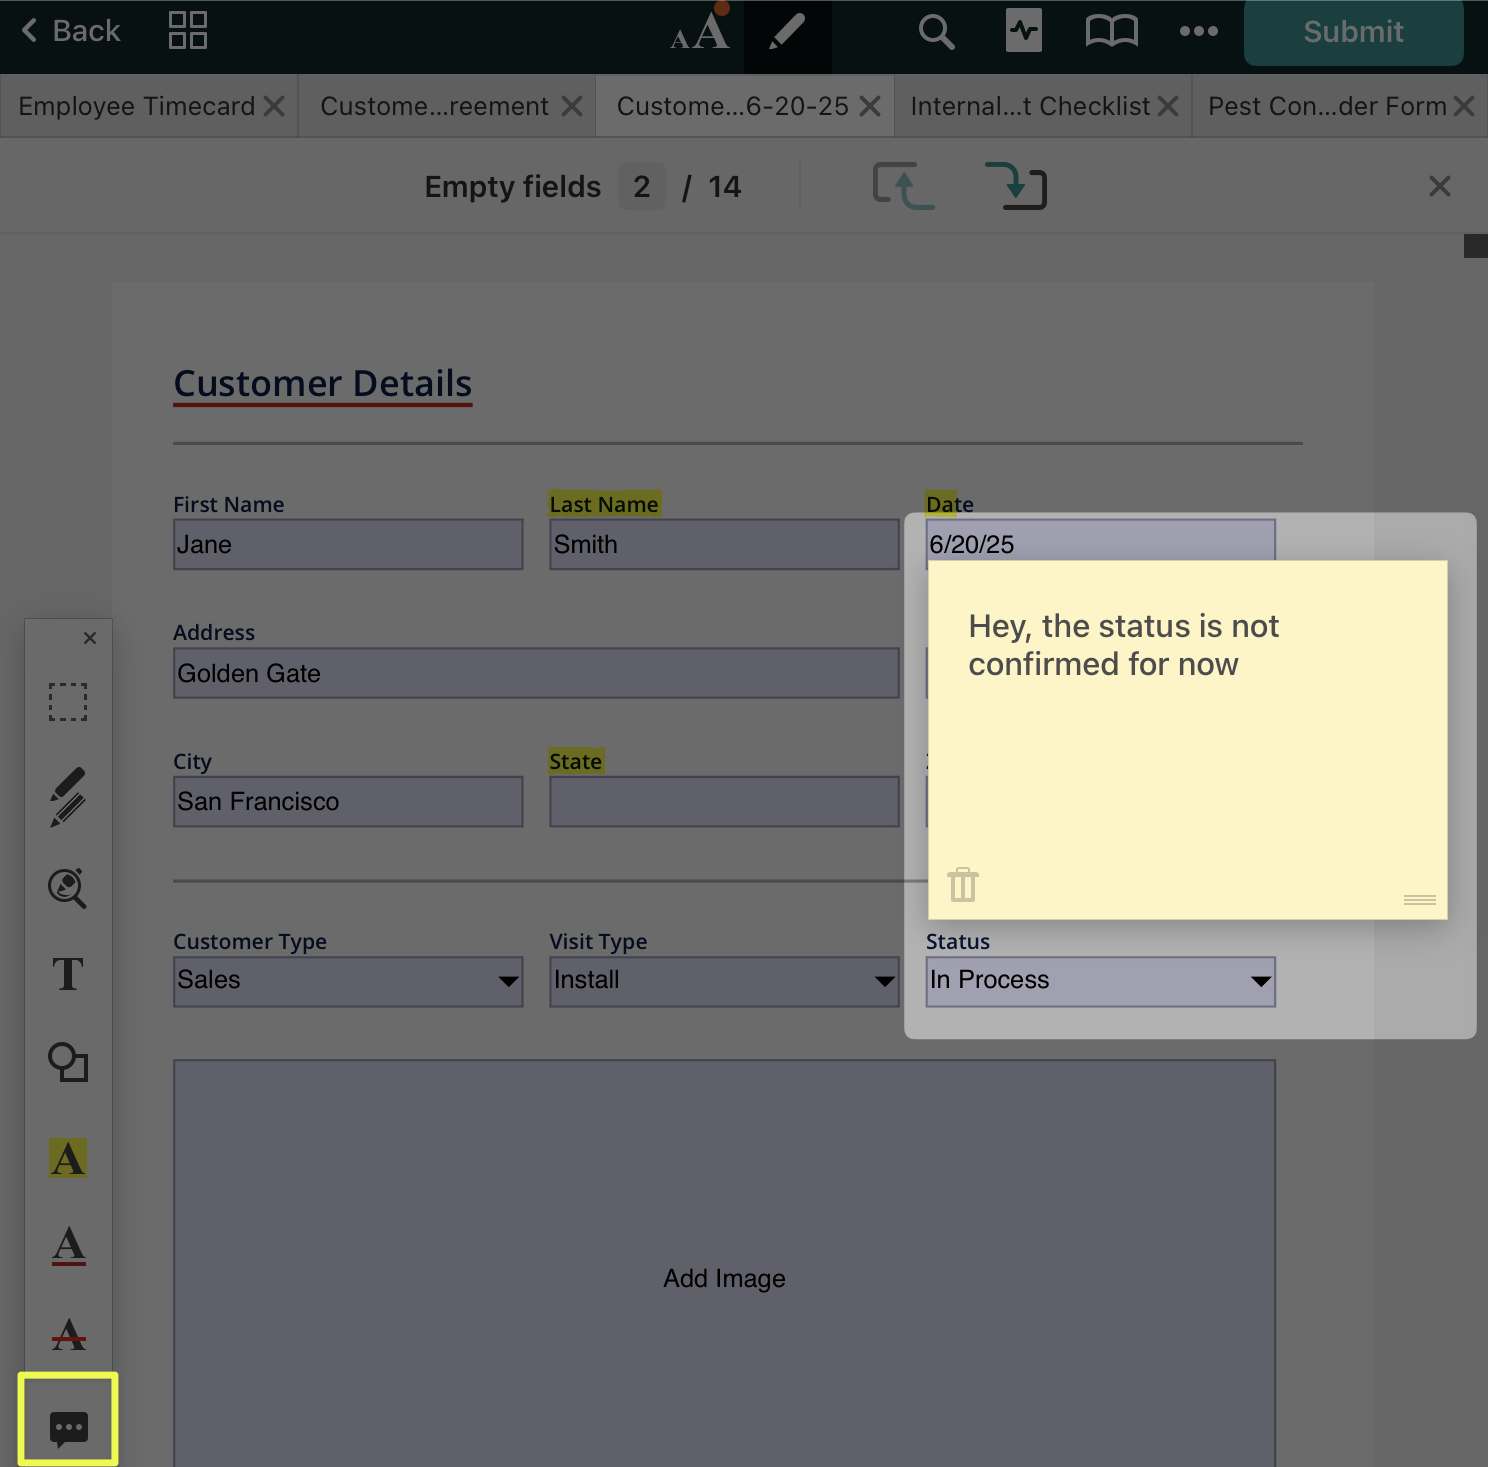
 or select ‘Stamp’ from the tap and hold popup menu. Select a stamp from the ‘Standard’ list to add to your form.
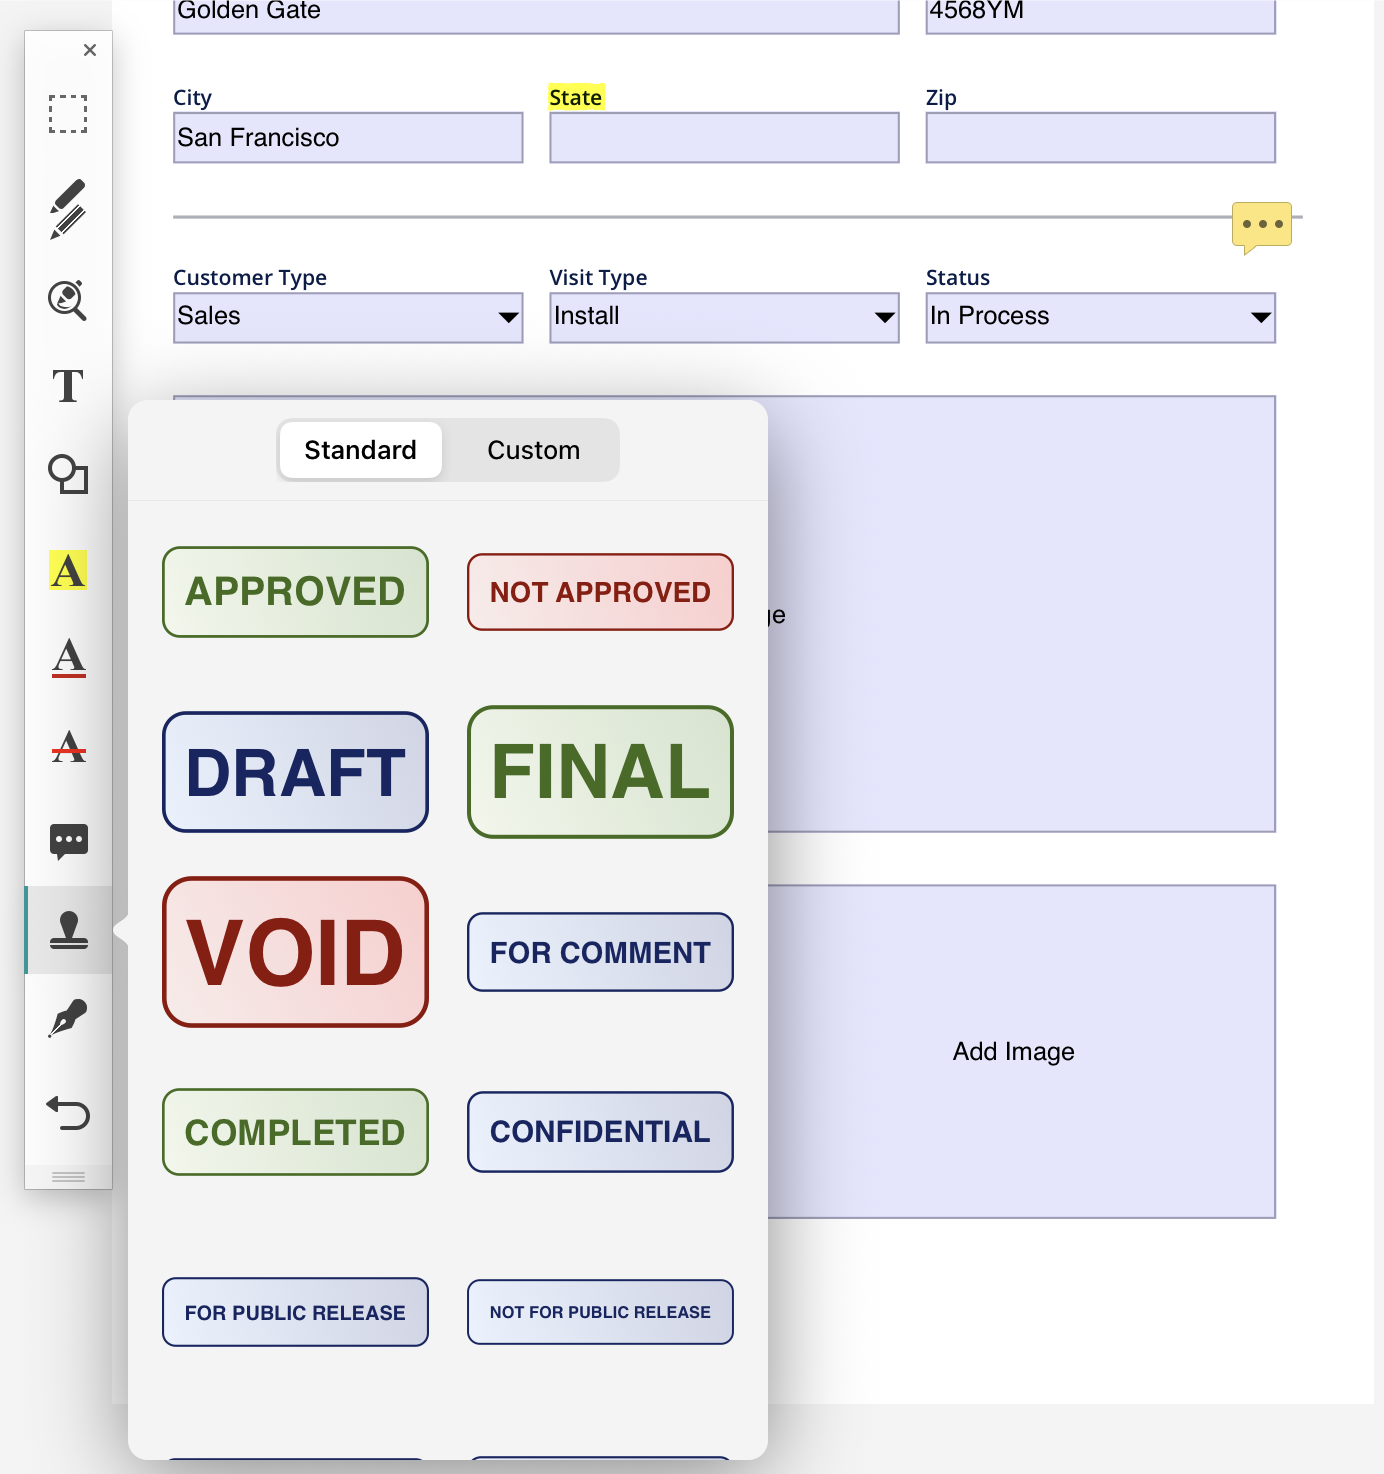

 , you can add a signature to the document and edit it accordingly in the dedicated section. You can also draw a signature to be included in the document. Up to four signatures can be stored in the app and adjusted in color and line thickness, or removed at will.
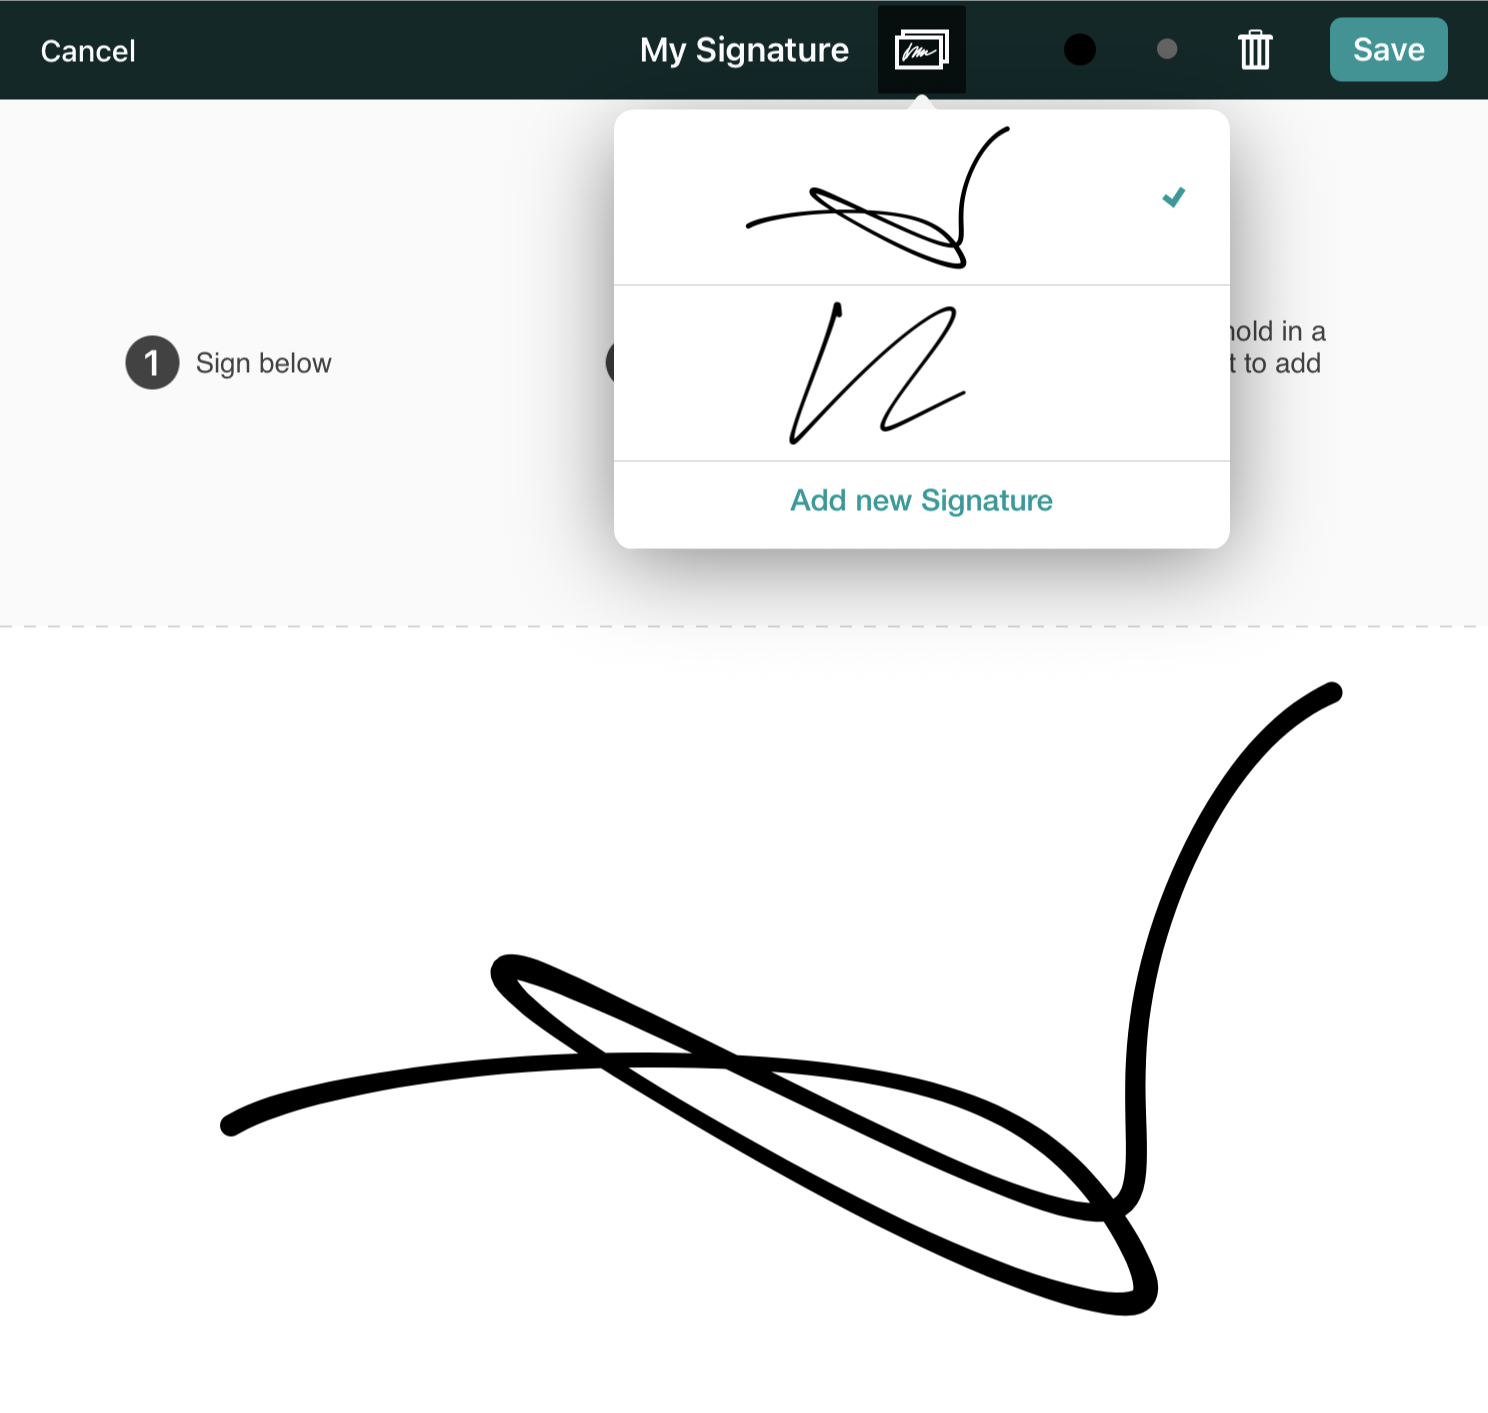
 to undo the previous annotation. To redo your annotations, tap and hold the icorn