To manage access to account and documents, please follow to Security Settings of the Settings section of the Admin Portal:
Allow working offline for the iOS device — this feature allows you to determine whether your end users can work on their devices offline. If activated, users can open the app with no Internet connection and access documents they’ve previously synced. The setting allows working offline for the number of days you determine, past which users will be logged out of the application and will need to connect to the Internet to sign back in.
Two-factor Authentication — an extra level of security for Fluix account admins. If enabled, Admins will be prompted to enter login, password, and unique pin that will be sent to a cell phone when the Admin is trying to access the Admin Portal.
Keep Completed workflow documents —amount of time within which all Completed workflow documents will be stored on Fluix servers. If you don’t wish to store any of those files once completed, choose Custom amount of days and put in 0.
Keep In Progress workflow documents — amount of time within which all the in Progress documents in the following sections Drafts, My Inbox, Group Inbox, Sent for Signature are stored on the Fluix server. Once the selected time range passes, the documents will be erased according to the retention policy.
Keep Deleted workflow documents amount of time during which you’d like Fluix to store documents from the workflows that have been deleted.
Keep Deleted storage documents —amount of time during which you’d like Fluix to keep documents that were deleted from Fluix Built-in storage on our servers.
Store user signature on the iOS device — lets users save their signatures on their devices for repetitive use.
Password complexity — allows you to define the level of complexity of passwords that end users choose to log in to the app.
Default PDF password — allows opening password-protected PDFs without entering a password each time such a document is opened in the application.
Single Sign-On (SSO) — allows users to use one set of login credentials to securely access multiple applications.
In order to enable this functionality for your account, contact your Success Manager or write to us at support@fluix.io.
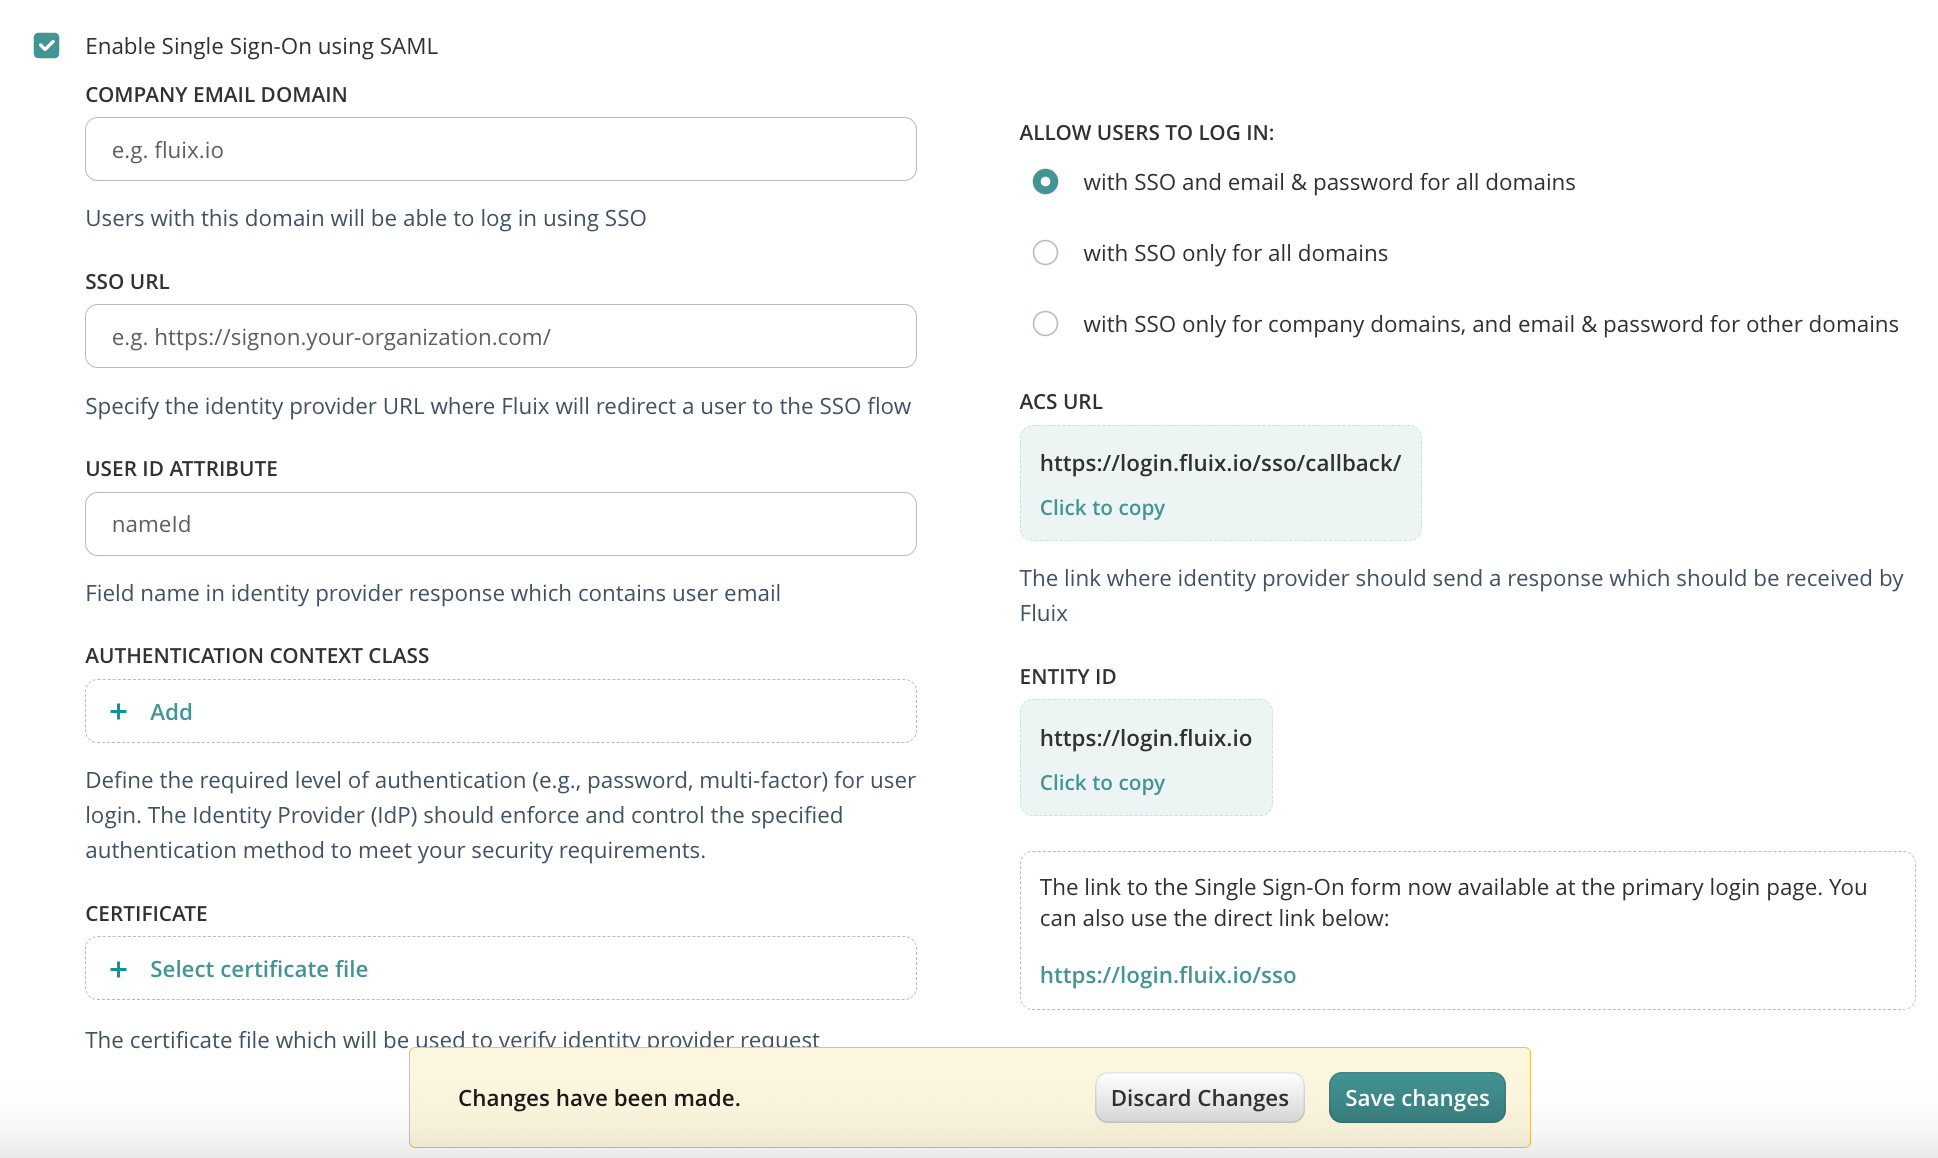
After SSO functionality is being enabled for your account, the check box for selecting SSO will become active:
Domain— the domain name of the sign-in URL.
Sign in URL— the identity provider URL to which the user will be redirected from Fluix upon selecting the SSO authorization.
User ID Attribute— the field name in the response of the identity provider that contains the user’s email.
Certificate— a certificate file that is used to verify the identity provider’s request.
Upon clicking the Save button, you will be provided with the Login URL, Entity ID, and ACS URL that should be implemented in your SSO solution.
Was that helpful? Learn about File Sharing settings in the next article or contact us at support@fluix.io if you have any questions or comments.
Was this article helpful?
Thanks for your feedback!
Oops, something went wrong. Please, try again later.
Thank you!
What details or examples would have made this article more helpful for you? We appreciate your insights!
Besides submit actions, preconfigured in a workflow, users can share documents with their colleagues and customers via sharing options. Additionally, you can customize the Application Tab Titles and add shortcuts for the work-related apps.
File Sharing Tab
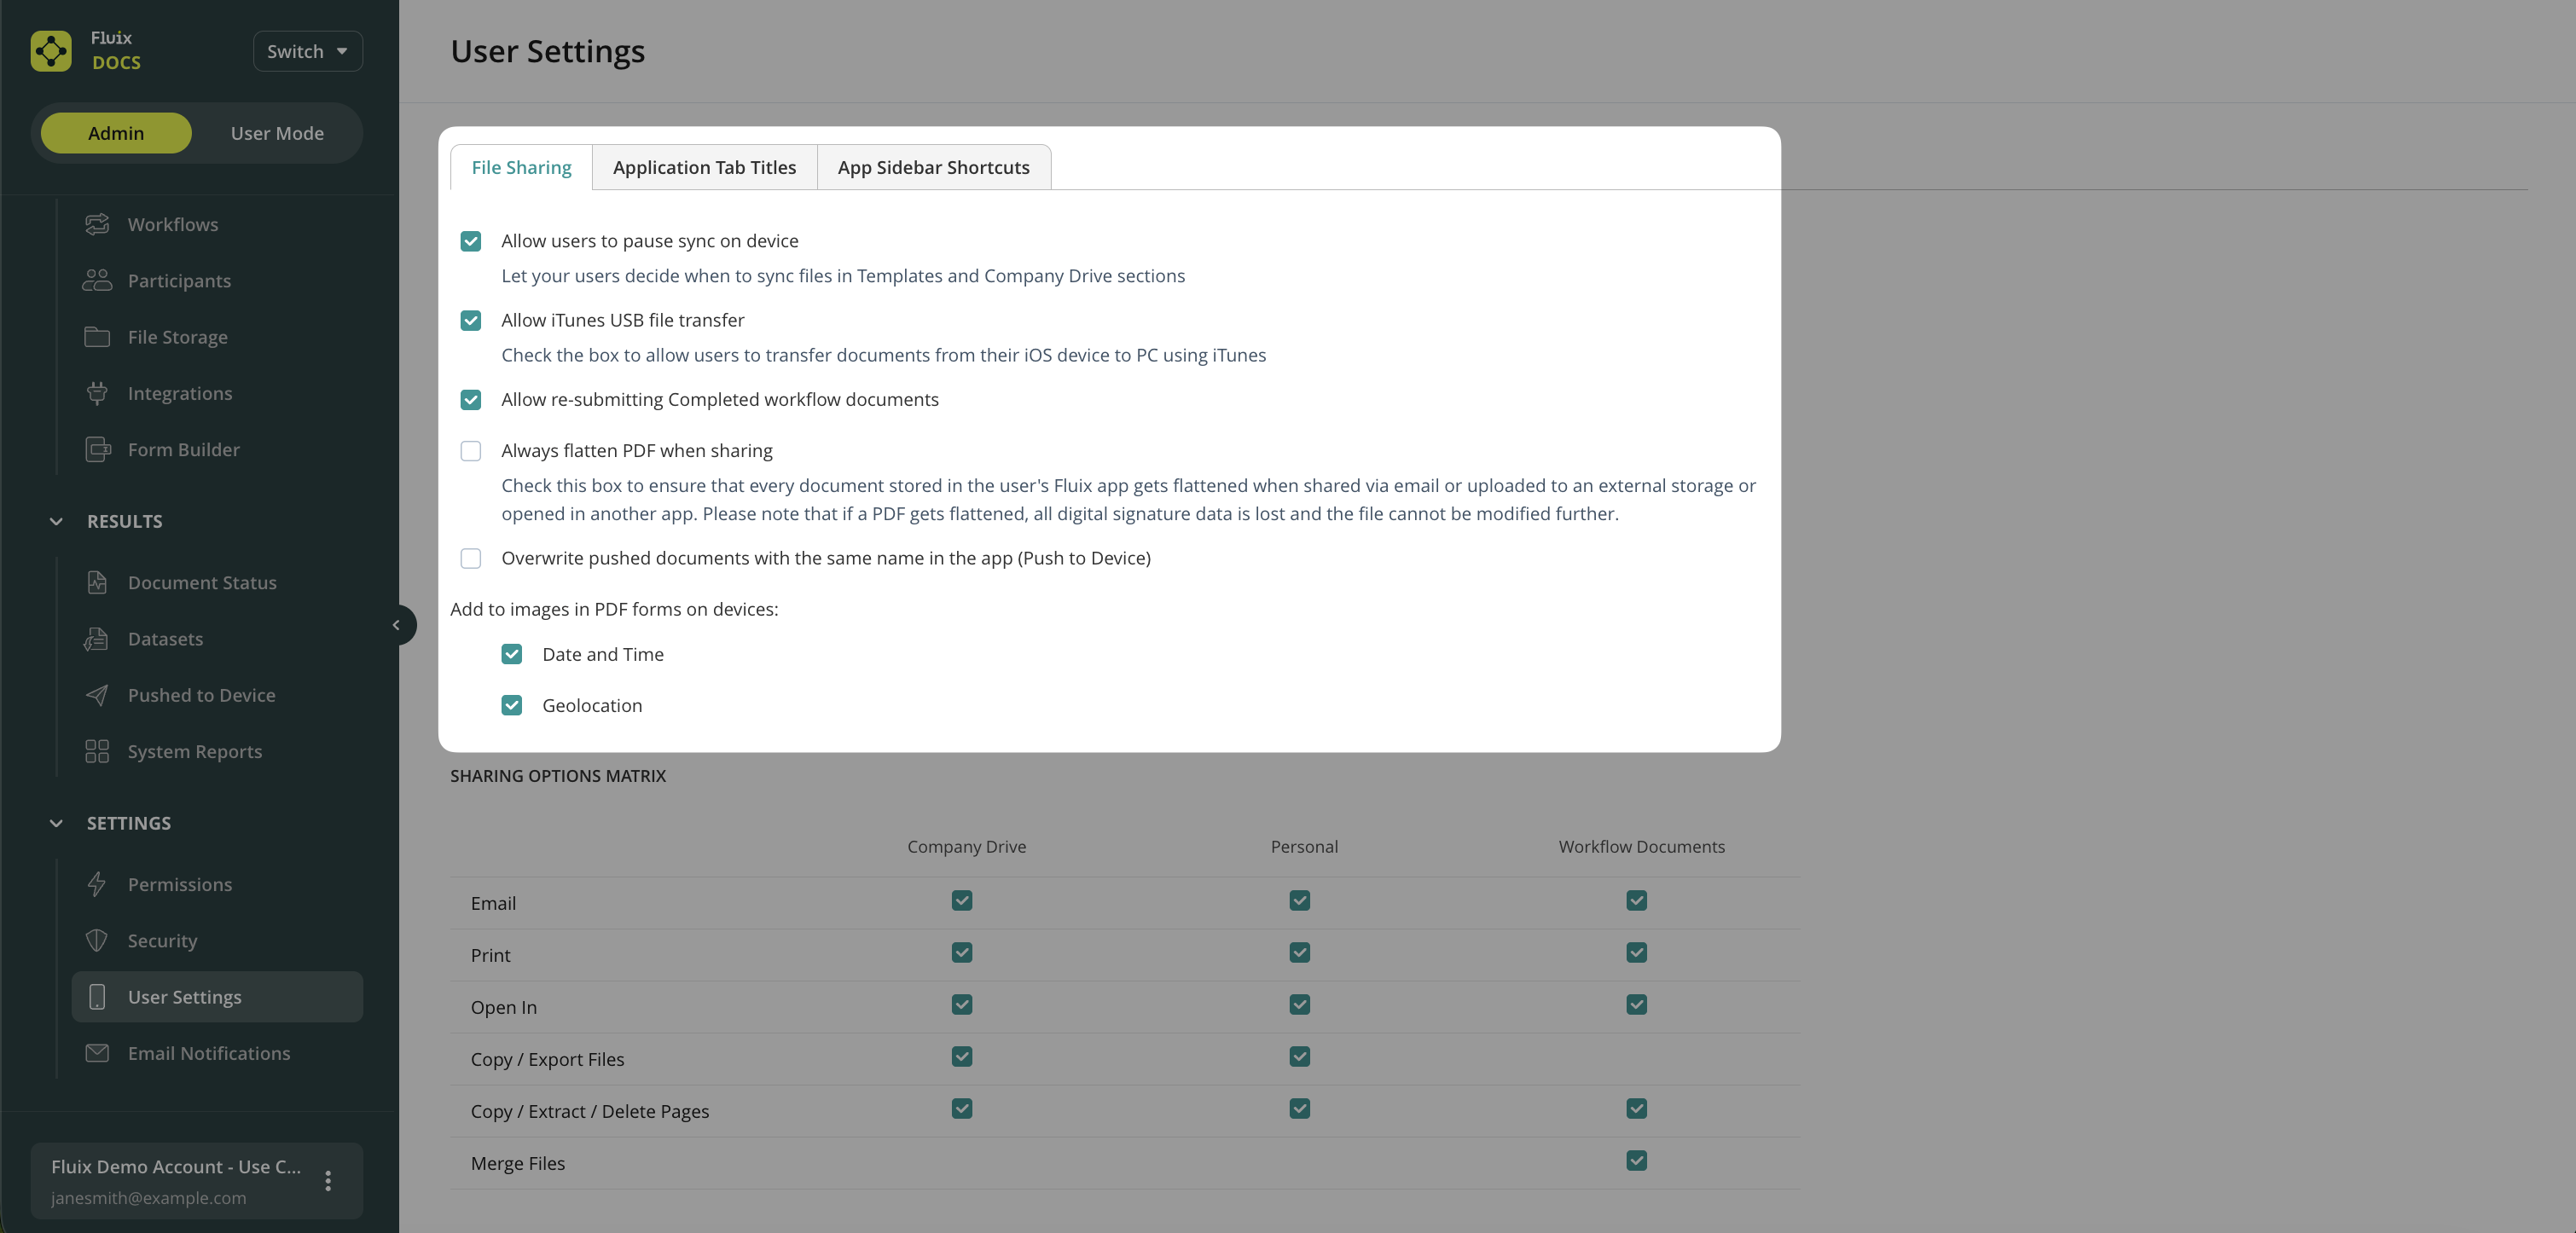
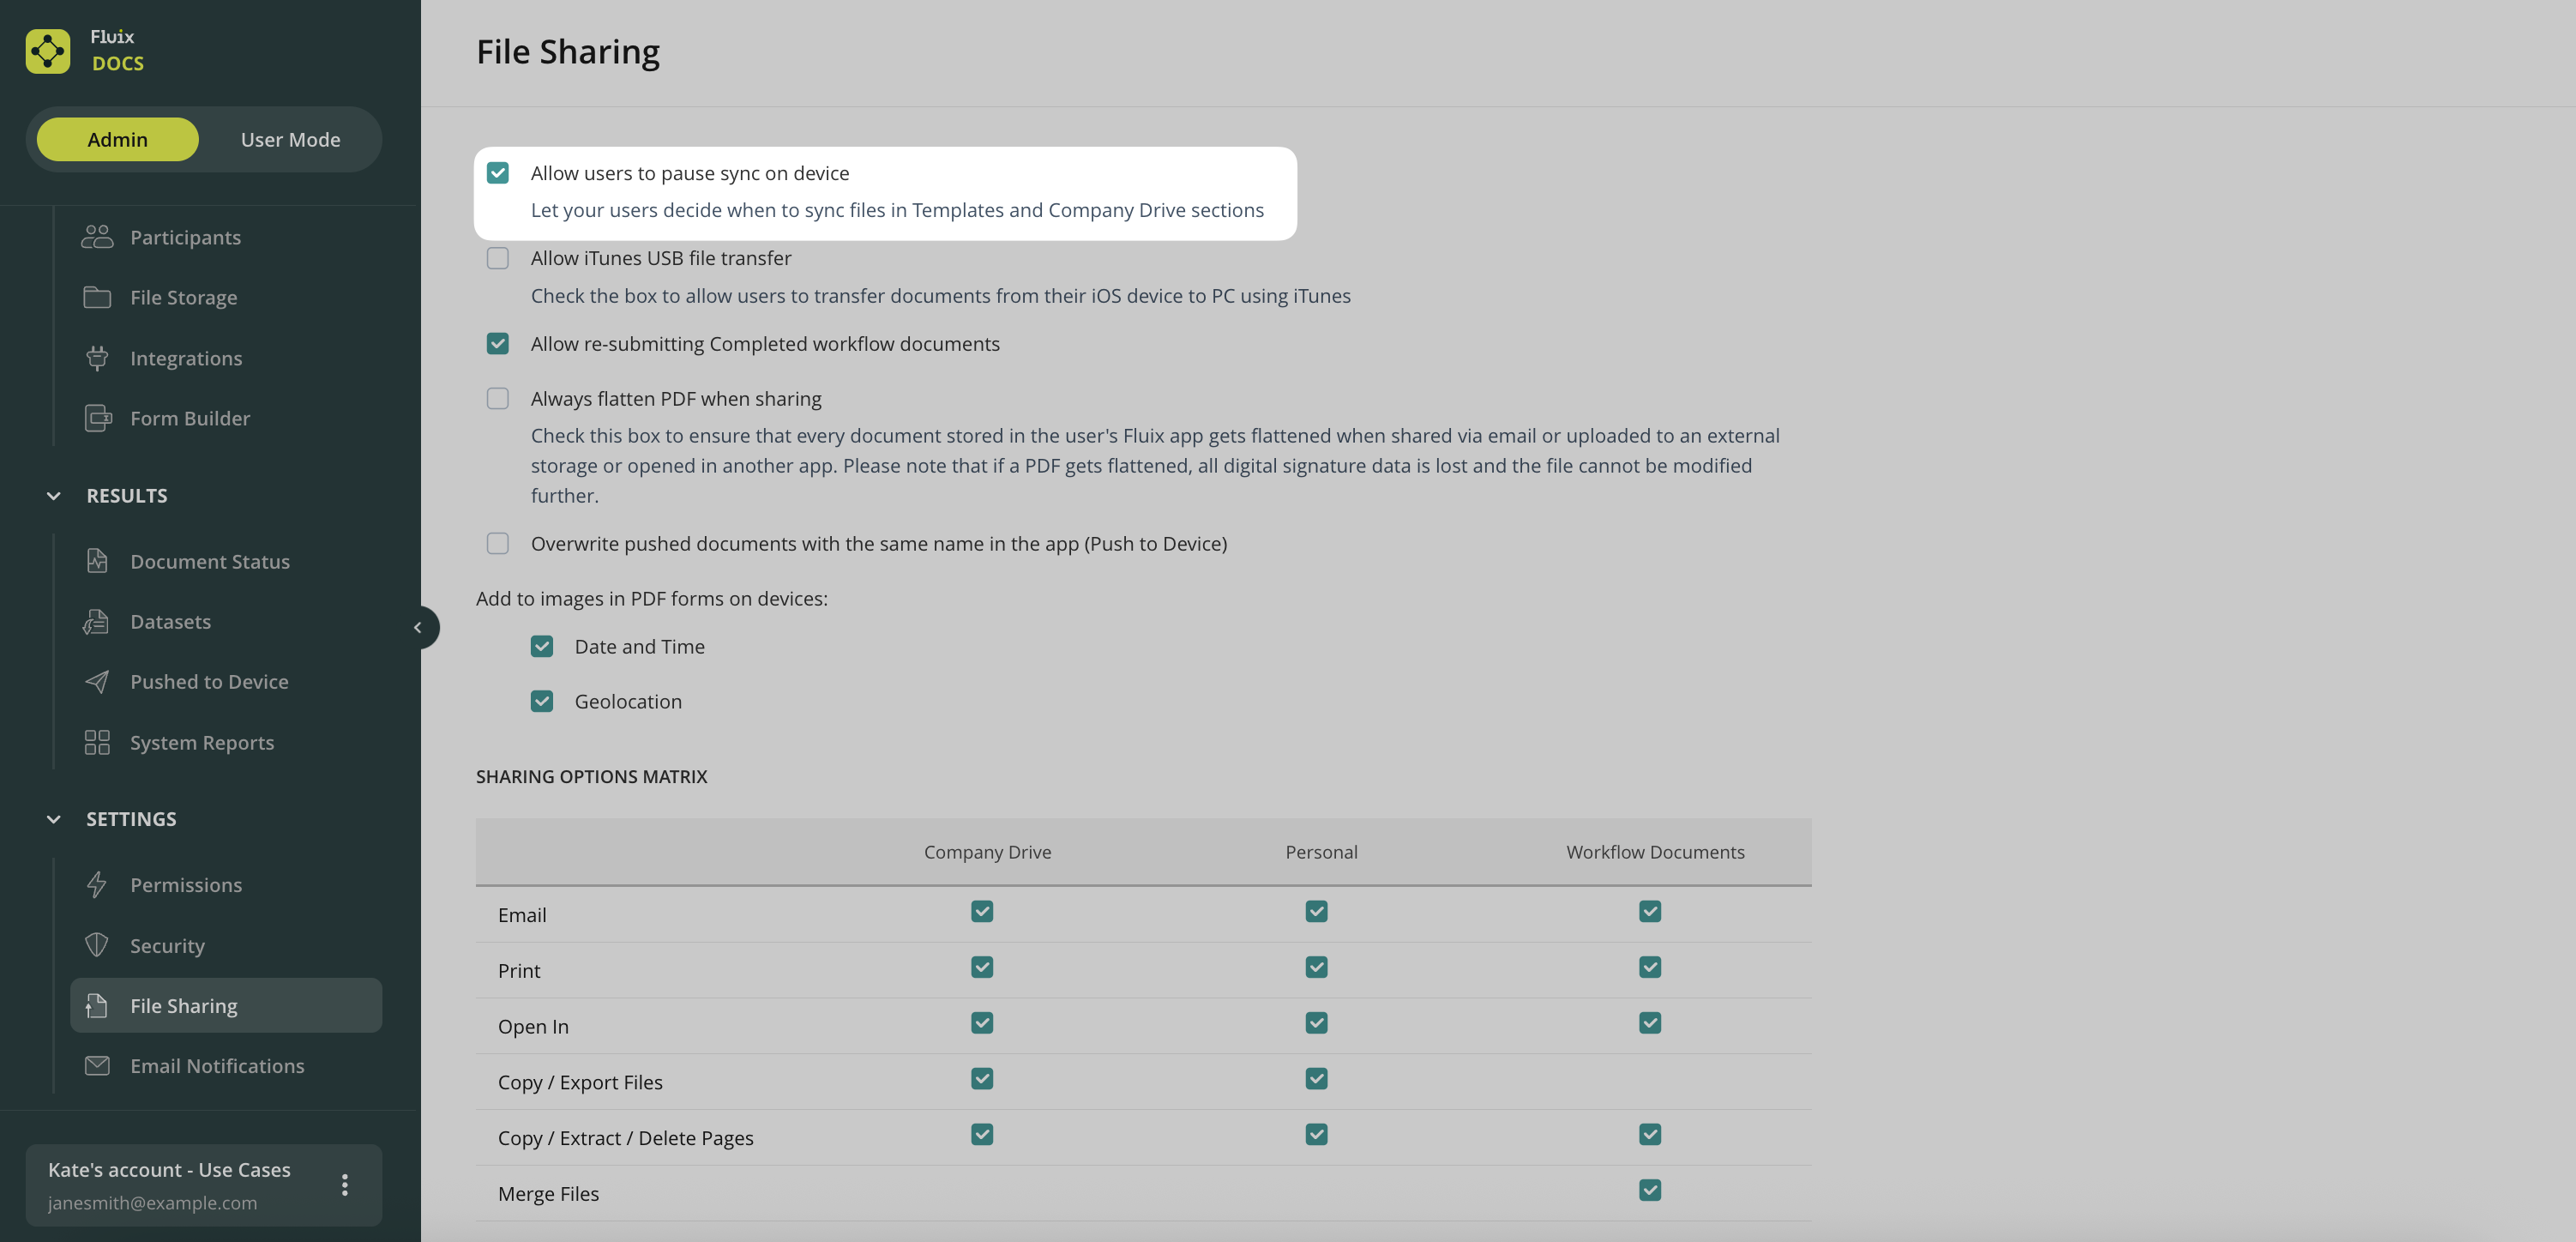
In the File Sharing tab, you can control which sharing options are available to your end users. To proceed, please navigate to the File Sharing tab of the User Settings section on the Admin Portal:
Allow users to pause sync on device—Let you enable the sync control in the Fluix Docs App. By allowing it, you let your users prioritize which folders they want to sync first in the Fluix Docs app. Check out this tutorial to learn how to use this feature.
Allow iTunes USB file transfer — enables users to transfer files from the iPad app to computers via USB cable and iTunes.
Allow re-submitting completed workflow documents—This option enables users to modify files under the Completed tab and resubmit them.
Always flatten PDF when sharing: will flatten each PDF once it leaves Fluix, i.e the file will no longer be editable
Overwrite pushed documents with the same name in the app: if this setting Push to device is enabled and you push a file with an already existing name to the Fluix app on device, Fluix will replace the old file with a new one.
Add to images in PDF forms on devices:
Date and Time — once enabled, the date and time stamp will be added to all images inserted into the forms while working in the Fluix app on devices.
Geolocation — once enabled, the geolocation will be added to all images inserted into the forms while working in the Fluix app on devices.
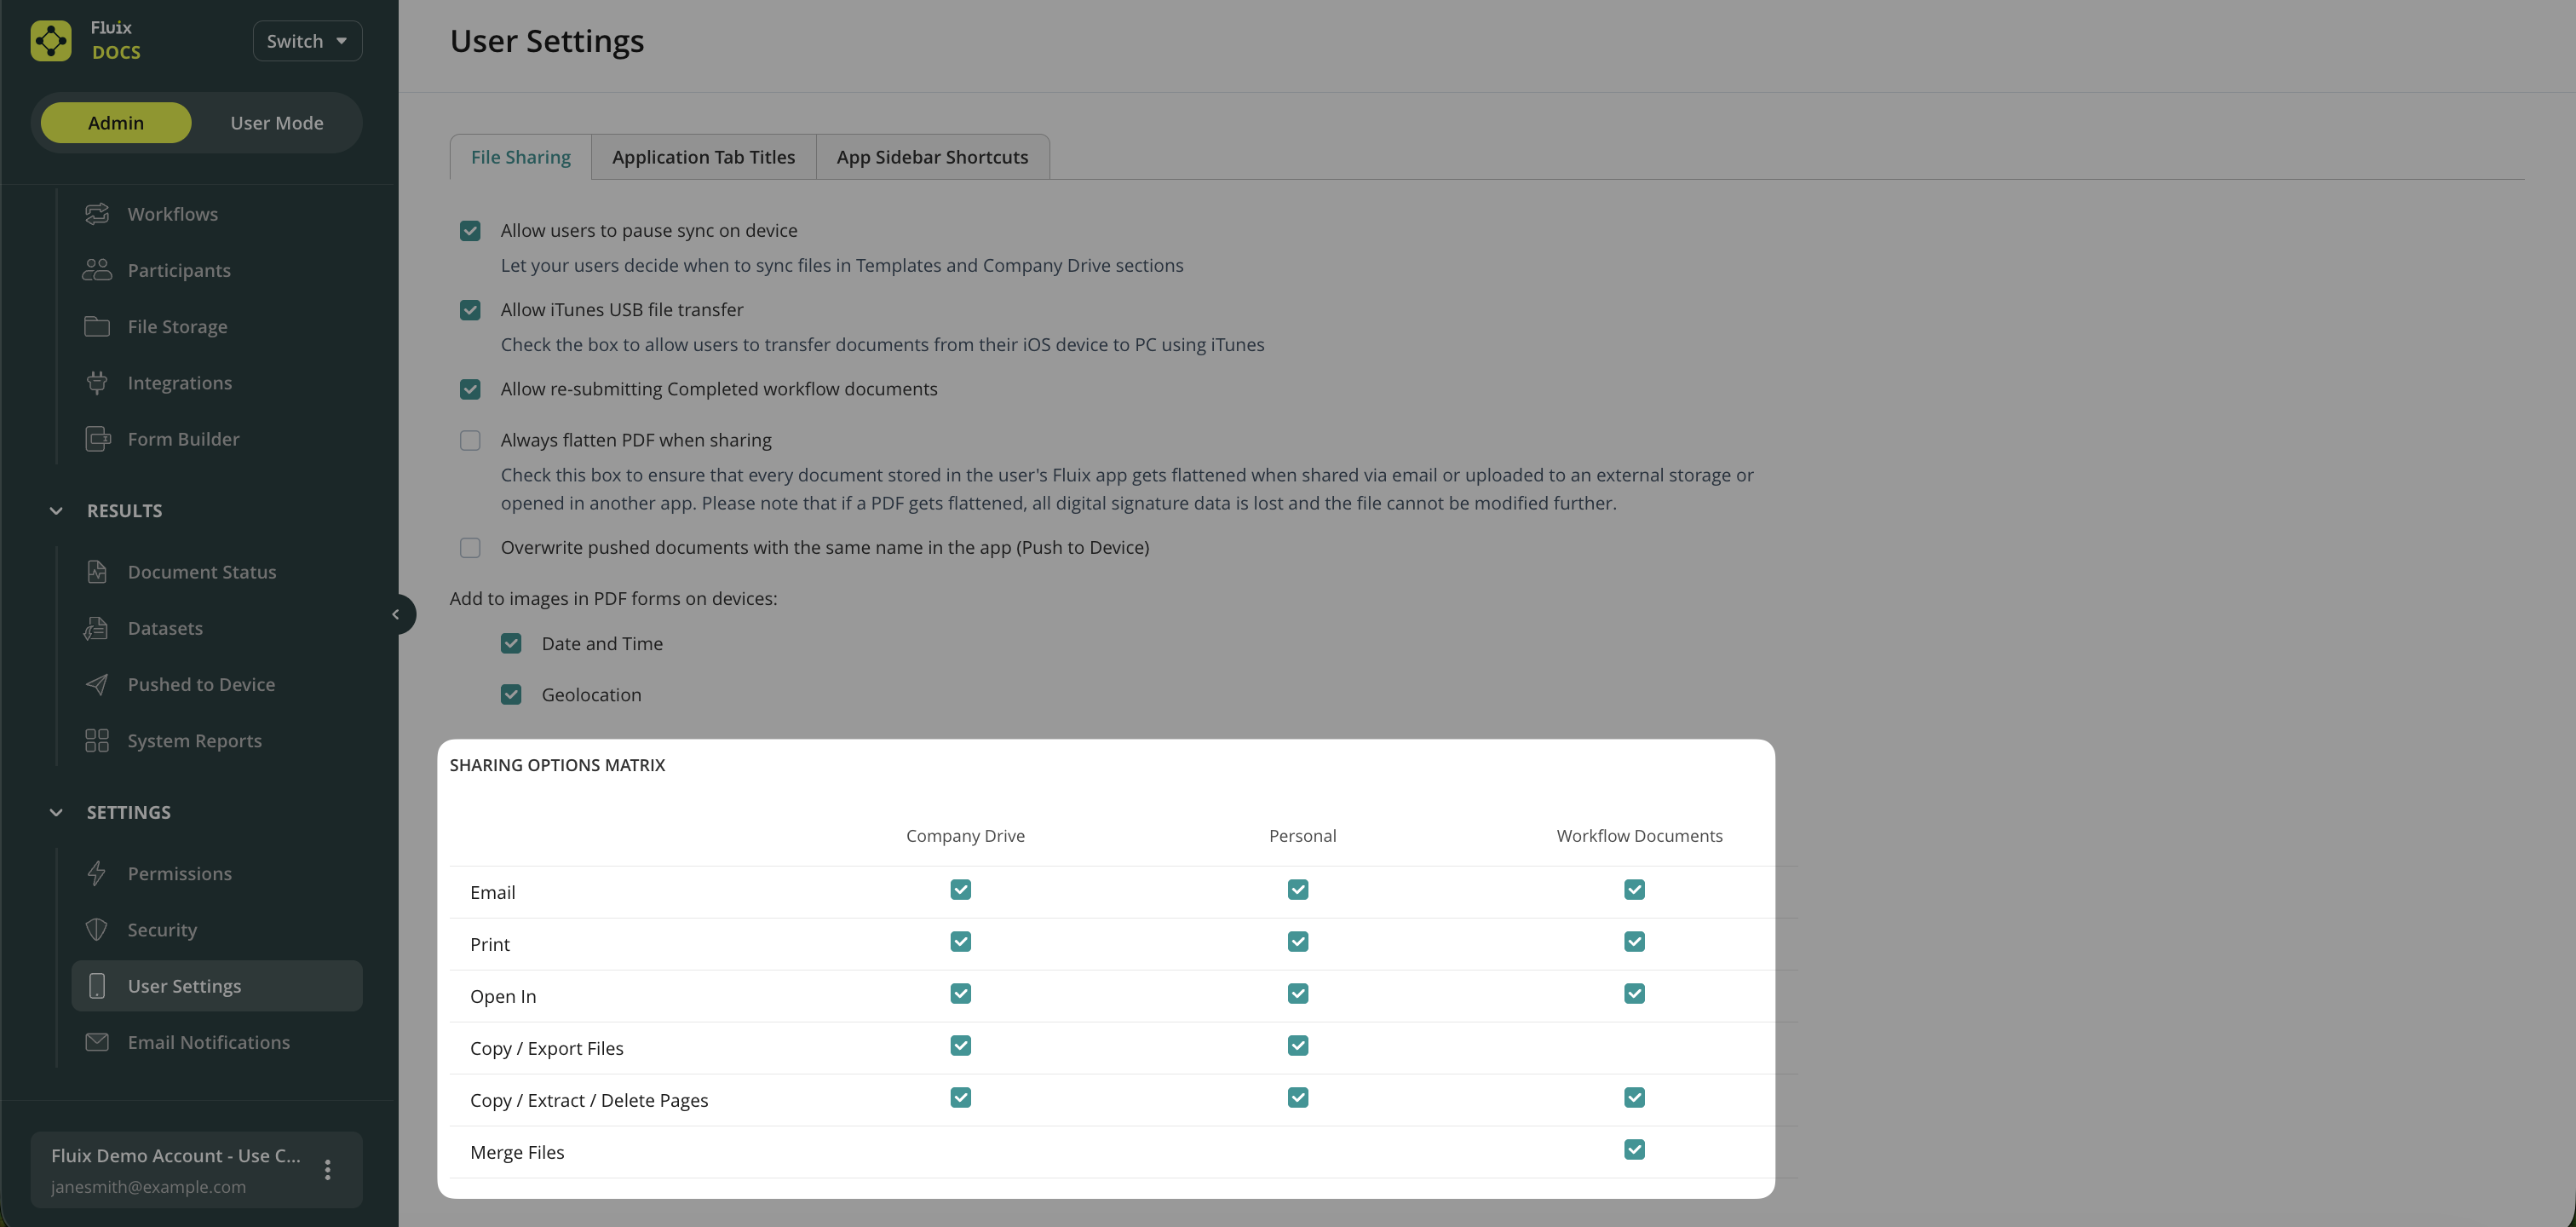
Sharing Options Matrix
The options below are enabled separately for:
Files in the Company Drivetab in theuser app. These include files from three kinds of workflow sources:
A folder with the option to sync changes back to the server.
A folder with the option to make changes on the device only.
A folder with documents that are manually downloaded on the device.
Documents in the Personal tab of the app. These are the documents that can be accessed by a user only and are not available to the admin.
Workflow documents. These include documents at all workflow stages: Templates, Drafts, My and Group Inbox, Cabinet, Sent for Signature, Reassigned, Completed.
Possible sharing options
Email allows emailing files directly via the default email app on an iOS device or PC.
Print: allows users to print documents from Fluix using AirPrint-compatible printers.
Open In: makes it possible to open PDF files located in Fluix to other applications on the device.
Copy/Export files: allows copying and exporting files within the Personal tab and Documents tab (Sync folders).
Copy/Extract/Delete Pages: This option allows copying individual pages, extracting them, and deleting them within one file. It is available under the grid view icon located in the top left corner.
Merge files: allows combining several workflow PDF files into one. Check the feature tutorial here.
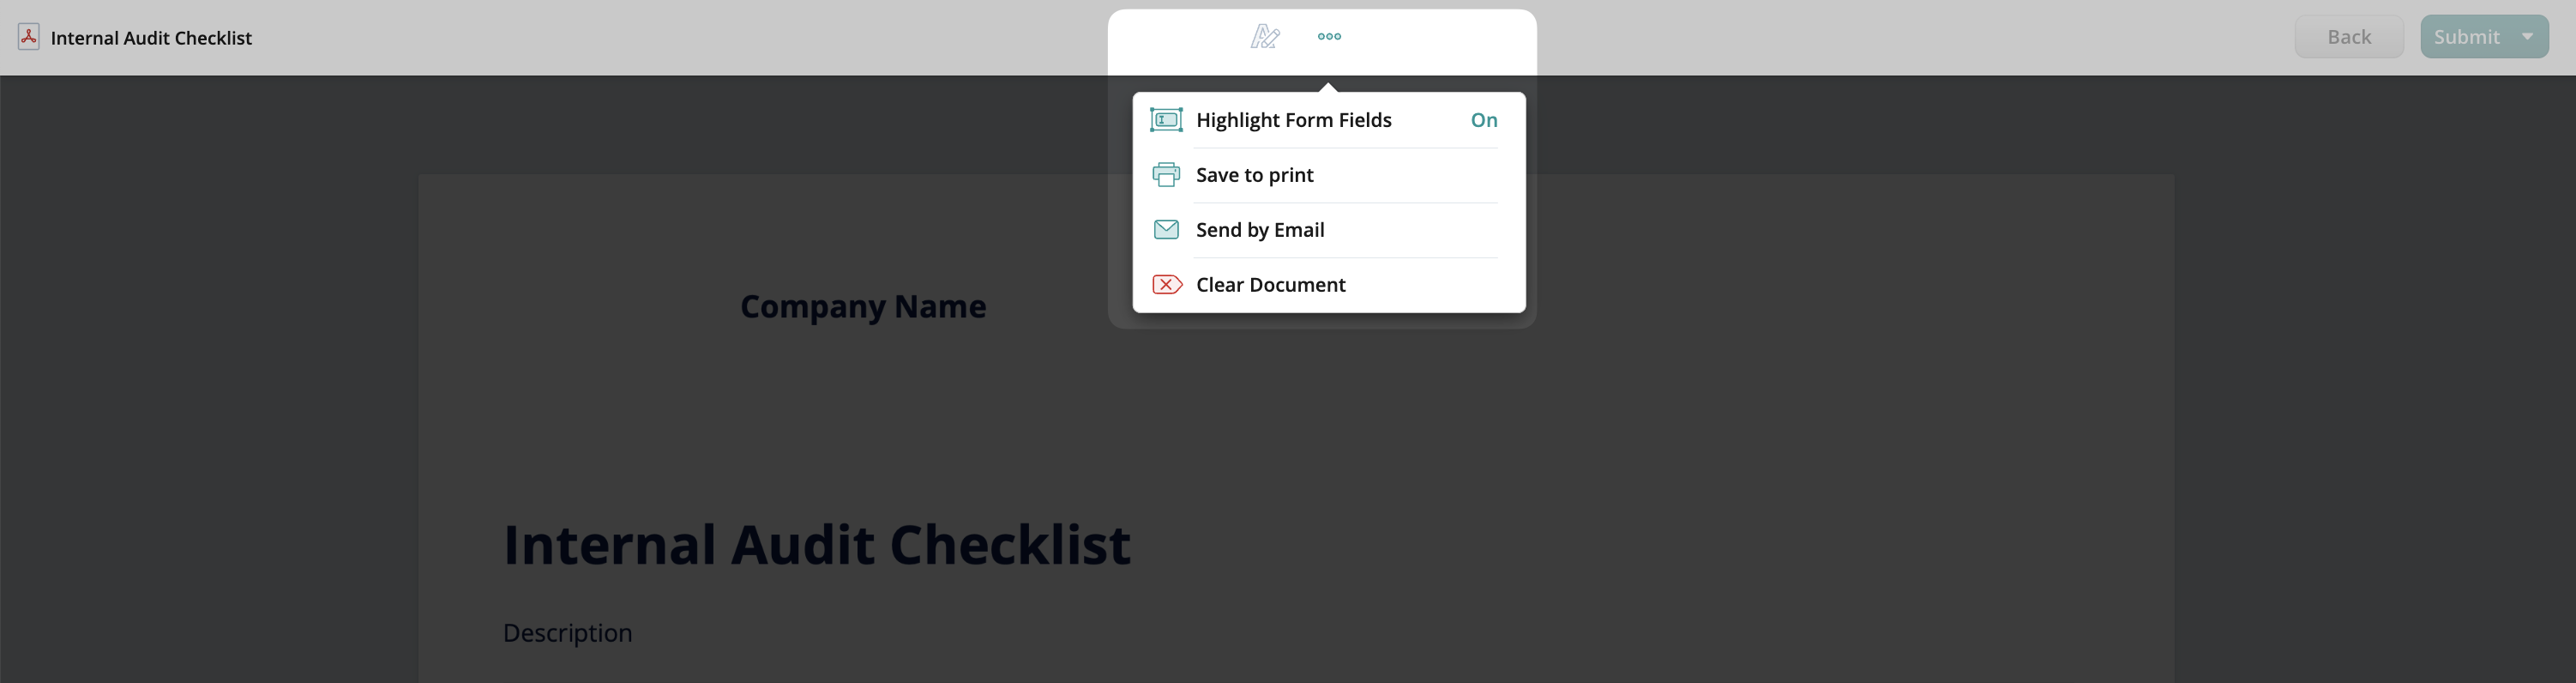
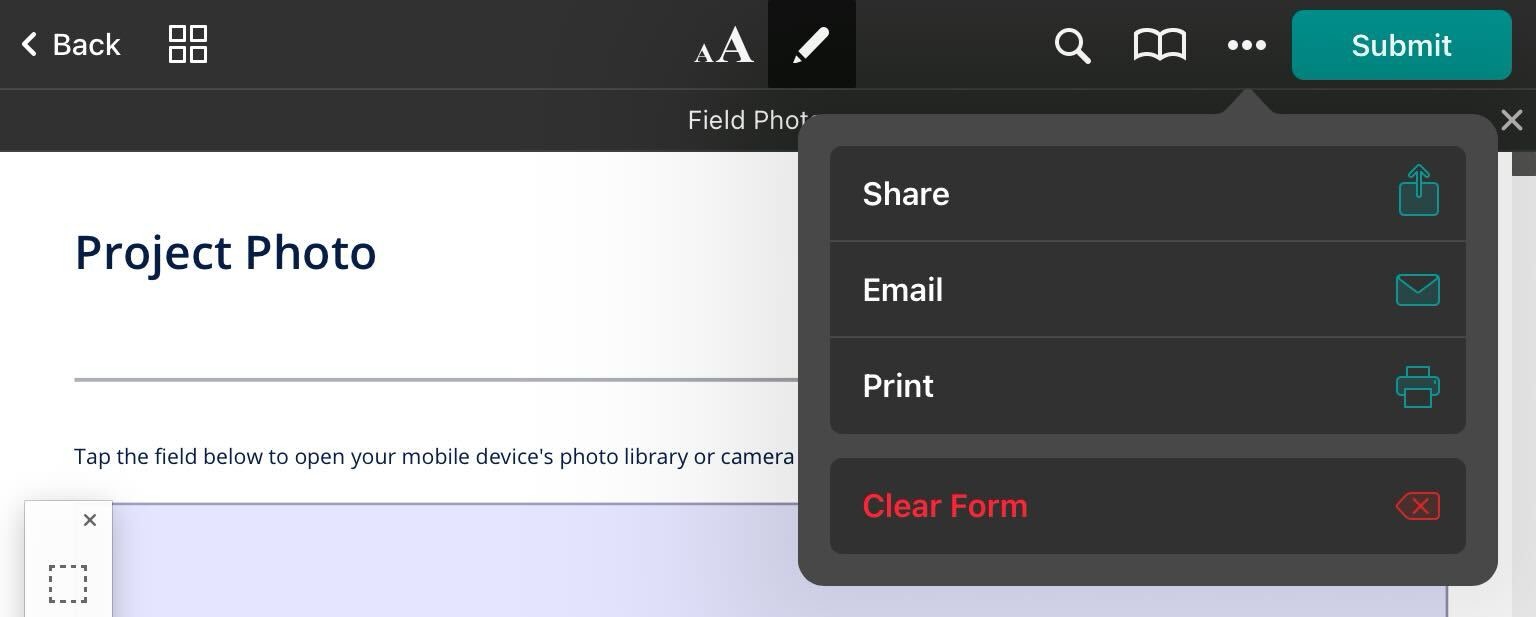
Once enabled, in a web browser application, a user will see the options upon opening the document:
On the iOS device, the options are available under the sharing option at the top.
Was that helpful? Learn more about Email Notifications Settings in the next article or contact us at support@fluix.io if you have any questions or comments.
Was this article helpful?
Thanks for your feedback!
Oops, something went wrong. Please, try again later.
Thank you!
What details or examples would have made this article more helpful for you? We appreciate your insights!
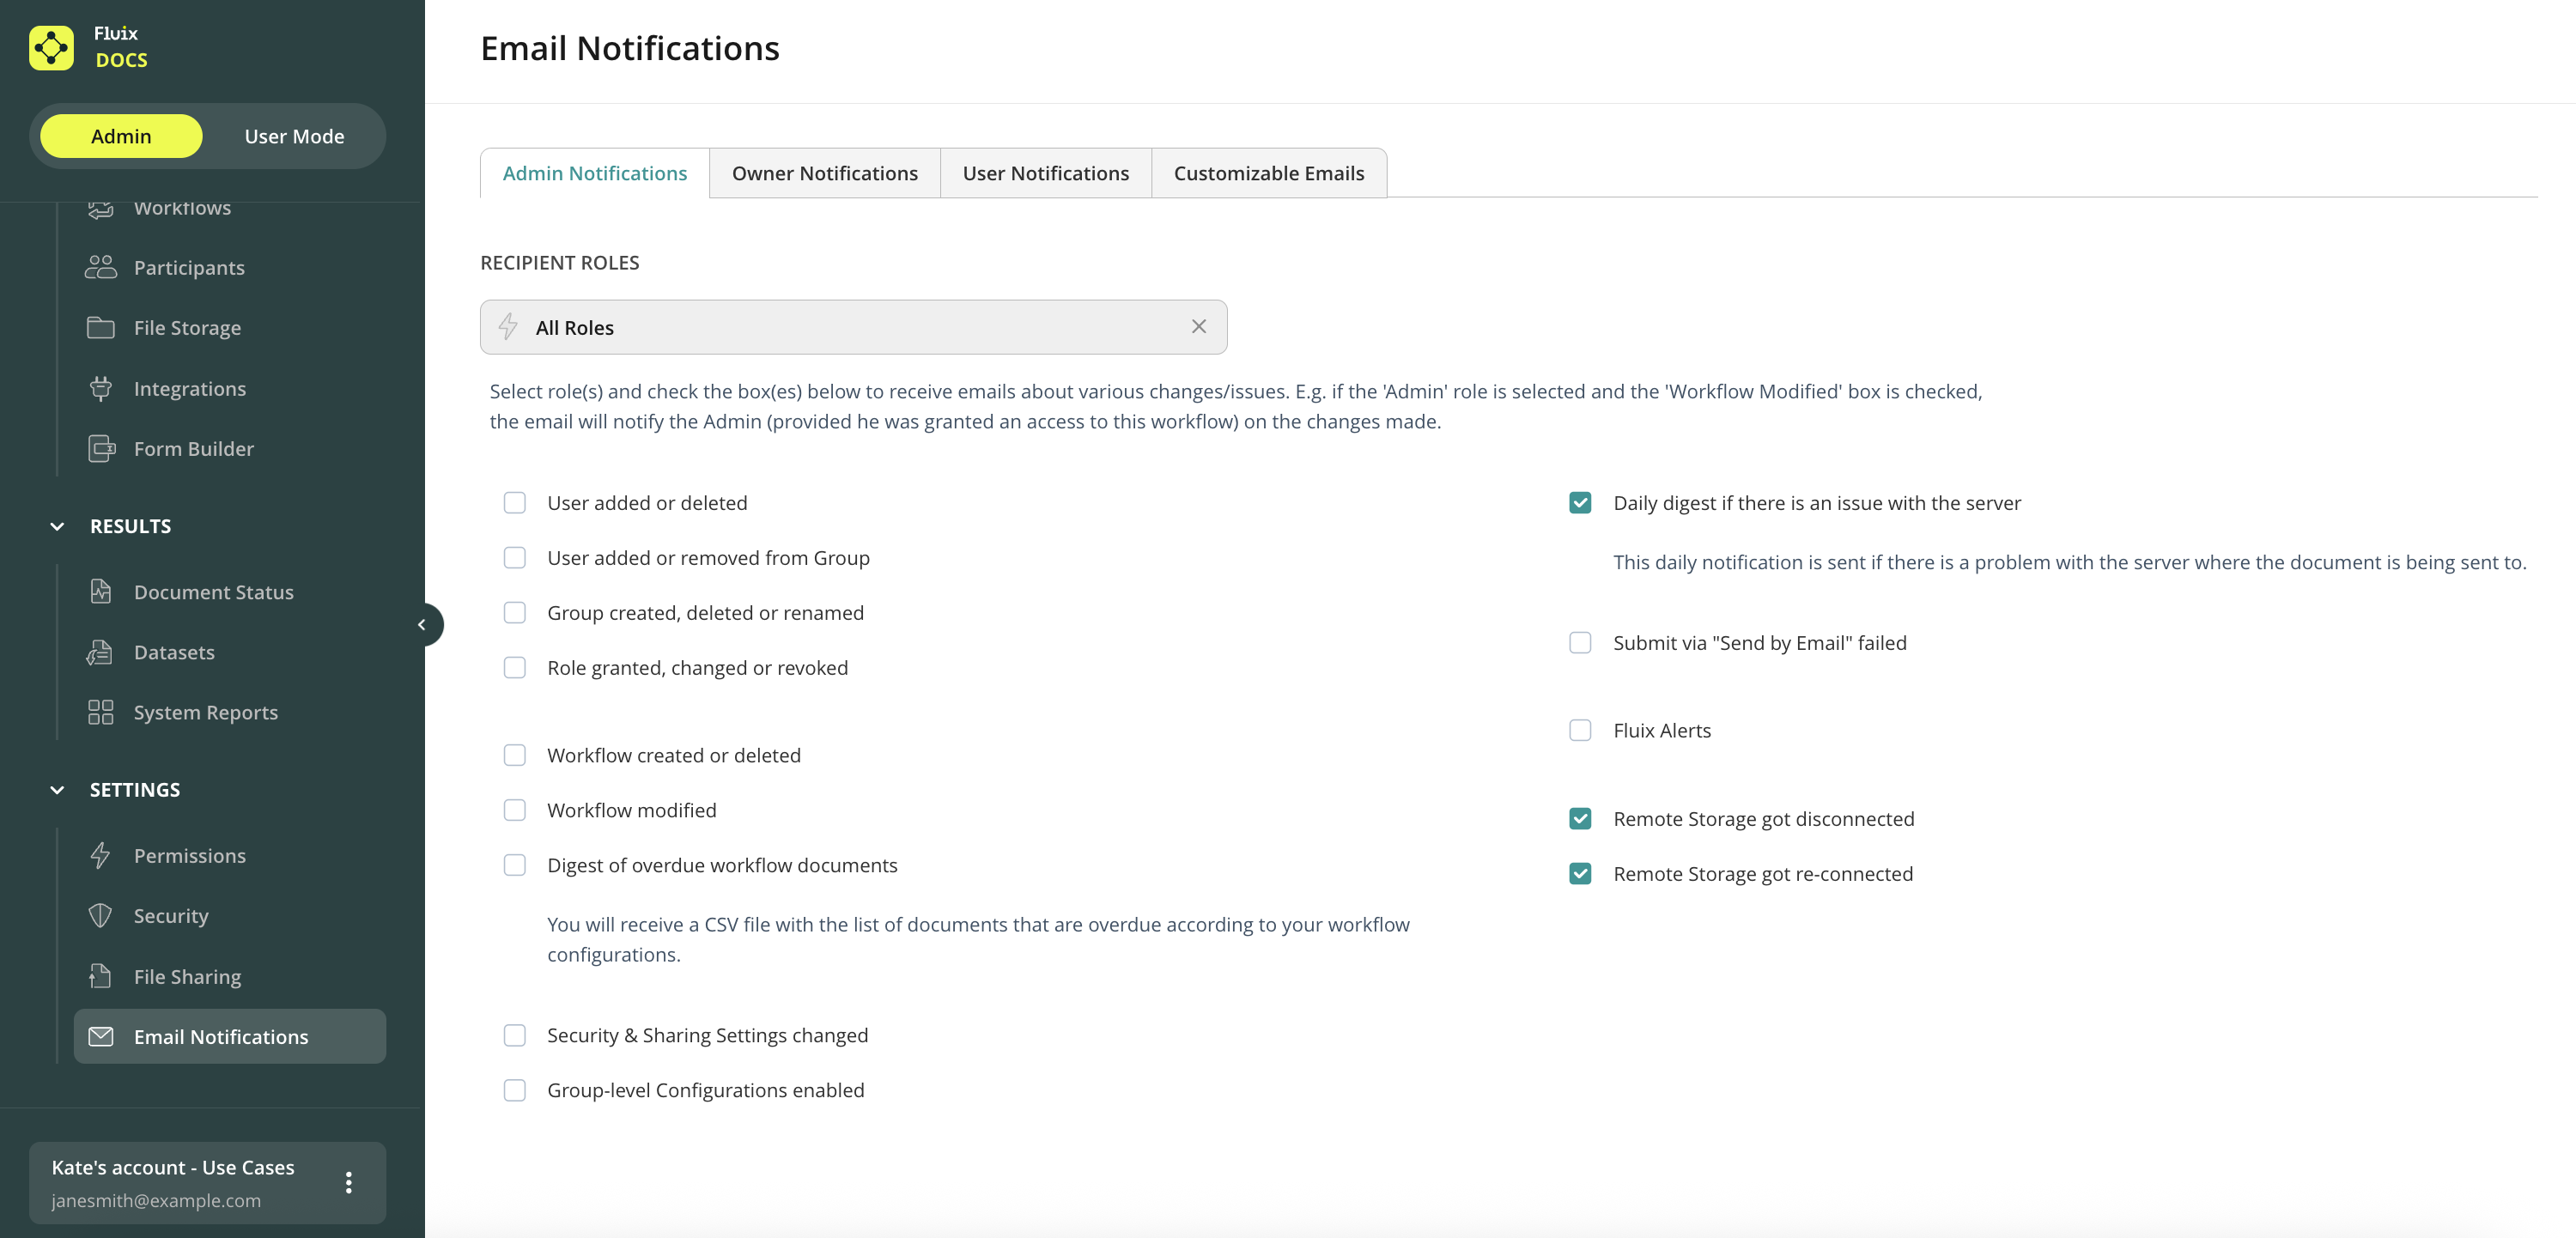
As a company administrator, you can control the email notifications that Fluix sends to both Admins and regular users, on the various updates coming from Fluix account:
You can turn on/off email notifications separately for Admins, the Owner, and for End Users.
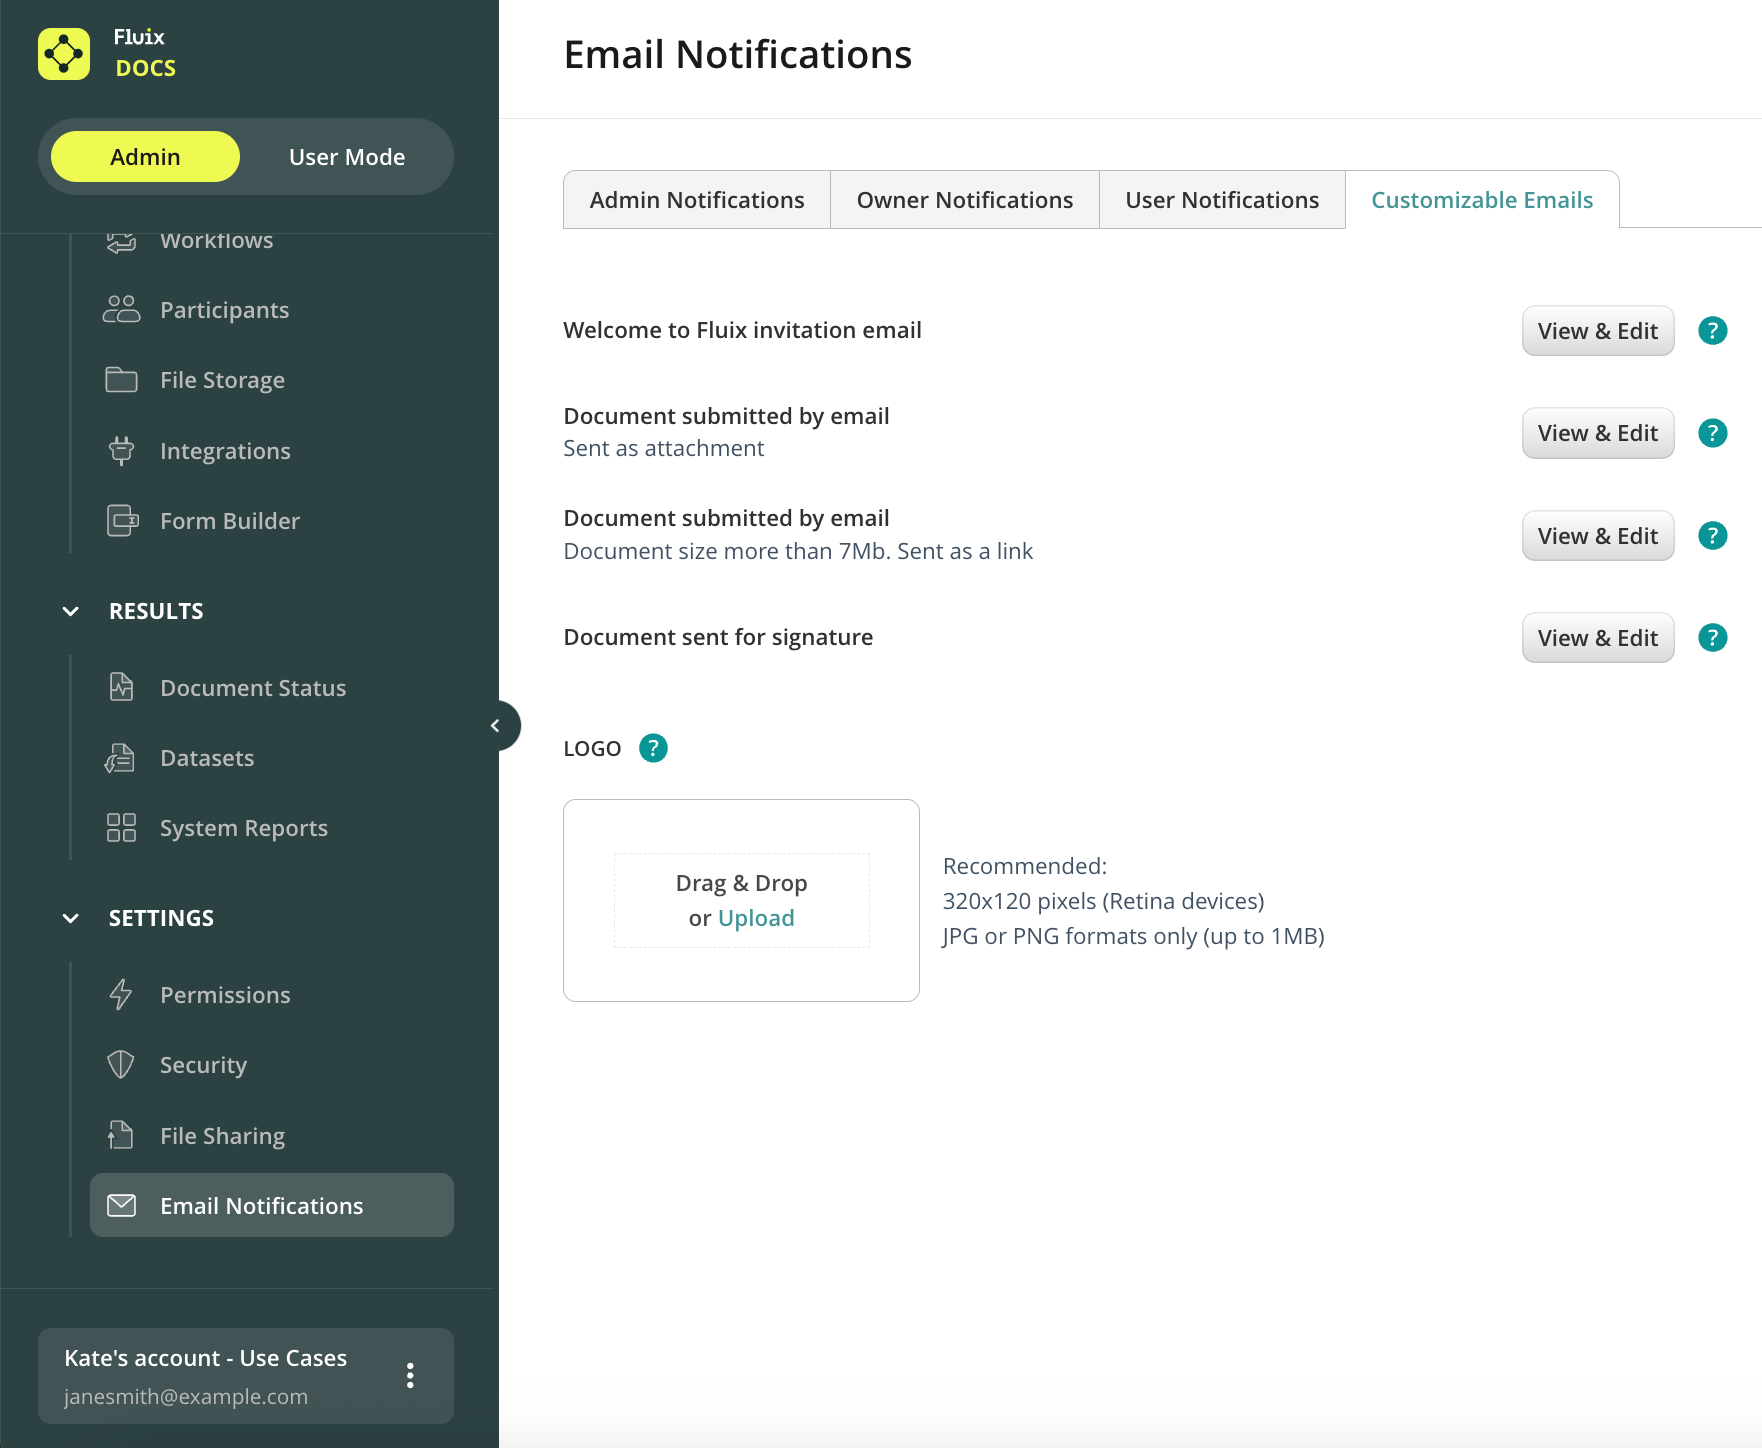
In this section there’s also a subsection for email customization, here you can change the text in the emails which users receive when joining Fluix as well as the template for when a file is submitted via email. Additionally, the emails can be customized by using the keywords to provide the recipients with specific data about the users, documents, or any other information.
Your company logo can be also added to the email templates, it’s especially recommended when sending documents for signatures to people outside of Fluix.
Was this article helpful?
Thanks for your feedback!
Oops, something went wrong. Please, try again later.
Thank you!
What details or examples would have made this article more helpful for you? We appreciate your insights!
The Sync Regulation feature lets your team manually pause or resume syncing of specific folders in the Templates or Company Drive on their devices. This gives your users control over when and what content to sync first.
Other top-notch benefits are:
Saving battery since a permanent auto sync will no longer be performed.
Decrease the usage of the storage capacity of the user’s device.
The users may independently prioritize which folders they want to sync first, working with slow internet.
When Is It Useful?
Your Fluix setup includes many documents for the user working in the iOS app, and syncing everything takes up space.
Your team often works in areas with weak or unstable internet.
You want to let your team sync only specific relevant folders for them at a certain point.
How to Enable Sync Regulation in the Admin Portal
To enable this feature for your whole Fluix company account:
1. Go to Admin Portal → Settings → File Sharing section.
2. Check the box Allow users to pause sync on device.
3. After that, click Save changes when it appears on your screen.
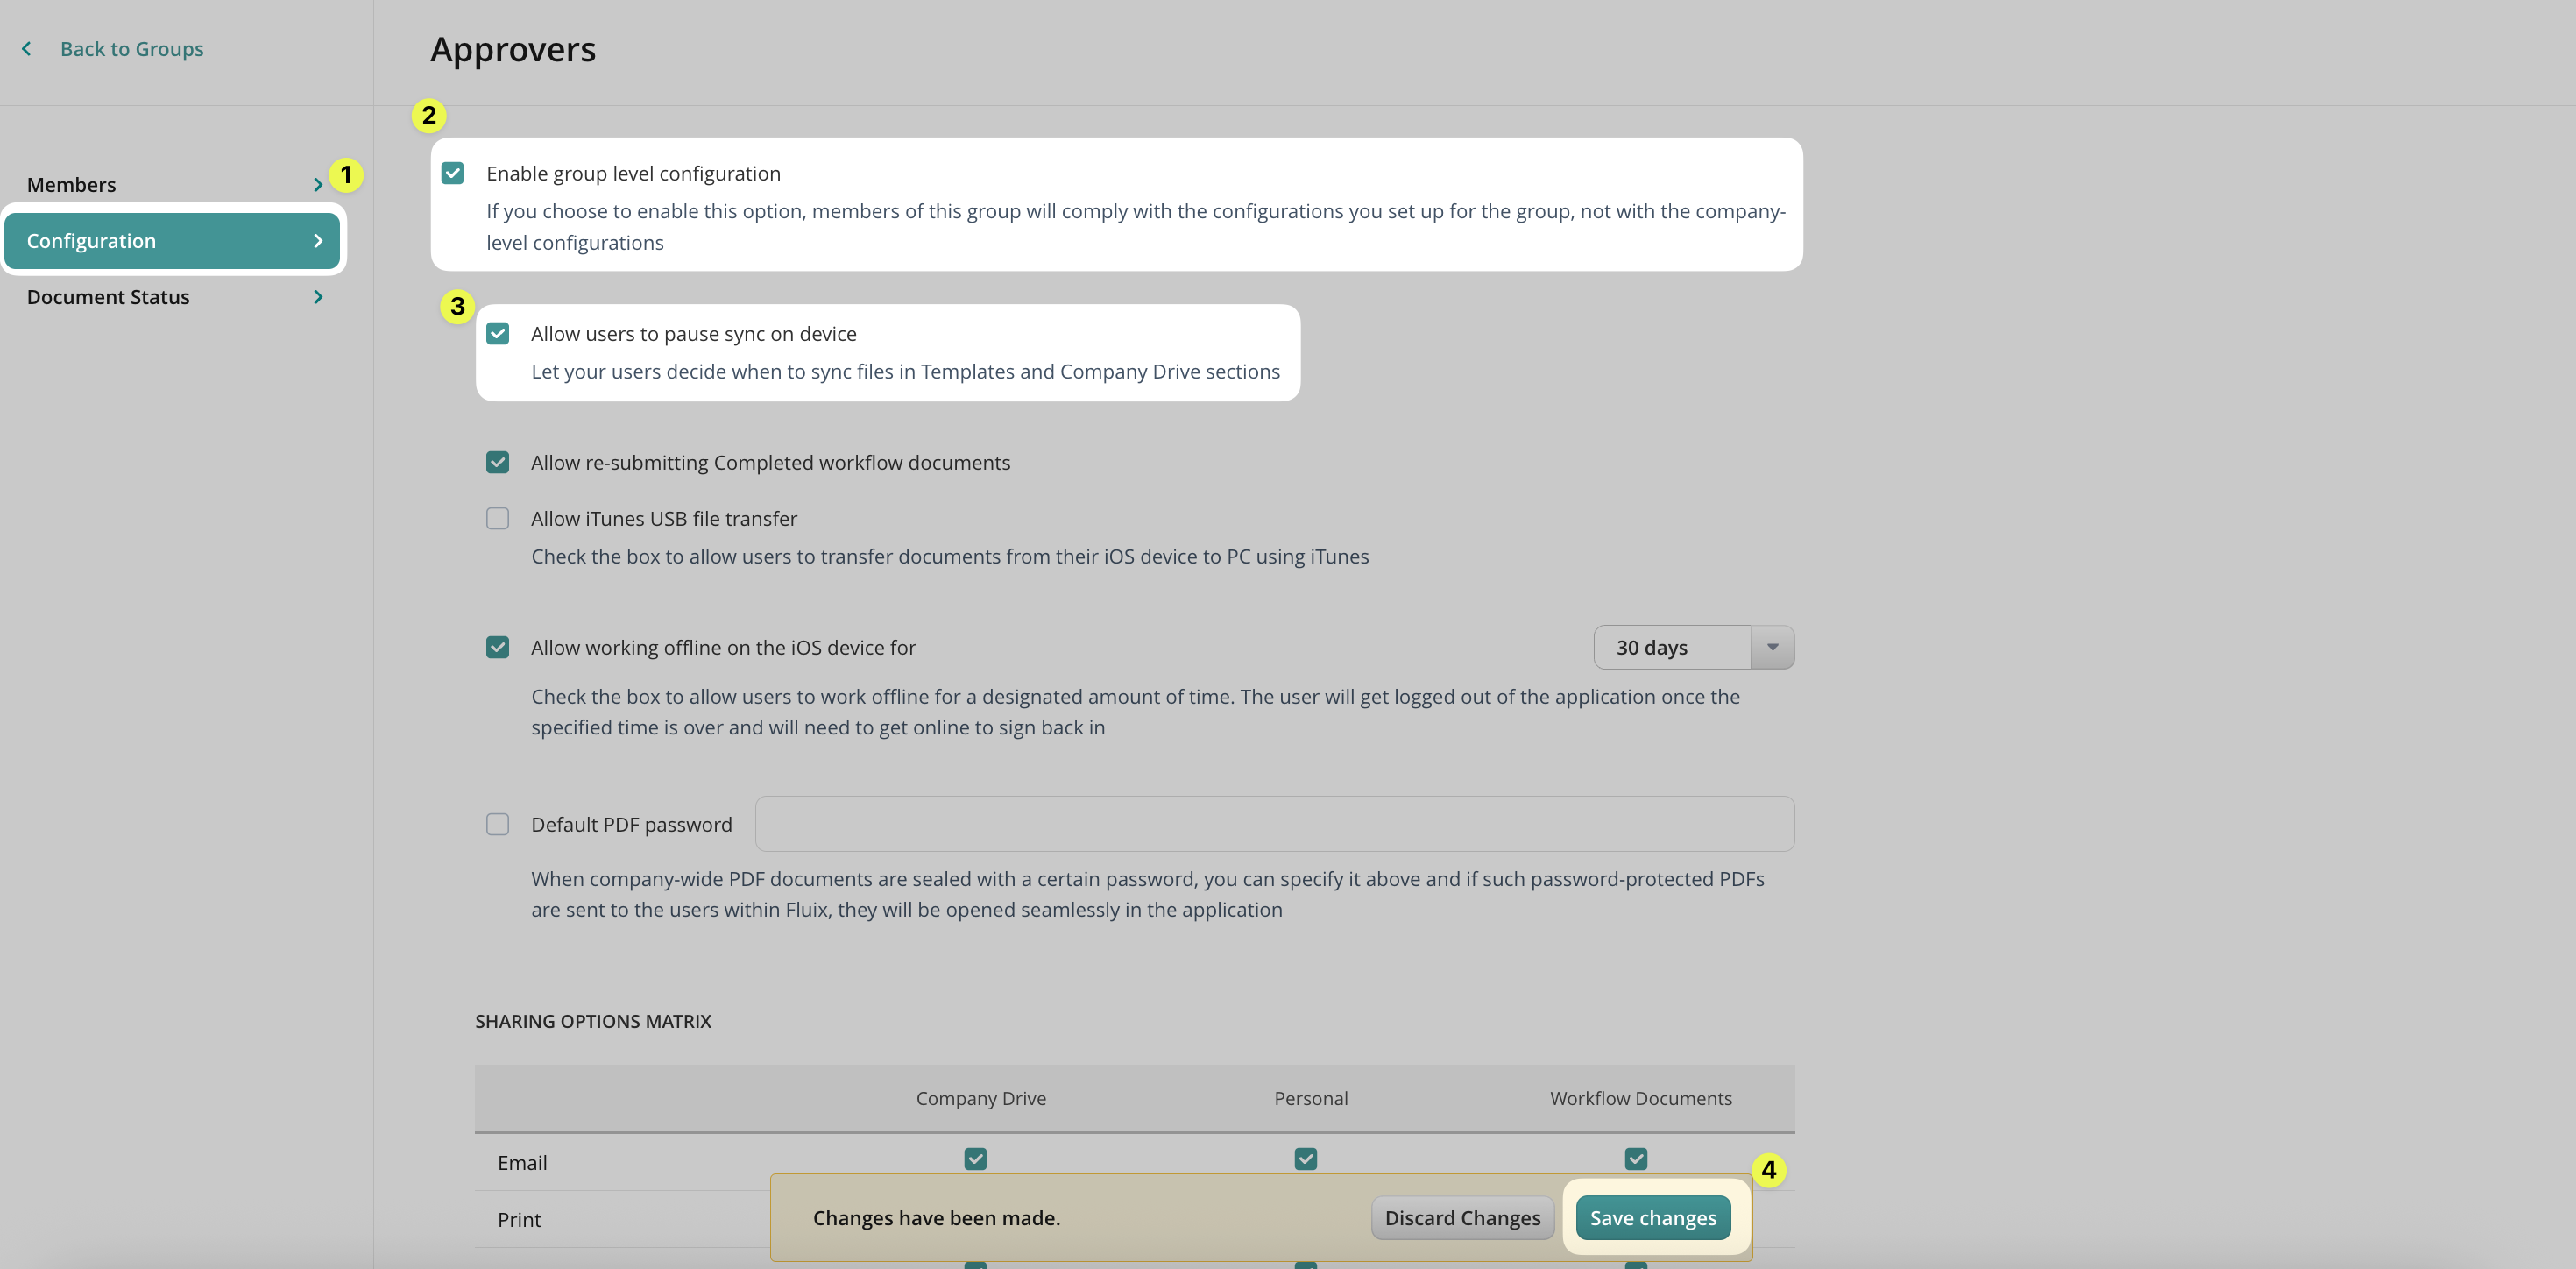
To enable this feature for the specific group in your company’s account:
1. Navigate to Participants → Groups.
2. Choose the group and open the Configuration tab.
3. Check the box Enable group-level configuration, and then check the box Allow users to pause sync on device.
4. After that, click Save changes when it appears on your screen.
Ensure each user’s profile has this group set as a default in their User Details. Note: This overrides company-wide settings for those users in the group. This means that the configurations you set for them in their default group will be assigned to all the users within this group.
How Sync Control Works for Users in Fluix Docs App
The users can pause or resume a sync in a couple of different ways:
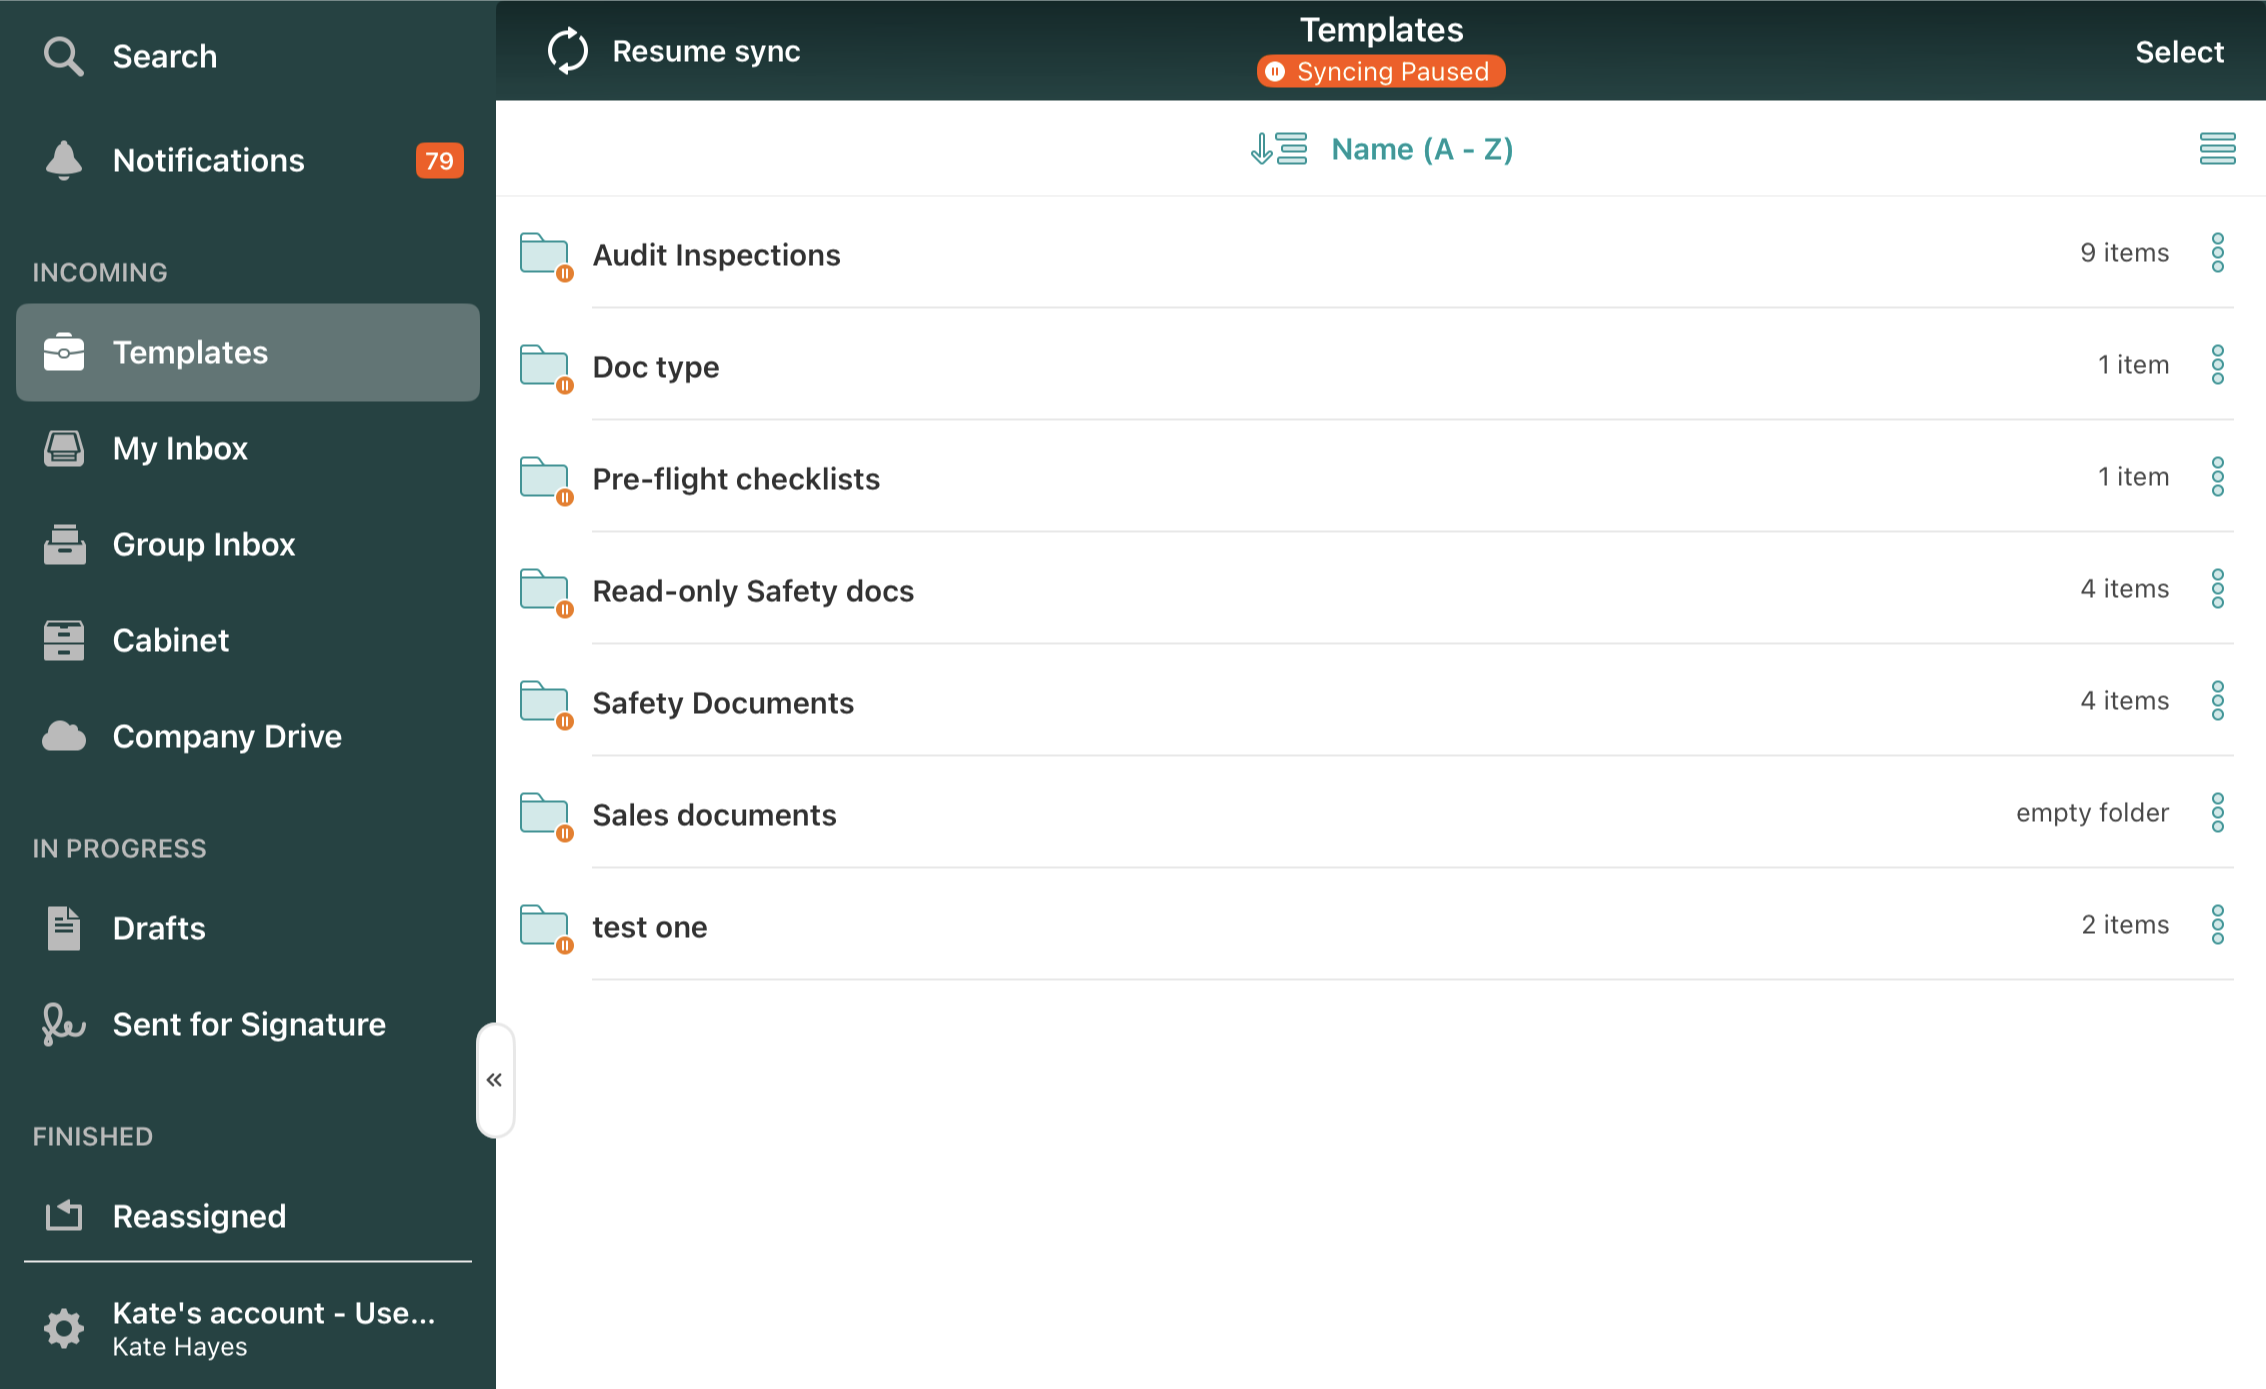
1. Pause Sync For The Specific Section:
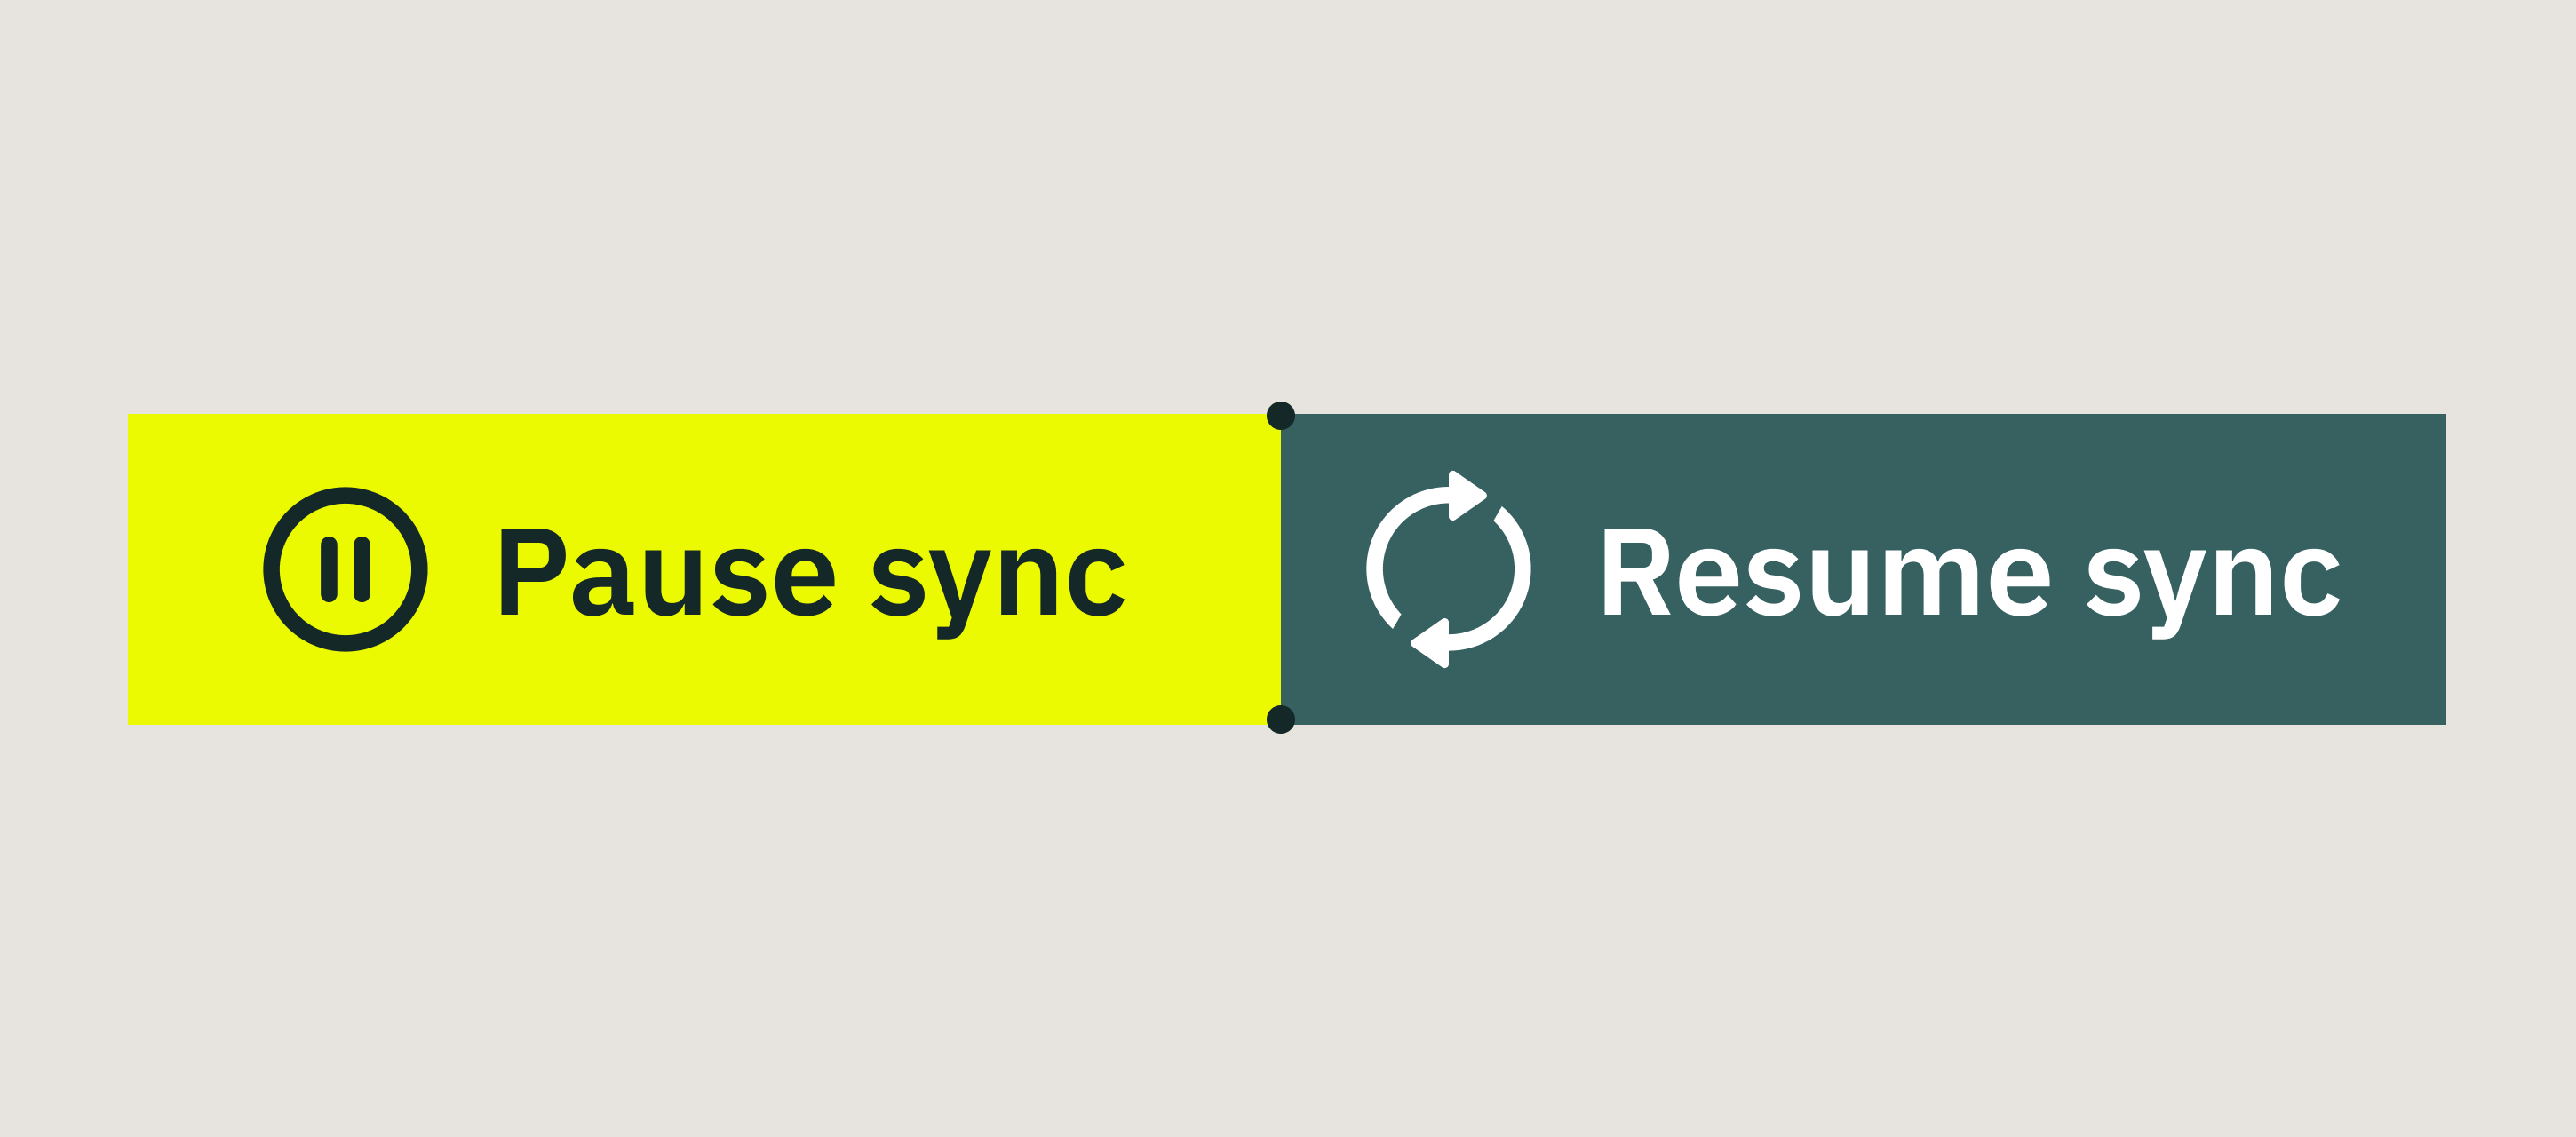
Tap Pause Sync next to a section name to stop syncing all its folders.
Tap Resume Sync to restart it.
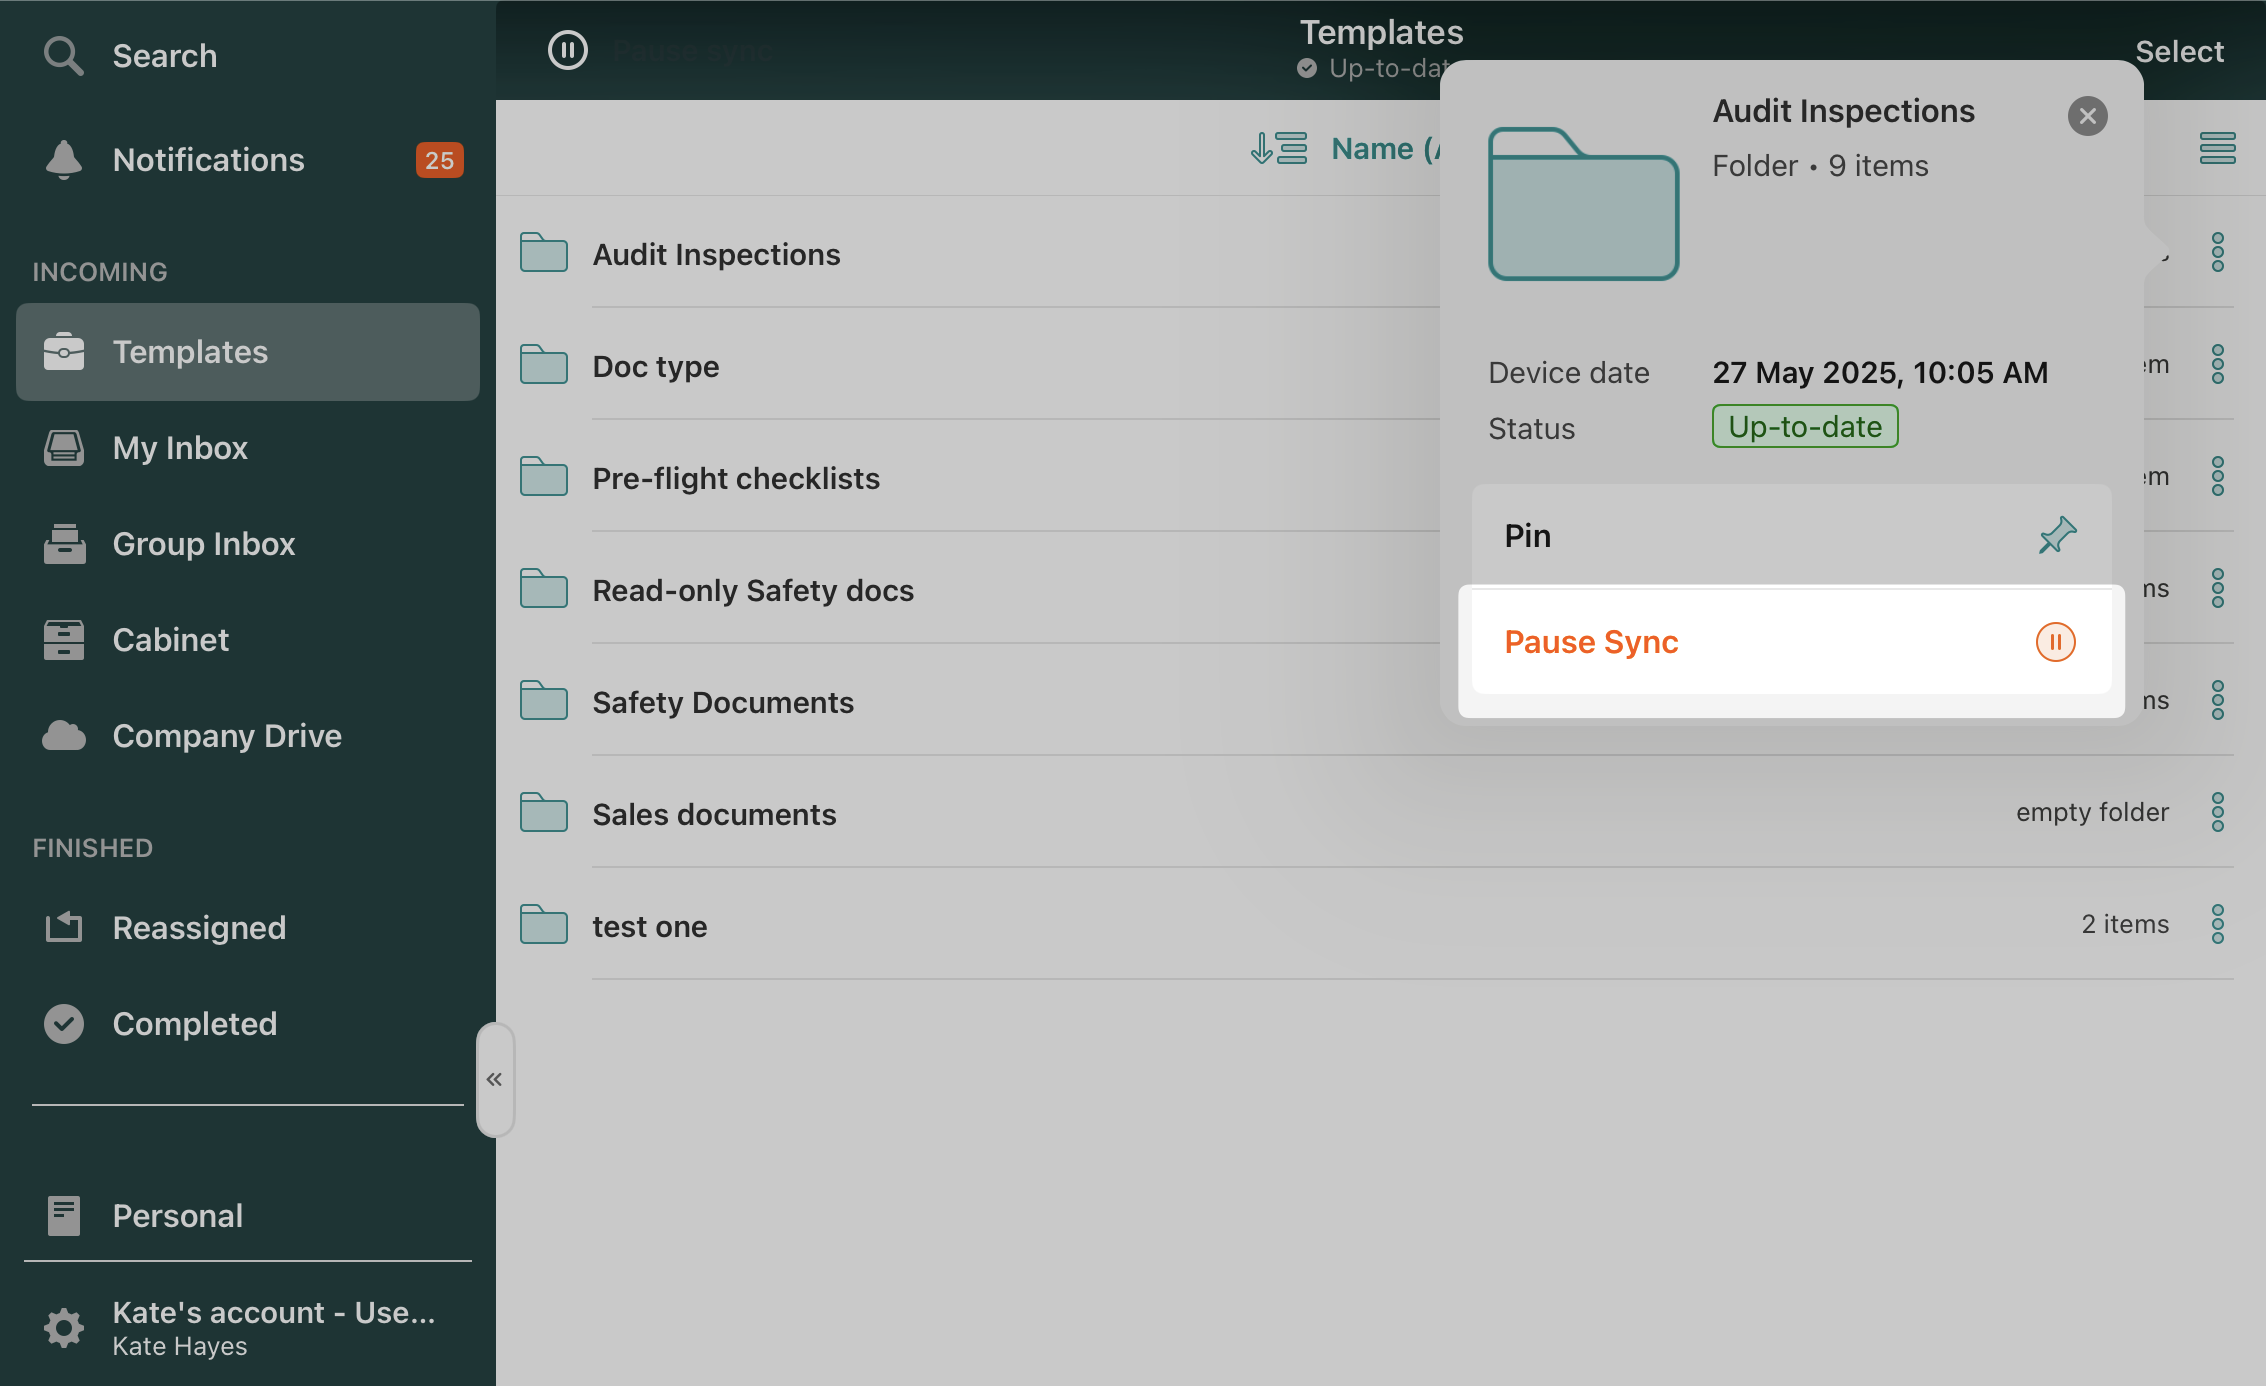
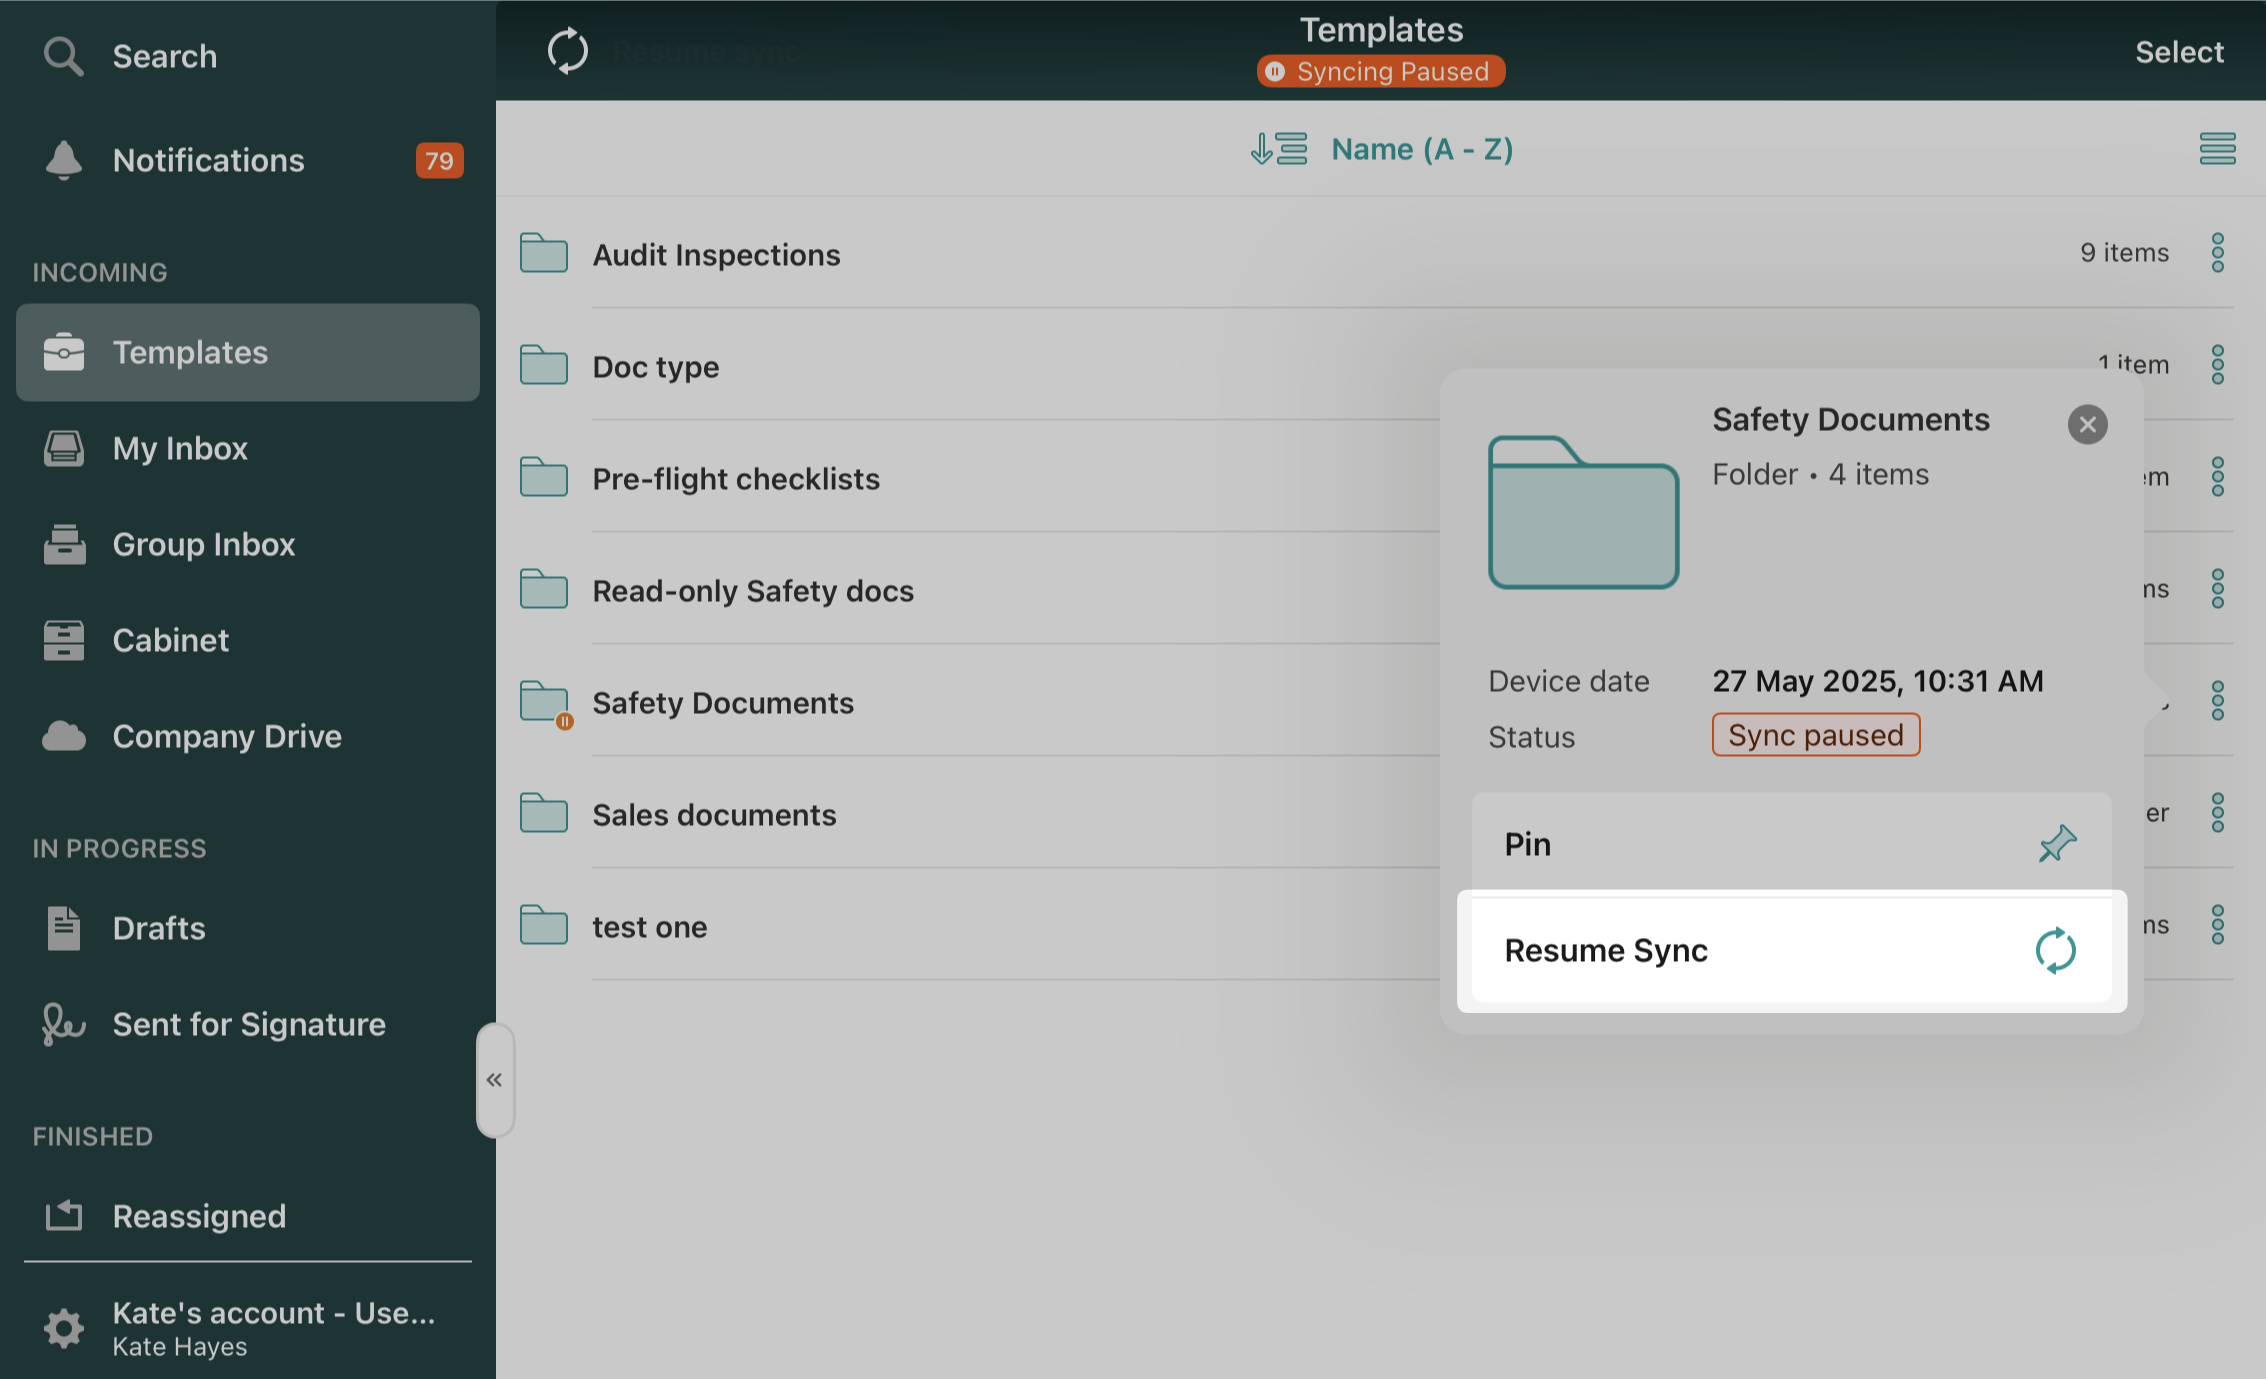
2. Pause or Resume Sync for an Individual Folder:
Tap the three dots next to the folder. Select Pause Sync.
Tap Resume Sync when necessary.
Note: The users can only pause sync for root folders, not subfolders individually. Pausing a root folder will pause the sync for all its contents.
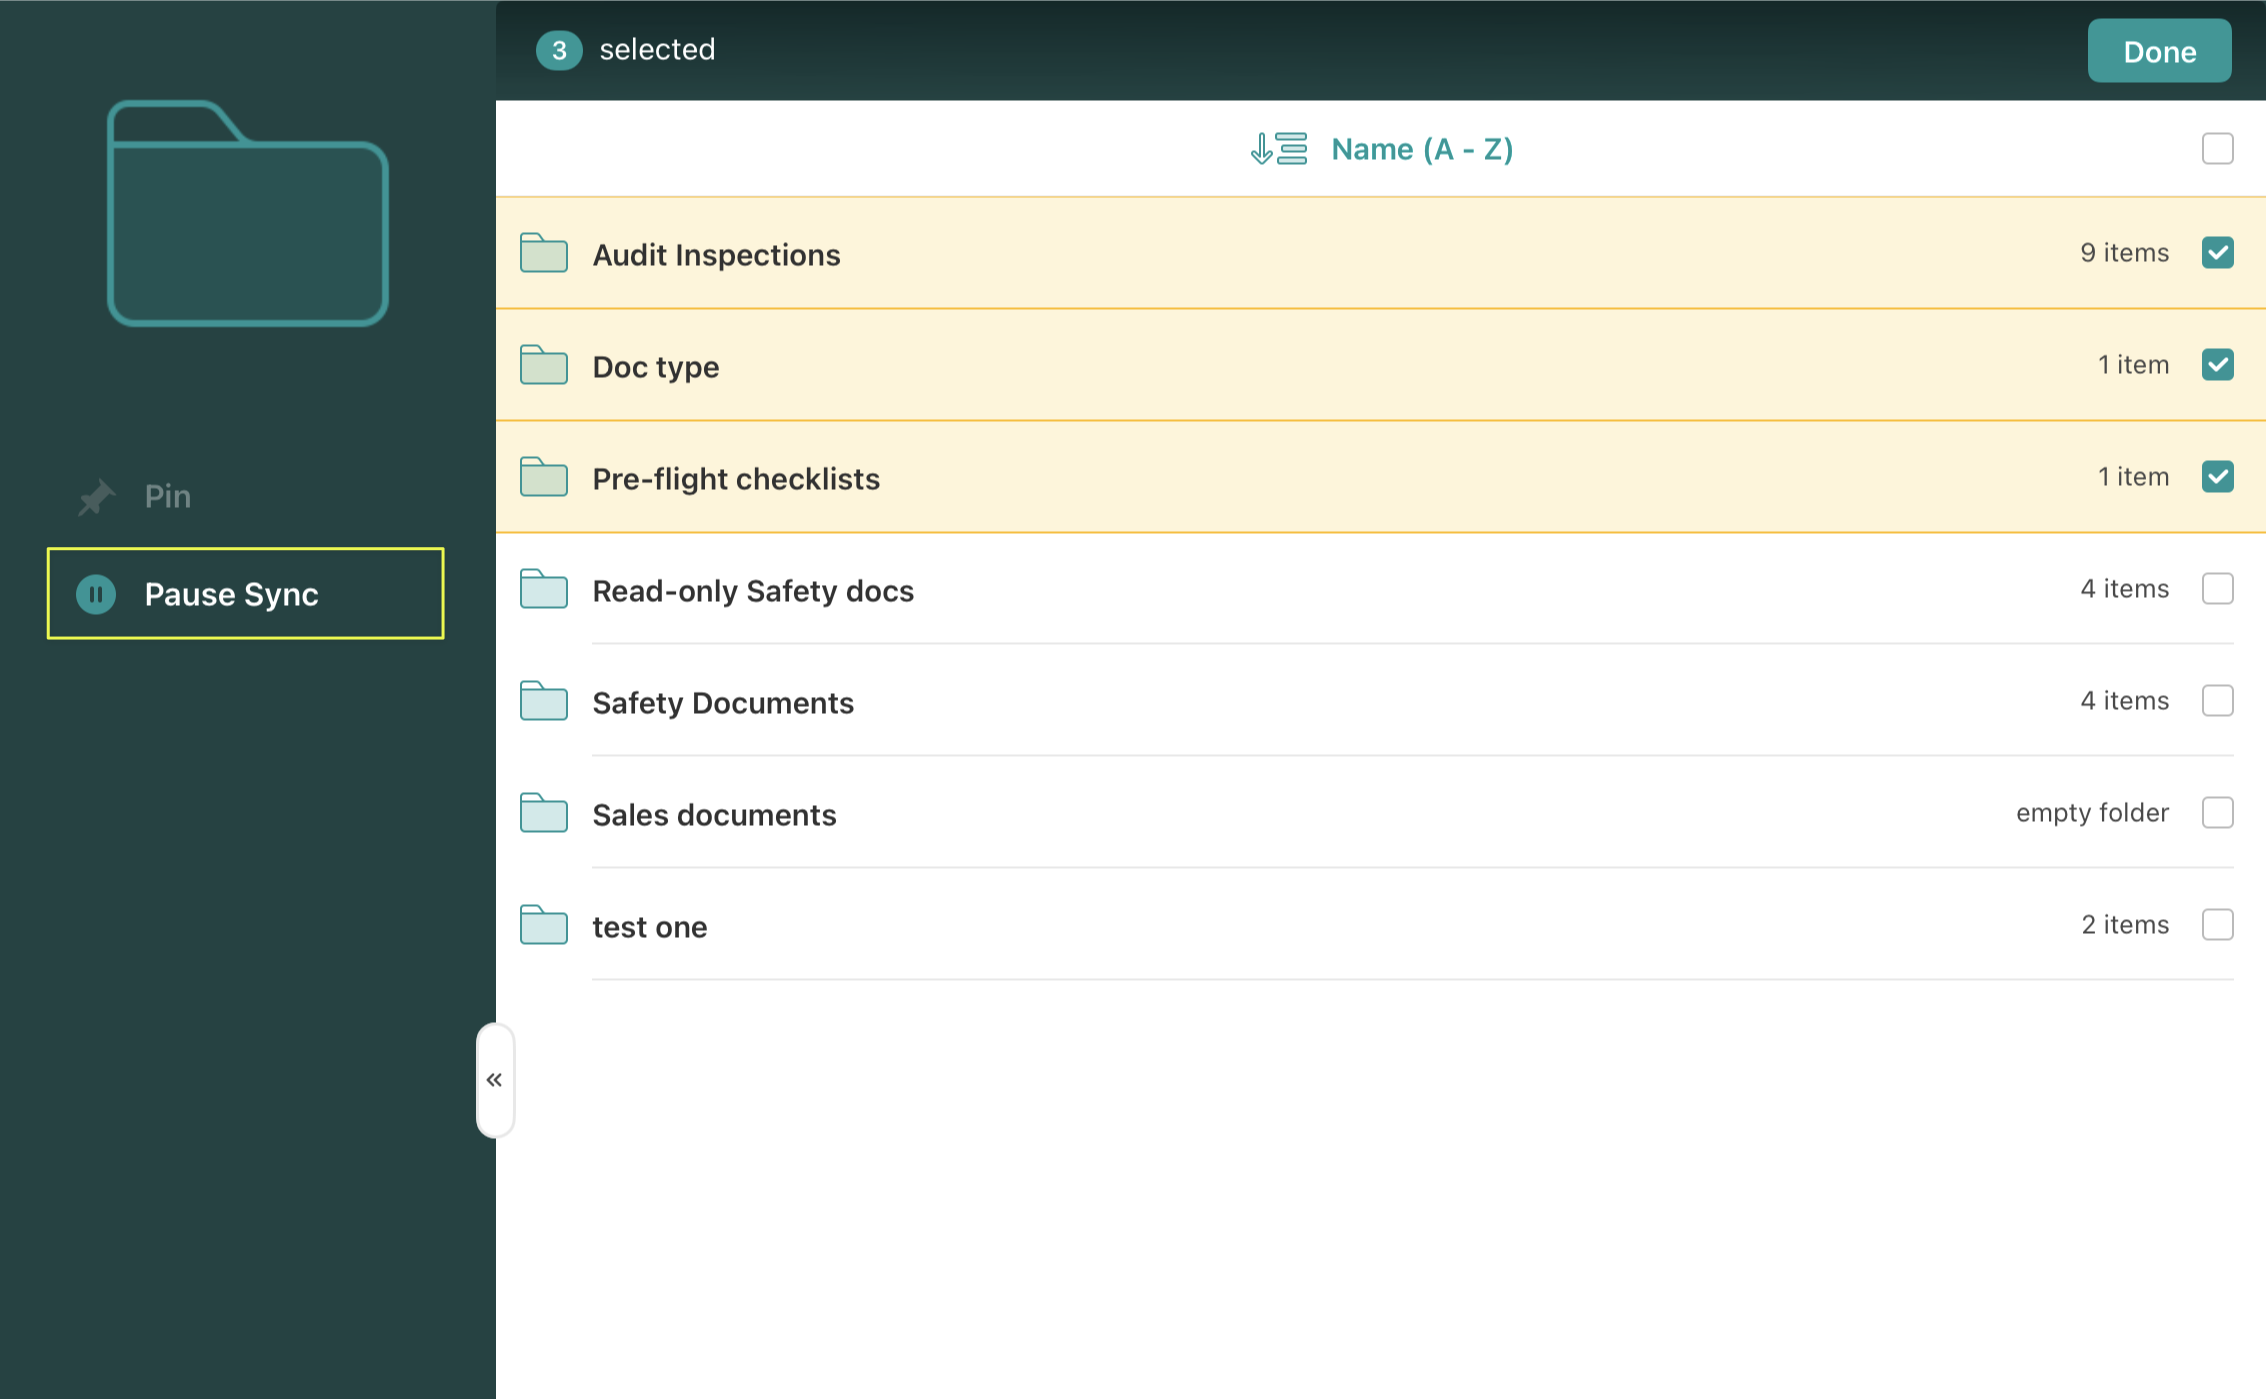
3. Pause Sync For Selected Folders:
Tap Select, choose the folders that need to stop syncing, and hit Pause Sync.
Note: If the users tap the Resume option from the three-dot menu, it only affects the one folder that they selected.
Feel free to contact us at support@fluix.io if you have any questions or comments.
Was this article helpful?
Thanks for your feedback!
Oops, something went wrong. Please, try again later.
Thank you!
What details or examples would have made this article more helpful for you? We appreciate your insights!
In Fluix Docs, the Retention Policy determines how long documents remain stored on Fluix Servers after being completed, deleted, or left in progress. This feature allows you to automatically manage the document lifecycle, ensuring that old or unnecessary files are removed after a specified period, while important records remain accessible for as long as needed.
Note: Once the retention period has expired, the documents will be permanently deleted and cannot be restored. Therefore, we may suggest regularly reviewing and adjusting the policy if needed.
To manage the Retention Policy settings, you should have the permission to access the Settings, which your account admin can grant by following the guidelines below:
Log in to Fluix Admin Portal.
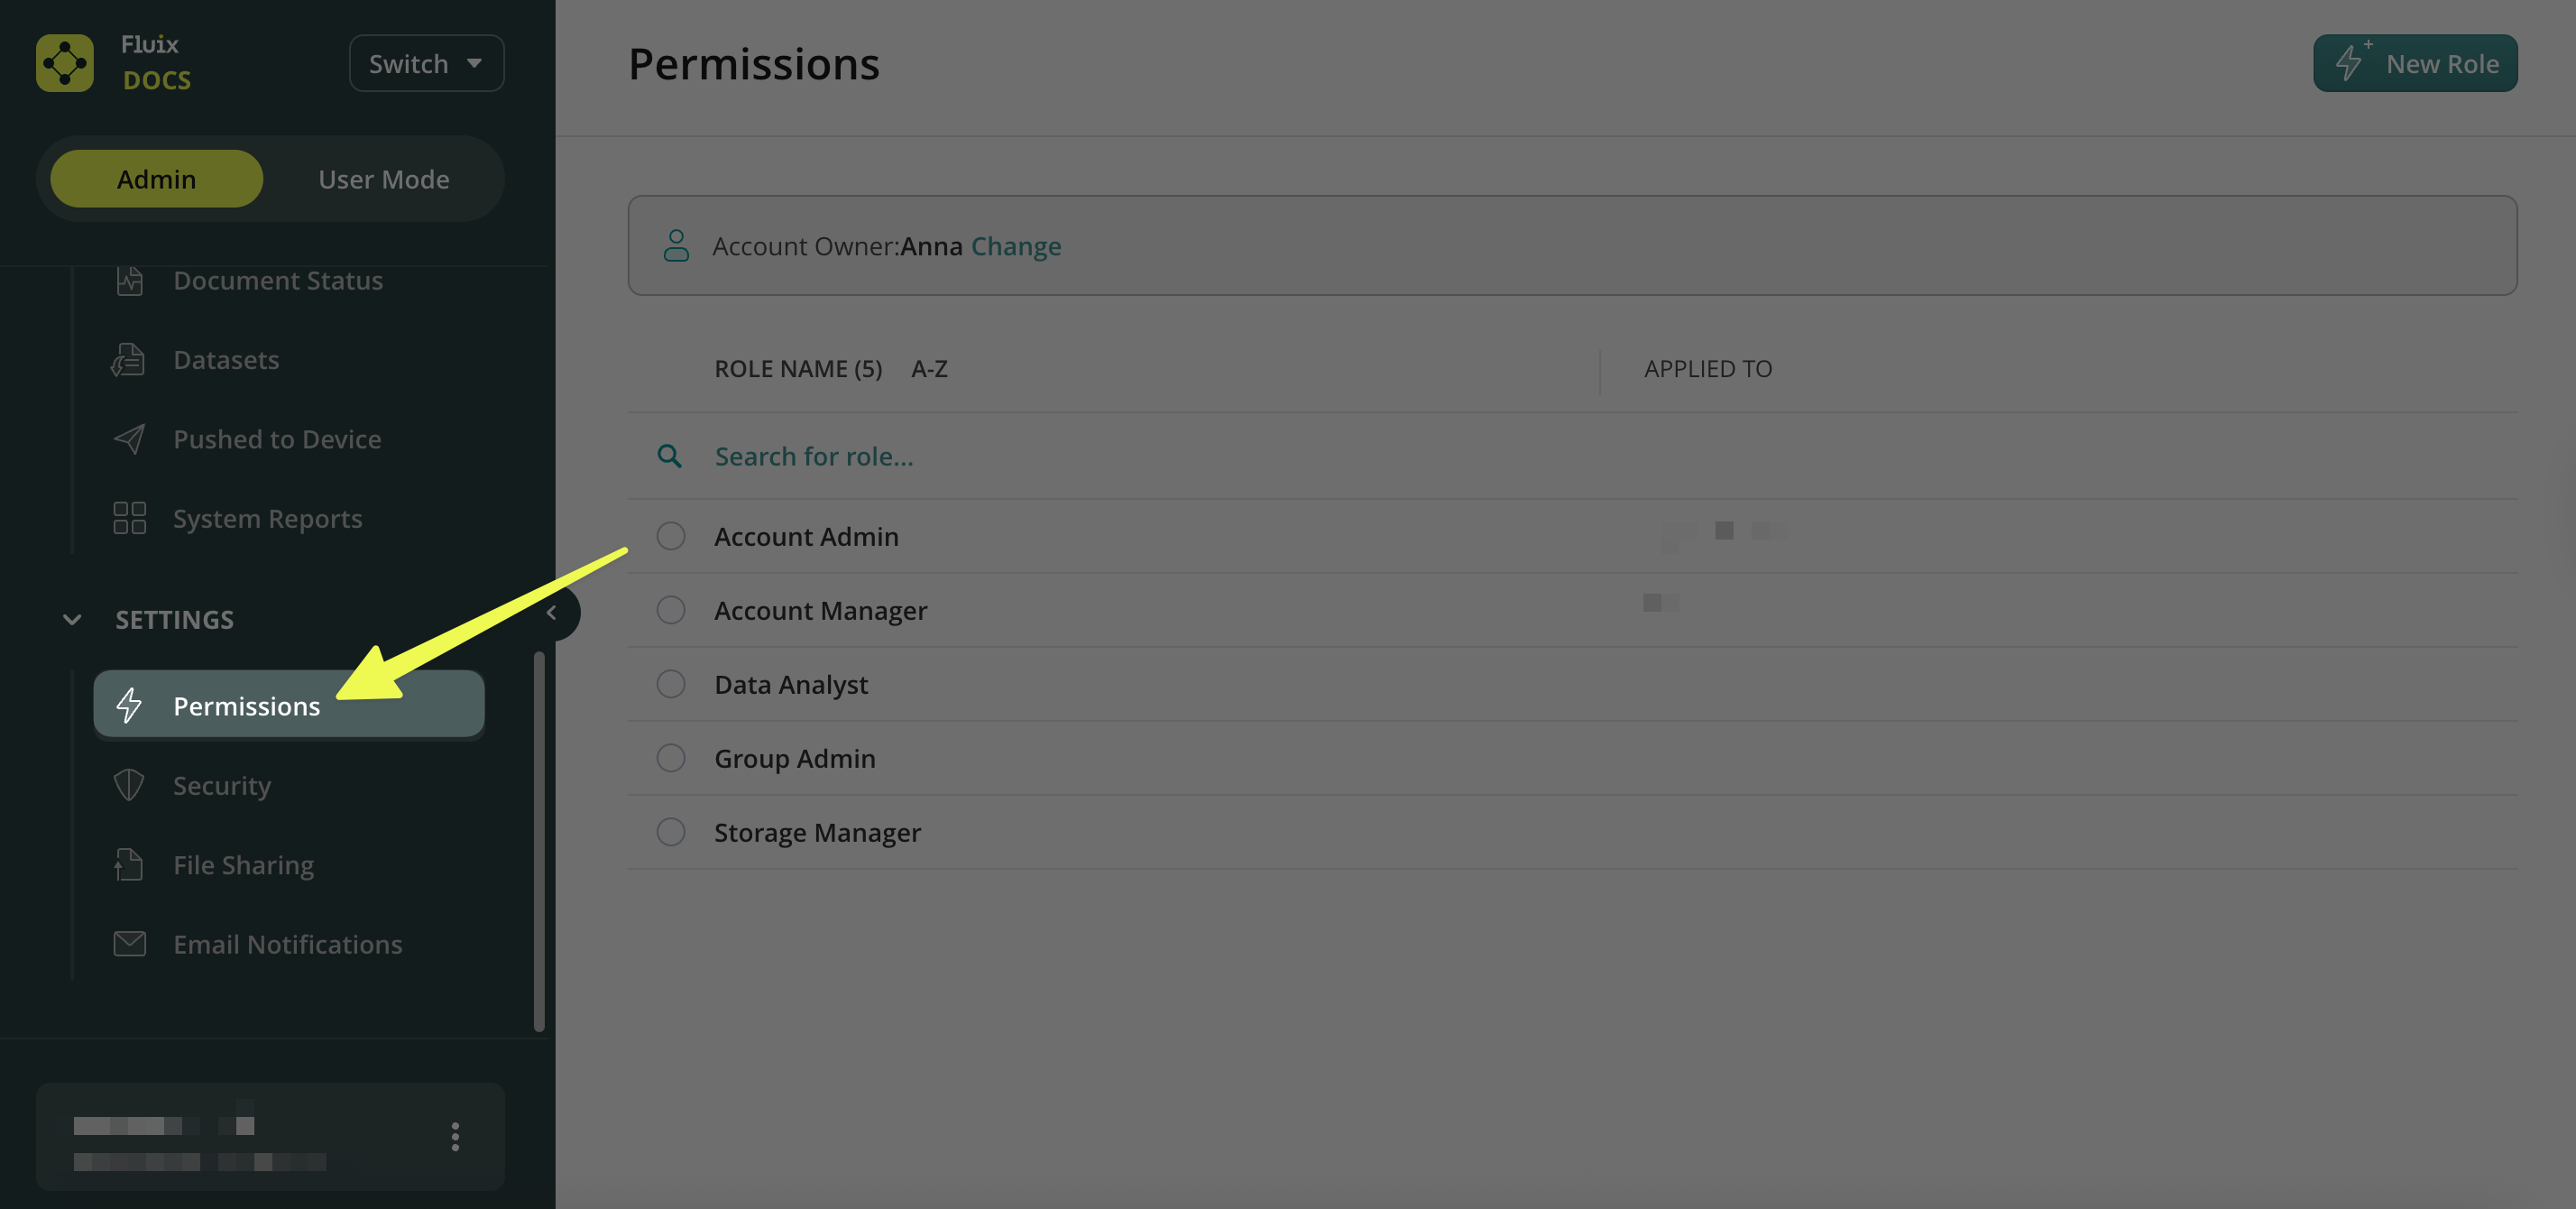
On the left-side menu, scroll down and navigate to Permission under the Settings section.
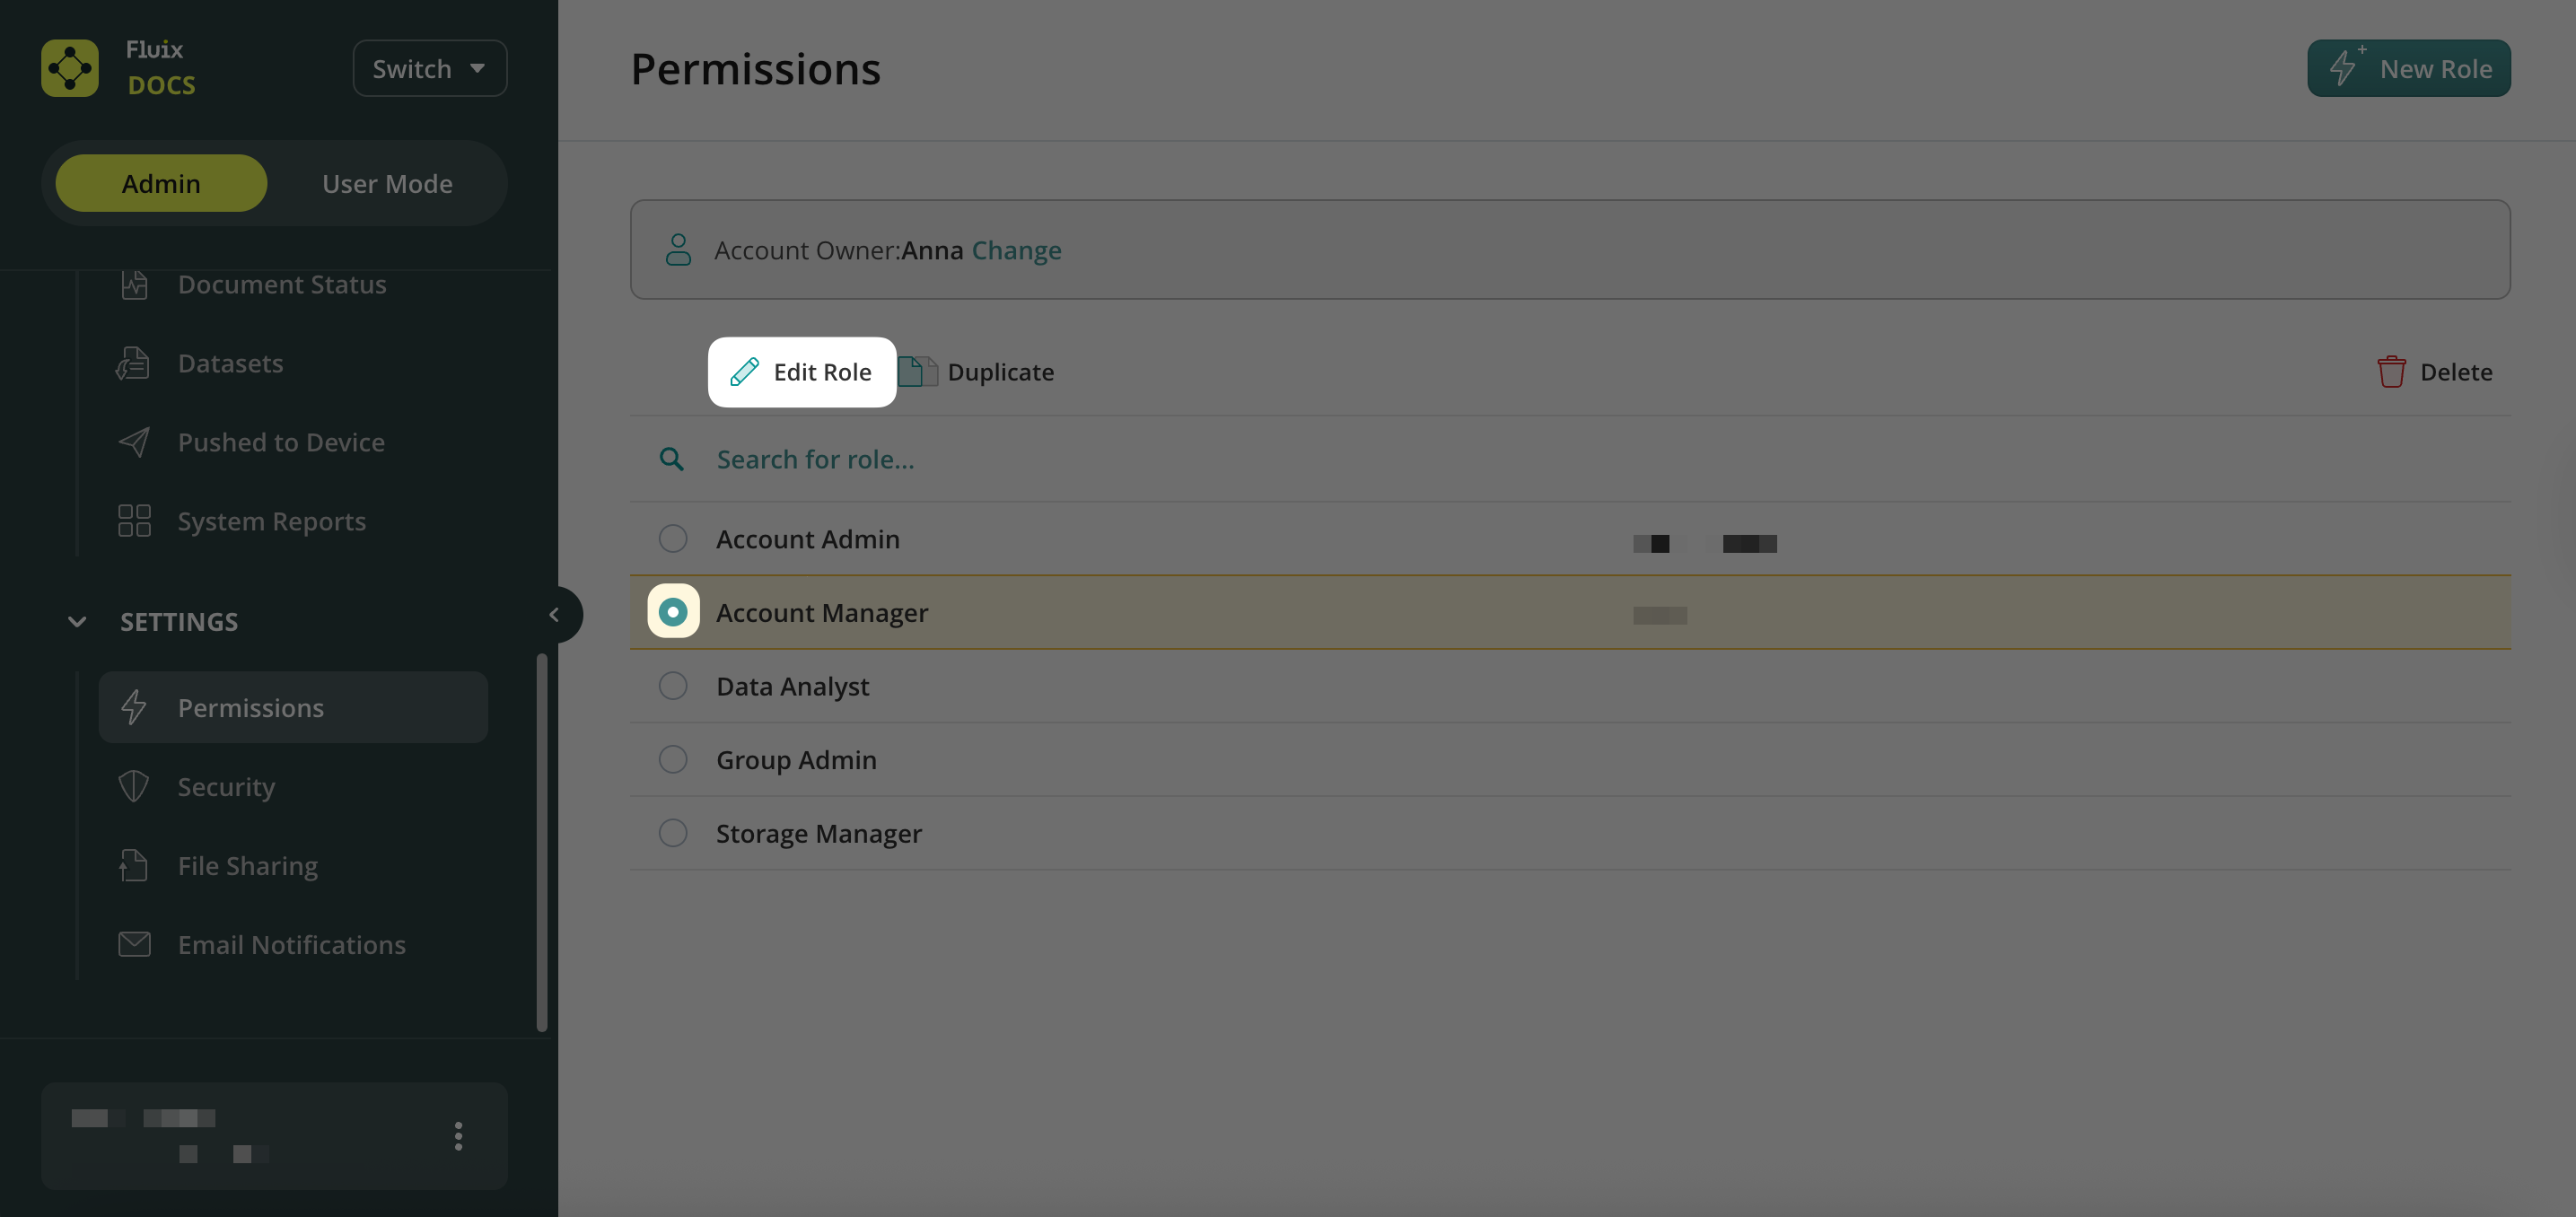
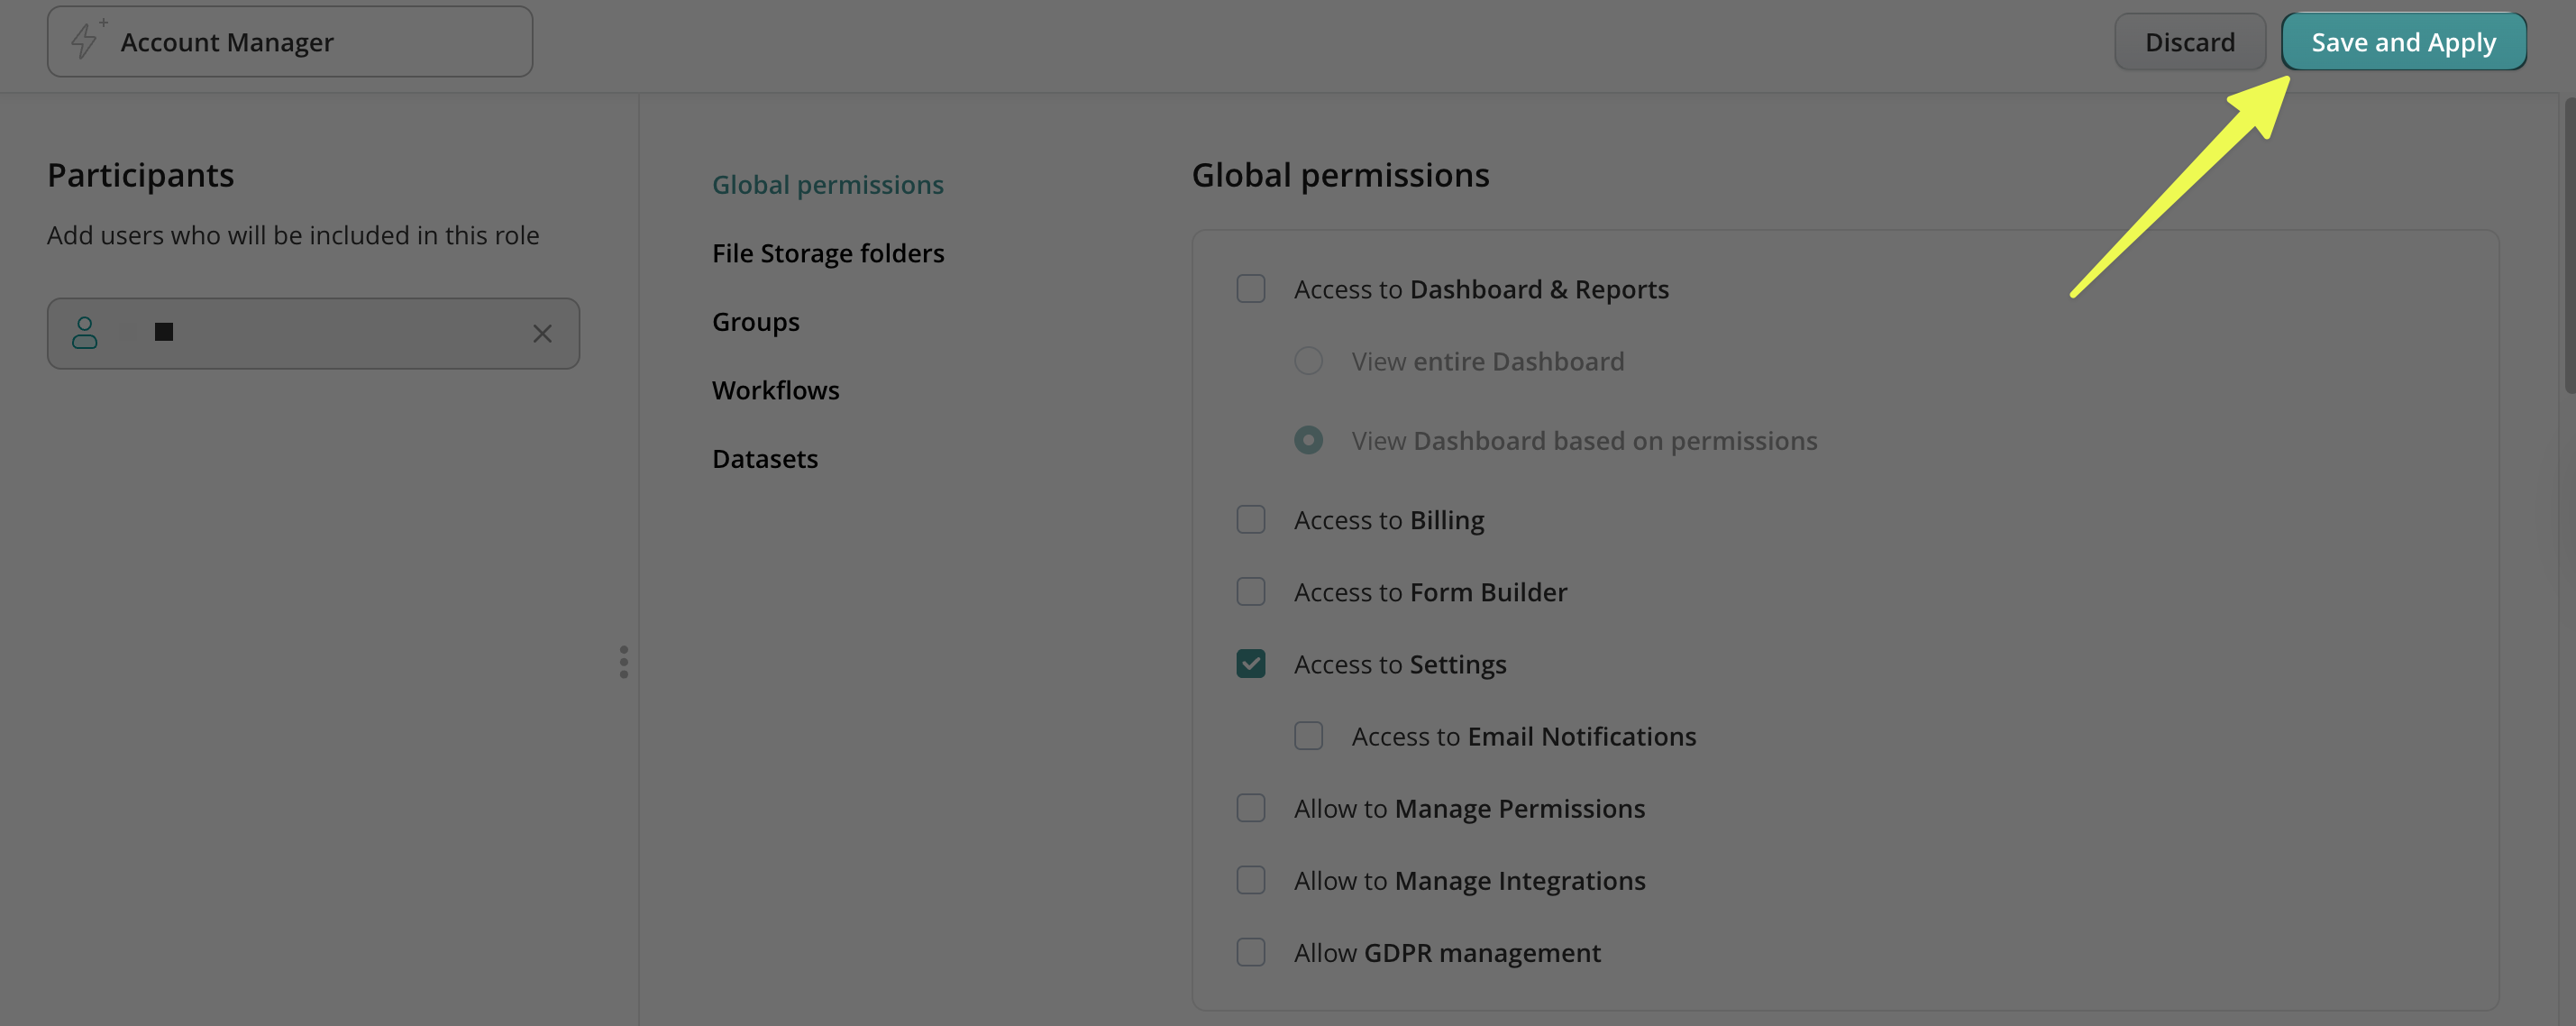
Select the respective role → click Edit Role.
In the Global permissions, select the Access to Settings permission by placing a check mark next to it.
Click Save and Apply.
How to Set the Retention Policy in Fluix Docs?
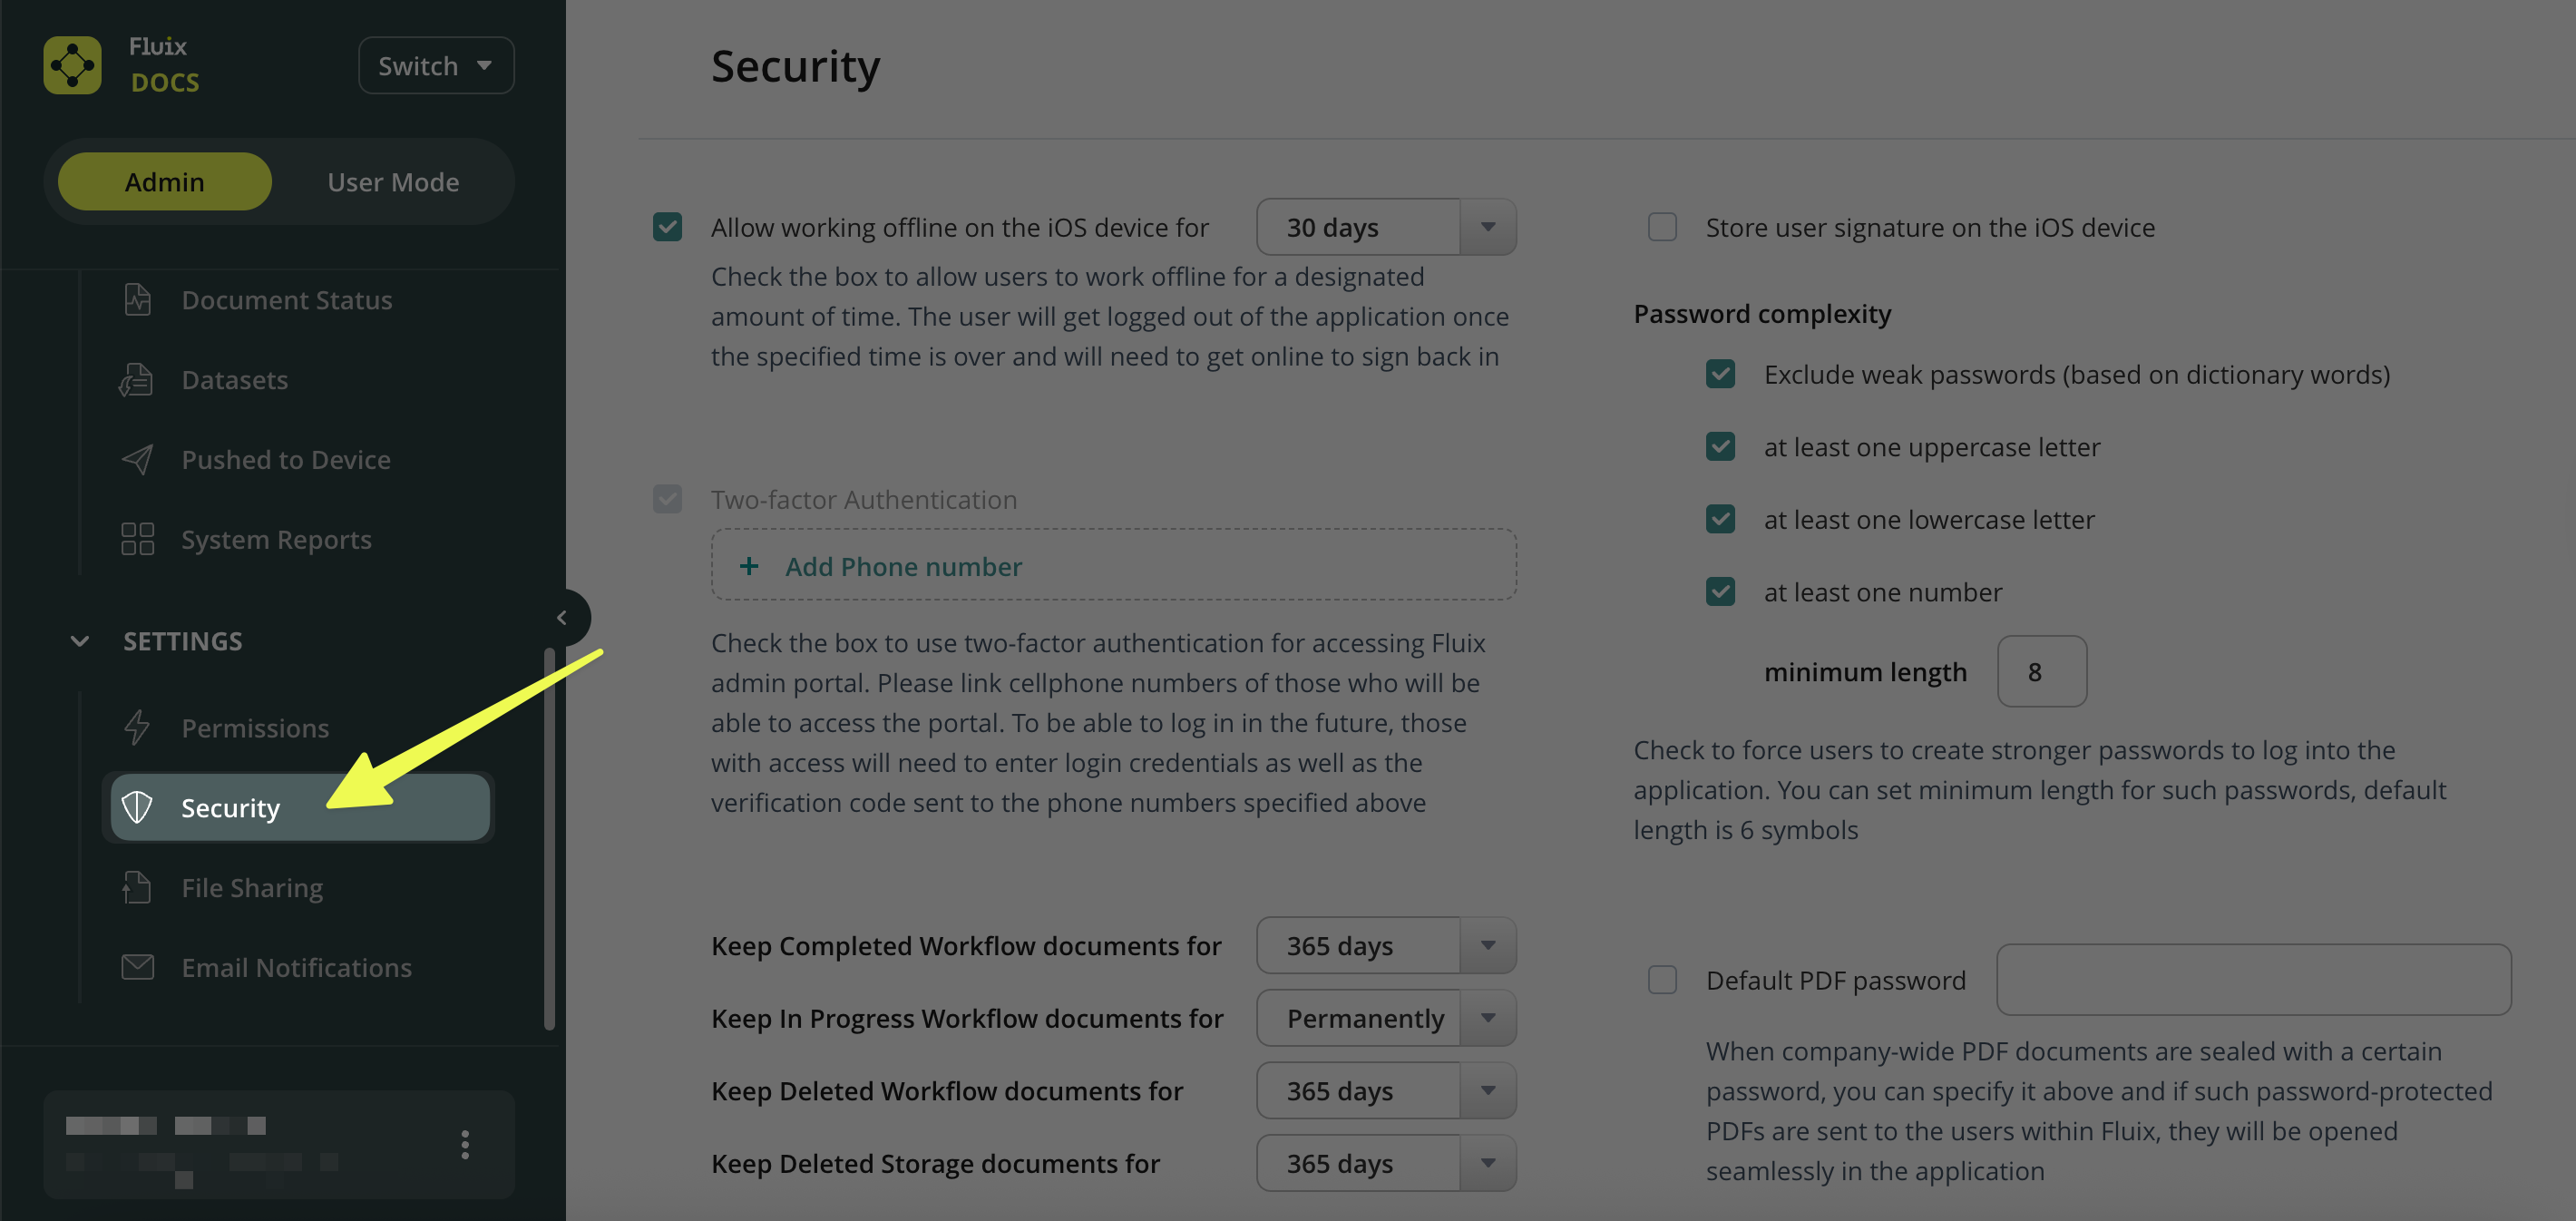
Log in to Fluix Admin Portal.
On the left-side menu, navigate to Settings → Security.
In the Security section, find the following options:
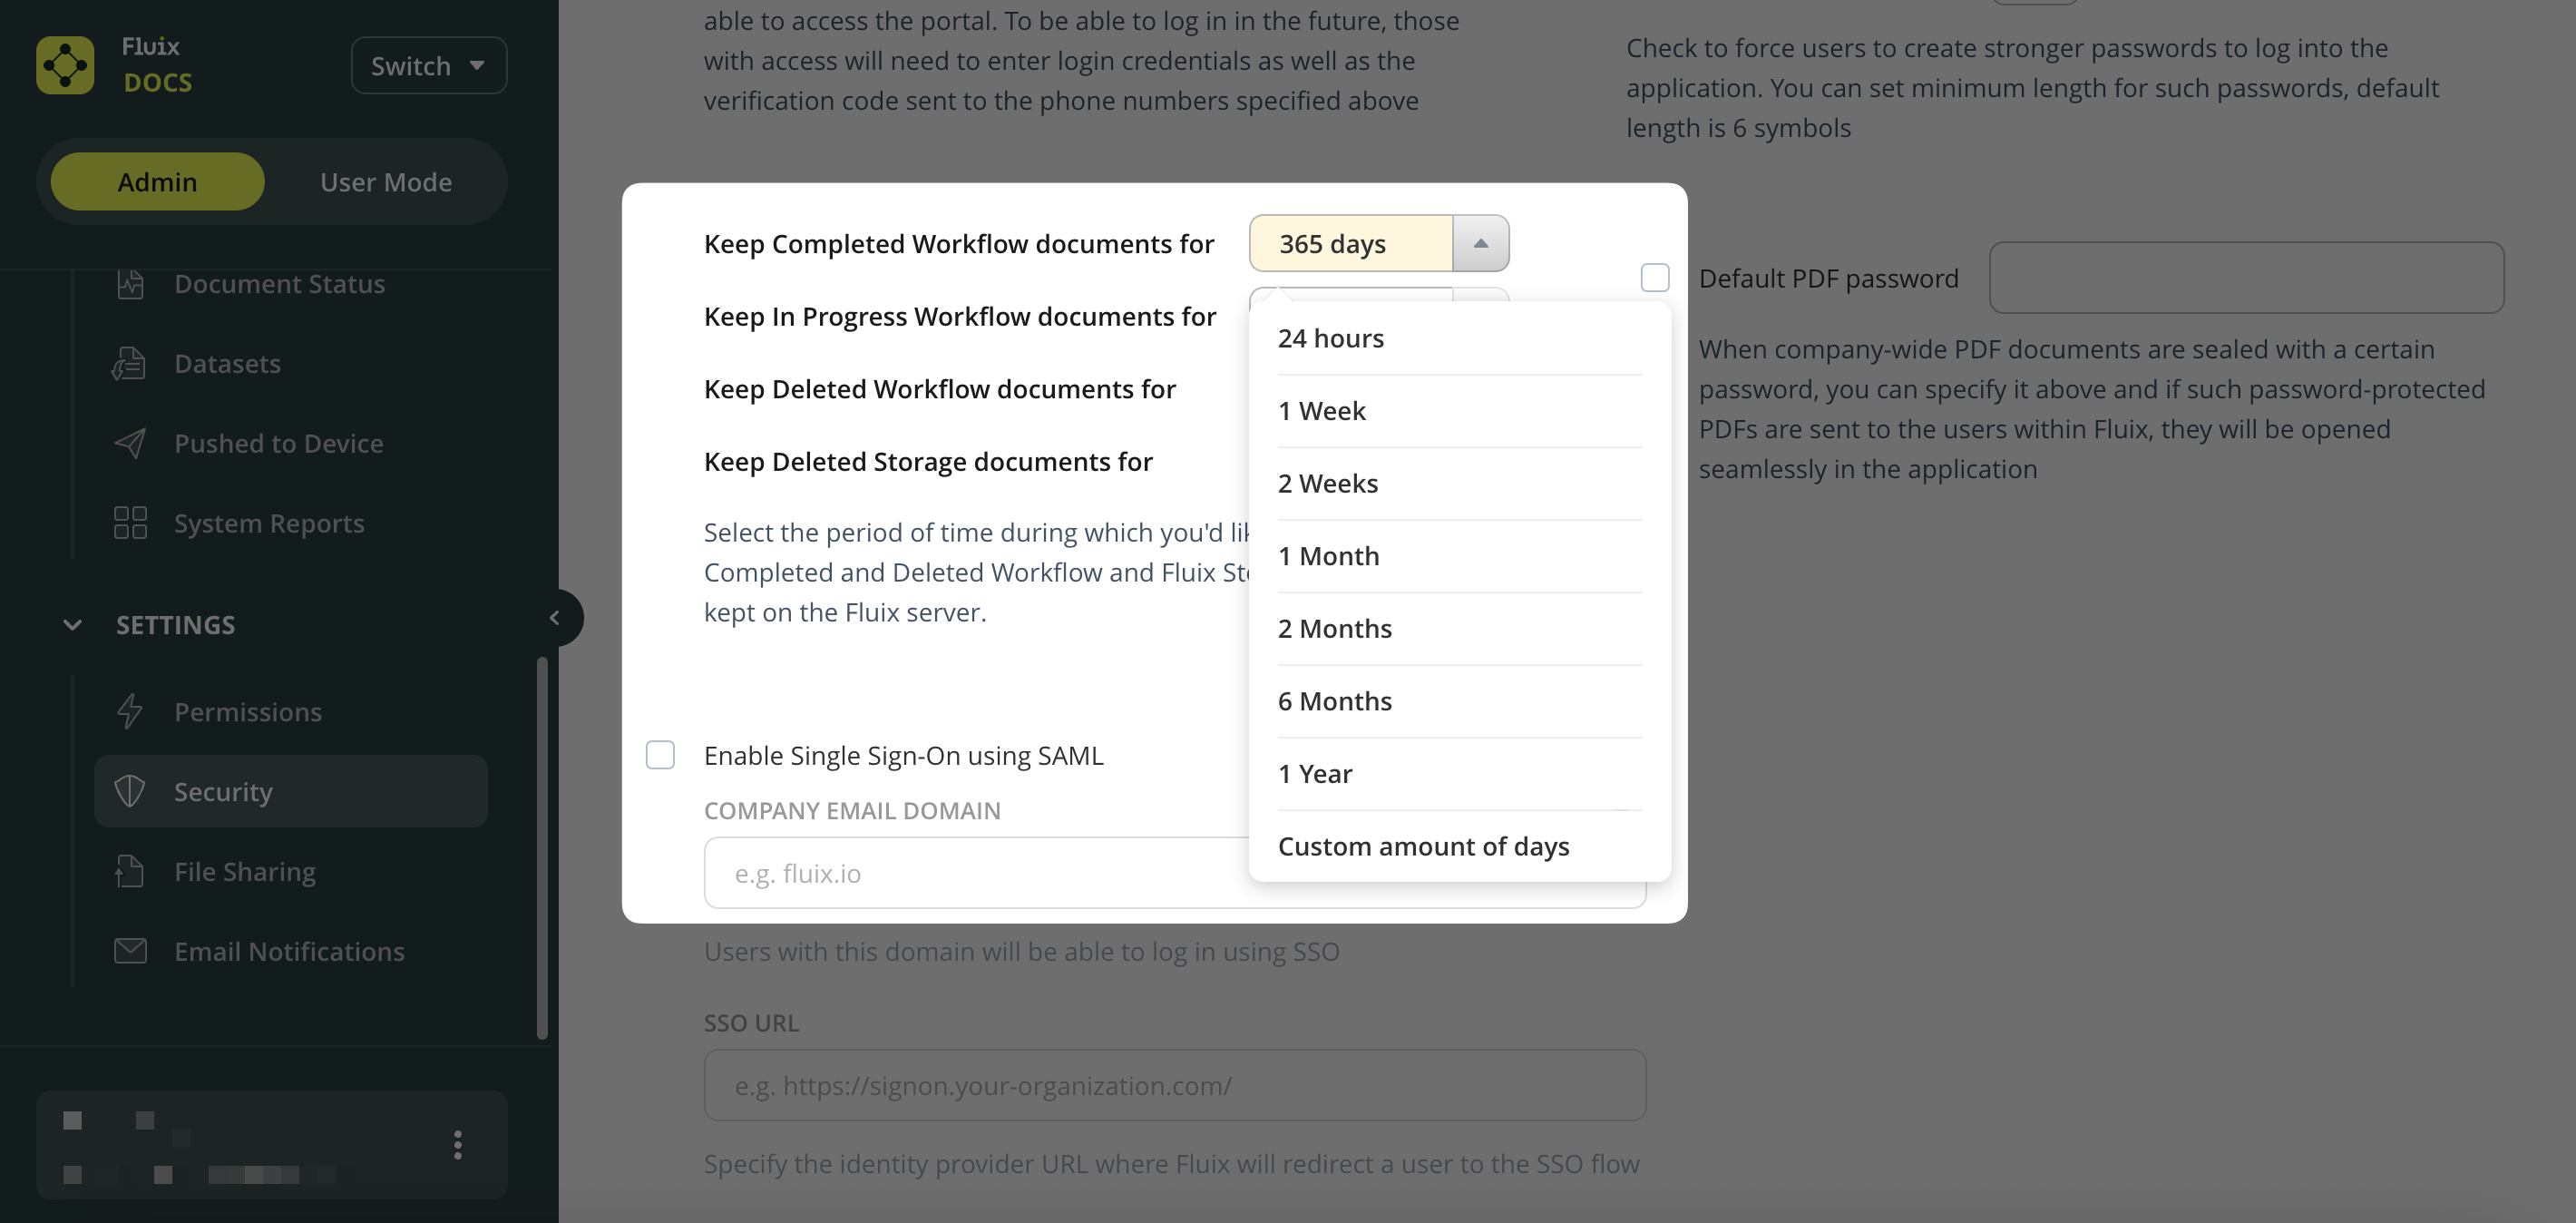
Keep Completed Workflow Documents For – determines how long completed documents remain stored in the Document Status. Keep In-Progress Workflow Documents For – sets how long ongoing workflow documents are stored in the Document Status. Keep Deleted Workflow Documents For – defines how long deleted workflows remain in the Document Status before being permanently removed. Keep Deleted Storage Documents For – sets the duration for which deleted documents in Fluix Storage are kept.
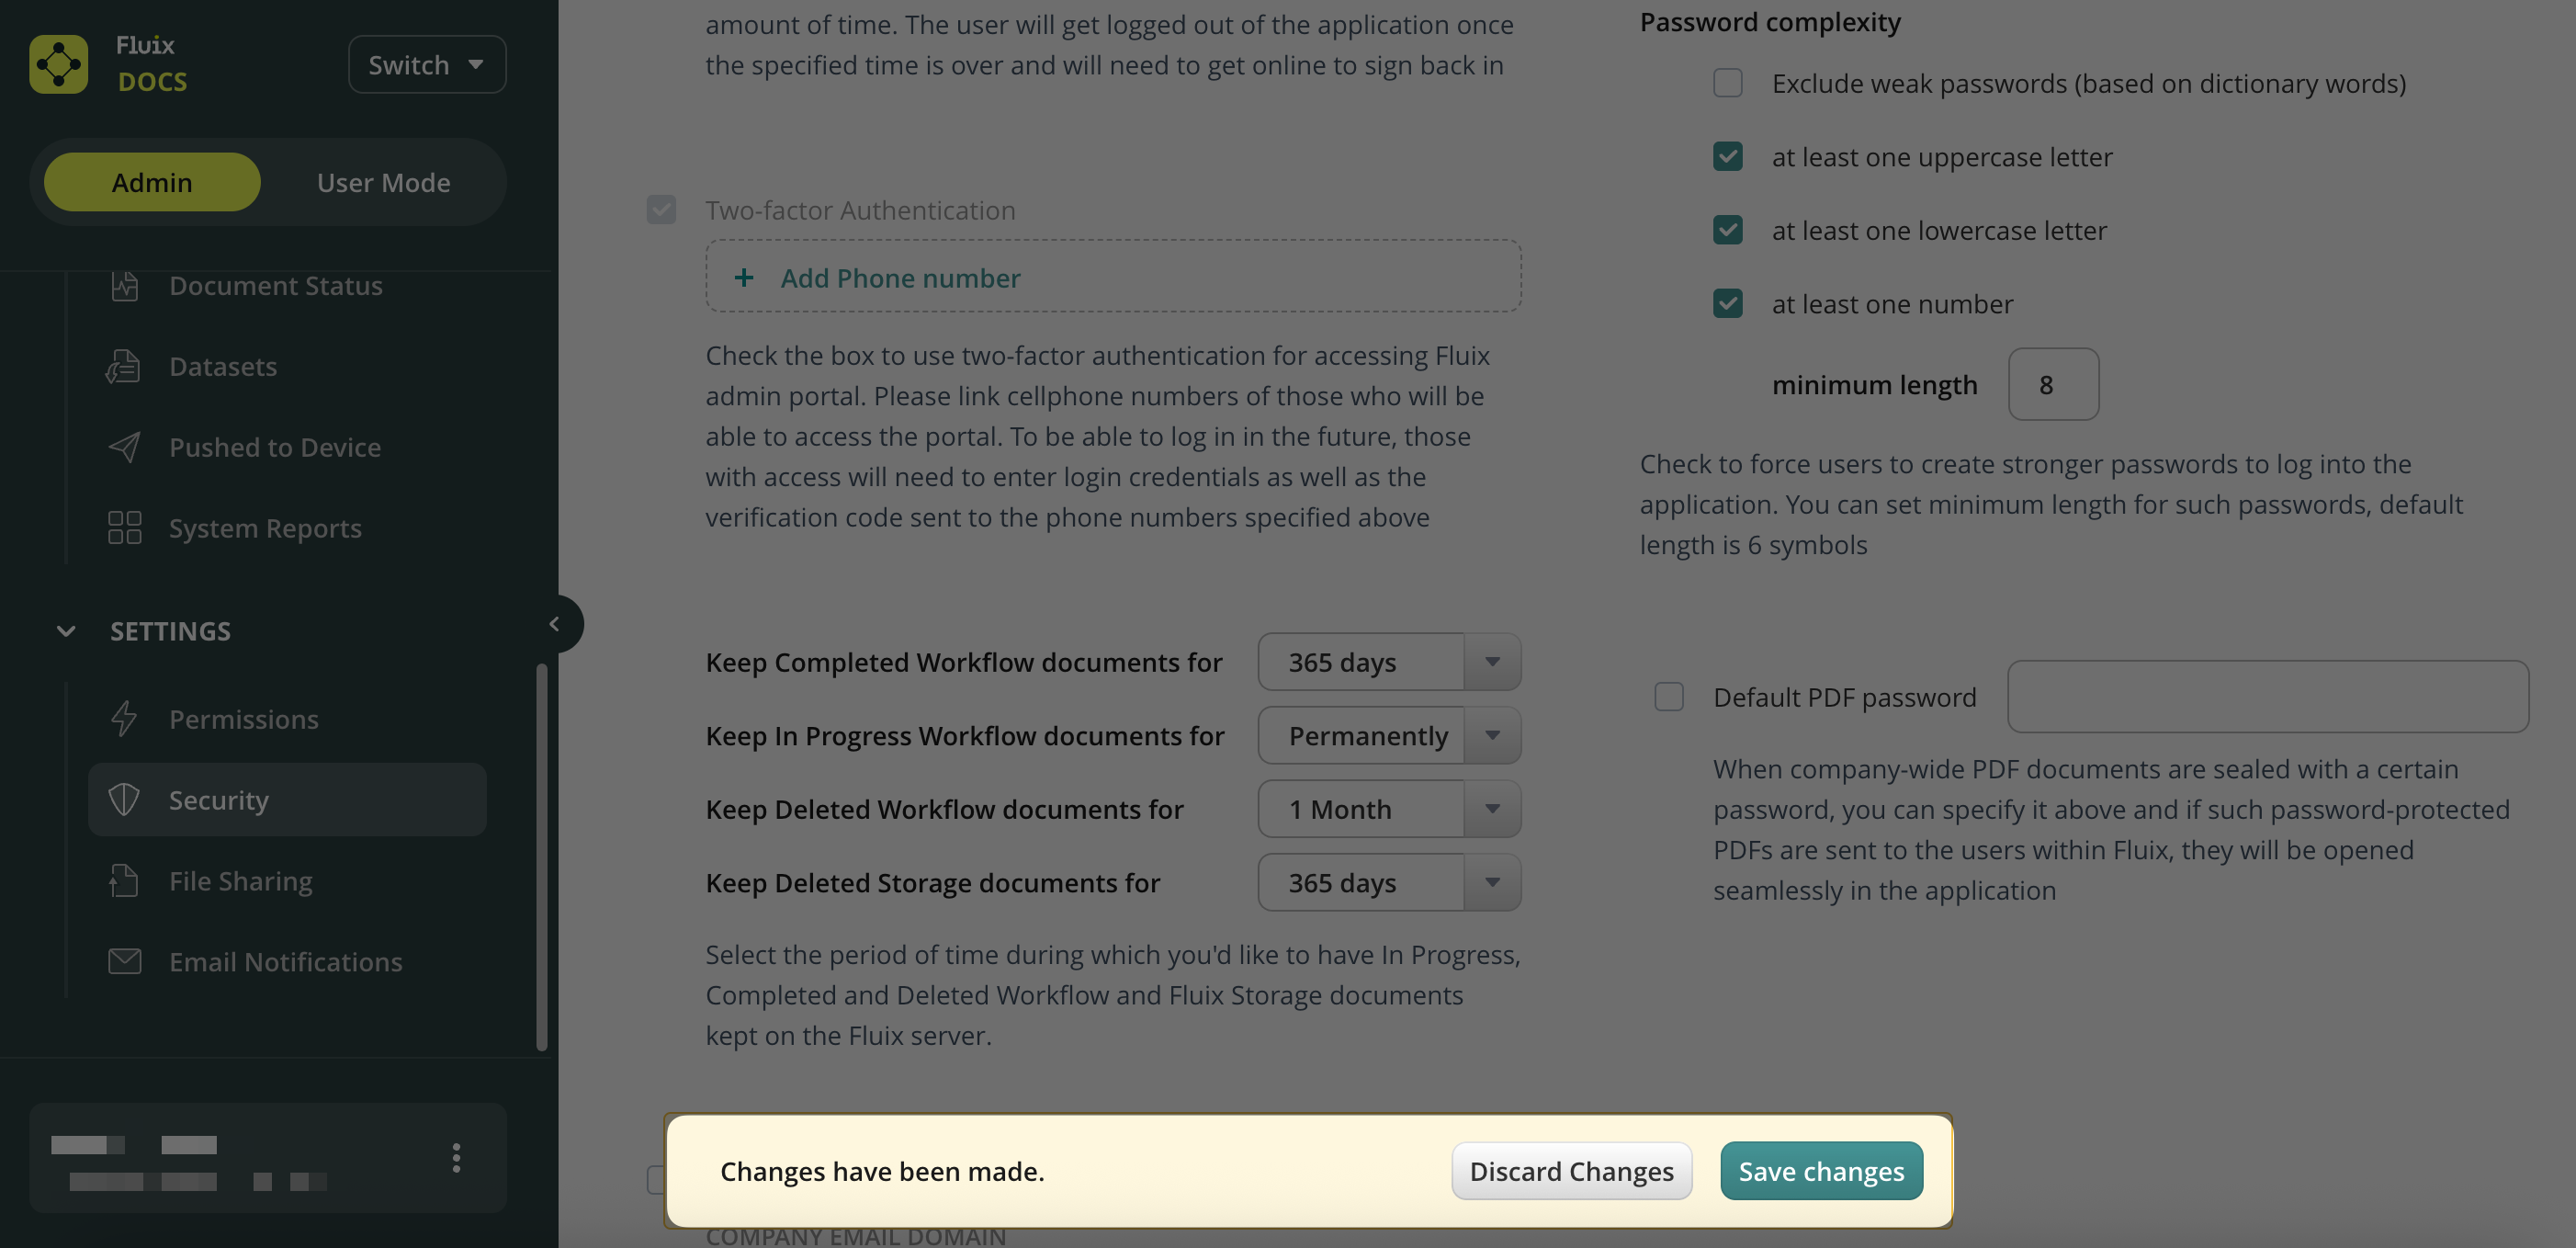
Select the Retention Period → use the dropdown menu to select the desired time frame (e.g., 1 week, 1 month, 1 year, permanently, etc.).
Note: the maximum period you can select is 999 days.
Save Changes.
Feel free to contact us at support@fluix.io if you have any questions or comments.
Was this article helpful?
Thanks for your feedback!
Oops, something went wrong. Please, try again later.
Thank you!
What details or examples would have made this article more helpful for you? We appreciate your insights!
The Customization of Tab Names functionality in Fluix Docs enables admins to modify the names of document source sections for Fluix Docs app users. This helps admins align tab naming with internal terminology and improve navigation clarity for the field teams.
In this tutorial, you will learn how to configure and manage your custom tab titles.
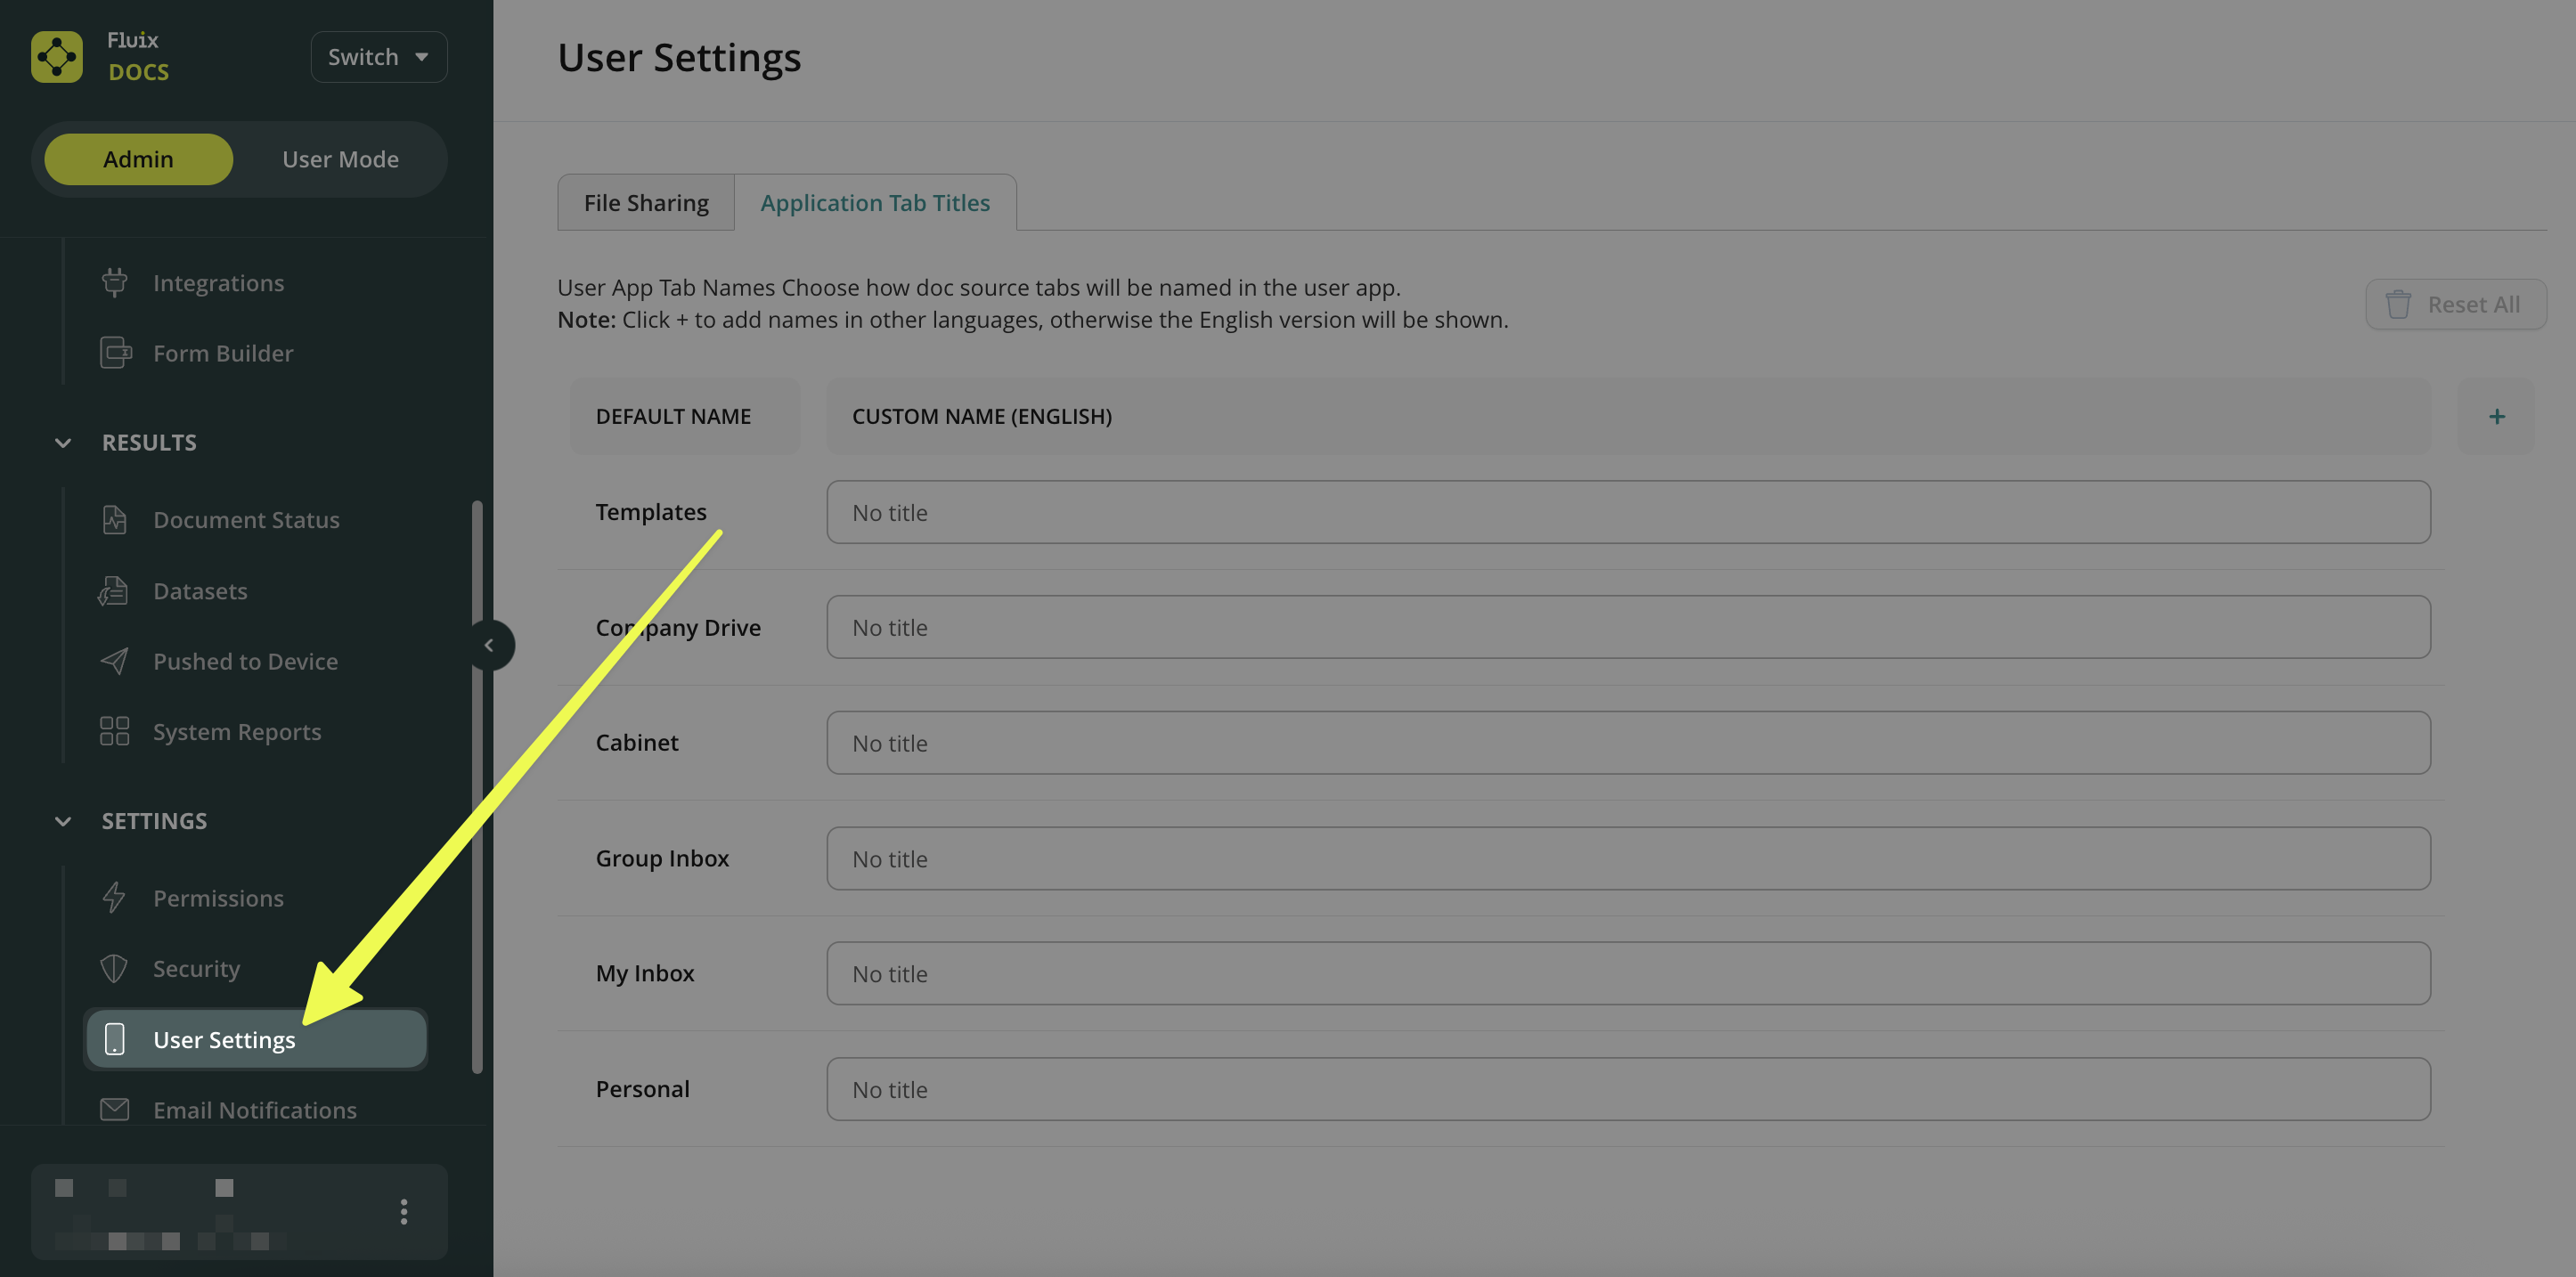
Navigate to the User Settings tab of the Settings section on the Admin Portal.
Note: If you don’t have access to the User Settings tab, please contact your company’s Fluix account admin to request the necessary permissions. To allow a user to manage User Settings, the admin needs to grant the user with the permission and enable access to Settings in the Global Permissions tab.
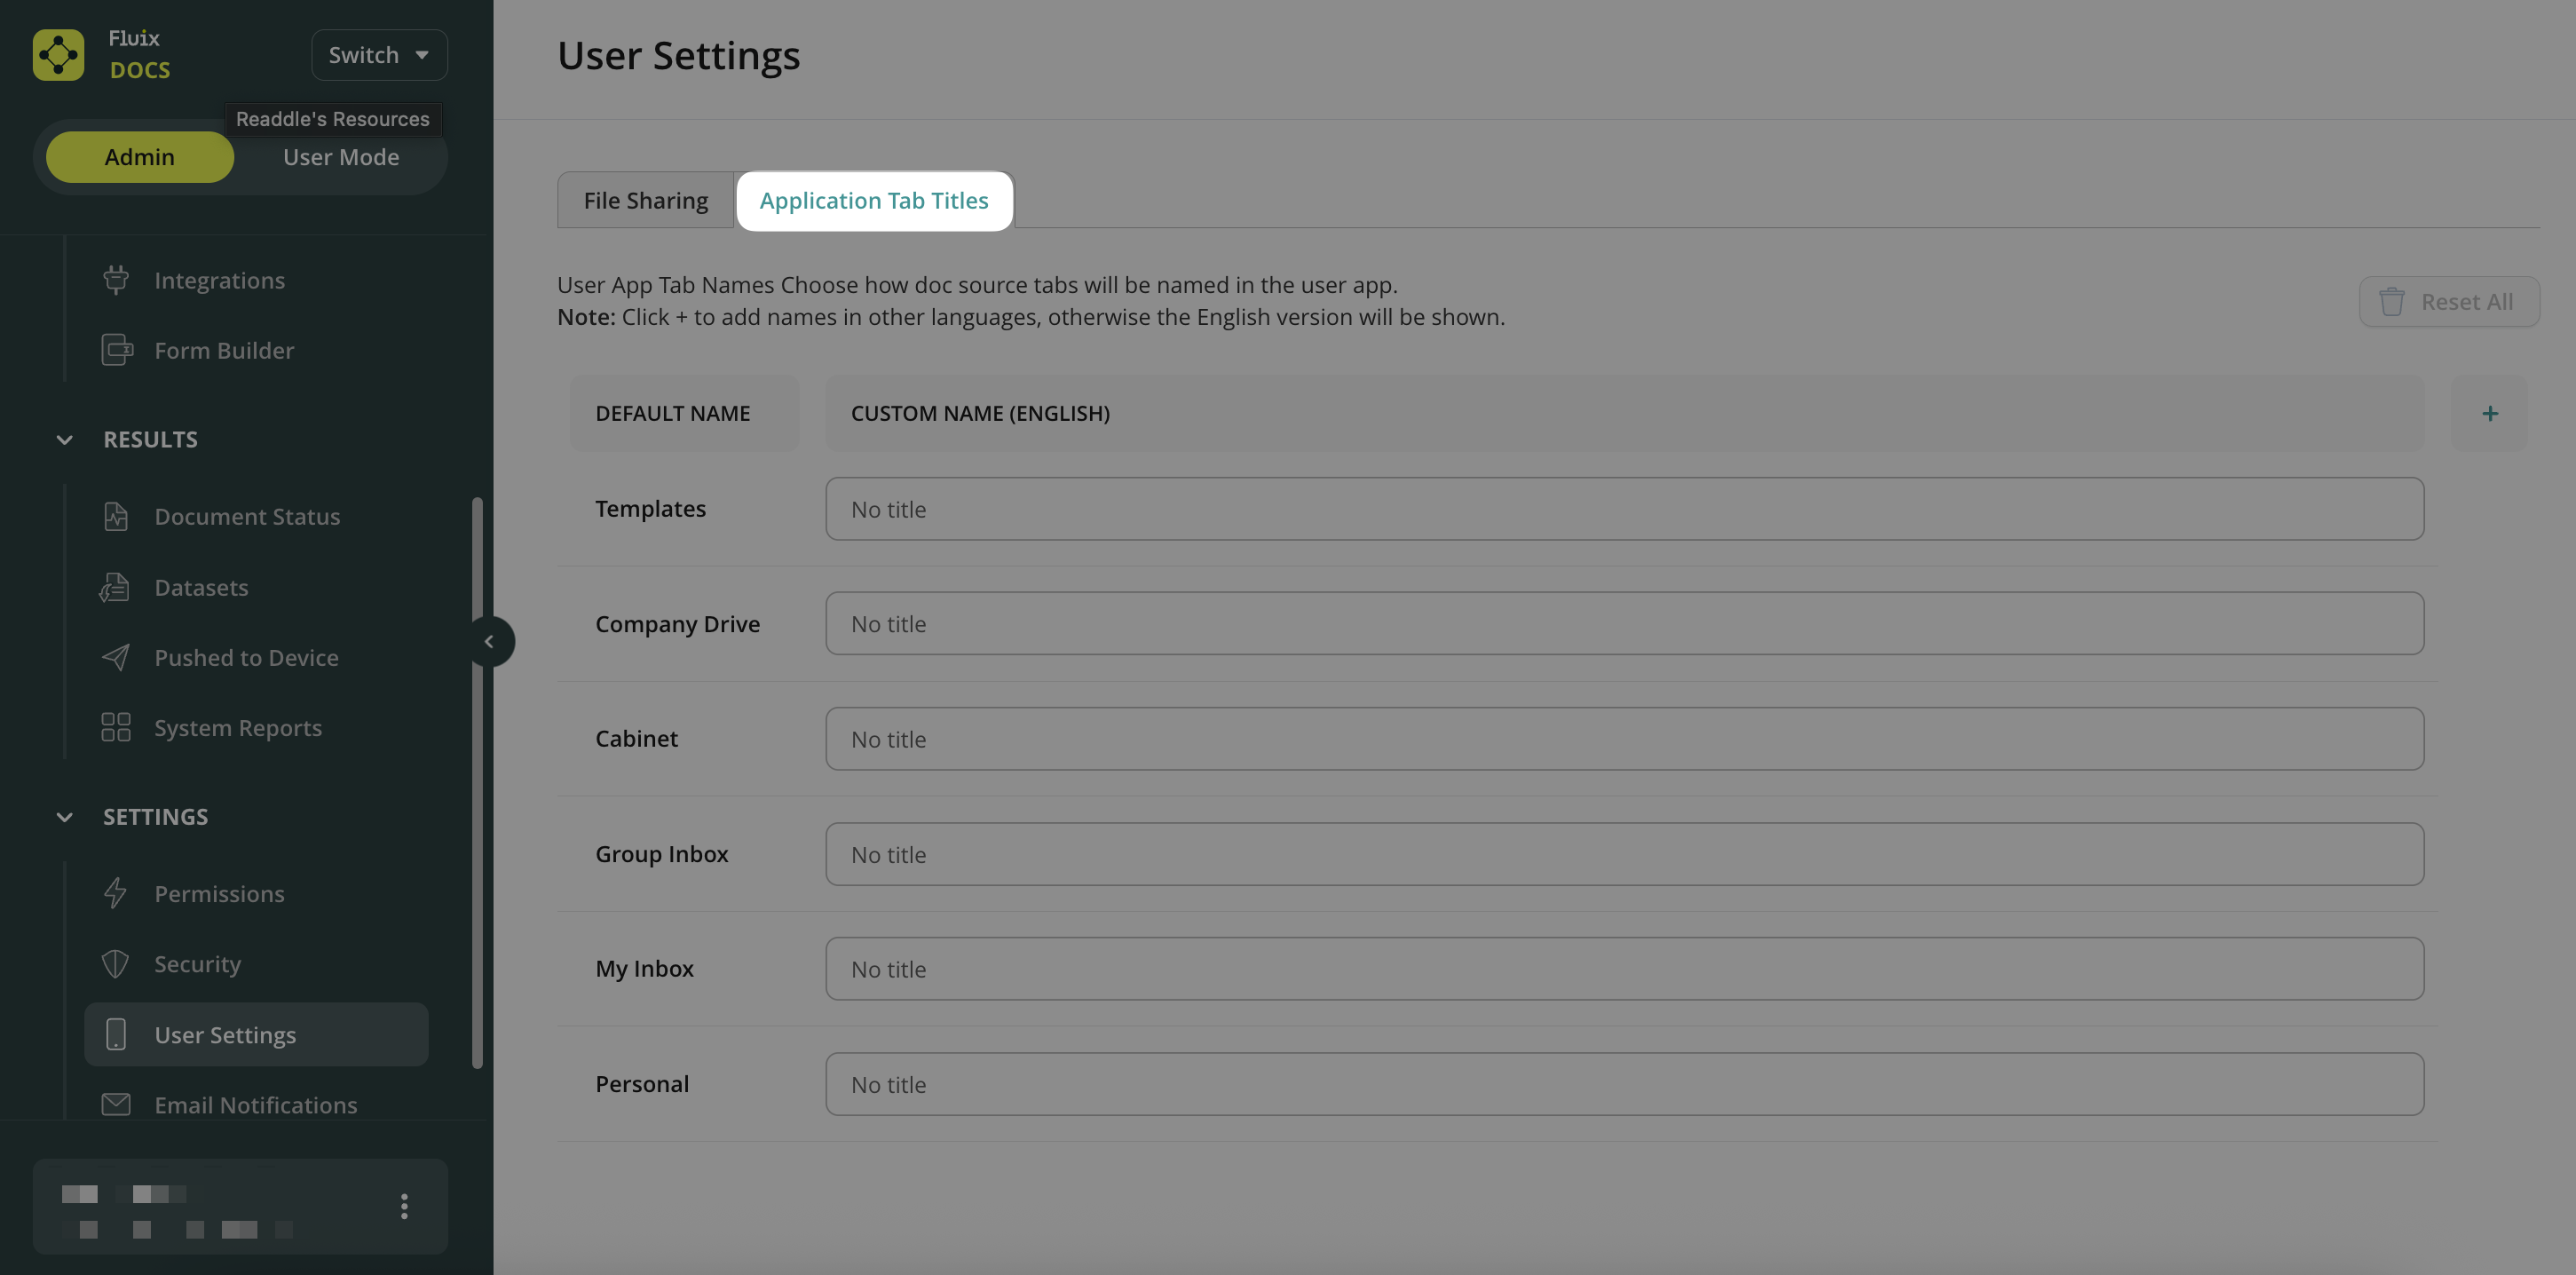
Select the Application Tab Titles tab.
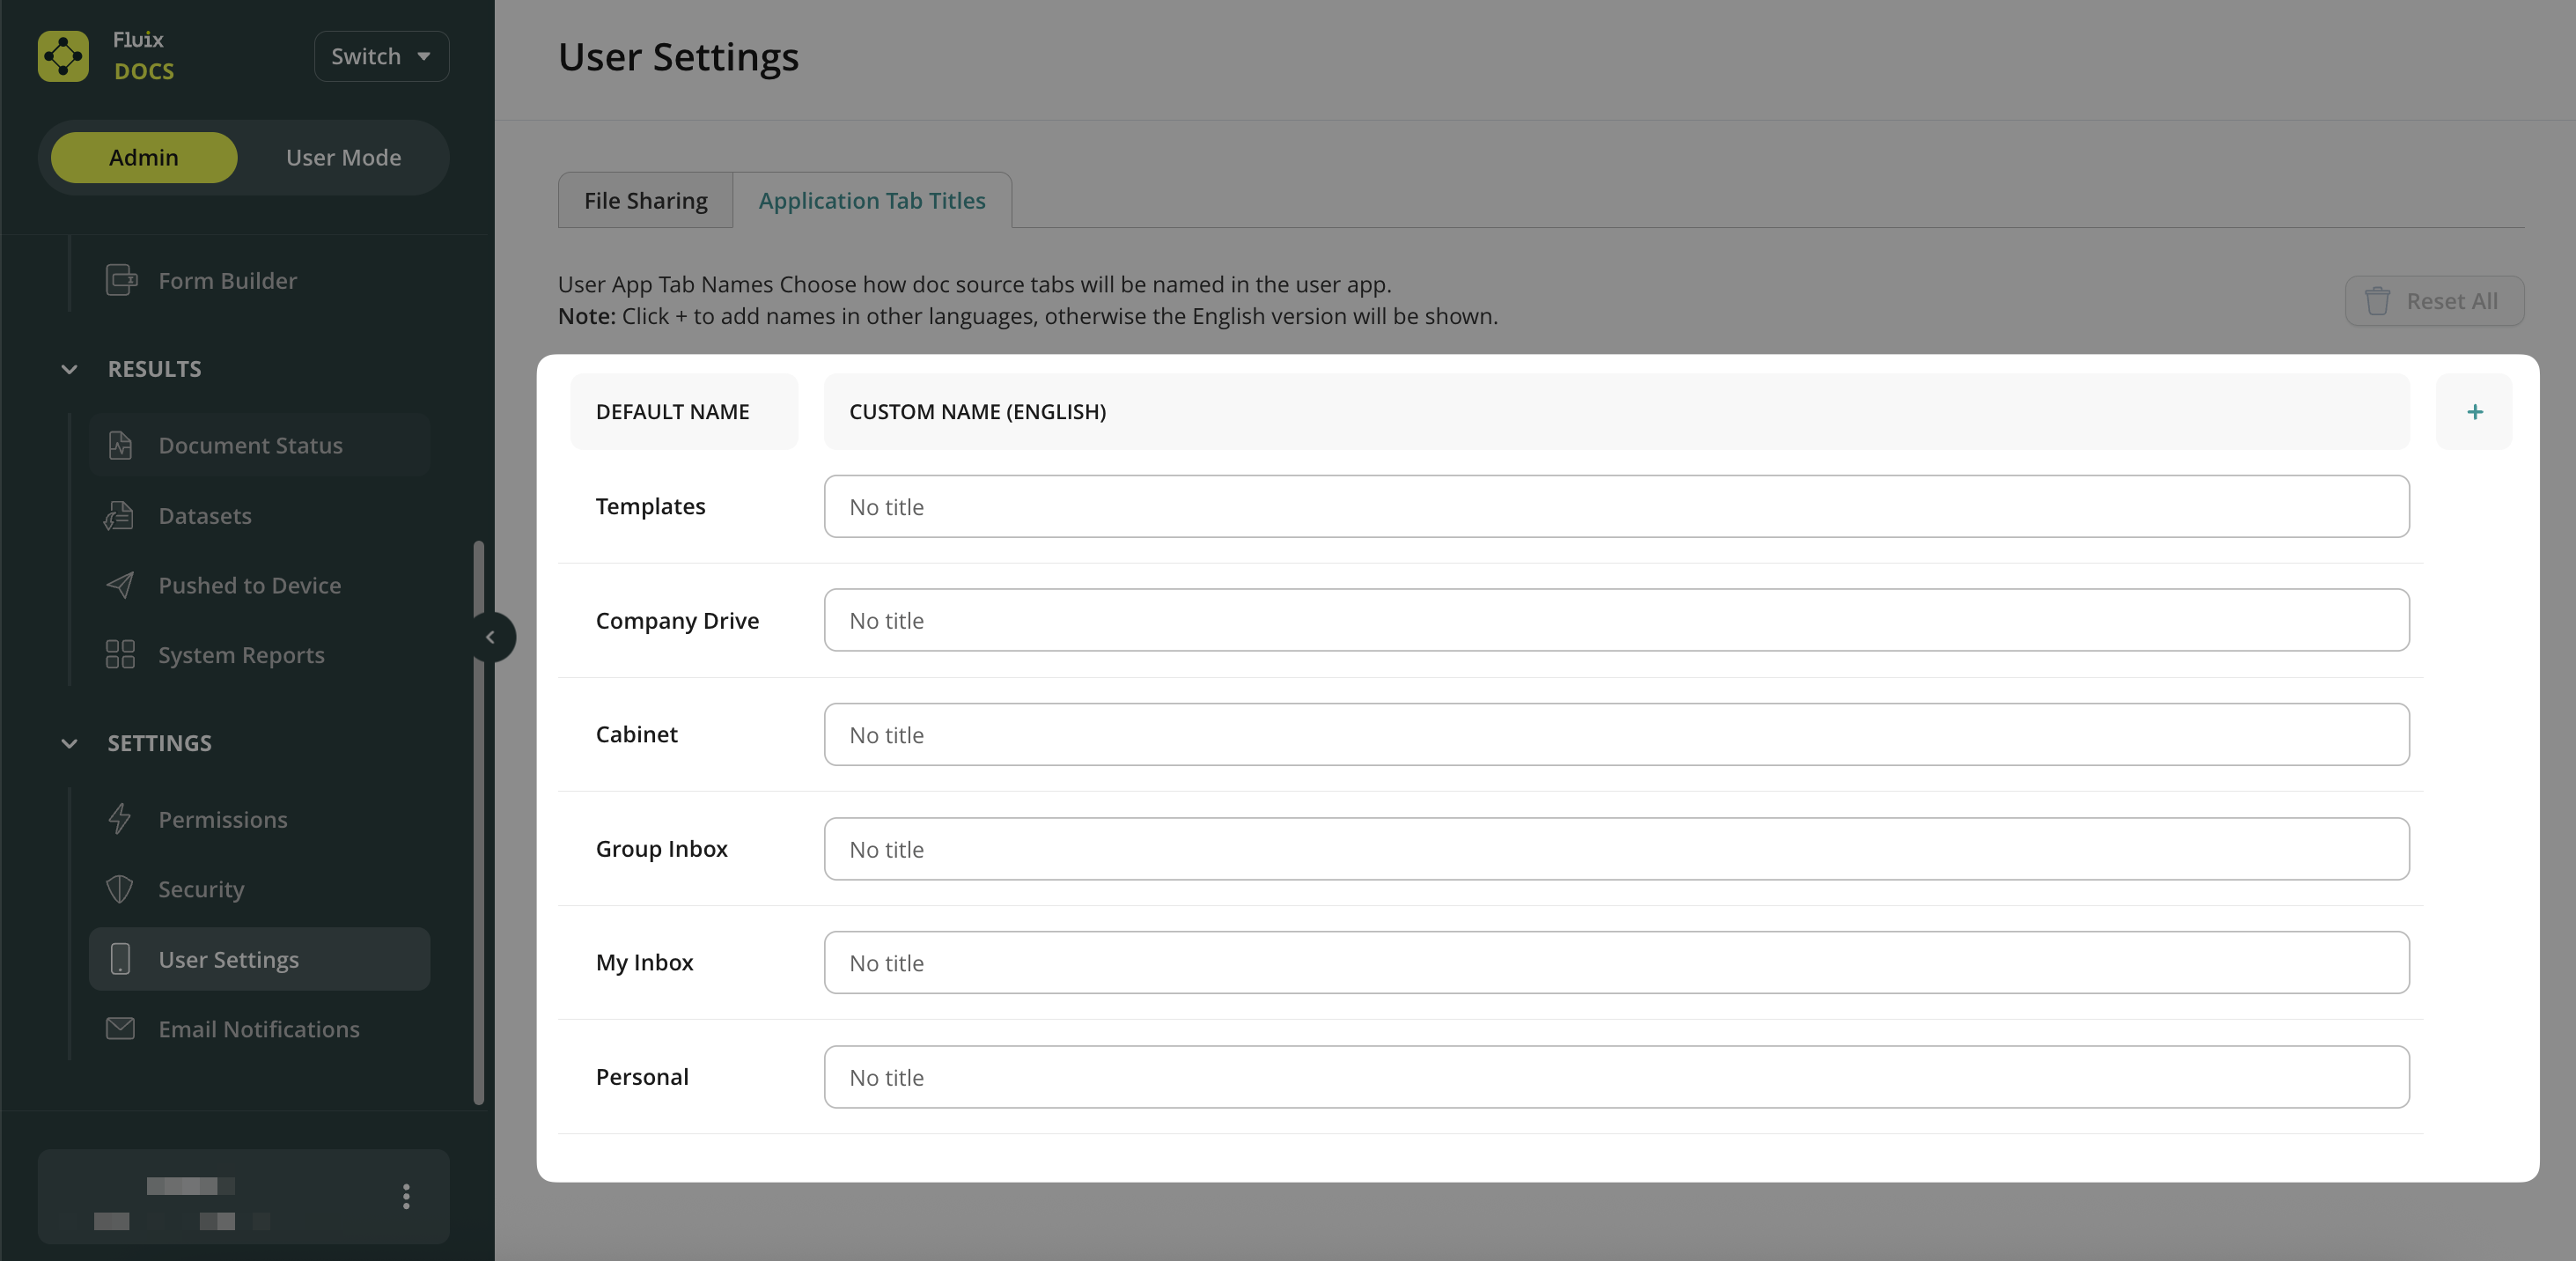
You will see a table with two columns:
Default Name – system titles displayed in the Fluix Docs app. Custom Name (English) – editable fields for your custom app tab names.
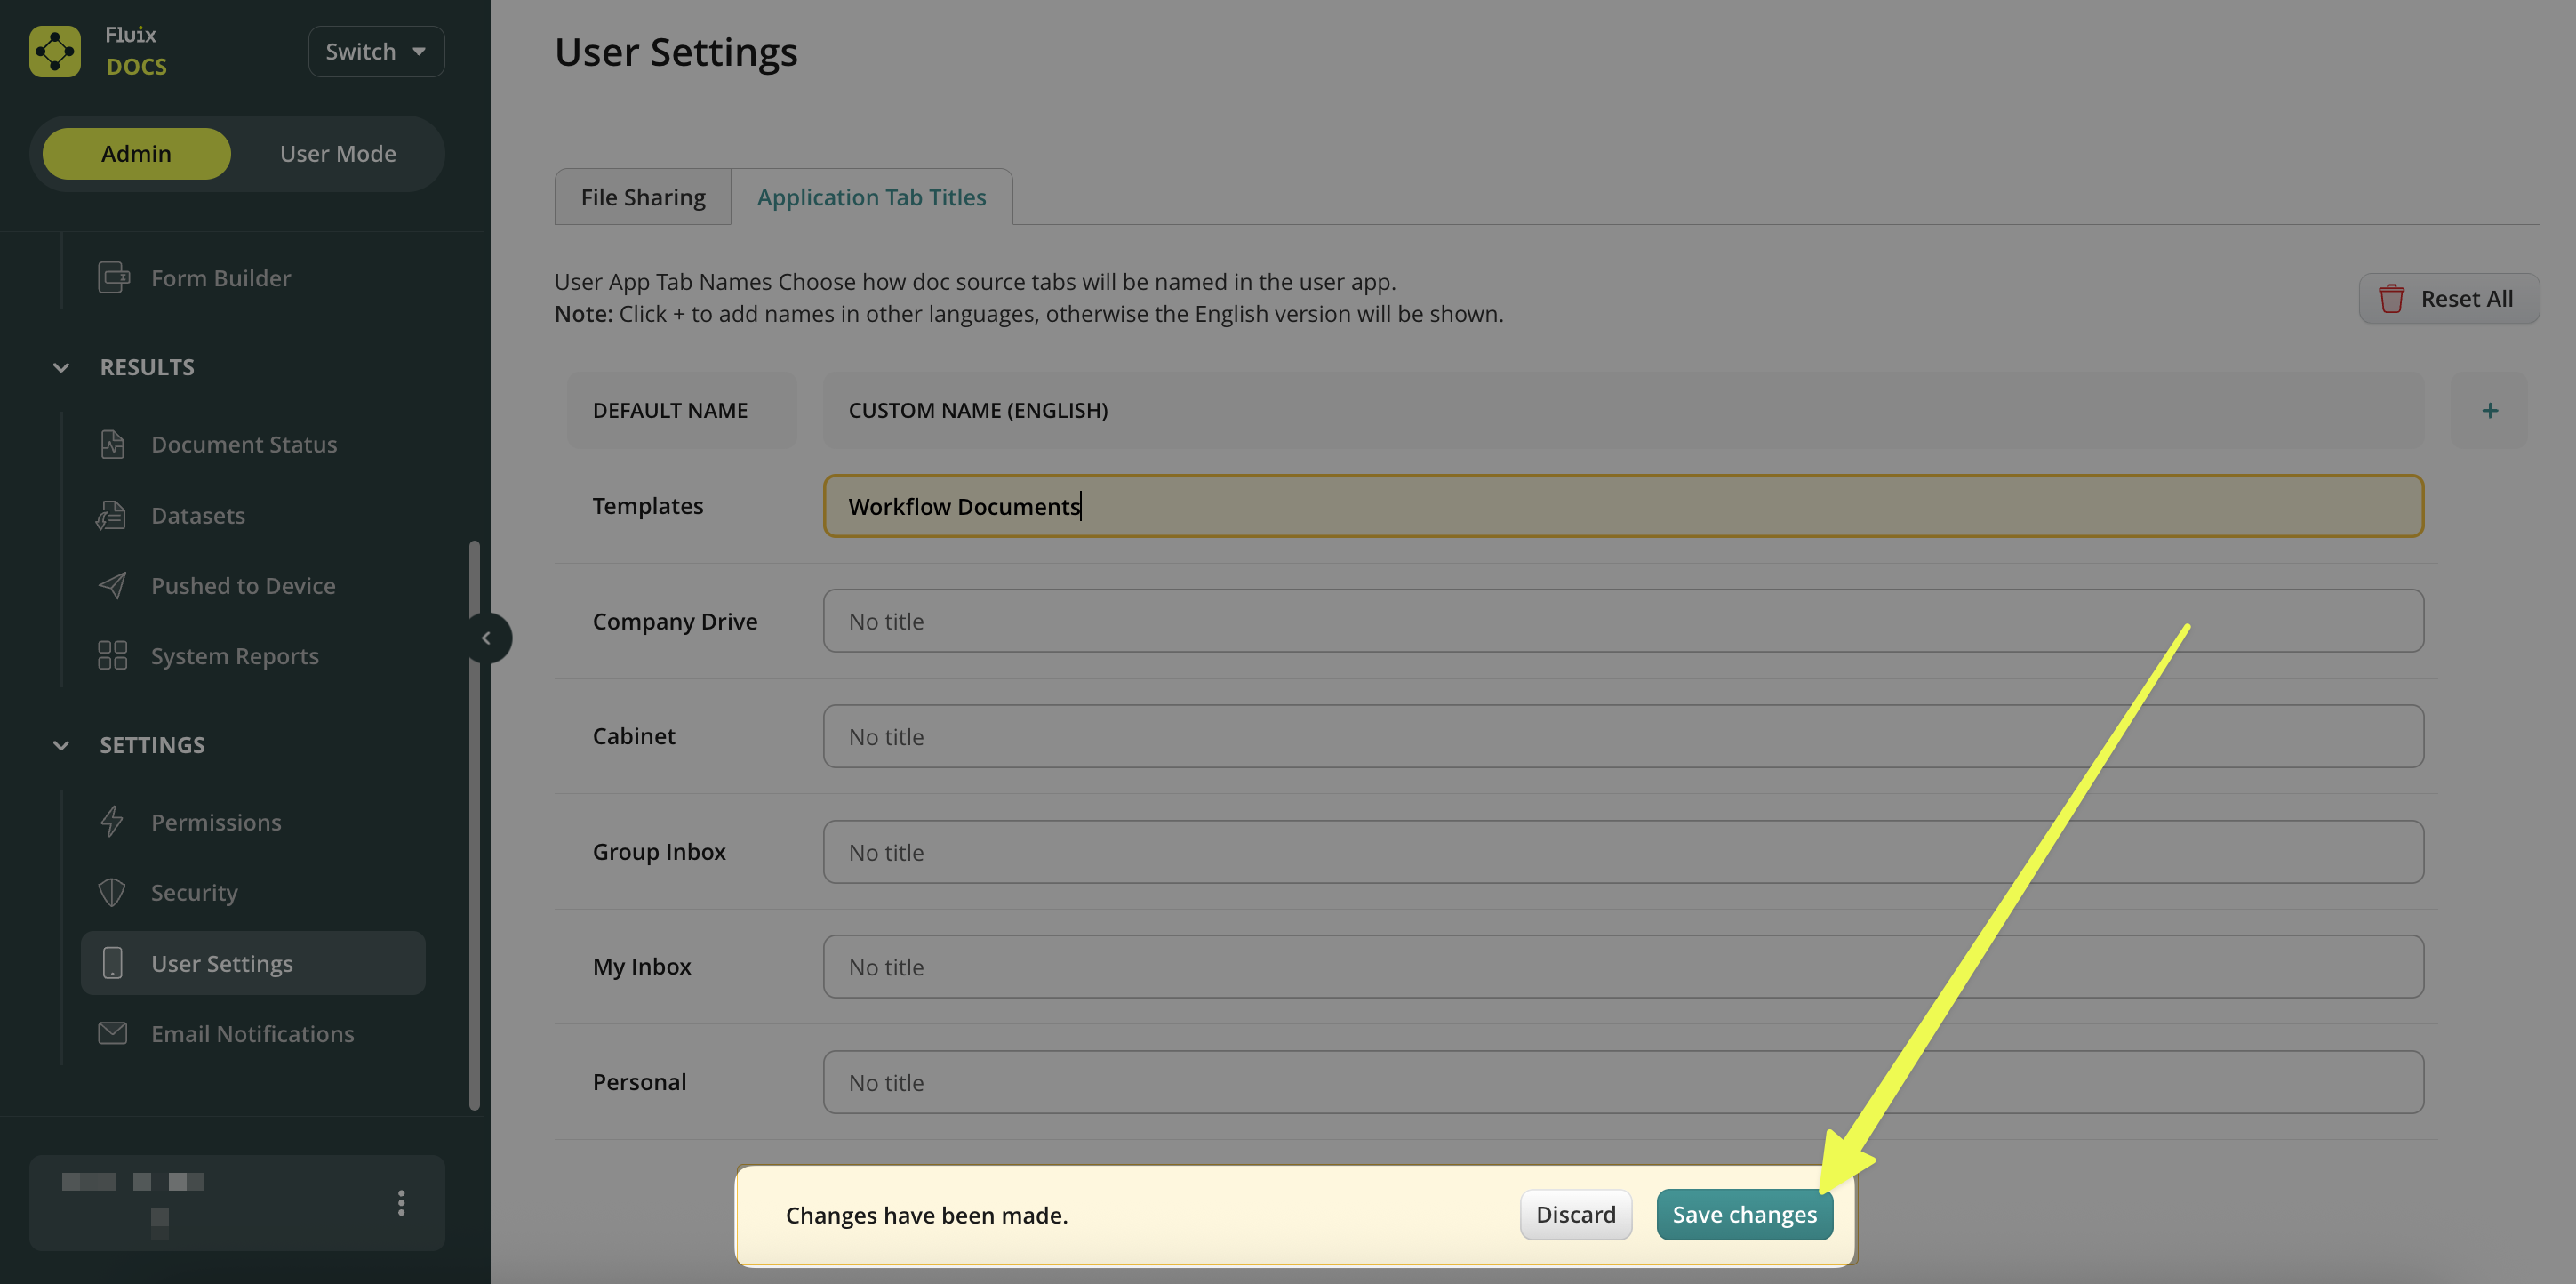
Click on the Custom Title field and type the name you would like to display in the Fluix app for your field team.
Note: each field has a 22-character limit.
After you make any edits, click on the Save changes button.
Note: Upon clicking the Save changes, the settings you configure in the Application Tab Titles will be applied globally to all the users in your company account.
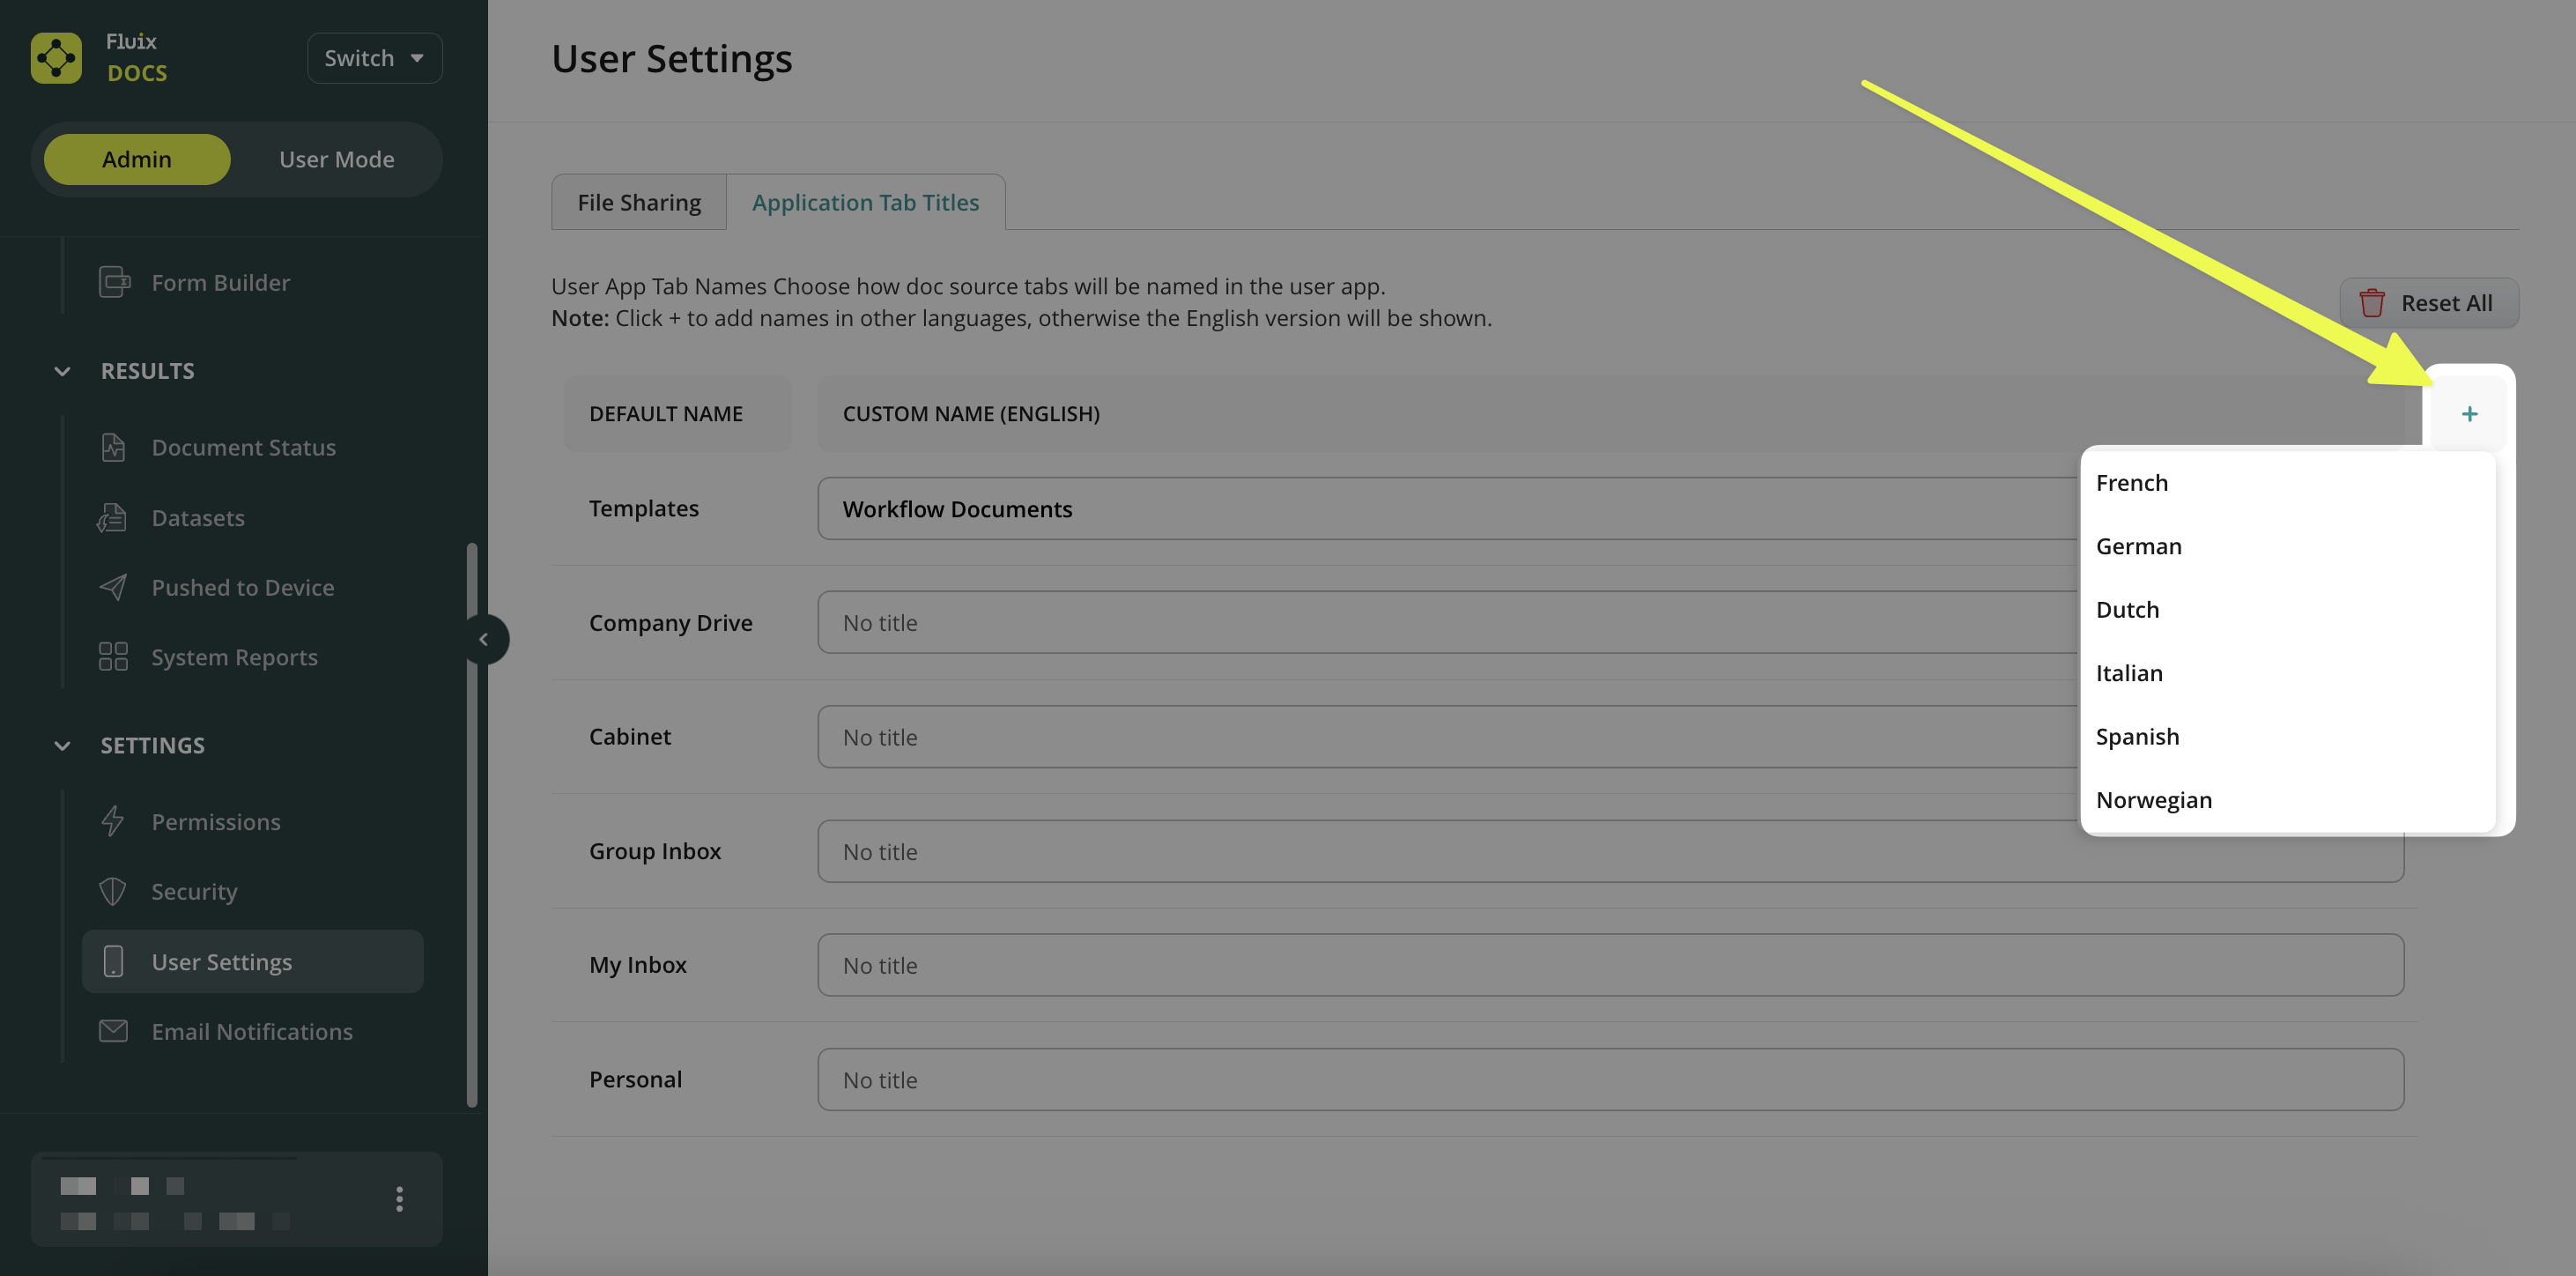
How To Add Titles in Different Languages
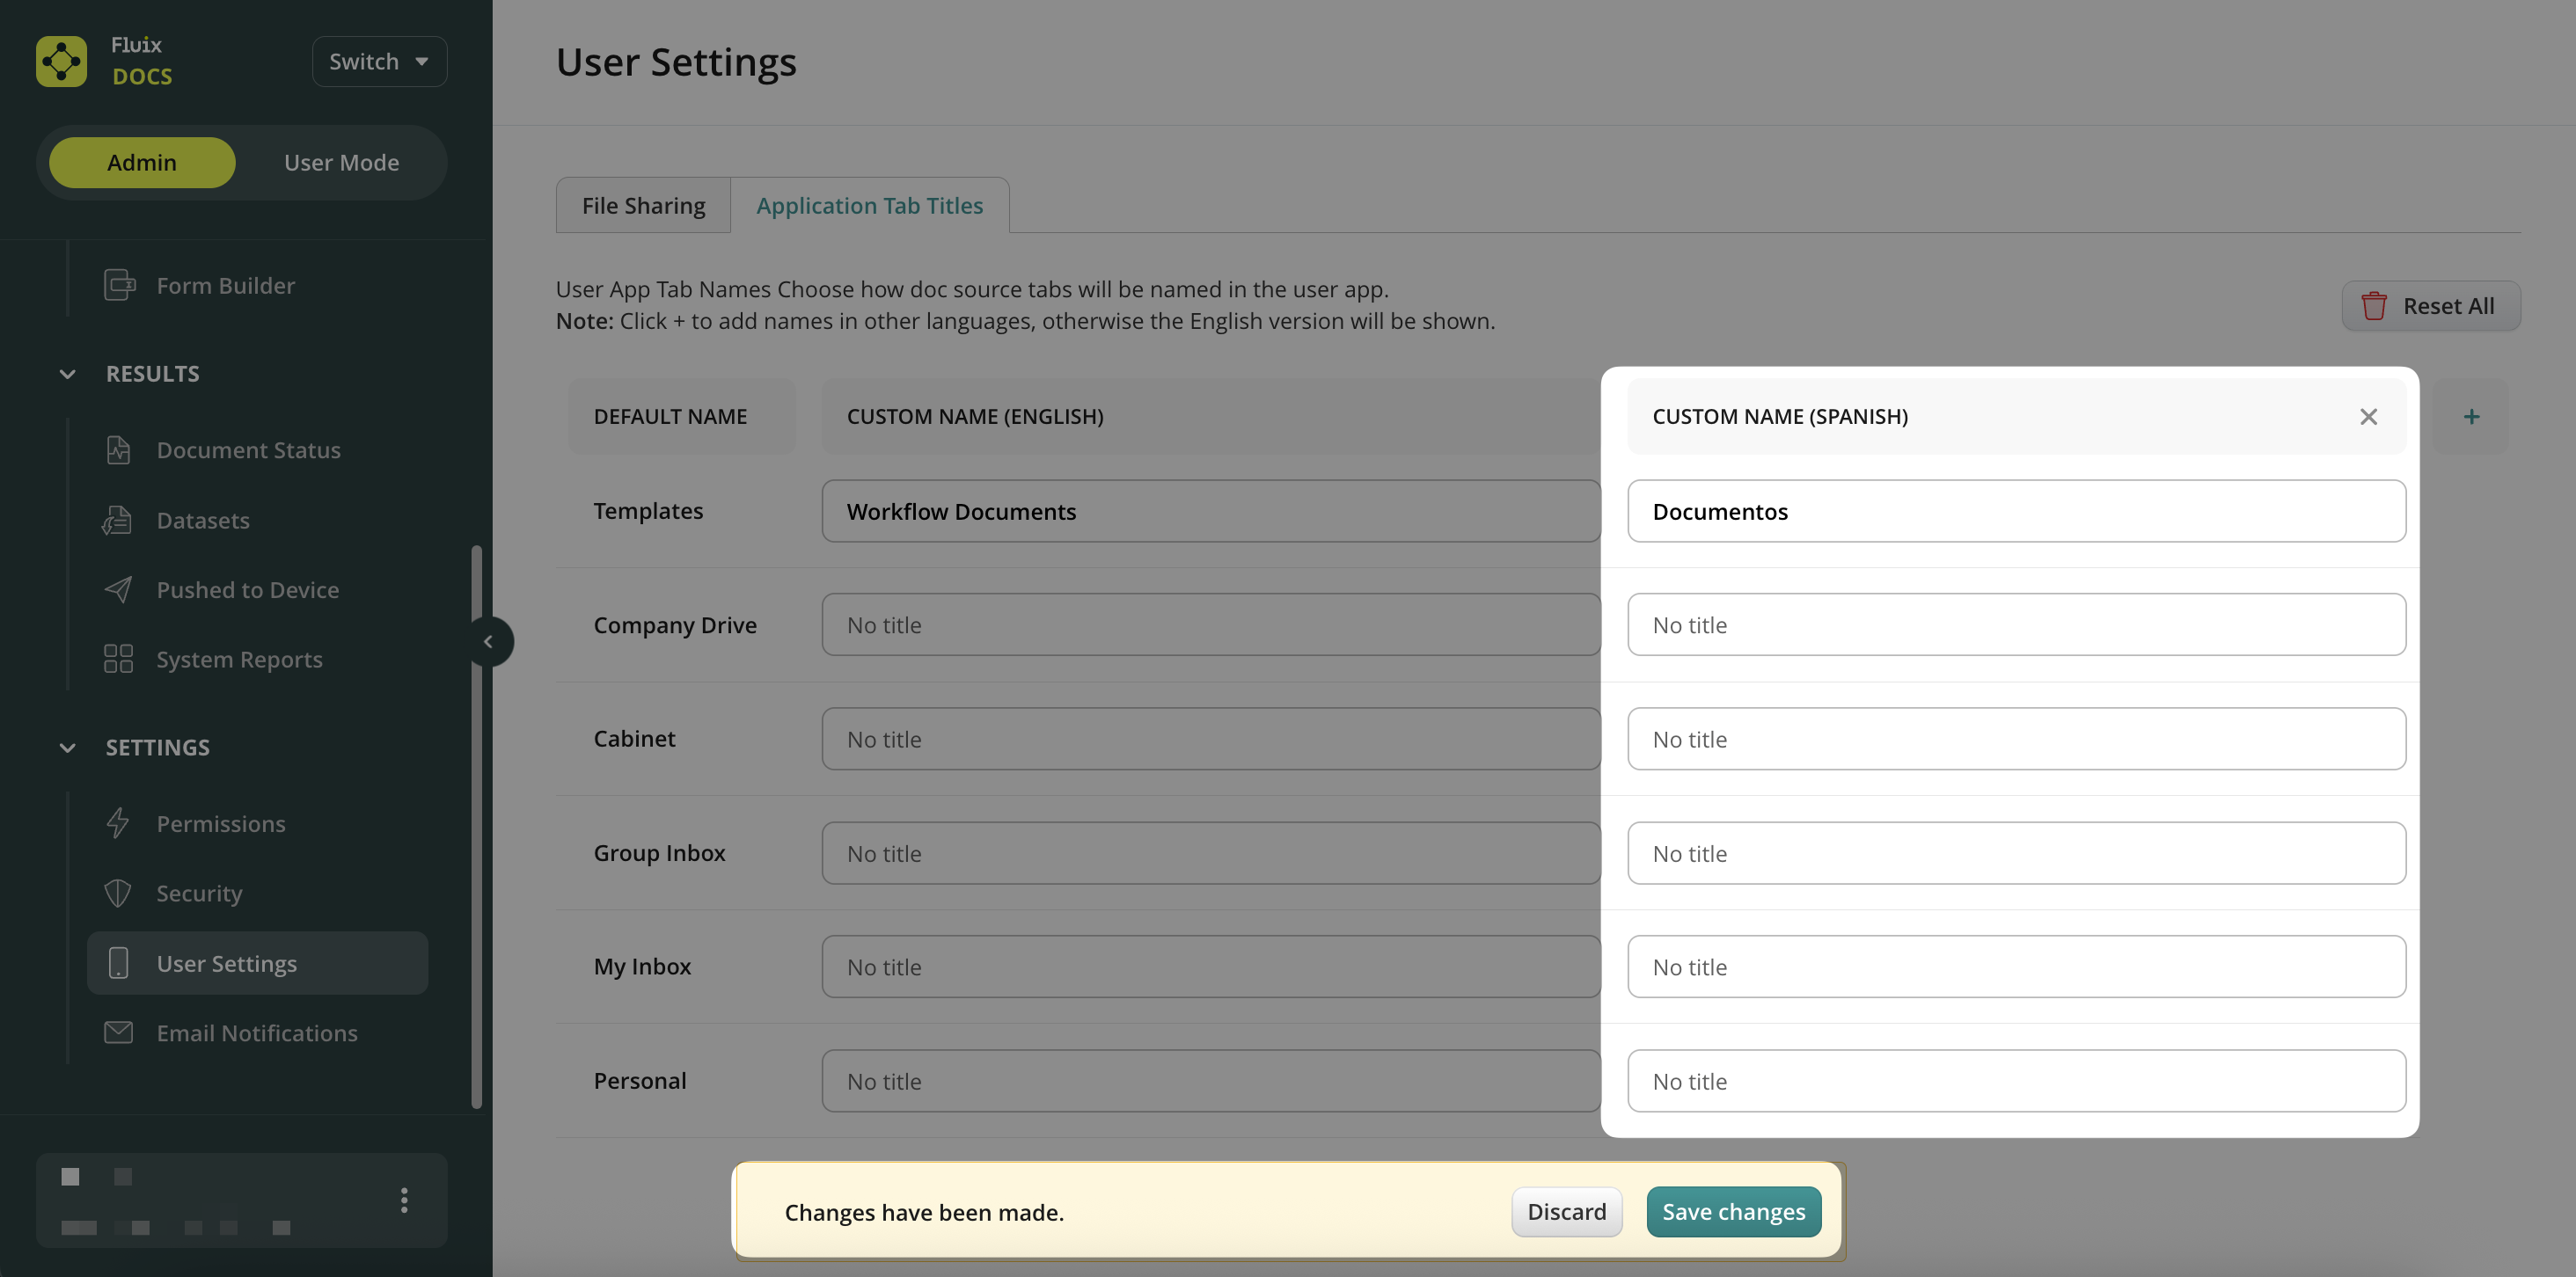
To add a localized tab name, click the Plus (+) button to add another language column.
Enter the custom titles for the selected language and click Save Changes.
Note: Custom titles will be displayed to users according to their device’s language settings.
If you have any questions, contact our support at support@fluix.io, and we’ll be happy to help.
Was this article helpful?
Thanks for your feedback!
Oops, something went wrong. Please, try again later.
Thank you!
What details or examples would have made this article more helpful for you? We appreciate your insights!
App Sidebar Shortcuts enable field teams to quickly switch between the Fluix Docs app and other work-related apps installed on the same device. This provides fast access to essential tools used in daily operations without disrupting workflows.
Shortcuts are created and managed by an admin in the Admin Portal and appear automatically on users’ devices.
Note: App Shortcuts in the sidebar are available starting from the Fluix Docs 4.8 app version.
How it works
Admin creates appshortcuts in the Admin Portal.
Shortcuts appear in a dedicated Shortcuts section in the Fluix Docs app sidebar.
Users can open another app or webpage with a single tap.
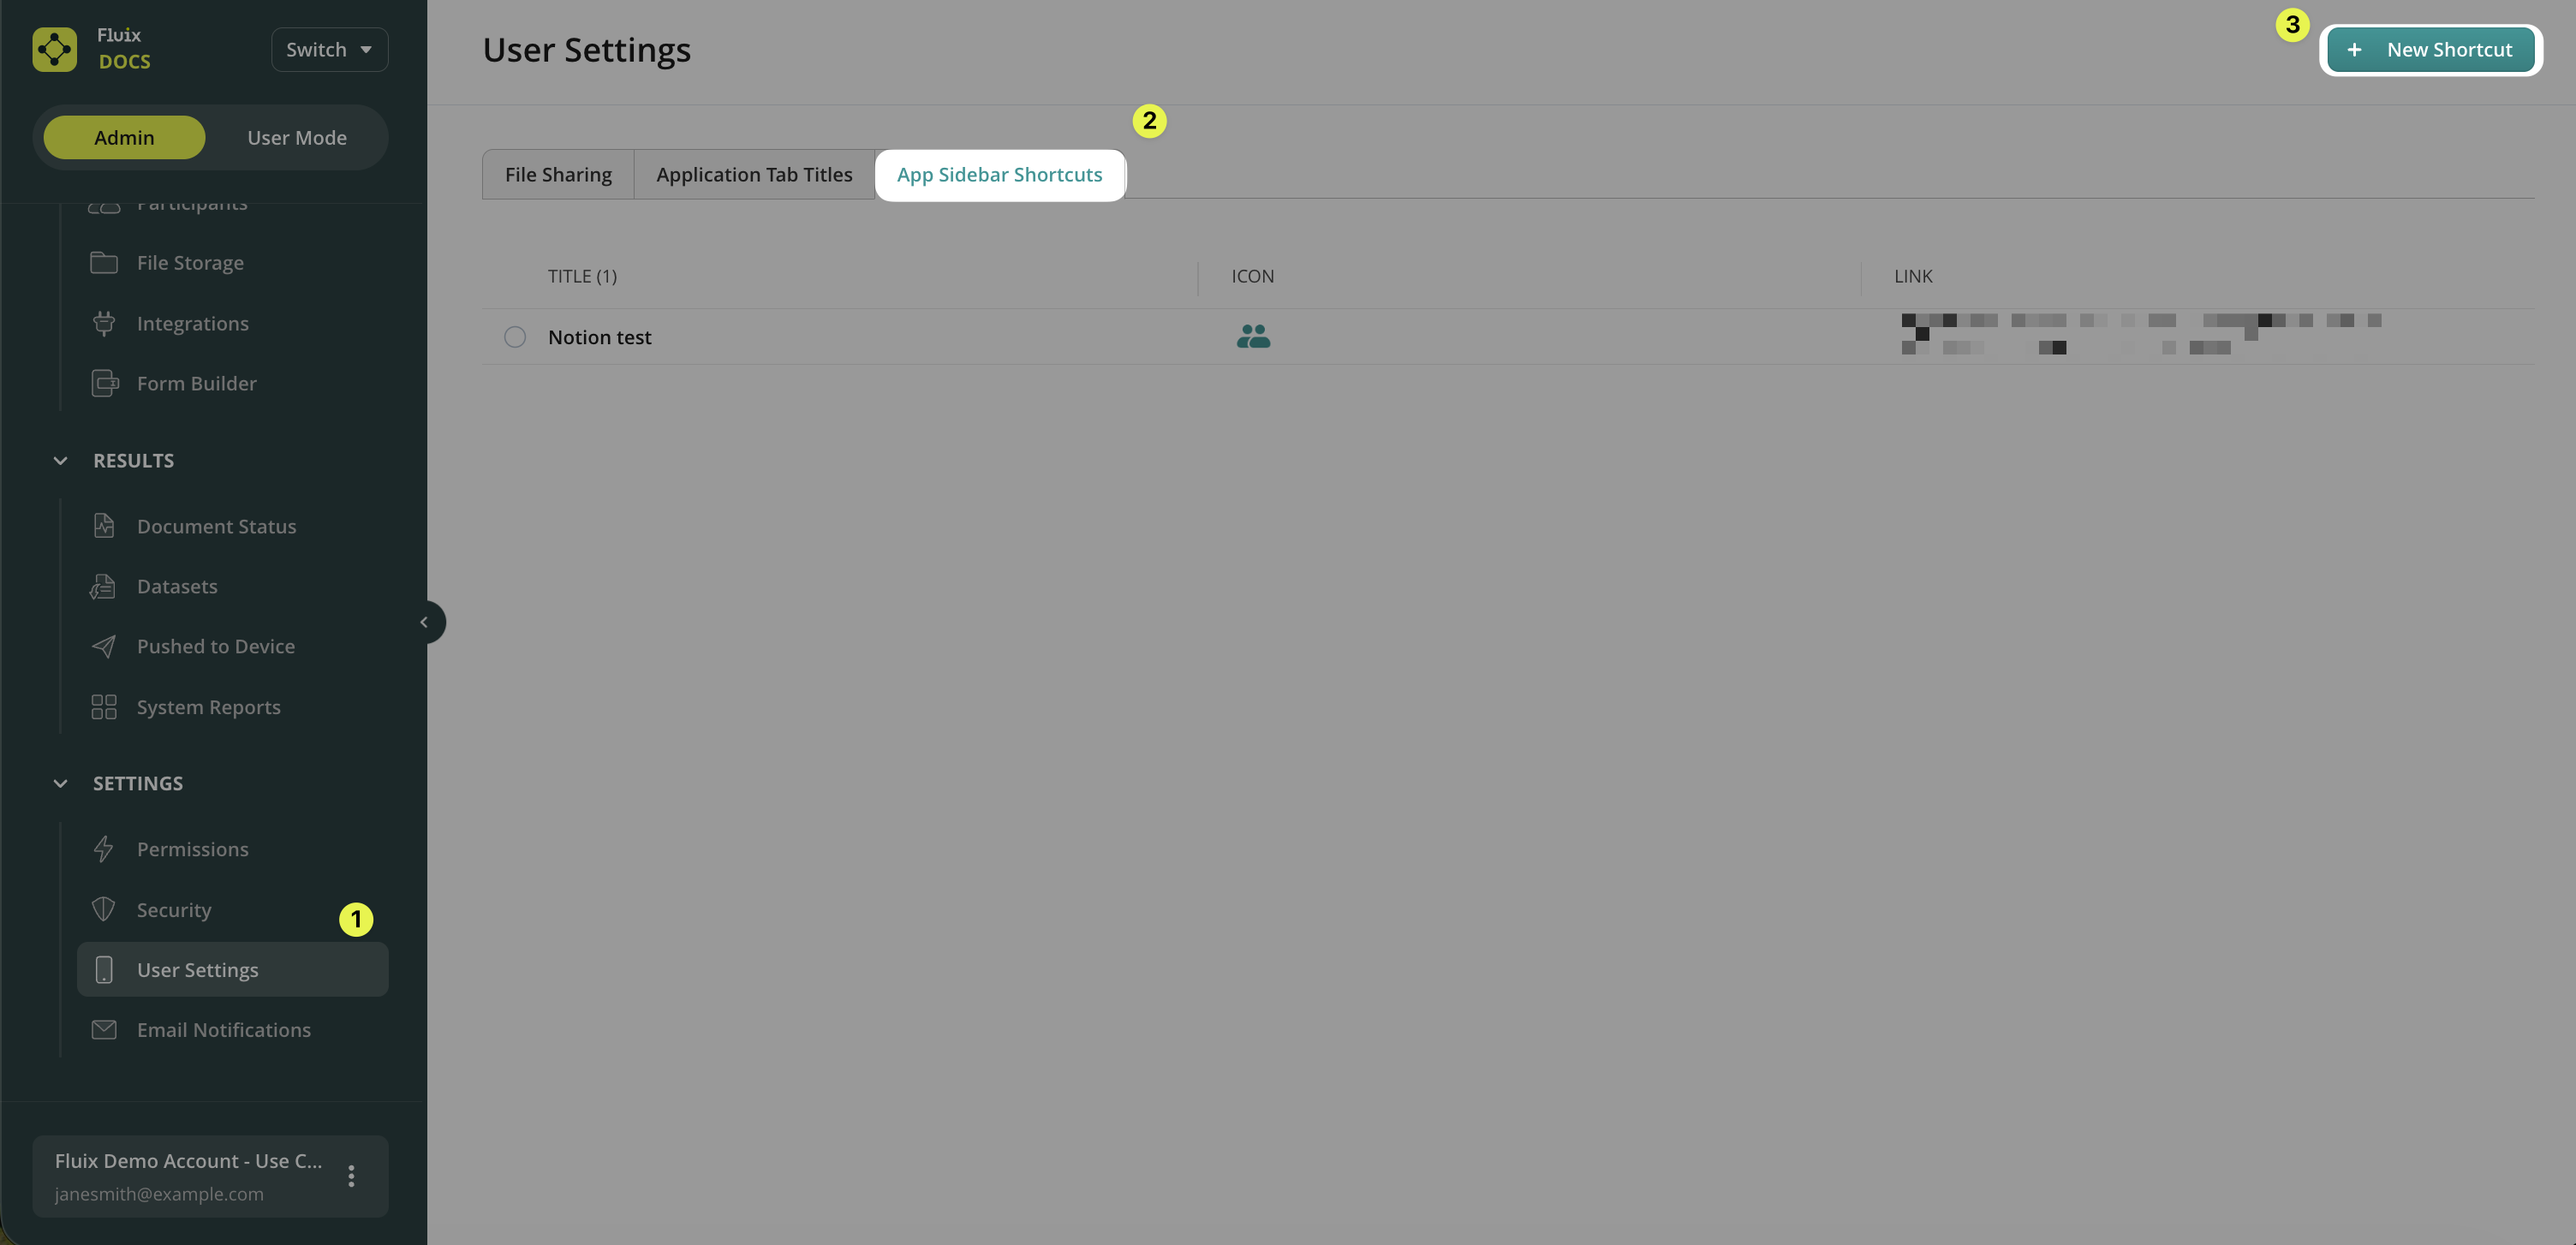
How to Configure Shortcuts in the Admin Portal
In the Admin Portal, navigate to User Settings.
Open the App Sidebar Shortcuts tab.
Click Add Shortcut.
In the modal window, fill in all required fields.
Shortcut settings
Link requirements Fluix supports one of the following formats:
Universal Link: Enter a full URL that opens an app or webpage.
Example: https://example.com
Custom Link: Enter the app scheme for an installed application.
Example: myapp://
Iconrequirements A default icon is pre-selected. However, you can:
Choose from preset icons, or
Upload a custom square image in JPEG or PNG format.
Maximum size: 1 MB
How to Manage Shortcuts in the Admin Portal
You can see all shortcuts appear in a table in the App Sidebar Shortcuts tab. You can perform the following action with the shortcuts.
Edit – update shortcut details
What will the Fluix Docs Users’ experience be?
Where to find shortcuts
Admin-created shortcuts are displayed in a separate Shortcuts section within the app sidebar. If no shortcuts were created by an admin, this section is not shown.
Open a shortcut
Tap a shortcut to open the linked app or webpage.
If the end user is unable to open the link, please contact the Fluix account manager or Fluix Support at support@fluix.io.
Notes and limitations
Custom links work only if the linked app is installed on the device.
All shortcuts are managed centrally by the admin.
Device users cannot add or edit shortcuts.
Feel free to contact us at support@fluix.io if you have any questions or comments.
Was this article helpful?
Thanks for your feedback!
Oops, something went wrong. Please, try again later.
Thank you!
What details or examples would have made this article more helpful for you? We appreciate your insights!
Sign Up to Our Product Newsletter
The latest updates from our Product team, straight to your inbox