


With the Customization of Tab Names feature, admins can now rename document source sections within the Fluix Docs app to ensure the interface matches your company’s specific terminology, making it easier and more intuitive for your teams to navigate the documents.
In this guide, you will discover more about the custom tab titles on your device.
Note:
The Customization of Tab Names functionality in Fluix Docs is determined by specific admin permissions, which are based on the configuration established by your company’s Fluix Account Admin. Therefore, if you would like to use this functionality, please reach out to an administrator with higher-level permissions who can set this up for your organization by following the instructions in this guide.
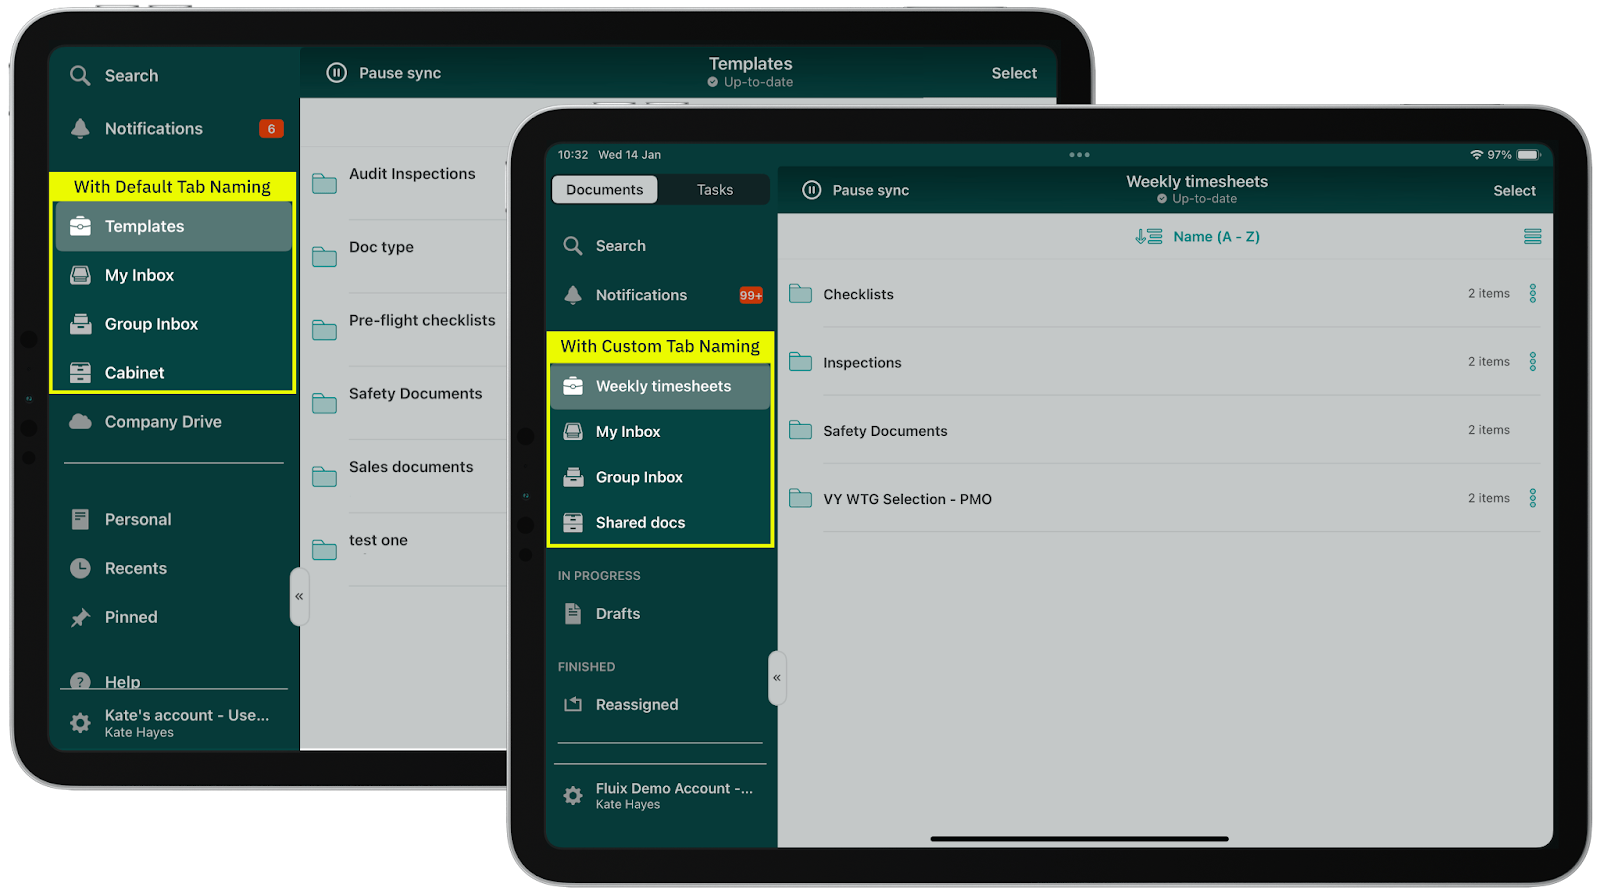
Here are examples of how the customization tabs will appear on your device, provided they have been preliminarily configured by your account admin:
Note:
Custom titles will be displayed according to your device language settings. Additionally, this feature is available starting from the Fluix Docs app version 4.8. You may upgrade the app through the App Store.
If you have any questions, contact our support at support@fluix.io , and we’ll be happy to help.