Fluix Users are your team members that will participate in your document flow, namely, fill out and exchange documents between each other, collect customers’ signatures, manage the work process between the field and office, and perform many other tasks aimed to streamline your business workflow.
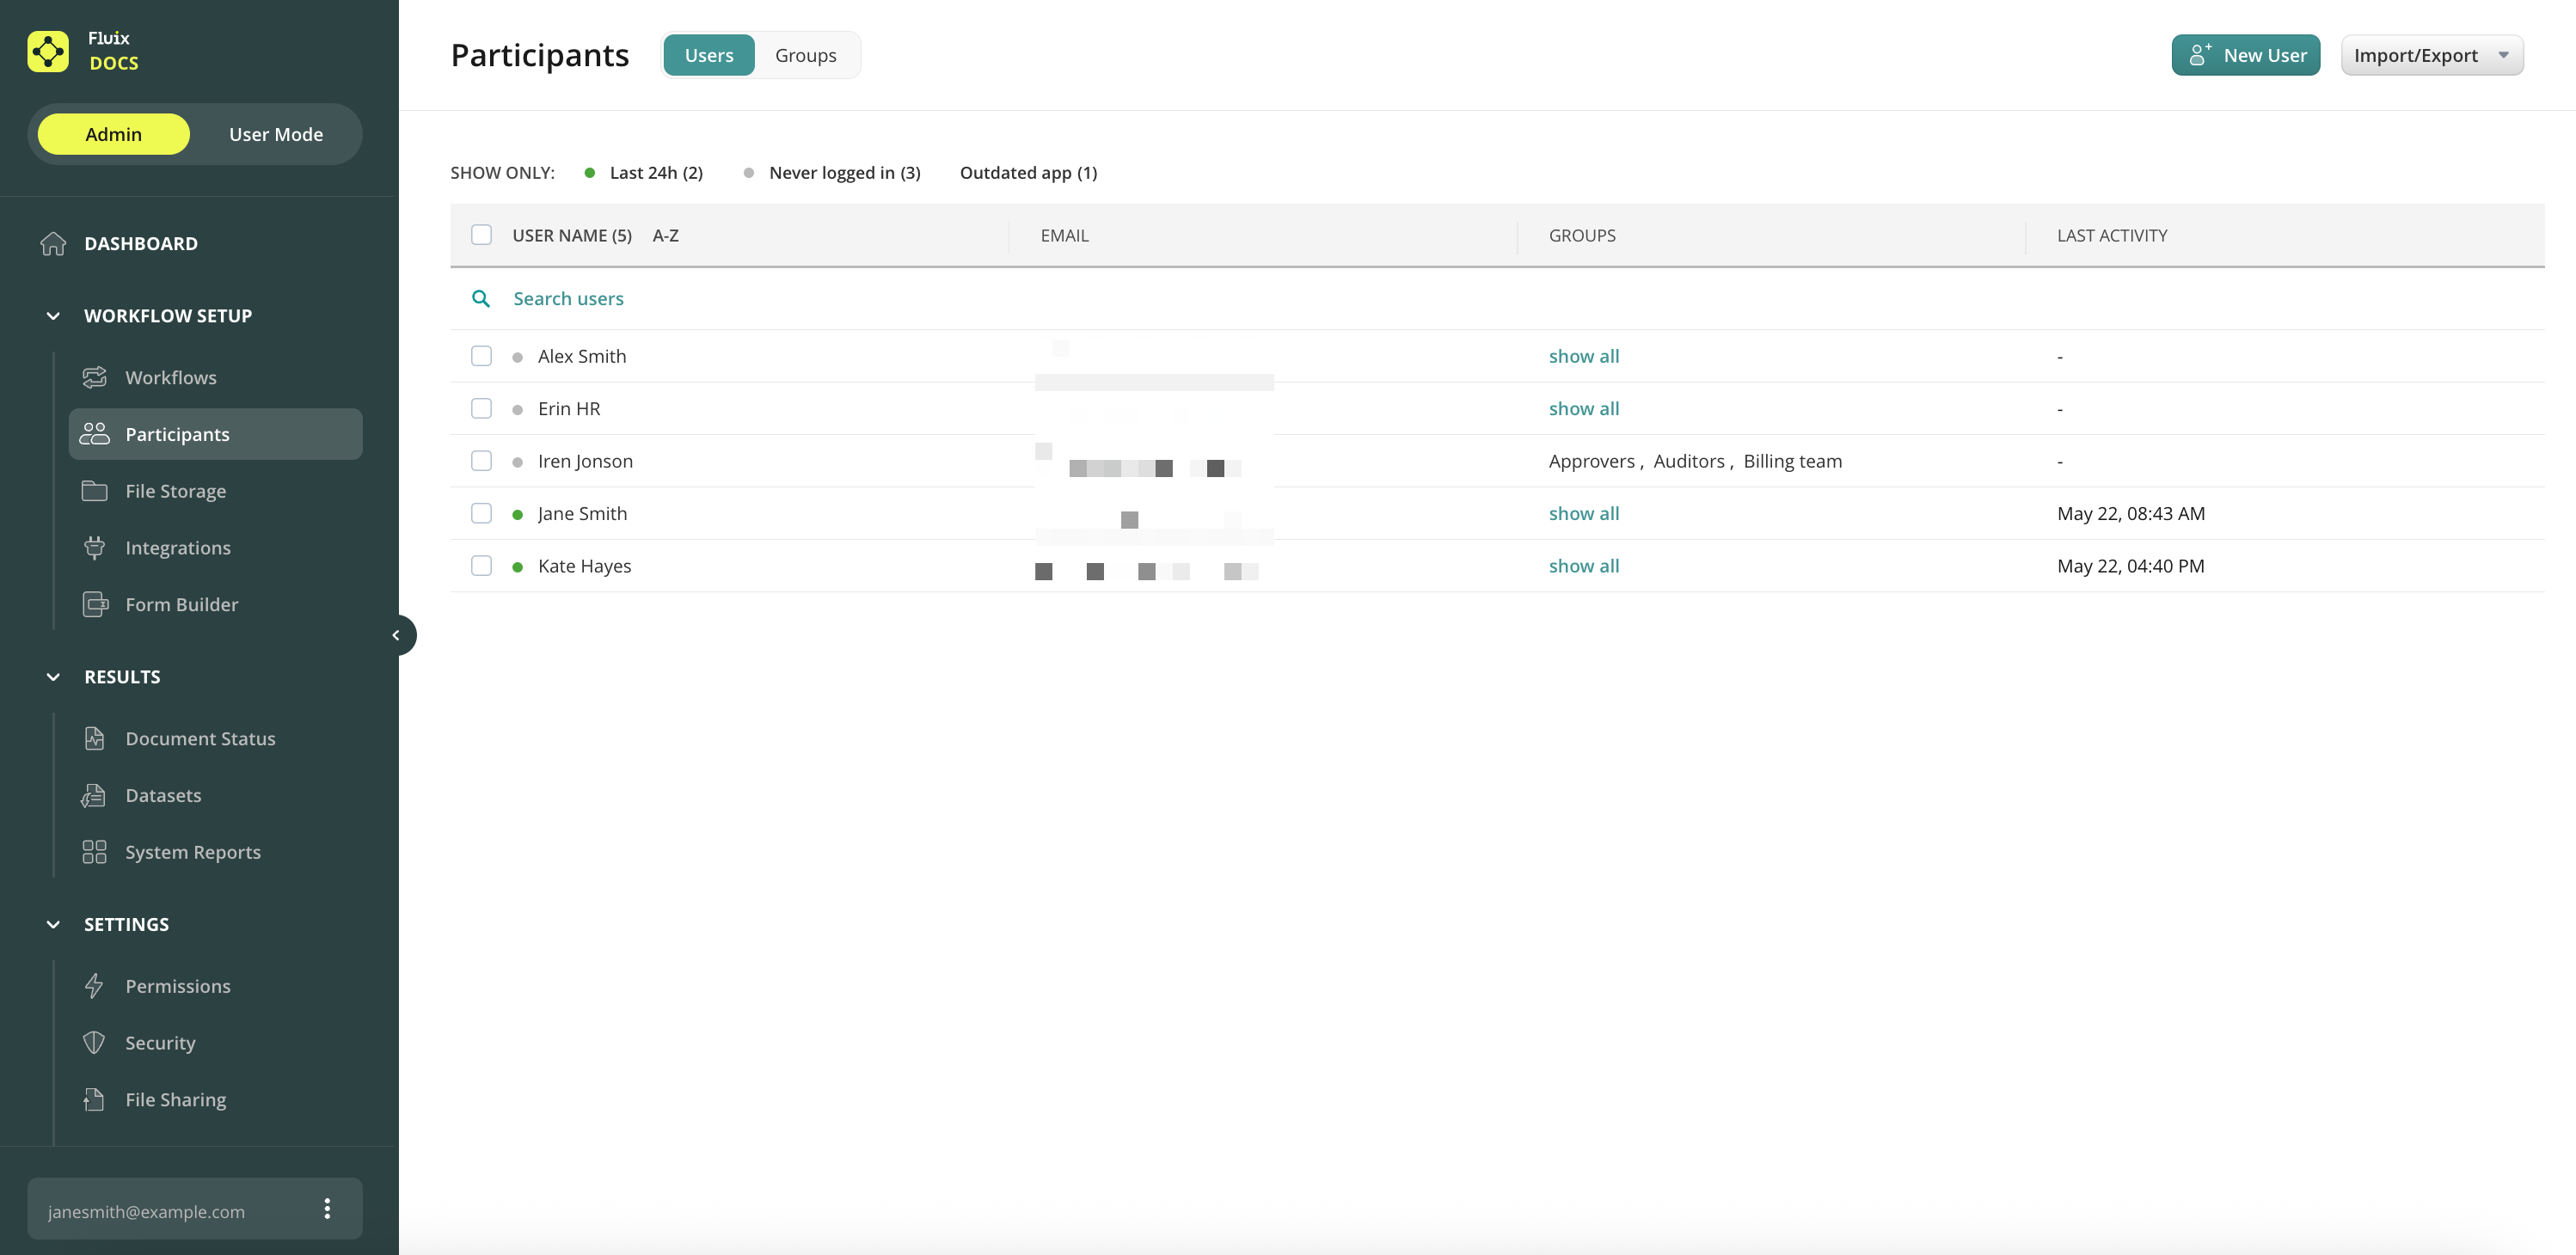
Users are managed on the Admin Portal under the Participants->Users section:
The first step in Fluix setup is adding users and organizing them into groups for further participation in workflows. Learn how to Add Users in the next article or contact us at support@fluix.io if you have any questions or comments.
Was this article helpful?
Thanks for your feedback!
Oops, something went wrong. Please, try again later.
Thank you!
What details or examples would have made this article more helpful for you? We appreciate your insights!
You can add a user by going to the Participants->Userstab under the Workflow Setup section and clicking on the New User button.
Fill out the user information and click Create.
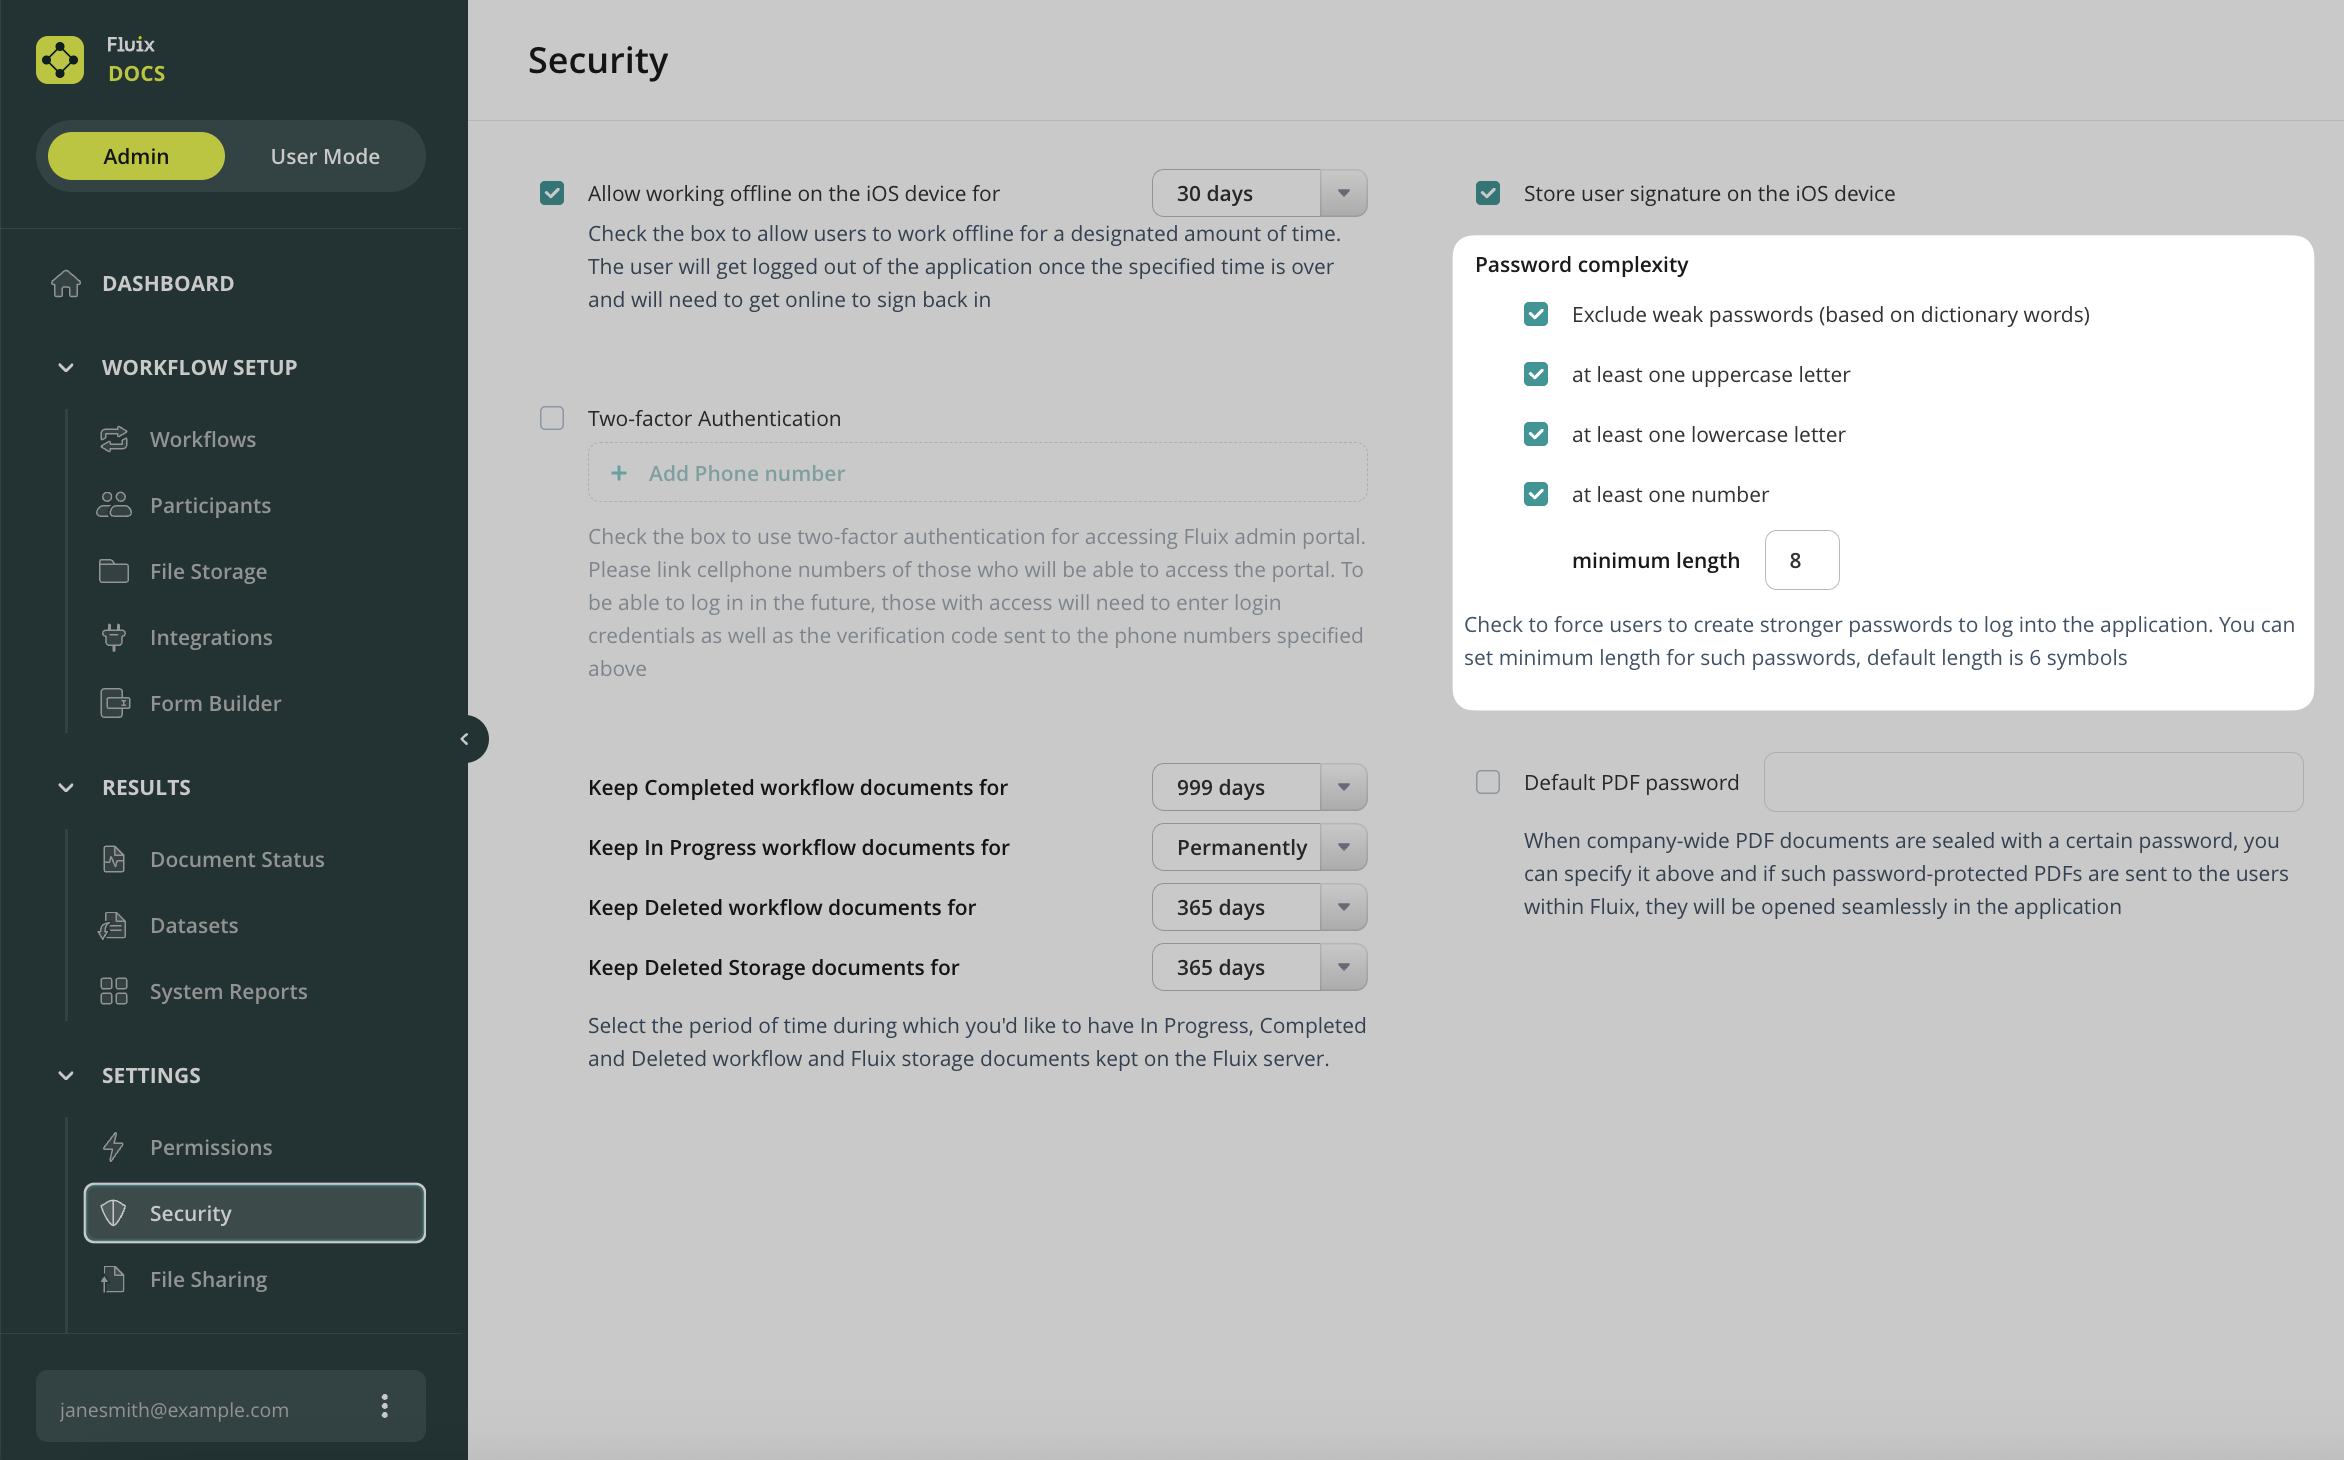
Please note that you can define the password complexity for the users’ passwords. This option is available in Settings-> Security.
If a user participates in a couple of accounts, then he or she will use one password for all accounts.
Invitation Email
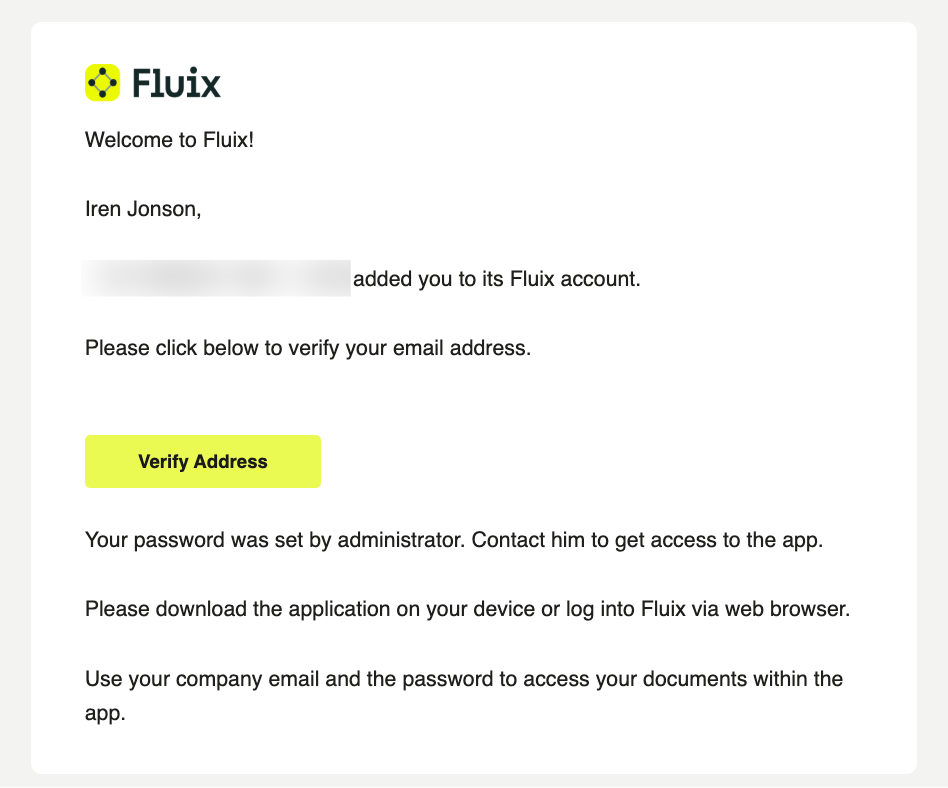
Once added to the Fluix account, a user will be sent an email invitation to access Fluix via iPad, iPhone, and web application.
In case the added user didn’t receive the invitation email, you will receive the automatic email notification saying that the system didn’t accept the email address. Please, double-check the address and if that didn’t help, email us at support@fluix.io for assistance.
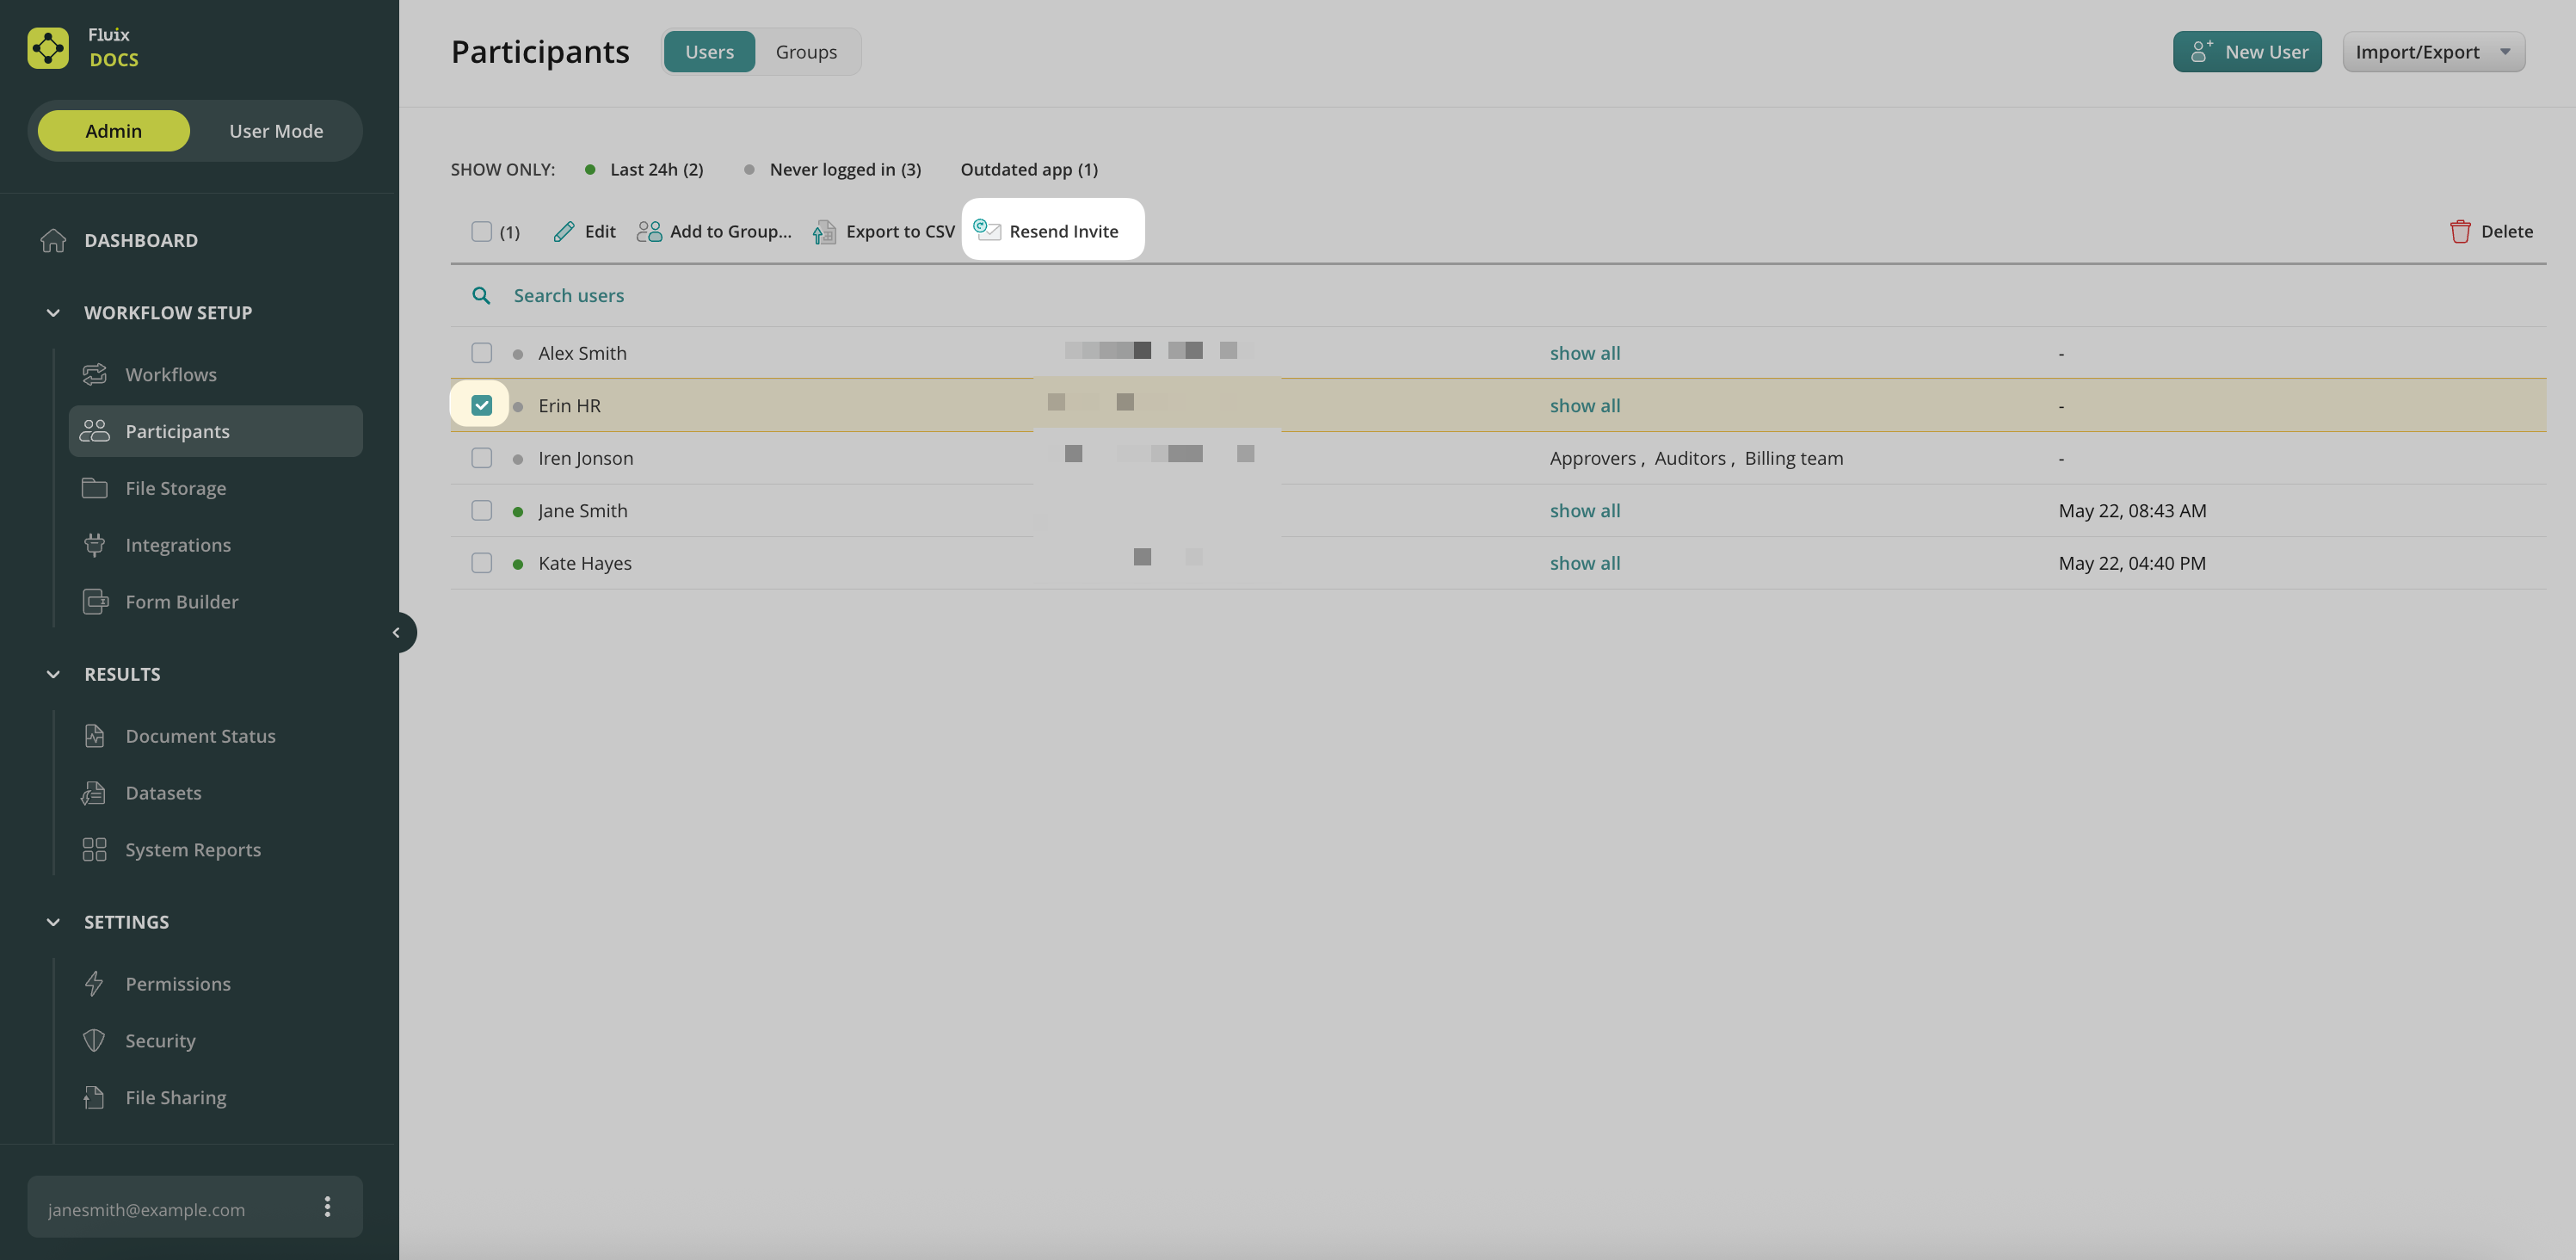
Resend Invite
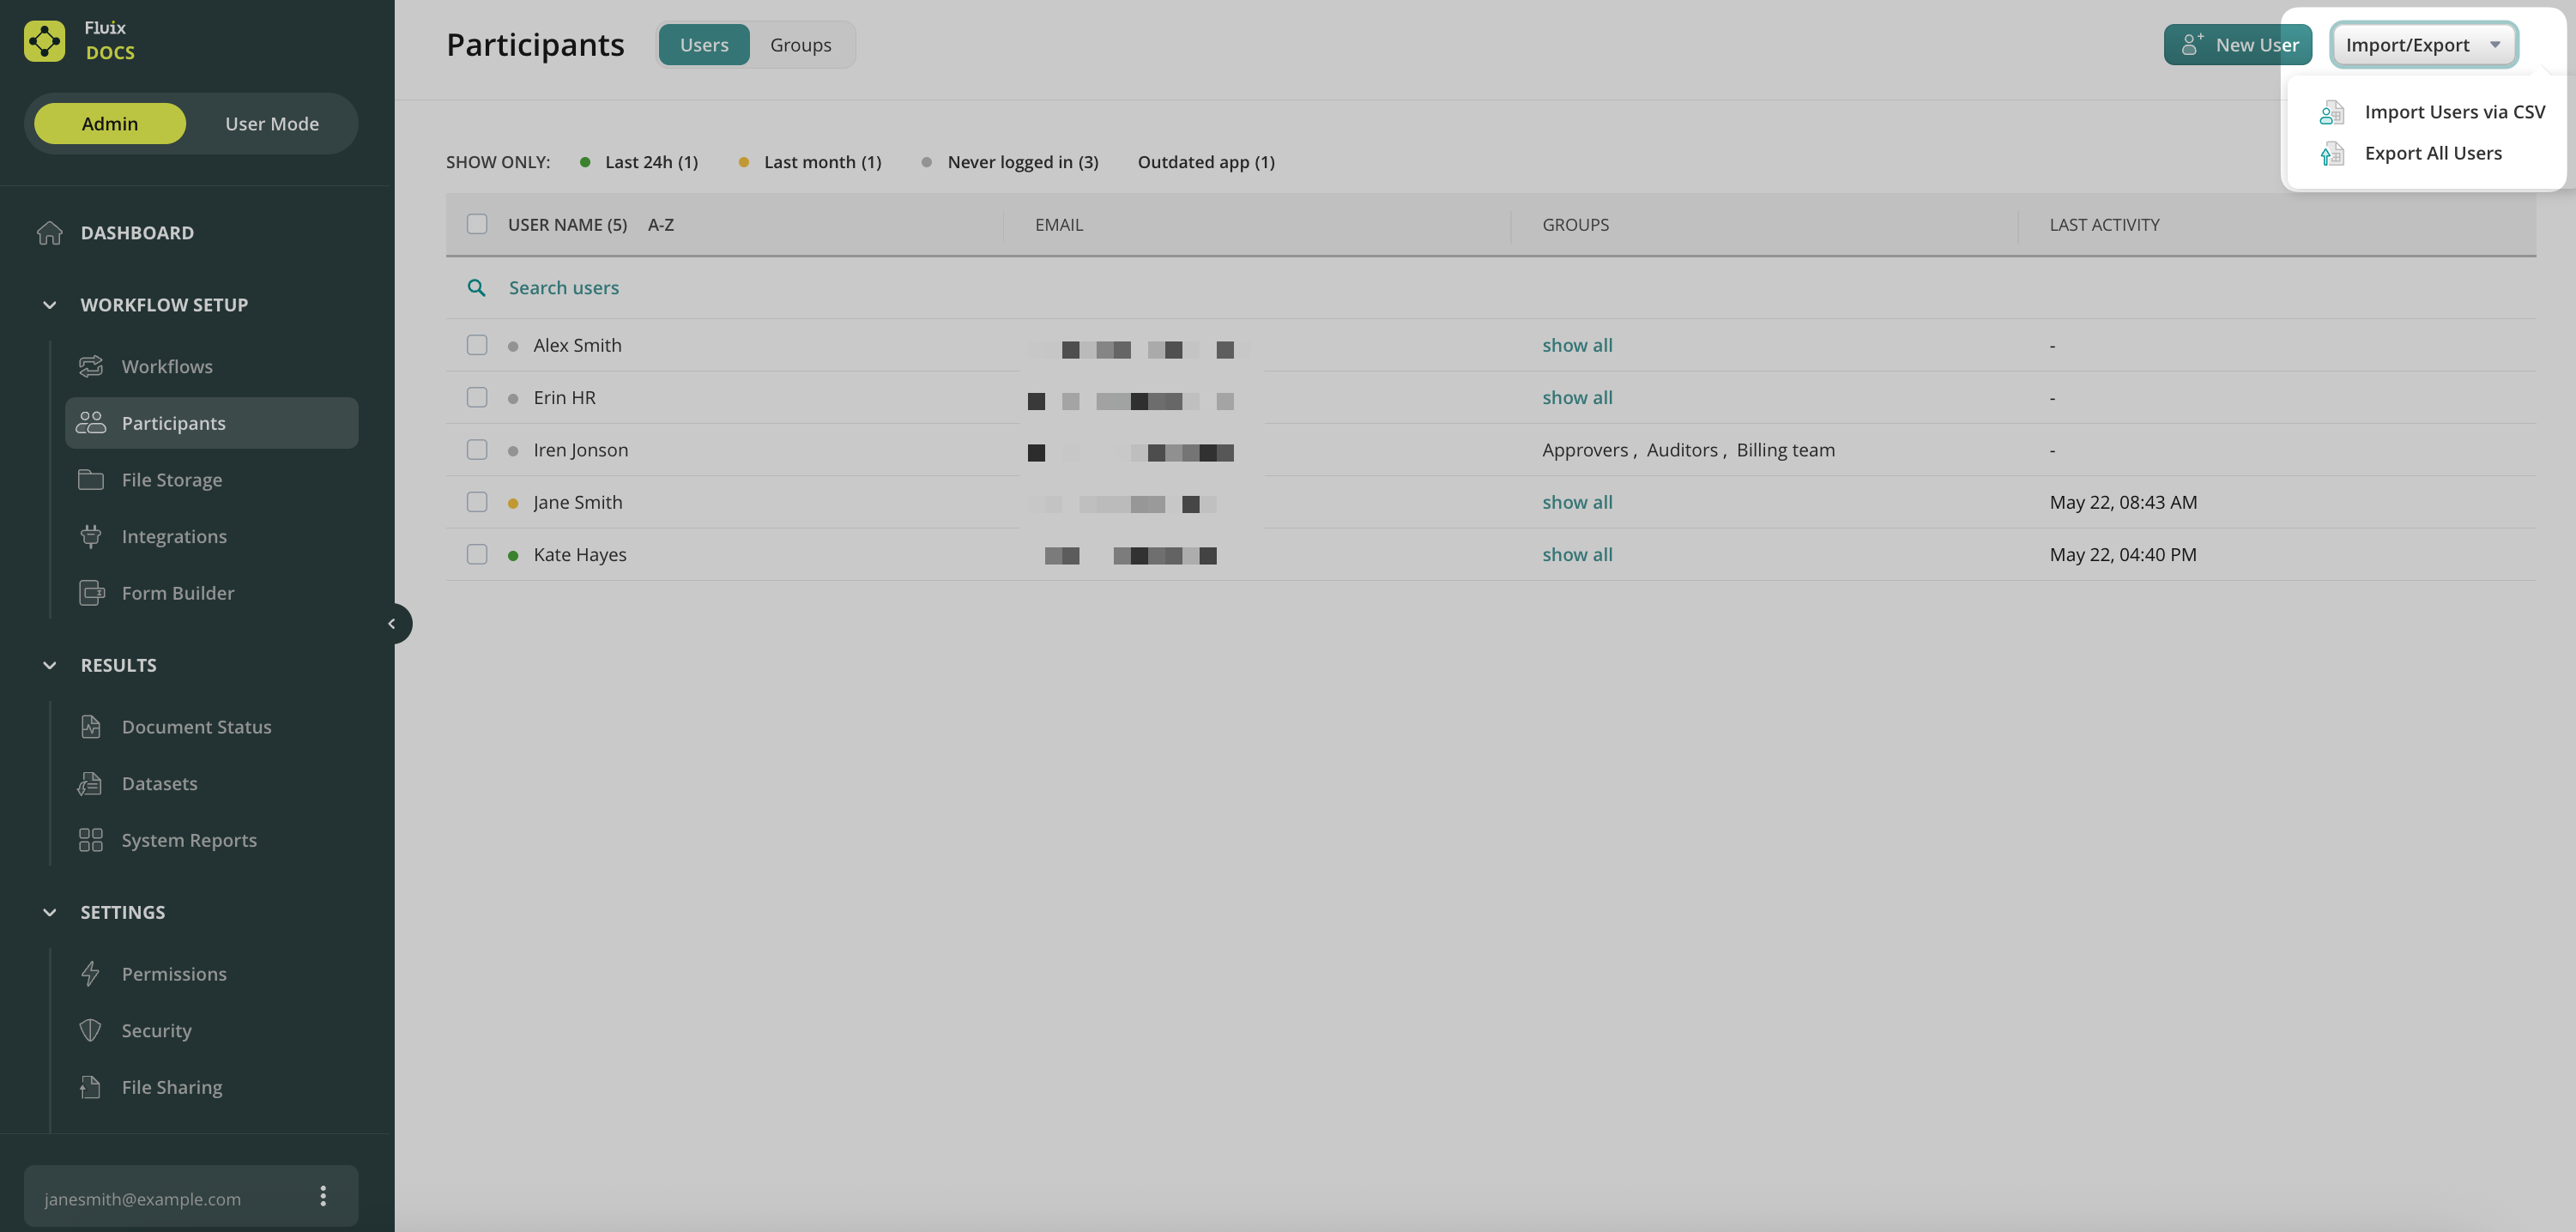
If you need to resend the invite to a user who never logged into his account, you can do that from the Participants->Users section:
The invitation to access Fluix will be sent again to the selected user who hasn’t logged into the application yet.
Was it helpful? Learn how to add Users in bulk in the next article or contact us at support@fluix.io if you have any questions or comments.
To save time on adding users to Fluix, we recommend doing it by uploading a CSV file.
Here’s a detailed guide:
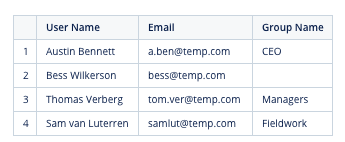
1. Collect users’ names and last names, email addresses and group they have to belong to (optional).
2. Open a Google Spreadsheet (or any other tool that can export this file in a CSV format) and create 2 columns: User Name and Email. If you would like to assign users to groups automatically, add a third column – Group Name (optional). Fill the document in with users’ information.
3. Download the file in CSV format (in Spreadsheets via File -> Download As – CSV)
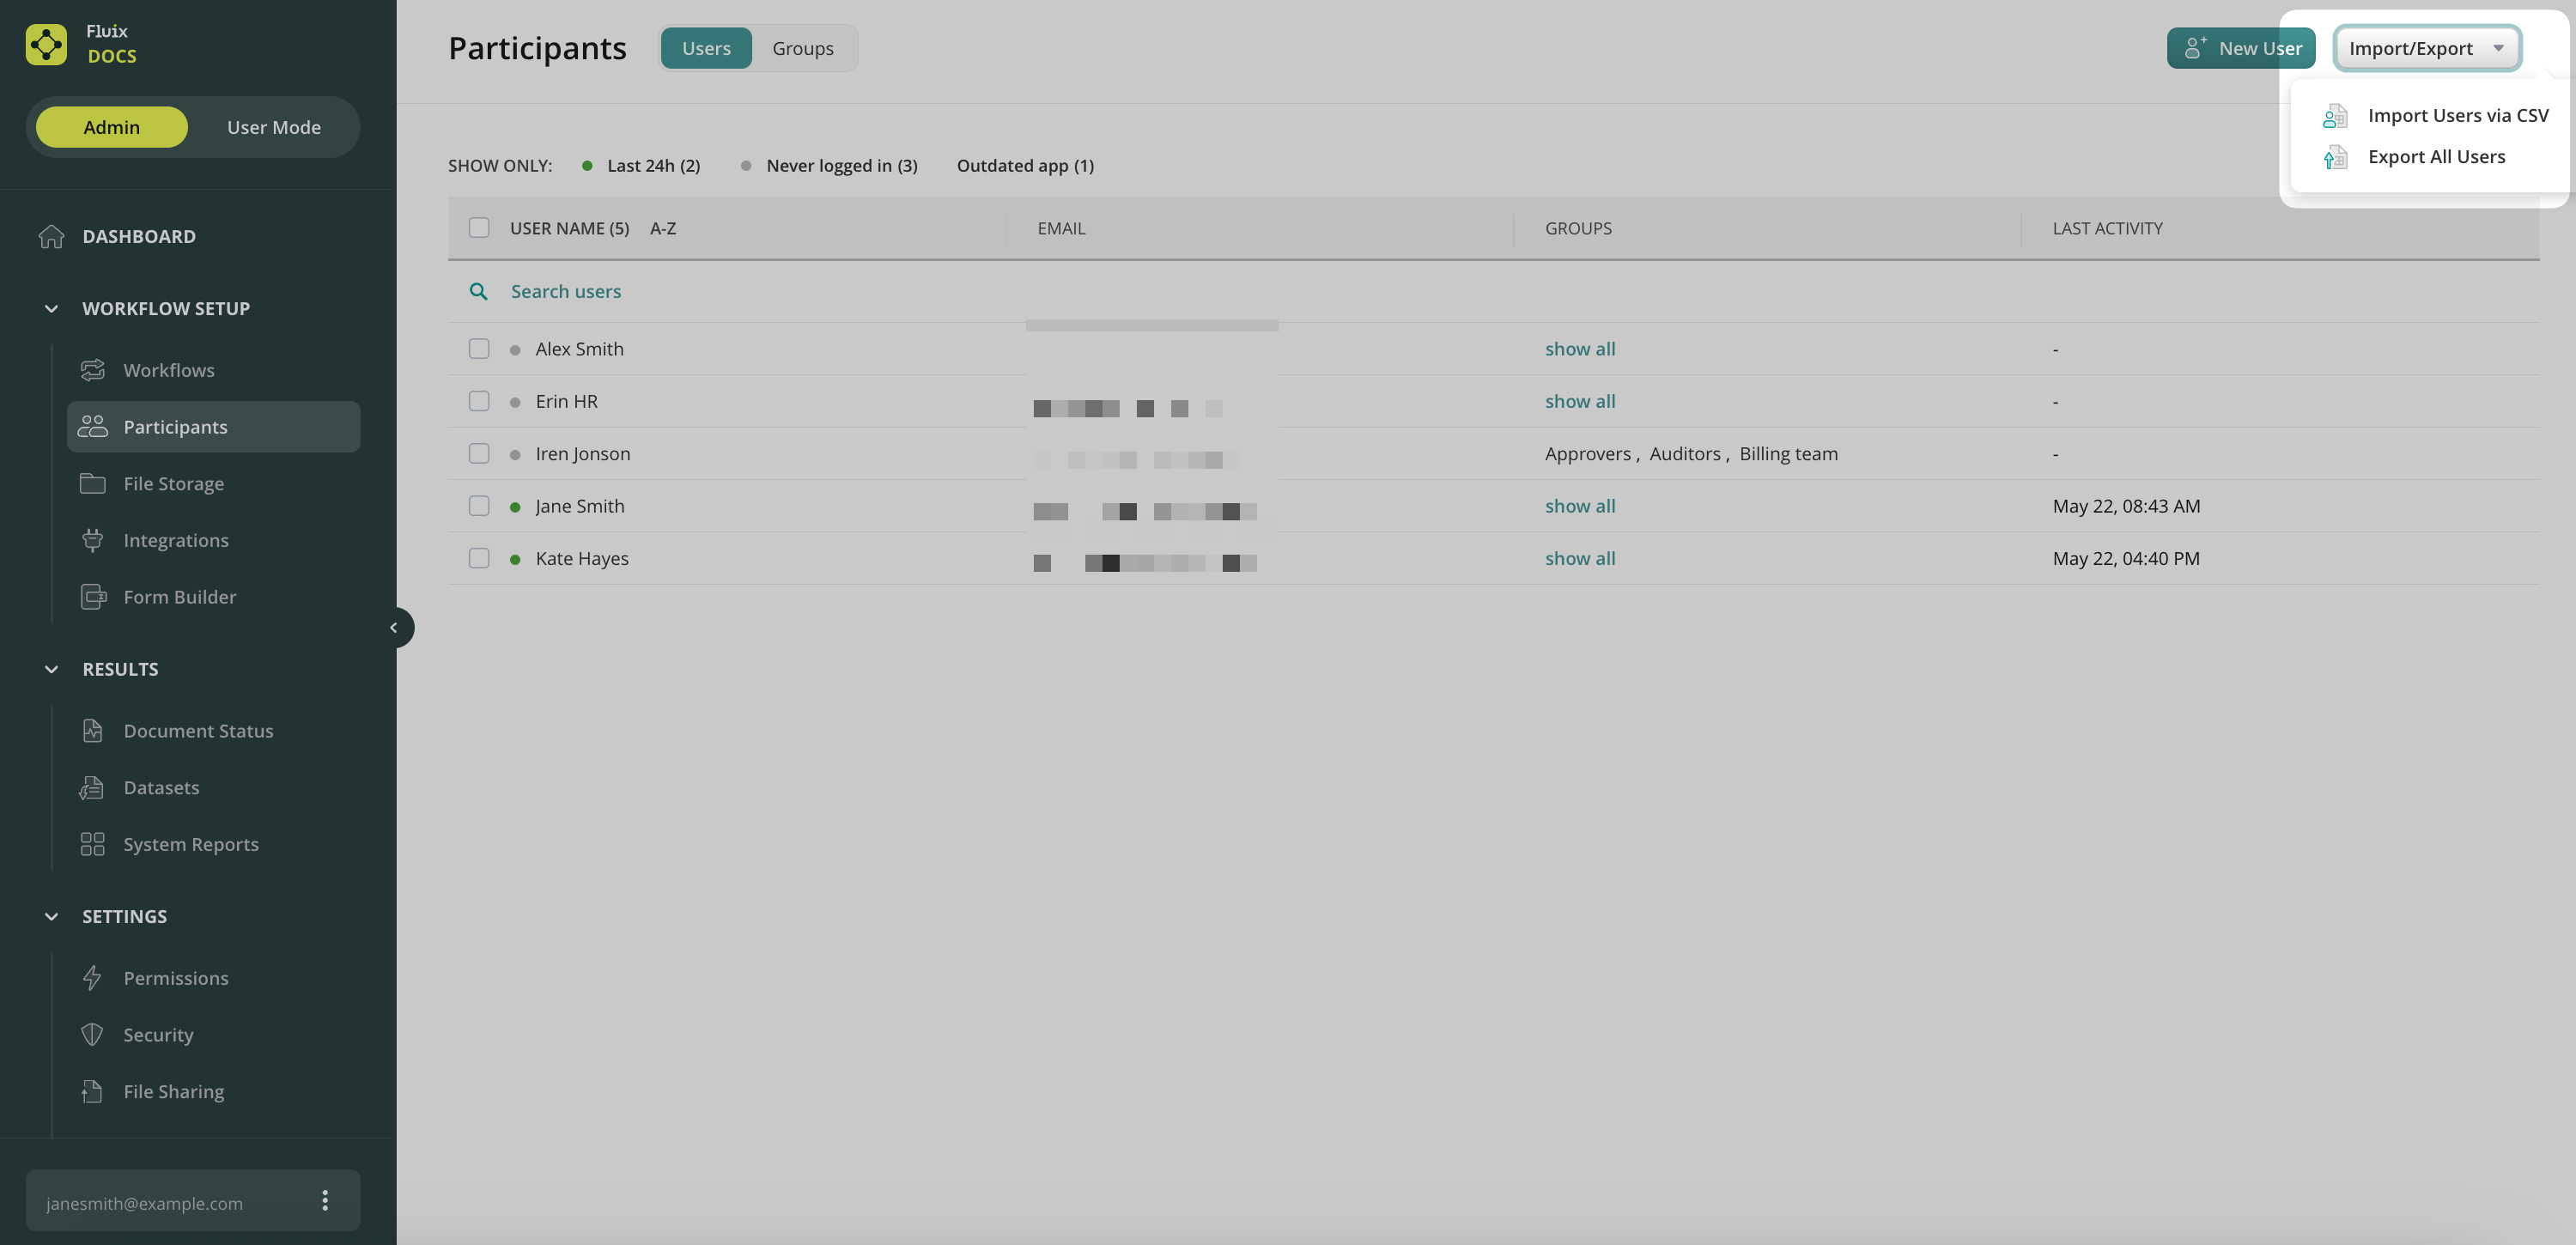
4. In Fluix admin portal go to Participants-> Users -> Import/Export dropdown -> Import Users via CSV button:
5. In the right sidebar, upload the CSV document by clicking on Browse CSV File:
6. Once CSV file is uploaded, you will see a list of users from the document, select the ones you want to add or click on Import all.
Was it helpful? Learn more about User Details in the next article or contact us at support@fluix.io if you have any questions or comments.
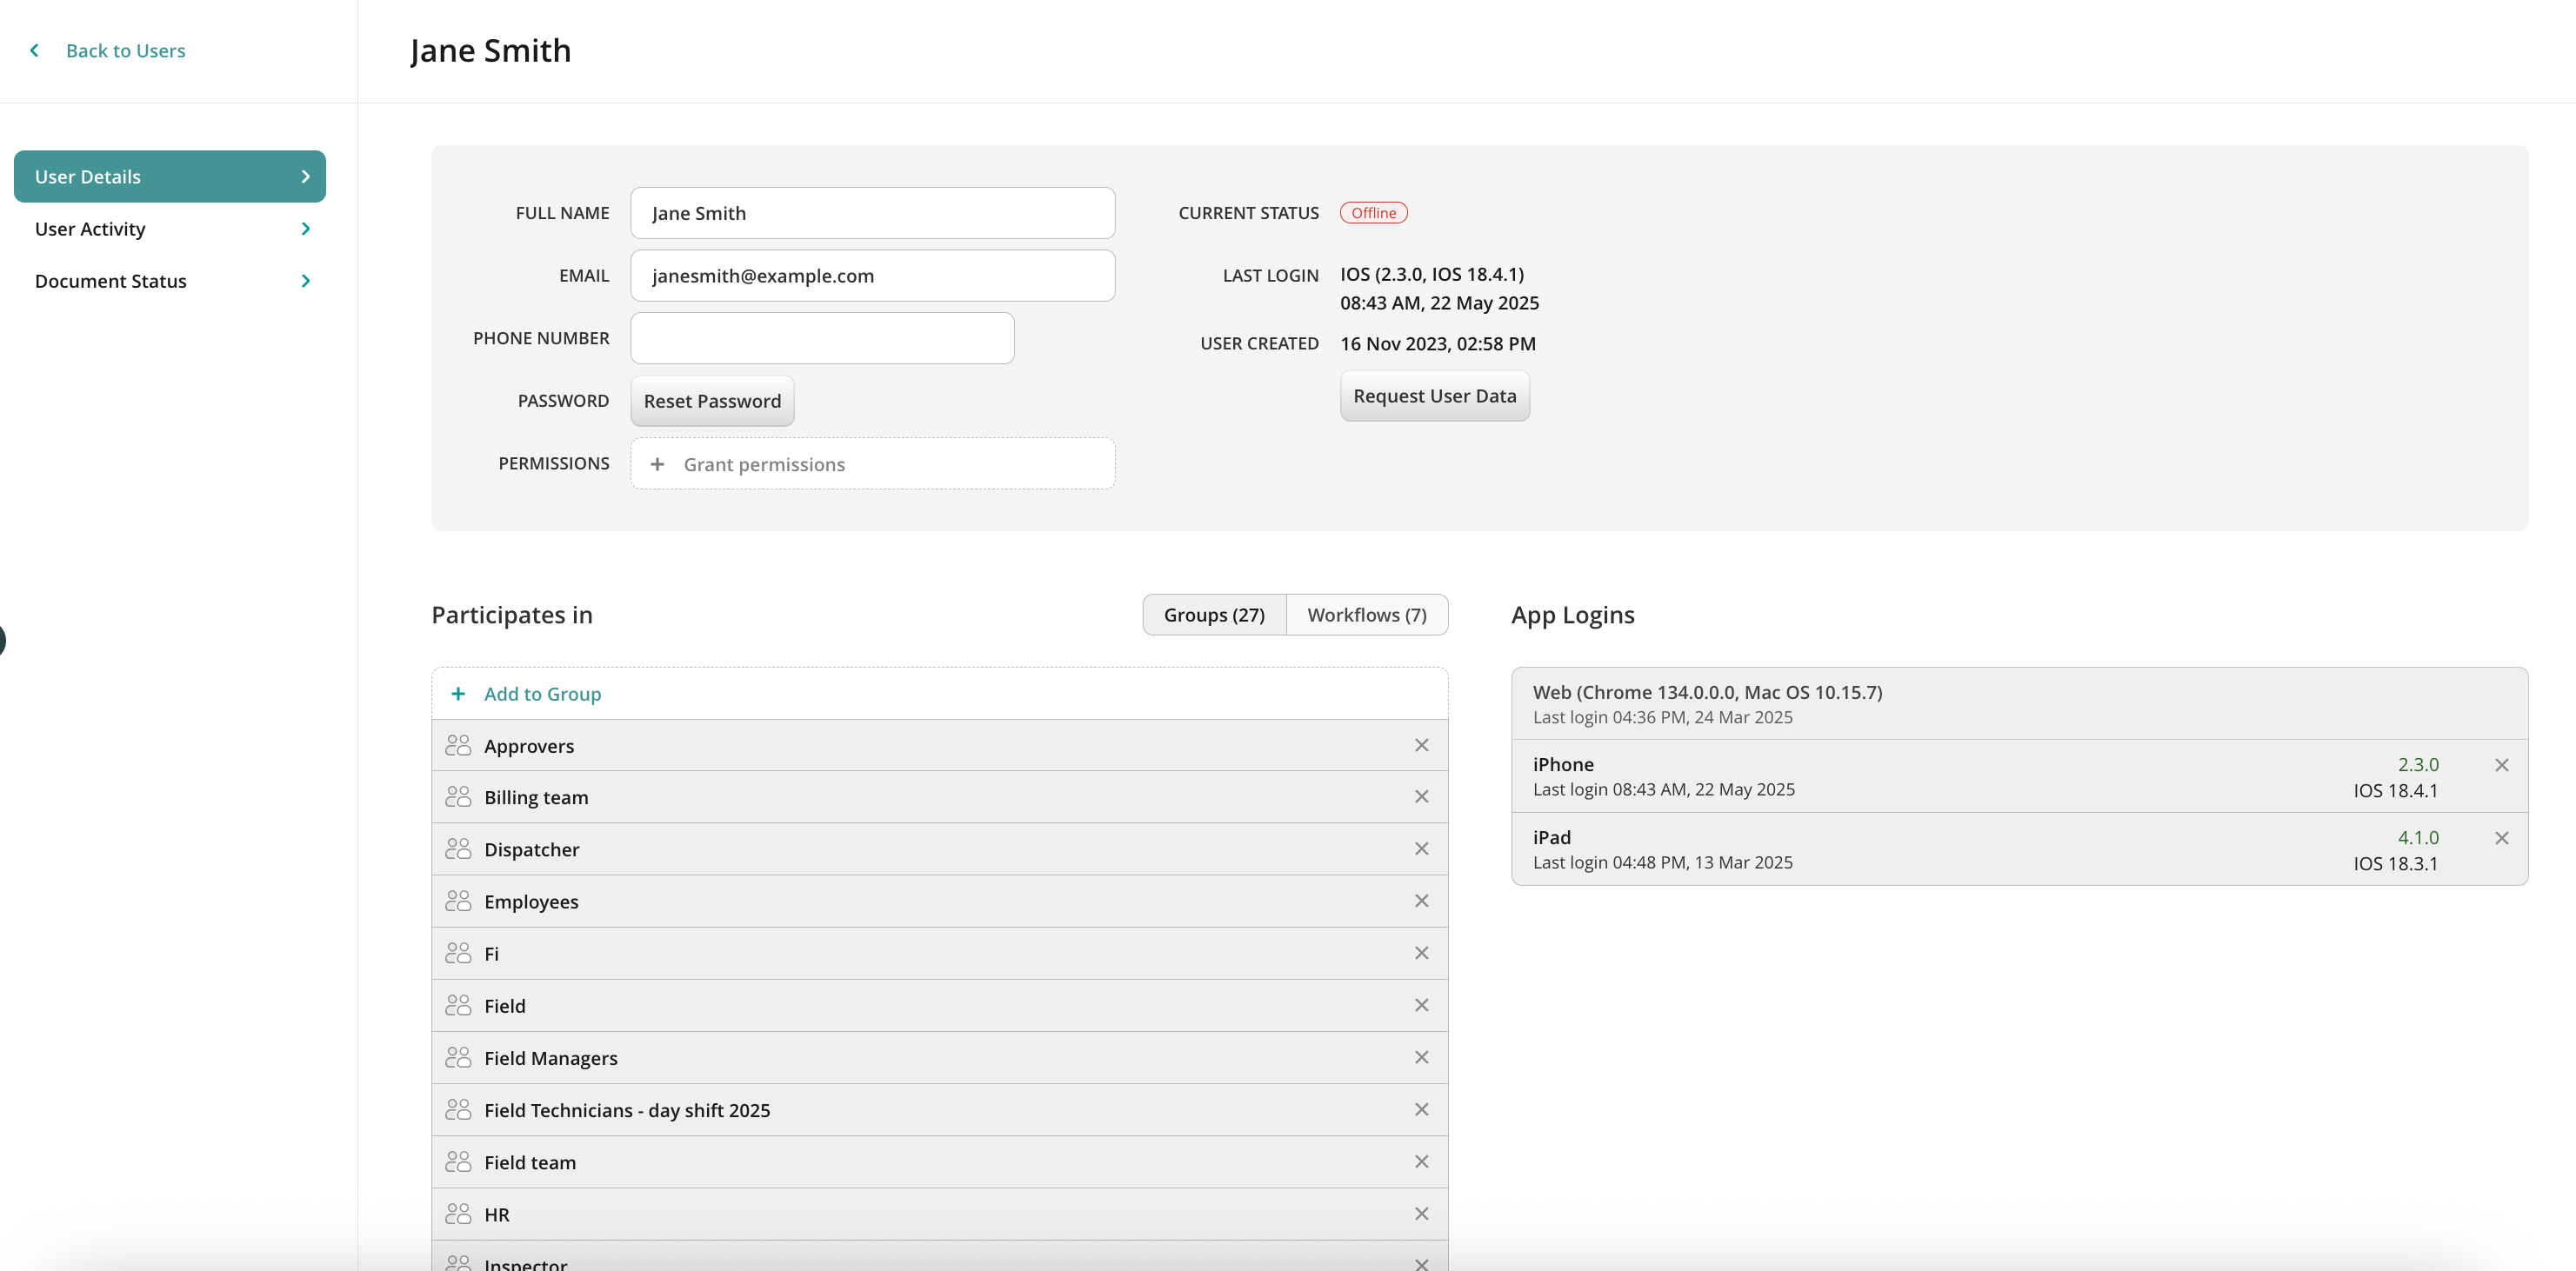
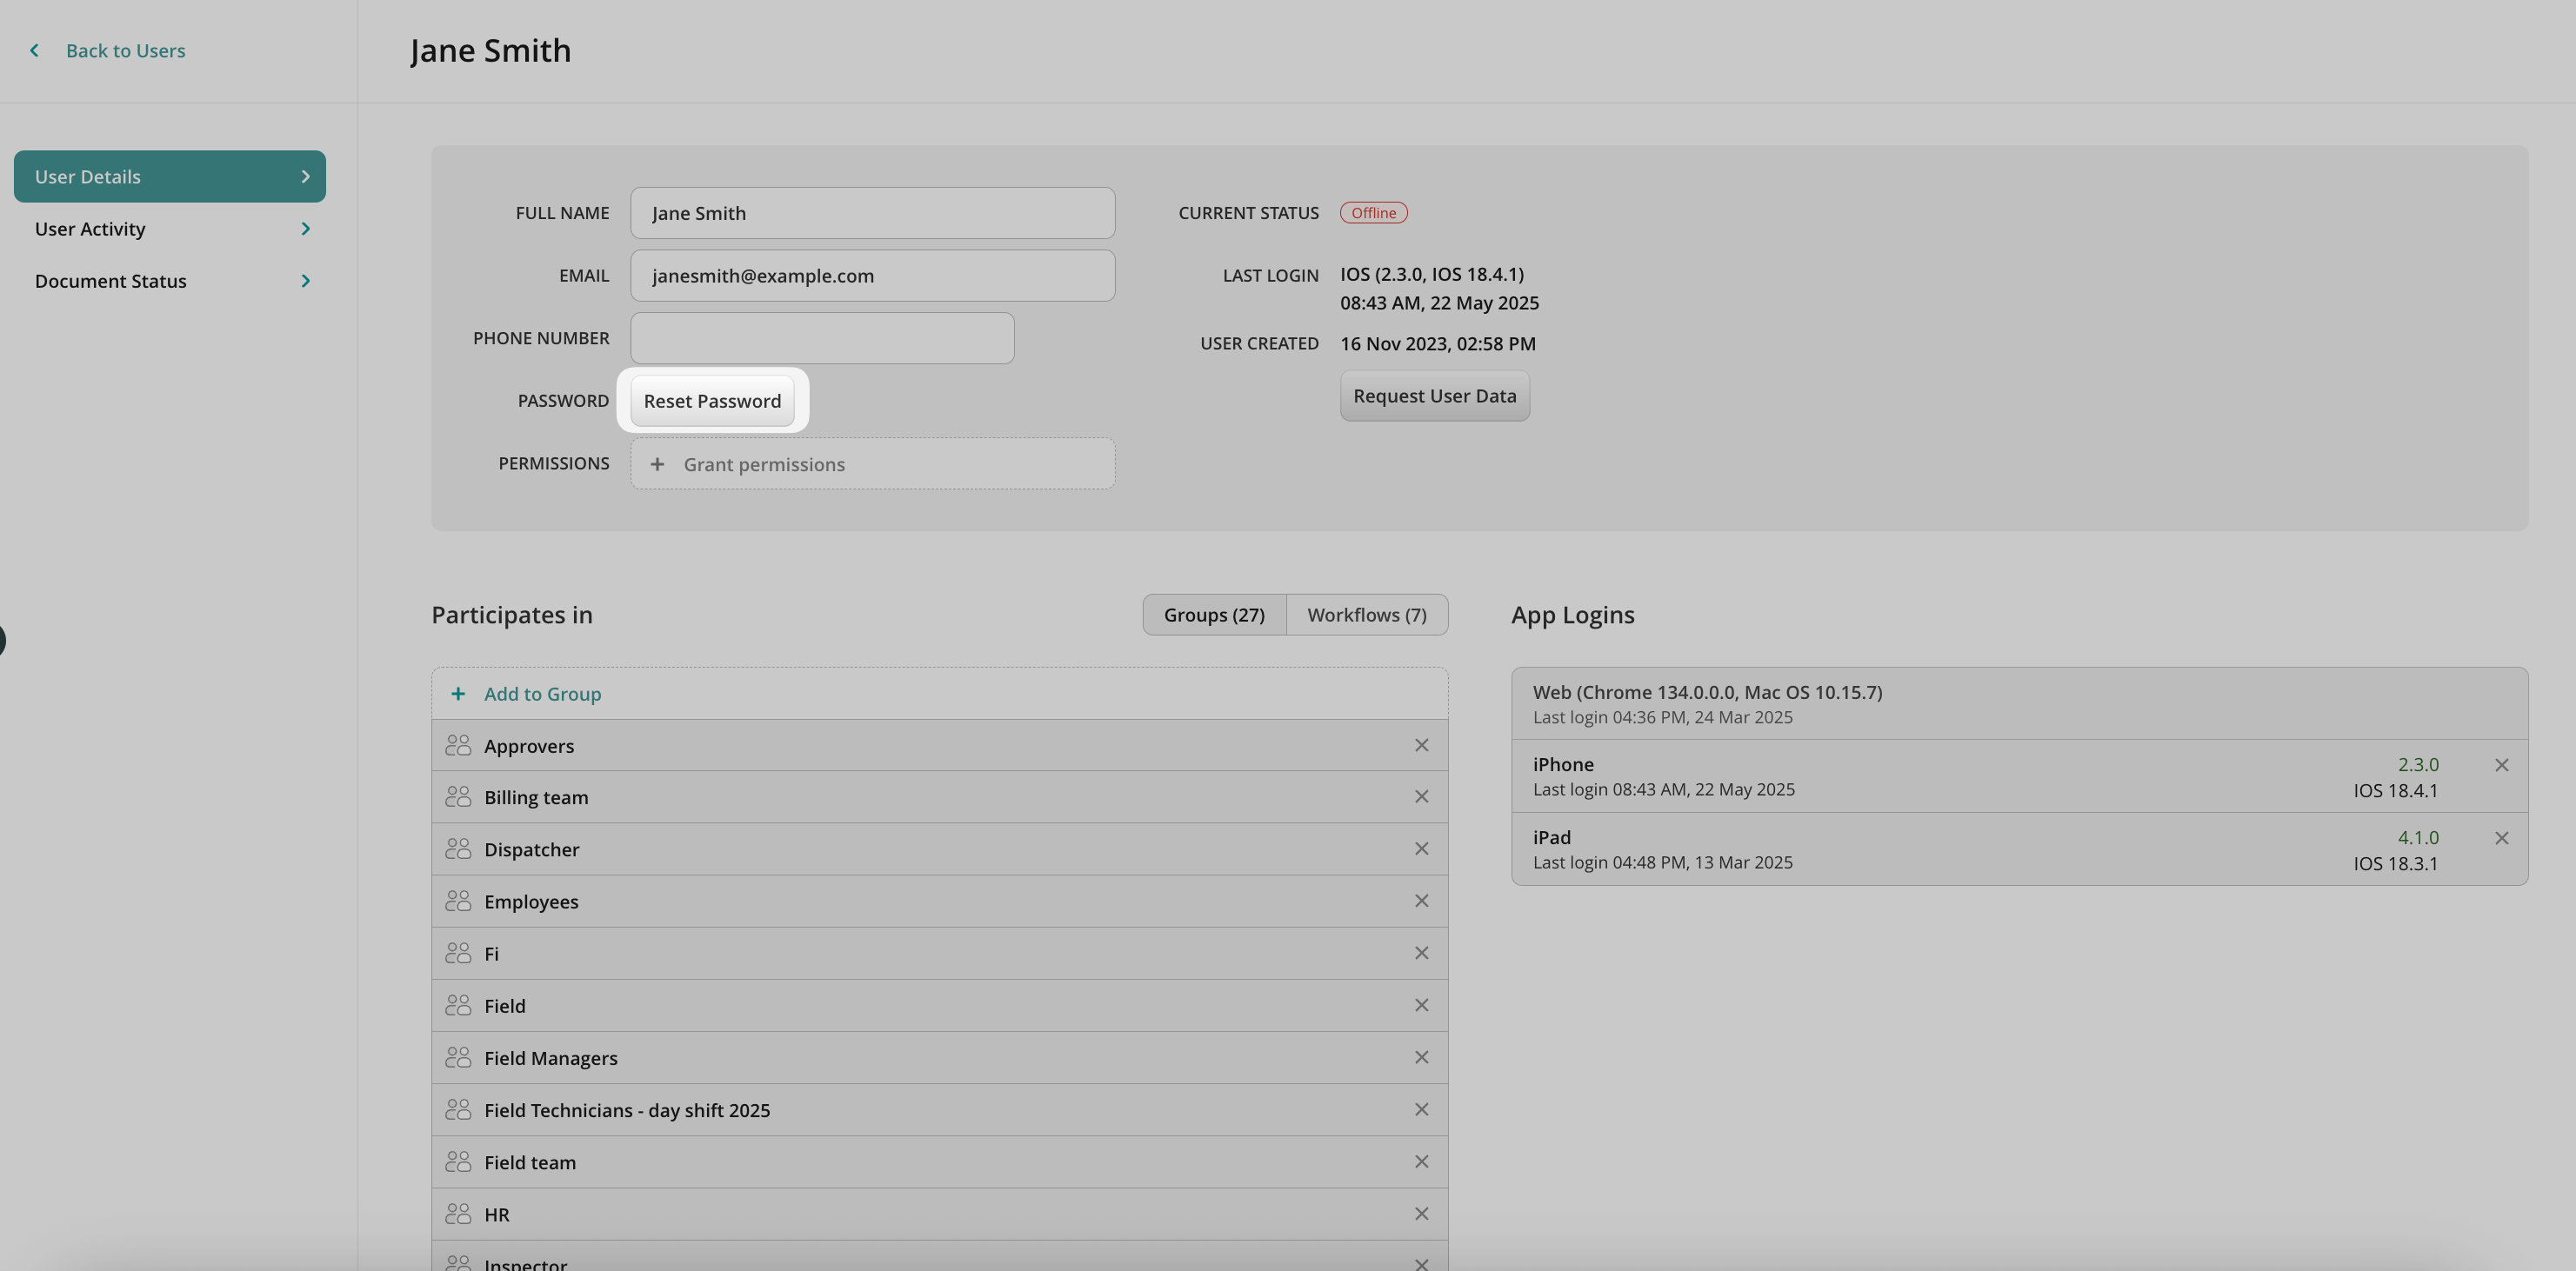
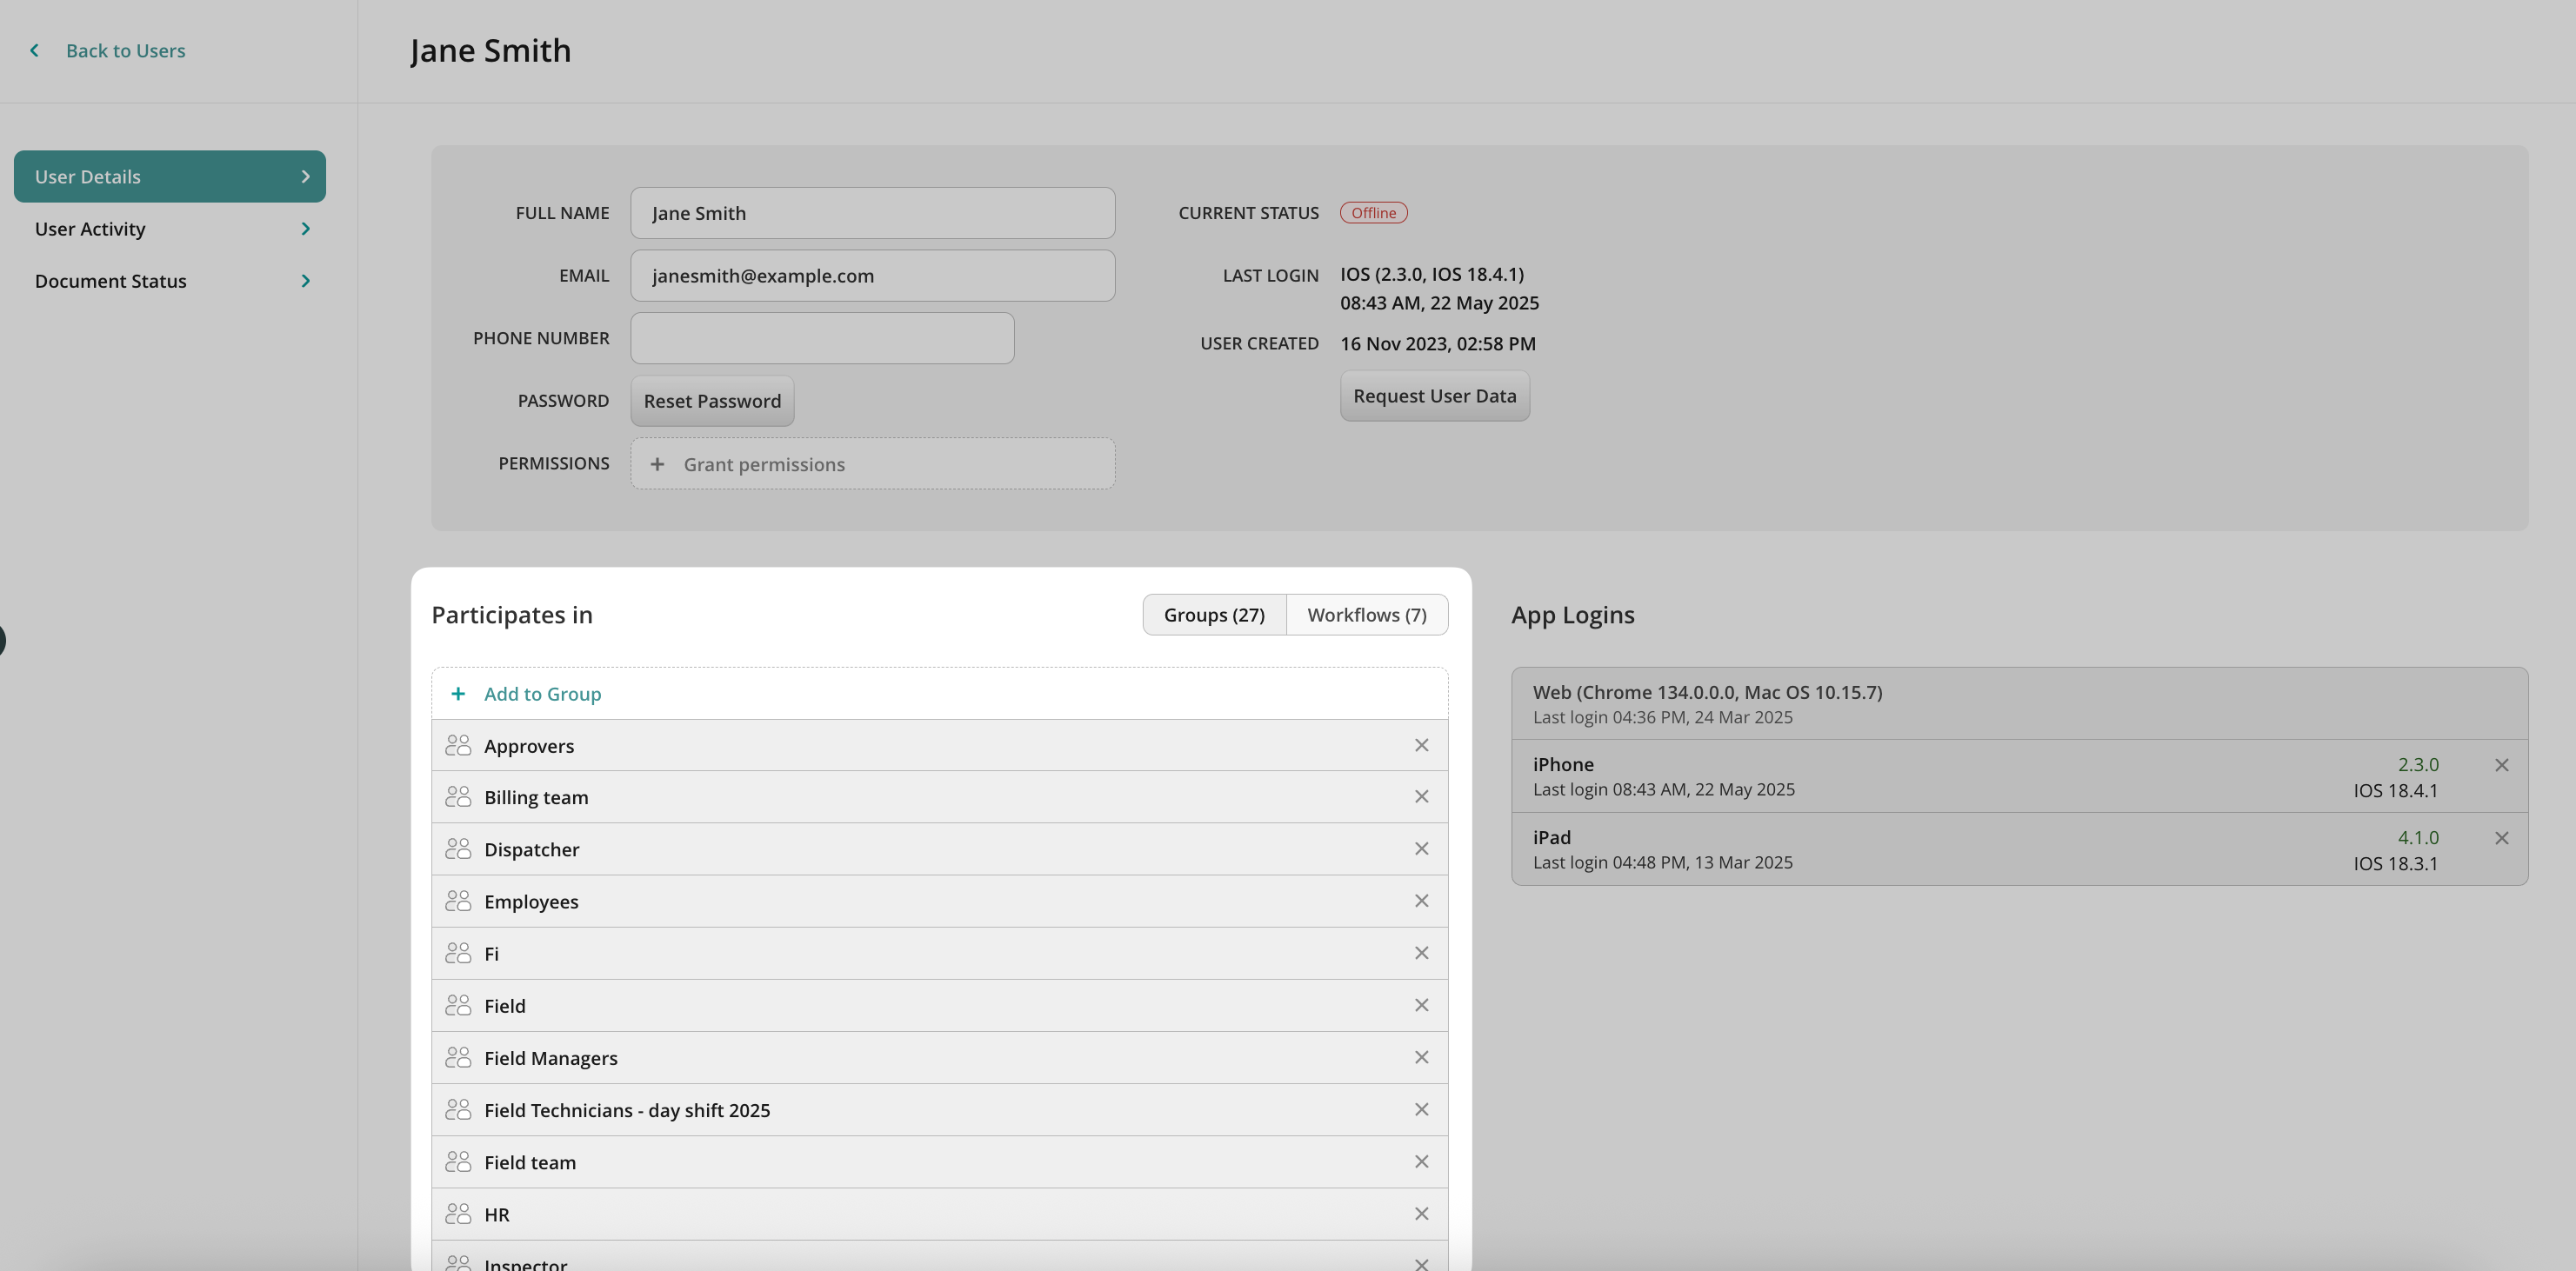
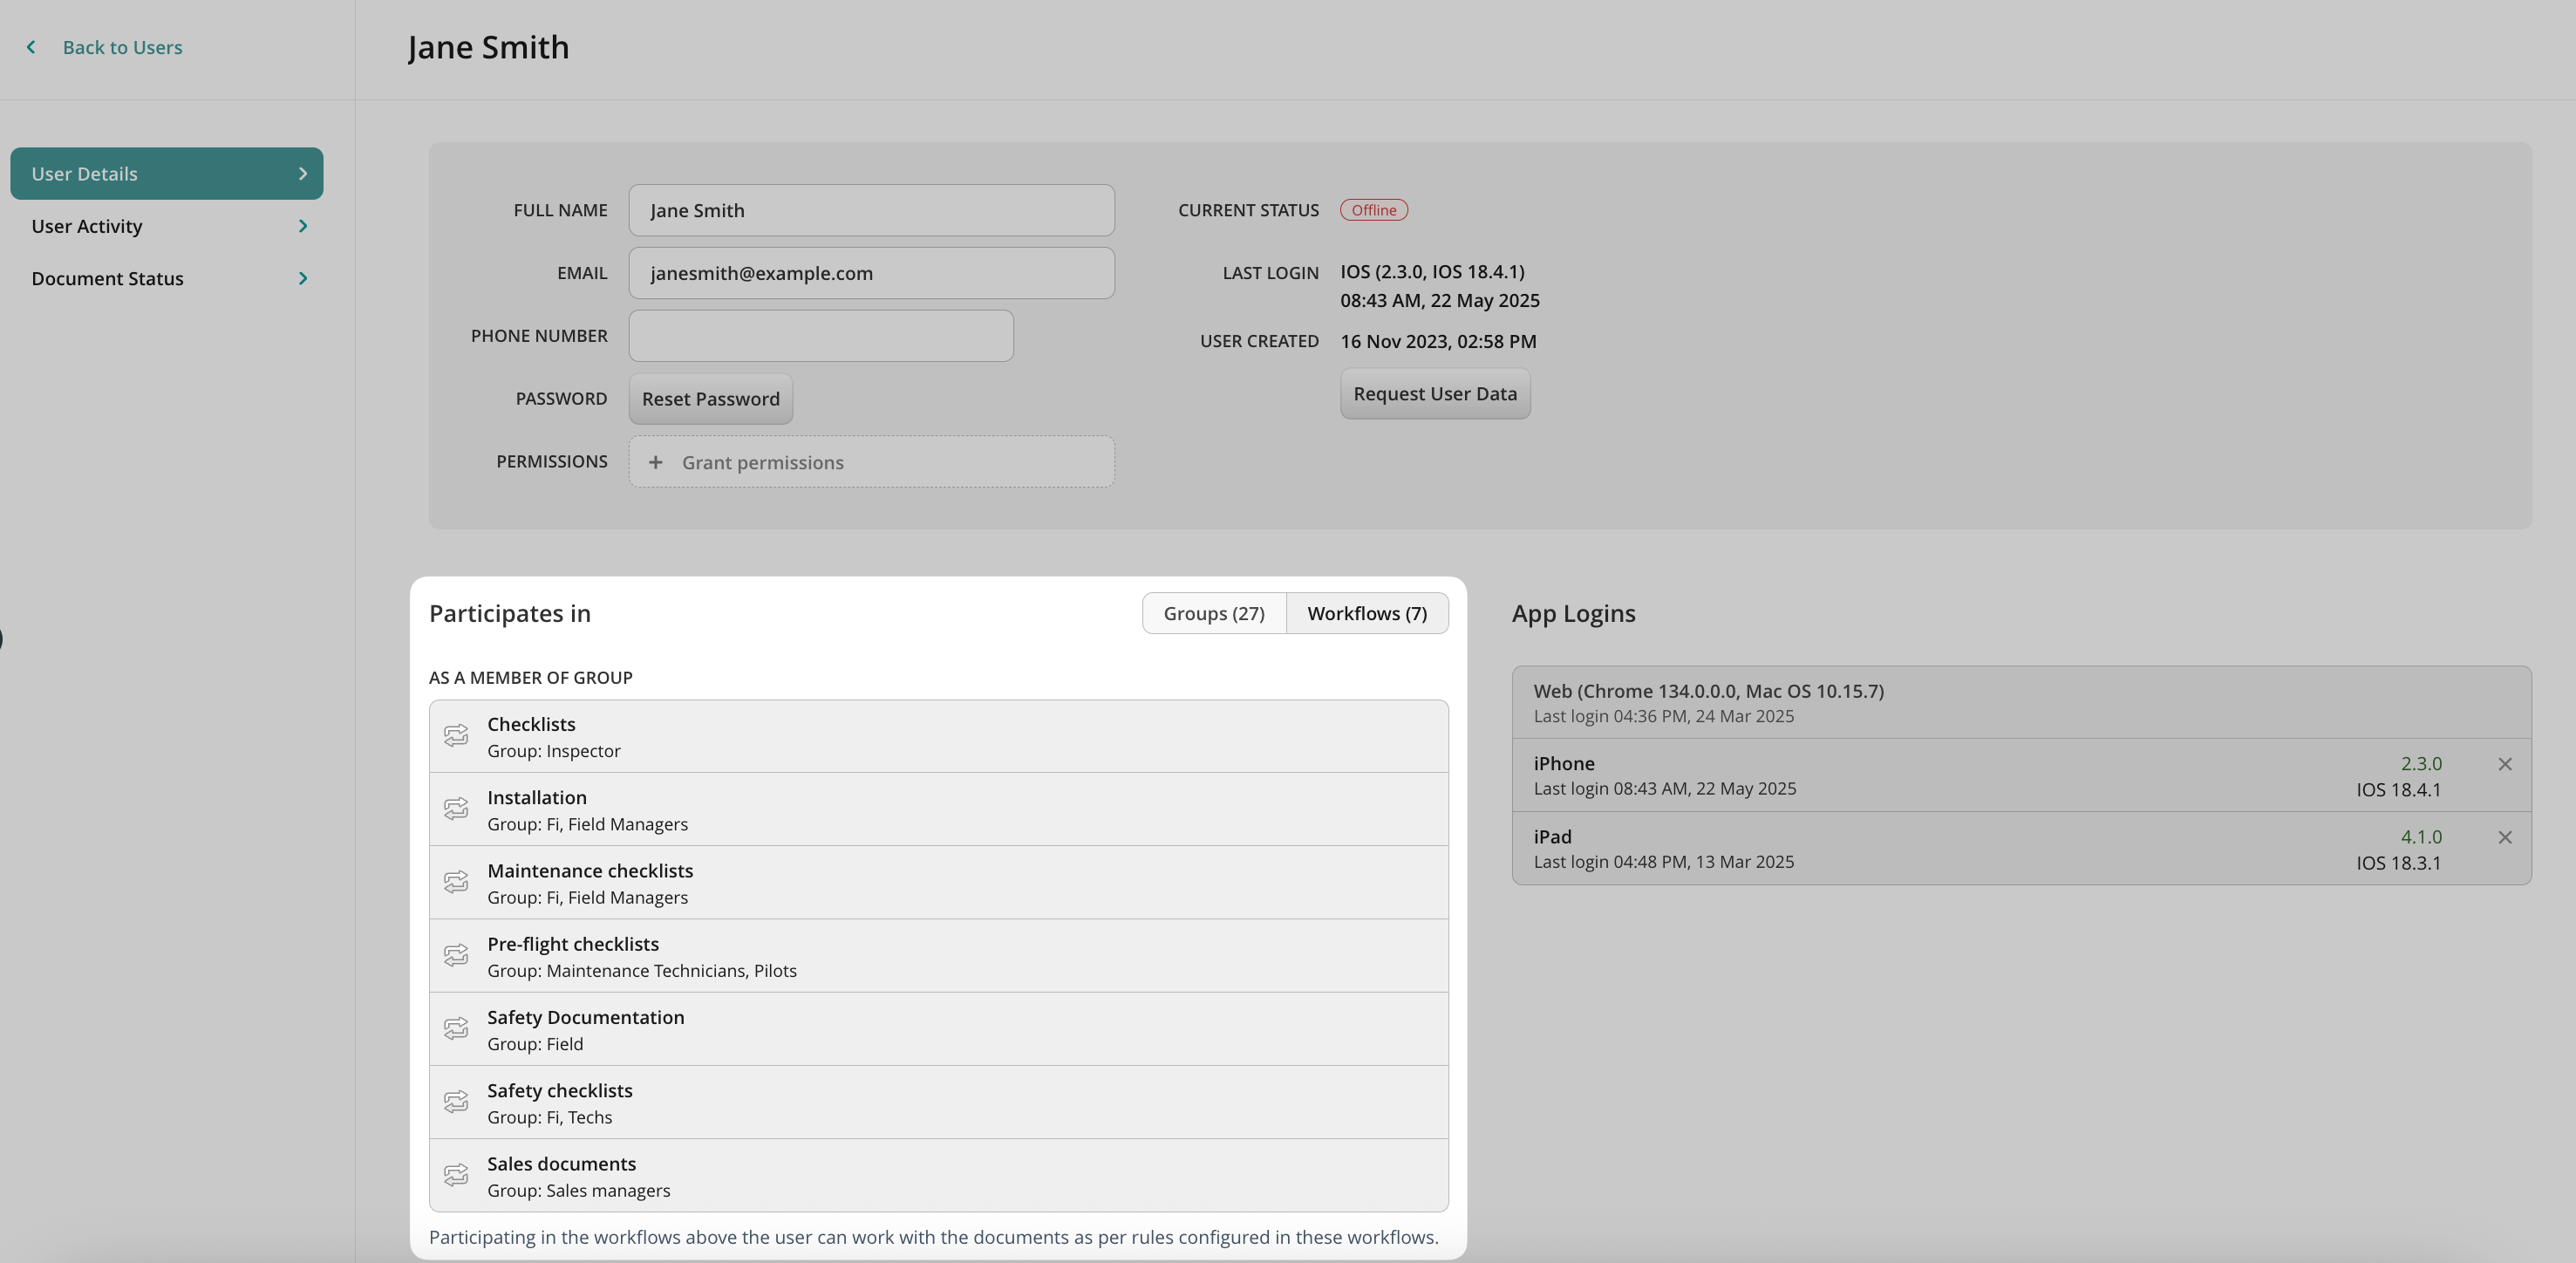
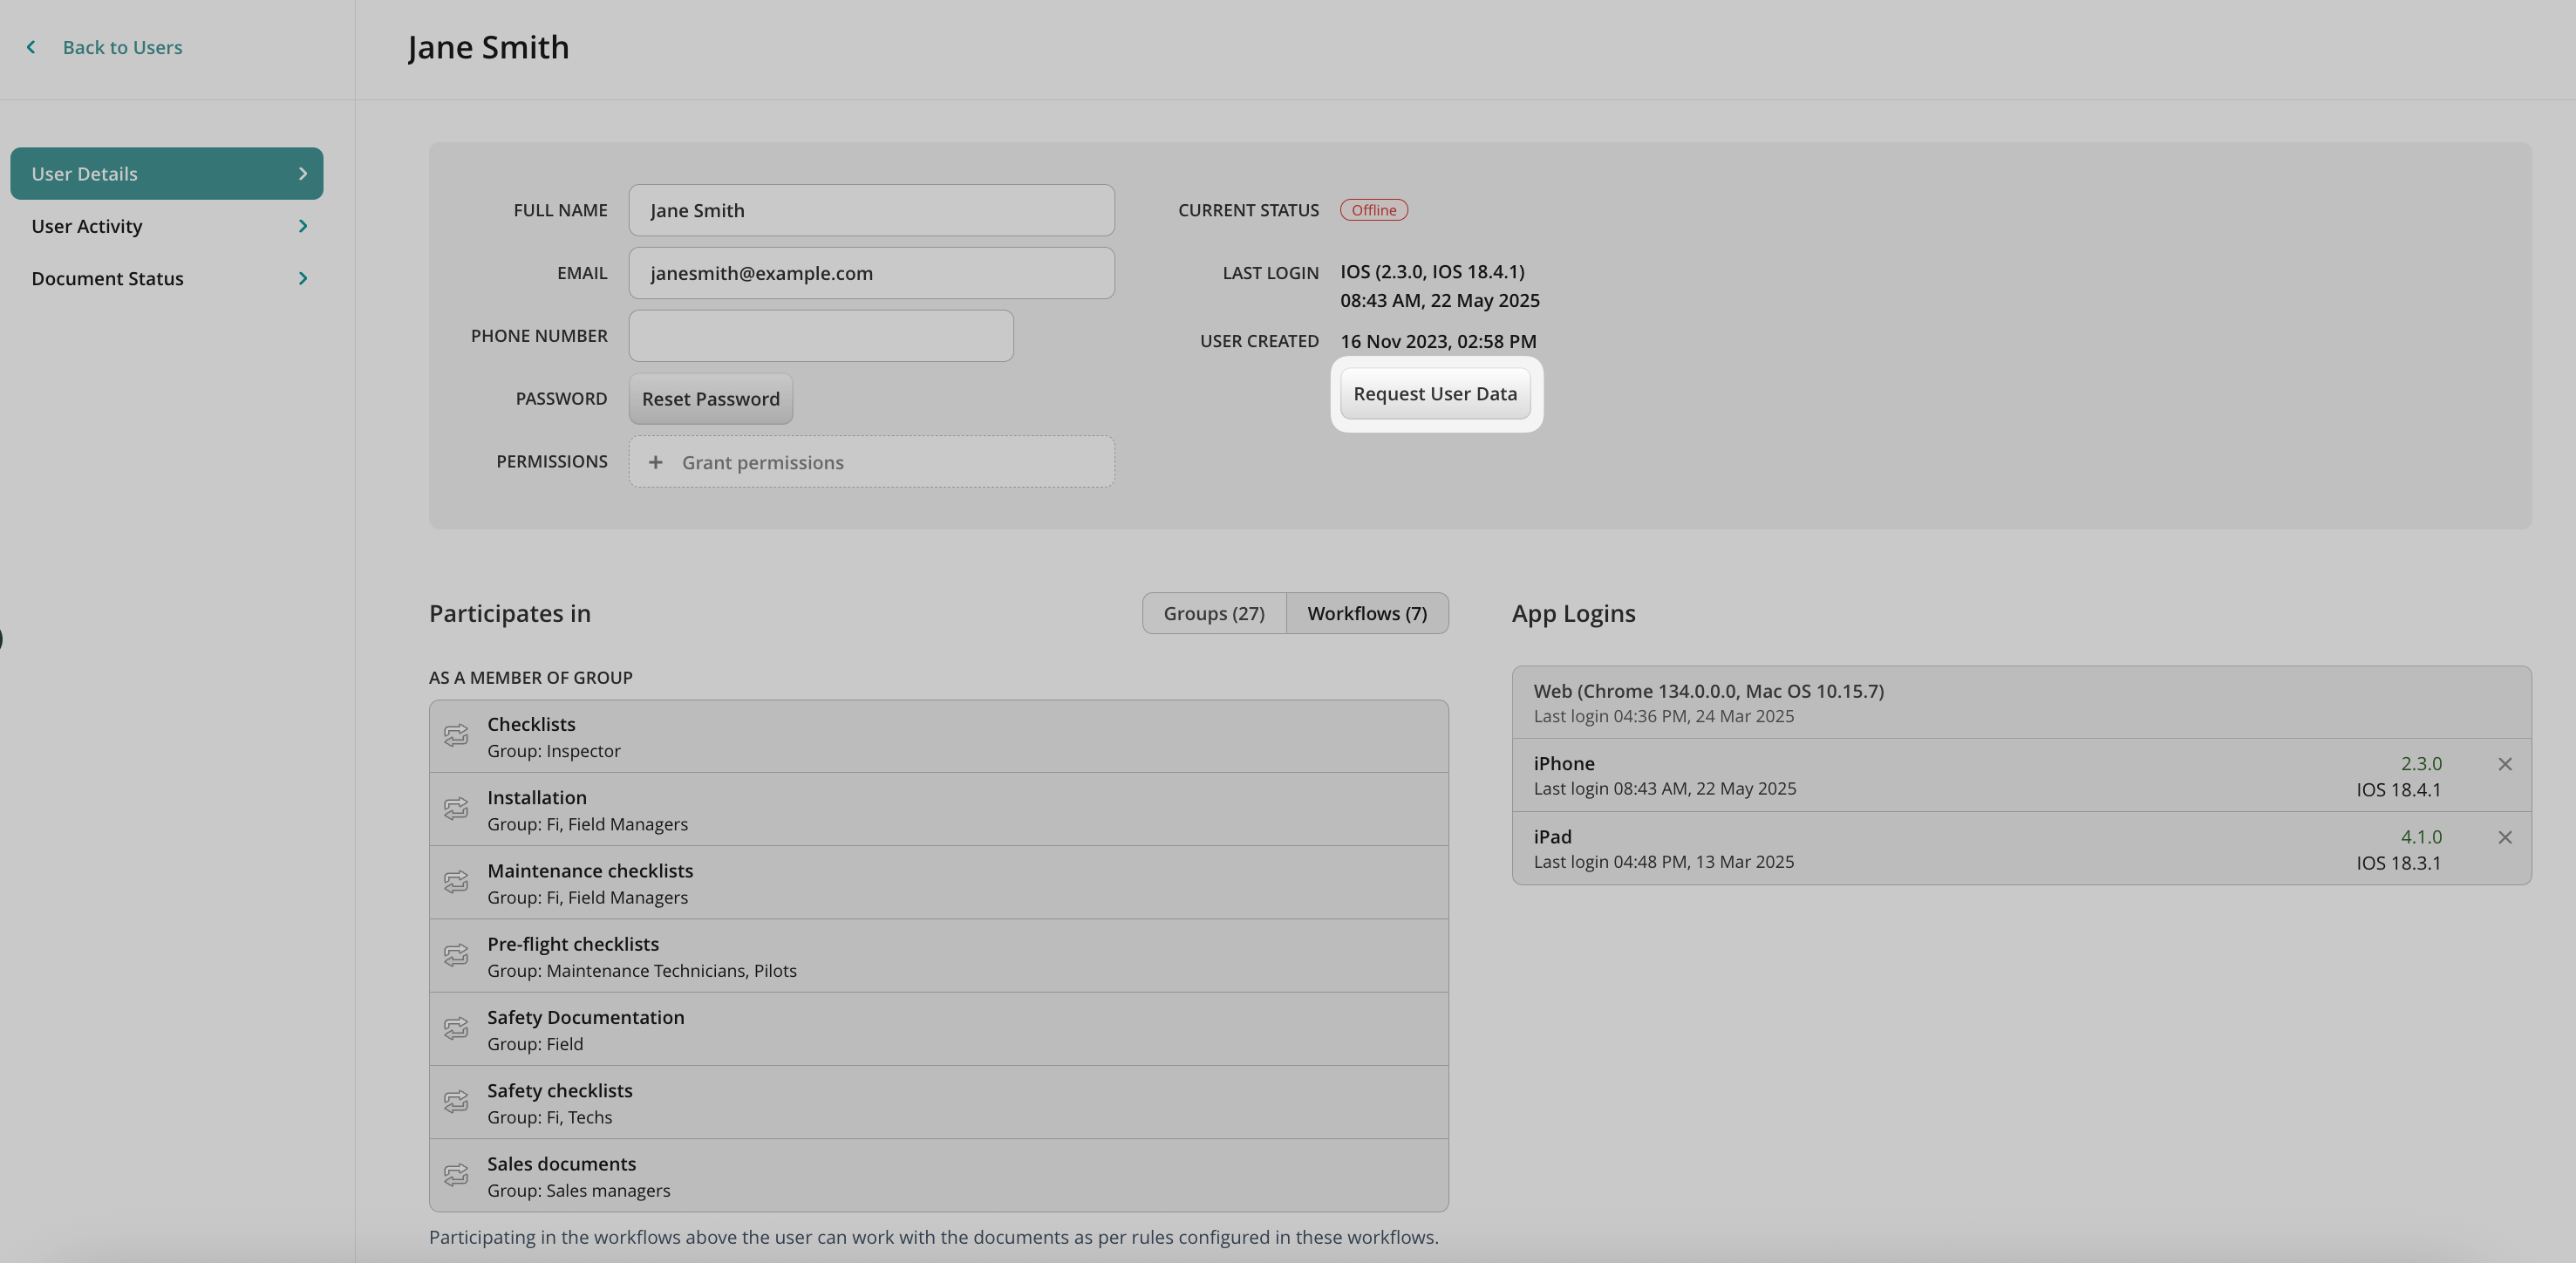
In this section, you can view and edit all user details such as name, email address, Groups and Workflows a user belongs to, and other details:
User Password
From here, you can manually change a user’s password by using the Reset password function to send an email request to the user asking to change their password.
Groups
Here, you can assign a user to a group or groups of users that participate in a workflow.
Workflows
Once you add a user to any workflow, he/she will access the documents within this workflow. The list of workflows the user participates in is listed in this tab.
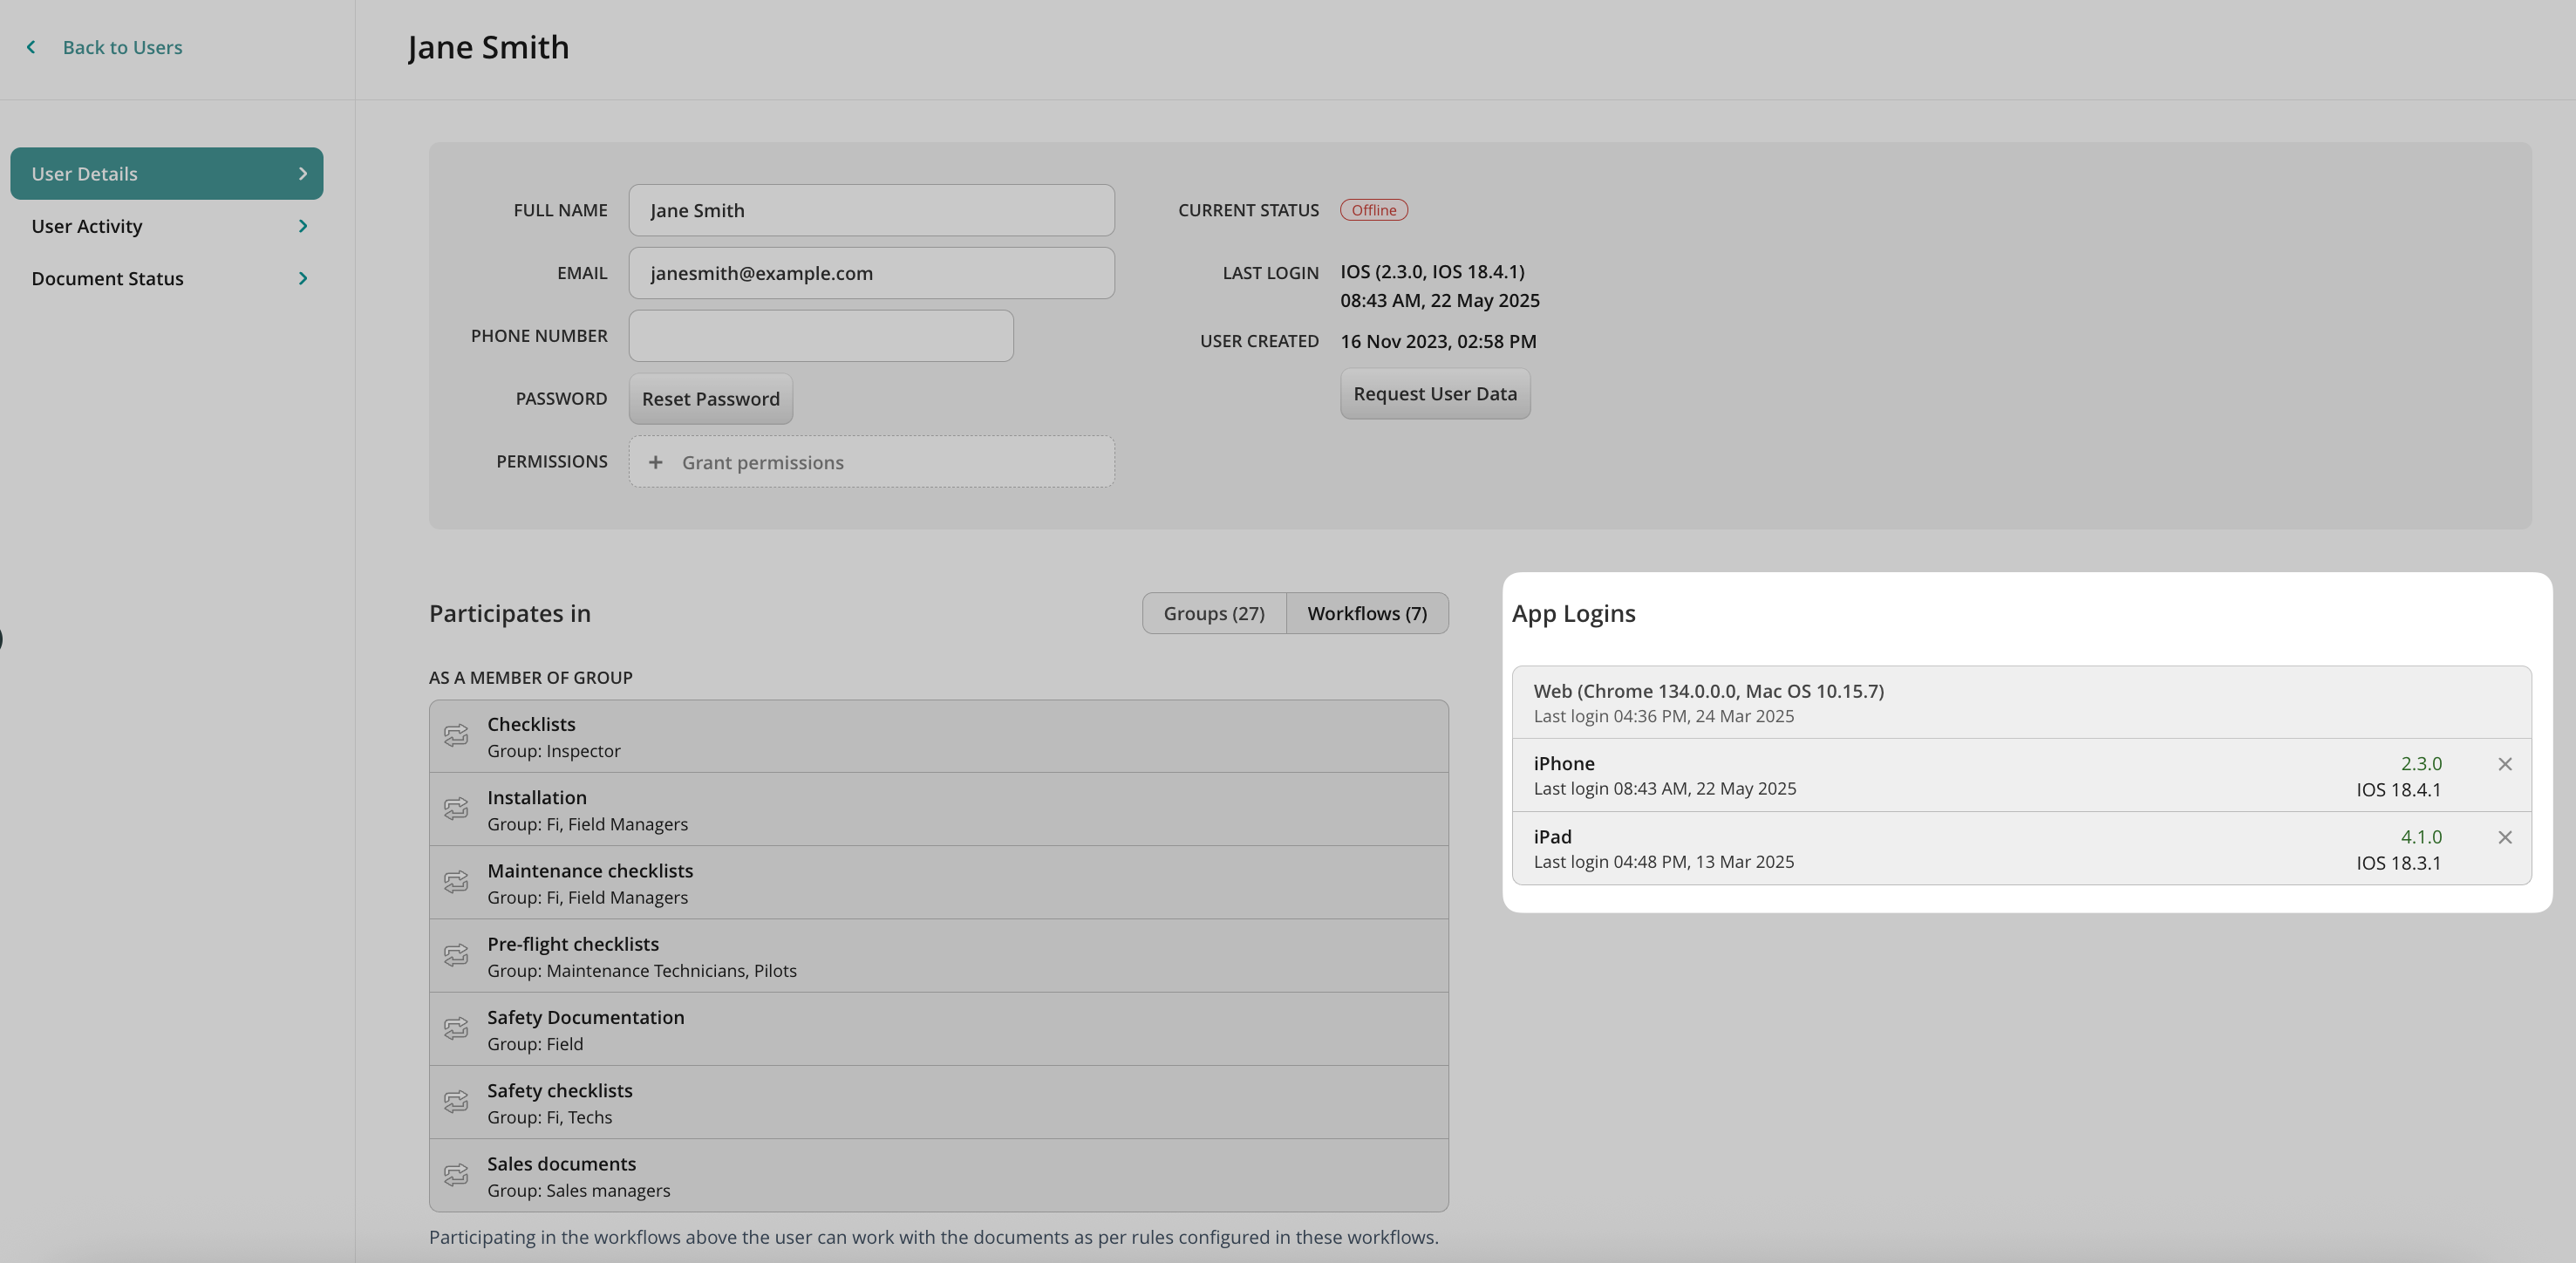
App Logins
In this section, you will see the list of devices a user used to log into Fluix and the app version on each device. If there’s a need to log out from a specific device, simply click on the cross sign next to the device name.
By default, a user can be logged into 3 devices. Once the number is exceeded, the user is logged out of the first device automatically. To limit or increase the number of devices, please contact your Customer Success Manager.
Request User Data
This is an option to email the user the details of his/her activity.
Was it helpful? Learn more about User Activity in the next article or contact us at support@fluix.io if you have any questions or comments.
Was this article helpful?
Thanks for your feedback!
Oops, something went wrong. Please, try again later.
Thank you!
What details or examples would have made this article more helpful for you? We appreciate your insights!
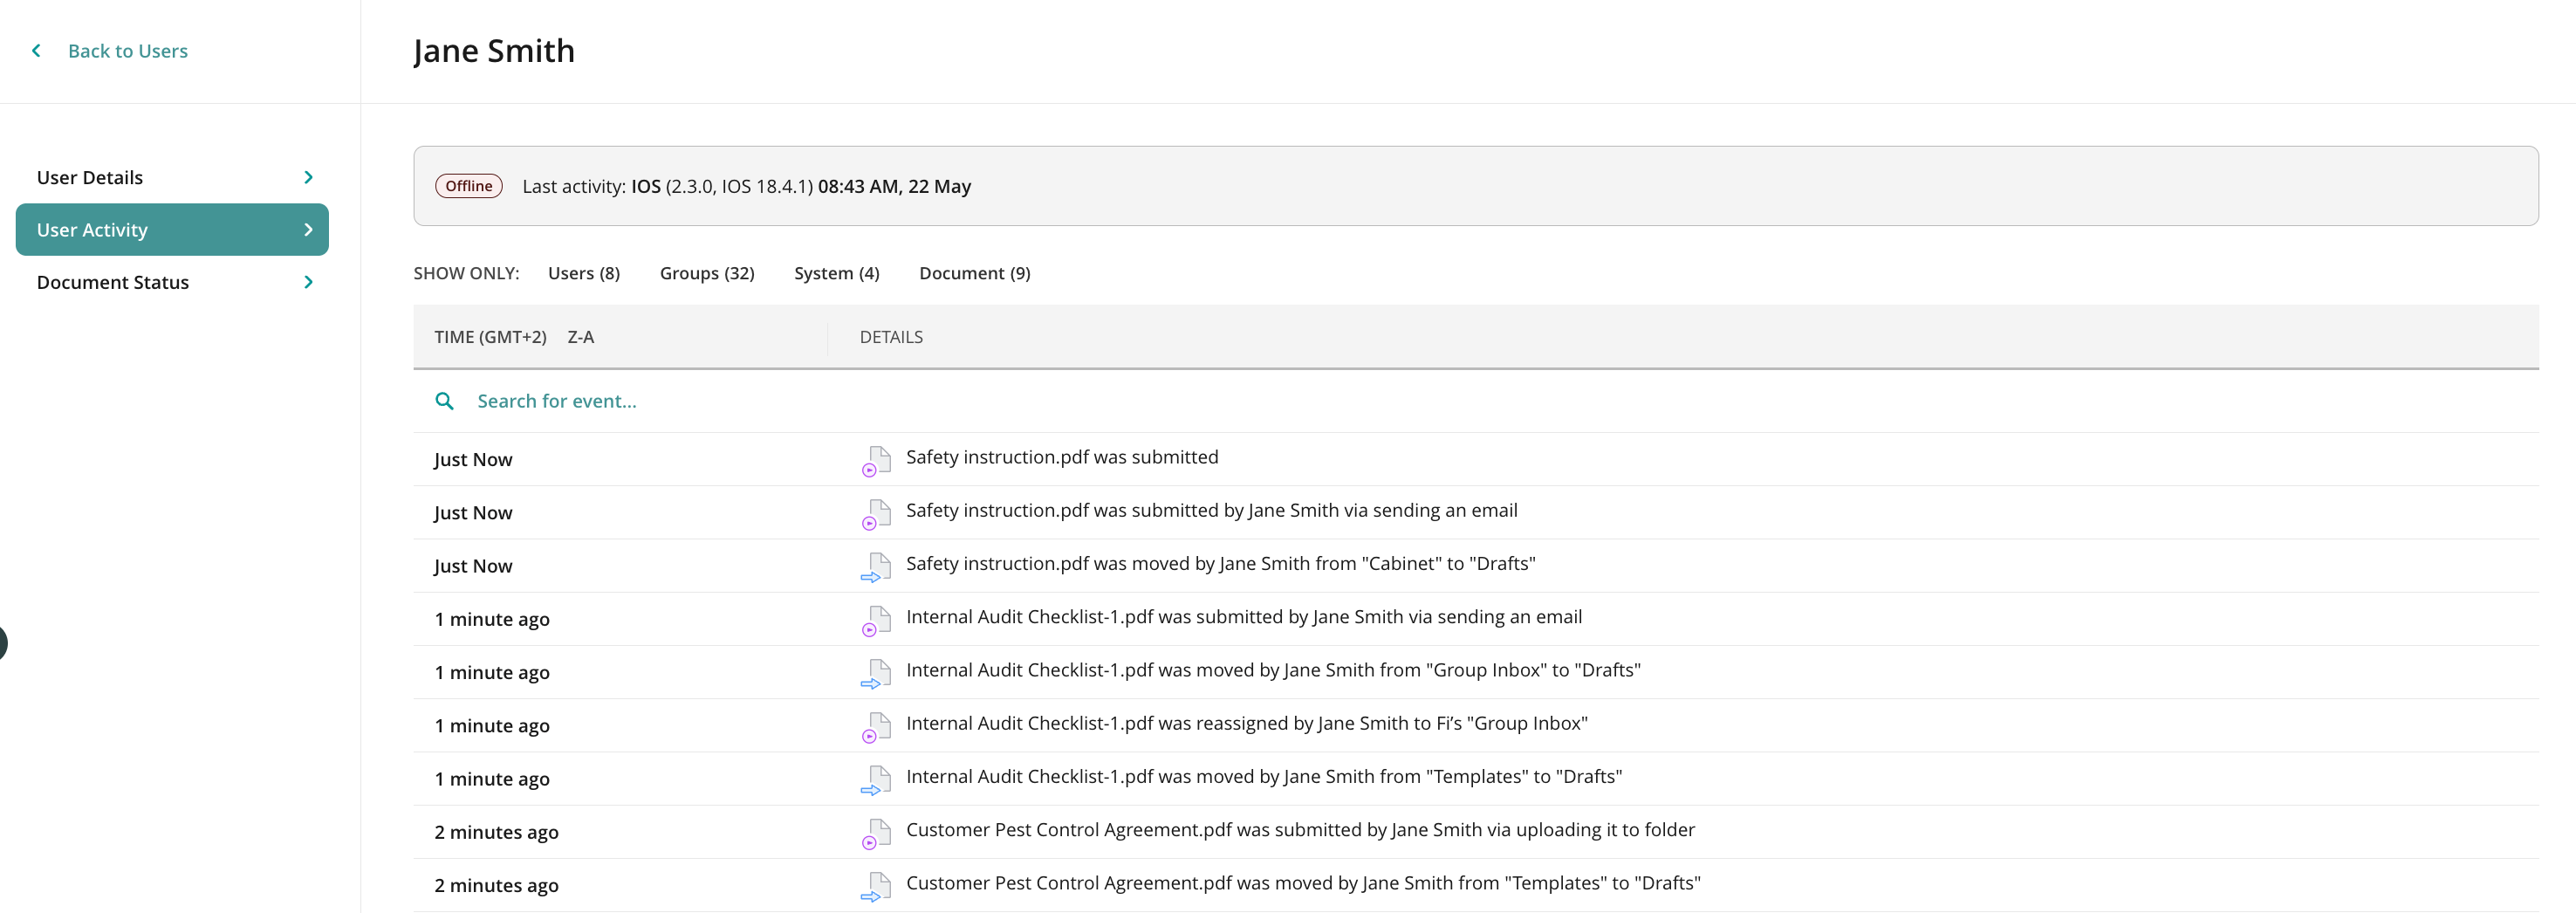
Keep track of all actions that your users take in Fluix. In the User Activity tab, you can see users’ activity log like the last login to Fluix, records of submitted and edited documents, etc.
Was it helpful? Feel free to contact us at support@fluix.io if you have any questions or comments.
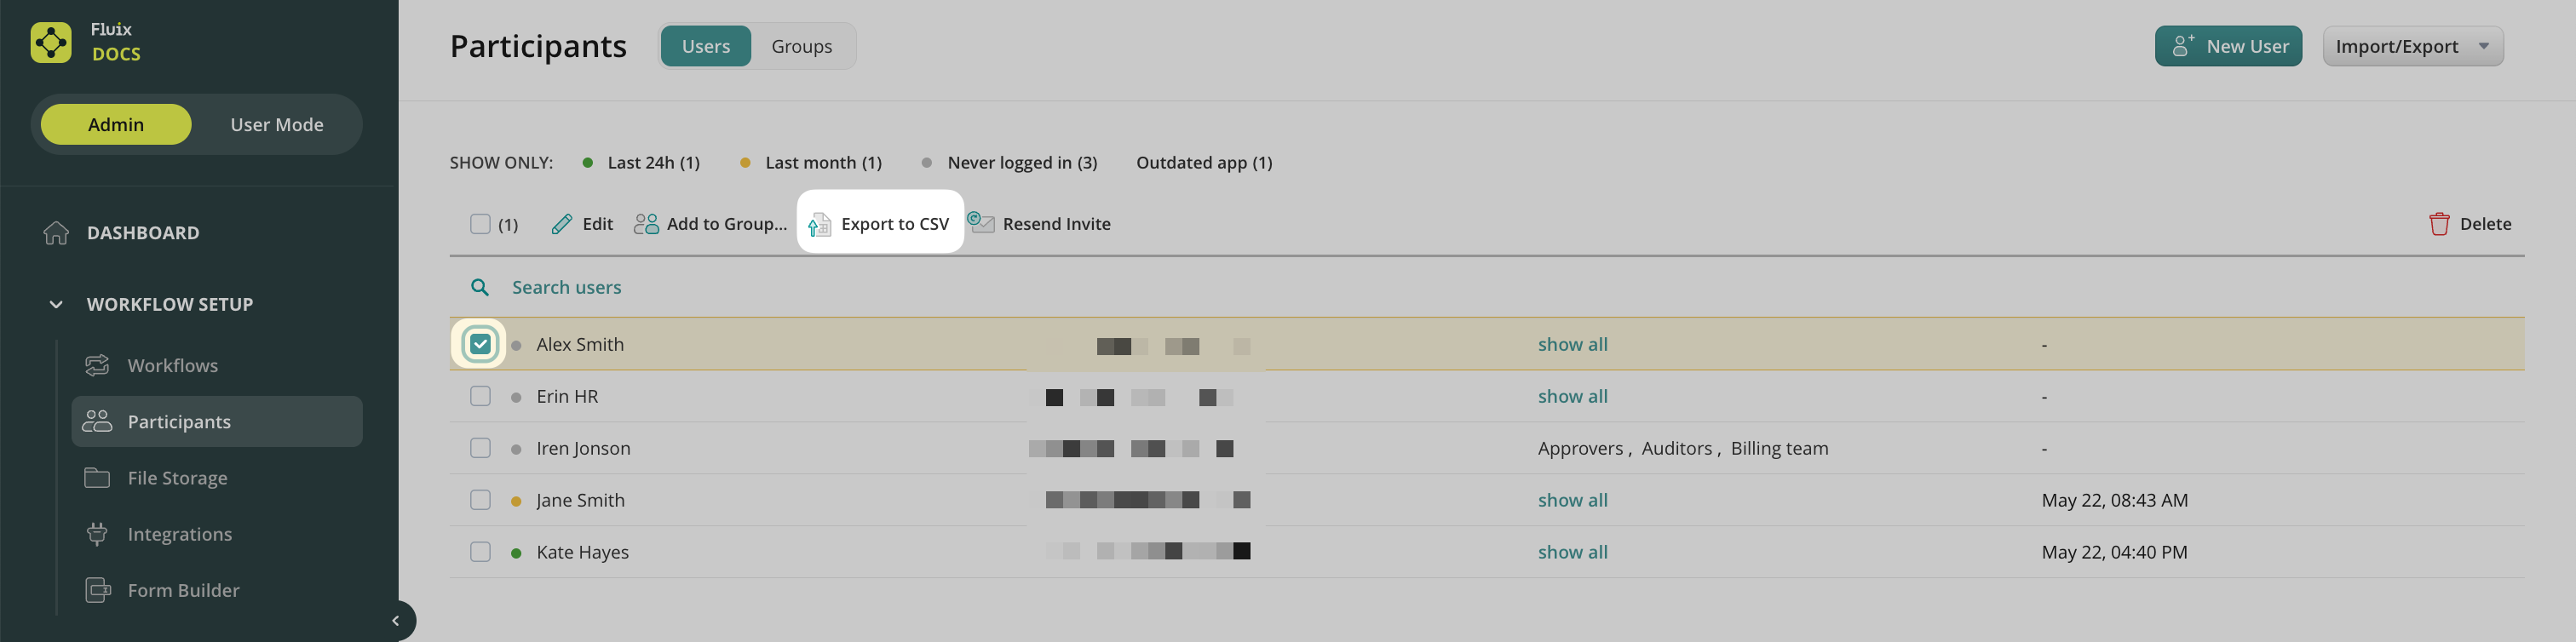
To export the list of all or selected Fluix users, please go to Participants->Users in the Workflow Setup section and follow the steps for each option below:
Option 1. To export the list of all the Users, click on Import/Export button in the top right corner of your screen and select Export AllUsers from the drop down menu:
Option 2. To export the list of selected users, select them by checking a box next to the User’s name and then click on Export to CSV button. The list of selected Users will be downloaded as a CSV file to your computer.
Was it helpful? Feel free to contact us at support@fluix.io if you have any questions or comments.
In case you use the MDM solution to manage your users’ devices, you can ease the login process for your end users by pre-filling their email address on the Fluix login page. Here are the steps to proceed:
1. Add device to MDM
2. Set test user email for ‘com.fluix.mdm.userEmail’ key in MDM
3. Install Fluix via MDM
4. Run Fluix, check if the email is in the ‘username’ field
Feel free to contact us at support@fluix.io if you have any questions.
Was this article helpful?
Thanks for your feedback!
Oops, something went wrong. Please, try again later.
Thank you!
What details or examples would have made this article more helpful for you? We appreciate your insights!
You can delete users in Fluix who no longer need access to the platform.
To delete a user, please proceed to Participants->Users in the Workflow Setup section and follow the steps below:
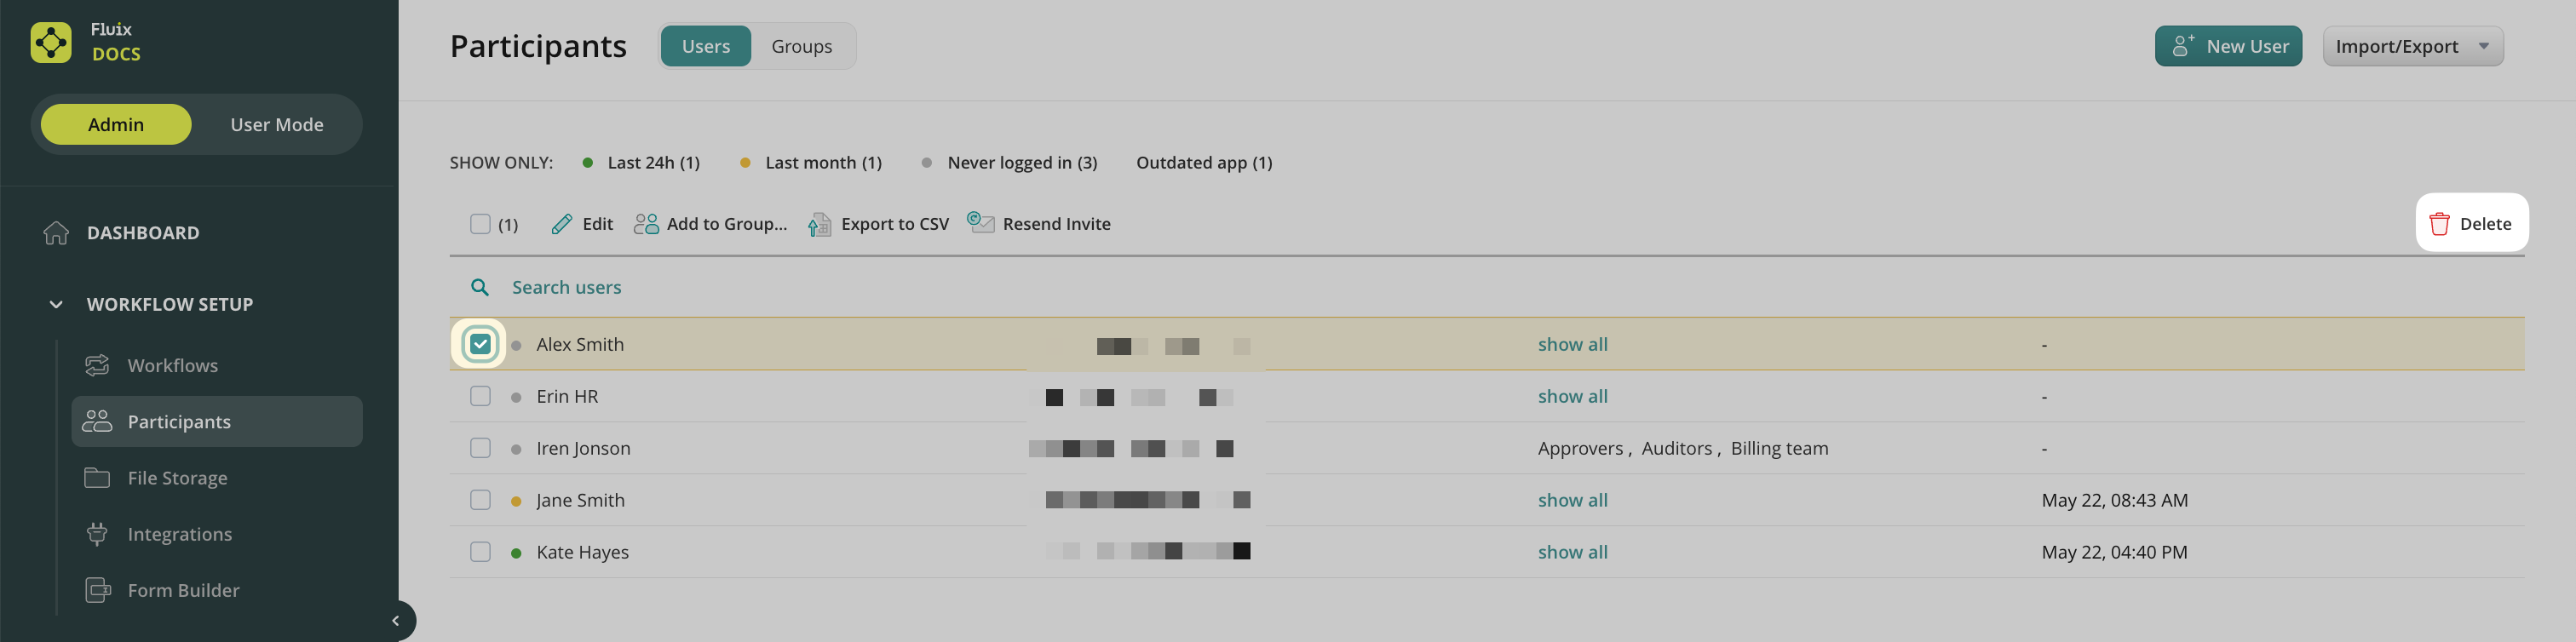
1. Select a User or multiple Users you want to delete by checking the box next to the User’s name.
2. Click on the Delete button in the right corner of the screen. Confirm the selection, and the user’s account will be removed.
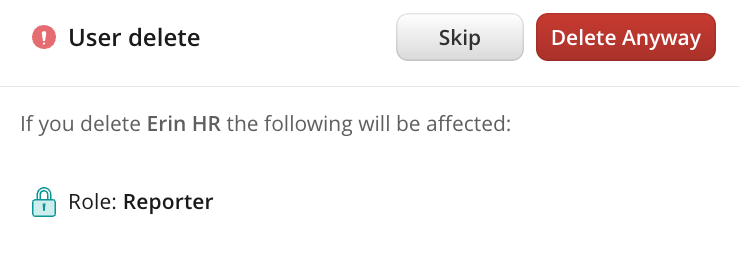
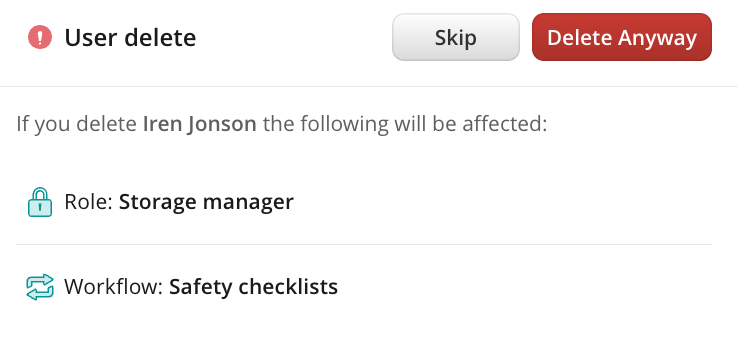
Please note that there are a couple of instances where a user deletion can affect the account:
The user who has documents in the Drafts section or is assigned to him/her. In this case, you can either proceed with deleting if you do not need those documents or go to Document Status and download or reassign the documents to another user.
The user has administrative rights.
The user participates in a workflow. In this case, the system won’t let you delete a user until you delete him/her from a workflow:
IMPORTANT:According to the GDPR requirements, the data on the deleted user is stored for 30 days. So, in case you deleted a user by mistake, you can recover him/her within the next 30 days by recreating him/her as a new user and asking the Fluix Support Team to recover their setup.
Was it helpful? Feel free to contact us at support@fluix.io if you have any questions or comments.
Was this article helpful?
Thanks for your feedback!
Oops, something went wrong. Please, try again later.
Thank you!
What details or examples would have made this article more helpful for you? We appreciate your insights!
With the Early Access Program, you get to access the pre-release version of the Fluix mobile app before it becomes available in the App Store for your users. It is available through Test Flight (a certified Apple beta-testing tool).
The program is designed to enable Admins and key users to test the newly developed functionalities and promptly share feedback with the Fluix team.
In order to download a pre-release Fluix app, follow the steps below:
Contact us at support@fluix.io, or reach out to your Customer Success Manager to request access to Testflight
You’ll get an email invitation for TestFlight with the link to download the app on your device
Download and install Fluix beta version from the TestFlight app
If the Fluix beta app appears to be expired in TestFlight, it means that the current version is already available in the AppStore, therefore we recommend downloading Fluix from there.
Was this article helpful?
Thanks for your feedback!
Oops, something went wrong. Please, try again later.
Thank you!
What details or examples would have made this article more helpful for you? We appreciate your insights!
Sign Up to Our Product Newsletter
The latest updates from our Product team, straight to your inbox