You can set group-level configurations for specific groups if you need to distinguish their permissions from configurations applied to the global account’s settings.
For example:
You may have two user groups: Field Technicians and Supervisors. According to your company’s policy, each group needs different file-sharing permissions.
With group-level configurations, you can give Field Technicians standard file-sharing options while allowing Supervisors to perform additional actions, such as sharing files to third-party platforms or merging files.
Let’s explore how you can enable group-level configurations:
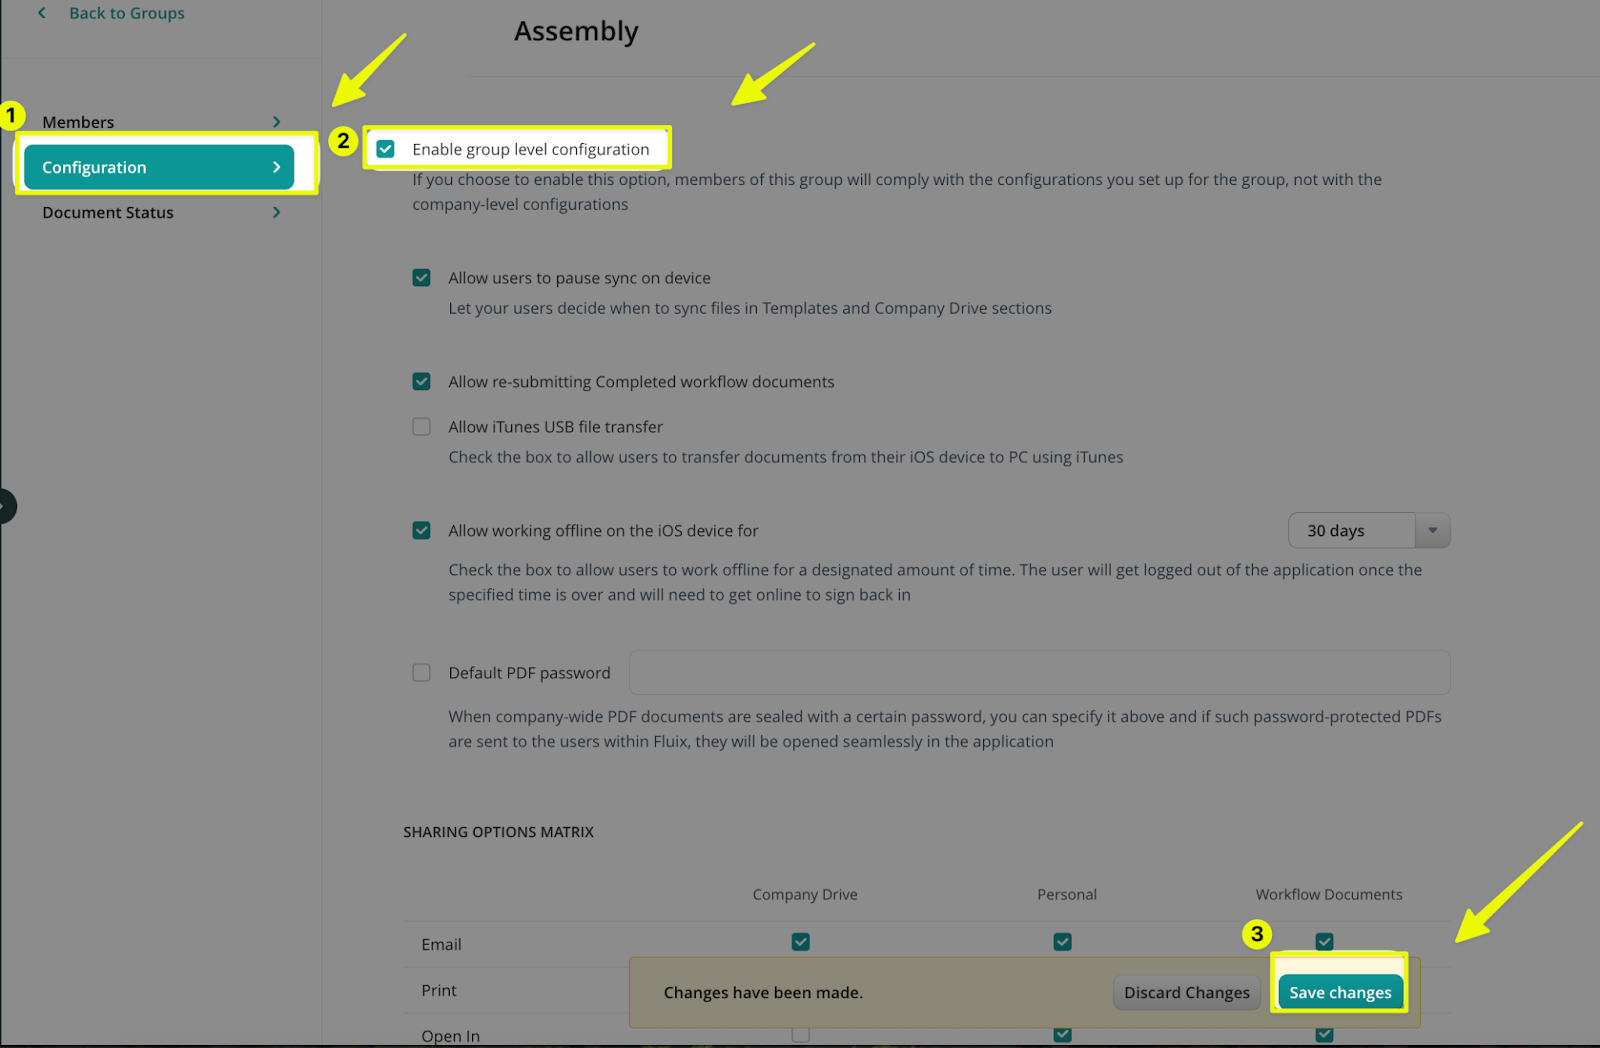
Proceed to Groups->Configuration, and activate the Enable group-level configuration by ticking a checkbox next to it.
This will show you a list of group configurations from which you can choose.
Once done, Save Changes.
To enable the group-level configurations for your users, you have to define which groups’ settings they should obtain instead of the global account-level settings. To do this, follow the steps below:
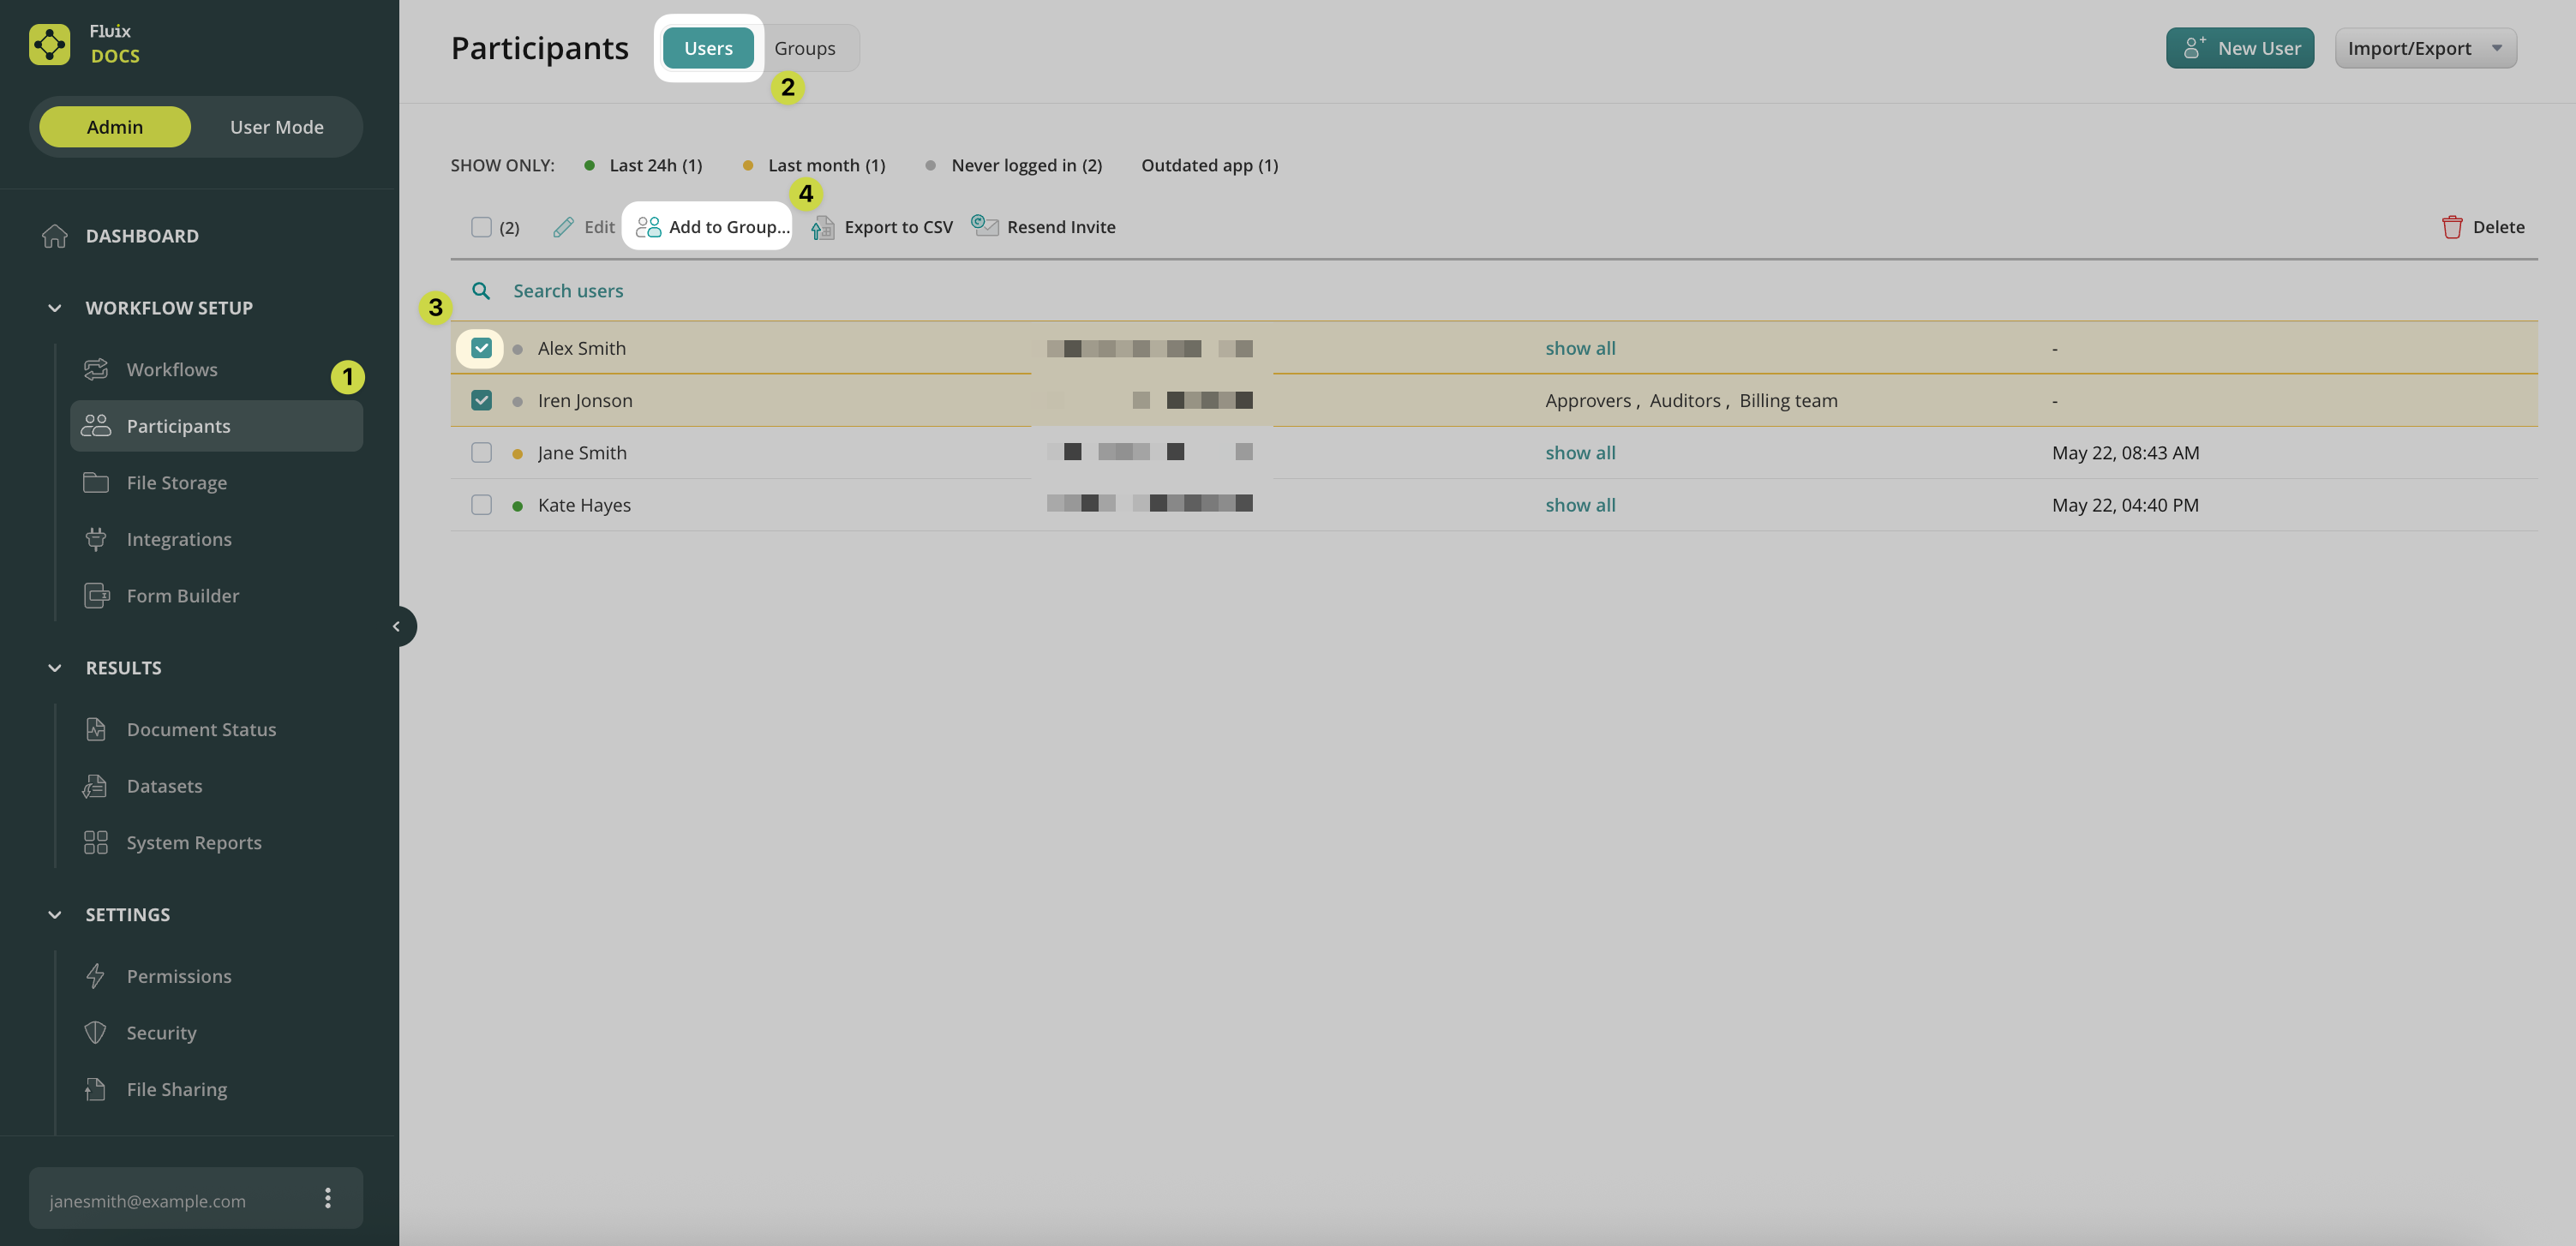
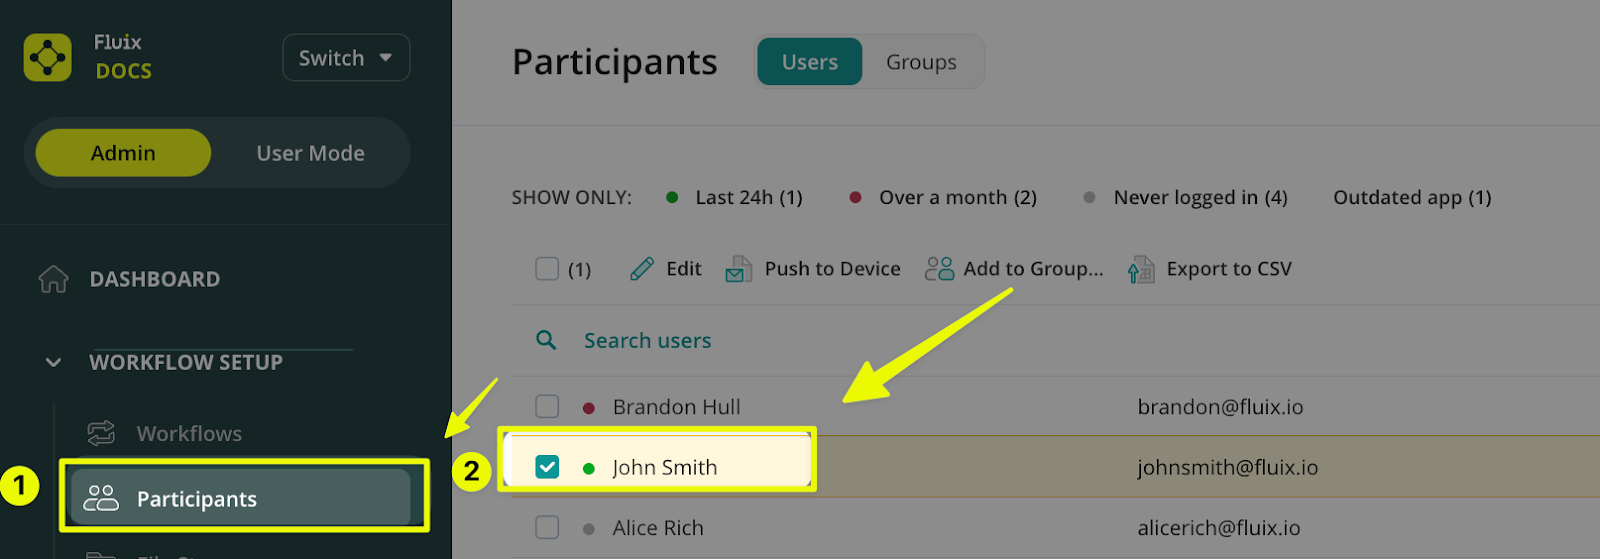
Proceed to the Participants section -> Select the user by ticking the checkbox next to their name, click on the user’s full name to open the User Details.
From the list of Groups the user participates in, select the group -> Put the check mark next to the Turn on to be able to define the ‘Default’ group from which the user will inherit group-level configurations below all the groups listed. Click on Set as Default next to the needed group -> Click on Save Changes.
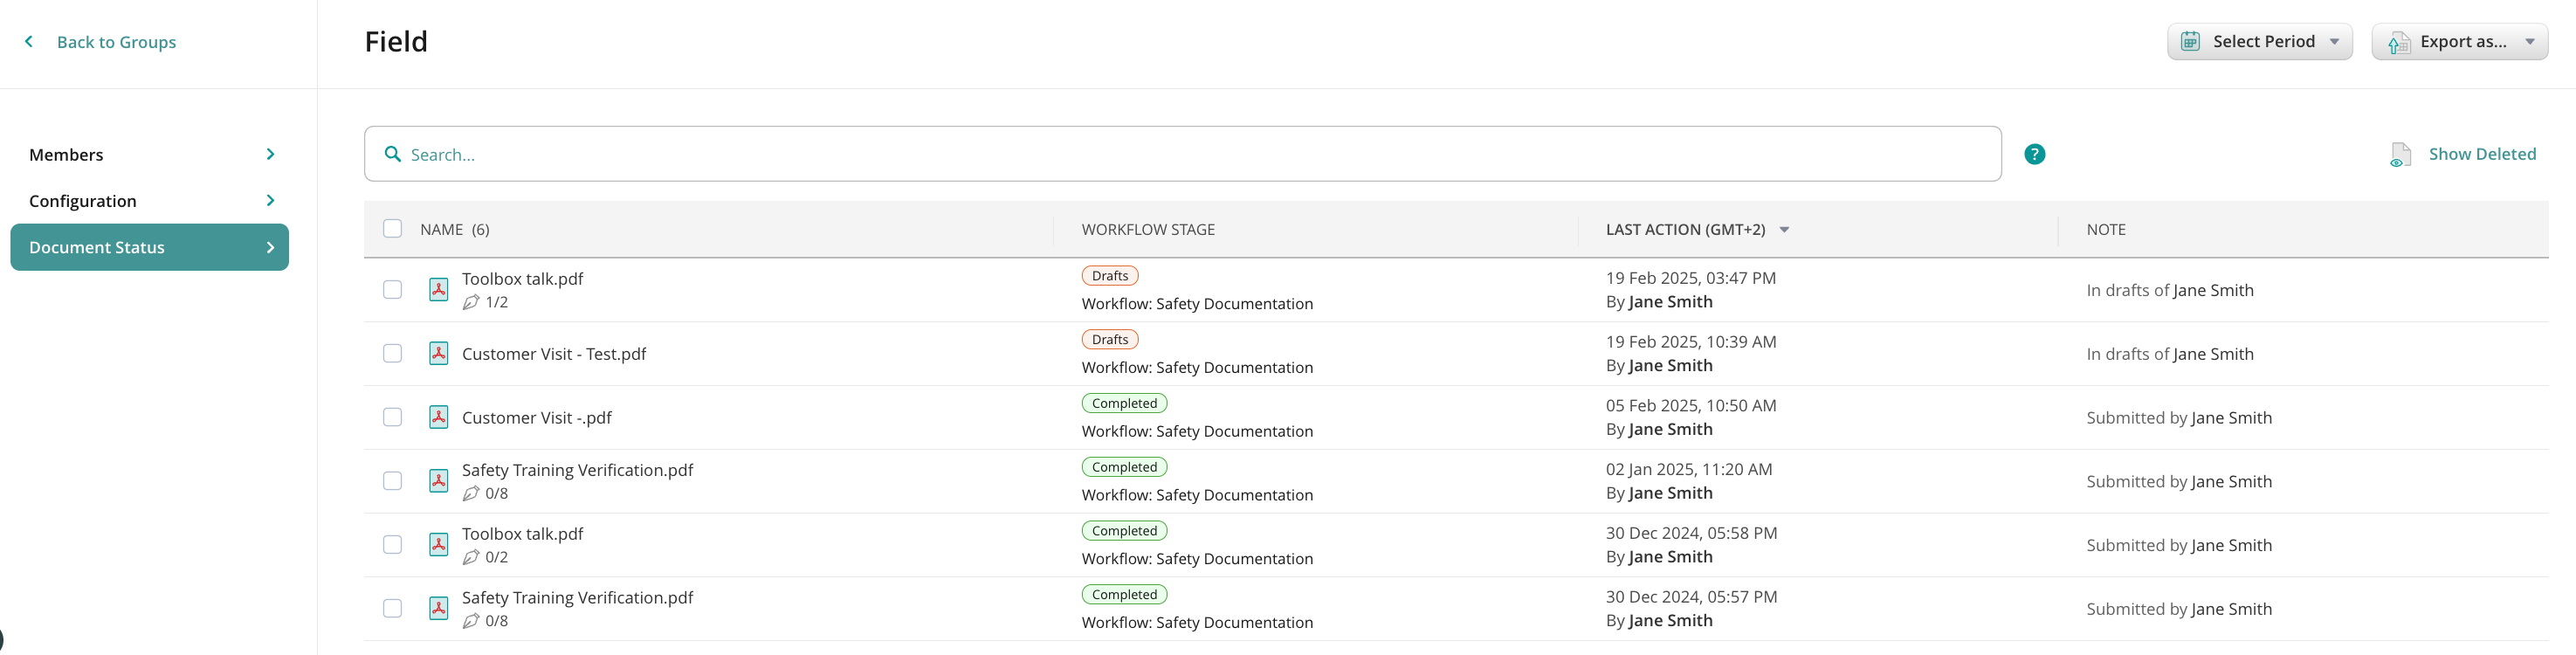
In this section, you can see the documents that a particular group has been working with.
A document can have one of the following statuses:
My Inbox. The document has been assigned to a user but the user has not started working on it yet or the document was signed via remote signing and returned to the user to submit it according to the next workflow rule.
Drafts. The document is currently being worked on by a particular user but hasn’t been submitted yet. Please, note that the document in the Outgoing tab on the iPad will be listed under Drafts on the Admin Portal until it is submitted from the iPad.
Group Inbox. The document has been assigned to a particular group but none of the group members has started working on it yet.
Sent for Signature. The document was sent for signature but hasn’t been signed yet.
Completed. The document has gone through the complete workflow.
Deleted. The document has been removed from the user’s device or the web admin portal. This label will be displayed in case the Show Deleted button is on.
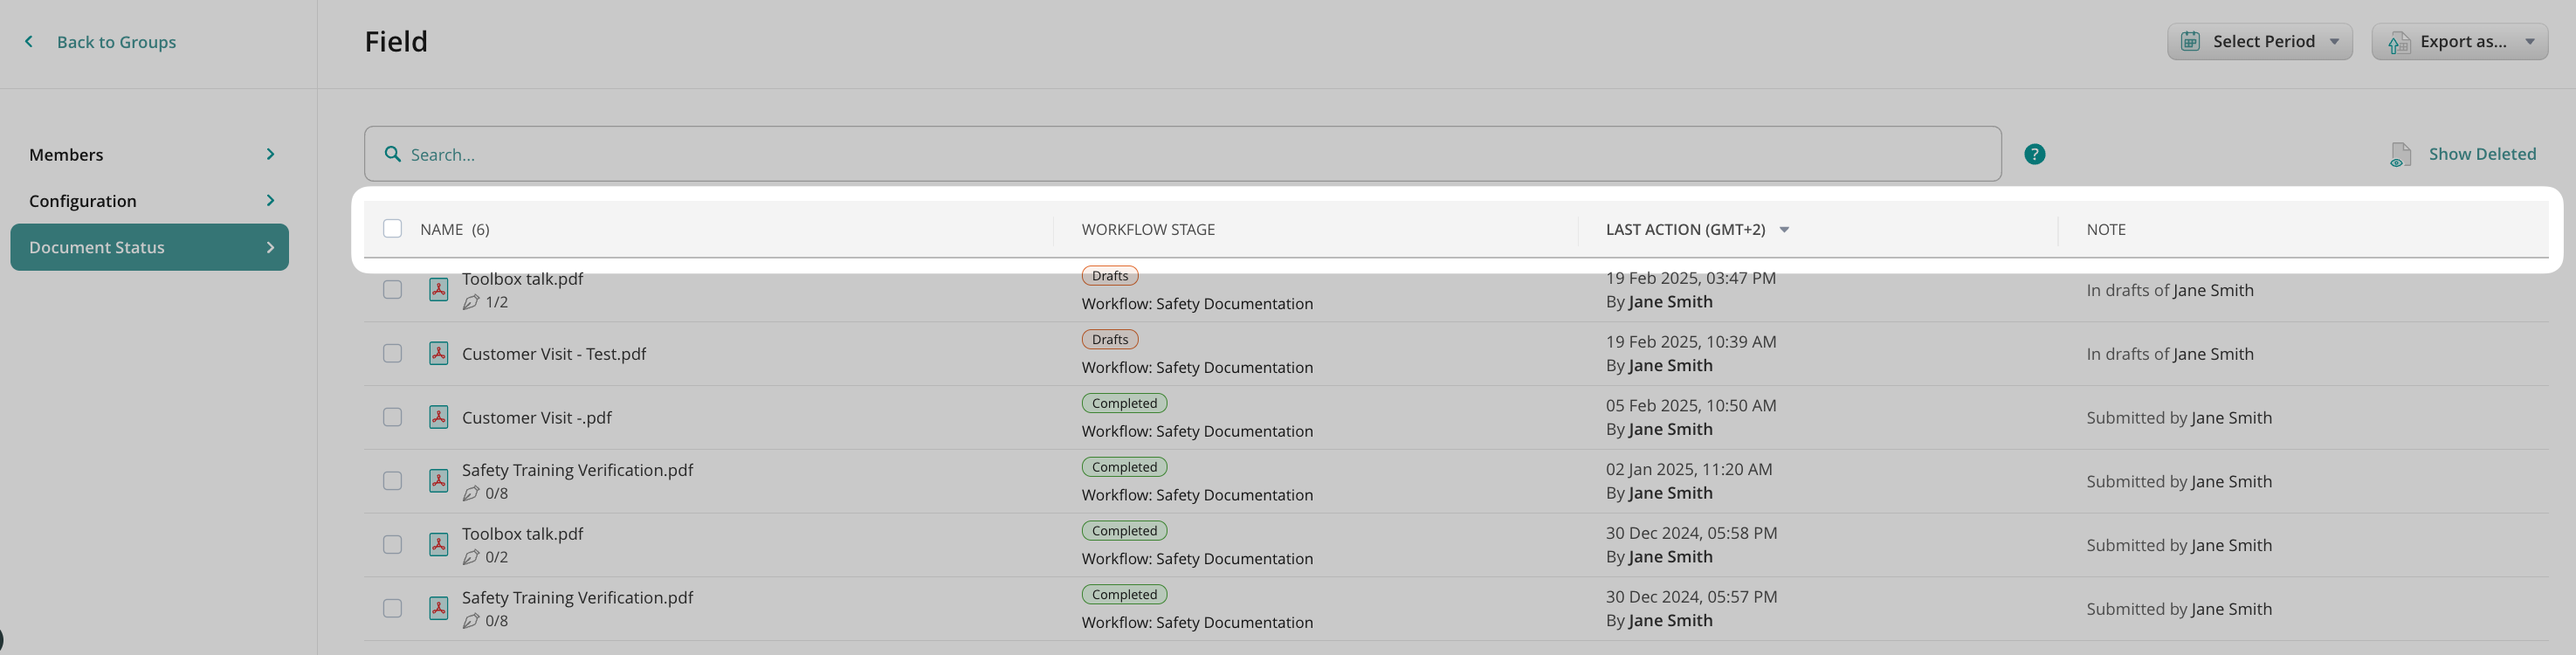
The documents can be sorted by their names or last action dates by clicking on the corresponding column header.
The list includes 100 of the latest documents. To see the older documents, please scroll down.
By selecting any document, you can perform the following actions:
Show History to see the initial document source, time of document modifications with its status, and an assignee, open or download the document revision if needed.
Open the document to view it.
Download the document to the Admin’s computer without removing it from the workflow.
Reassign the document to move it from one workflow participant to another (user or group). This will remove the document from the current assignee’s device and transfer it to the new one, with changes made by the current one saved.
Resubmit the document that failed to be submitted.
Void the document that was sent for signature and needs to be returned to the user’s My Inbox tab on the device.
Delete the workflow document both from the user’s device and the web admin portal.
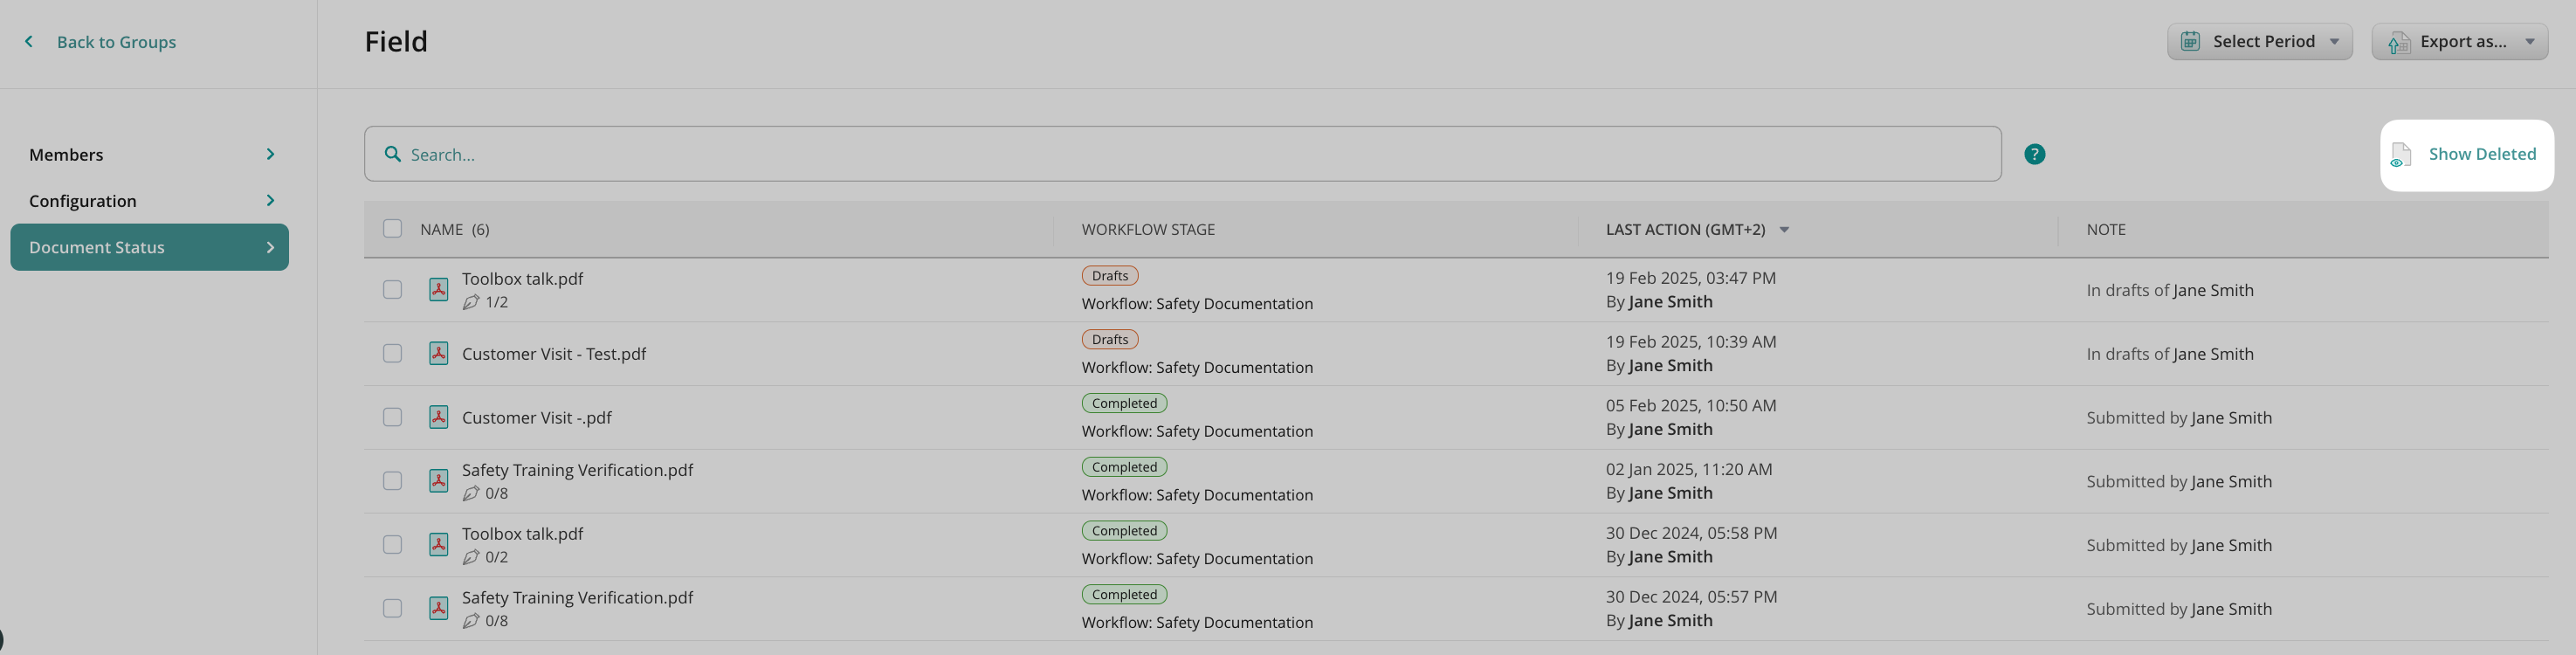
To check the documents that an Admin deleted, click Show Deleted.
Note: the list will not include those deleted documents according to the retention policy, configured in the Security Settings section.
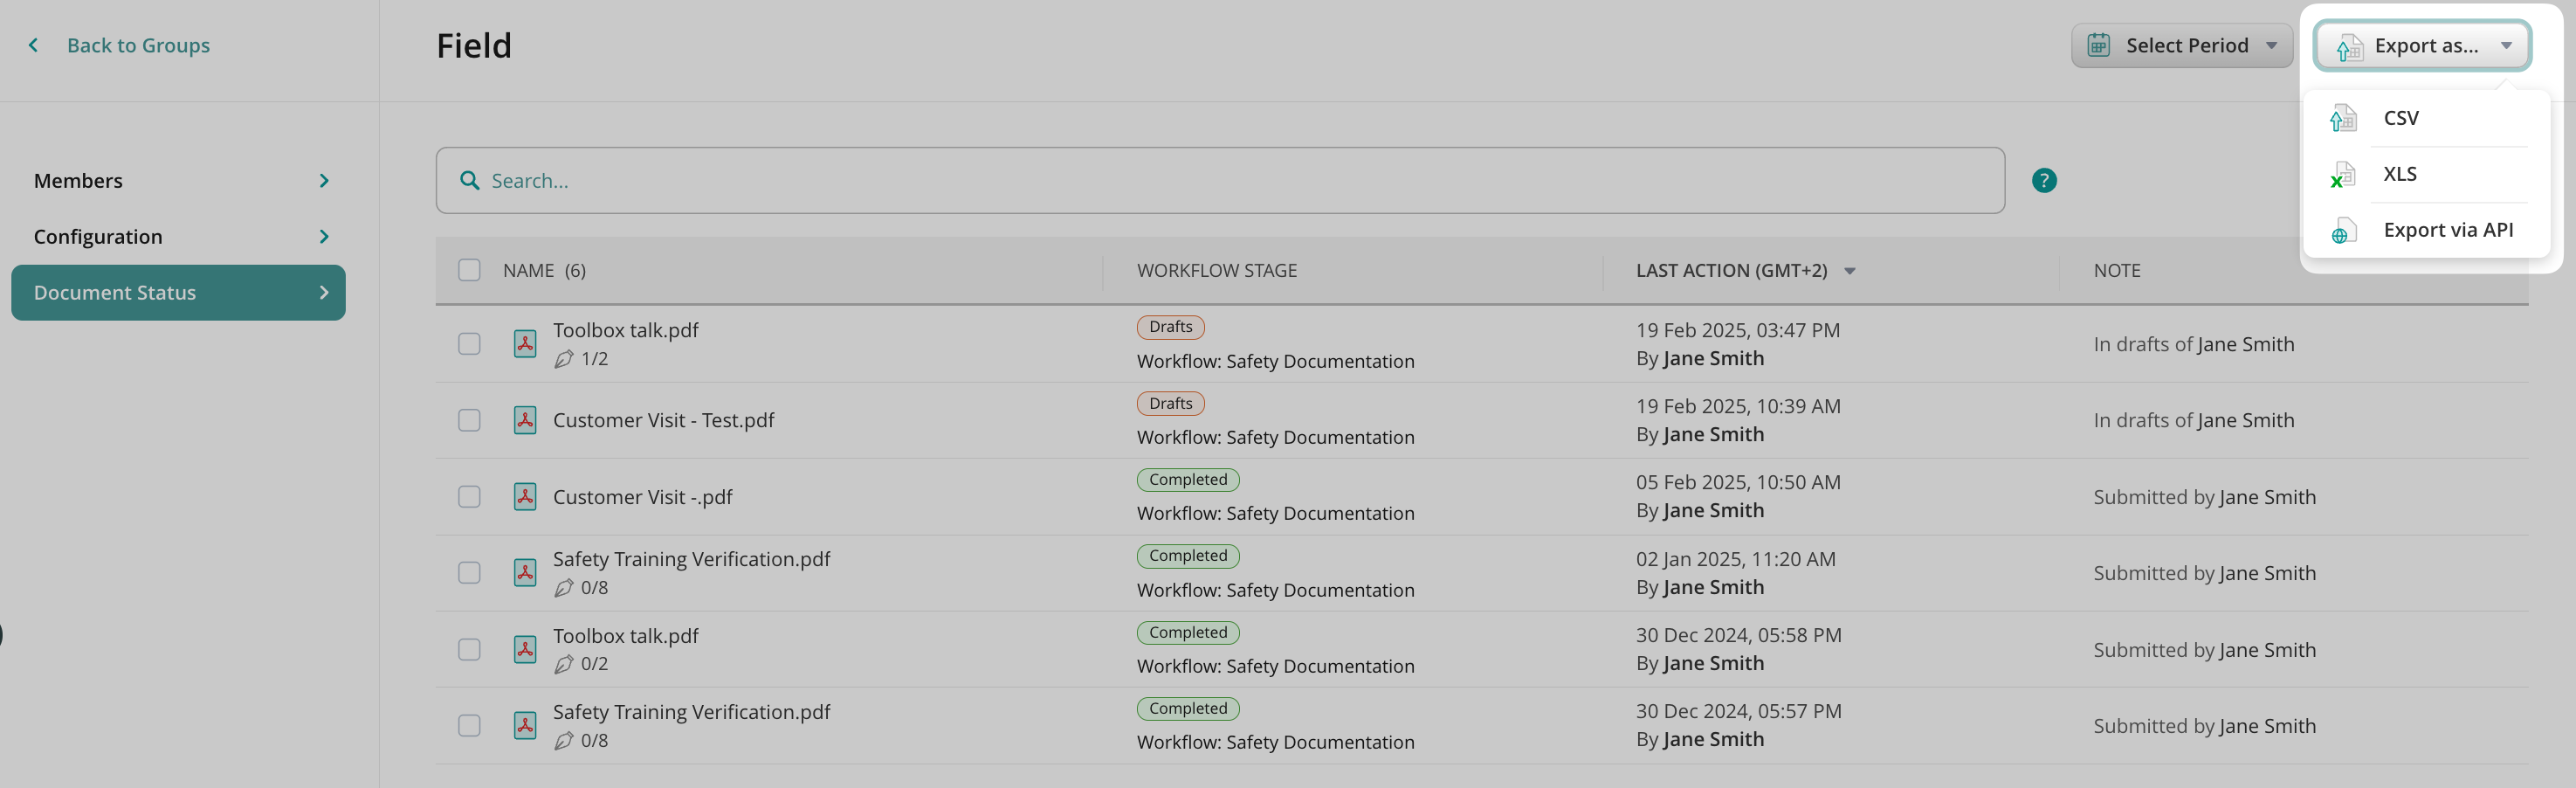
You can also export the list of documents containing the numbers of signature fields, whether those fields were signed, and the dates when the document was created, modified, and became overdue. You may export this data in the following formats:
Download CSV or XLS – This option lets you download all the data or a selected part from Document Status to a file in the respective format for further manual analysis.
Export via API – This option lets you export data directly to the external software you use, e.g., Power BI, Tableau, and other services that help analyze and visualize data. By selecting the Export via API optionfrom the list, the window with Authorization Details will be opened, allowing you to copy the authorization link for further export. Learn more about this functionality in the tutorial How to export data from Fluix Document Status to third-party platforms.
We’d love to hear from you! Please send as a question or comment at support@fluix.io.
Was this article helpful?
Thanks for your feedback!
Oops, something went wrong. Please, try again later.
Thank you!
What details or examples would have made this article more helpful for you? We appreciate your insights!
Sign Up to Our Product Newsletter
The latest updates from our Product team, straight to your inbox