


Process mapping is an approach used in fields ranging from business and finance to healthcare and manufacturing to visualize and analyze complex processes. A process map, an inevitable part of this approach, helps you improve workflows and provide stakeholders with a clear and structured overview of a process.
To better understand the concept of business process mapping, see this article on a business process mapping definition and its components.
In this article, you’ll learn how to create a process map and support your organization while embarking on an initiative to improve productivity and achieve operational efficiency.
Preparing to Create a Process Map
Data from iSixSigma suggests that process maps can solve 80% of business problems when implemented correctly, so you need to spend quality time laying the foundation for success. Proper preparation is what ensures that your process map accurately represents the workflow you’re trying to capture.
Understanding why you are mapping the process guides the selection of the appropriate symbols, level of detail, and focus.
Follow these steps to ensure that you both capture the workflow and create a reliable tool for analysis, communication, and improvement efforts.
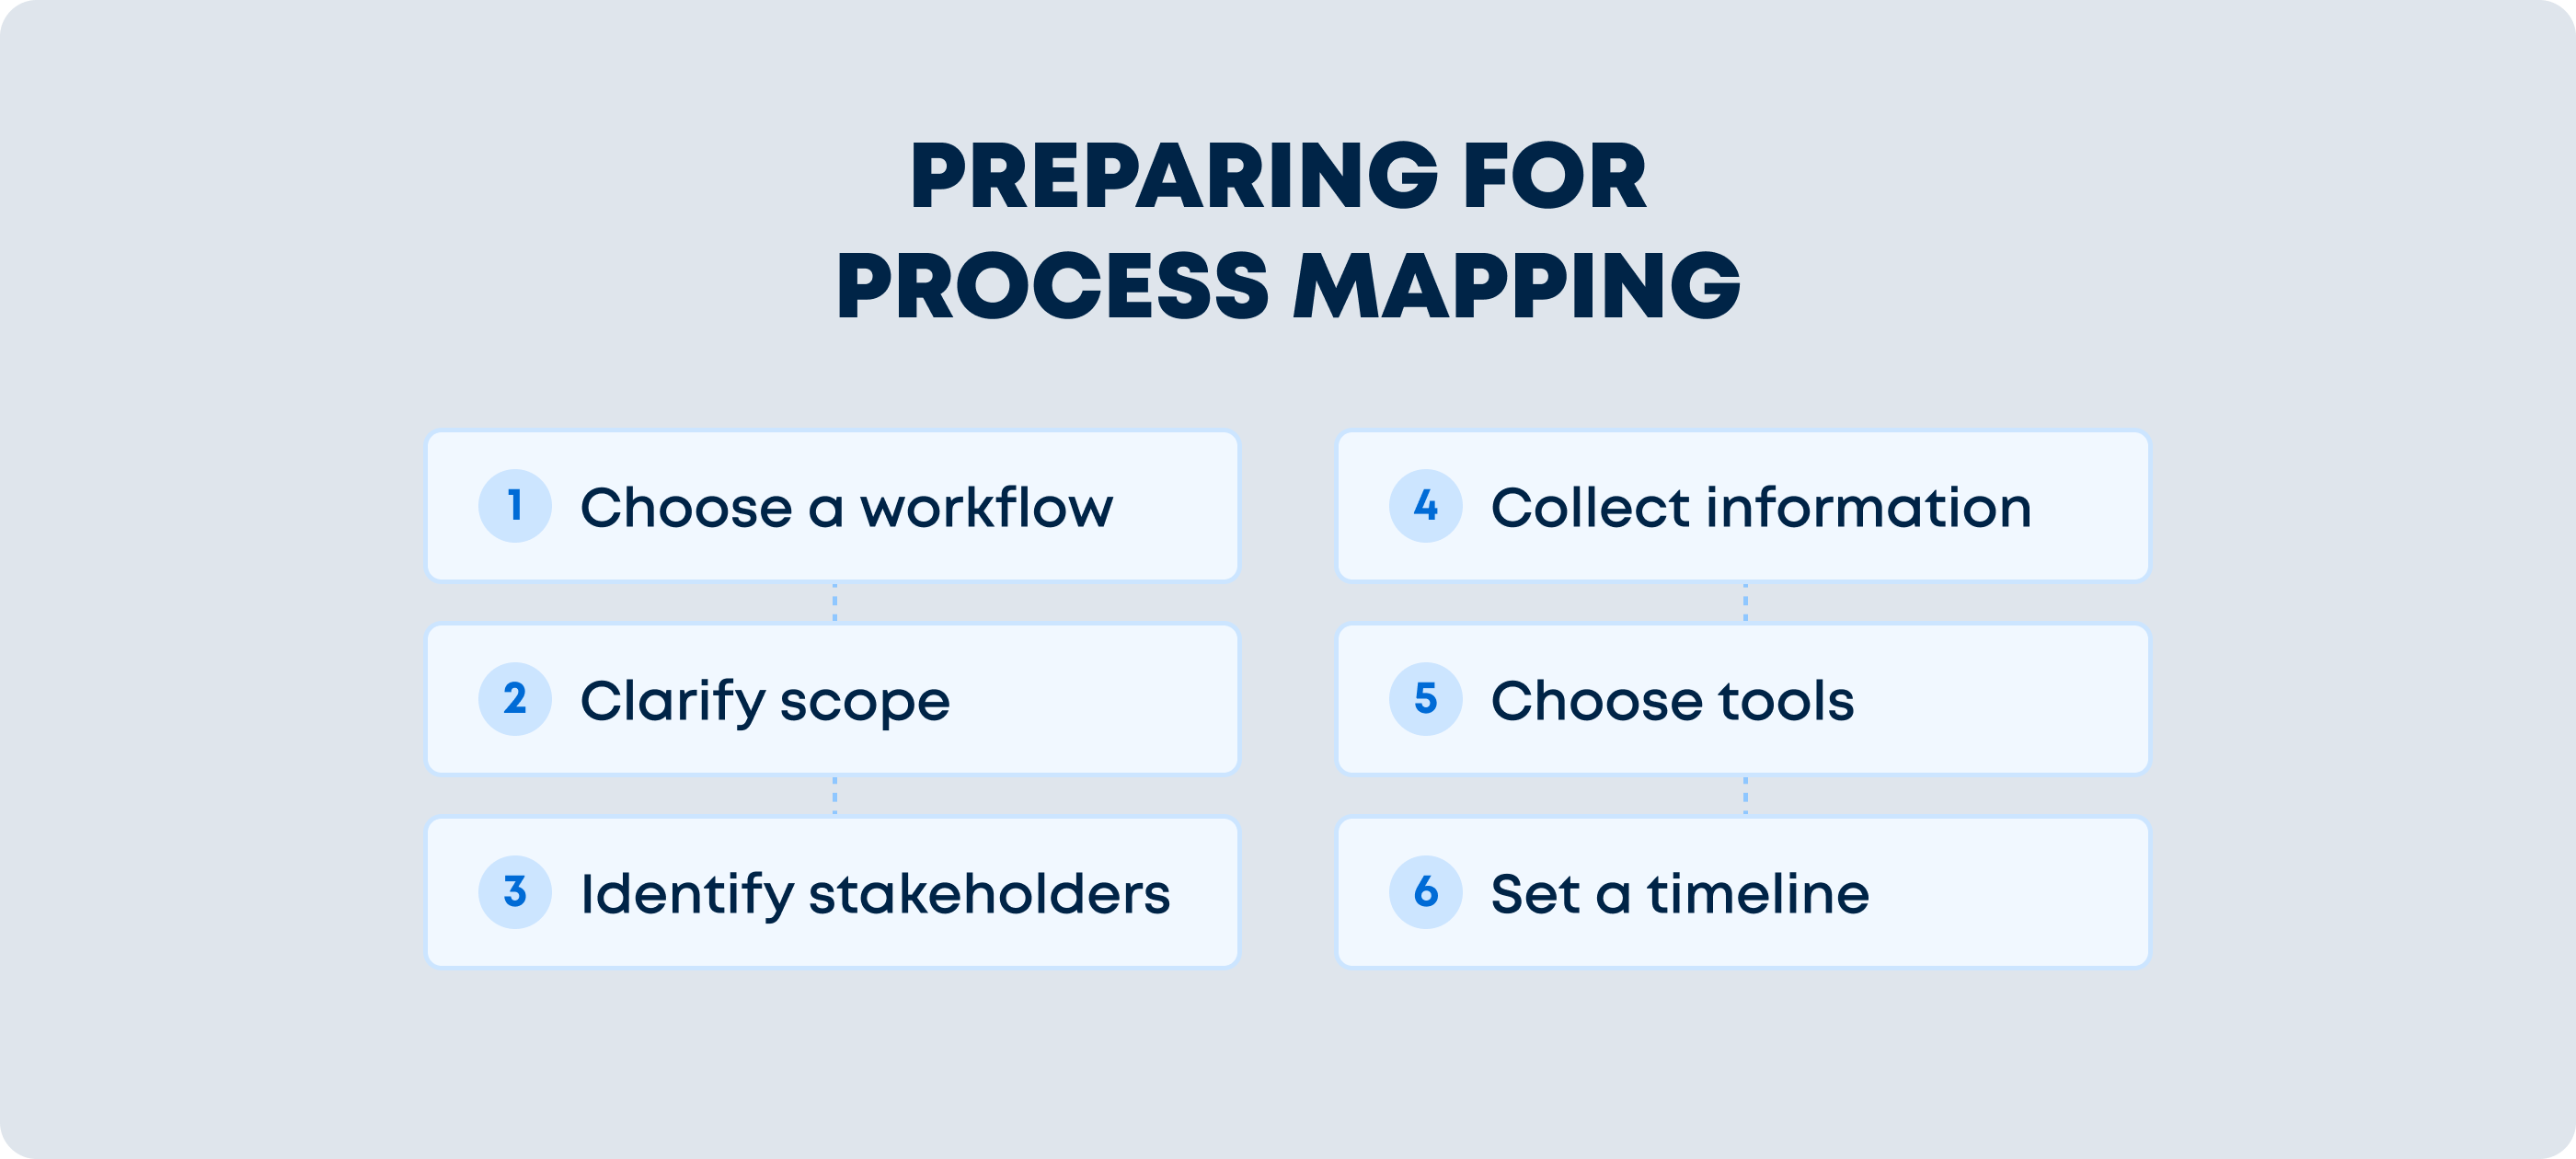
Select a Workflow To Map
There exist different map formats, and it’s recommended that you get to know the most common types of process maps before proceeding with creation.
Even if you’re planning a full-scale mapping initiative, it helps to start with a single workflow. You may want to focus on a costly process to reduce expenses or refine a workflow that just isn’t working.
Your business can also benefit from mapping processes that multiple departments use, that have a direct effect on earnings or user experience, and that have no current documentation.
Clearly Define the Purpose and Scope
While it sounds simple, this critical step guides the entire process mapping exercise by setting clear objectives. Whether you’re working alone or brainstorming with team members, establish the reason why you are documenting this specific workflow and what you hope to achieve by doing so.
At this stage, you should also consider the scope of your mapping initiative. For example, you may want to document all of a department’s processes, focus on cross-team workflows or illustrate all the operational workflows in your organization.
Identify Stakeholders
Determine the key stakeholders for your process mapping initiative, including employees who are directly involved in the process, managers, and other relevant parties such as external partners. Involving the right people leads to a more accurate representation and generates better insights.
Gather Information
Collect all necessary data including existing documentation and input from the people involved. During data collection, your teams should gather and review:
- Key performance metrics
- Work instructions
- Job descriptions
- Standard operating procedures
- Individual employees
- Process observation notes
Understanding the process in detail is essential for creating an accurate and useful process map.
Select the Right Tools
To choose the right business mapping tool, begin by clearly defining your specific requirements and goals for process mapping. The ease of use, collaboration features, and integration capabilities with other tools used in your organization are important factors to consider.
Additionally, assess the scalability, customization options, and support services provided by the tool, ensuring it aligns with your organization’s unique needs and facilitates effective business process documentation and analysis.
Set a Timeline
Having a clear schedule will help you stay on track. Allocate sufficient time for each step in the process and set up a regular review period every few months to make sure the map still makes sense.
How technicians at RWE Renewables reduce daily form completion time by 45%

How to Create a Process Map
Once you’ve completed the preparation phase, you’re equipped with the knowledge to create a process map.
Although your industry may have unique considerations, follow these general steps to build a basic diagram, then adapt as needed to fit your distinct operation.
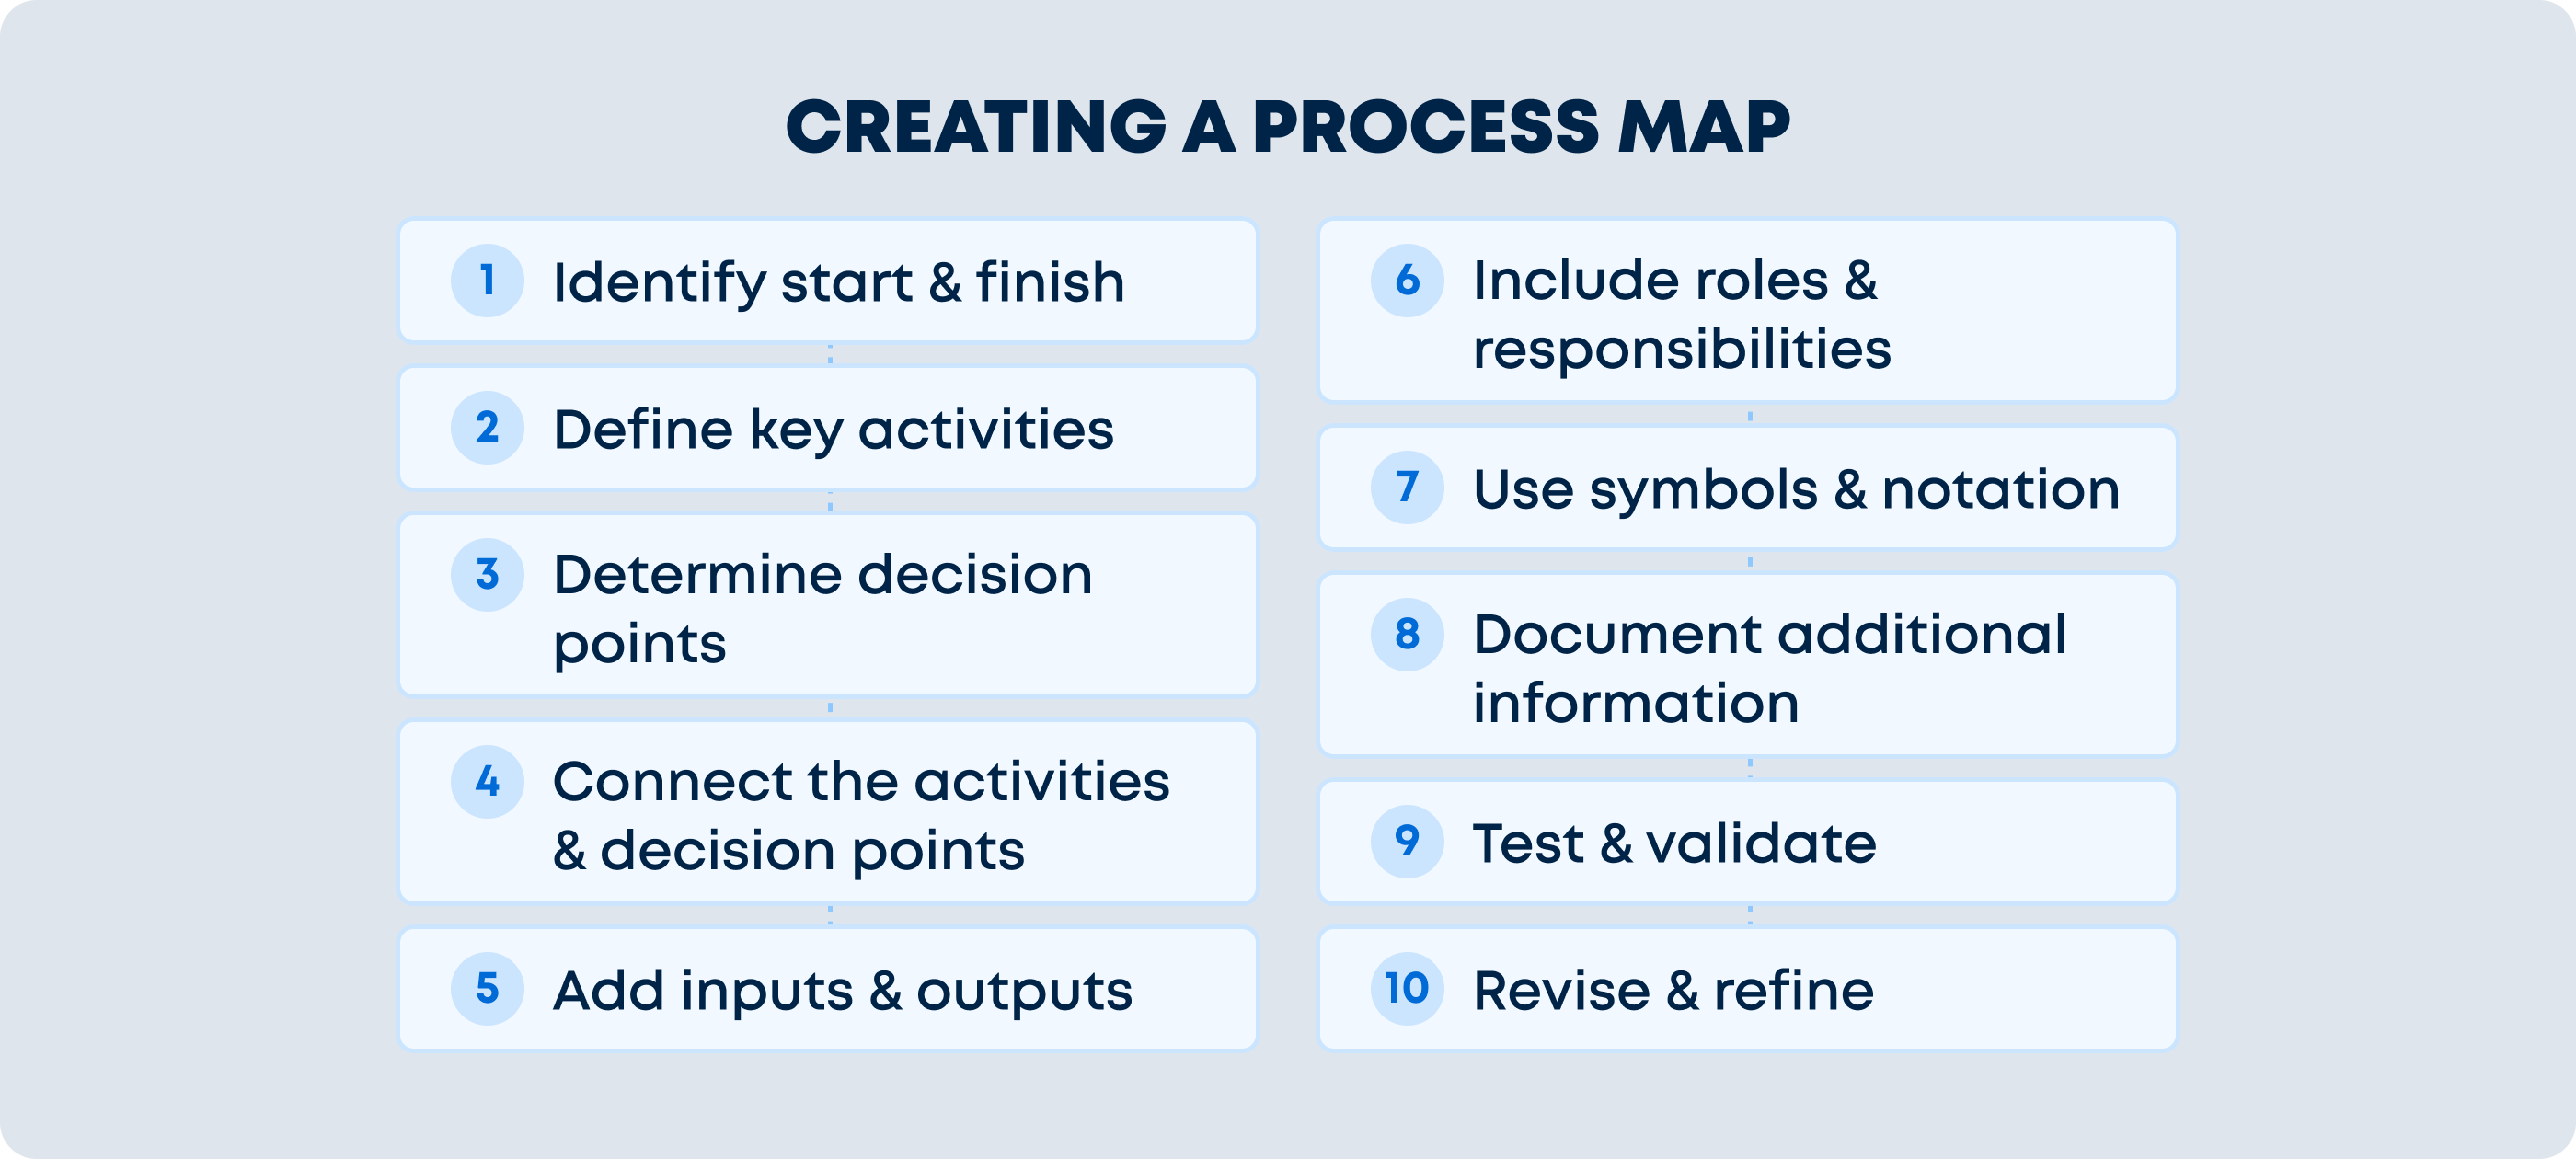
Step 1: Identify the Starting and Ending Points
These critical points define the boundaries of your workflow map. Make sure to document the action that triggers the process and the step marking its completion.
Step 2: Define the Key Activities
When you make a process map, break down the process into its essential activities or steps. List these activities in sequential order. Be as detailed as possible to avoid overlooking critical steps. Involve the stakeholders you identified during the preparation process to get their input on the activities and their sequence.
As you define key activities, designate the business metrics you’ll use to see whether each activity meets its intended objective. Including evaluations from the outset makes it easier to refine the workflow as needed for optimal results.
If possible, take a hands-on approach during this step and document your experience with careful notes. Actually going through each part of the process as the user or responsible party can uncover important elements that you might not otherwise capture in your process map.
Step 3: Determine Decision Points
Decision points within the workflow result in different outcomes when you do a process map. Identify and clearly indicate these points on your process map. Most maps use a diamond shape with arrows extending to indicate each of the possible pathways.
Many decision points incorporate business rules that the system or responsible person will follow to take the appropriate course of action.
For example, imagine you run a community camp and need to hire 100 new staff members for the summer season. You want to build a process map for the recruitment and hiring process. At the key decision point when you select applicants to interview, you can set a business rule such as “only contact candidates with lifeguard experience.”
Step 4: Connect the Activities and Decision Points
Use lines with arrows to show the direction of the flow. This visual representation illustrates the order of events. When arrows overlap, the more important process should appear to cross over the less important sub-processes in a hierarchical fashion.
For the sake of accuracy, avoid making assumptions when documenting how different steps in the process flow into one another. If the team making the map doesn’t know exactly how a specific action or task works, they’ll need to gather more information from those who perform the process to gain clarity.
Step 5: Add Inputs and Outputs
For each activity or decision point, specify the inputs required and the outputs produced. Inputs include anything that needs to occur for the activity to begin, while outputs are the results or products of the activity. This information clarifies the purpose of each step.
Step 6: Include Roles and Responsibilities
Indicate who is responsible for each activity or decision point by adding the names or job titles of individuals or teams next to the corresponding step. Establishing clear roles and responsibilities ensures accountability when you create a process map.
Step 7: Use Symbols and Notation
Employ standard symbols and notation to represent different elements in your process map. Process maps shapes include rectangles for activities, diamonds for decision points, arrows for flow and ovals for the start and end points. Consistent use of symbols makes your process map more accessible and understandable.
Step 8: Document Additional Information
Incorporate any additional information that can enhance the understanding of the process. This could include metrics, time estimates for each activity or any special considerations. The more comprehensive your process map, the more valuable it becomes as a tool for analysis and improvement.
Step 9: Test and Validate
Once you’ve created your initial process map, review the map with the stakeholders and individuals involved in the process. Make sure the diagram accurately represents the workflow and aligns with their experiences and expectations.
You should also return to the metrics you set earlier in the process. Use these key performance indicators to decide whether the workflow meets its established goals. If yes, it’s time to set new objectives and tweak the process to deliver even higher levels of productivity. If the process falls short, you can make small changes that bring you closer to the end objective.
Step 10: Revise and Refine
Based on the feedback you receive during the validation phase, revise and refine your process map. Ensure that it accurately reflects the real-world process, is easy to follow and effectively serves its intended purpose. Iterate as needed to achieve and maintain a clear and accurate representation.
Best Practices to Develop a Process Map
Following these best practices when you create a process map facilitates real operational improvements as you improve and optimize your workflows.
Keep It Simple
Strive for simplicity in your process map. Avoid unnecessary complexity, as it can make the map confusing and less useful. Focus on the essential elements and information required to understand the process.
Use Standard Notation
Stick to widely accepted symbols and notation for process mapping. This ensures your process map can be easily understood by others familiar with process mapping conventions.
Review and Revise Regularly
A process is not static and can change over time. Regularly review and update your process map to keep it aligned with the current workflow. This keeps it a relevant and effective tool.
Document Exceptions
Be sure to document any exceptions or variations in the process. Not all processes run perfectly all the time, so acknowledging these scenarios in your map allows your teams to address them more effectively.
Choosing Software to Create a Process Map
Using special process mapping software tools that offer features like automation, collaboration and the ability to create dynamic, interactive process maps is important for the success of the approach.
Fluix, a workflow automation tool for streamlining document workflows, can help you with certain aspects of business map creation and mapping processes.
- Fluix facilitates the automation of document workflows to help you visualize and optimize document-centric processes.
- Allows users to collect data with digital forms to capture information that can then be analyzed to understand the flow and dynamics of business activities.
- Supports collaboration by enabling users to share and work on documents and workflows.
- Offers integration capabilities, allowing you to send the collected data to other business applications and systems.
- Ensuring document compliance that is crucial for processes that involve regulatory requirements.
With its data collection functionality, Fluix can complement other tools by providing capabilities for managing document-centric workflows within the broader context of business processes.
Want to Start Automating Your Workflows and Processes?
Give us 15 minutes to show you how you can do it quickly in Fluix