


With Fluix Assets, you can prefill your team’s forms with data from your company database. This means no more manual typing, fewer errors, and faster form completion in the field.
Why Use Fluix Assets
- For Managers: Connect your internal databases (e.g., vehicles, equipment, machinery) to Fluix forms. With just a few clicks, keep all records up to date from the Admin Portal.
- For Field Teams: Save time and reduce mistakes. Instead of typing information, your team selects from a prefilled list of options in their forms.
Note: Assets are available starting from the Pro Pricing Plan.
How to Set Up Assets in Fluix
Step 1 – Prepare Your Data
1. Upload an Excel (.xlsx) or CSV (.csv) file with your assets, or create one directly in Fluix.
2. Make sure your file includes:
- Column headers in the first row
- A unique ID column for each asset
- No merged cells
Step 2 – Create an Asset Collection
1. In the Admin Portal, go to Assets → click New Collection.
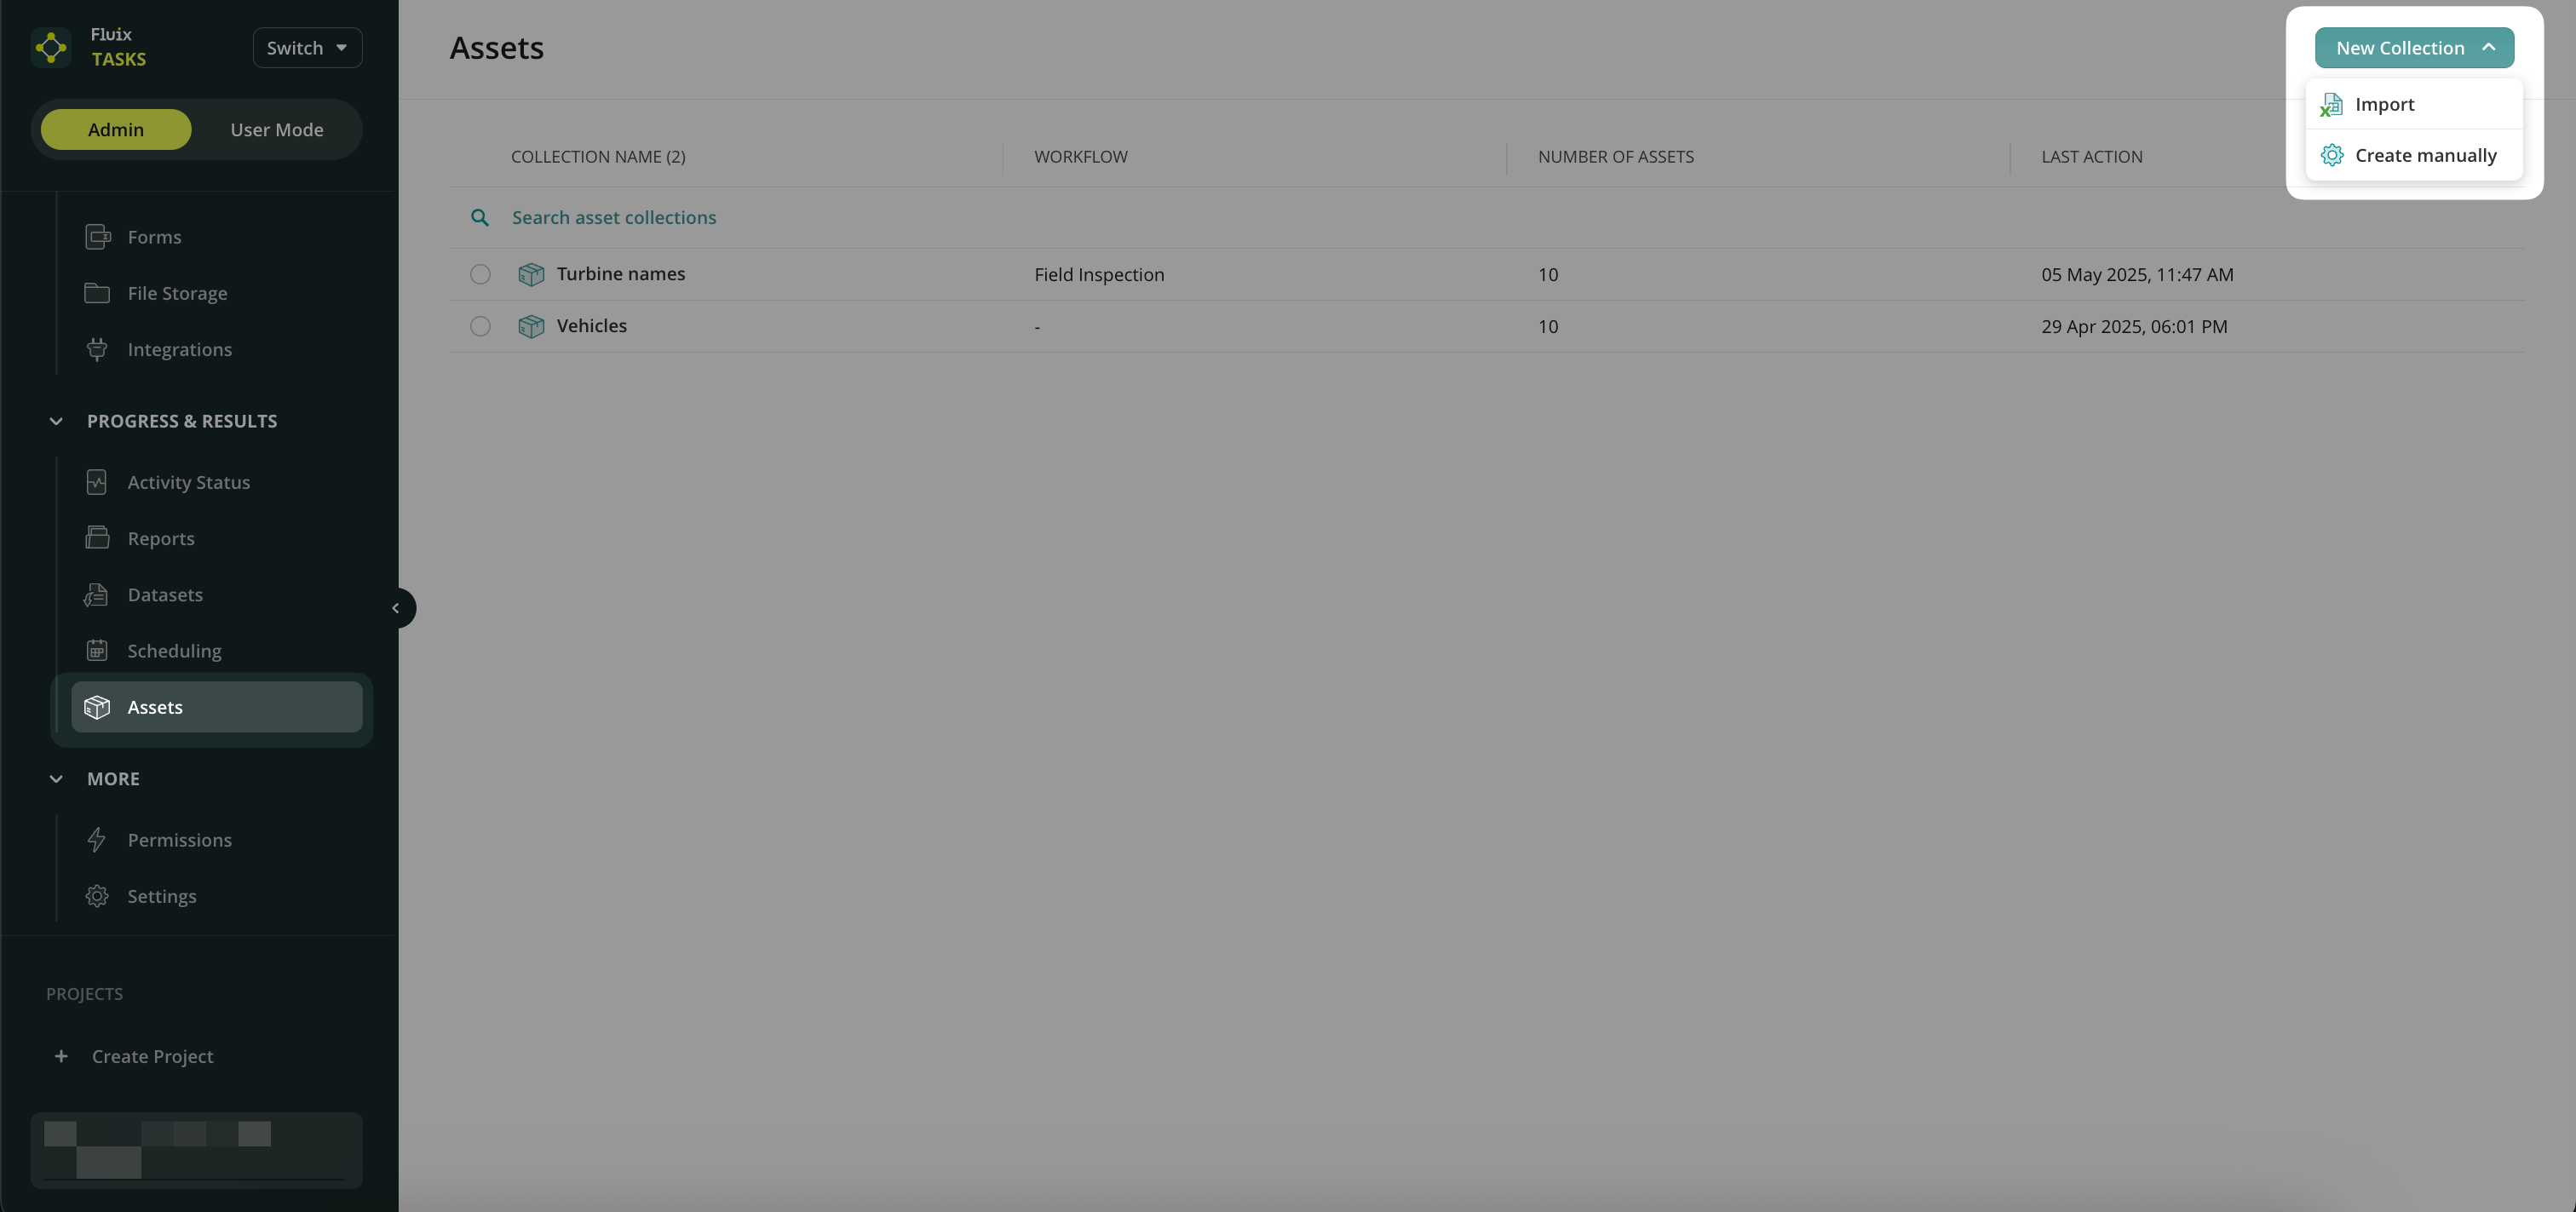
2. Upload your file or create a list manually.
3. Name your collection and click Create.
4. Your assets will now be displayed in a table. Click on an asset name to edit it directly in Fluix.
Step 3 – Connect Assets to a Form
1. Go to Forms in the Admin Portal and open or create a dynamic form.
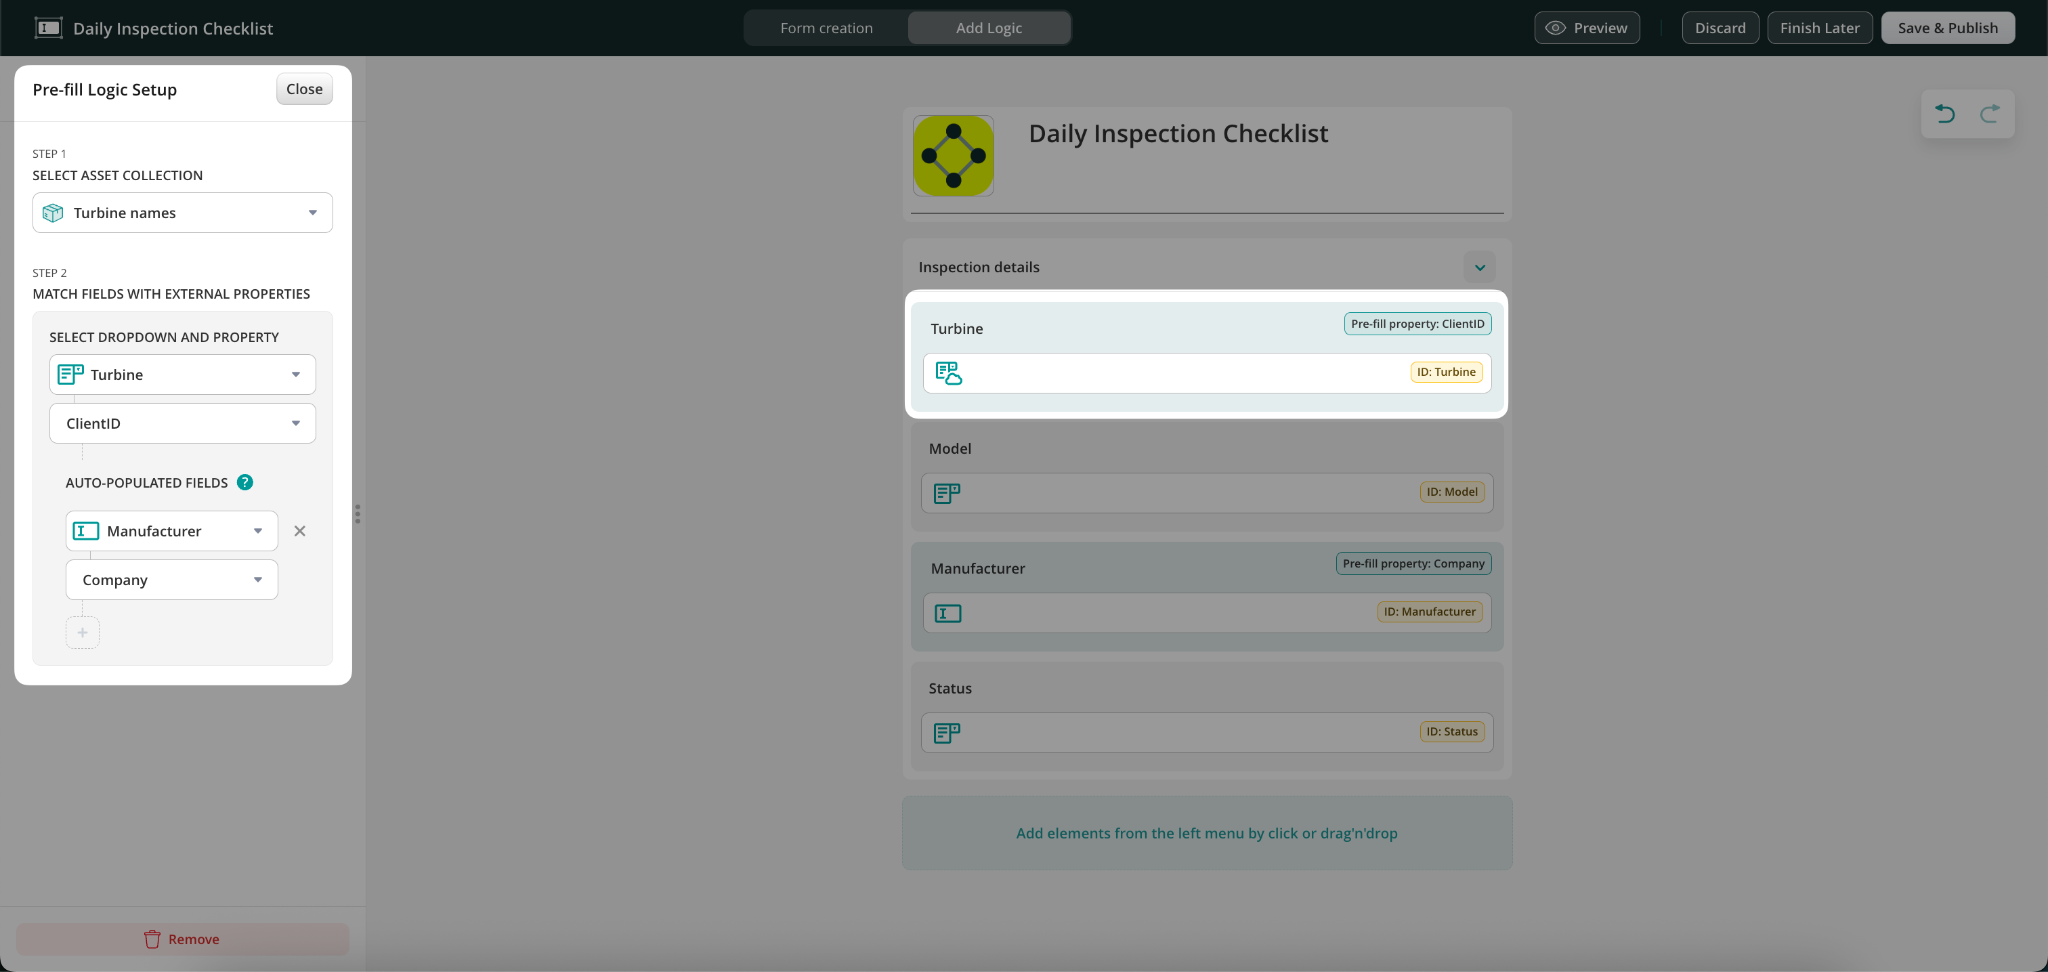
2. In the Form Builder, add a Dropdown field and give it a clear label (e.g., “Select Vehicle”).
3. In the Options panel, choose Pre-fill options → Open Pre-fill setup.
4. Select your Asset Collection and choose which column should populate the dropdown list.
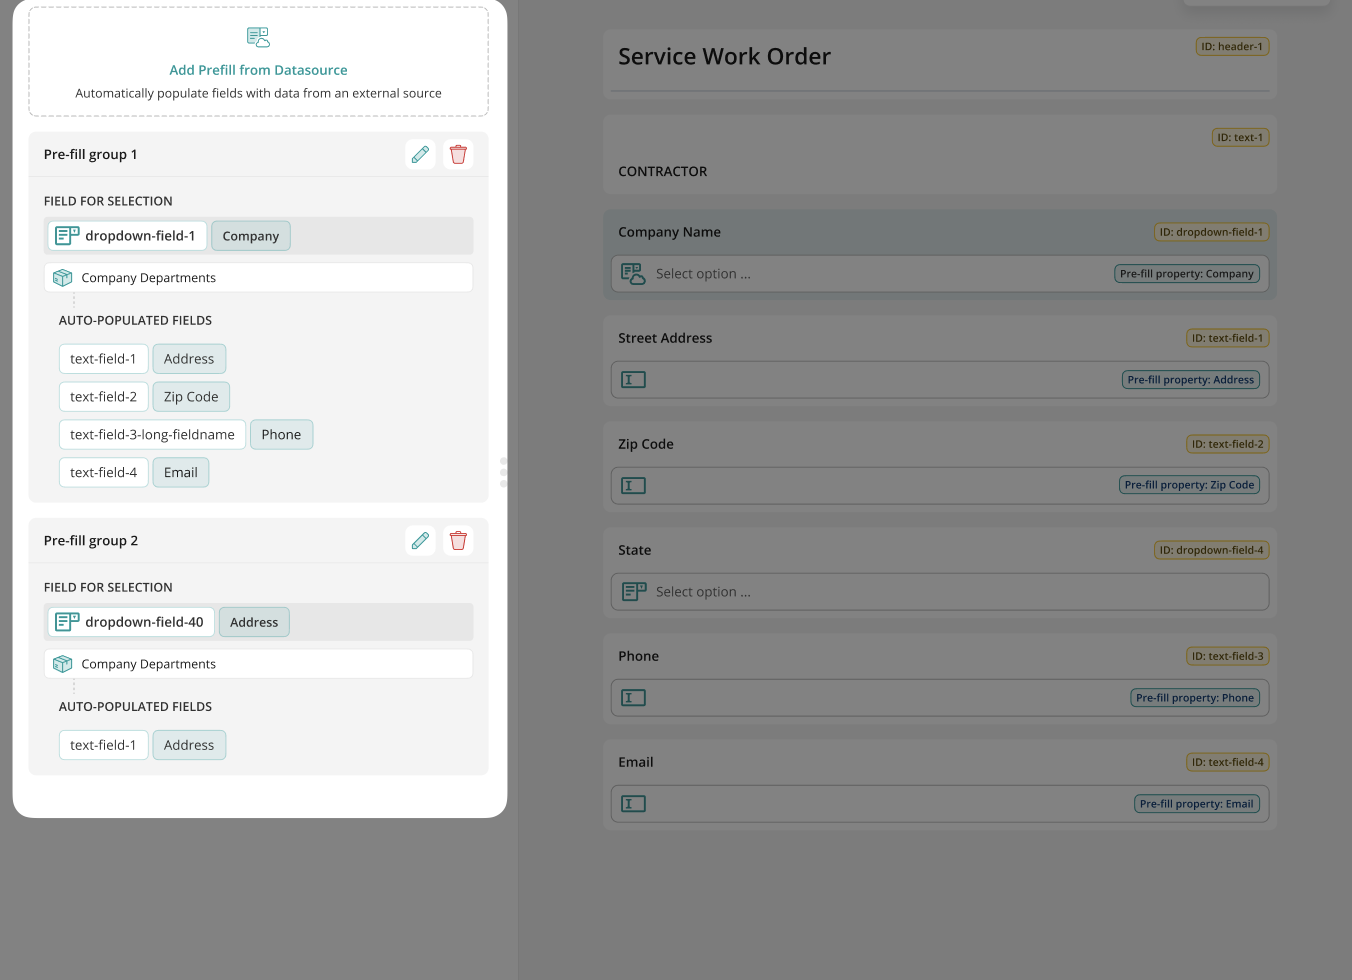
You can include multiple drop-down fields connected to different data sources within the same dynamic form. This provides greater flexibility and allows users to work with several data sources simultaneously.
In the Form Builder, you can add an unlimited number of data sources and link them to individual drop-downs and related fields.
5. Save & Publish your form.
Step 4 – Add the Form to a Workflow
1. Navigate to the Workflows section in the Admin Portal.
2. Create a new workflow or edit an existing one.
3. Add your dynamic form to a Task element.
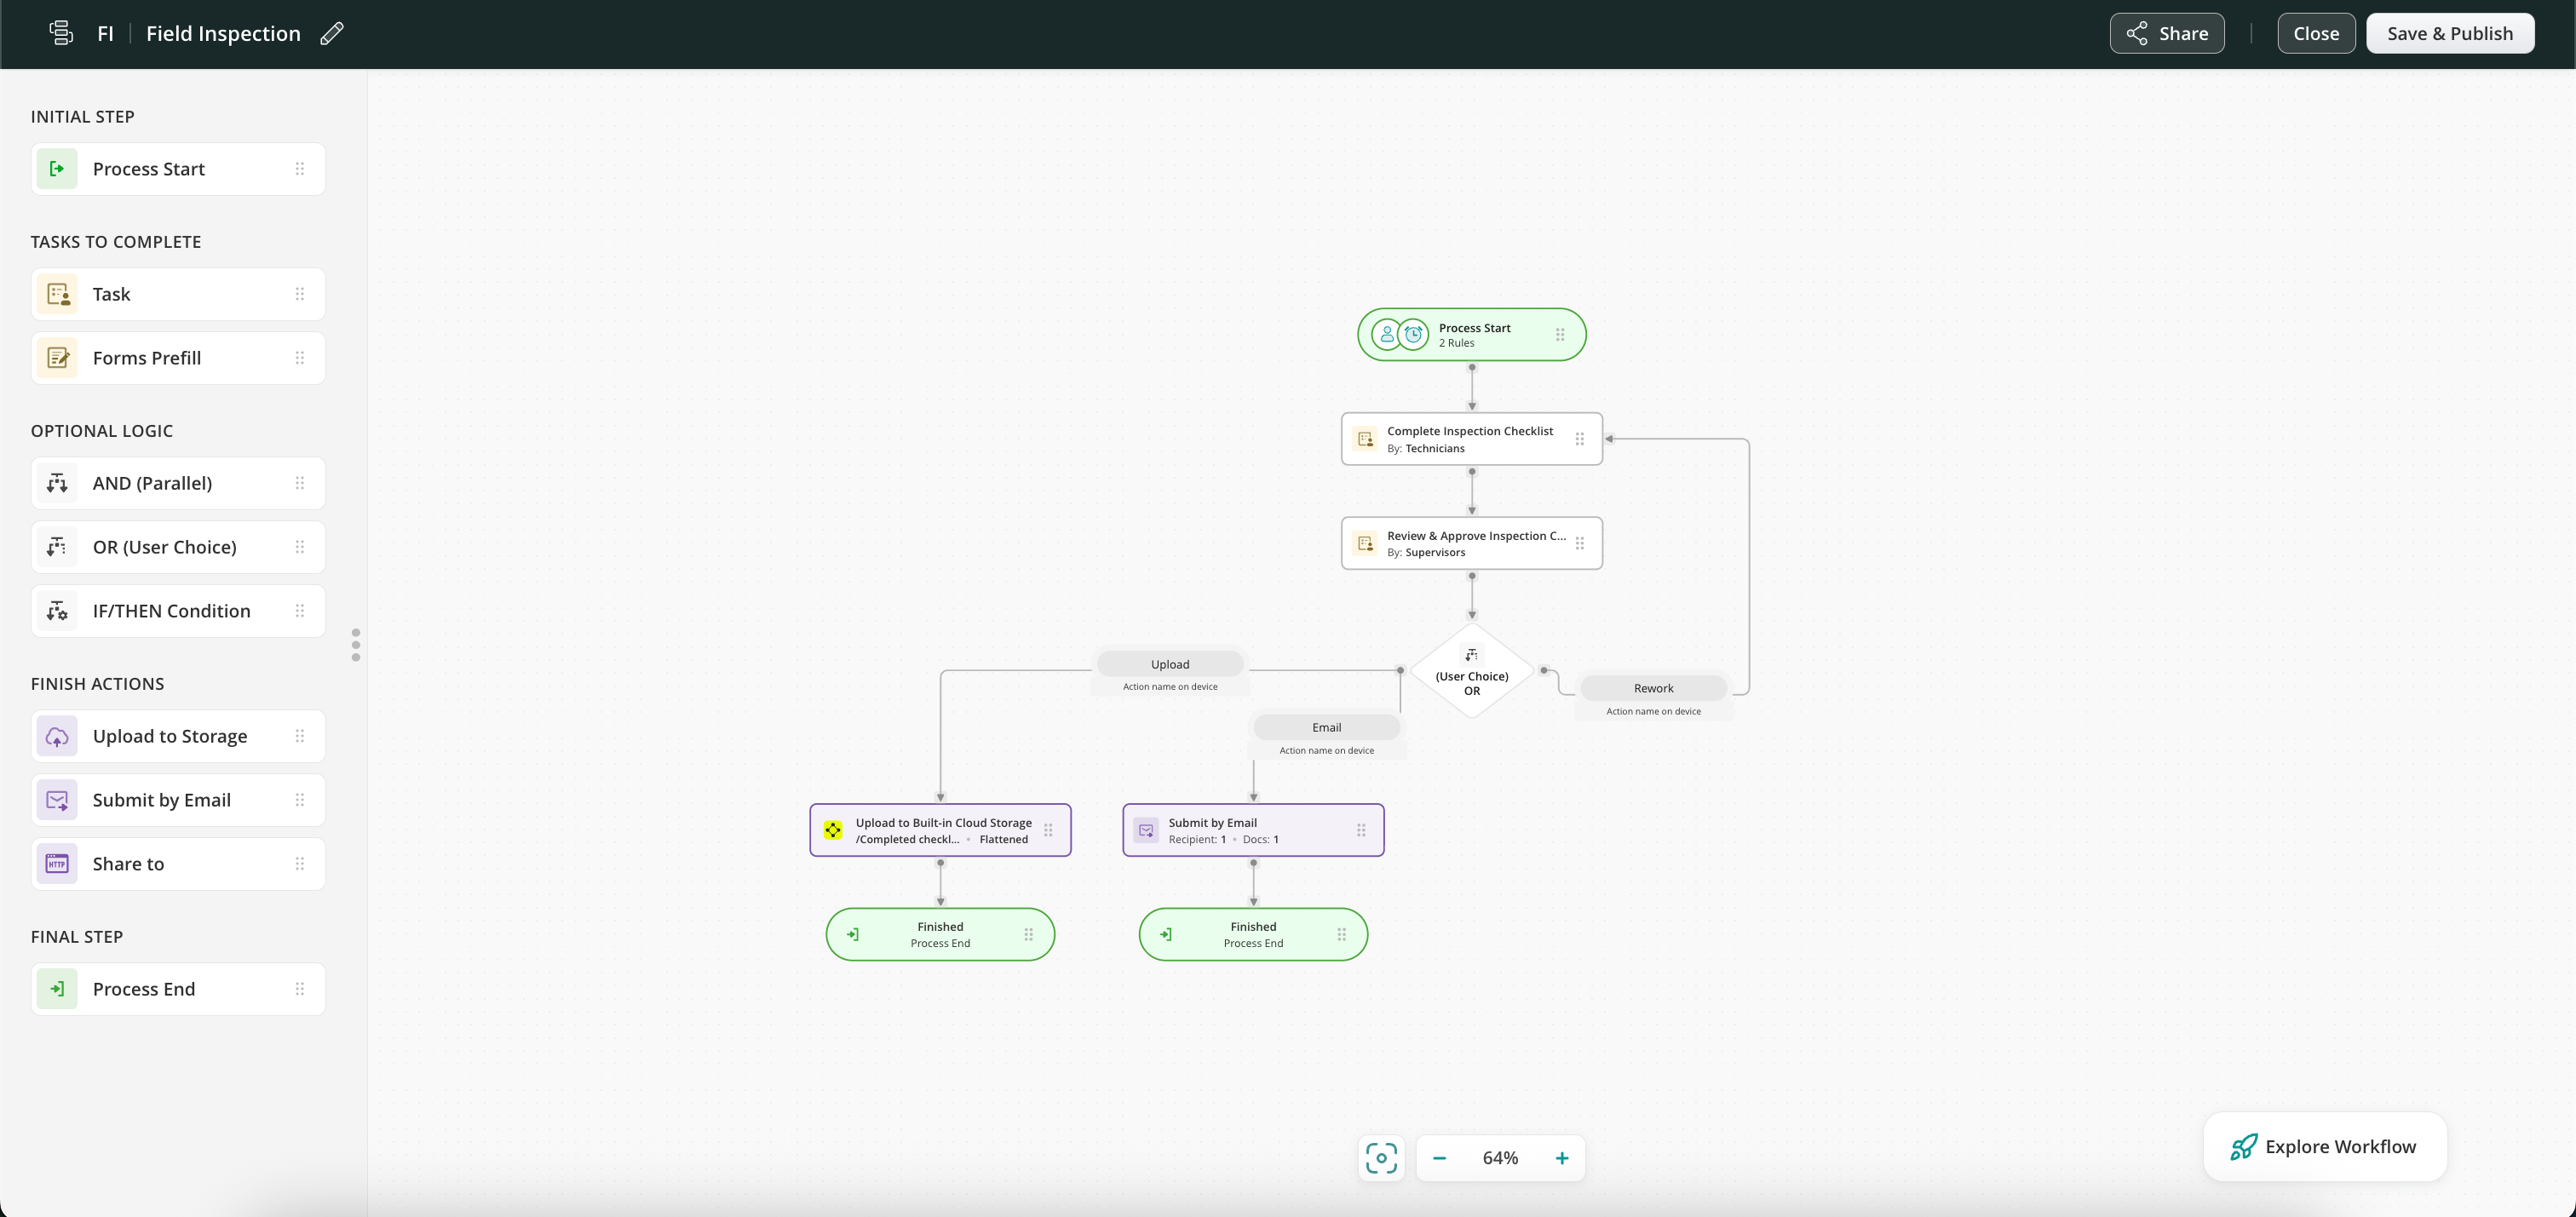
4. Decide where completed forms should go (e.g., Fluix File storage, email, or third-party platforms like Salesforce, Procore, Smartsheet, etc). An example of a ready-to-use workflow is shown below.
5. Save & Publish the workflow.
Step 5 – Test It in the App
1. Make sure you’re assigned to the workflow group.
2. Open the Fluix app (iOS, Android, or Web).
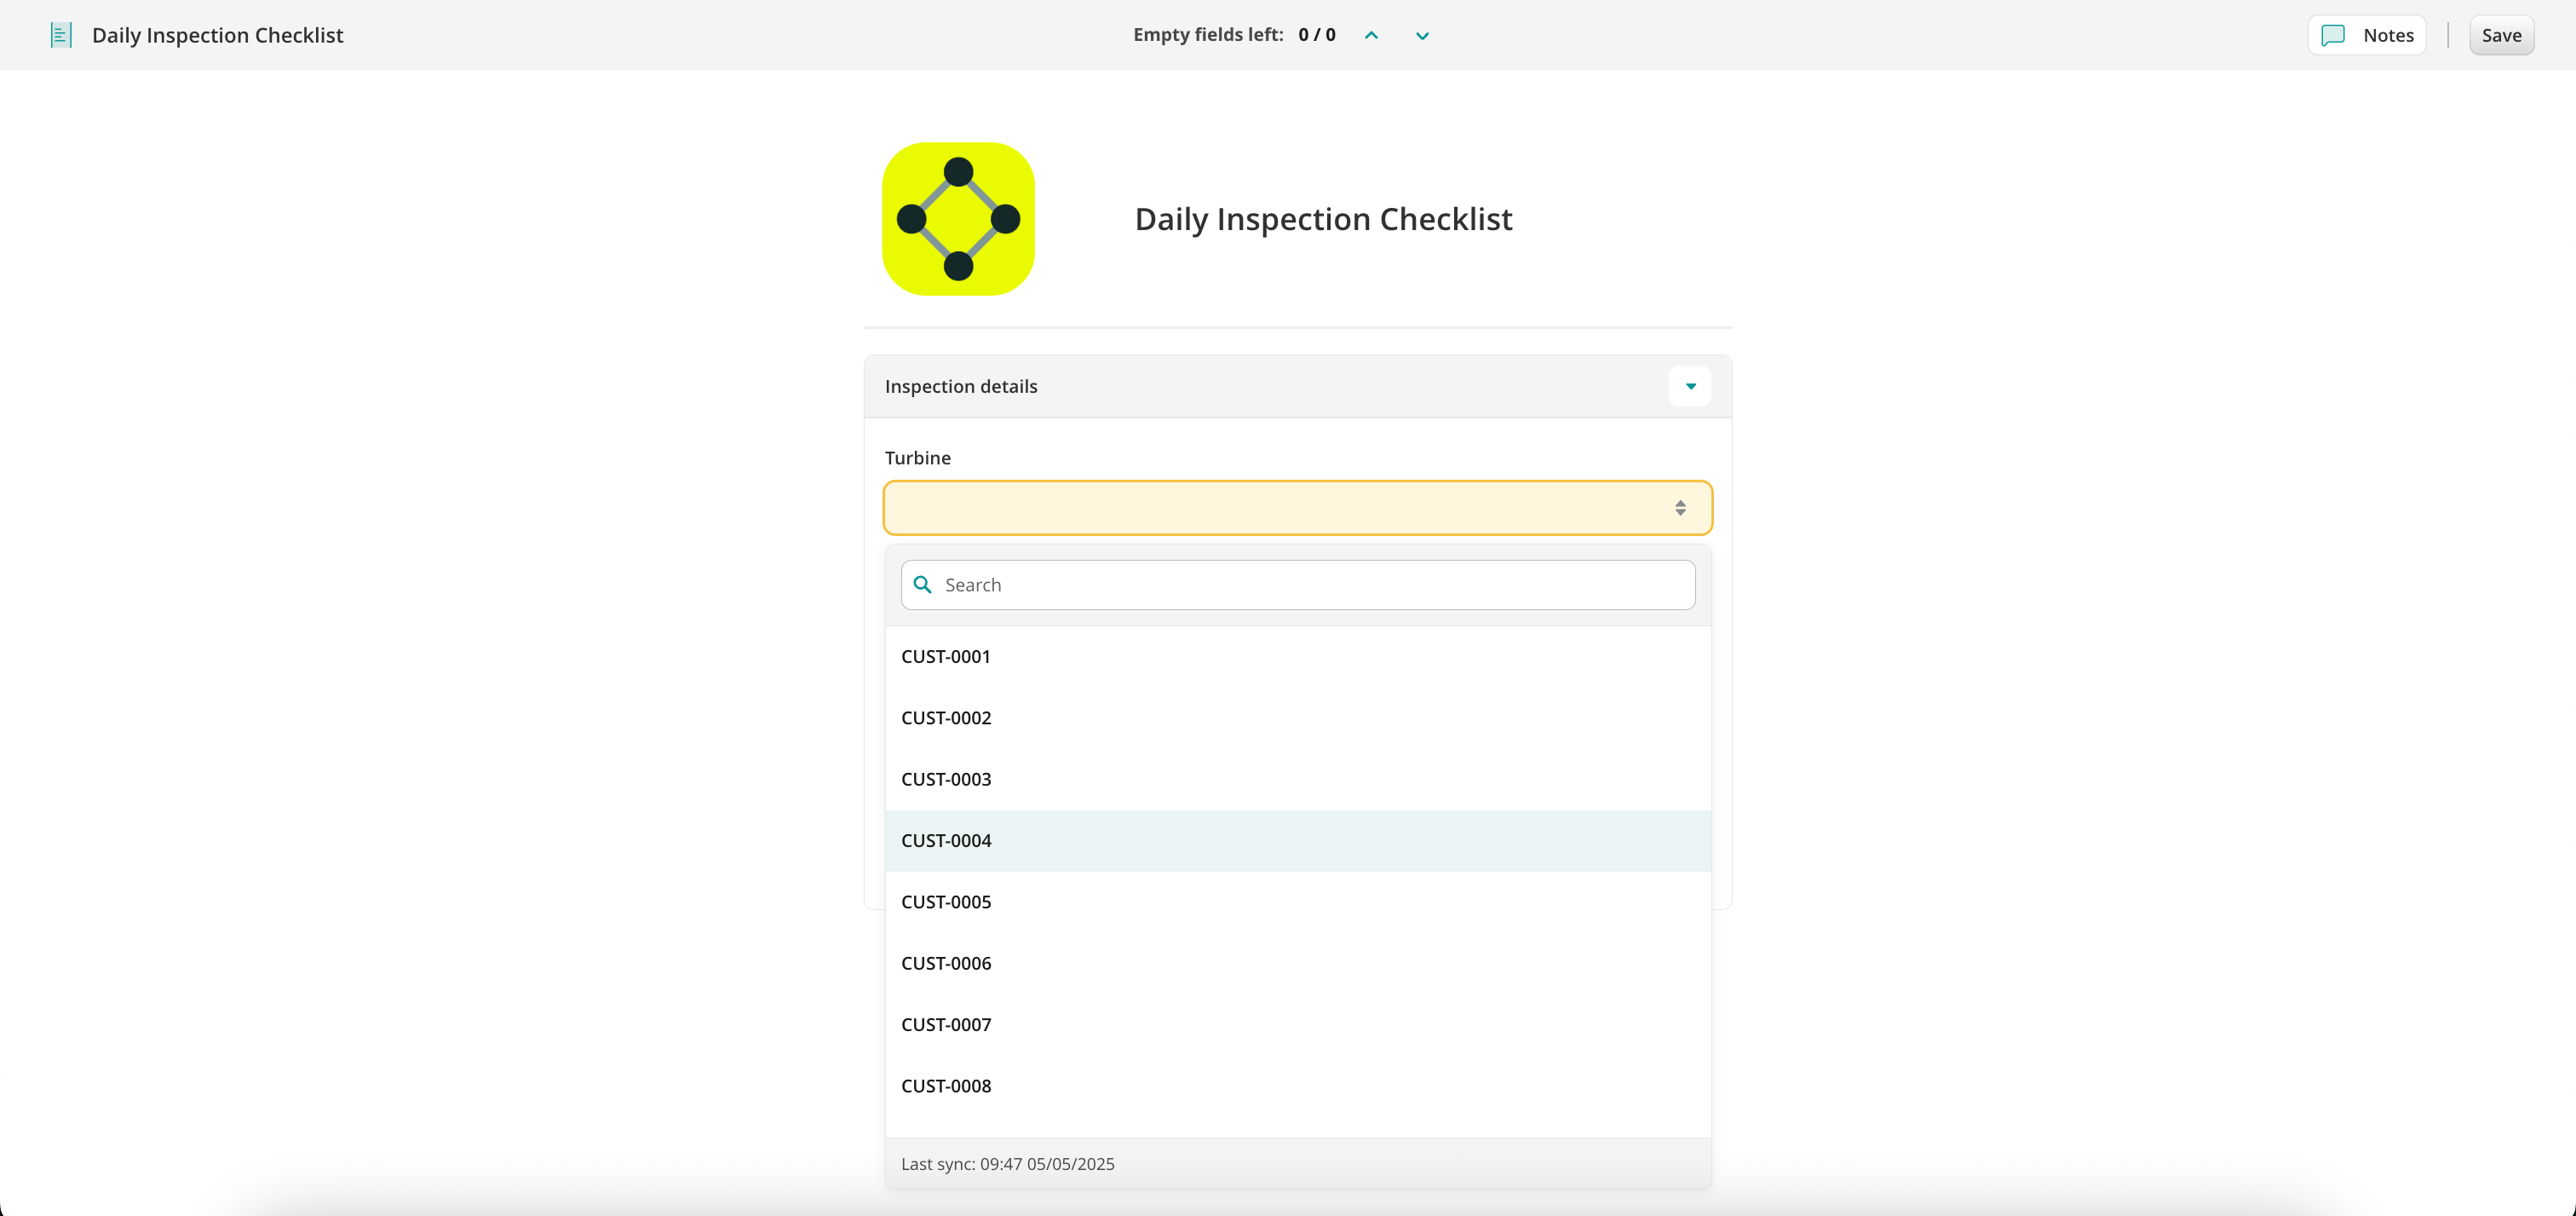
3. Start the task and open the form.
4. Tap the dropdown field—you should now see the prefilled asset list.
6. Complete and submit the form.
Step 6 – Track the progress of the used Assets
To monitor the assets used and the current status of the related tasks:
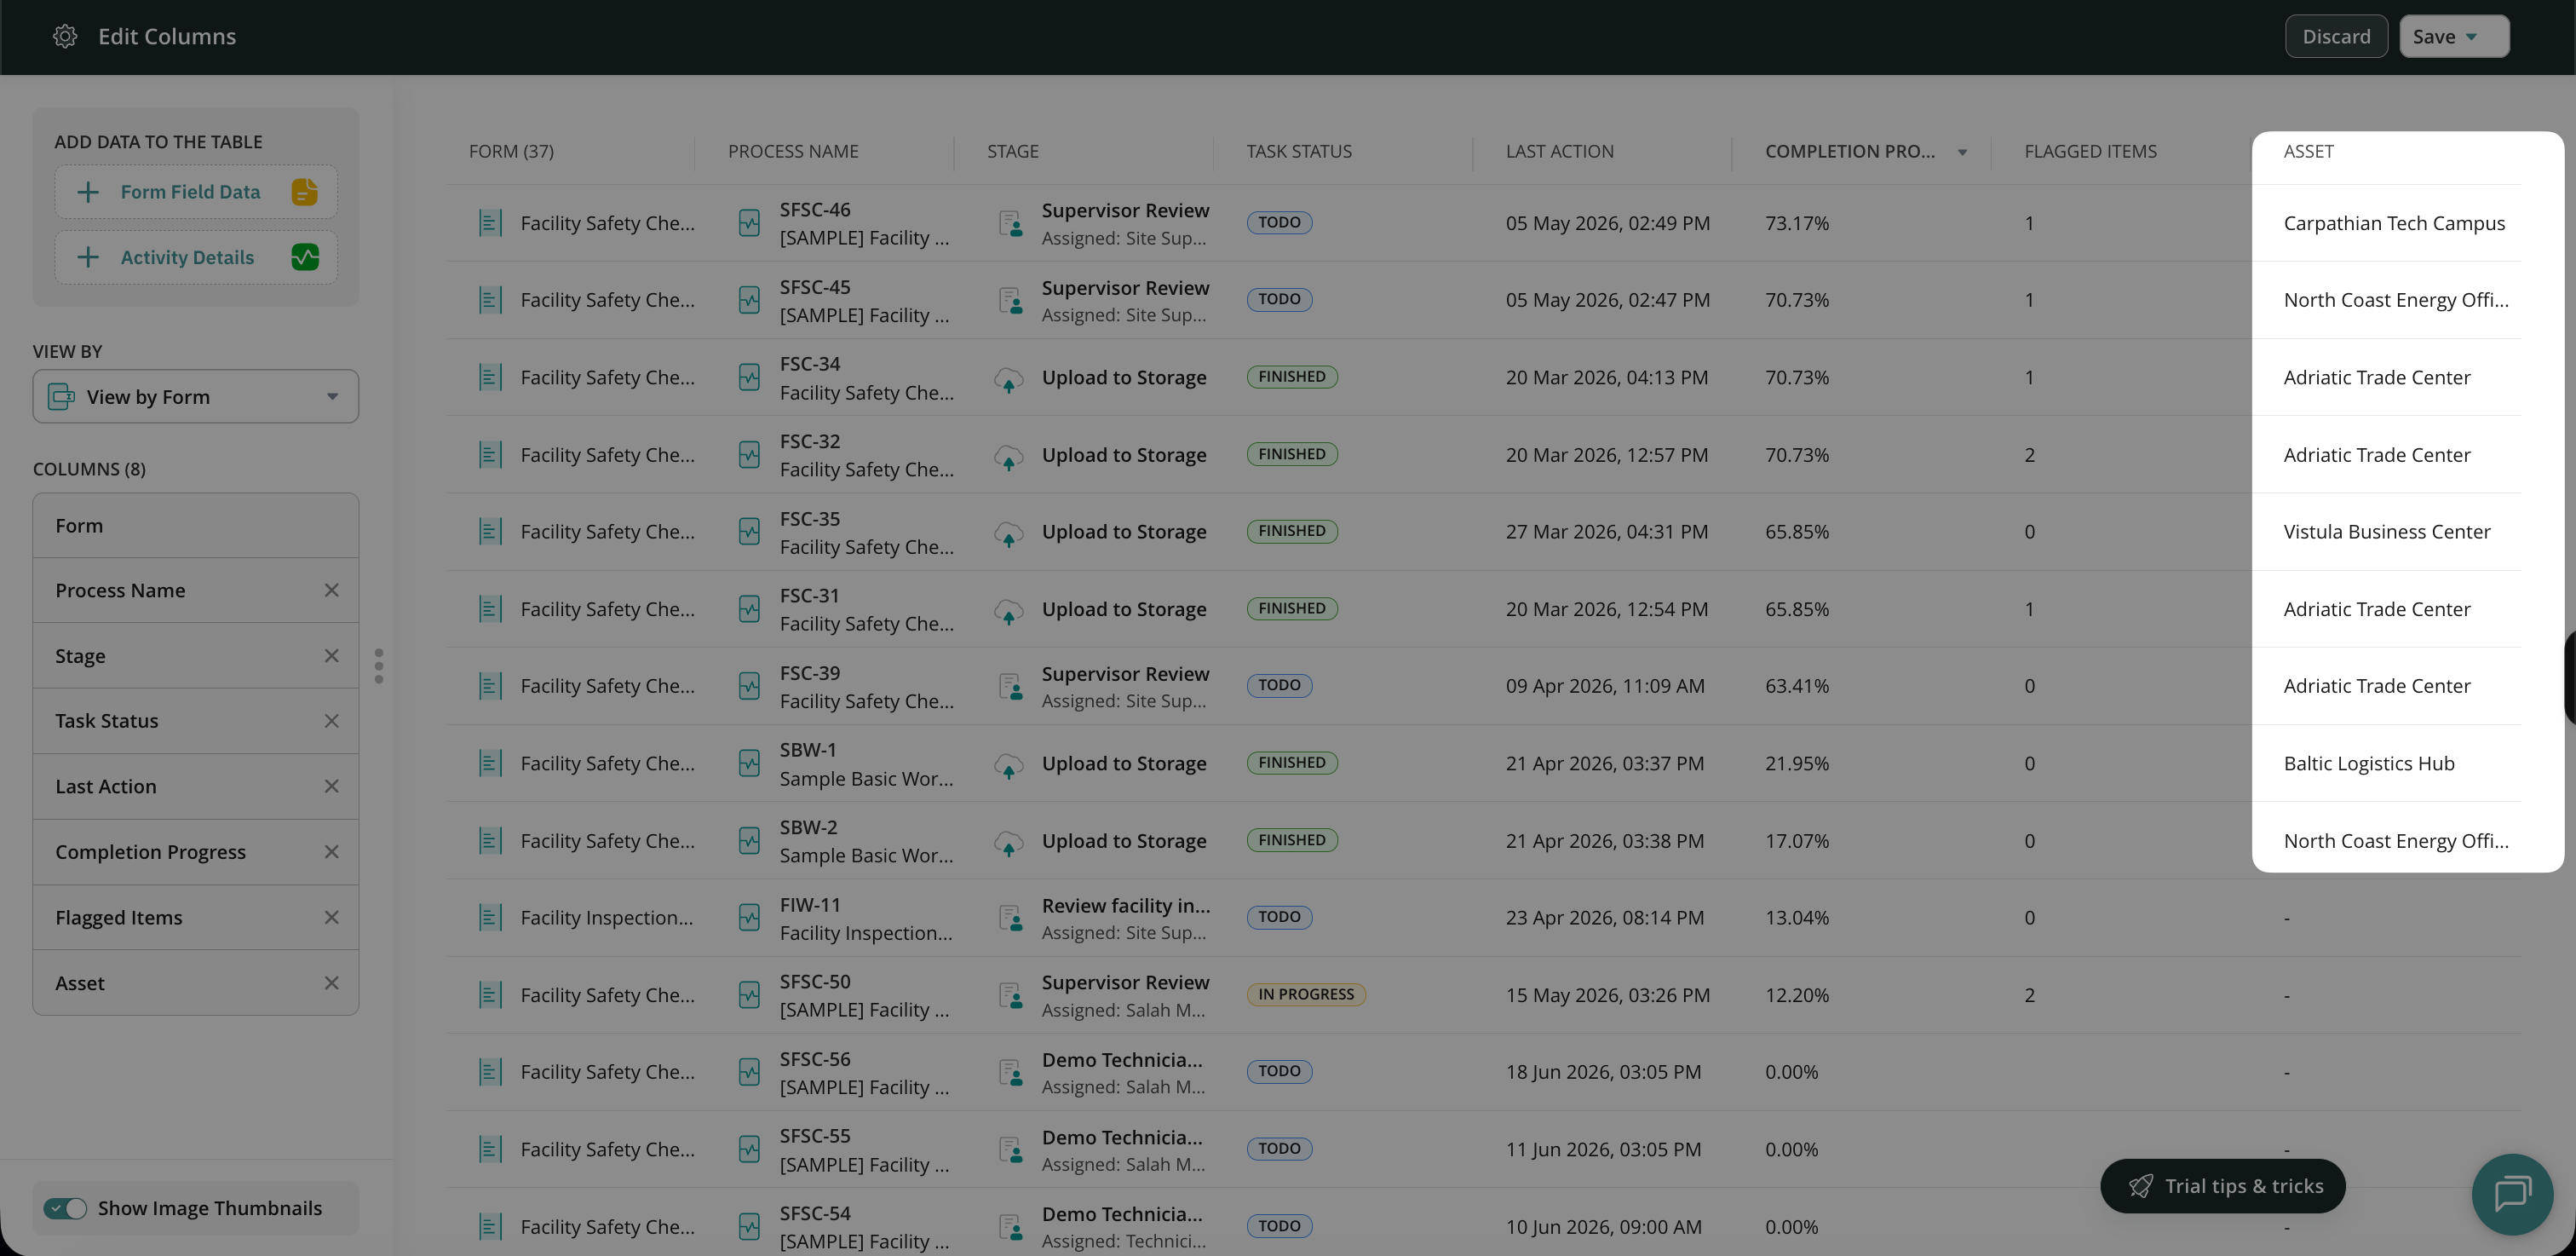
1. Navigate to the Dashboard section.
2. There, you will see a separate column with the used assets.
If you have any questions or experience challenges setting up Assets in your Dynamic forms, contact us at support@fluix.io, and we will assist you shortly.