


Dynamic forms in Fluix are mobile-friendly and designed to adapt to user input. You can set conditions so that specific fields appear, become required, read-only, or hidden based on what users select in the form. With unlimited photo uploads, users can attach as many images as needed for each task, without predefining a fixed number of image fields as an admin.
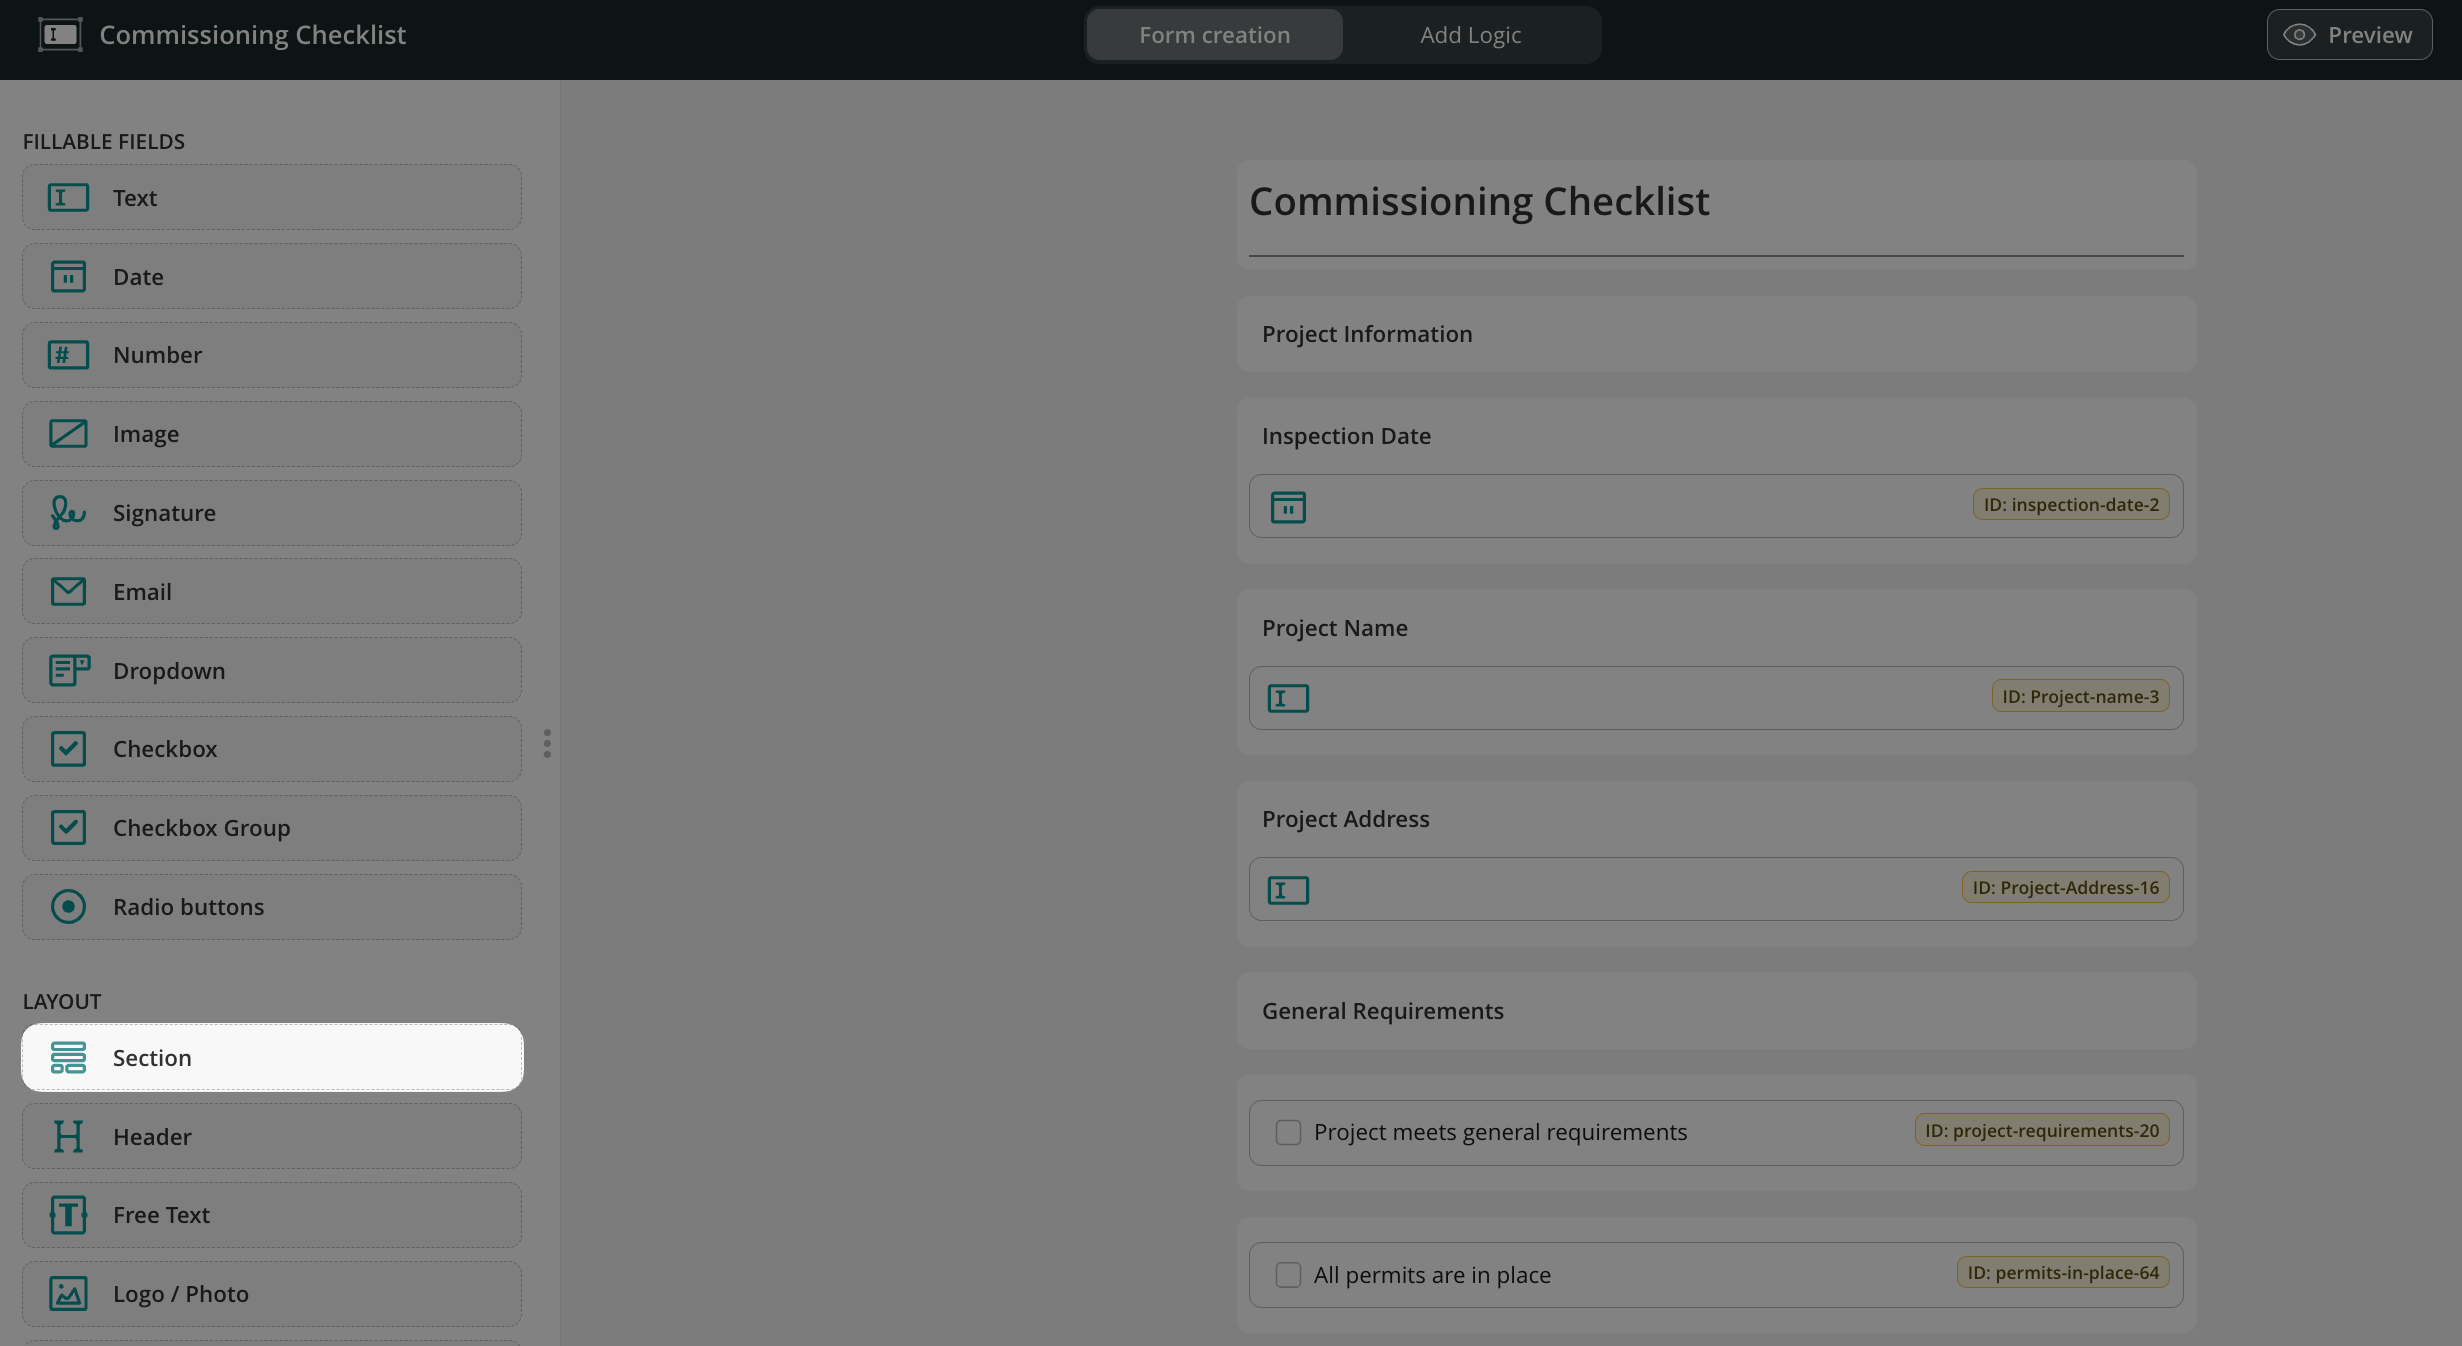
To create a dynamic form, navigate to the Admin tab -> Process Setup -> Forms, and click Create Form. On the left, click Start from Scratch, select Dynamic View in the opened window, and name your form.
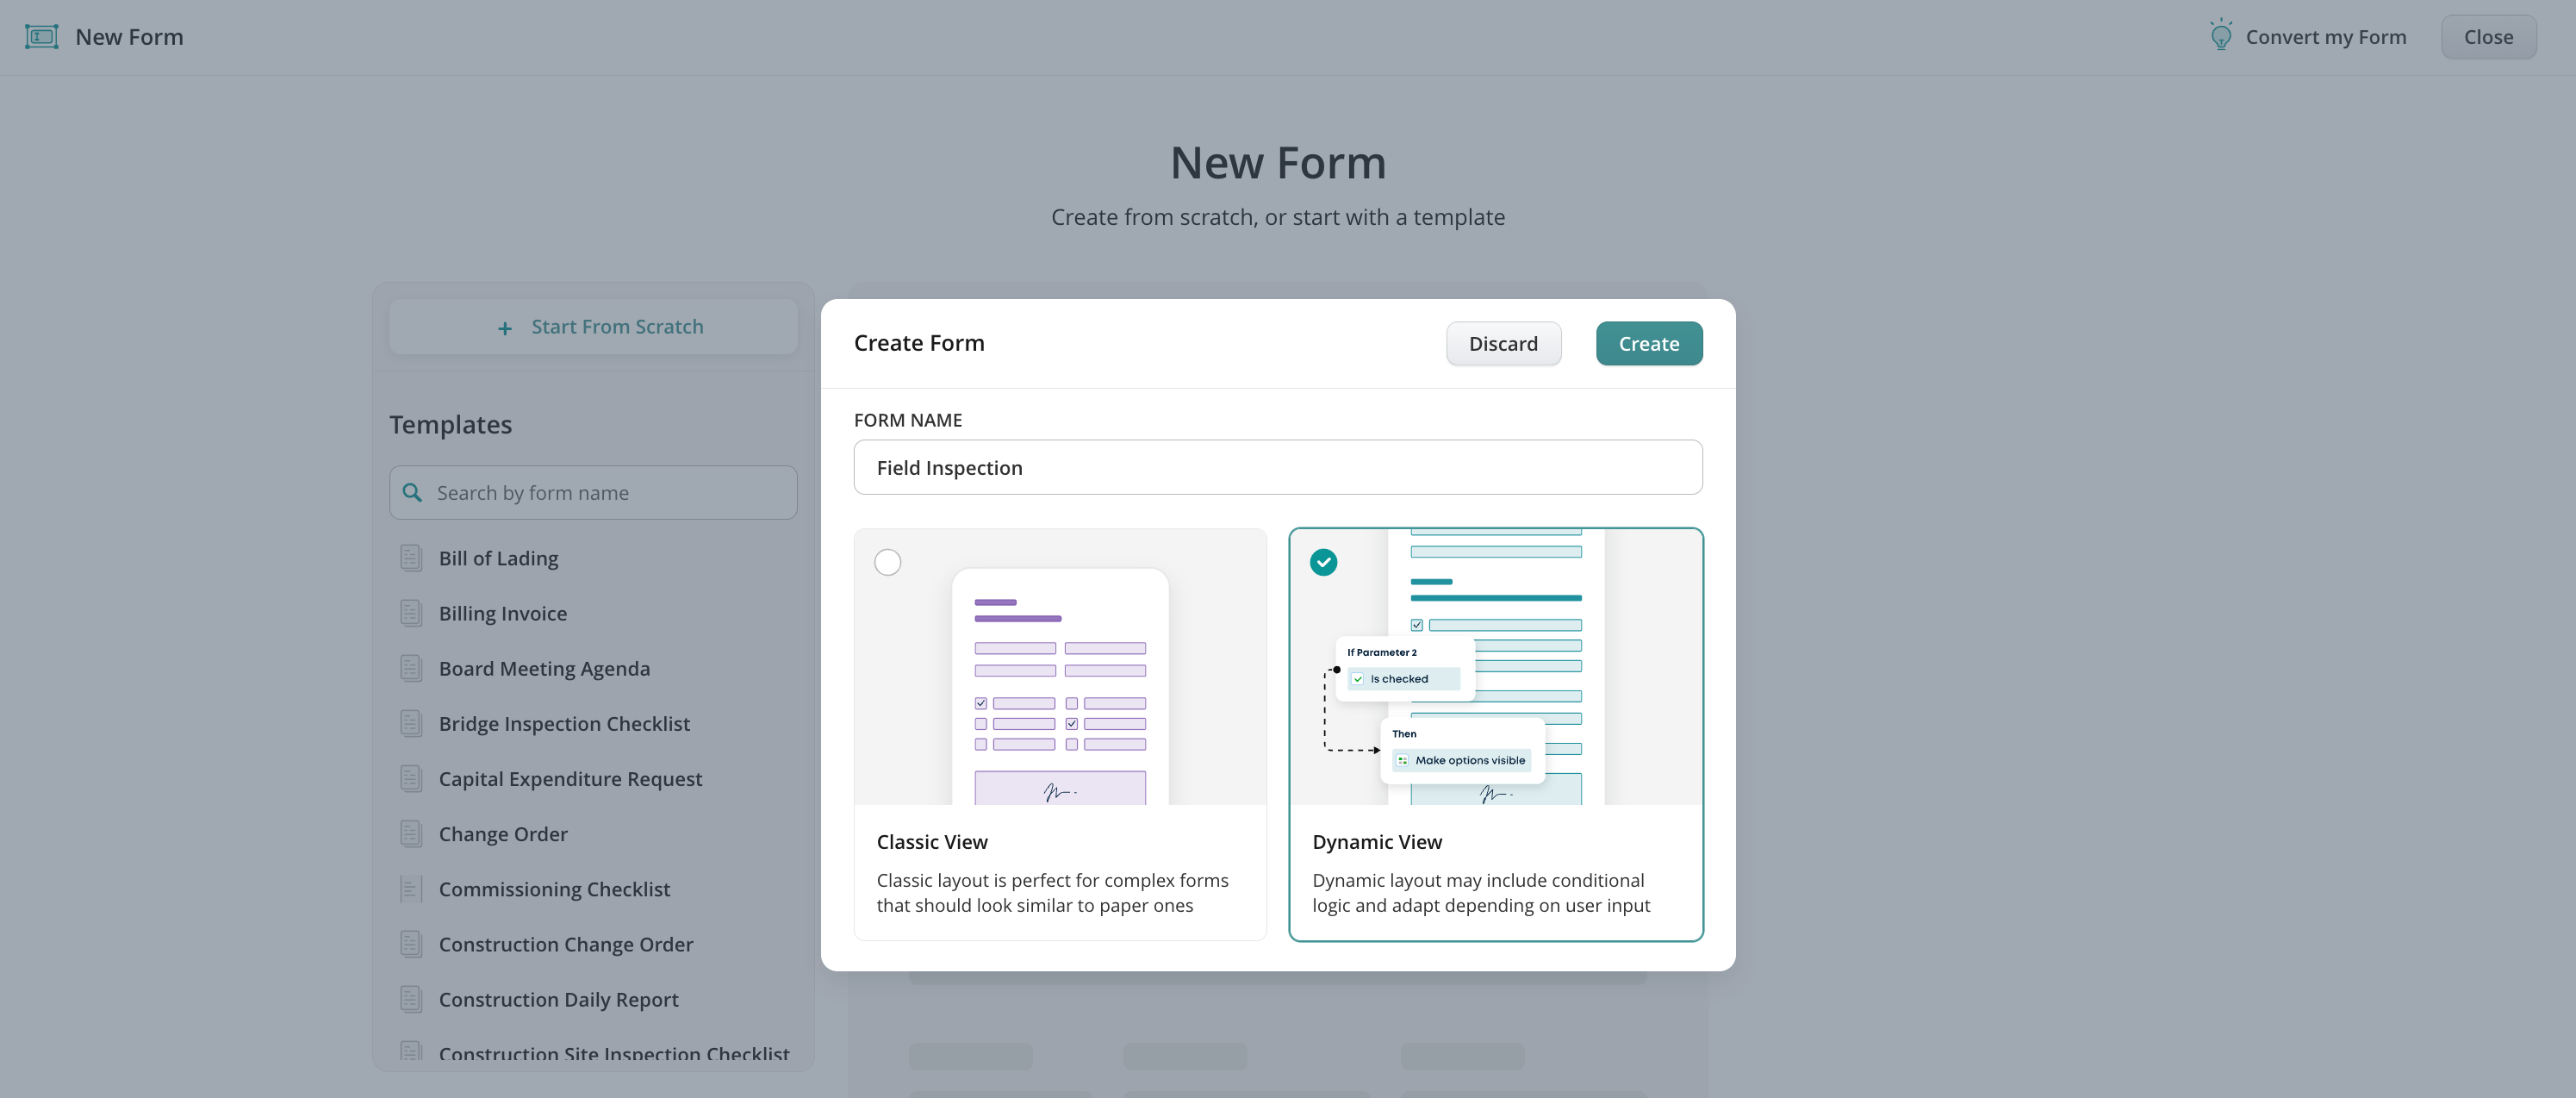
The Dynamic Form Builder works similarly to the classic one but offers more flexibility. It allows you to configure advanced settings for each field, such as applying conditional logic to show, hide, or change field behavior based on user input.
In the upper panel of the Dynamic Form Builder, there are two tabs:
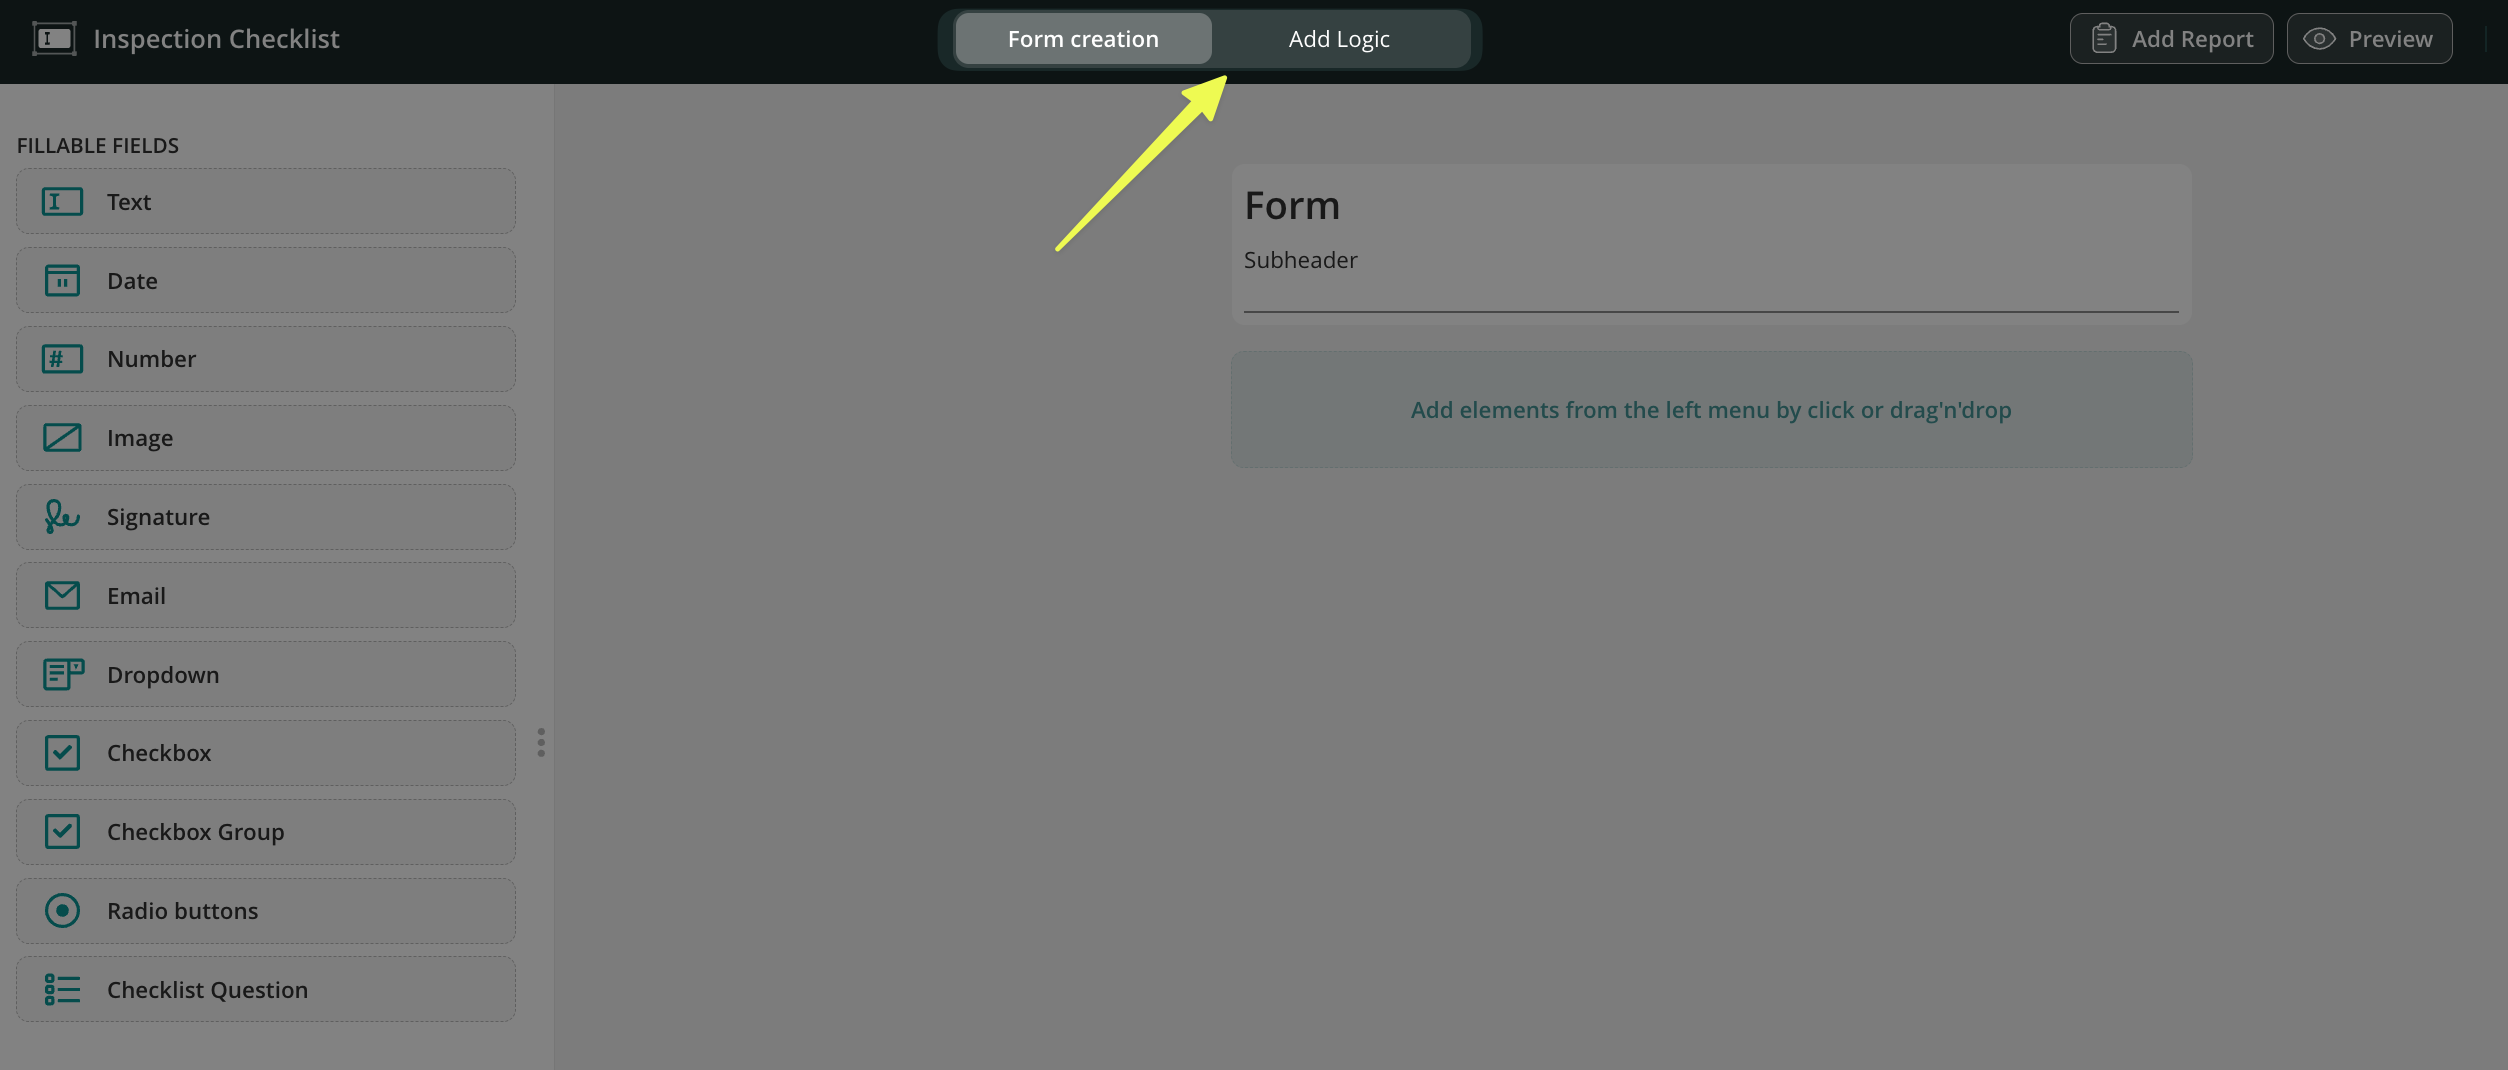
- Form creation tab – displays a menu with a list of elements that can be used to create a form. Click on the element to add it or drag and drop it to the centre to start creating your form.
- Add Logic tab – here you can configure the conditions for fields in the form to make them required, read-only, and hidden dynamically based on the options the users select in the form.
In the upper-right panel, you will see the Add Report tab. Here, you can configure the generation of reports from completed checklists, eliminating the need for manual copying and pasting, as well as double data entry.
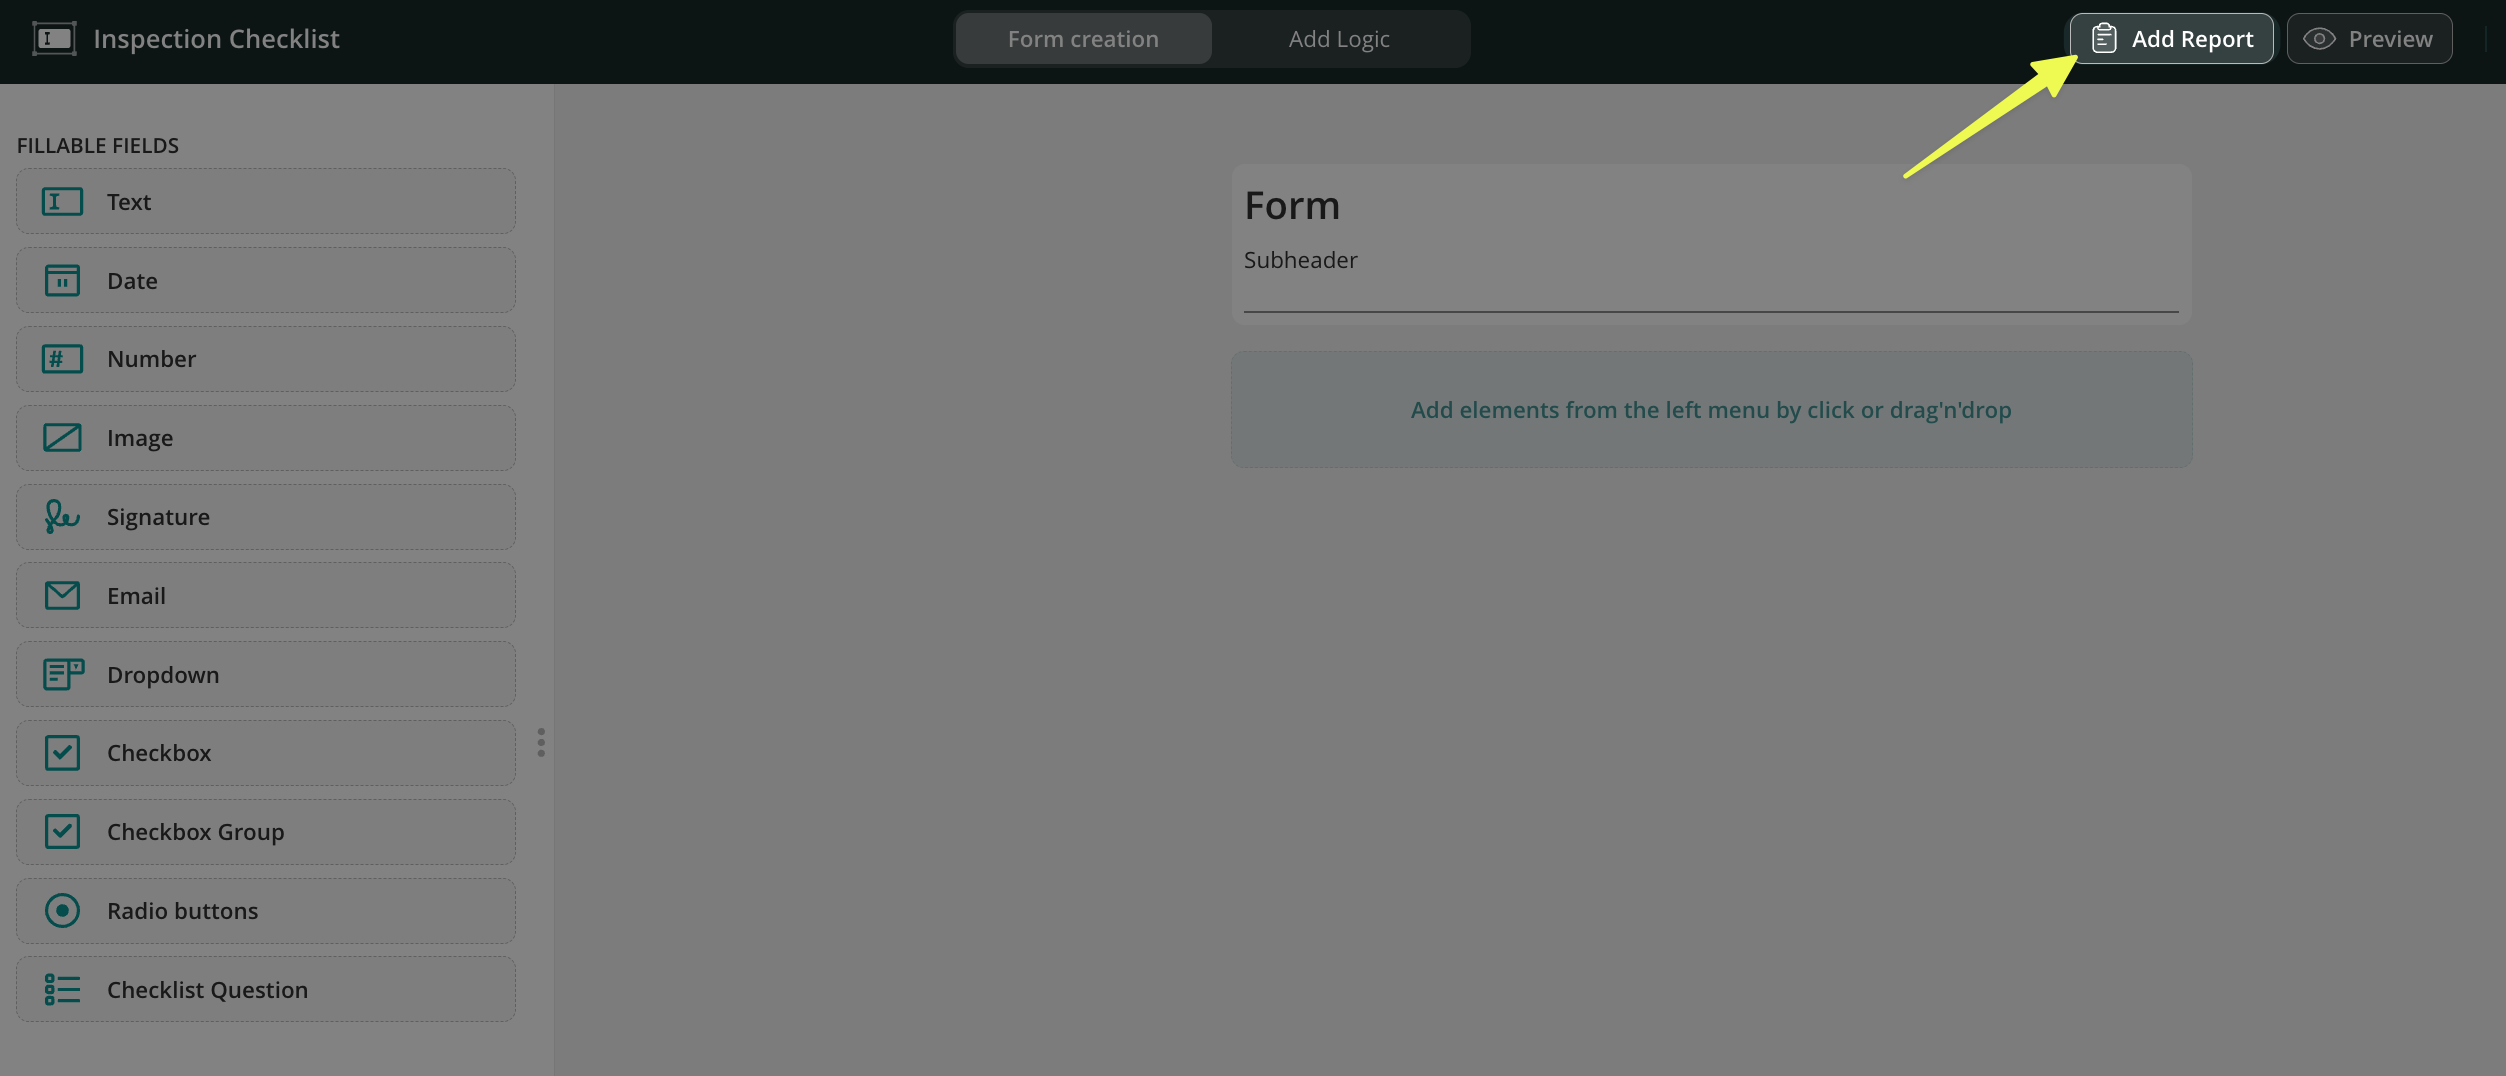
Note: The Issue report is available starting from the Operations Plan.
To learn more about Issue Report and how it can benefit your business, please check our How to Use Issue Report article.
Menu of the form elements
On the left, you will see a menu with a list of elements that can be used to create a form. Click on the component to add it.
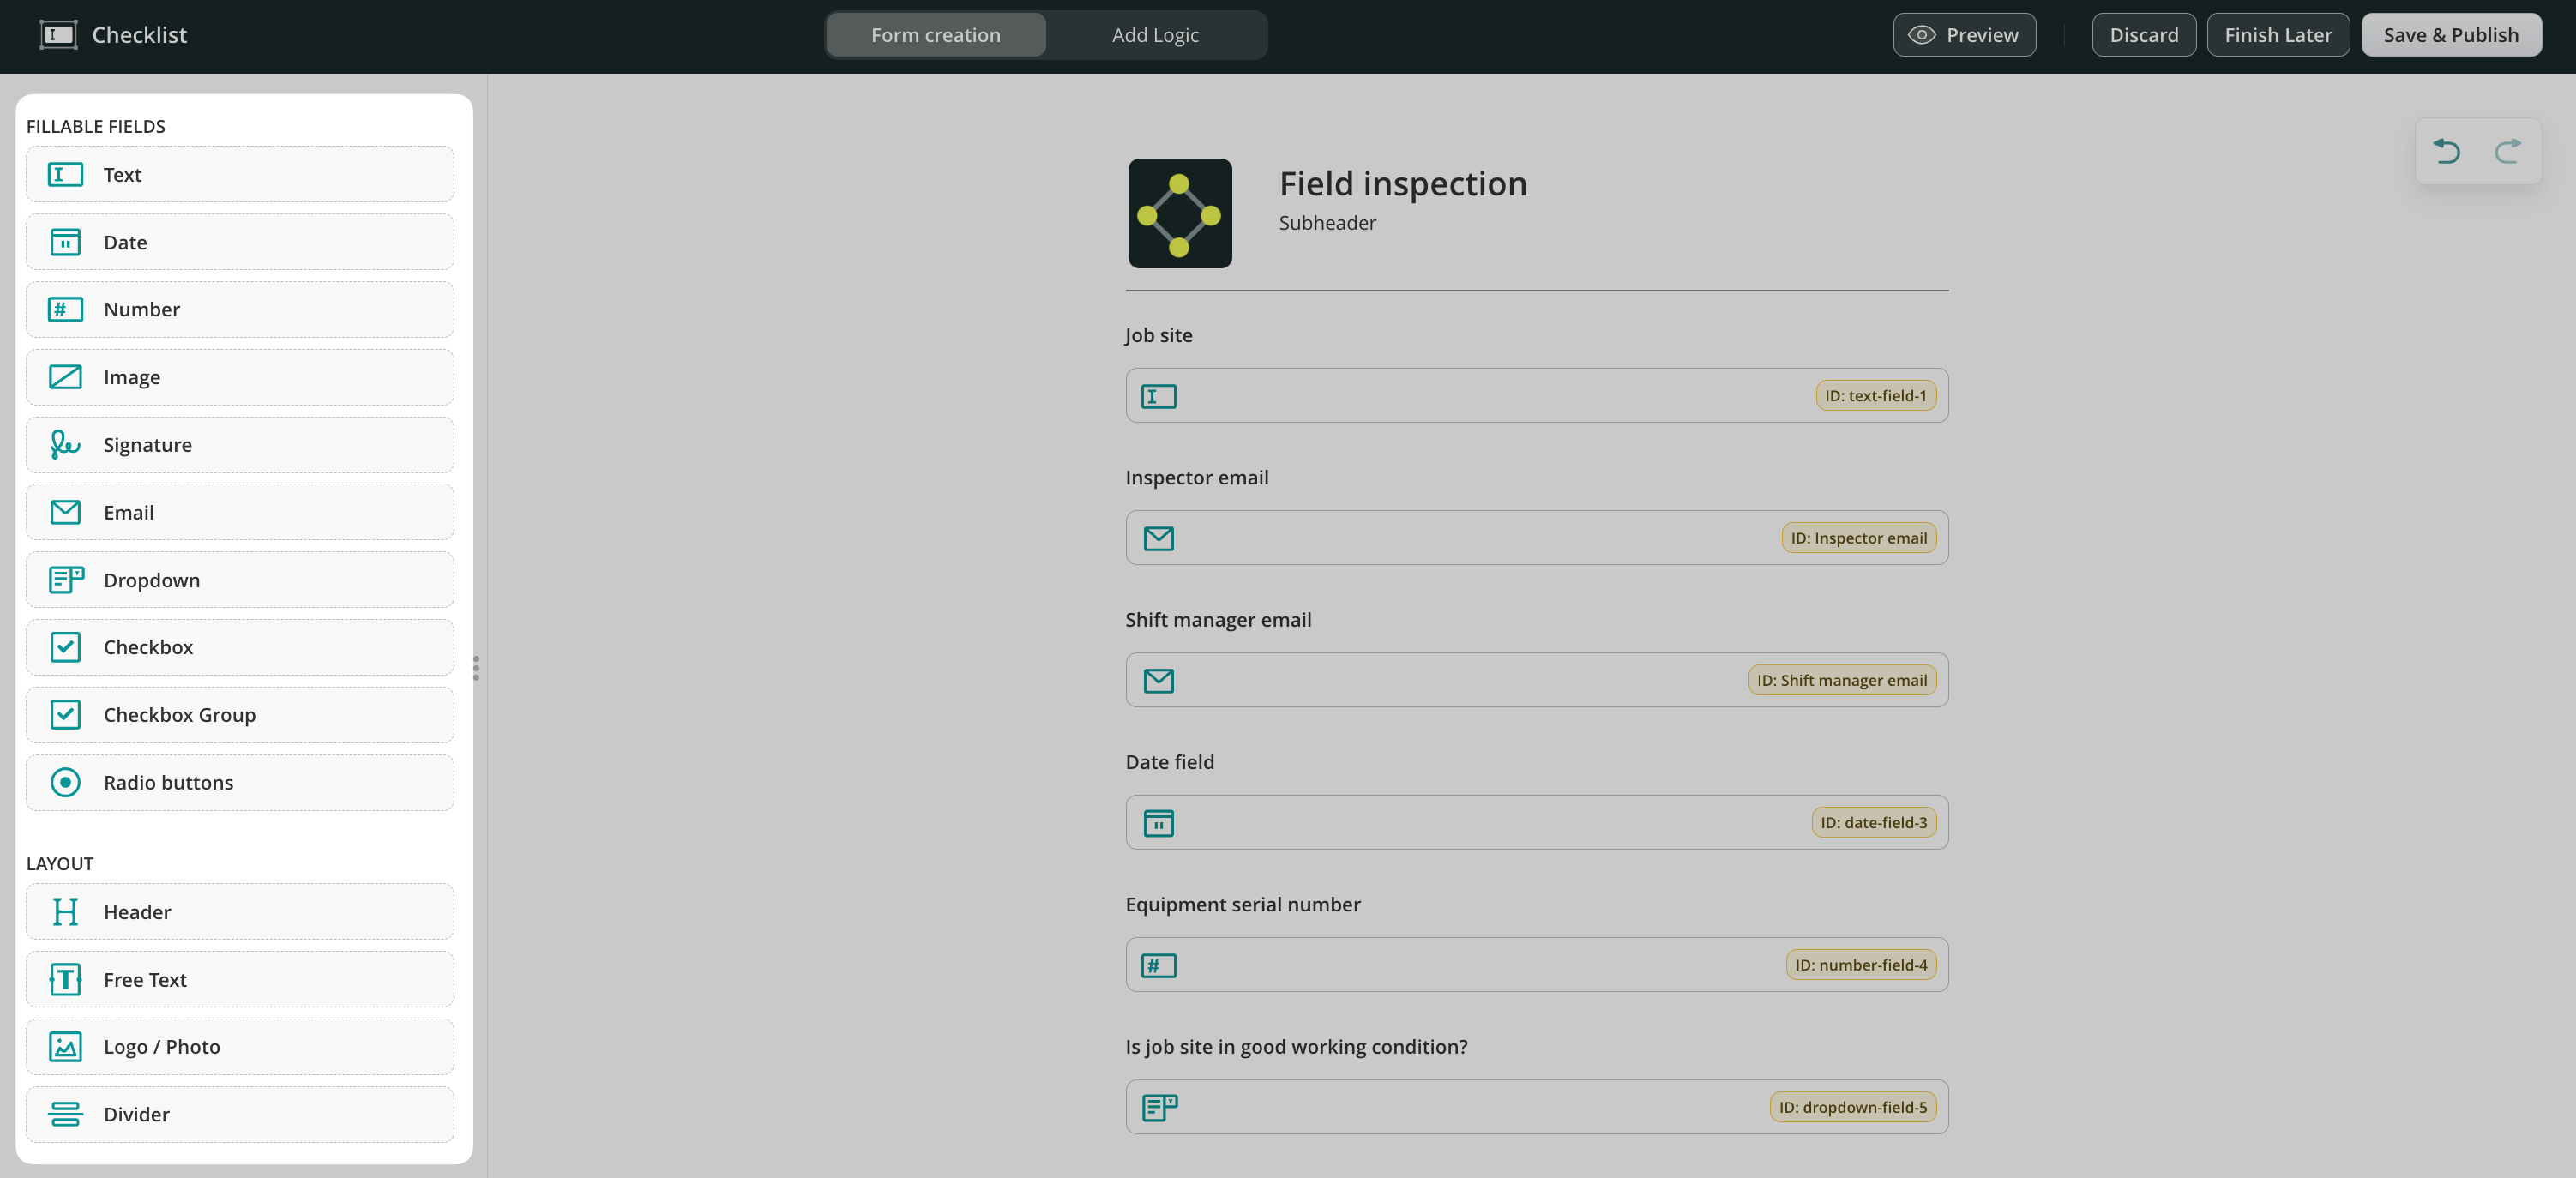
- Fillable fields – the different types of fields to add to the forms to collect the most relevant data.
- Layout – helps you customize your forms by adding a header, text, your company’s logo, and a divider.
The Section element makes dynamic form building more efficient by organizing repeated fields, supporting conditional logic, and improving usability in long forms. Instead of recreating the same fields, you can create one section and duplicate it anywhere in the form, ideal for repeating checklists like room inspections. This approach keeps forms easy to navigate by collapsing completed sections to reduce scrolling.
Learn more about building and managing sections in the Using sections in dynamic forms article.
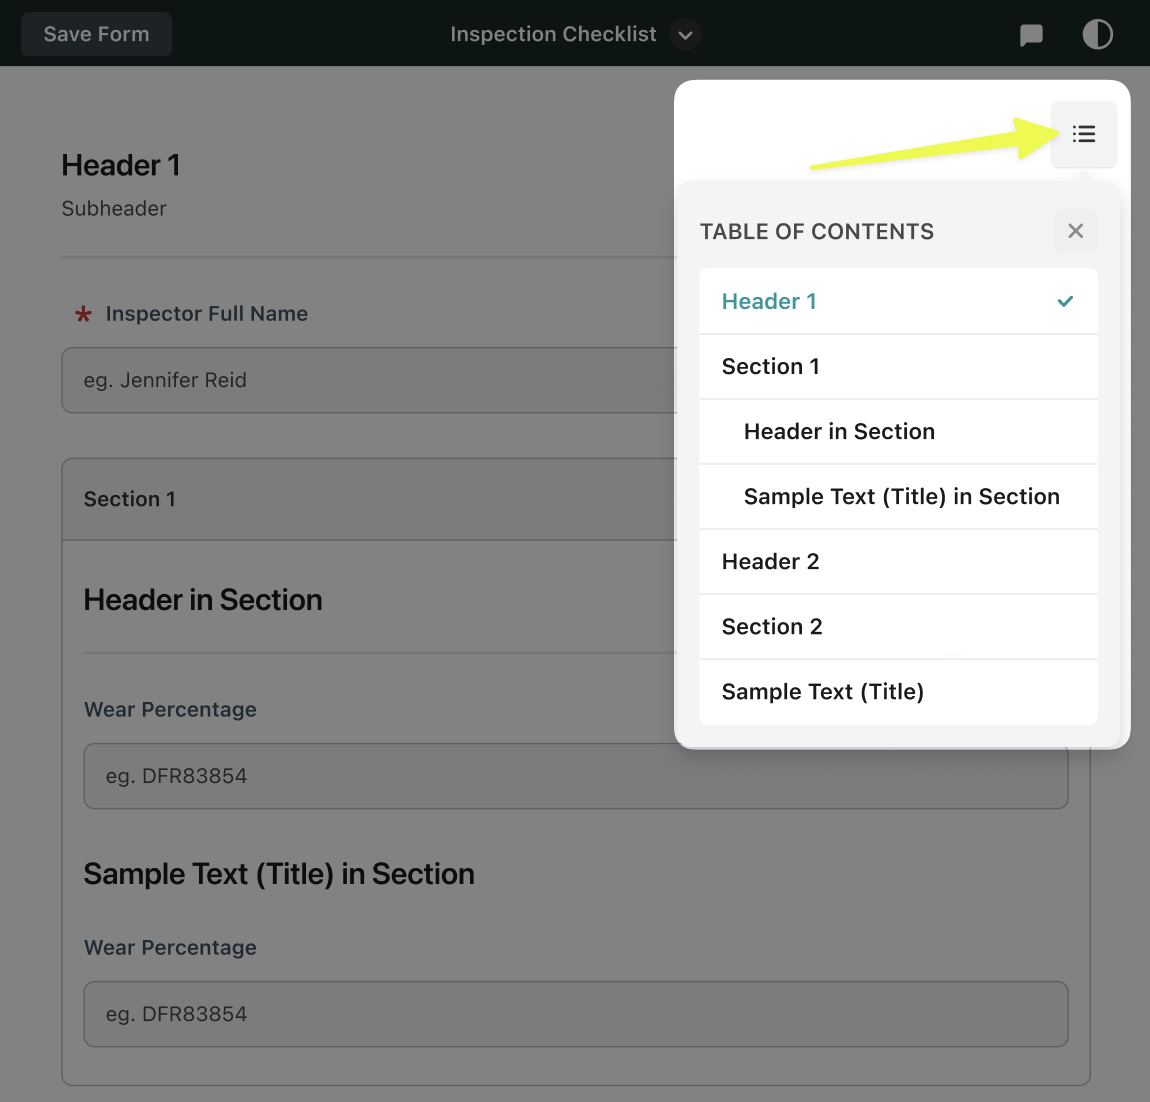
When working with long dynamic forms, it can be challenging to quickly locate the section you need. The Table of Contents helps by providing fast navigation to specific parts of the form.
The Table of Contents is generated automatically based on the structure of the dynamic forms. It includes the following elements:
- Header
- Section
- Free text (with style: Title)
If a section contains elements inside it, those elements appear indented under the section name. Clicking any item in the Table of Contents takes you directly to that part of the form. Below, you can see how this function will look for the field team in the Fluix Task app:
To learn more about building Dynamic forms from scratch, visit our Feature Tutorial Center.
If you have any questions about setup, contact our team at support@fluix.io, and we’ll be happy to help.