


The Prefill from Data Source feature helps your team simplify form-filling by automatically pulling data from Excel-based databases into the form’s dropdown fields. It’s especially useful when users need to select items from long lists, like locations, customers, or equipment, without manually entering them.
In this tutorial, we’ll show you how to connect your Excel data and use it to prefill dropdowns and related fields in Fluix forms.
Note: Prefill from Data Source functionality is available starting from Pro Pricing Plan.
What does this feature do?
With Prefill from Data Source, you can:
- Connect an Excel file to Fluix and make its data available in your forms for your field teams
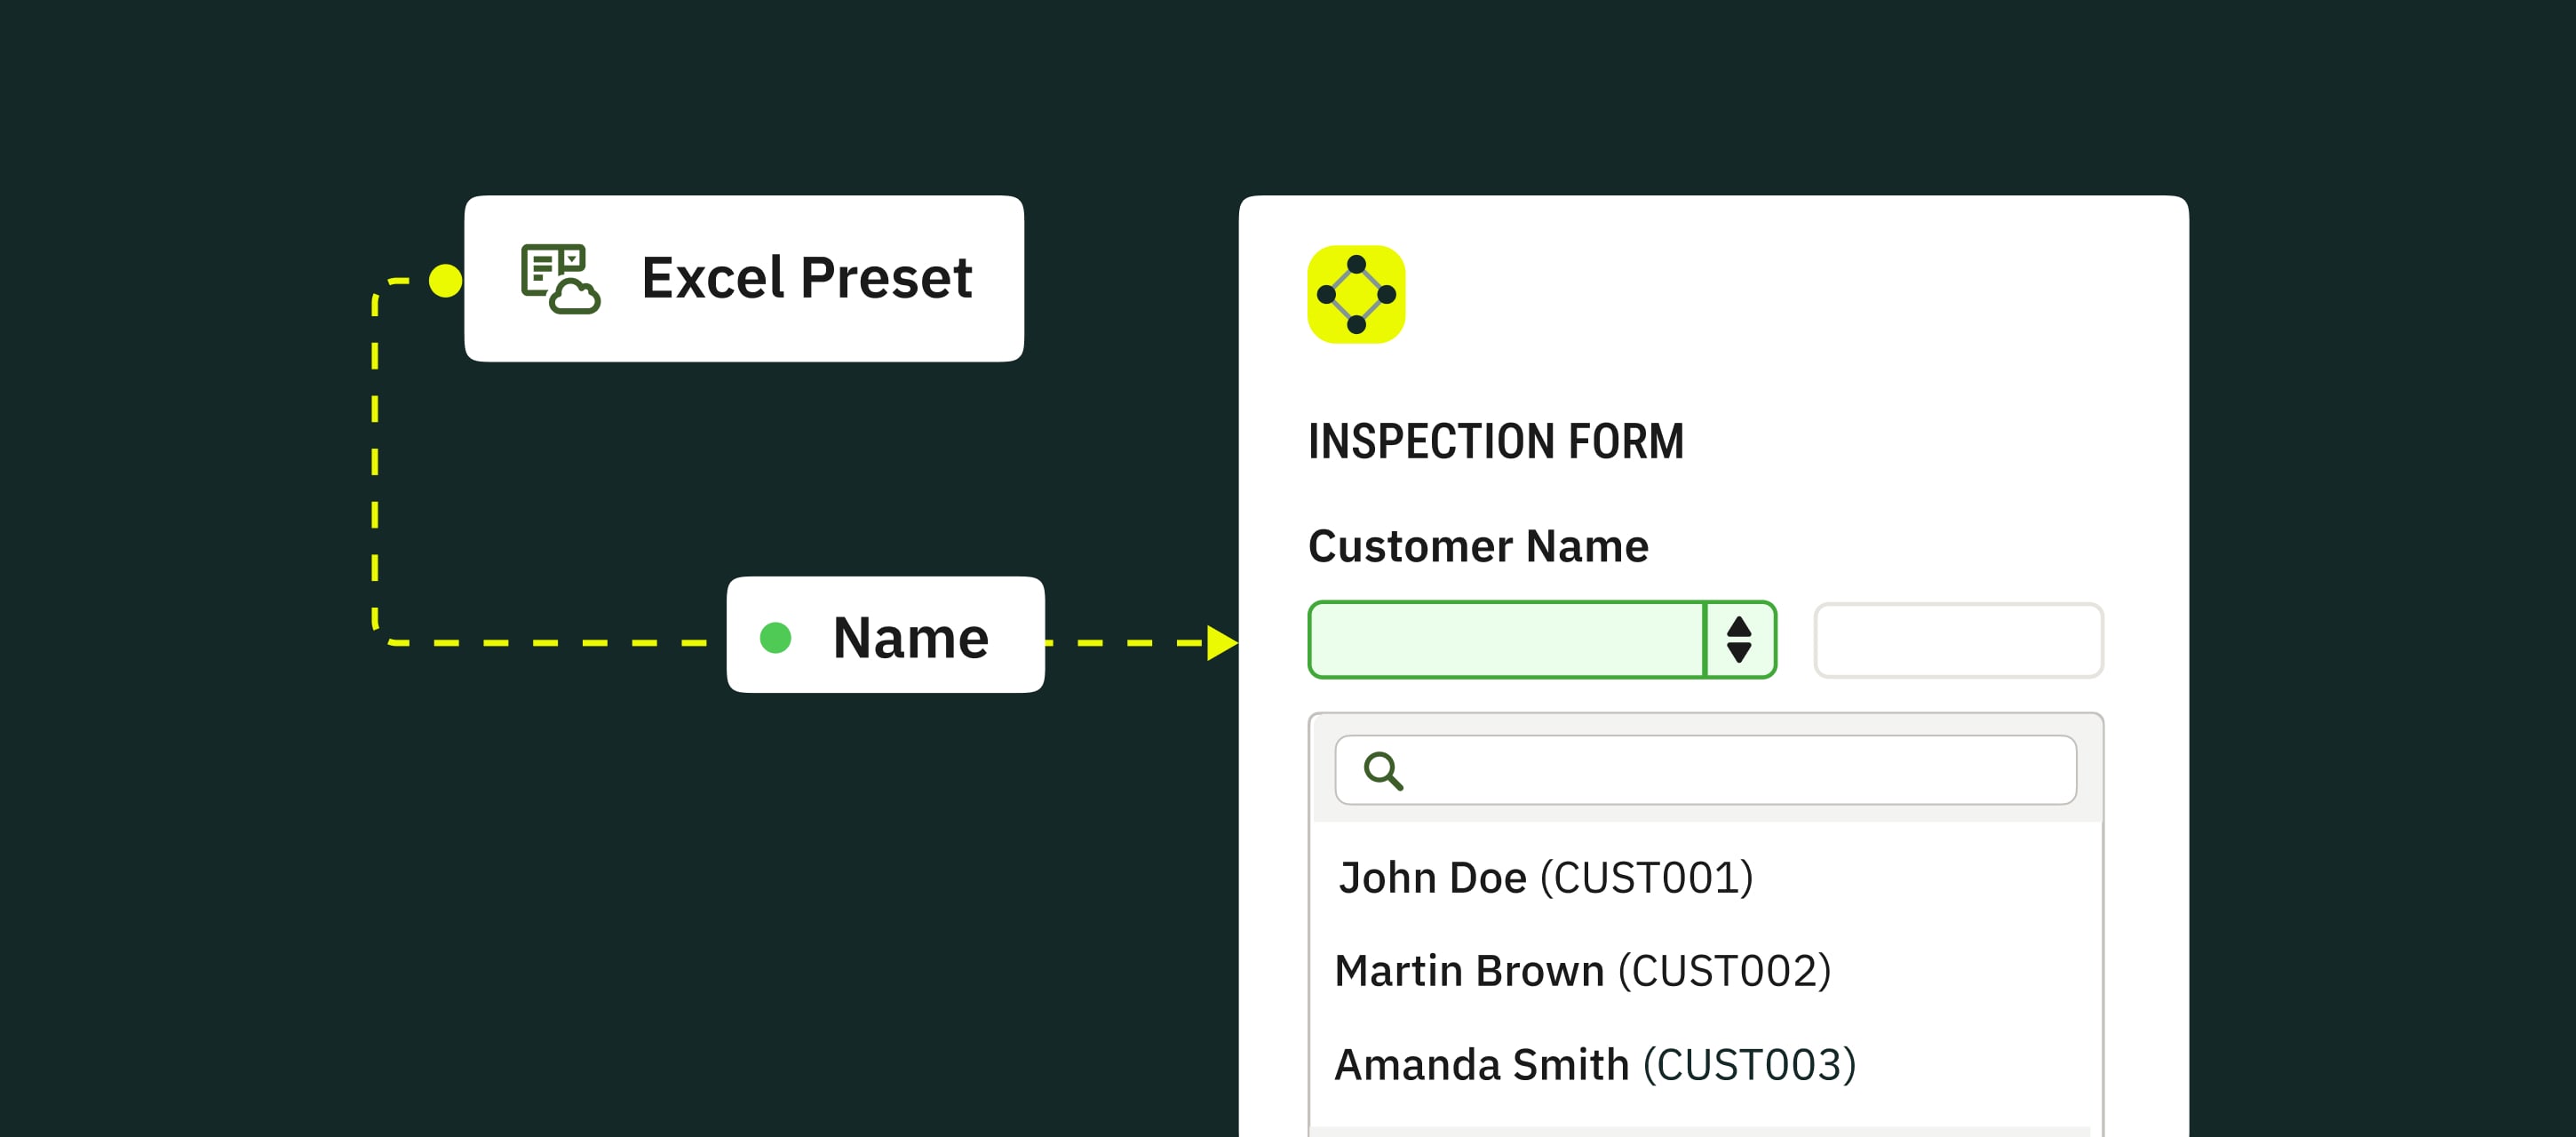
- Automatically fill related fields based on the selected option
- Let your field teams select values (like locations) from a live dropdown list
- Make sure your forms always show the most current data
- Minimize manual data entry and the risk of outdated info
Use Case Example
If you manage inspections across different locations and store details like addresses and contacts in an Excel file, keeping that data updated in multiple forms can be a hassle, especially when different teams use slightly different versions.
With Prefill from Data Source, you can upload your Excel file once and link it to your forms. Dropdowns and related fields will auto-fill with the latest data, saving you time and keeping everything consistent across teams.
Step-by-Step Setup
Step 1: Prepare your Excel file
Before uploading your file to Fluix, please:
1. Download your spreadsheet. An example of such a spreadsheet is attached below for your reference: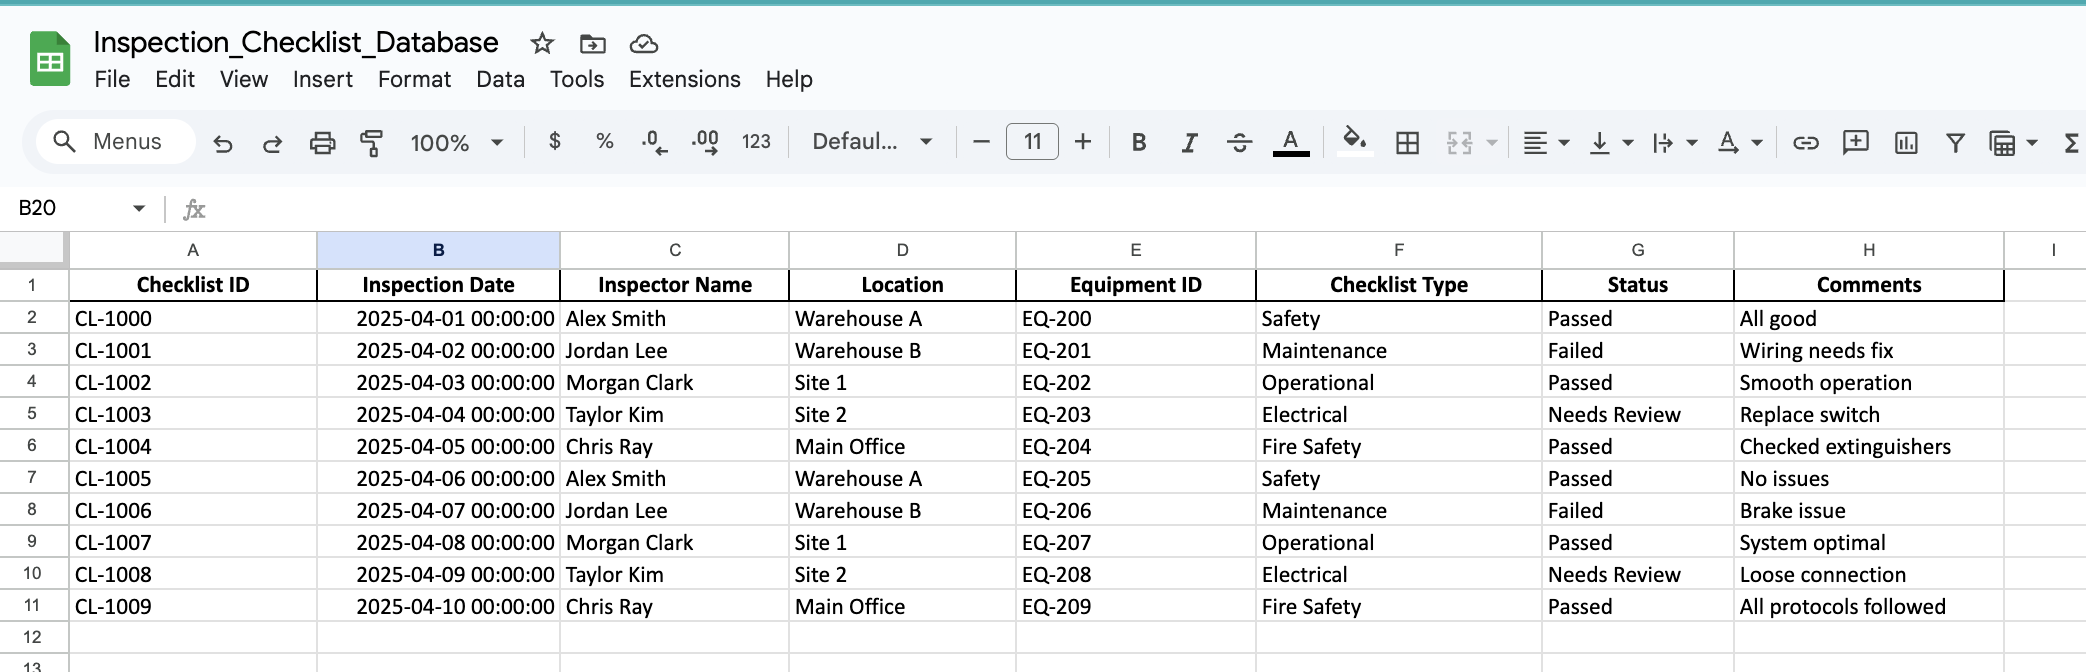
2. Make sure:
- The first row contains column headers.
- All rows have the same number of columns.
- Column names are unique.
- The ID column (if used) contains only unique values.
- The file size is no more than 50 MB.
Step 2: Upload your file to Fluix
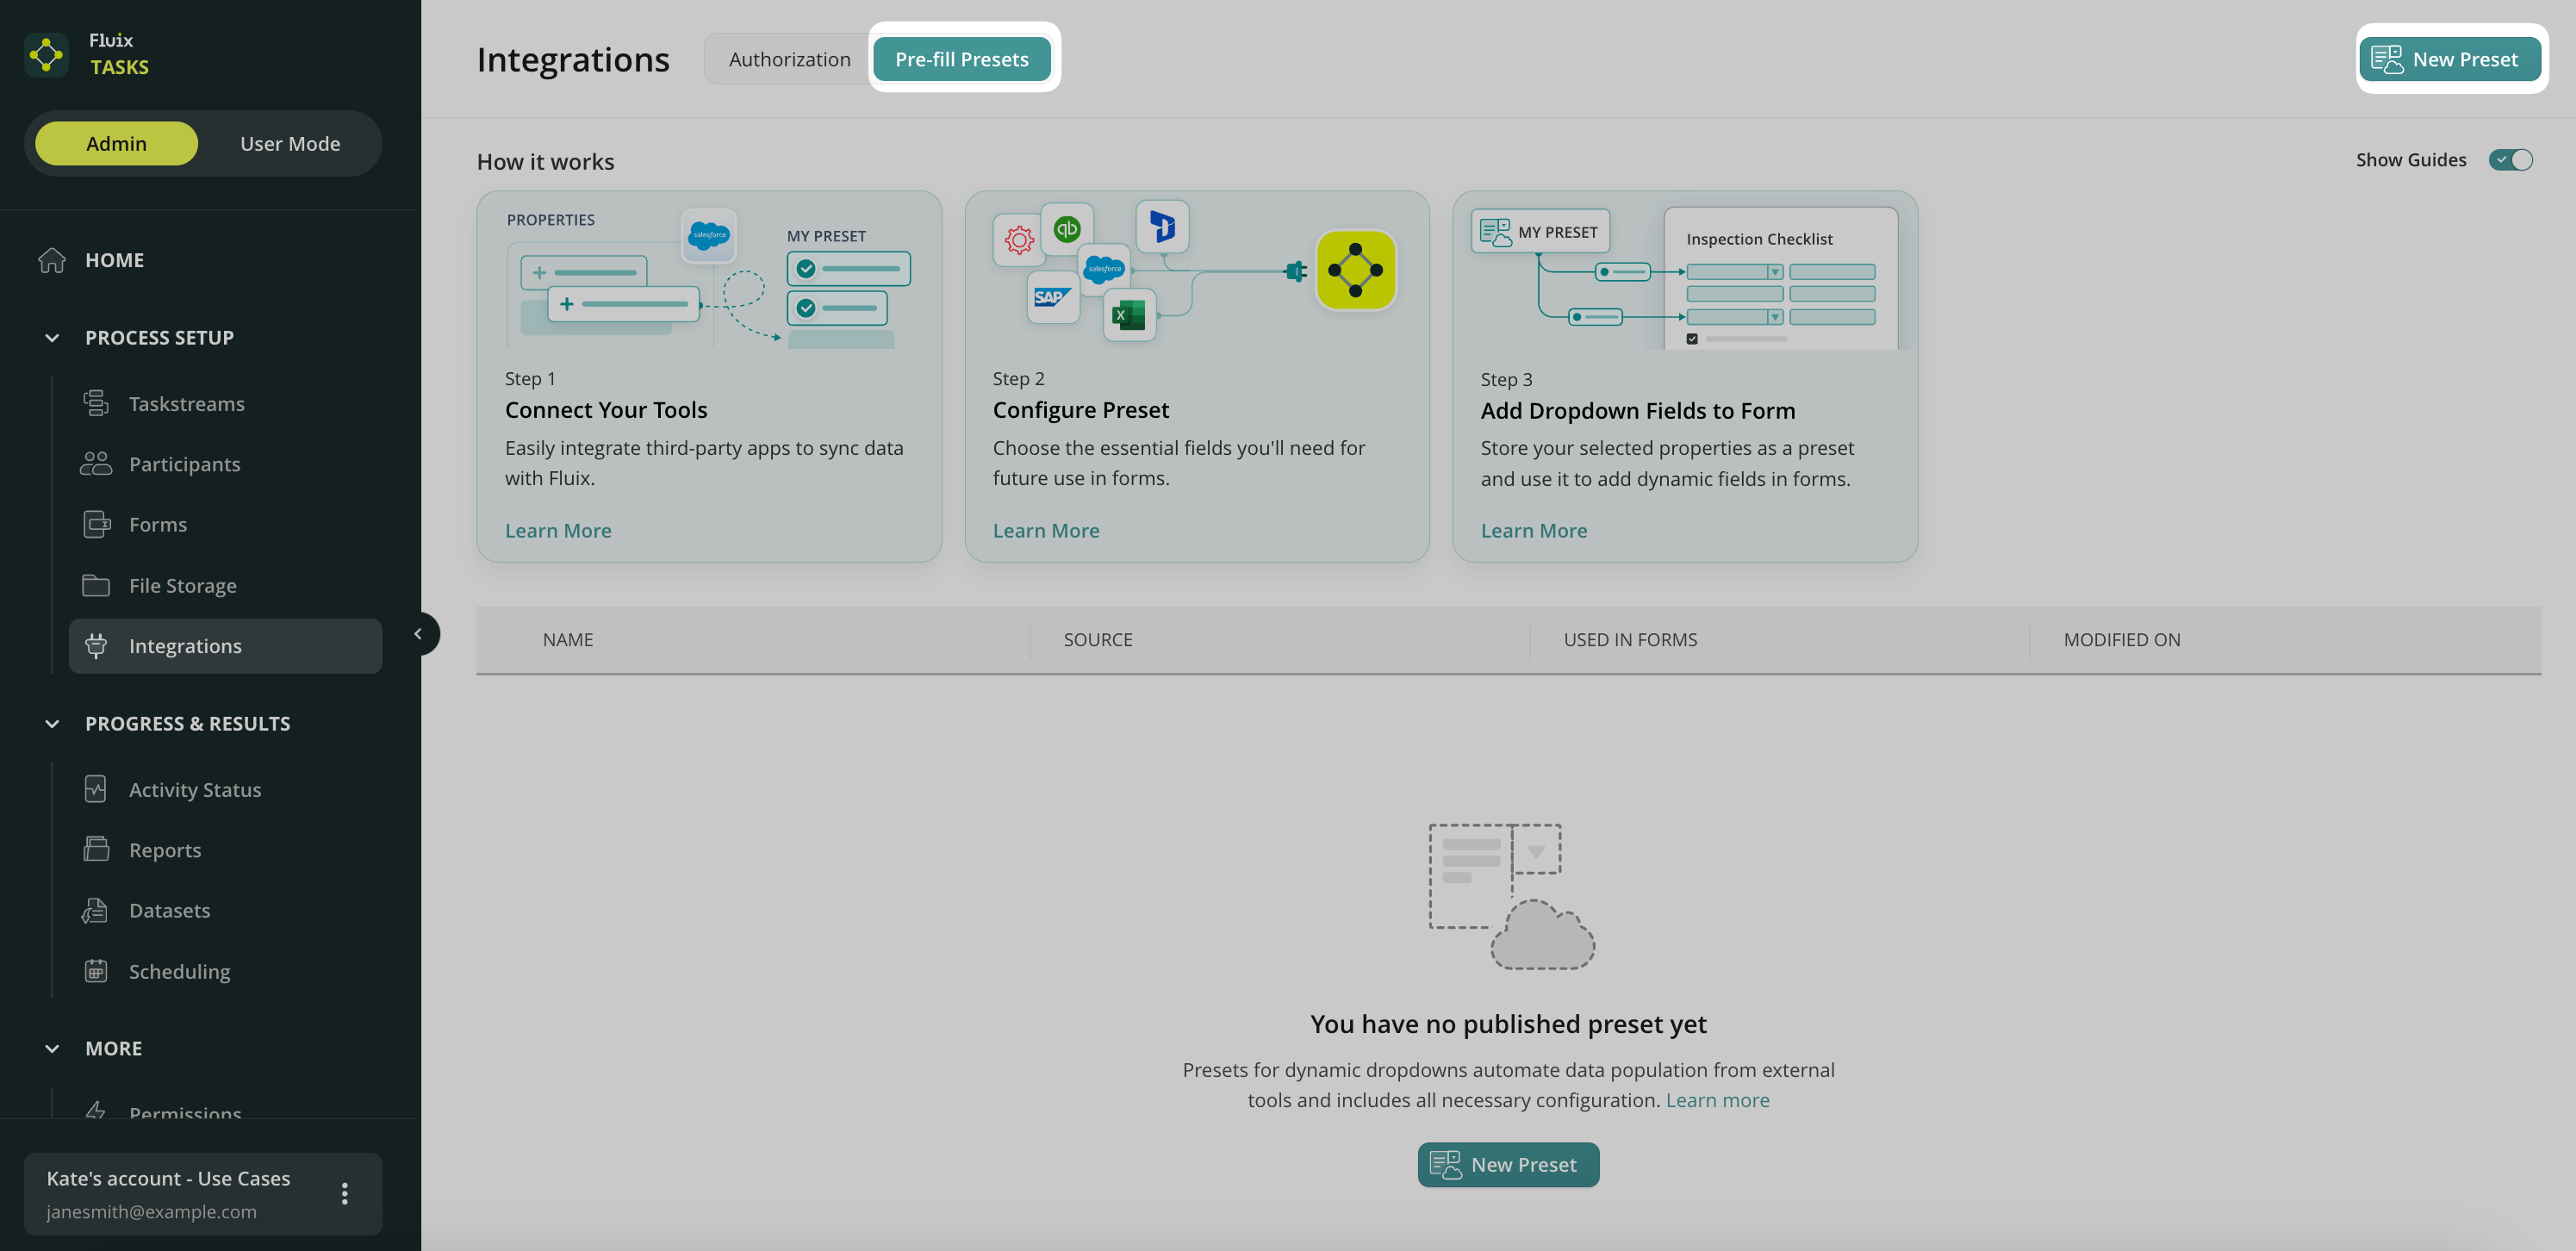
1. In the Admin Portal, go to Integrations → Prefill Presets → click New Preset.
2. On the left side, choose which file format you would like to upload and add it. The supported file formats are Excel and CSV.
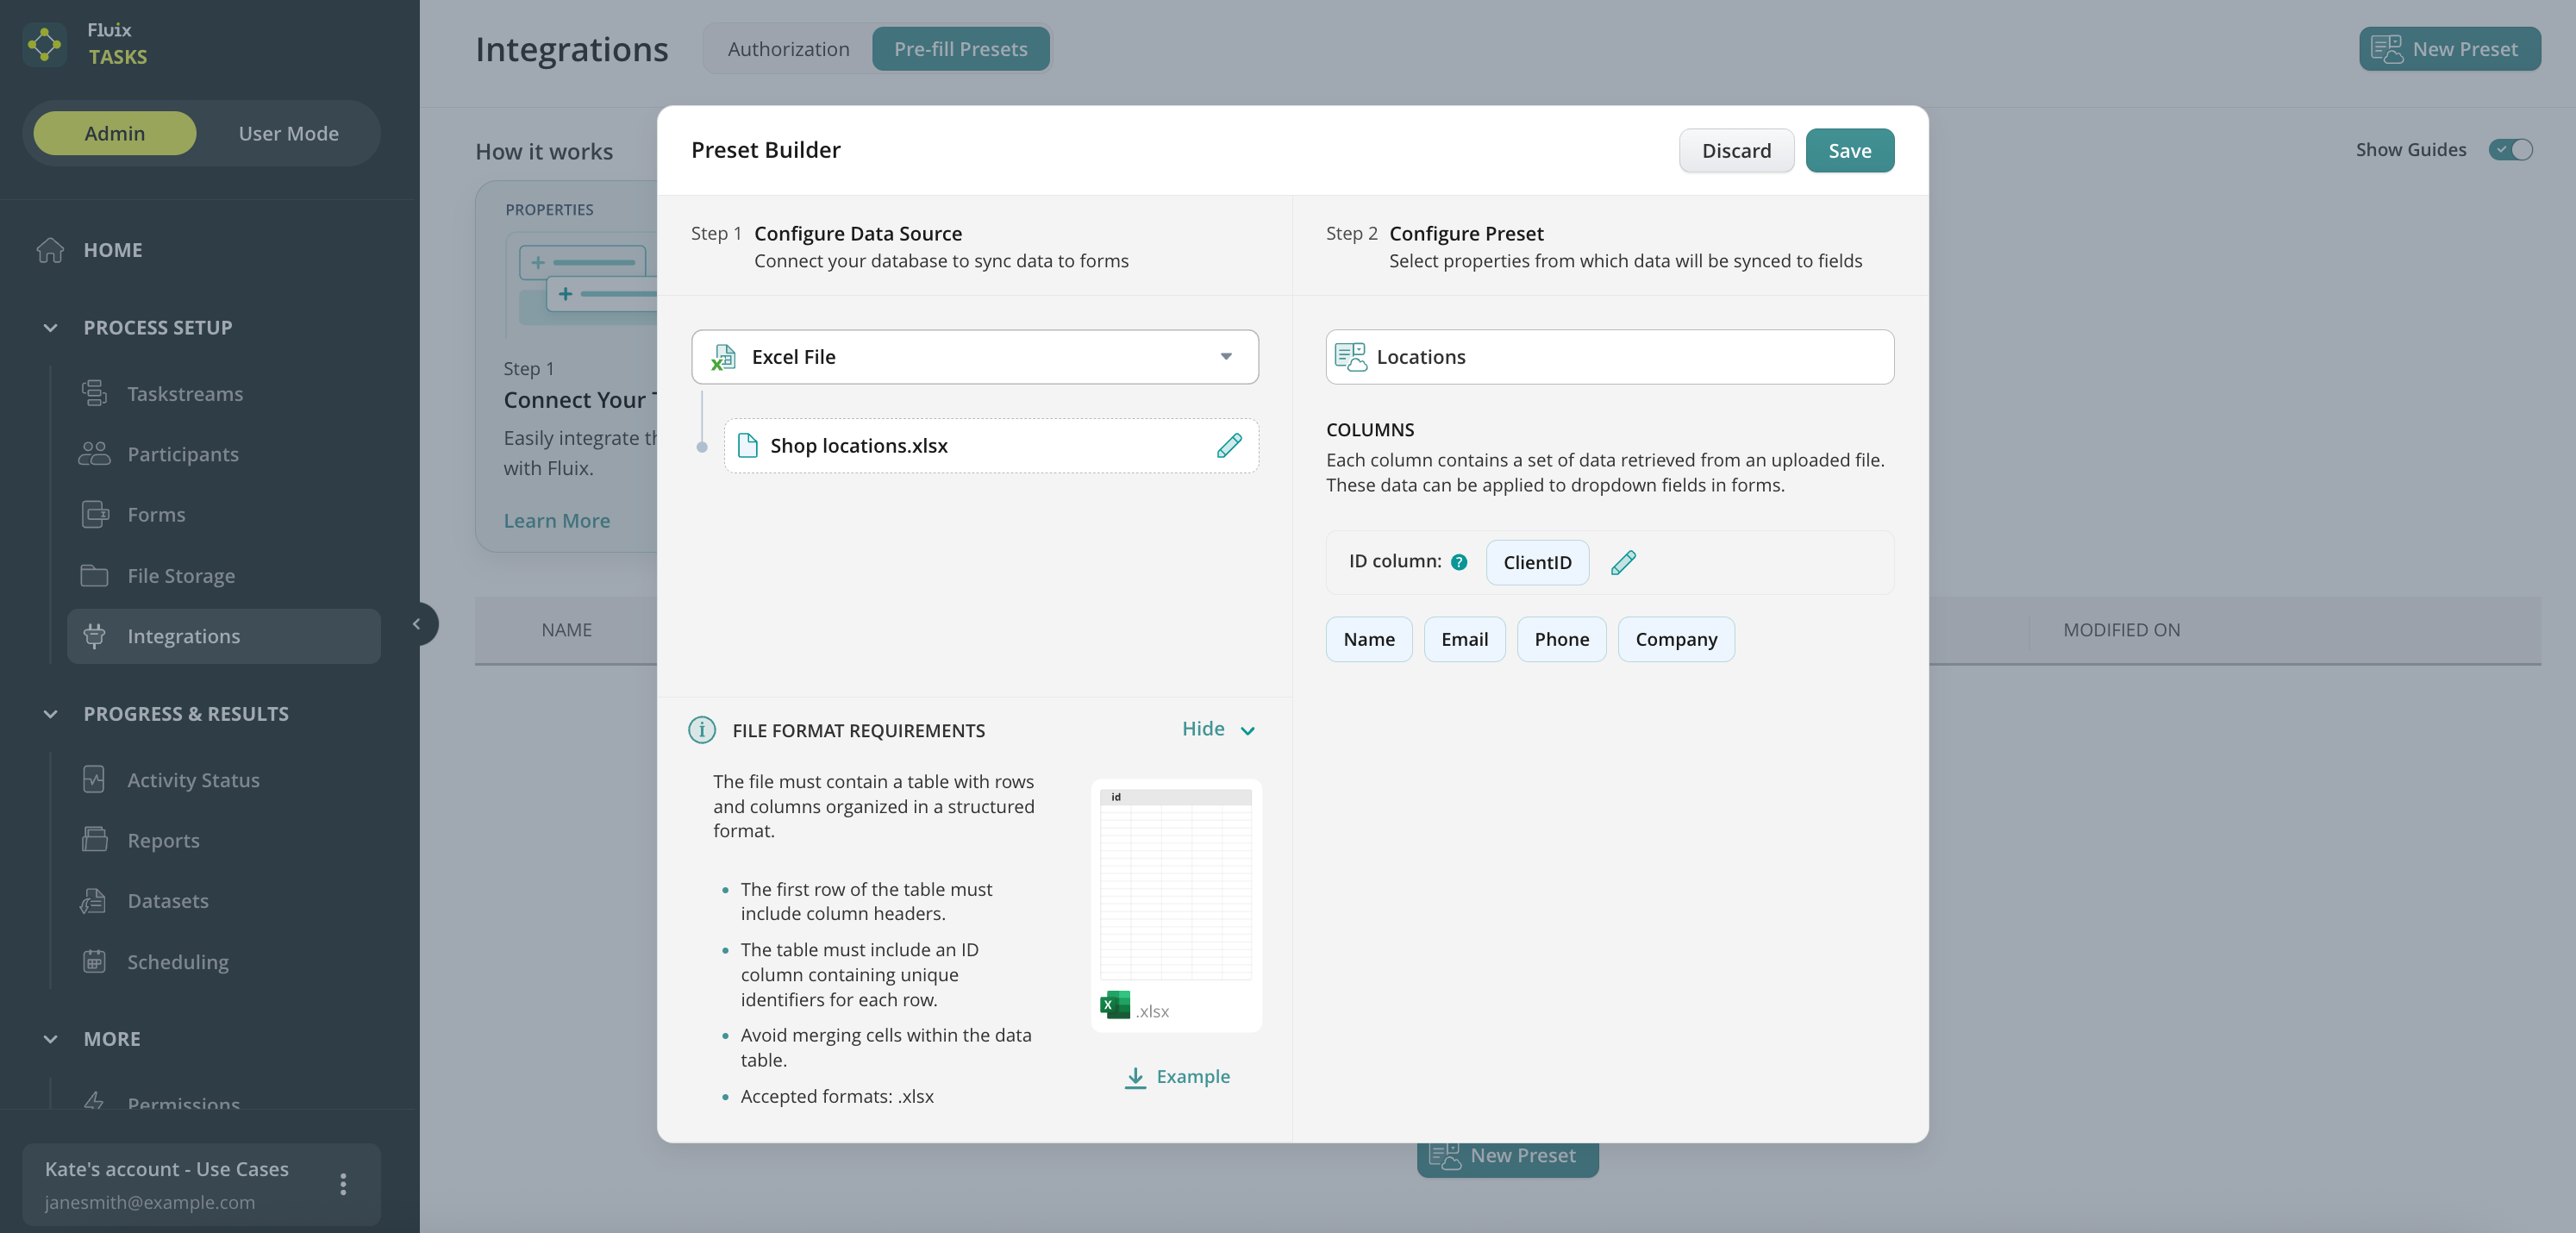
- On the right side, map the relevant columns to the data fields you want to use in forms (e.g., Location, Checklist type etc).
- Click Save.
Step 3: Connect your dynamic form to the data
1. Go to the Forms section and open an existing dynamic form or create a new one.
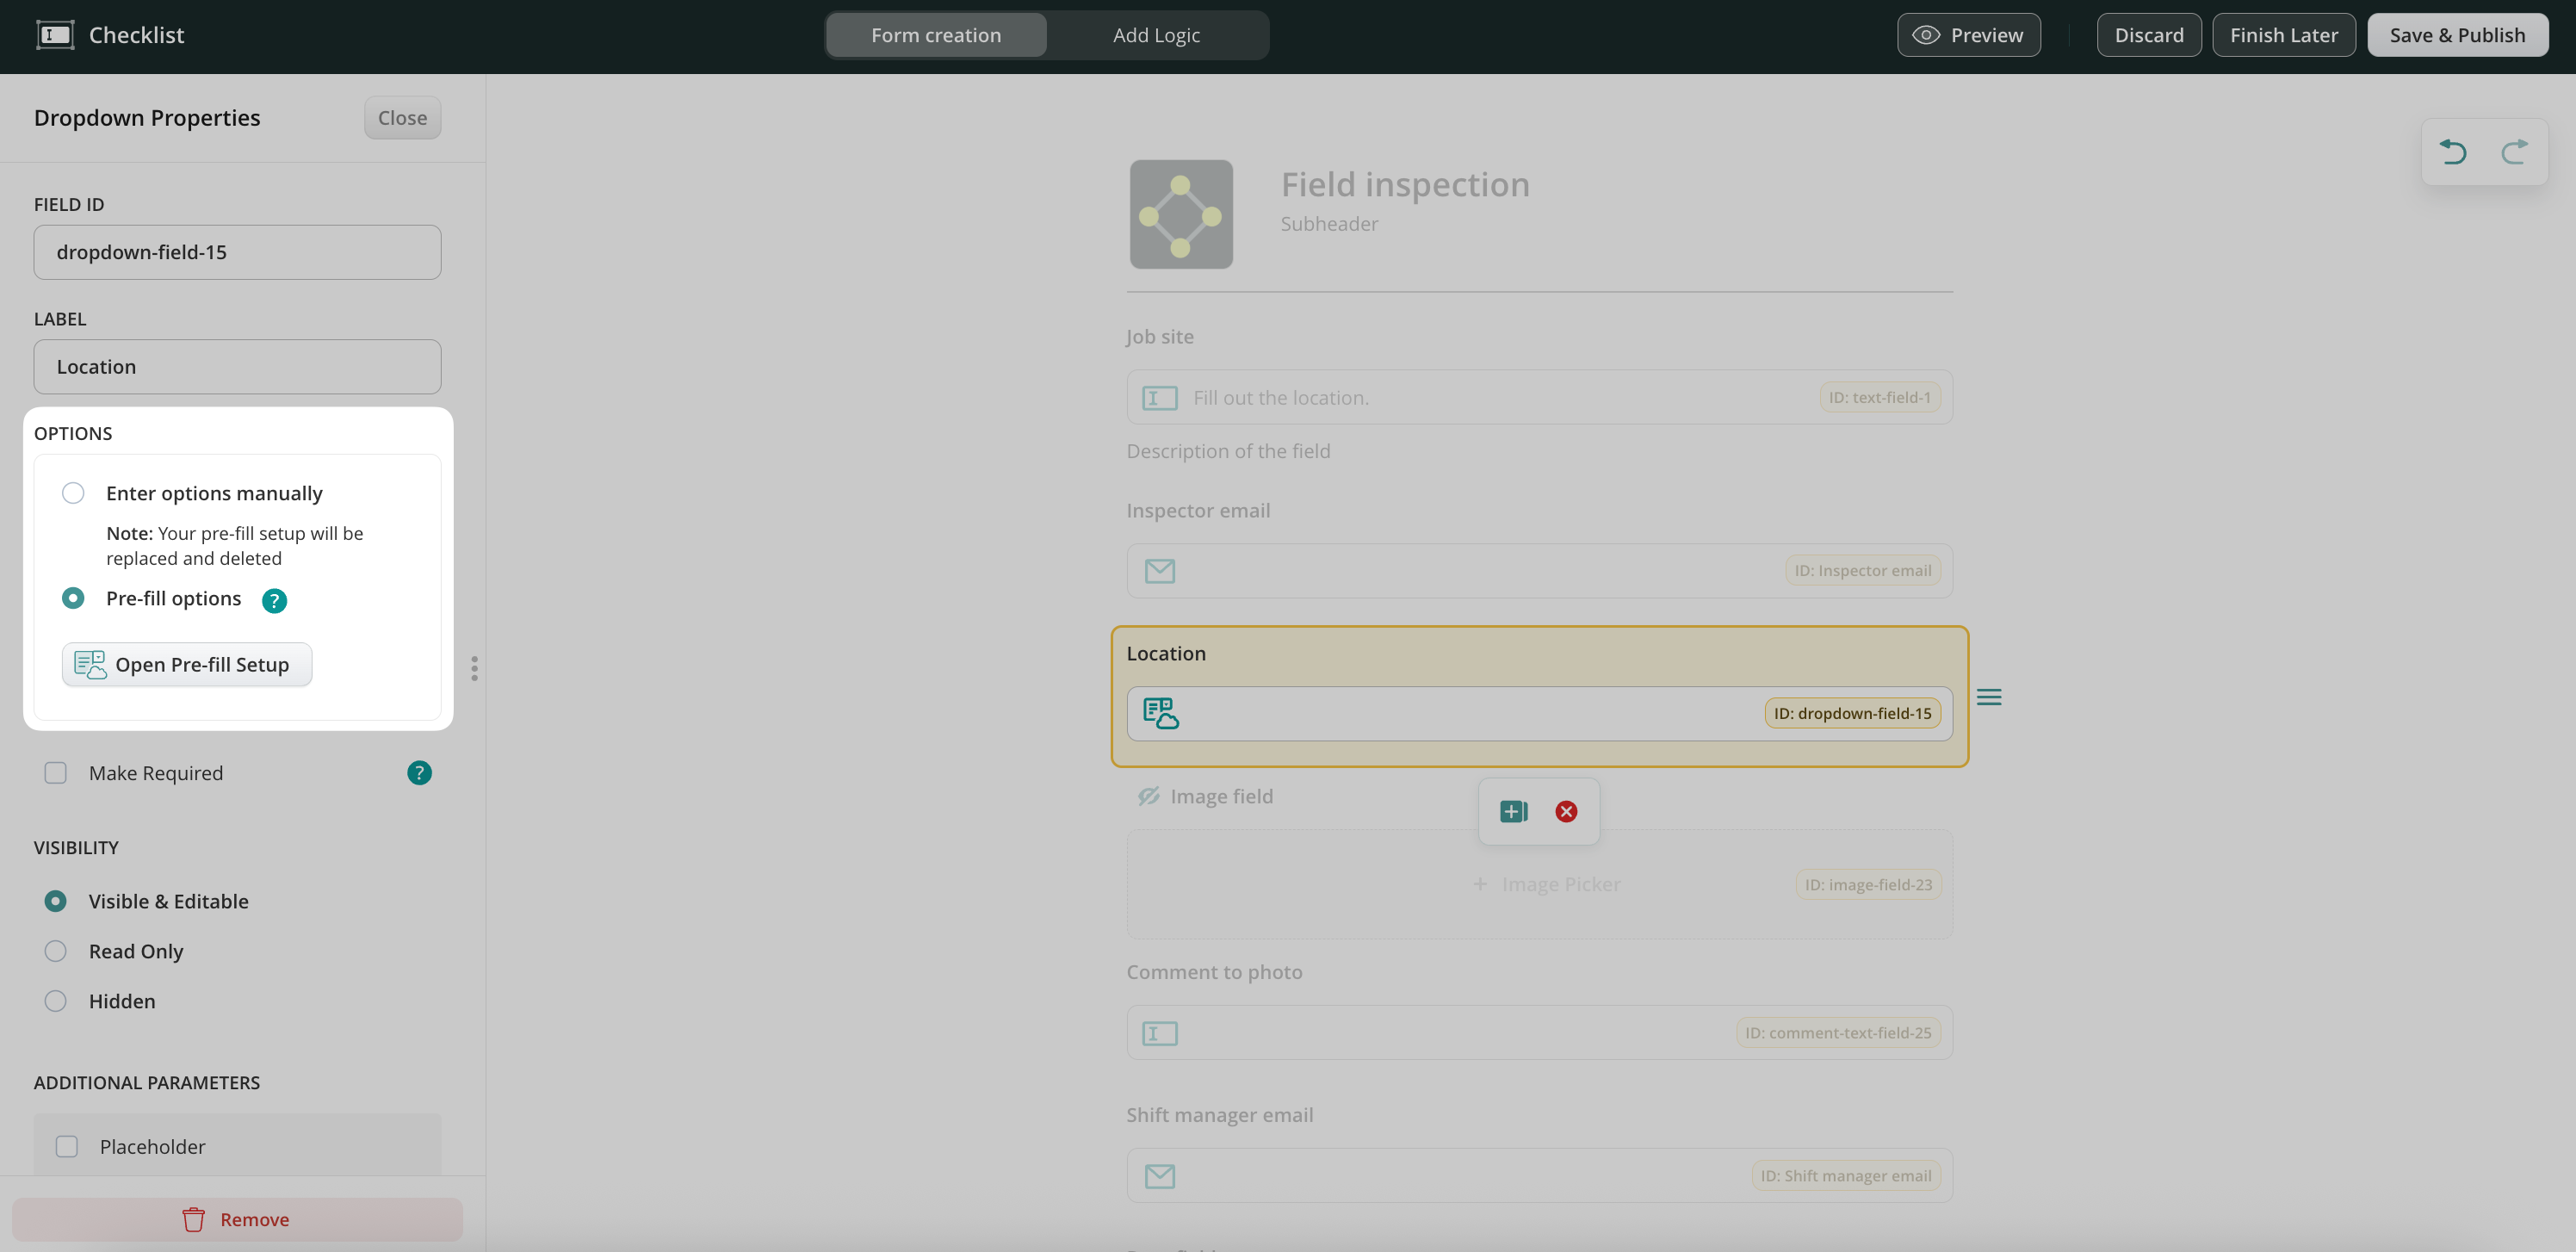
2. In the Form Builder, drag in a Dropdown field and name it (e.g., “Location”).
3. In the Options panel, choose Pre-fill options → click Open Pre-fill setup.
4. Select the preset you uploaded earlier.
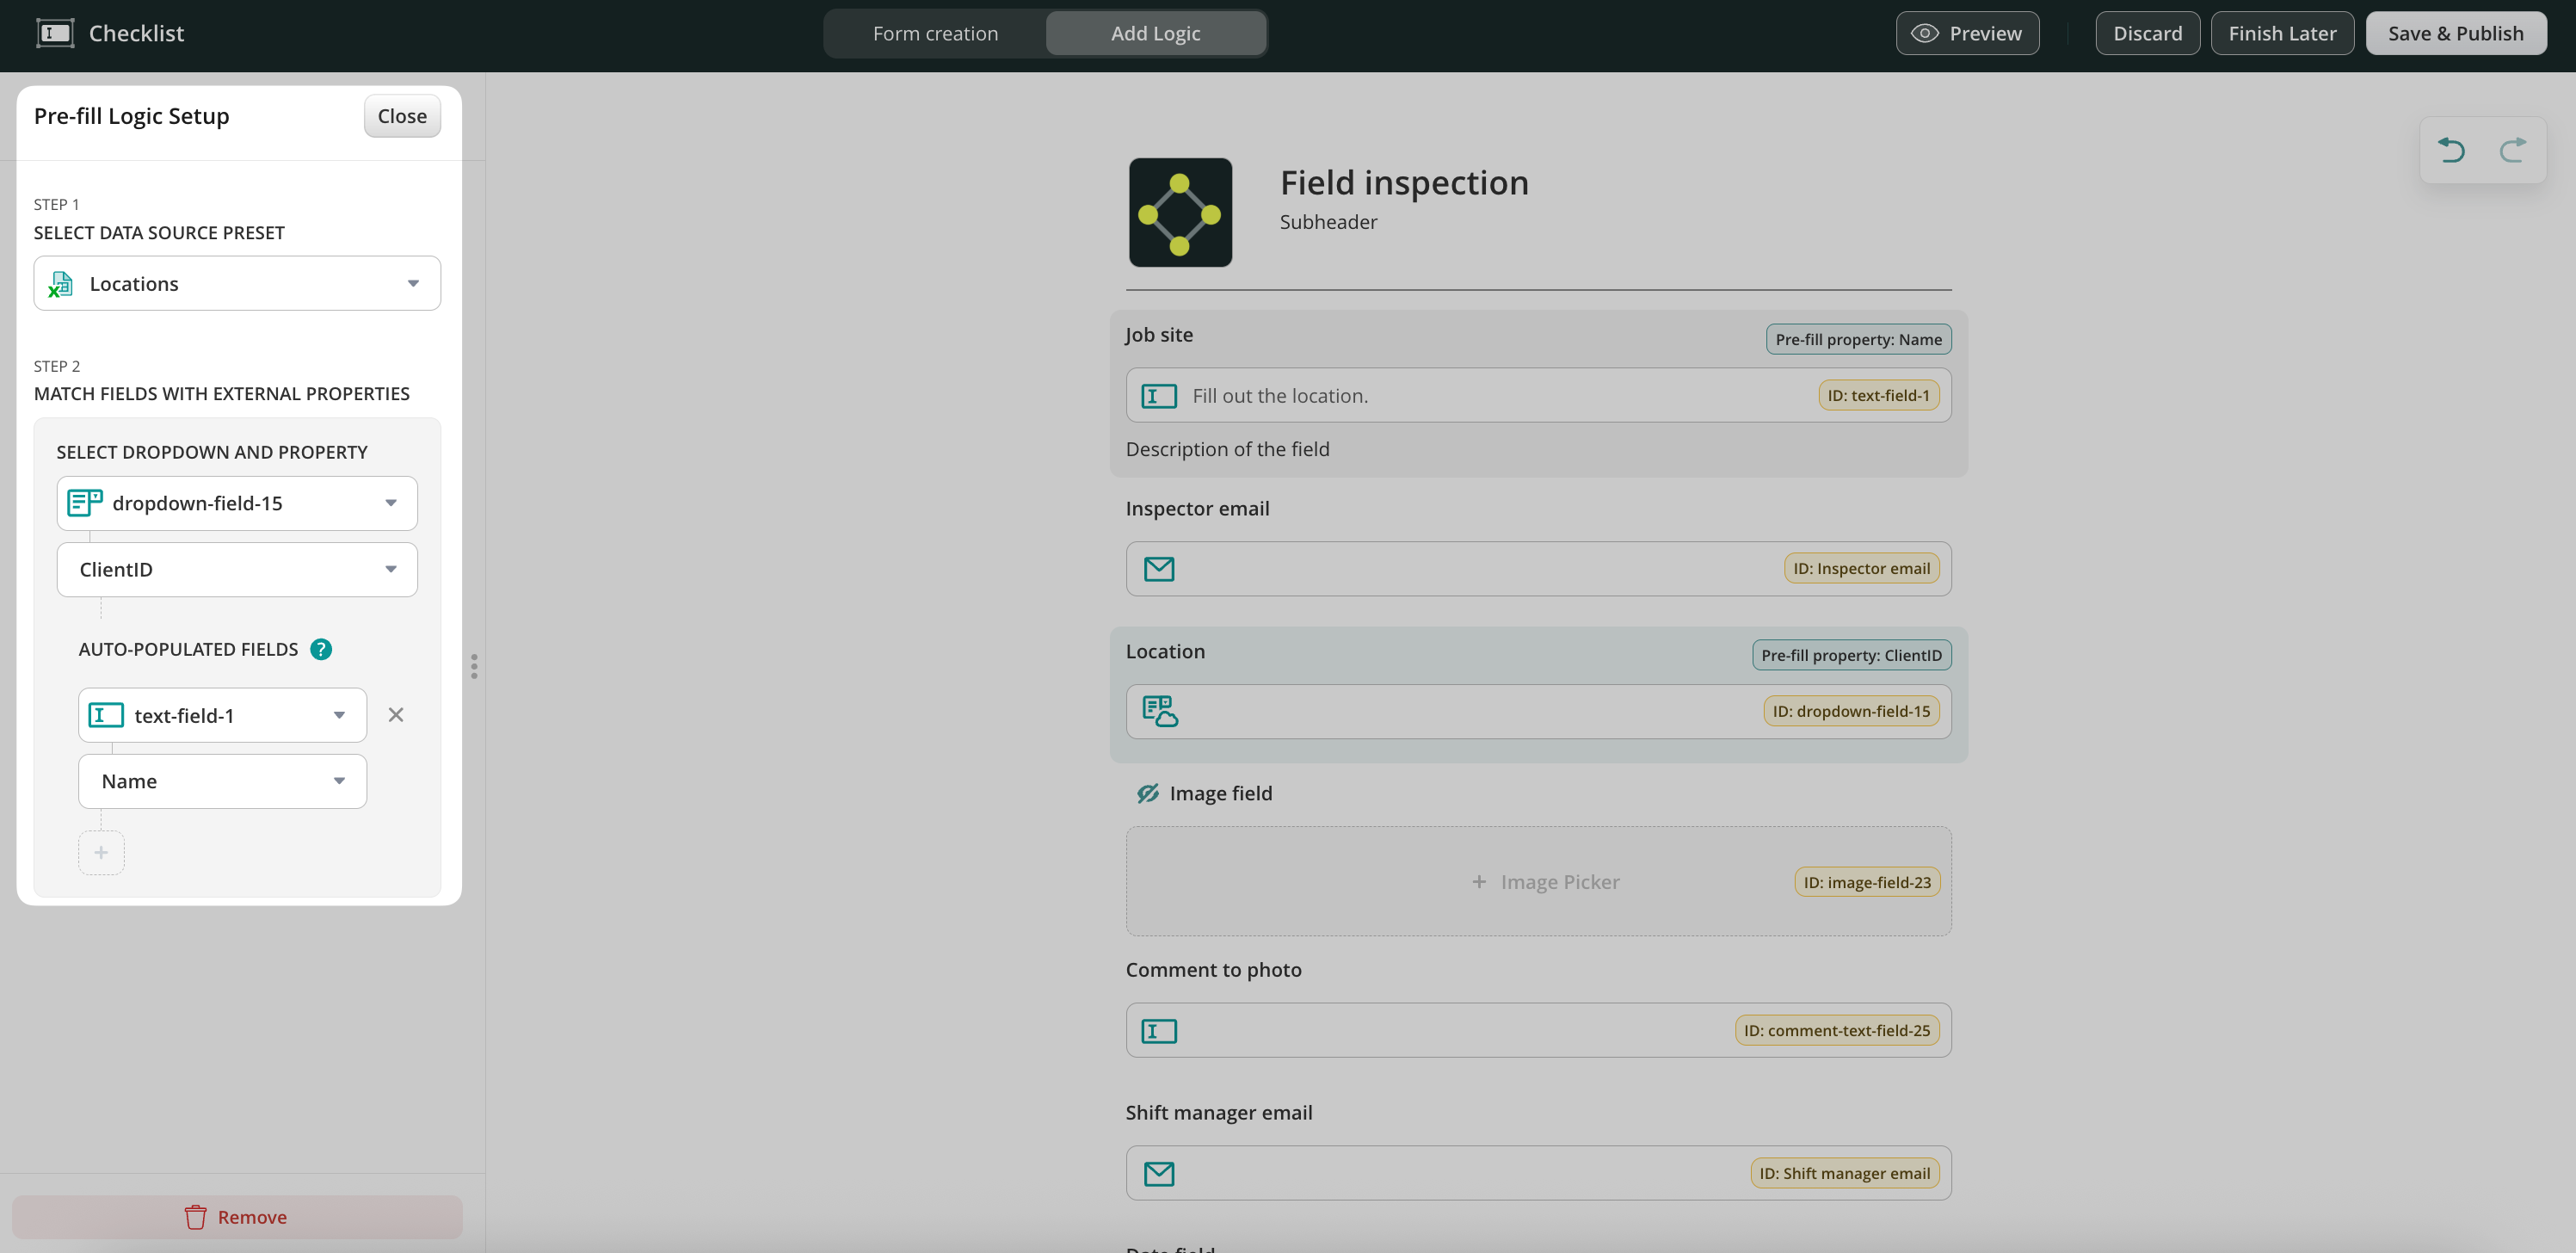
5. Match the dropdown to the correct column in your uploaded file (e.g., “Location”).
6. (Optional) Set up other fields to be auto-filled based on what’s selected (e.g., address or checklist type).
7. Click Close, and then Save & Publish your form.
Step 4: Use the form in a Workflow
1. Go to the Workflows section in the Admin Portal.
2. Create a new workflow or open an existing one.
3. In a Task element, include your dynamic form under Forms & Attachments.

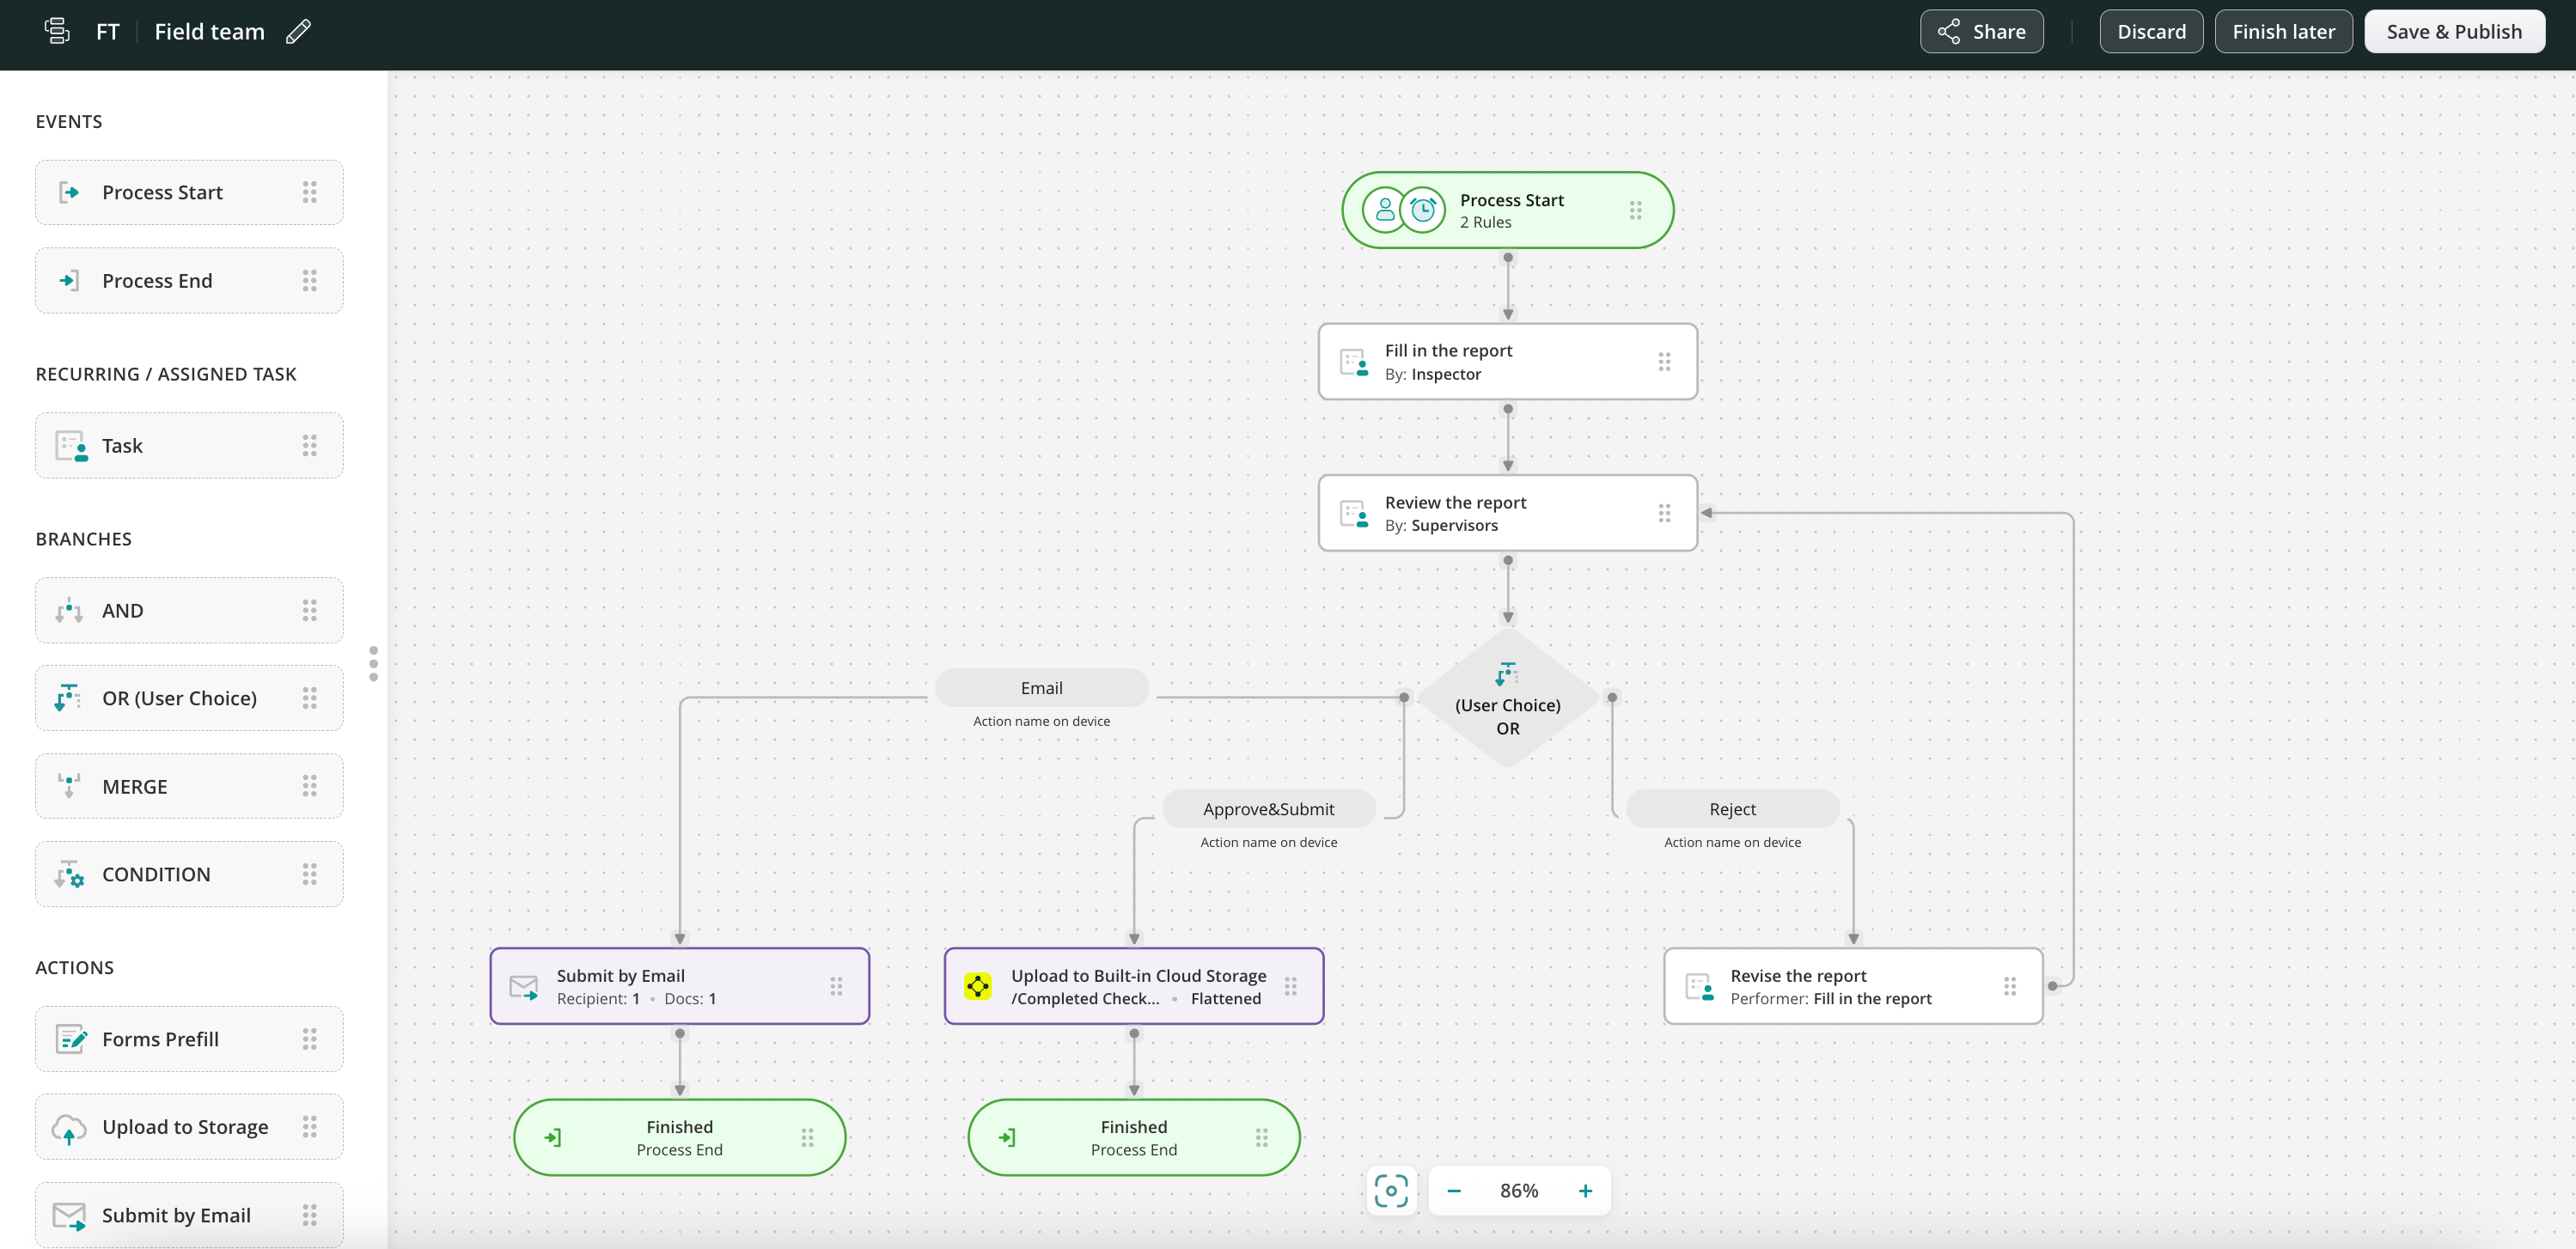
4. Choose how the submitted form will be handled (e.g., save to Fluix storage, email, or send to third-party platforms like Procore, Smartsheet, Salesforce, etc.).
5. The final view of your workflow may look like the example below. Save and Publish the workflow.
Step 5: Test the setup in the app
1. Make sure that you have added yourself to the group of users who participate in this workflow.
2. Open the Fluix app on iOS, Android, or the Web App from the Admin Portal.
3. Open the task and click the Start work button to fill out the checklist.
4. Tap on the dropdown field (Location field that we created in this tutorial)—the data from the uploaded file should now appear.
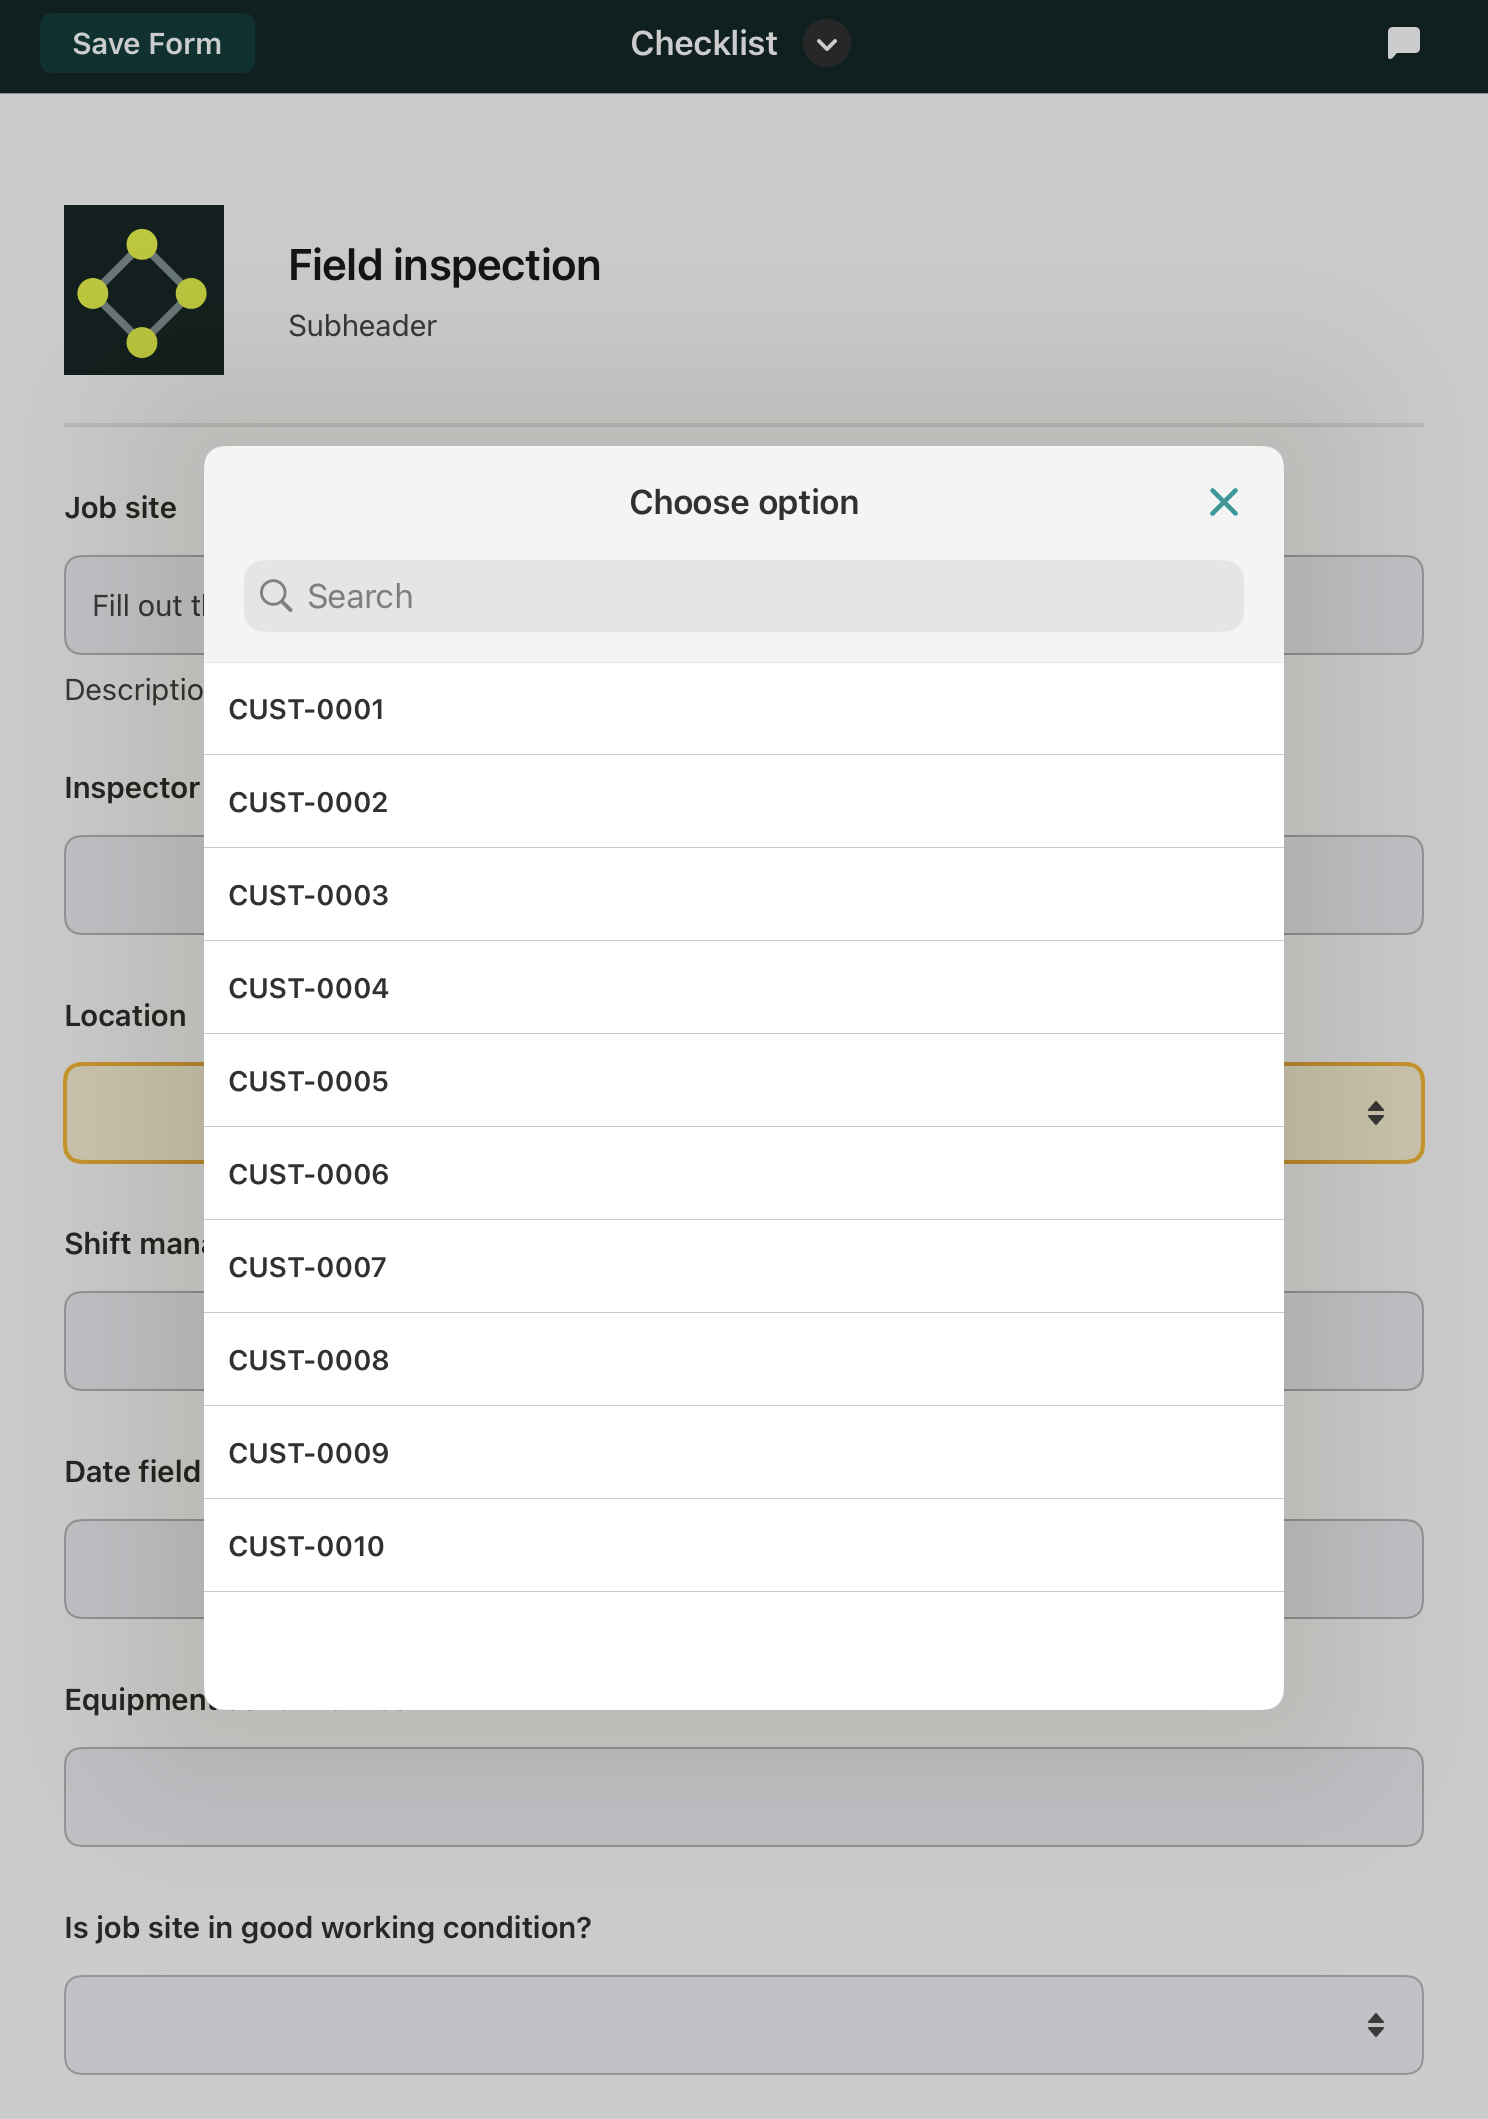
5. Select an item and check that any auto-filled fields are working as expected.
6. Complete and submit the form.
If you have any questions during setup, feel free to contact our support team at support@fluix.io. We’re here to help.