


What are Dynamic Forms?
Dynamic Forms is a new functionality in Fluix Tasks that adds even more flexibility in creating processes according to the company’s business needs. In addition to the classic PDF format that is supported in Fluix, you can create web forms with dynamic layouts. Let’s dive into the details in this article.
What tasks do Dynamic Forms solve?
The main benefits of Dynamic Forms functionality are faster form filling and more accurate data. Below are specific ways to achieve these benefits.
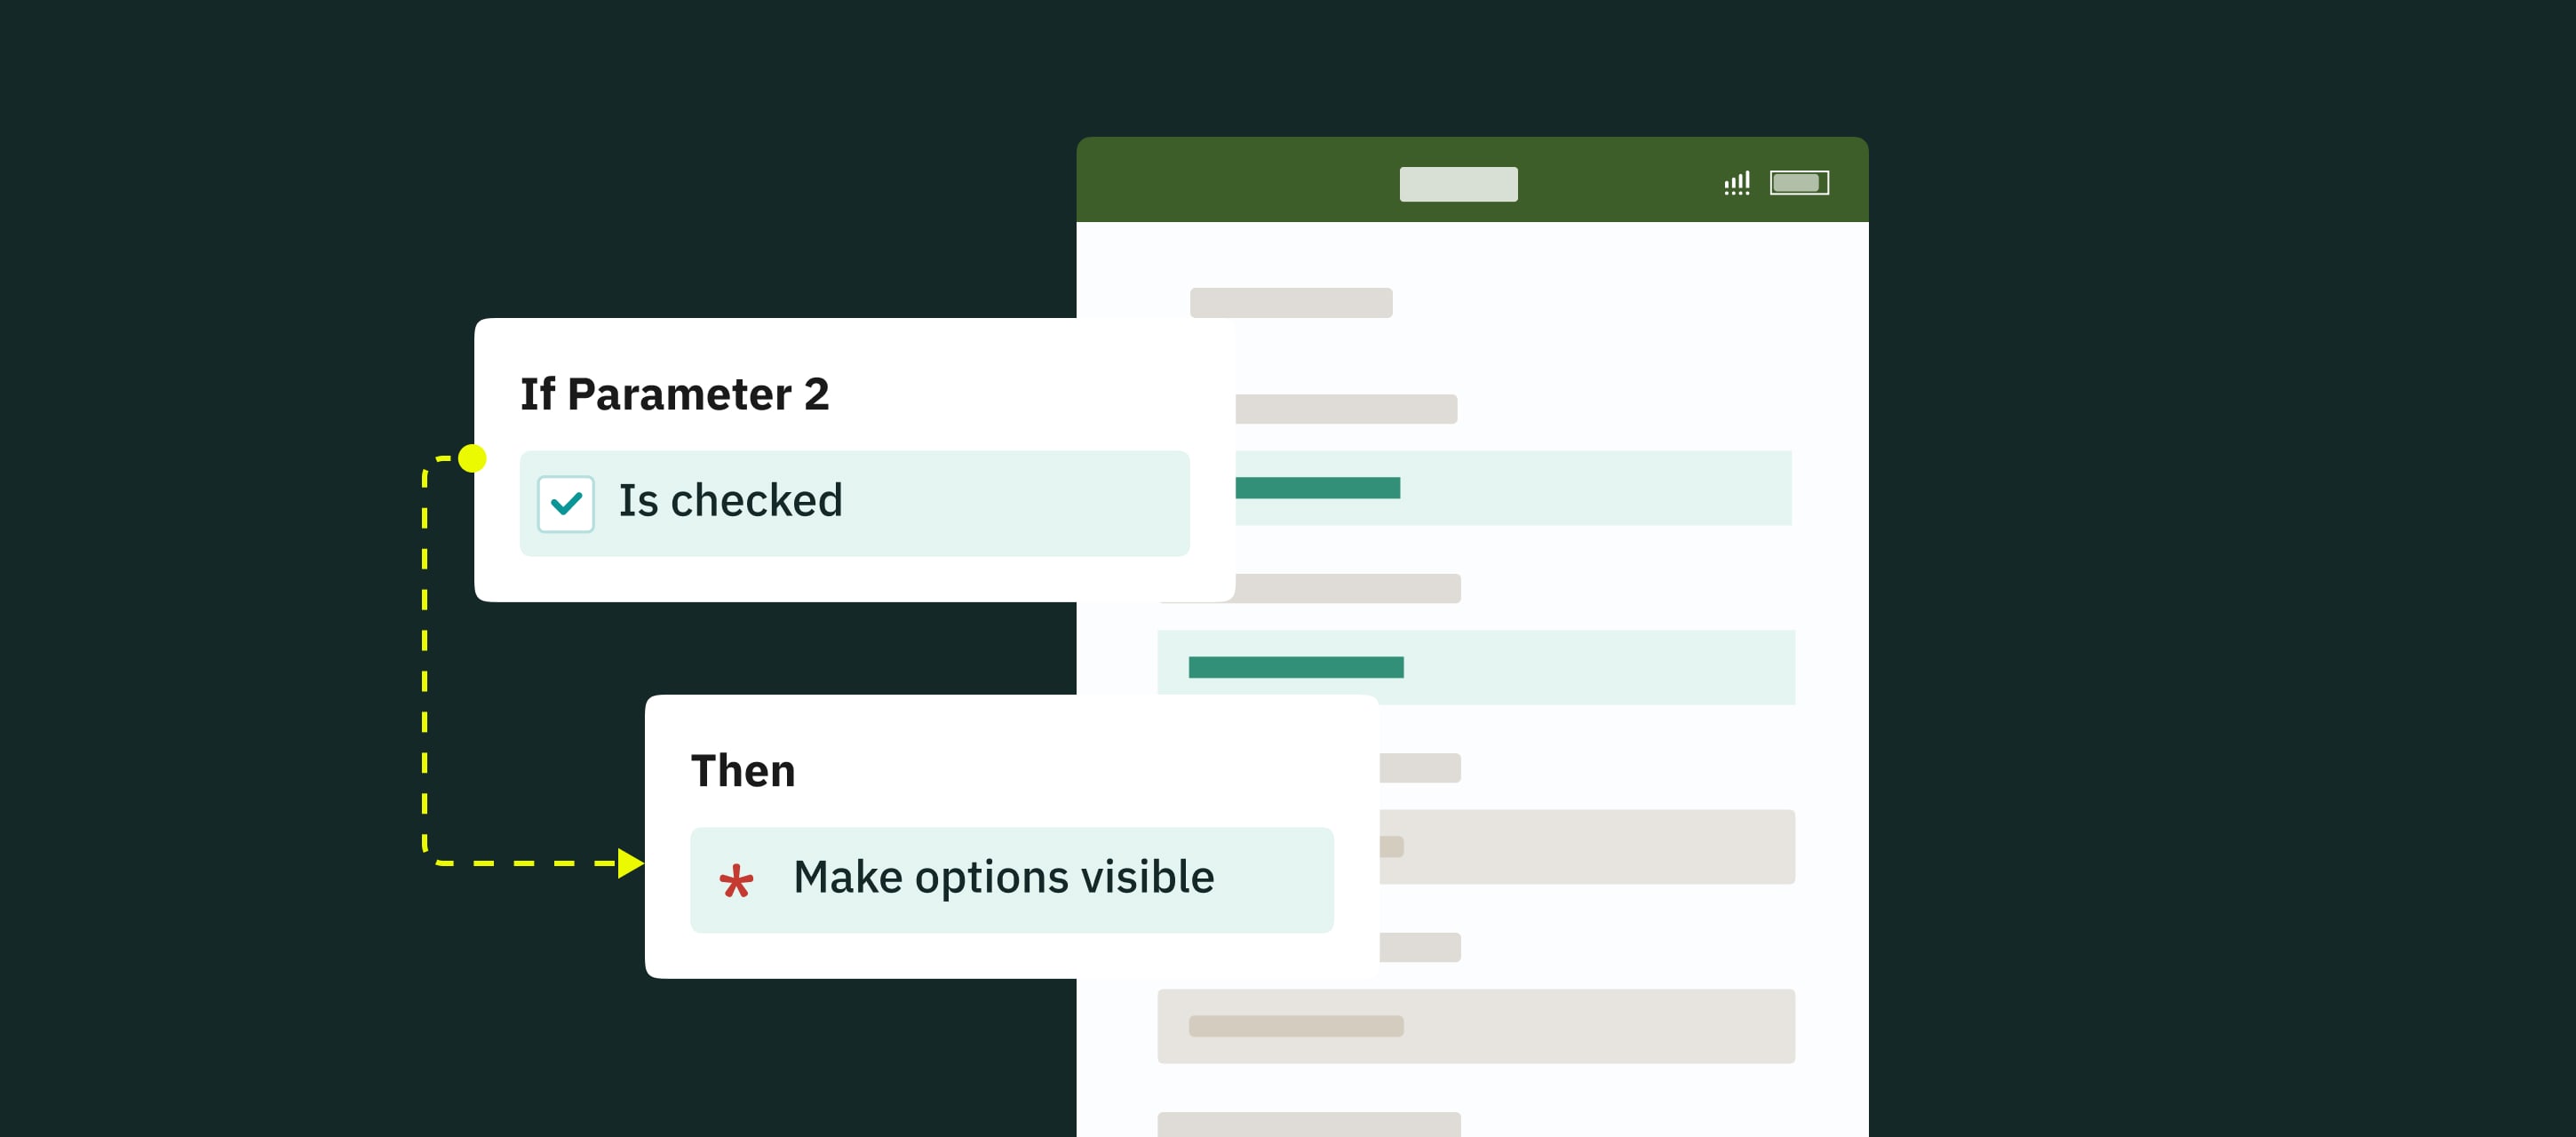
- Conditional Logic
The fillable fields may appear, become required, read-only, and hidden dynamically based on the options the users select in the form. This ensures a more relevant and personalized form-filling experience, adapting to the users’ specific needs and choices in real time.
- Unlimited Photo Upload
Let your field team upload as many images and comments as necessary in every case. Depending on the specific requirements or circumstances of the user’s case, the forms are flexible in providing the essential visual information and automatically adjust the size of the form depending on the number of photos added.
- Mobile-friendly Look
On-device forms look easy to fill in on smartphones and tablets, fields are big enough. This allows app users to collect data quickly.
- Fields Assignment on a Group Level
The admin can predefine who will fill out which fields at different flow steps. This enhances the form-filling process by tailoring forms to each group’s requirements and preferences as they fill them out.
Use Case Example
Here’s how dynamic forms can streamline real-life workflows in Fluix:
Imagine a field technician completing an inspection checklist during their shift. They need to attach several photos from the site. Based on their selections in the form, predefined conditions automatically trigger additional fields, guiding the technician to fill in only the relevant information.
How to set up Dynamic Forms in the business process?
Step 1 – Create a dynamic form in Form Builder
1.Navigate to the Admin tab -> Process Setup -> Forms.
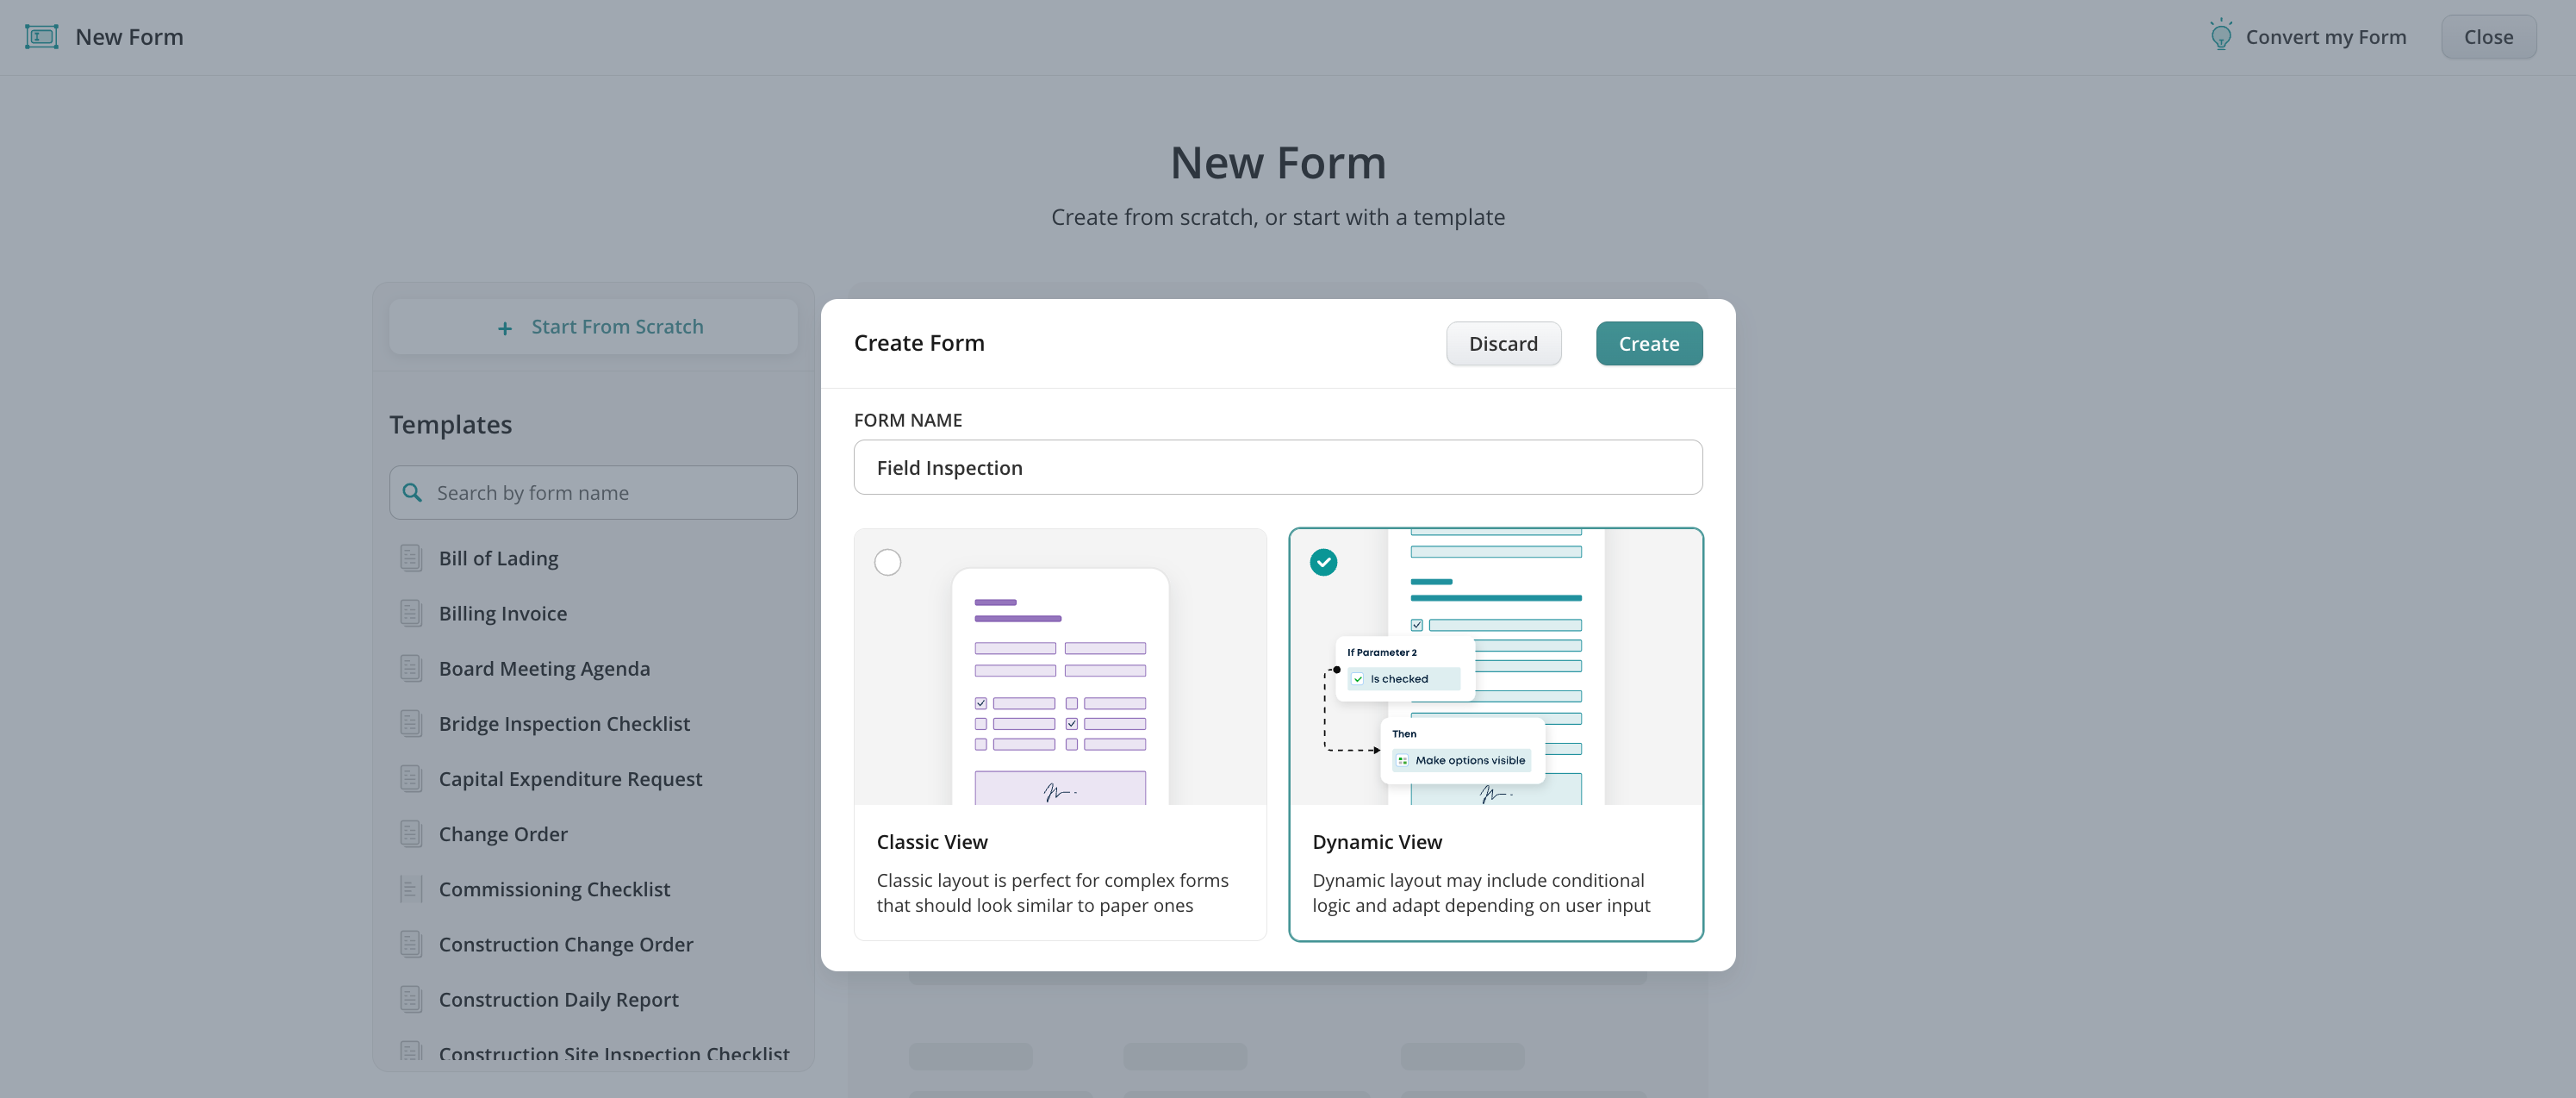
2.Click Create Form –> on the left, click Start from Scratch, select Dynamic View in the opened window, and name your form.
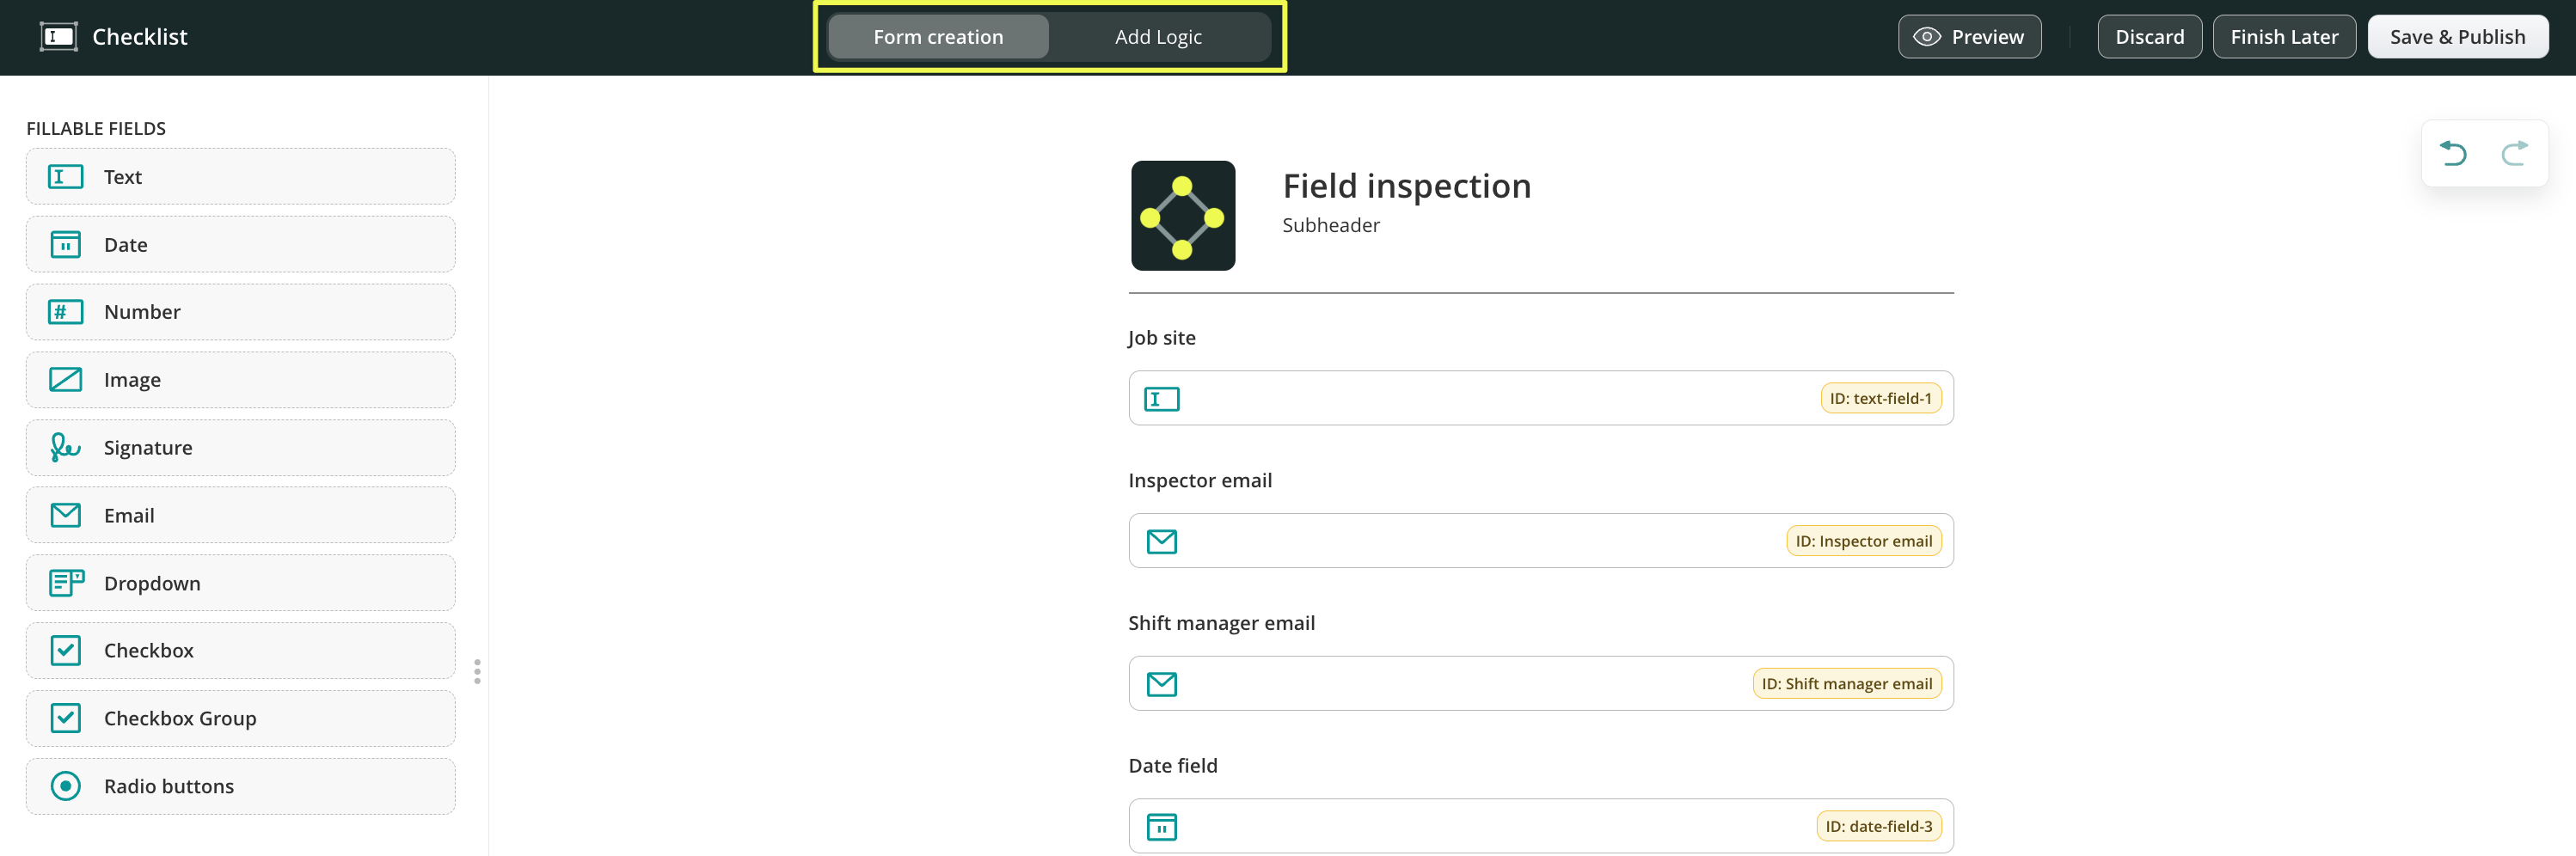
3.In the upper panel, you will see two tabs:
- Form creation—displays a menu with a list of elements that can be used to create a form. Click on the element to add it or drag and drop it to the centre to start creating your form.
- Add Logic tab—here, you can configure the conditions for fields in the form to make them required, read-only, or hidden dynamically based on the options the users select in the form.
Form creation tab – mapping the fields in the form
The elements are divided into two groups:
- Fillable fields – the different types of fields to add to the forms to collect the most relevant data.
- Layout – helps you customize your forms by creating Sections, adding a header, text, company logo, and a divider.
Check out our Feature Tutorial on creating Sections to optimize your form building for repetitive processes that contain similar fields.
Once the element is added, you may do the following:
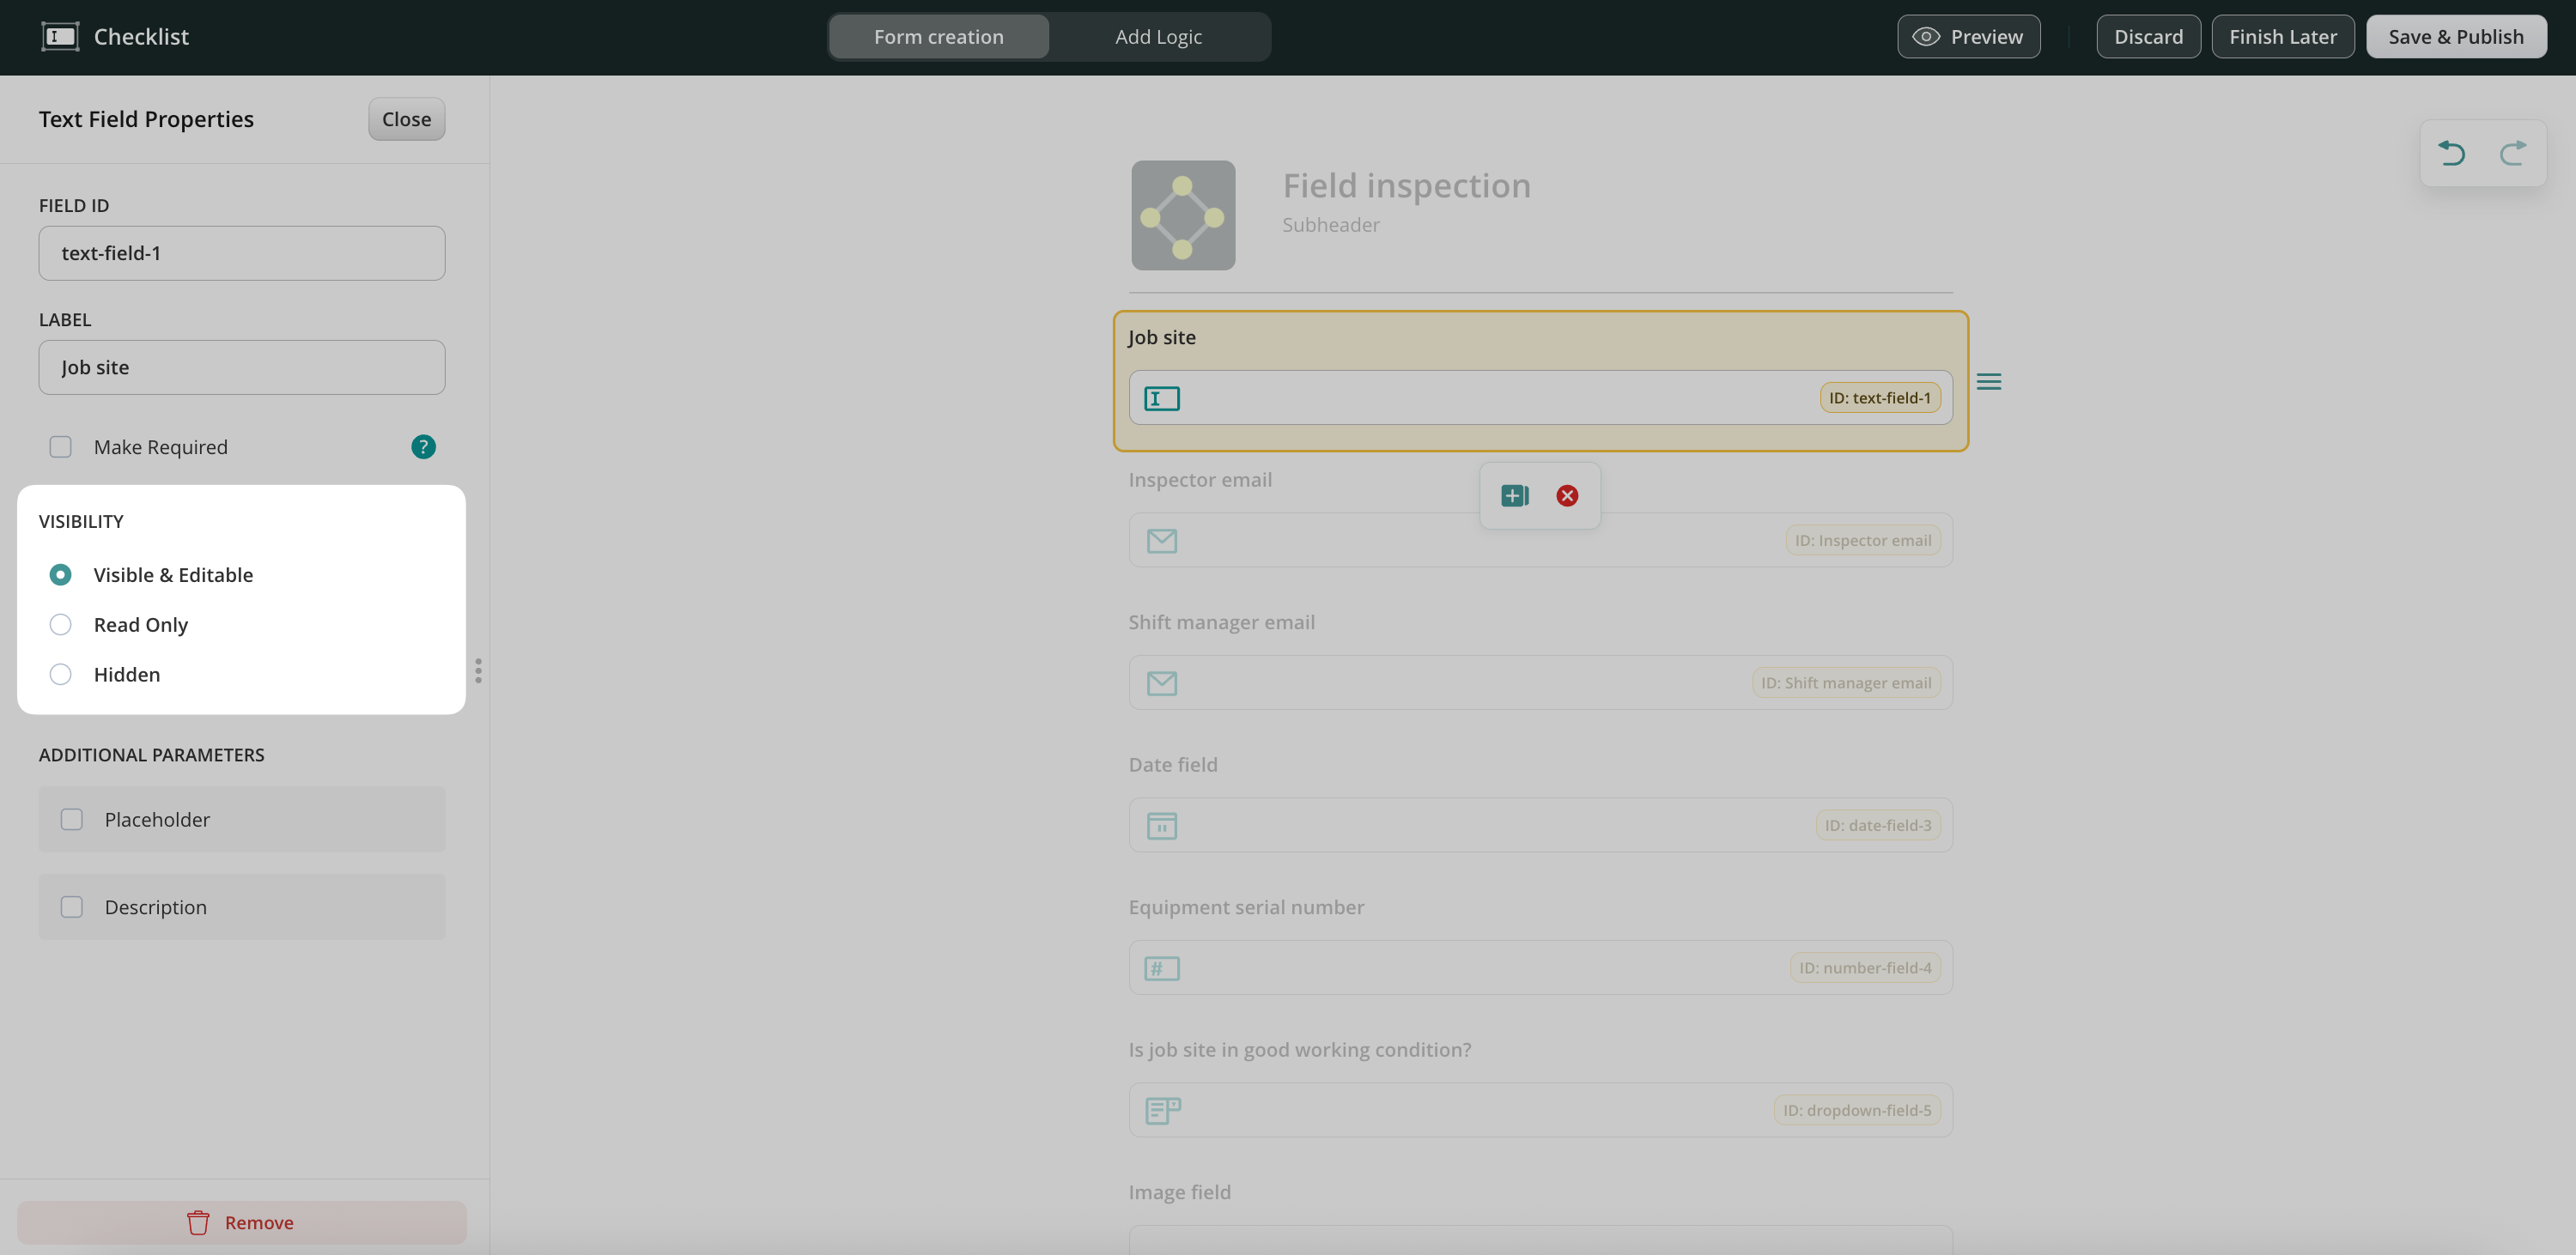
- In the Field ID section, a specific ID for each field is assigned. This will help you later navigate through the fields when setting up the conditions for the fields.
- In the Label section, you may add the name of how this field should be reflected in the form for the user. If needed, you can also make the field required. The required status does not work if this field is read-only or hidden. You can change it later in conditional options.
Please note: We recommend naming the fields IDs and labels of the fields the same way. It will help you to navigate through the dynamic form when configuring easily. - In the Visibility section, you can select how the field will be reflected in the form: should it be visible & editable, read only, or hidden.
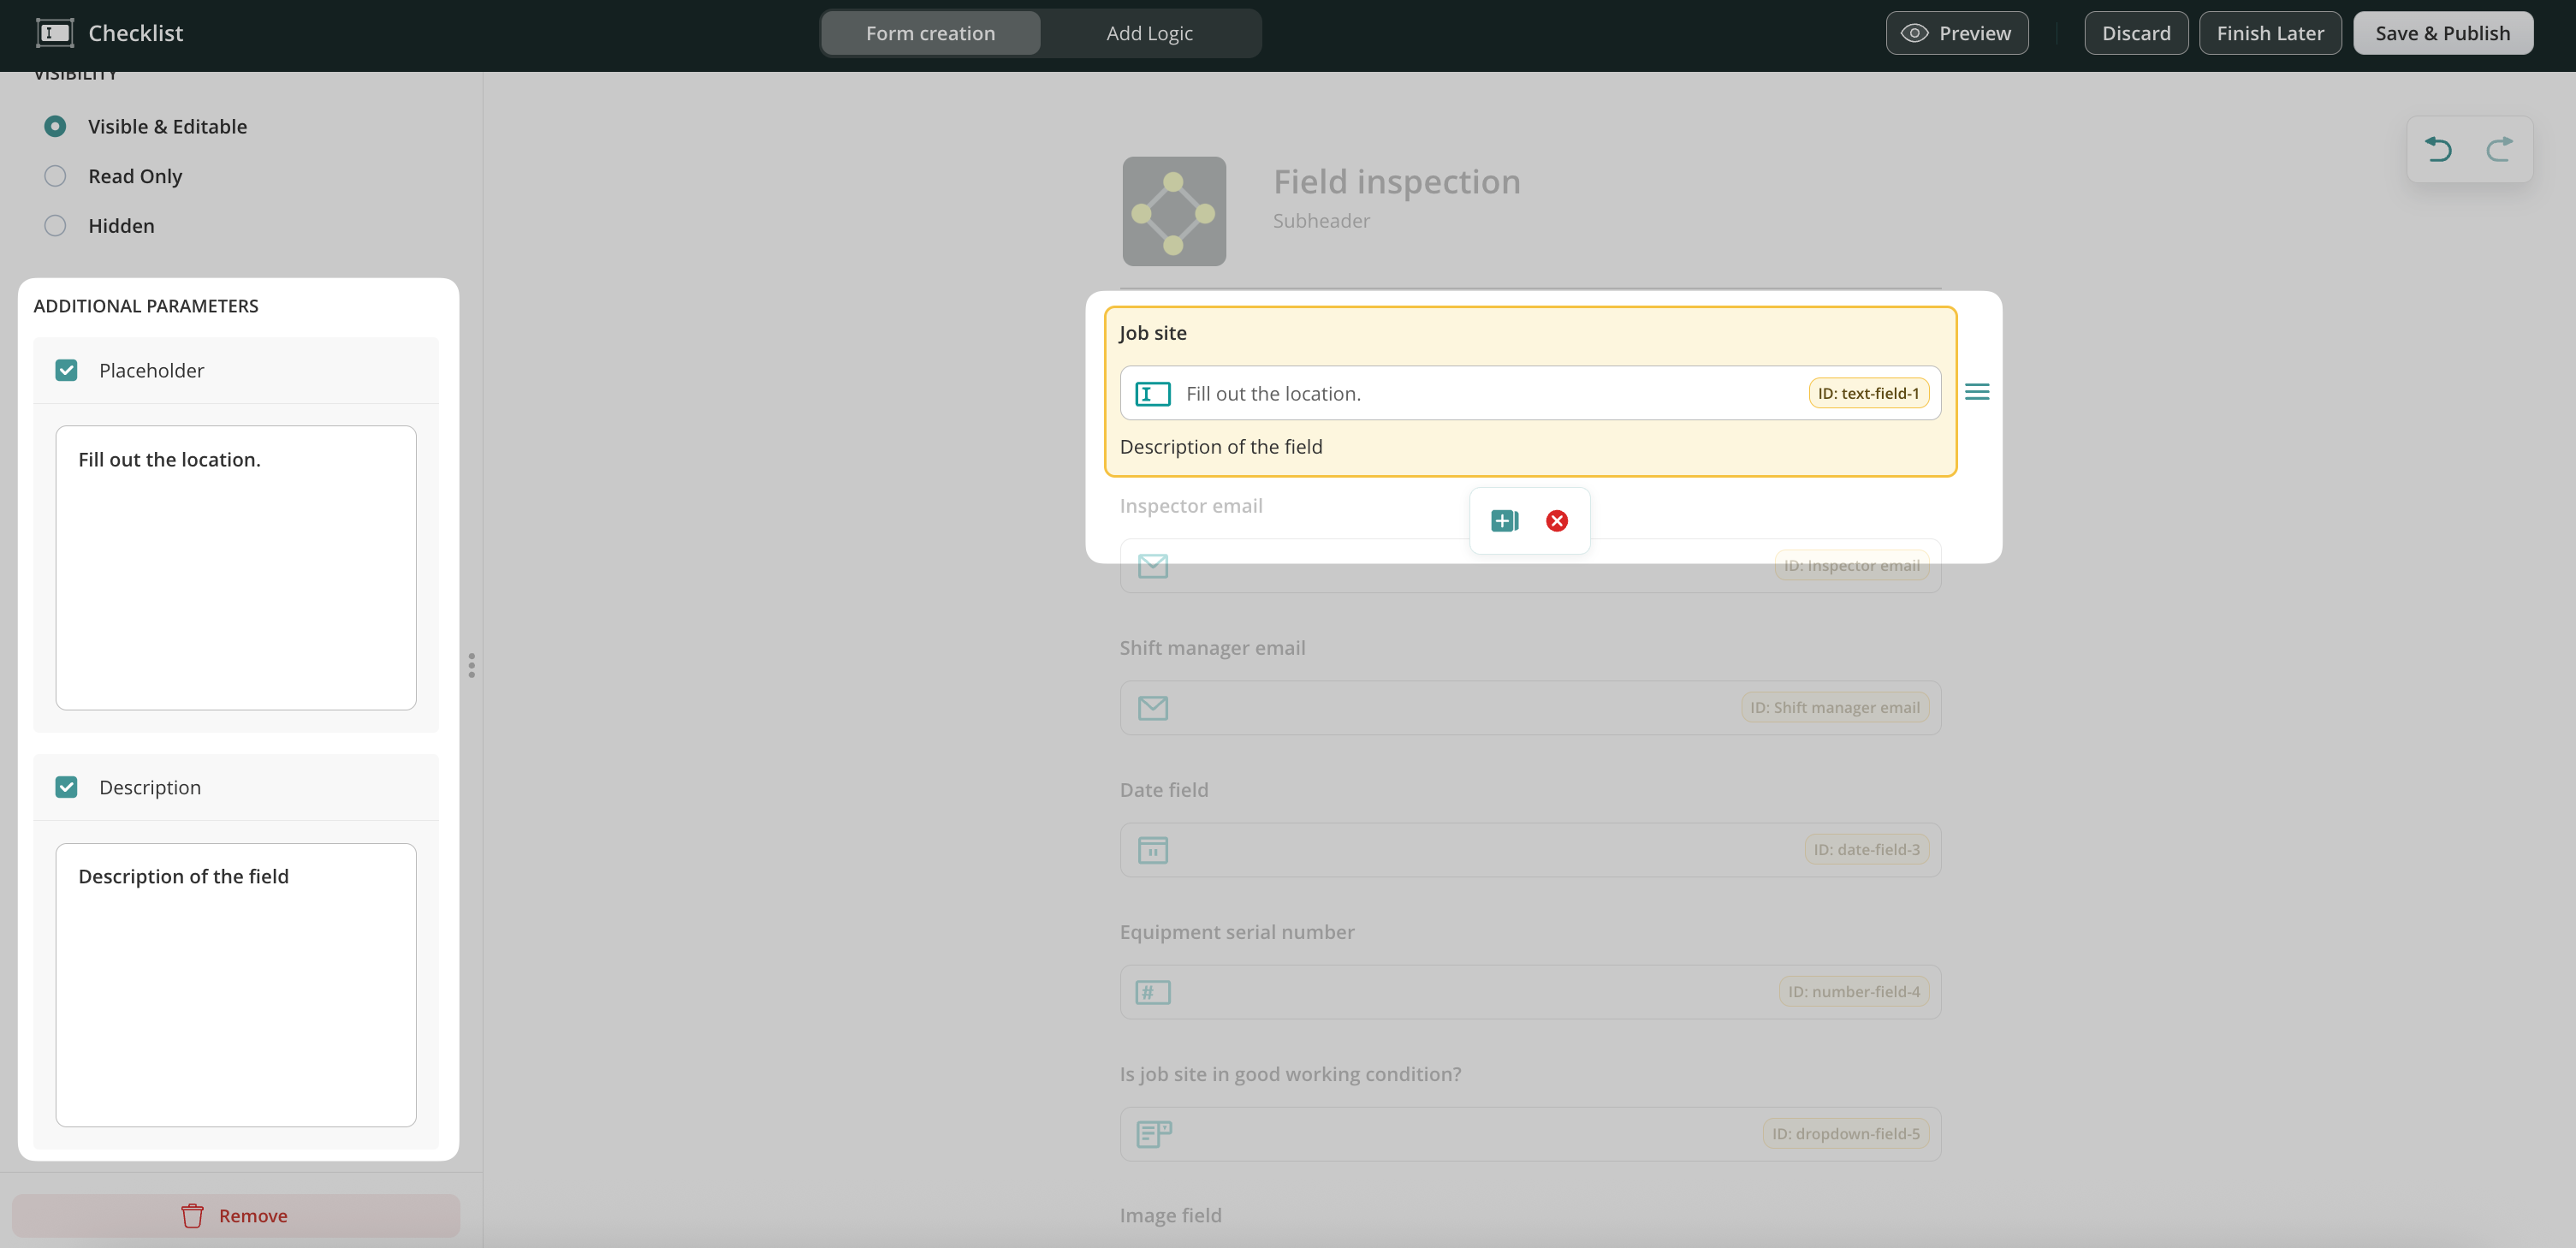
In the Additional Parameters section, you can add the following options:
1. Placeholder and/or Description — lets you create hints for your users, e.g., which information you expect them to fill out in the respective fields.
2. Format option is available for the Number field and lets you configure the visual view of the number that will be filled out in this field.
3. Copy Content is an option that can be added to the Number, Text, and Email fields in the form builder. This function duplicates the content added from one field to another.
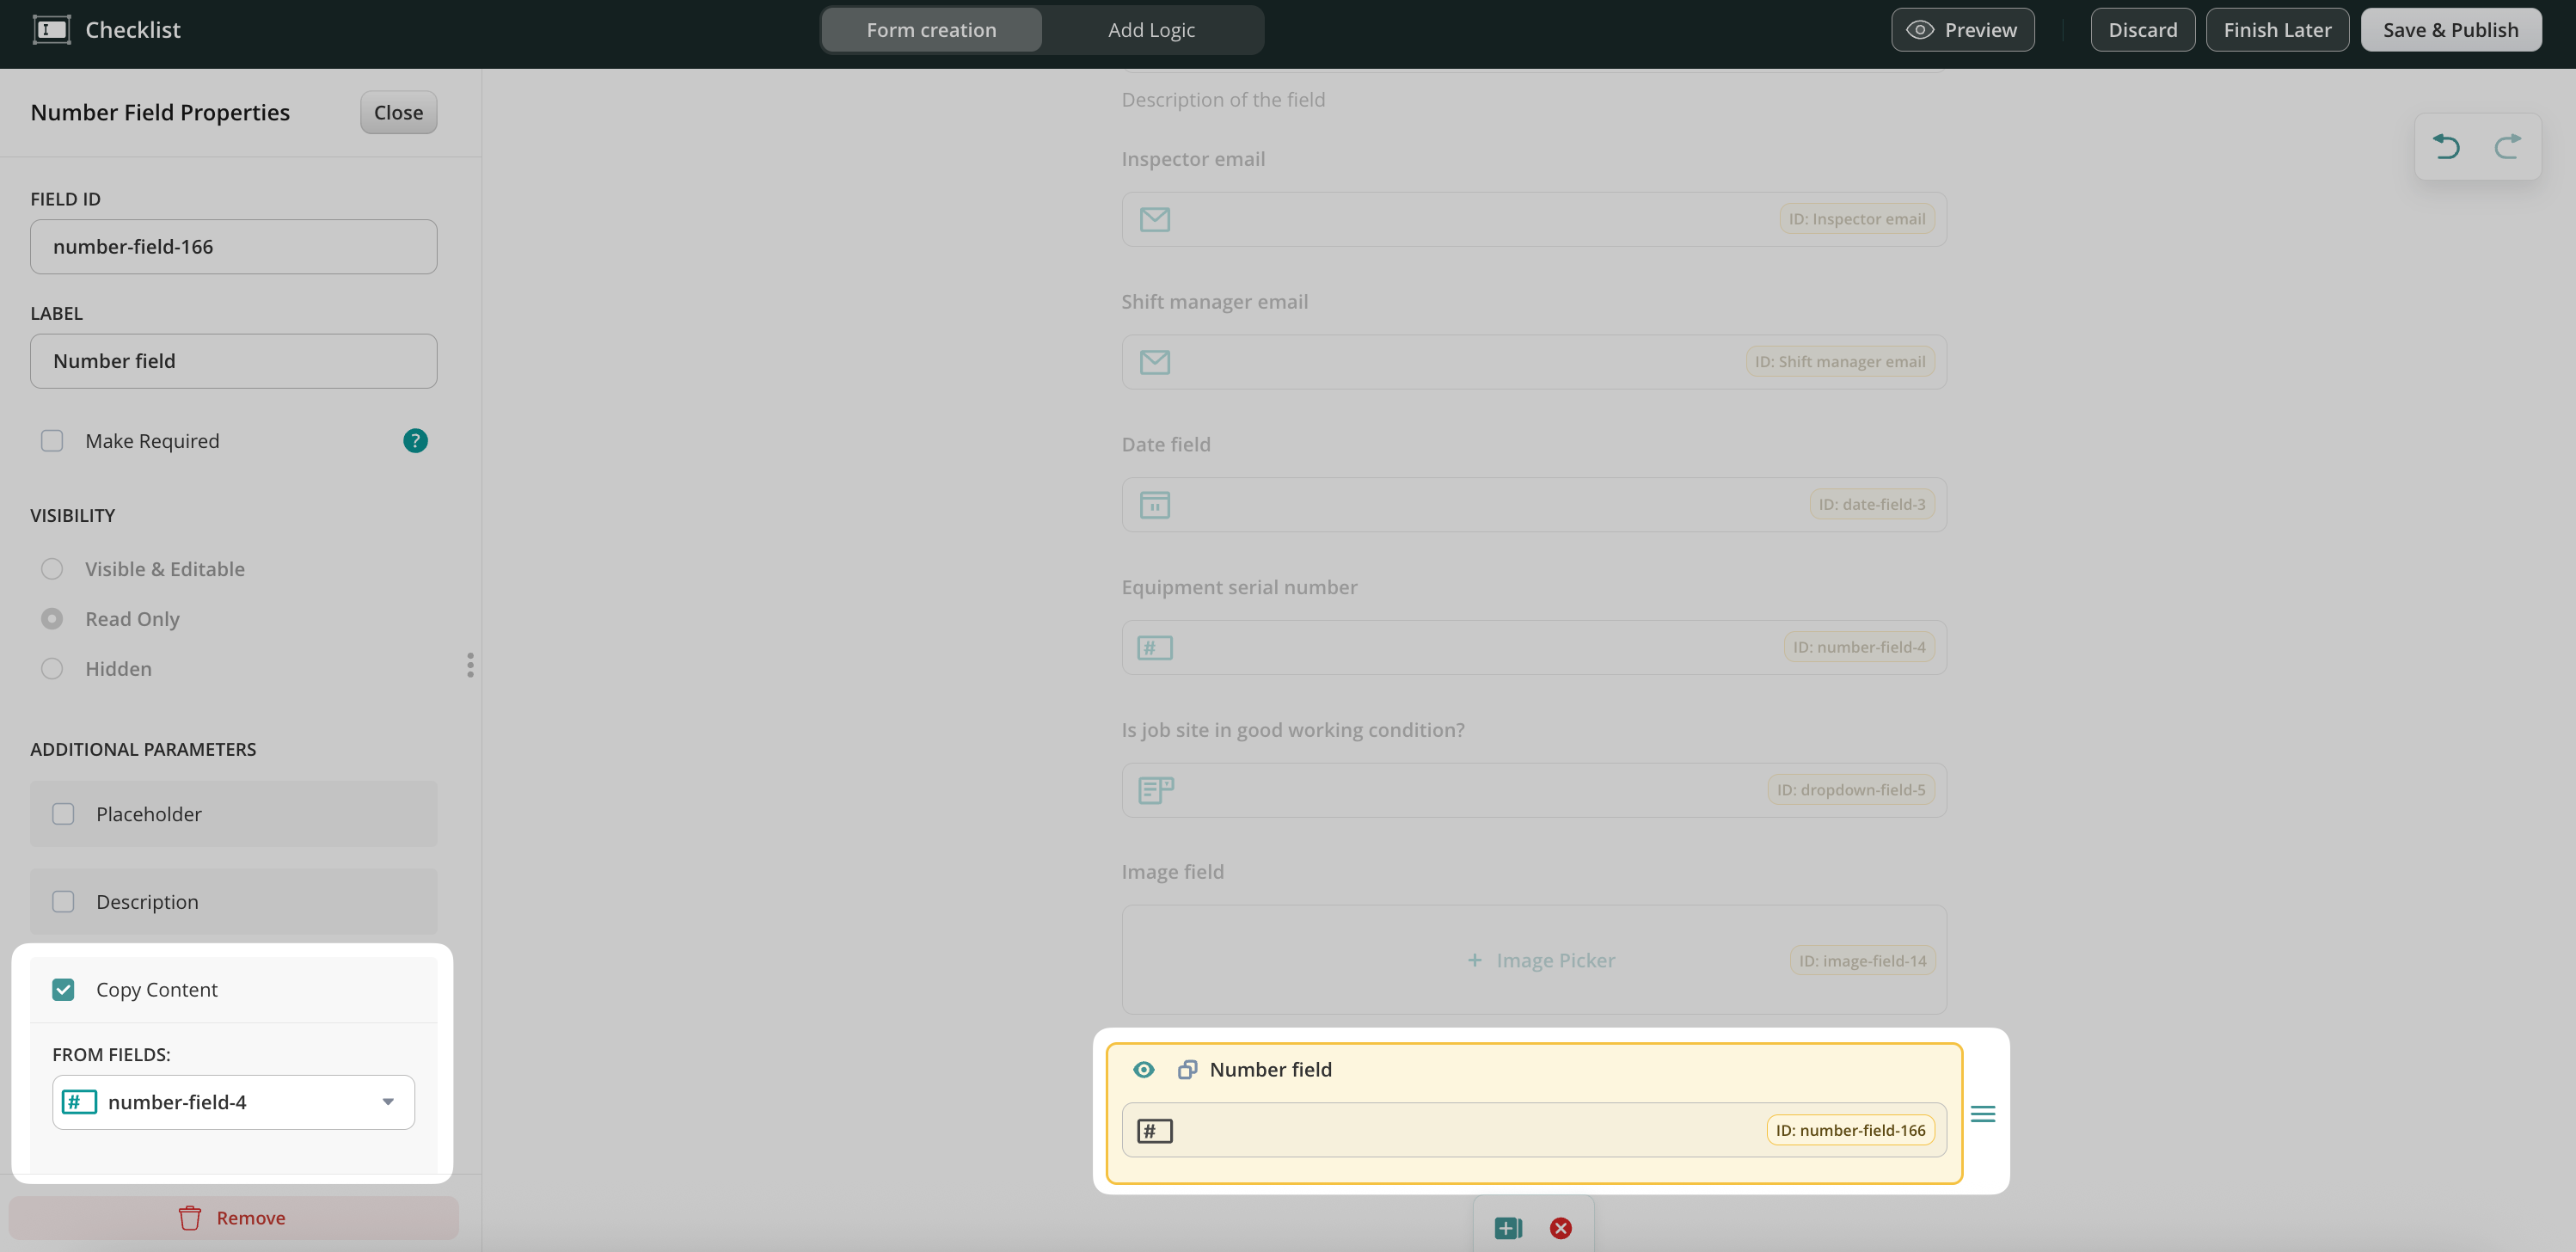
For example:
If, according to the business flow, your users fill out the same information on the form a couple of times, you may automate this flow by enabling the Copy Content option for the respective field. For this, add two similar fields, e.g., Number fields, to the Dynamic Form builder -> click on the field to open it -> select the ID of the field from which you would like the data to be transferred to the current field.
Please note: if the field used to copy content is deleted, the checkbox for the field to which the content should be copied will be automatically unchecked.
Please note 2.0: the field to which the content will be copied should not be set as required or read-only when the copy content is set up. Otherwise, a form with such configurations cannot be submitted due to the conflict of the configurations.
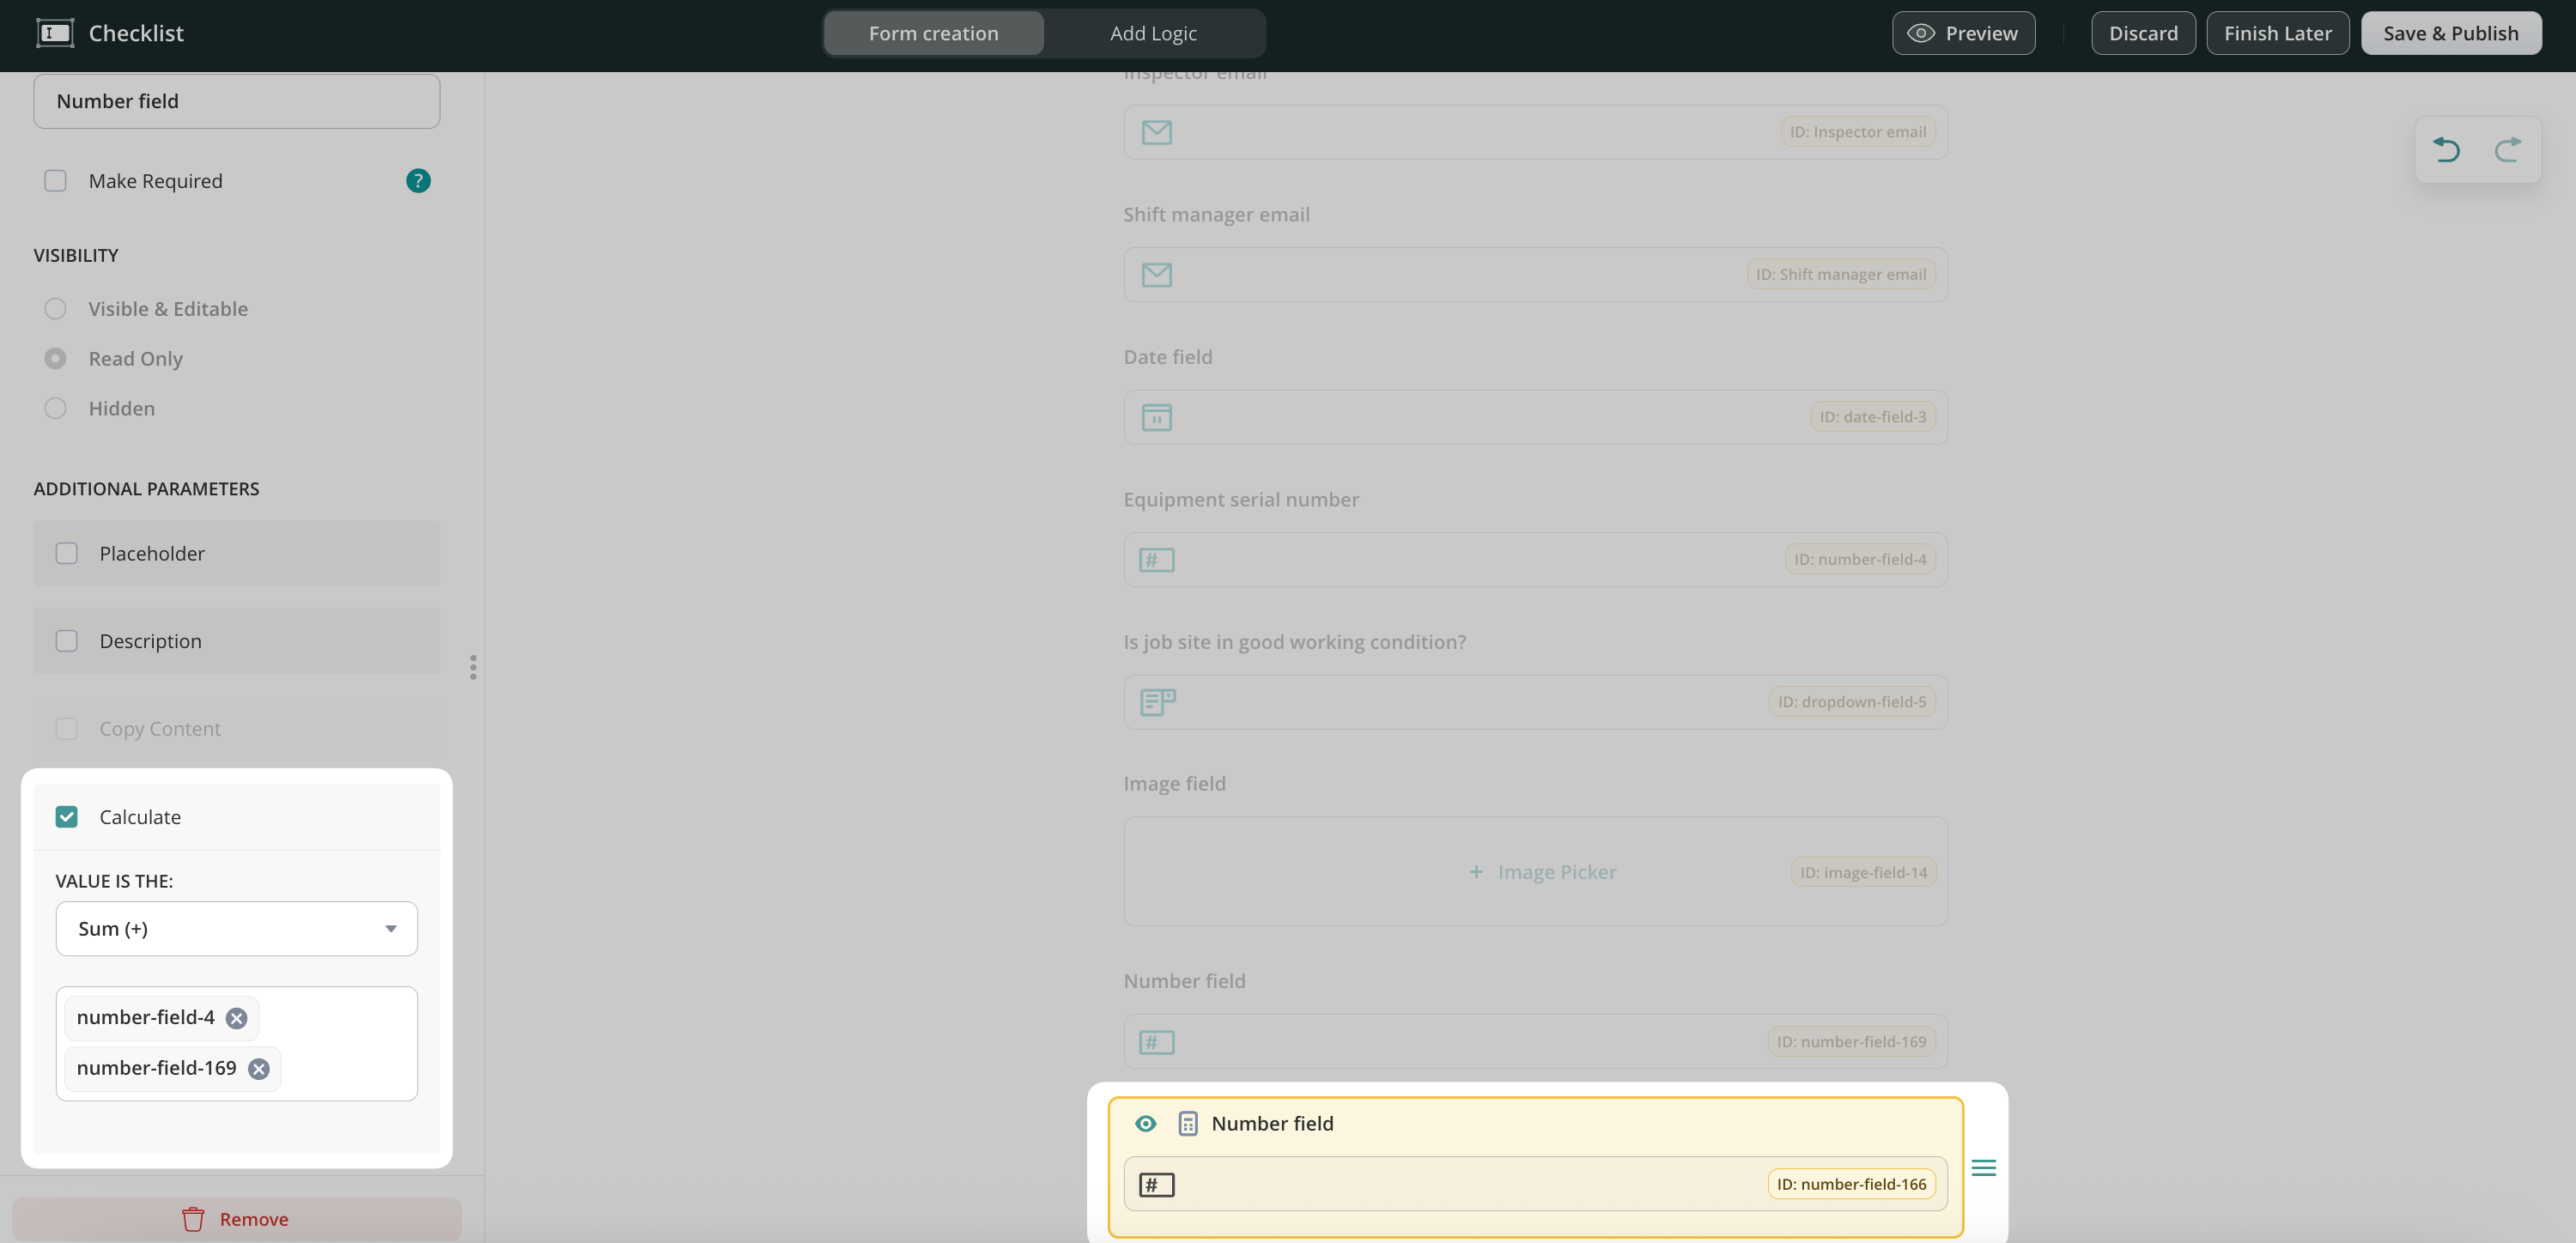
4. Calculate – this function is available for the Number field and lets you configure automatic calculations such as Sum ( + ), Product ( x), Average, Minimum, and Maximum.
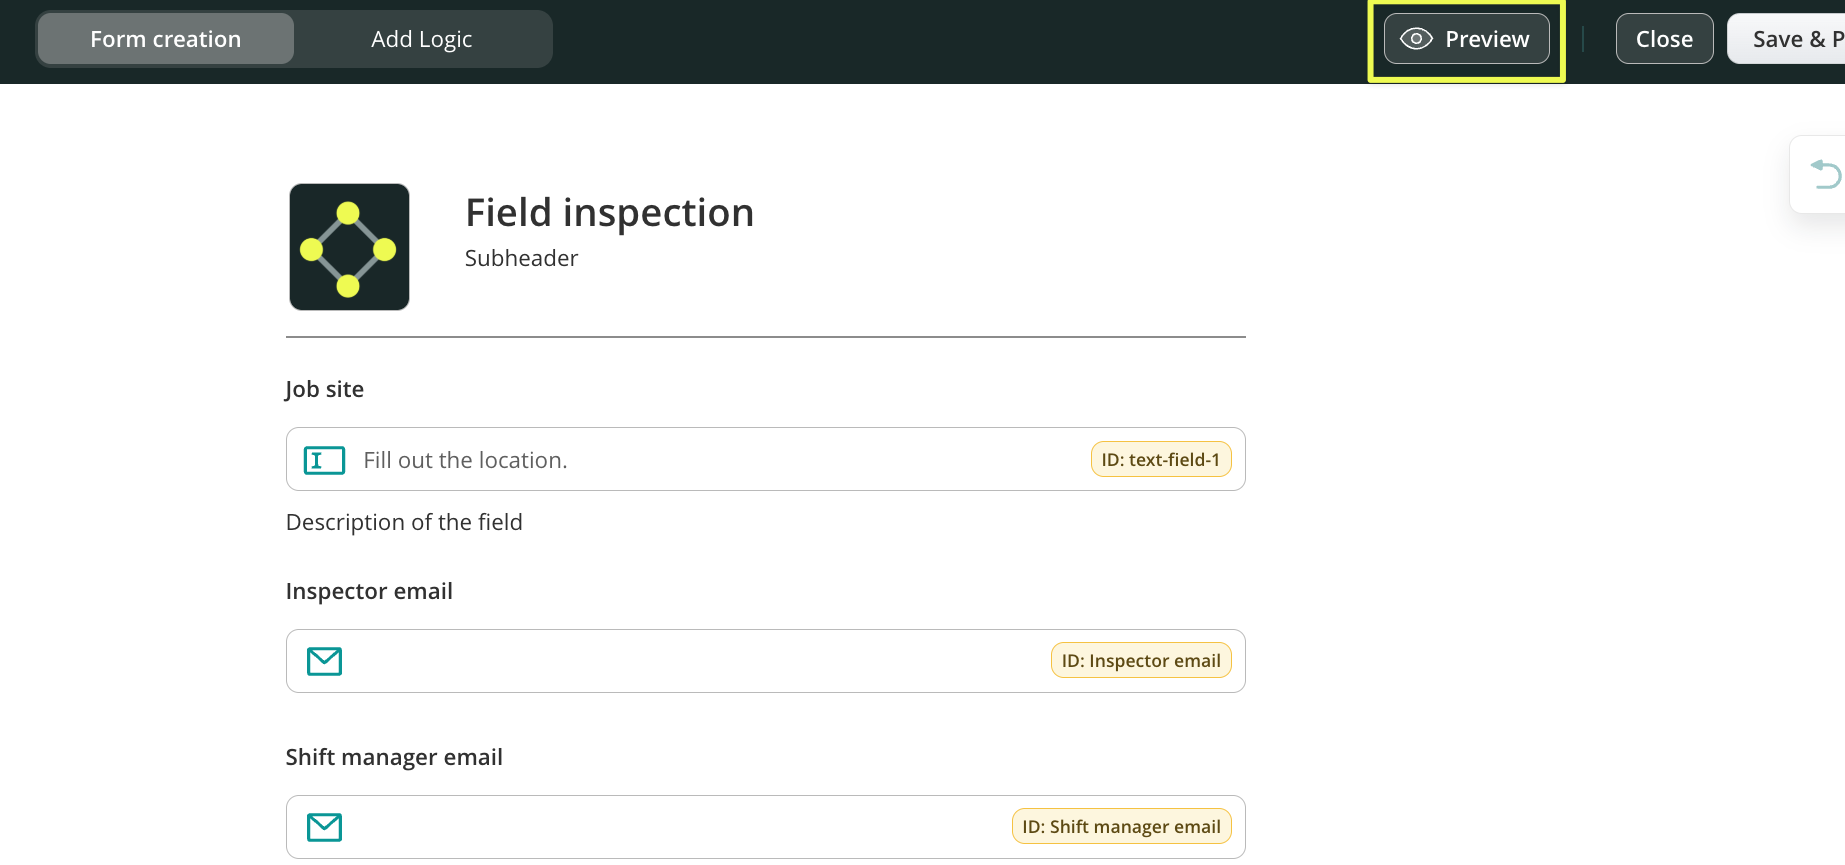
5. Preview – check the editable version of the created form in three main modes: Mobile, Tablet, and Desktop, before you publish it and use it in your workflow.
6. Move the added field through the page by clicking on the element from the right side of it and pulling it.
7. Duplicate or delete the field by clicking on it and selecting the respective option.
8. Undo the action done earlier or redo it to discard the results of the last Undo action by clicking on the arrows.
Unlimited Photo Upload – How to set up?
In our use case, during the inspection in the field, the service technicians might need to add multiple photos to the form in case some of the remarks do not match the standards. Let’s check how this can be achieved.
In the Form Creation section, you may add the Radio Buttons field to the form, add the options from which the users will select, and make the field Visible & Editable.
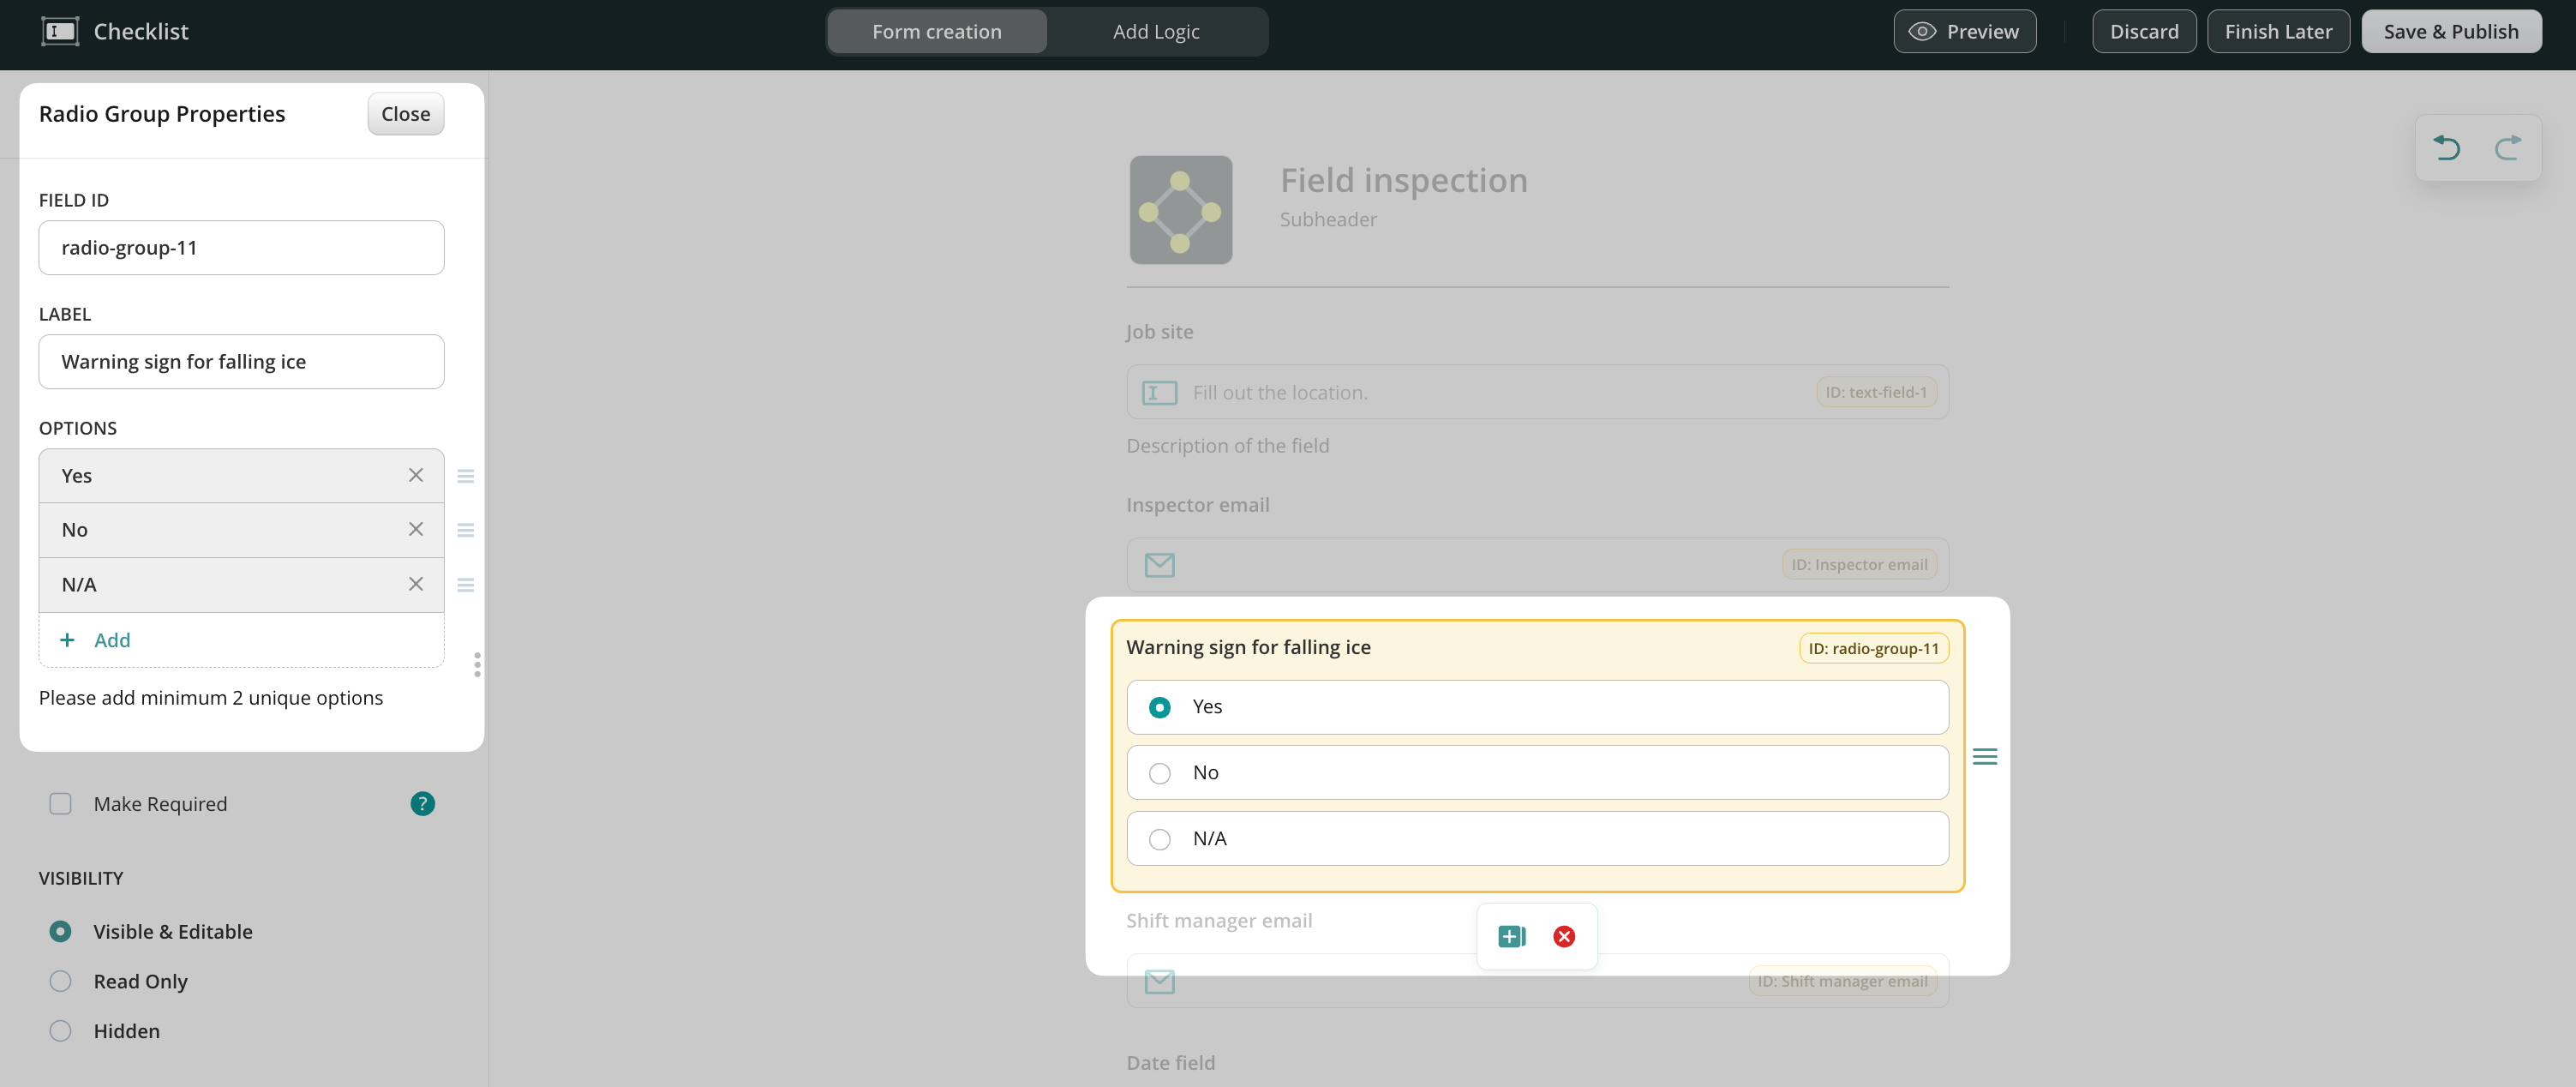
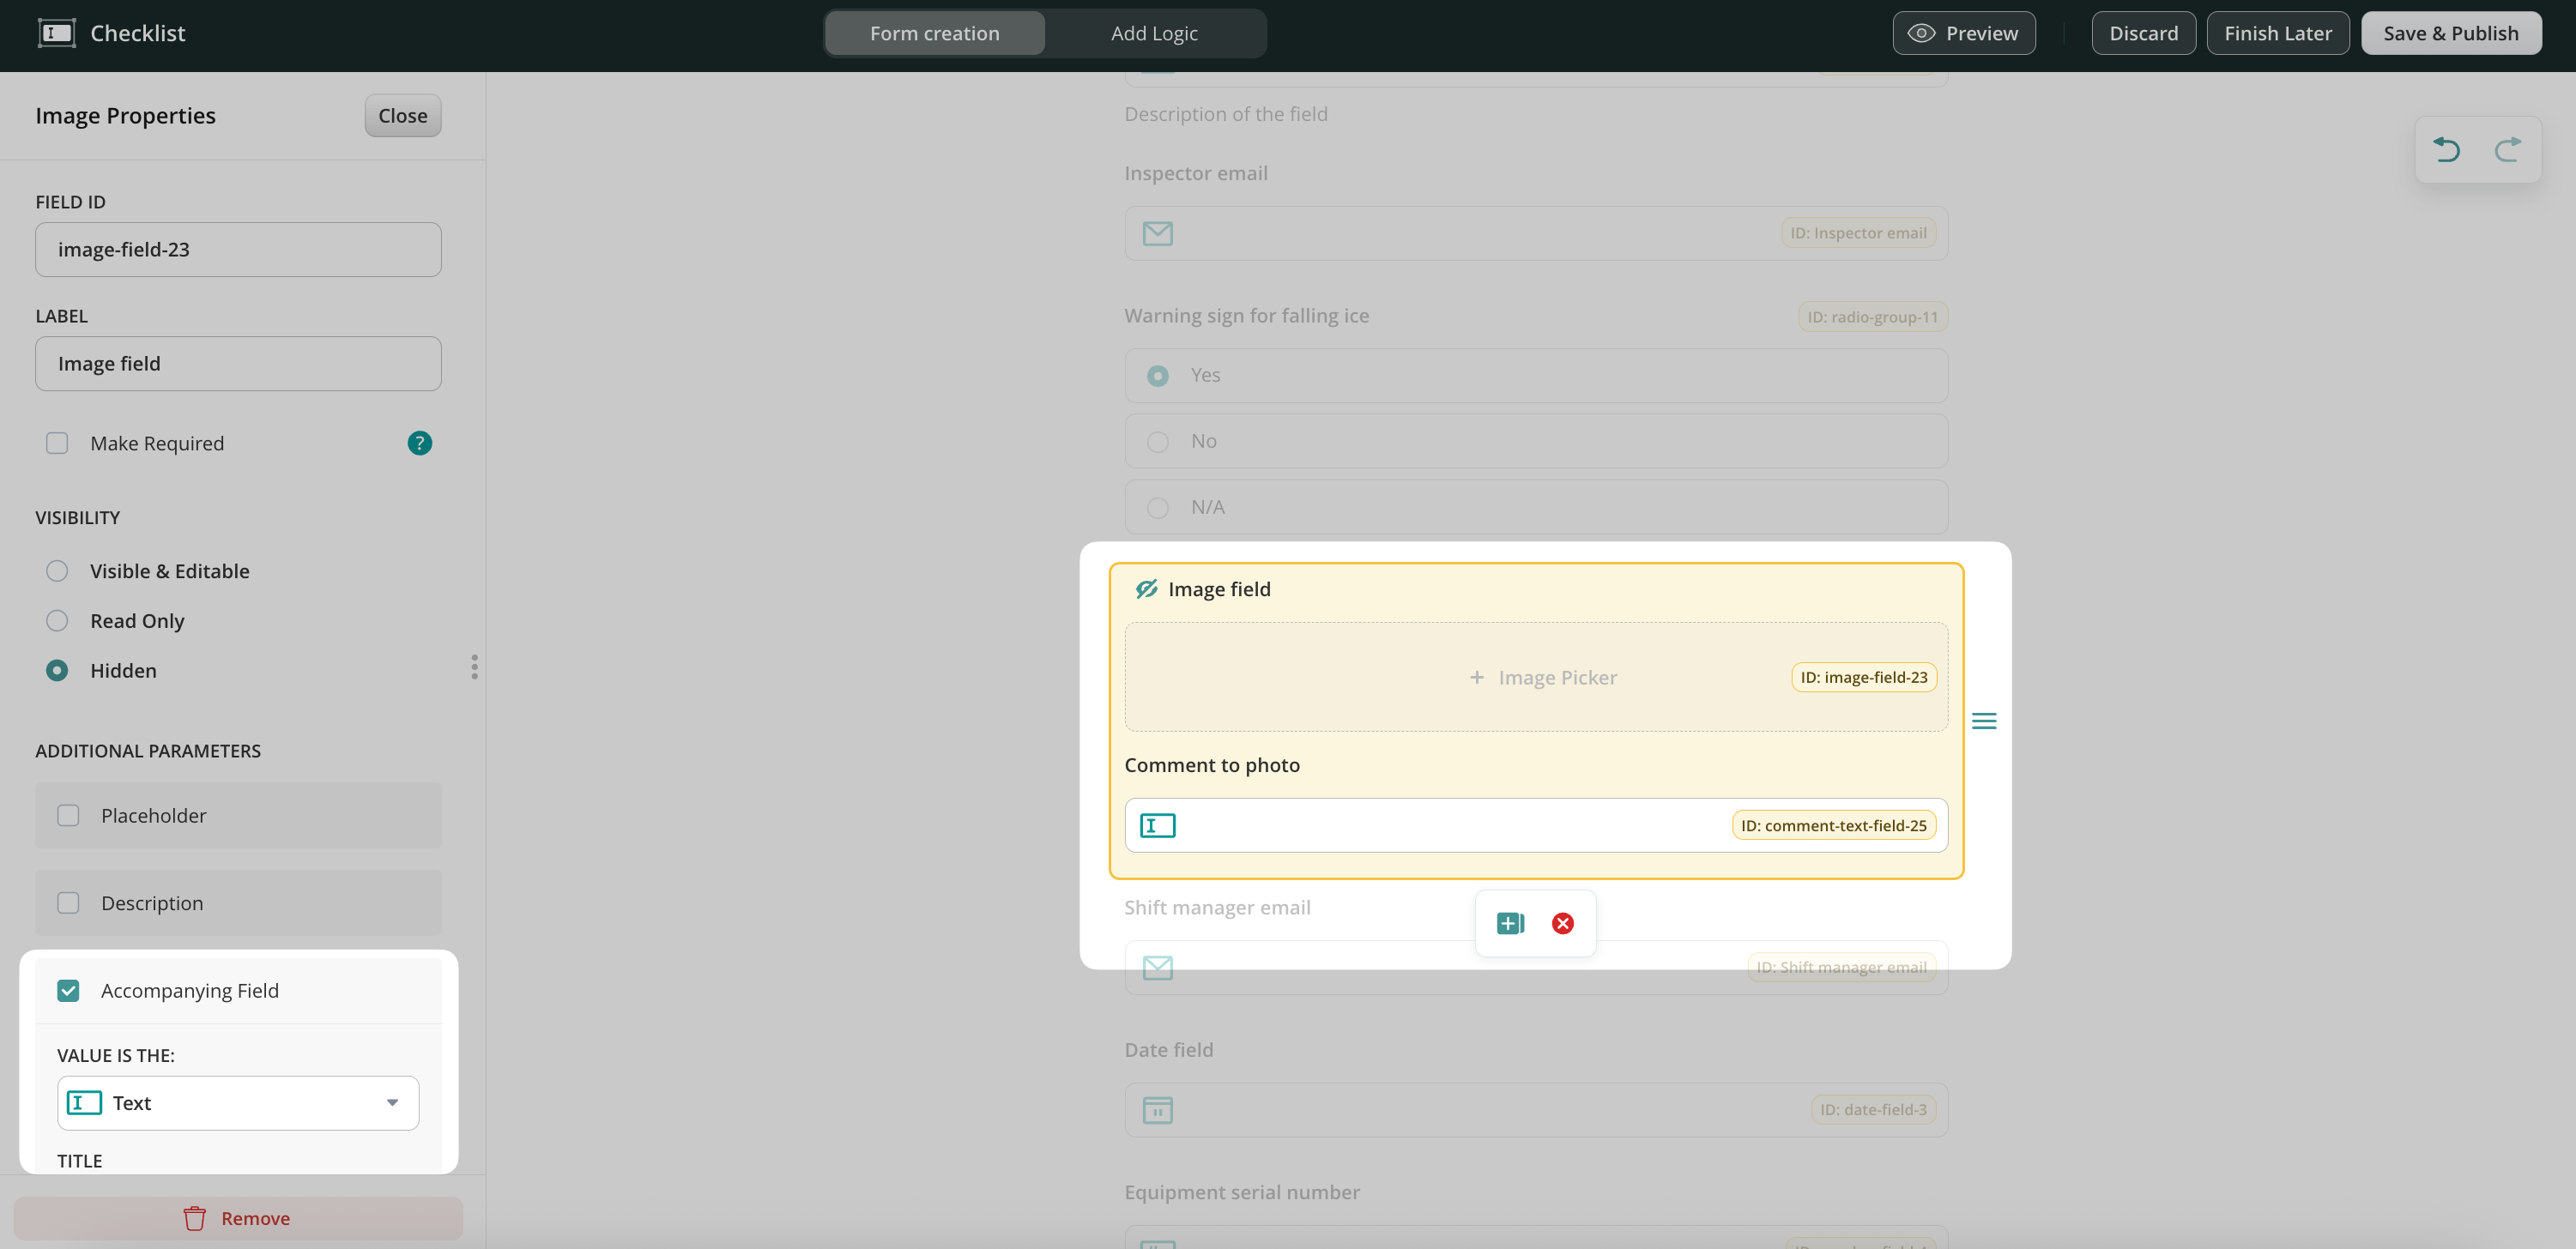
After that, you may add an Image field and make it hidden by default since we’ll add a condition to it later. You may add the Accompanying Field, an additional field where the tech can add more context to the added image (possible formats: text field, date, number, signature, or email field).
Once we map the fields in the form, it’s time to add conditional logic based on which the specific fields in the form will be demonstrated to the service technicians.
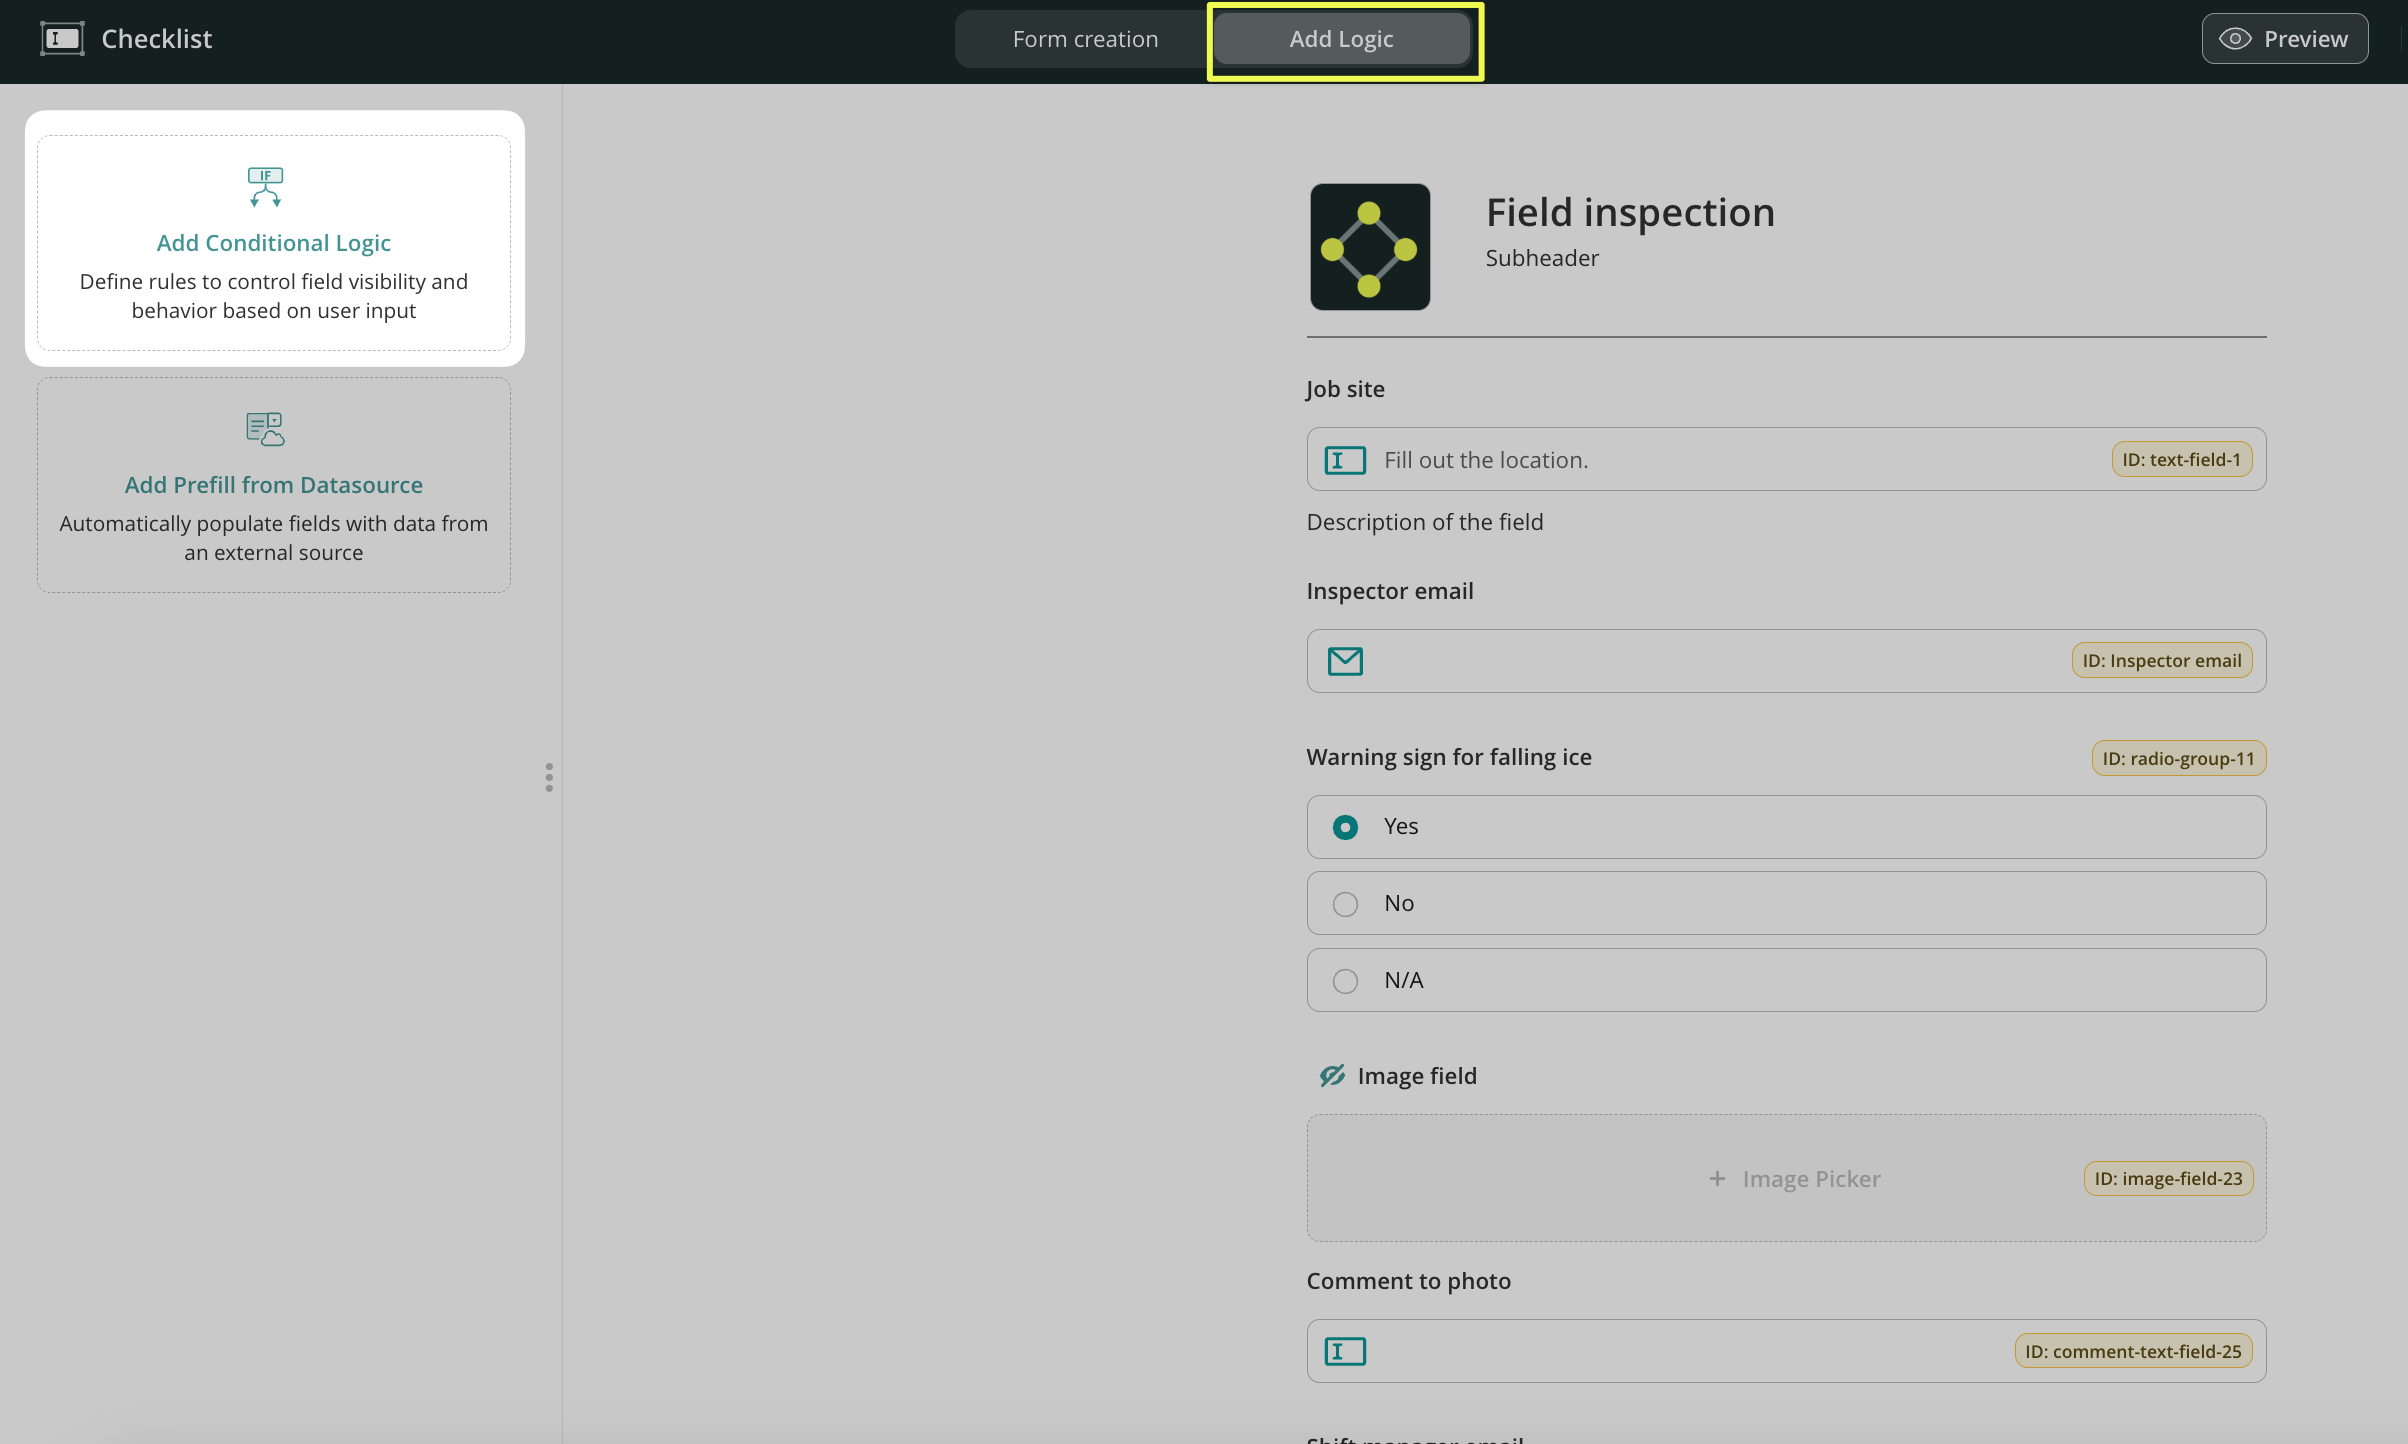
Add Logic tab – Add conditions to the form
Open the Add Logic tab, click Add Conditional Logic on the left side, and name the condition.
You may also configure a dropdown field prefill with data from your data source. To learn more about this, see the Feature Tutorial Prefill from Data Sources in Fluix.
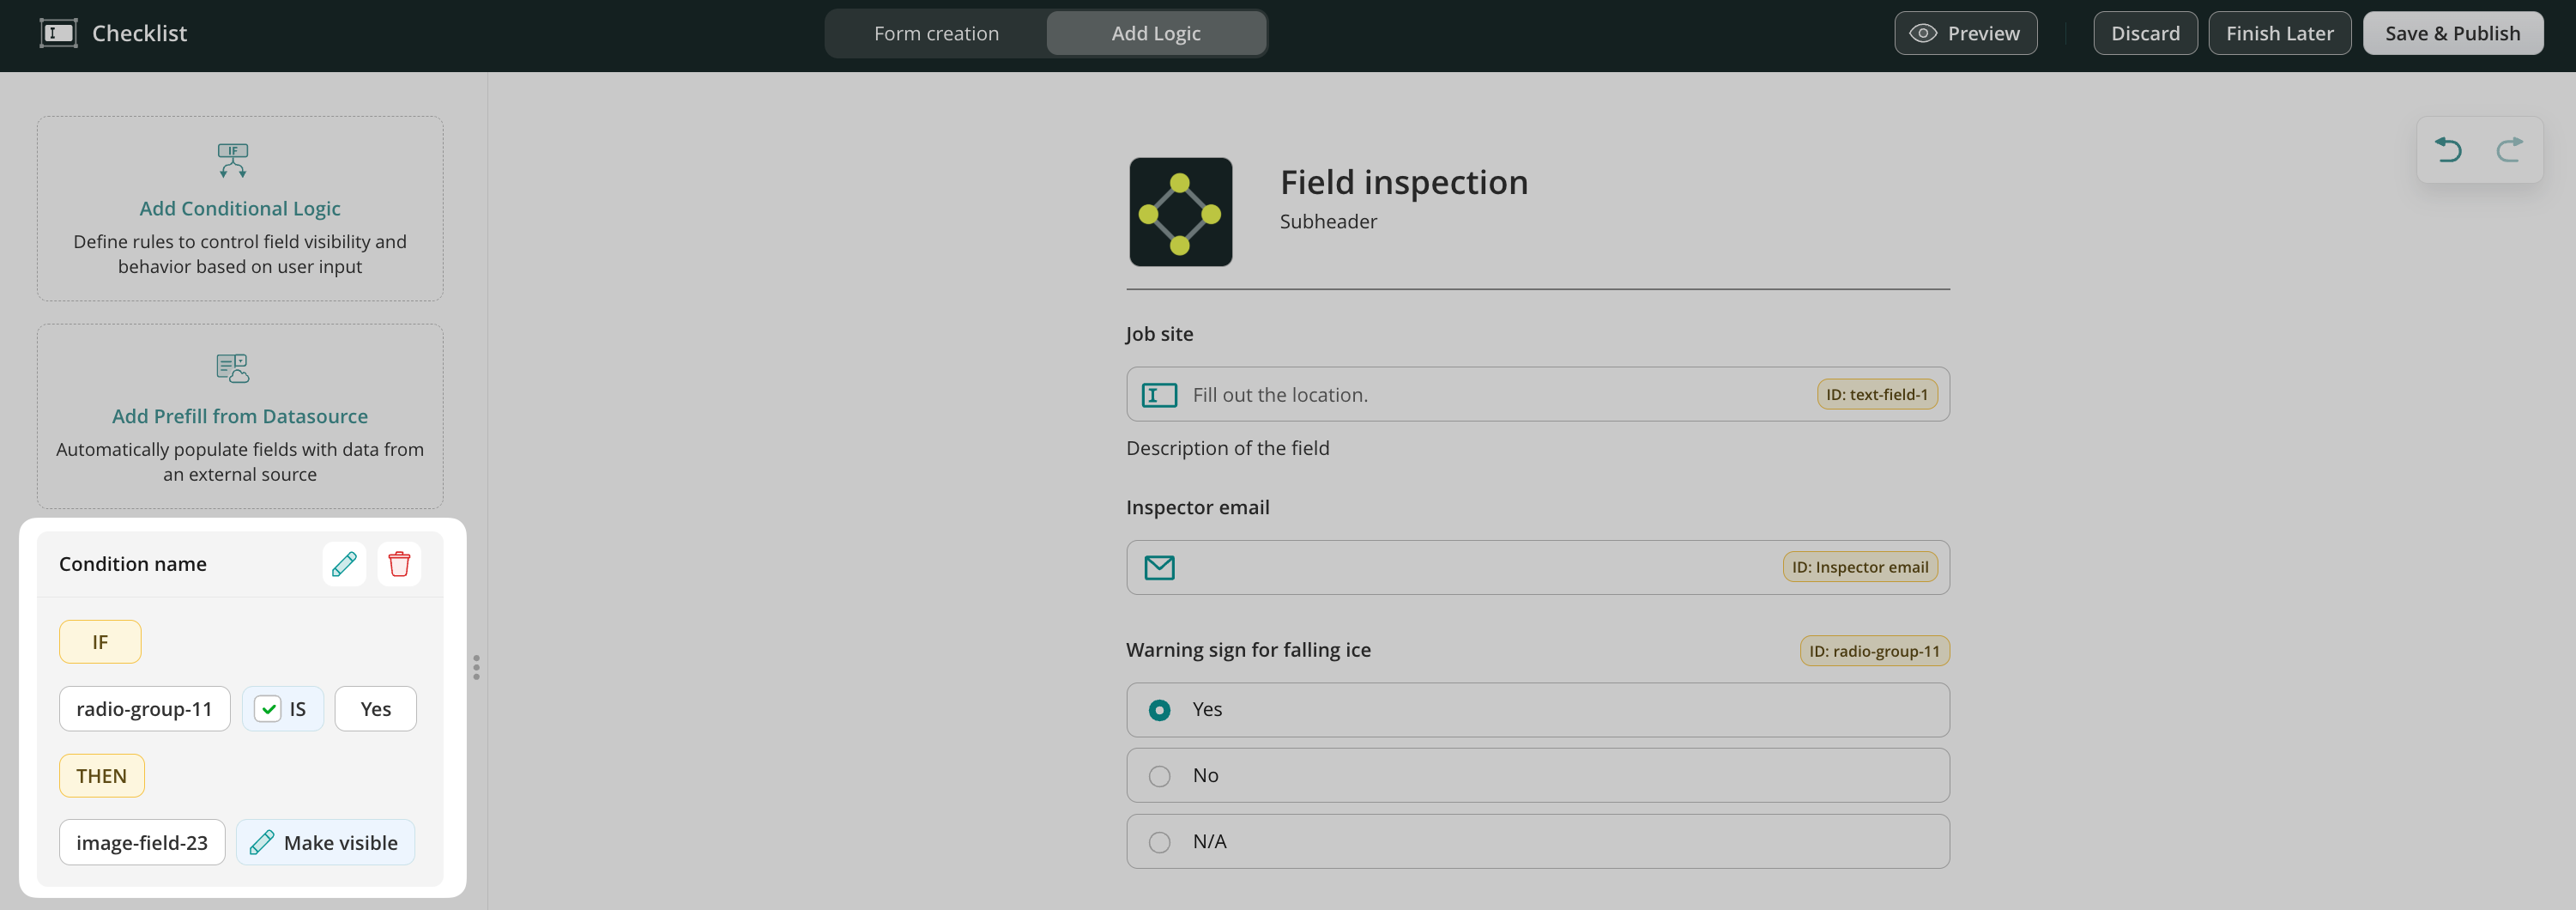
In our case, service technicians will need to add the images to the form if the Yes option is selected for the question.
Select the specific field ID and value from the dropdown list that will trigger the Image field to appear in the form.
Add similar conditions to other radio buttons in your form and click the Save & Publish button in the upper right corner to save the form. Once the checklist is created, let’s add it to the process.
Step 2 – Create the repetitive inspection process in Fluix
1.Navigate to the Fluix admin portal -> Workflows -> New Workflow.
2.Drag and drop Process Start to the working area and add a User task.
3.Configure User task by adding the overview of the task and adding the Service technician group.
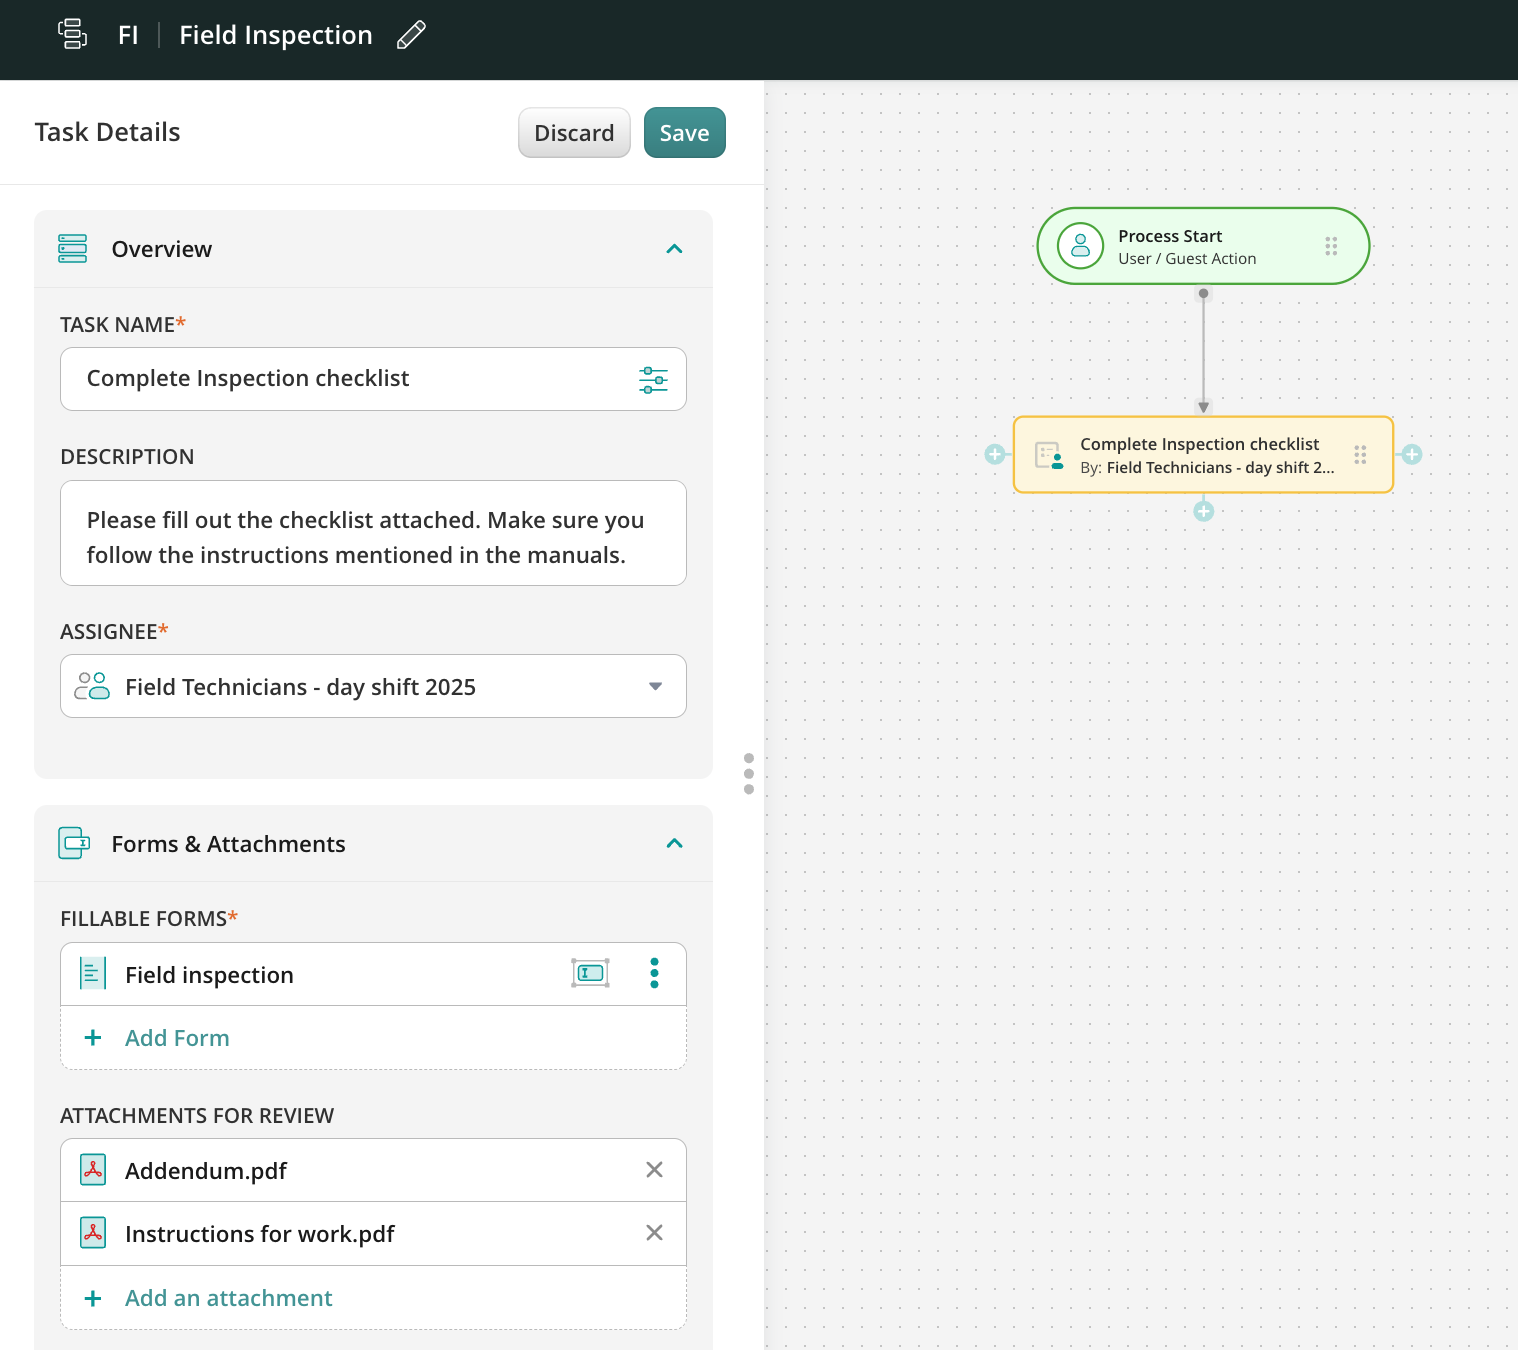
4.In the Forms & Attachments section, click Add form -> Choose from forms option and select the checklist created earlier.
Optionally, you can click on the form assignment mode to configure who will fill out which fields in a form on different steps of the process. By assigning form fields, you define the particular fields in a form for the Group-Assignee of the current Task. You can make particular fields visible & editable, read only, hidden, or required for this Group.
Please note: Making the field required does not work in case this field will be read-only or hidden.
5.Decide where the checklist will land when the inspection is completed: upload it to the Fluix storage or your company’s cloud storage, send it via email, or push it to third-party platforms like Procore, Smartsheet, Salesforce, etc. To learn more about different submit actions, check this article.
The final look of your Workflow may look like the example below:
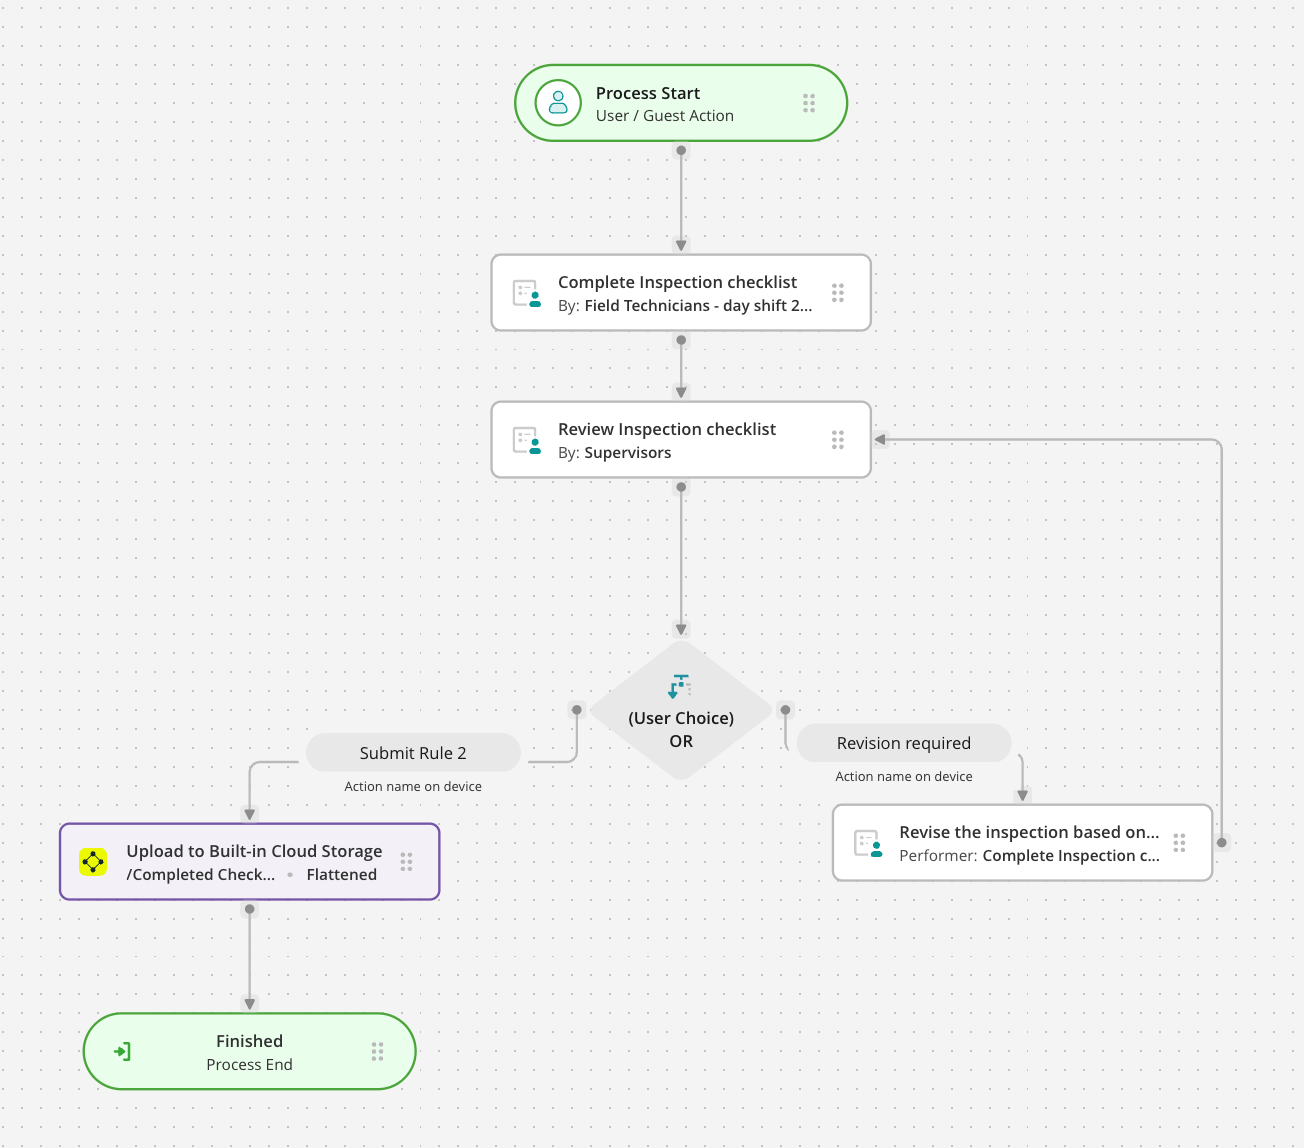
6.Once ready, Save & Publish the workflow and proceed to its testing.
Step 3 – Testing Dynamic Form in the App
1.To test the setup, make sure that you have added yourself to the group of users who participate in this workflow.
2.Open the Fluix app on your iOS or Android device. Alternatively, you may test the setup through the User Mode.
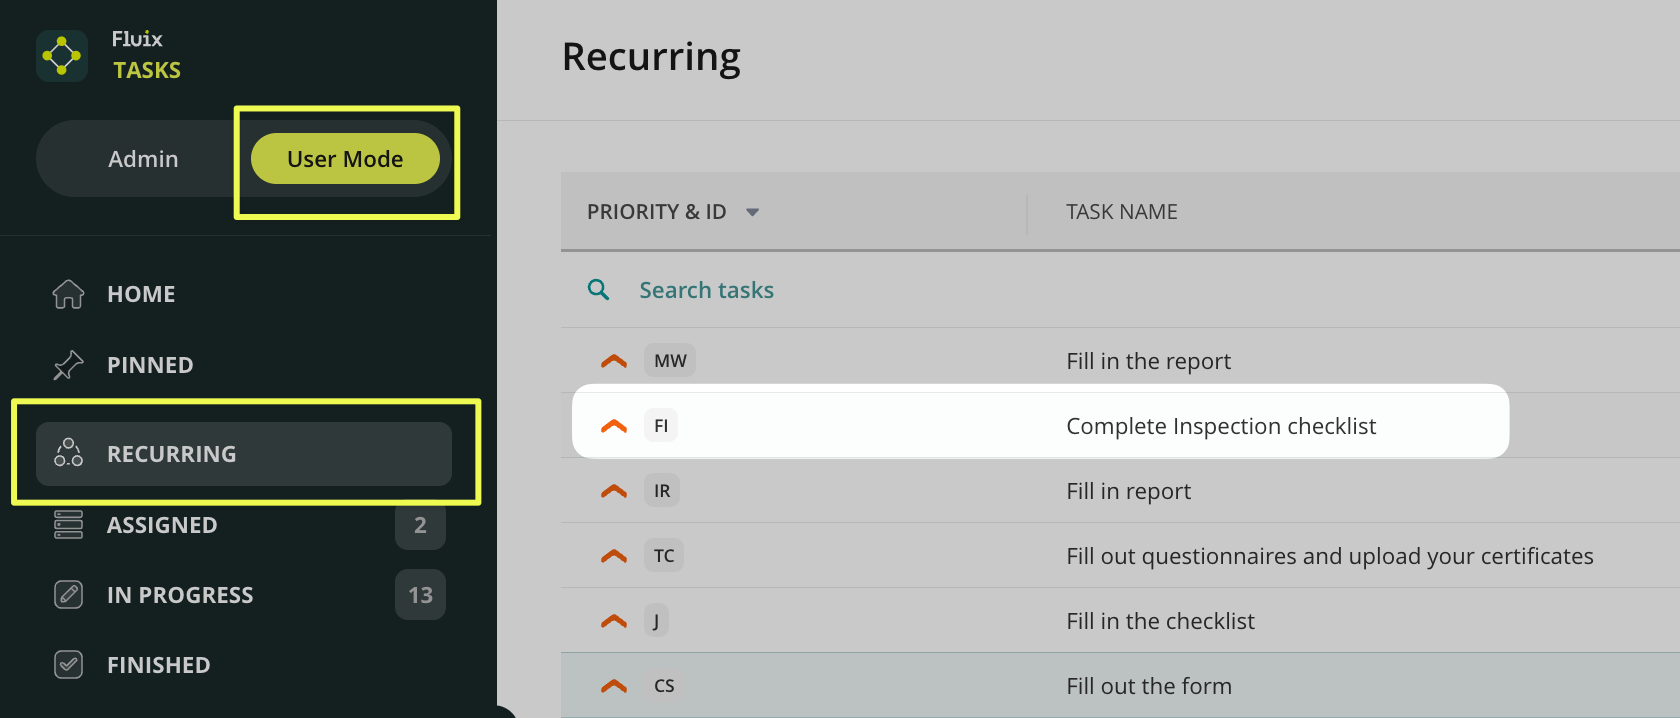
3.Open the task and the dynamic form, and click the Start work button to fill out the checklist.
Initially, the form will not display any image fields; however, upon selecting the Yes option from the list, the Image picker will become available, allowing you to add as many photos and comments from your location as you need.
In case you have any questions or difficulties with setup, contact our support at support@fluix.io and we’ll be happy to help you.