


In the Dashboard of your Admin Portal, you can now check a preview of the larger image that your field team adds to their inspections. Moreover, you can automatically extract images from tasks to your Fluix File Storage or external cloud storage
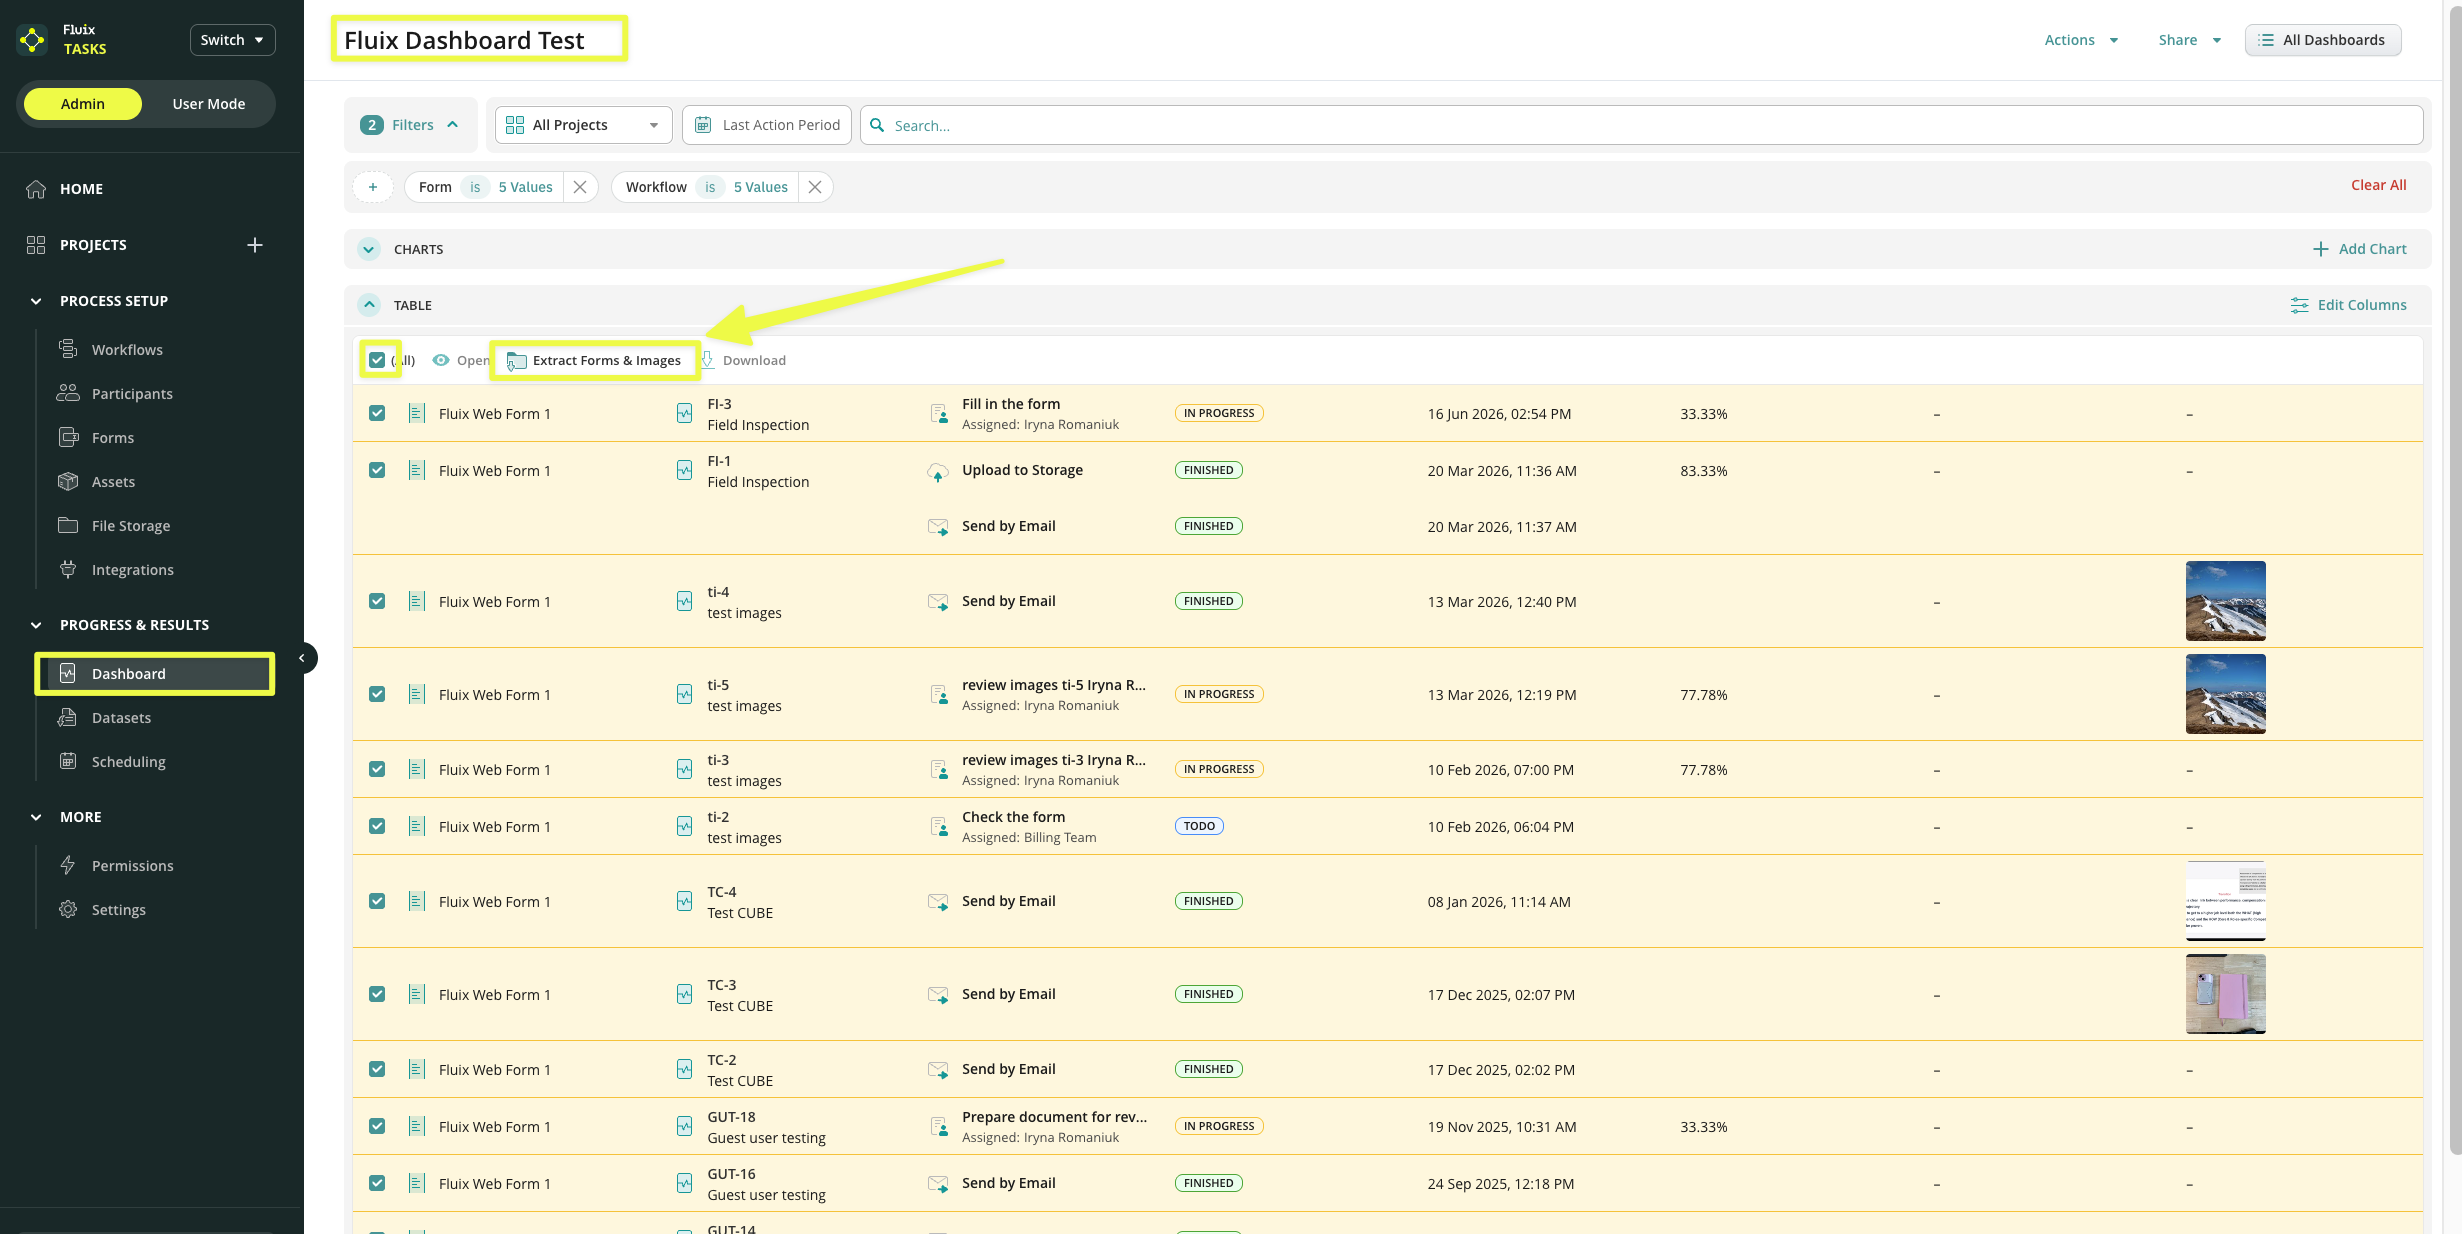
By routing images directly to your ‘Dashboard’, you’ll simplify the photo review and reporting process. You can eliminate manual image handling, and the new thumbnail view lets you verify media without opening individual PDFs.
Furthermore, the option to export forms and media as a single consolidated ZIP file or as standalone image sets enables you to share documentation with clients more efficiently.
Let’s take a closer look at both of these options.
How to extract images separately to Fluix Storage?
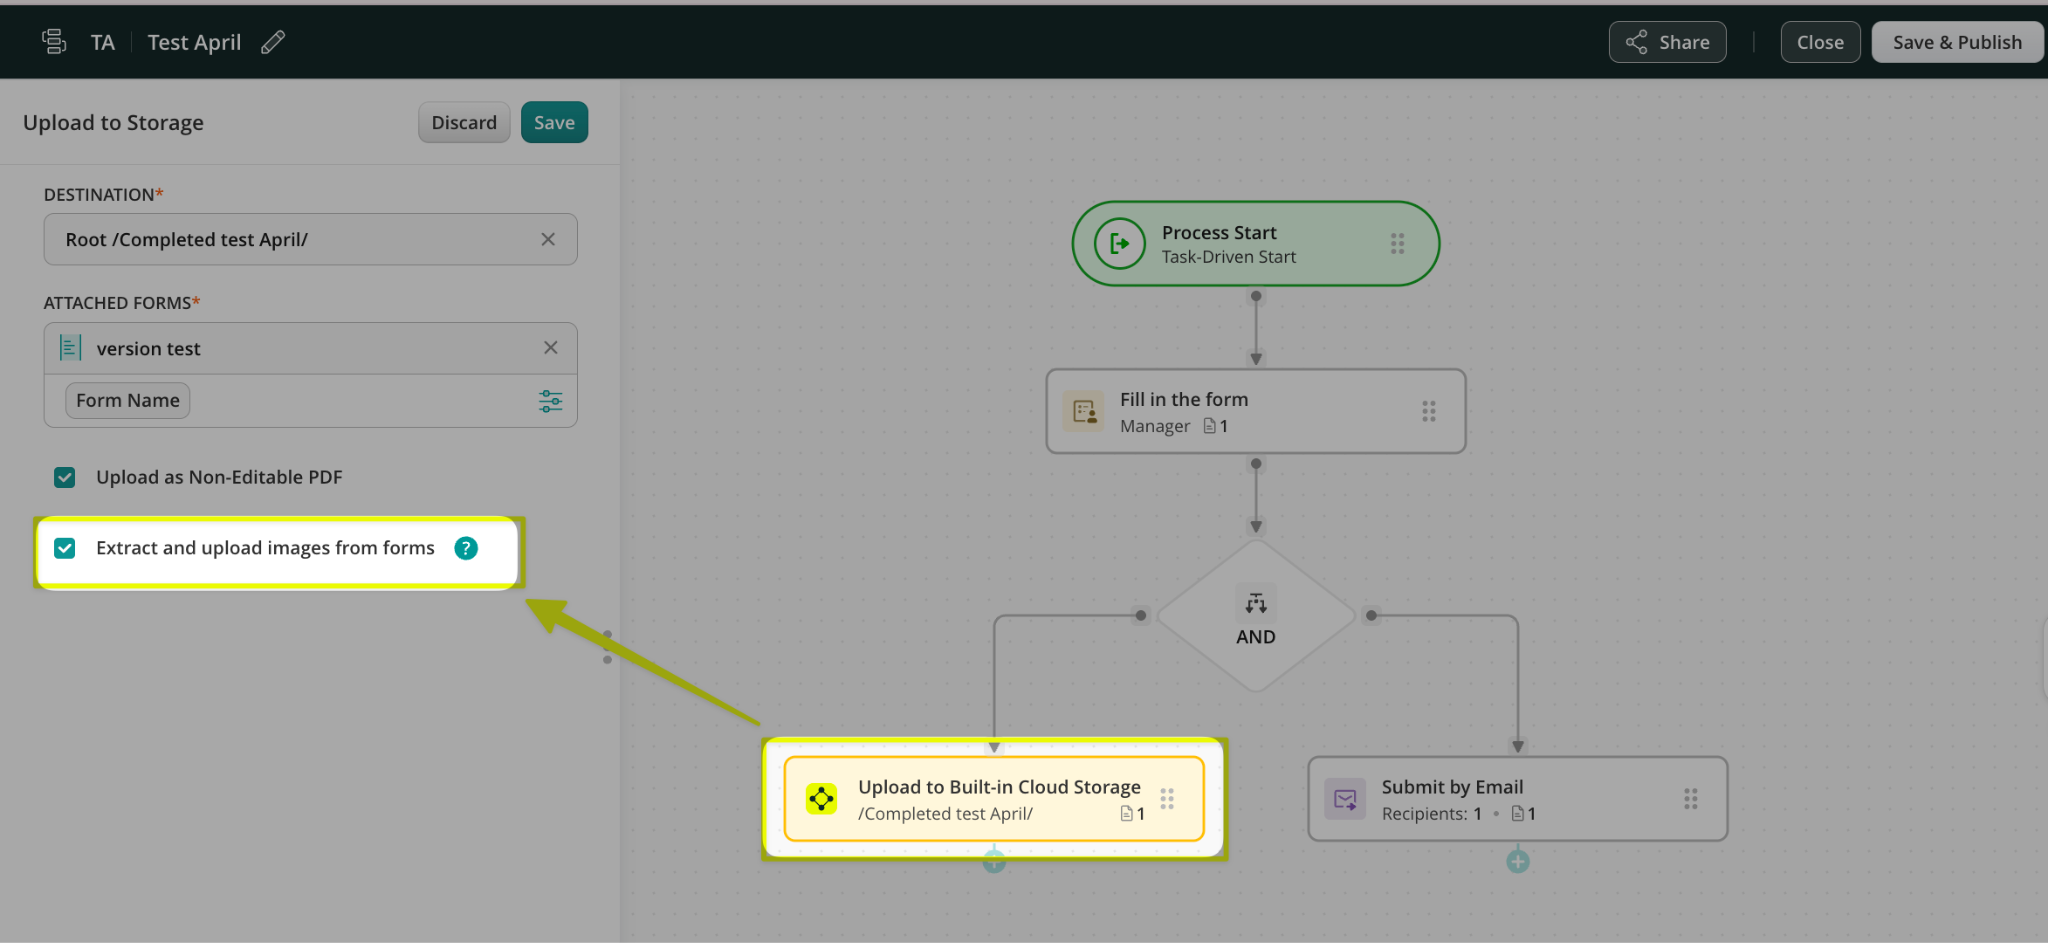
You can configure image extraction to File Storage in the workflow builder using the Upload to Storage action.
What does this mean for your forms and processes?
When completed tasks are submitted, the filled forms are archived to the preconfigured destination in your selected cloud storage. Any images added to the forms are also uploaded separately to the same destination path.
Below is an example of how this may look in case you store the completed PDFs in Fluix File Storage: a completed form submitted by your field team, along with the separate images they added to the form.
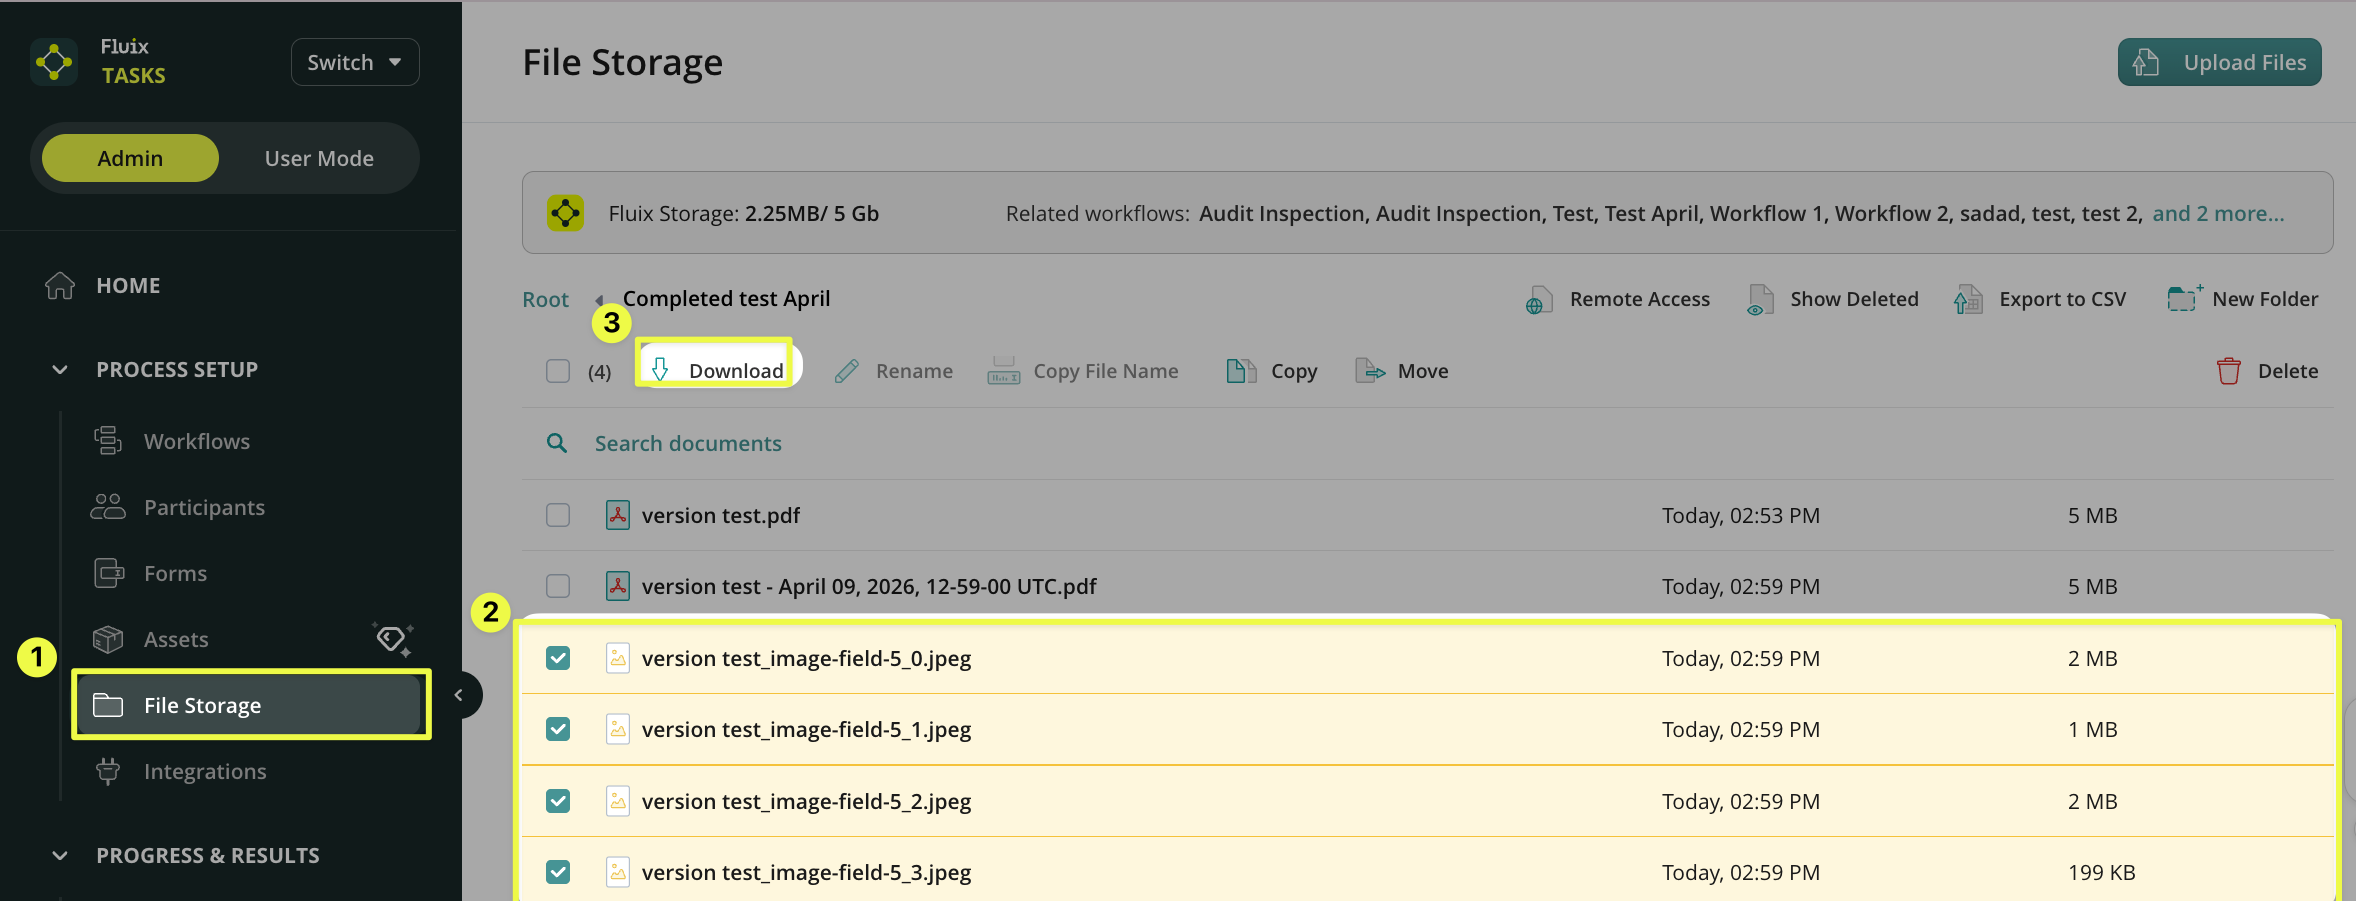
Note: Images added to a form are still saved within the form itself. This option provides an additional way to store images separately for quicker access when needed.
How to preview images from tasks in Dashboard?
The option to ‘Extract images from forms’ from the Dashboard can be enabled by following the instructions below:
- Navigate to the Admin Panel -> ‘Dashboard’ section -> ‘All Dashboard’ button on your screen:

- Click on the “Create board” button

- Switch on the toggle ‘Show image Thumbnails’ at the bottom left corner of your screen.

- Click on the‘Form Field Data’ -> choose the form for which you would like to see thumbnails. Click the ‘Continue’ button.

- Select the image fields that you would like to preview and click on the ‘Save’

- Click on the ‘Save’ button.

- Please provide the name to your Dashboard and click on the “Save” button

After applying these changes, you will see the image preview in the Dashboard where you saved the changes. Additionally, you can quickly Extract Forms & Images here, but we will dive deeper into this in the second part of this article.
How to extract images from tasks in Dashboard?
After you enabled the ‘Show image Thumbnails’ option in the instructions above, in the ‘Dashboard’ section, check the box next to the process from which you would like to extract images and click on the ‘Extract Forms & Images’ button in the opened panel, wait a few seconds until the file downloads.
In case you have any additional questions about the functionality, contact us at support@fluix.io to learn more about it.