


Forms Prefill is a new functionality in Fluix workflows that allows you to automate the pre-population of data in forms and save users time on manual data entry. Let’s look at 3 real-life scenarios as examples of configuring form prefill in Fluix workflows.
Scenario 1: Prefill from Forms Completed in Previous Tasks
In this case, form prefill is performed using the data from the forms completed in the previous user or guest tasks. The prefill is done in the middle of the process and should be followed by any other submit action.
To set up such a flow in Fluix, you’ll need to follow the steps below.
Step 1 – Create a workflow in Fluix
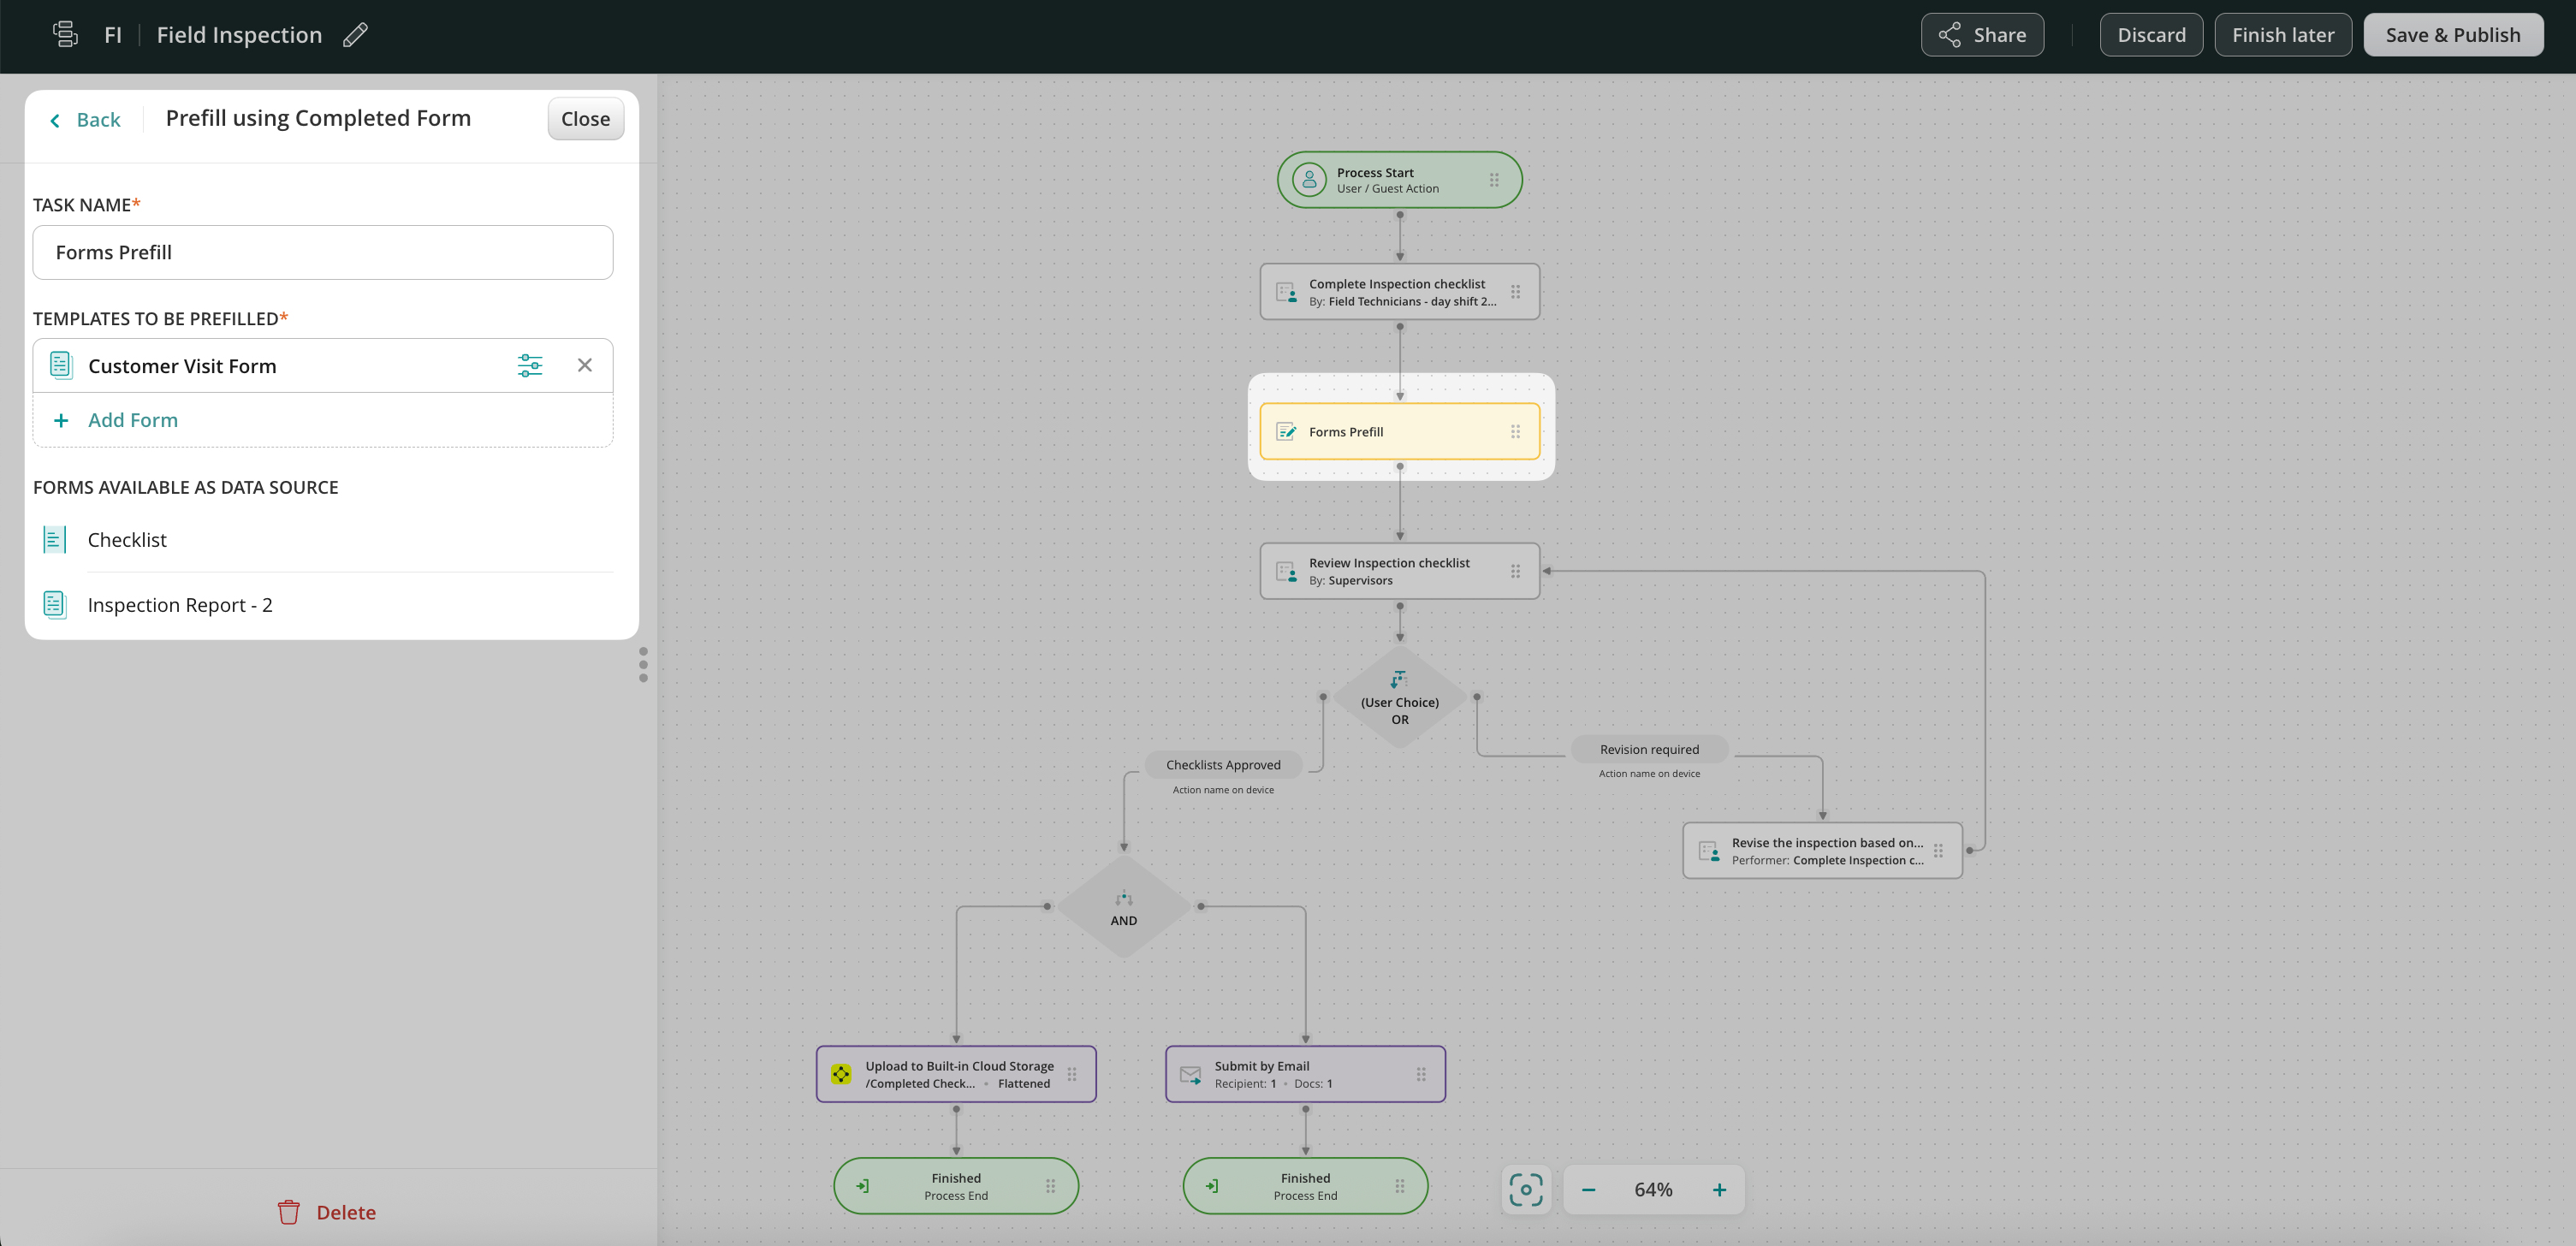
Create a workflow with a process that includes a series of repetitive User tasks for your teams, and Forms Prefill action between them. Each team will be assigned a task containing fillable forms.
Step 2 – Create a form prefill from a form completed in previous tasks
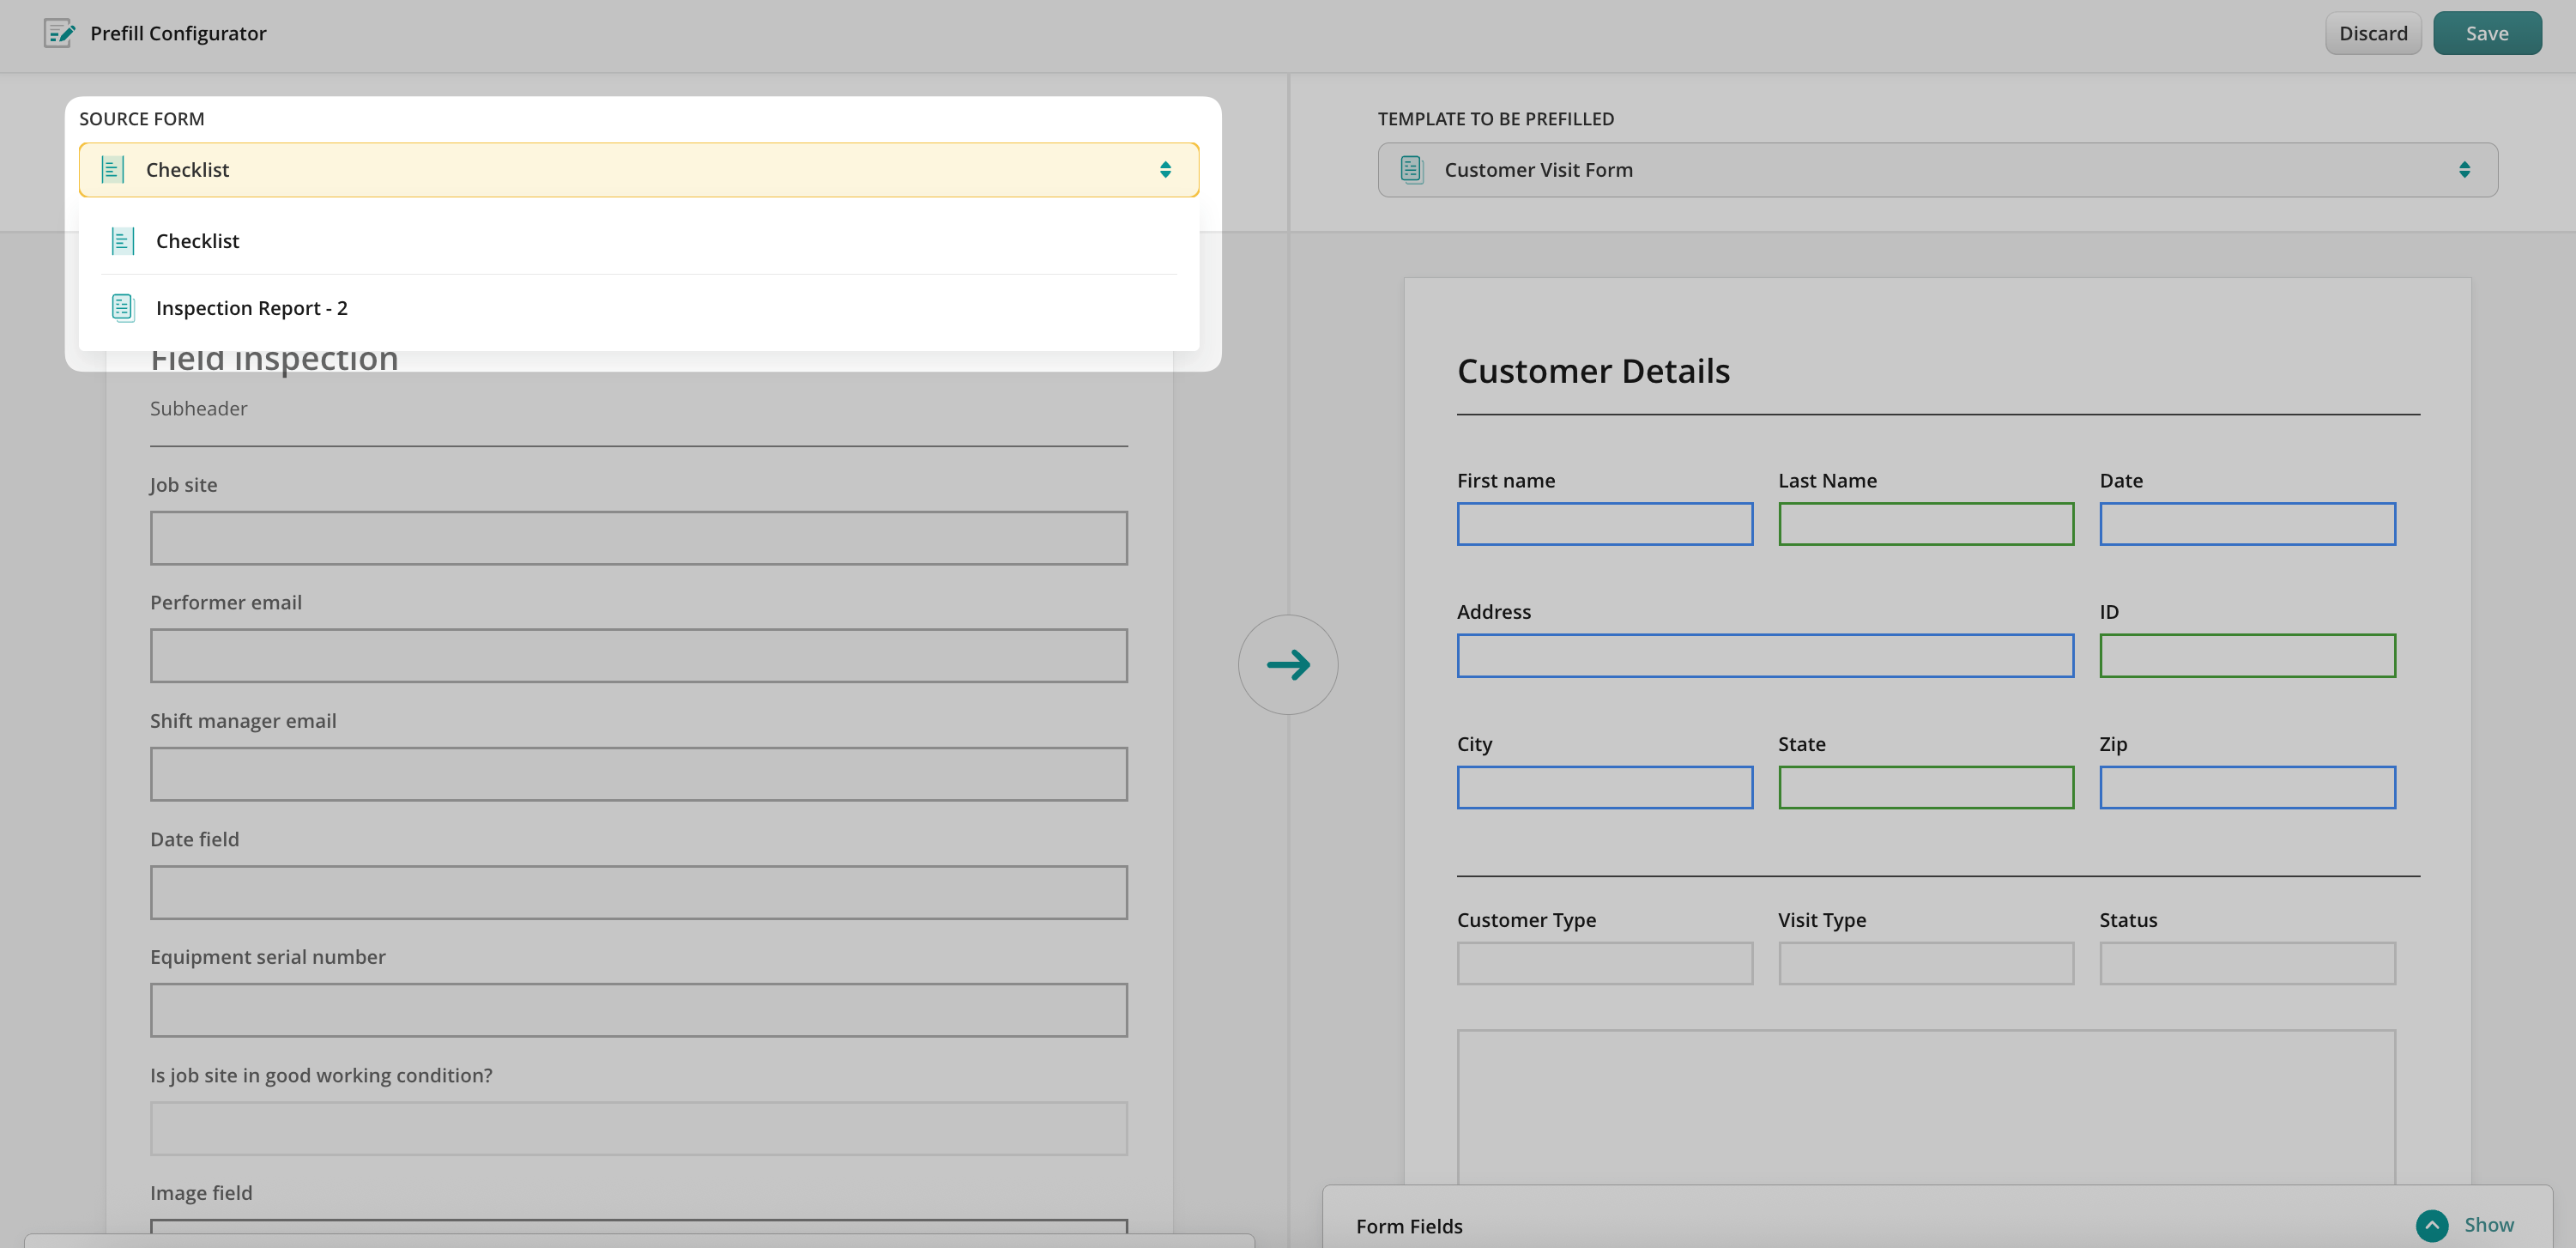
To configure the prefill from one form to another, in the Forms Prefill action, next to the form name click on the icon to open Prefill Configurator.
There you will map the fields from the source form to a template to be prefilled. By clicking on the field in a source form you will be suggested to match it with the field in the template form.
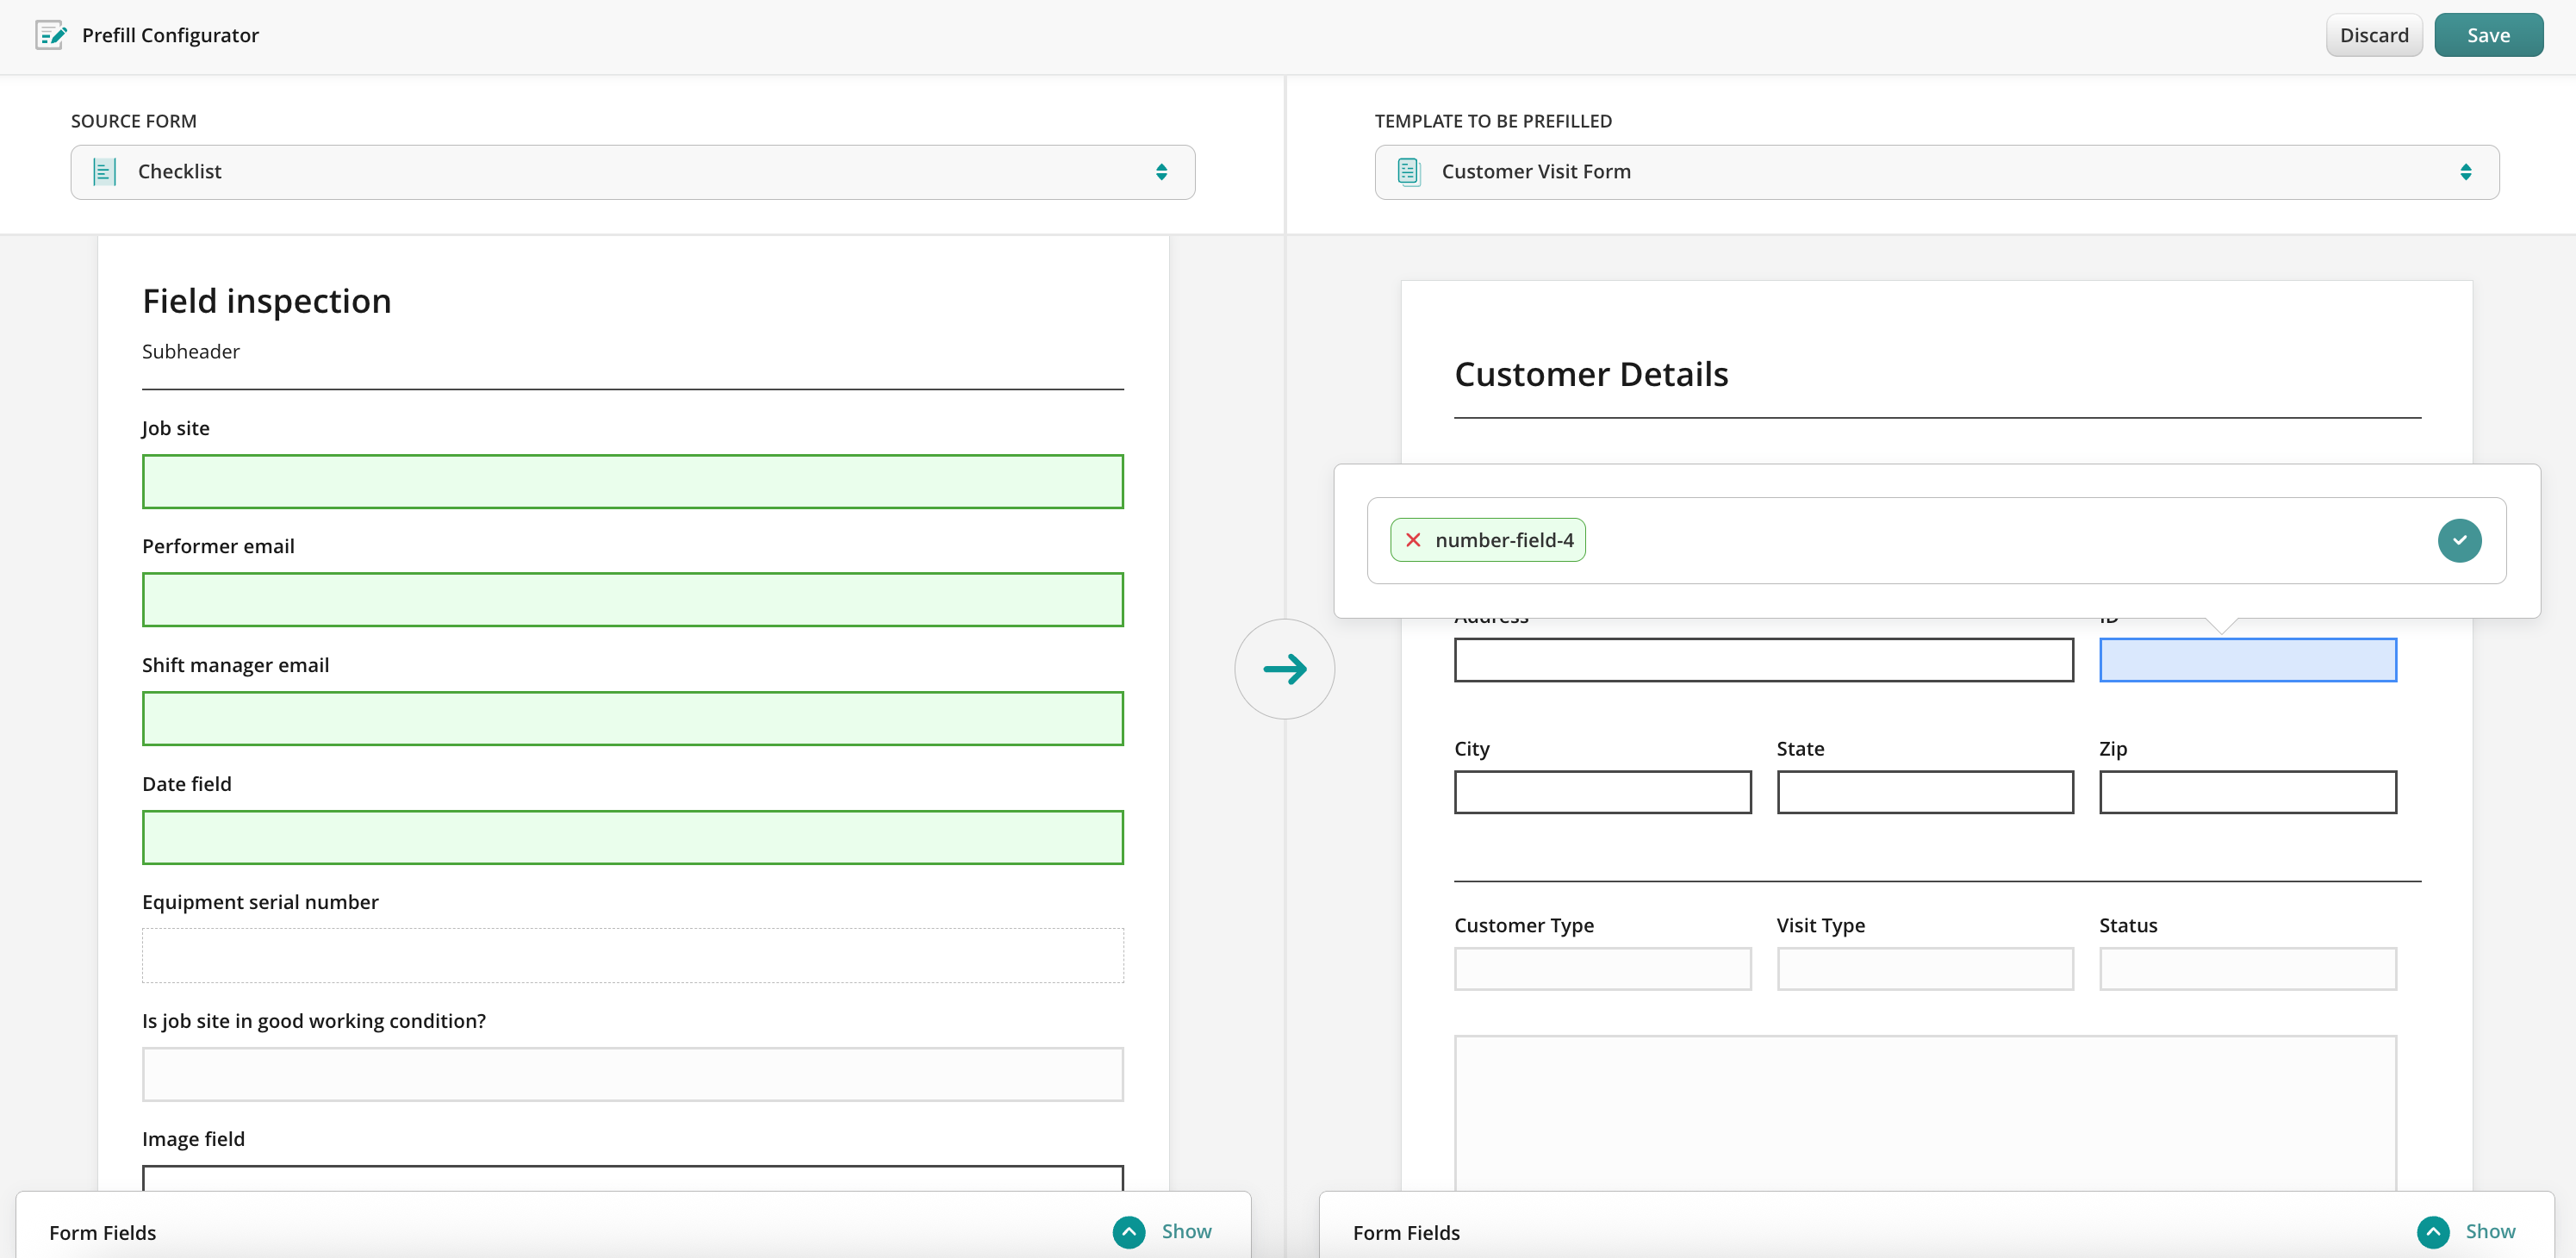
Also, it is possible to track field configuration in case there was more than one form in the previous task.
Use a simple dropdown menu to see and navigate the list of the forms from the previous task to use them as the data source for prefill.
Once configured, save and publish the workflow, to make the data flow seamless and accurate.
Scenario 2: Prefill Initiated by Third-party Tool
In this case, the process in Fluix starts right when the specific fields are changed in the third-party tool that is integrated in the respective workflow in Fluix. Therefore, it triggers a webhook and prefills the data into the pre-configured fields in the form in the workflow. A new task is created for the user or guest in Fluix where they fill out the rest of this form.
To set up such a flow in Fluix, you’ll need to follow the steps below.
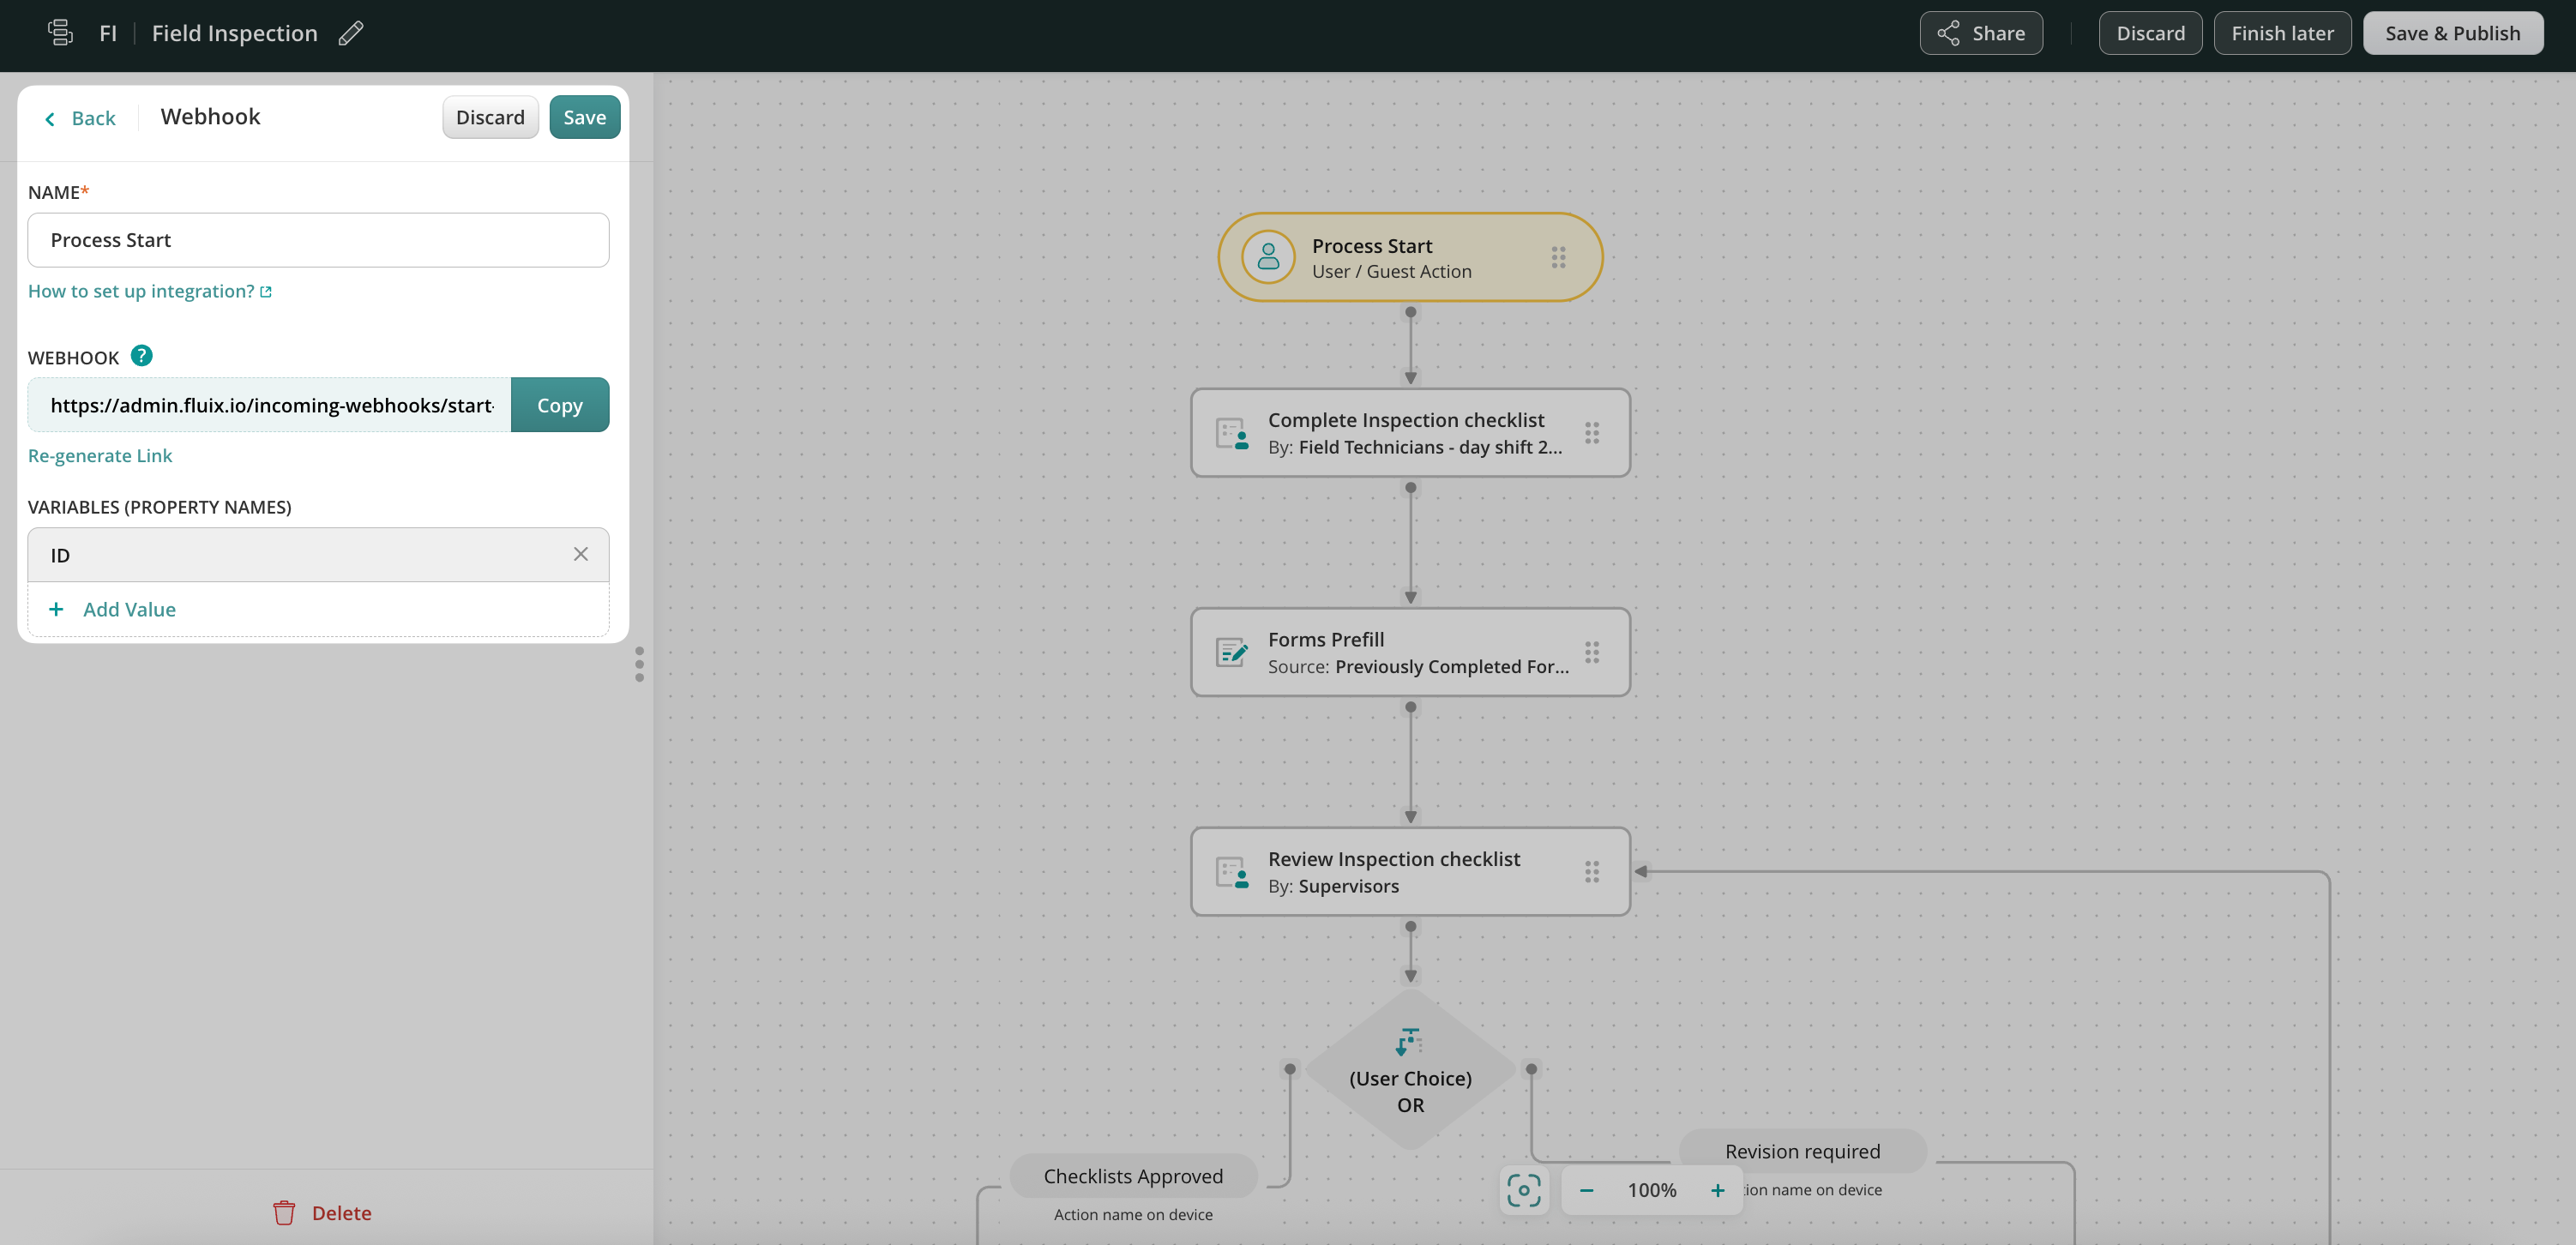
Step 1 – Create a workflow with the Start event in Fluix
Create a workflow with a Process start option and select External Software Trigger from the list of options. Copy the webhook from Fluix to put into your tool and select possible variables.
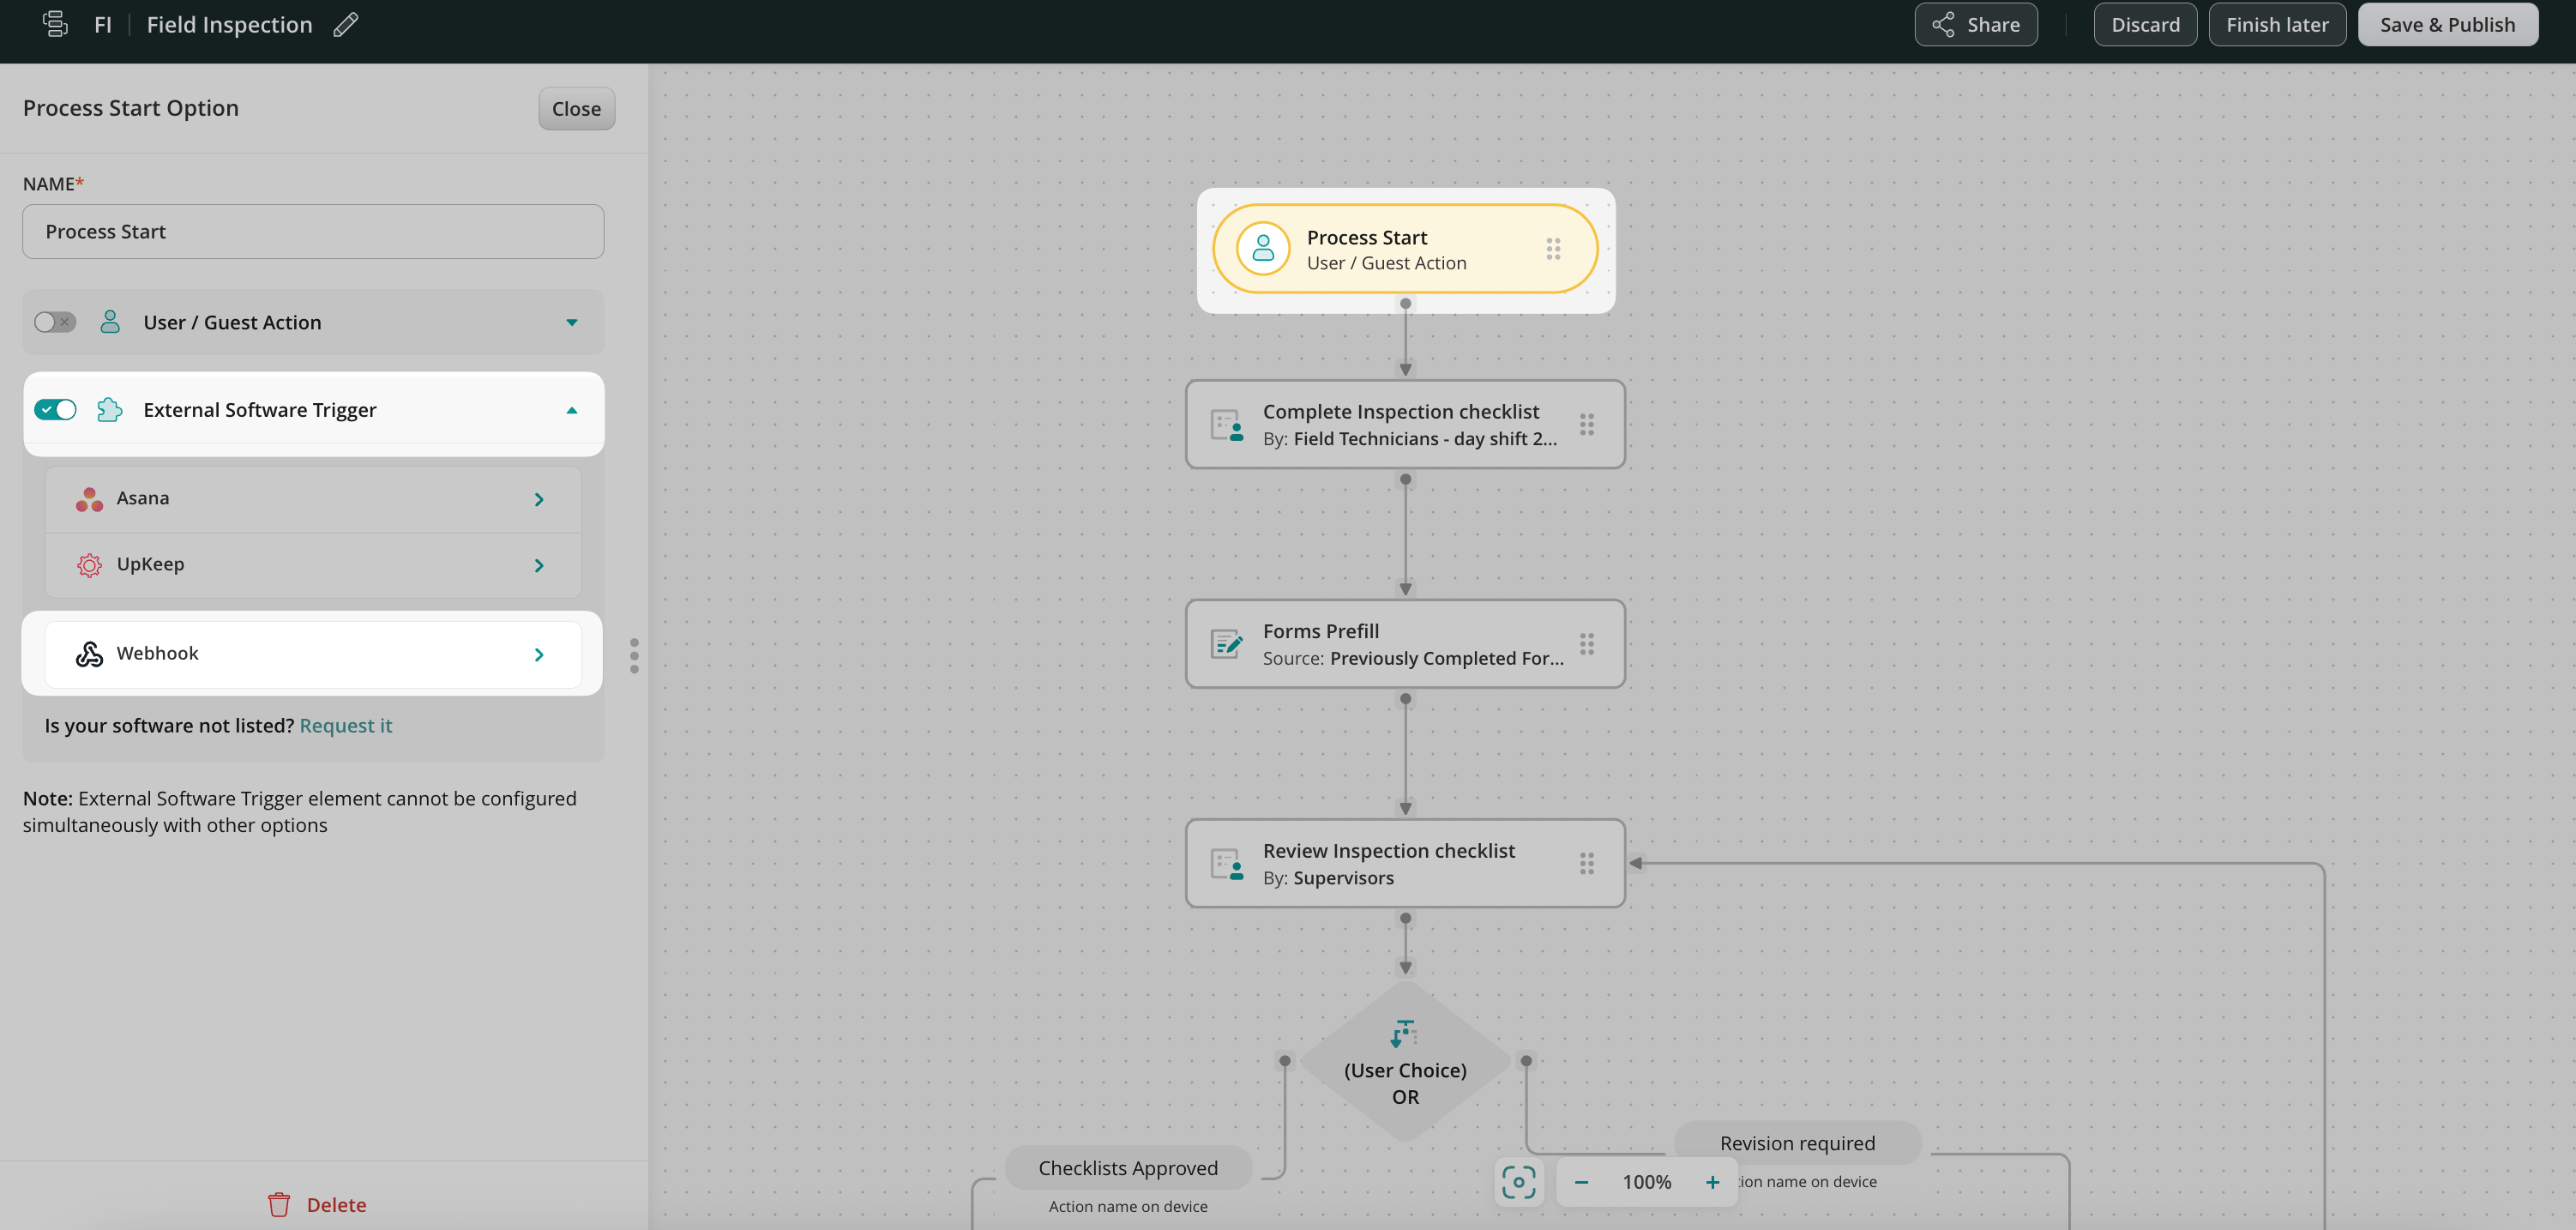
Add the Possible Variables (property names) from the third-party tool that you would like to integrate.
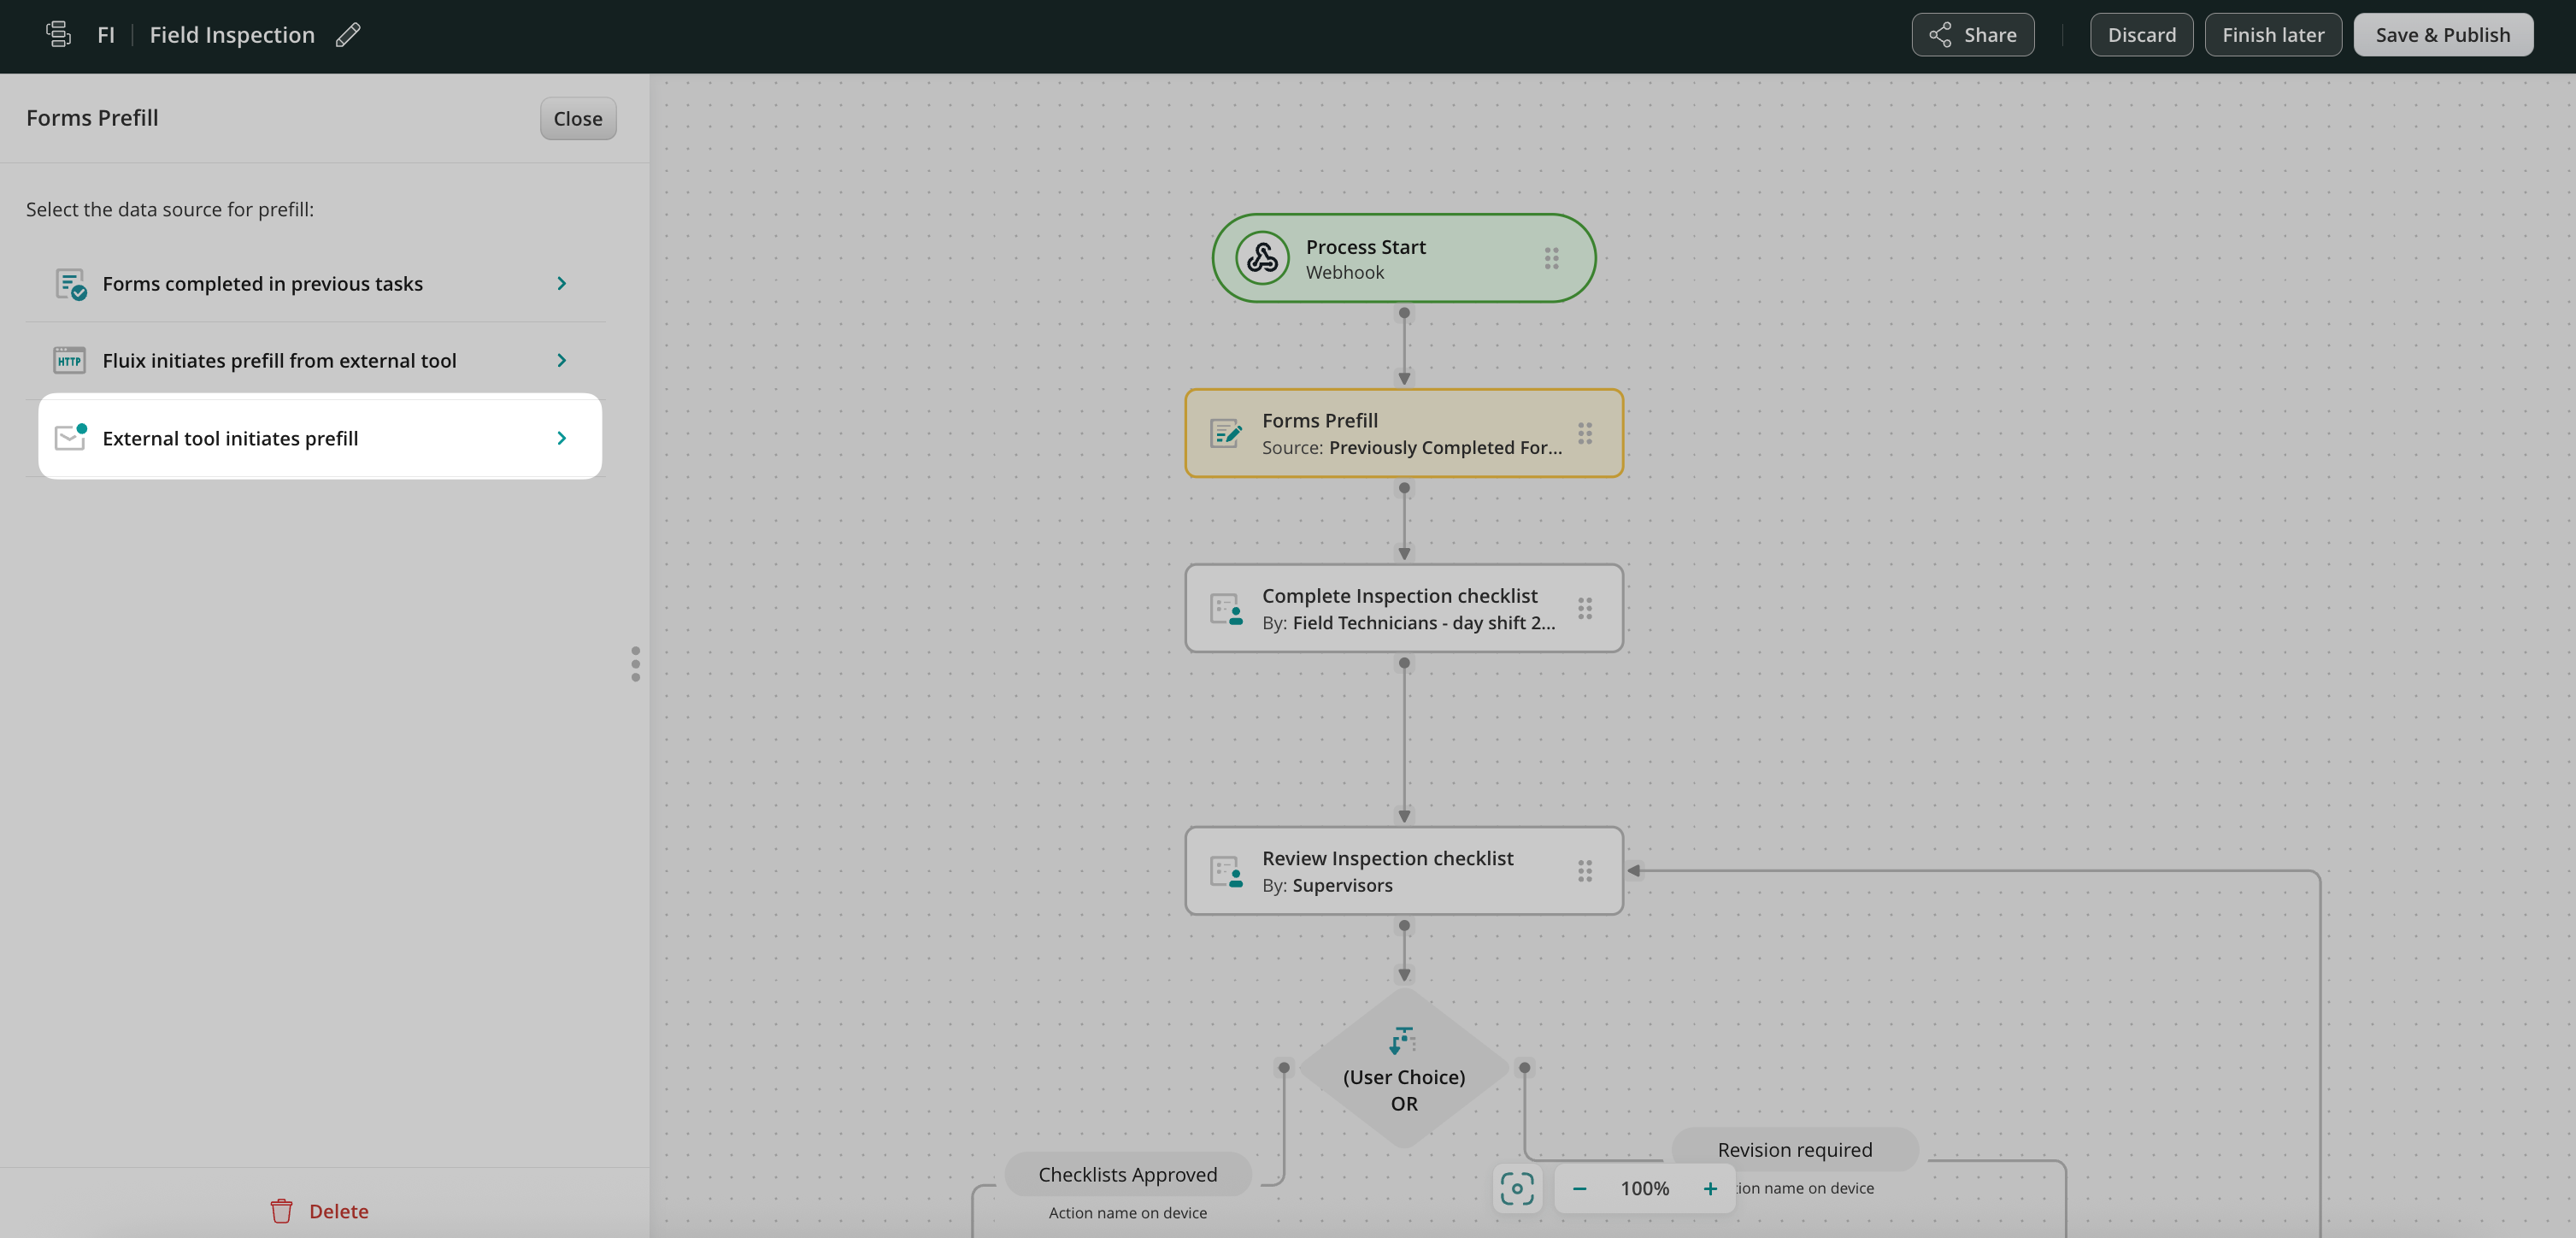
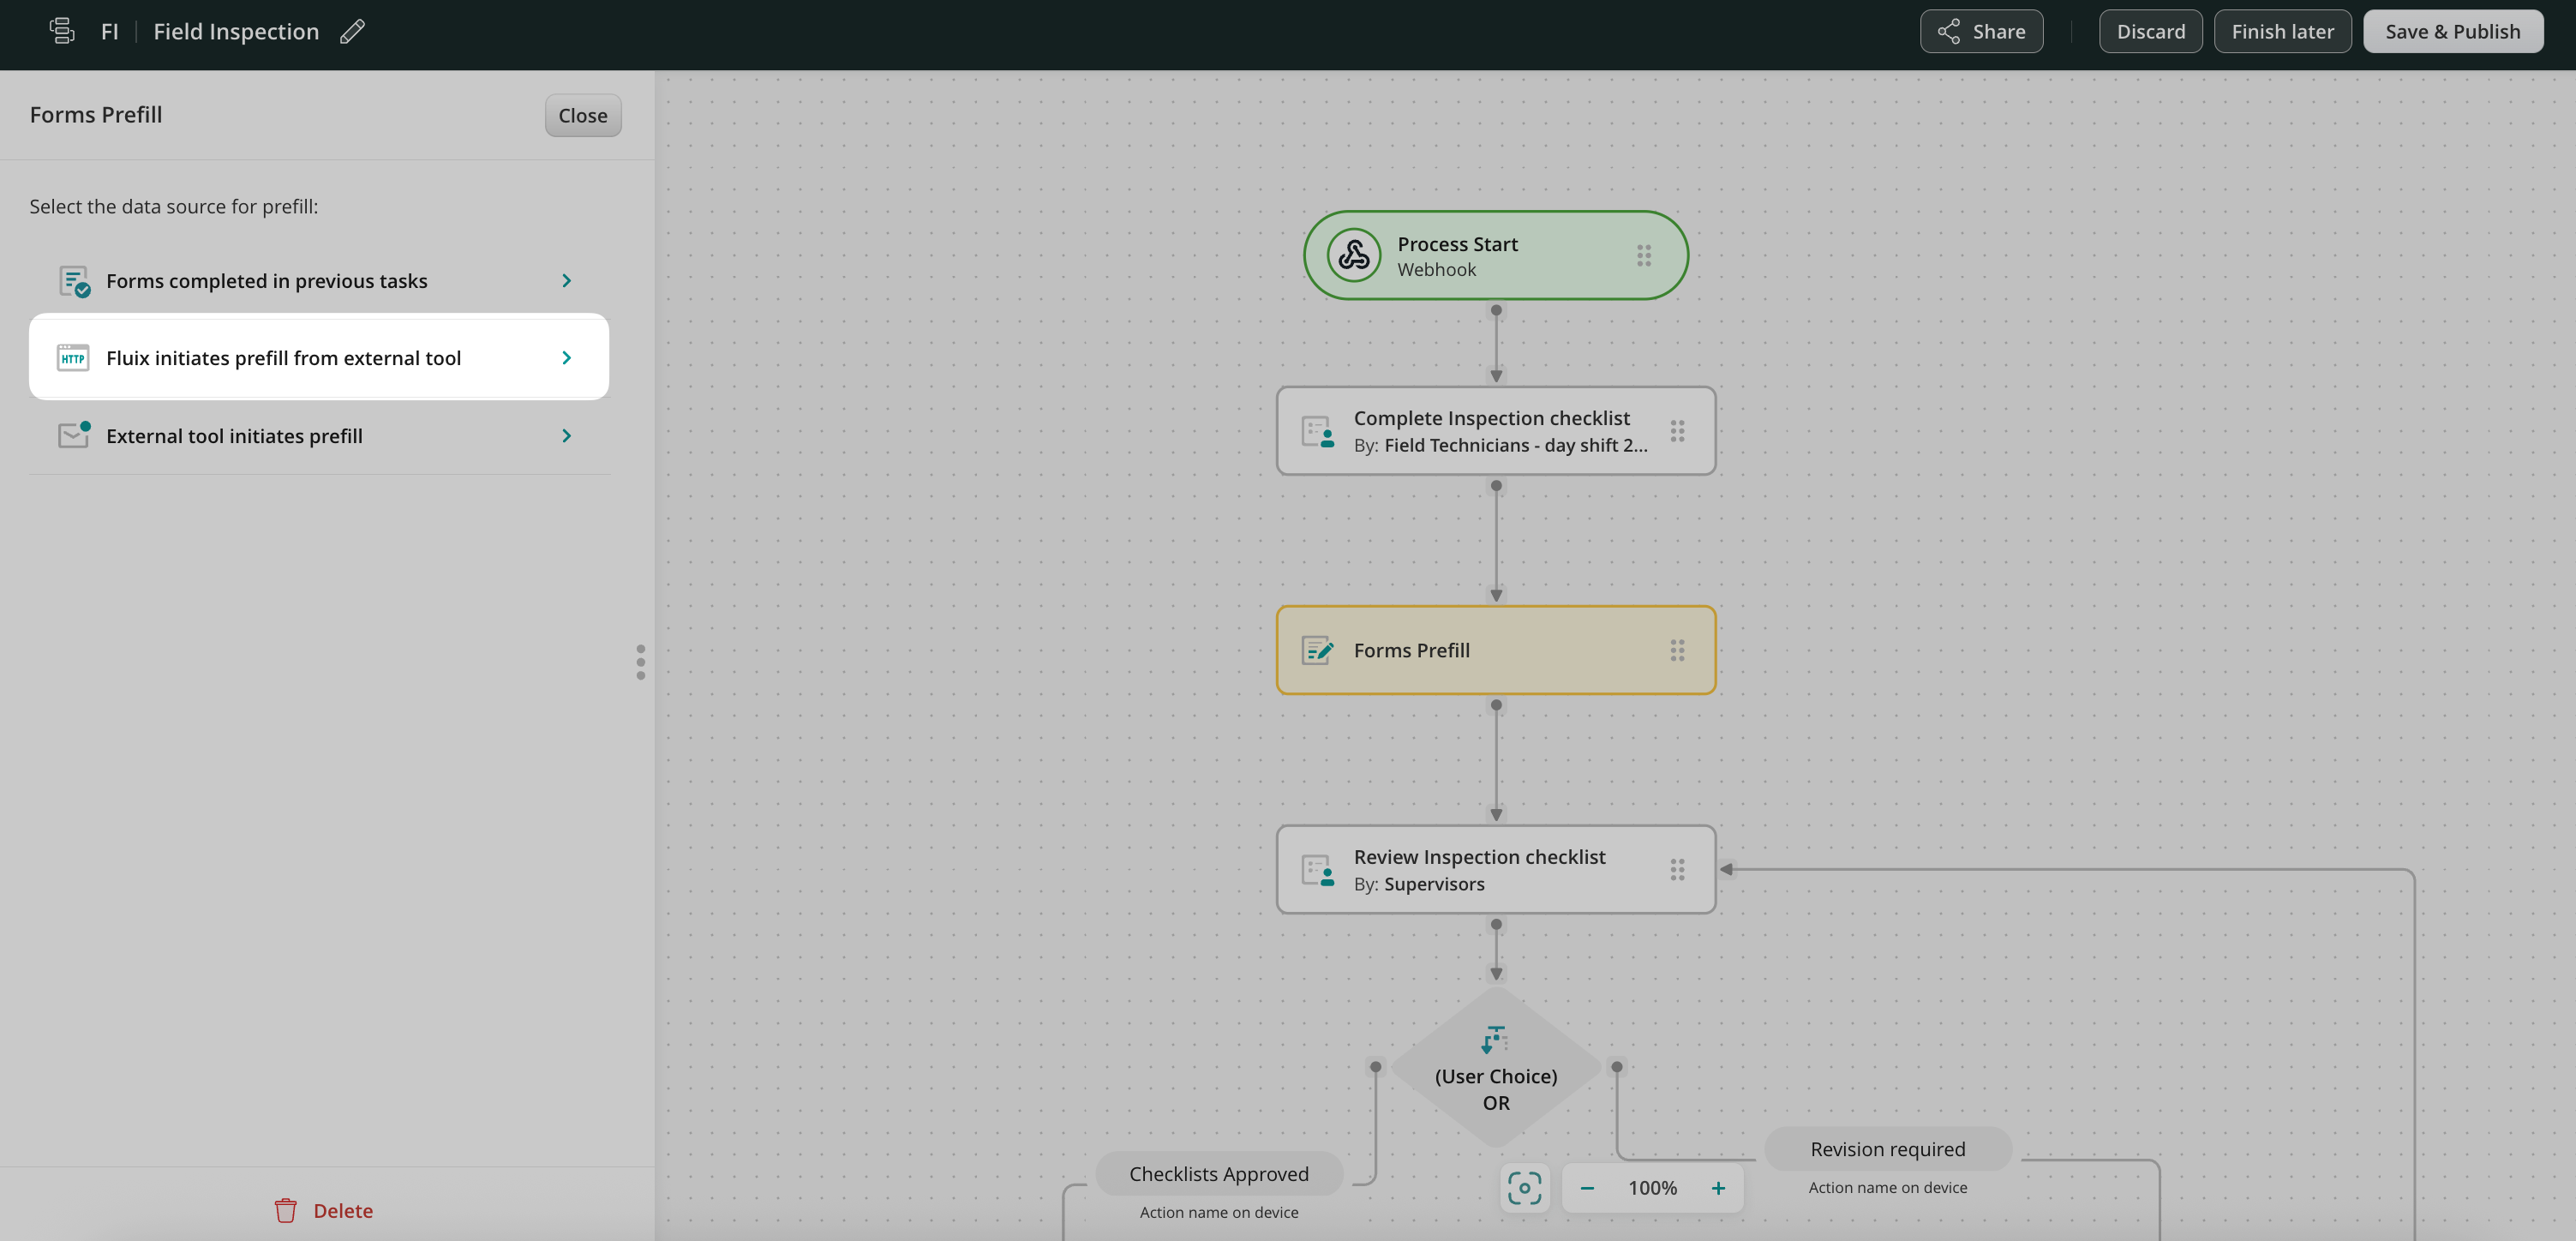
Step 2 – Create a Form Prefill from a Third-party Tool
Drag and drop the Form prefill element to the workflow chart, and it will be automatically connected with the Process Start Event. Click on the Forms Prefill element and select External tool initiates prefill.
Add a form to be prefilled and open Prefill Configurator. There you will map the fields from the server response to a template to be prefilled.
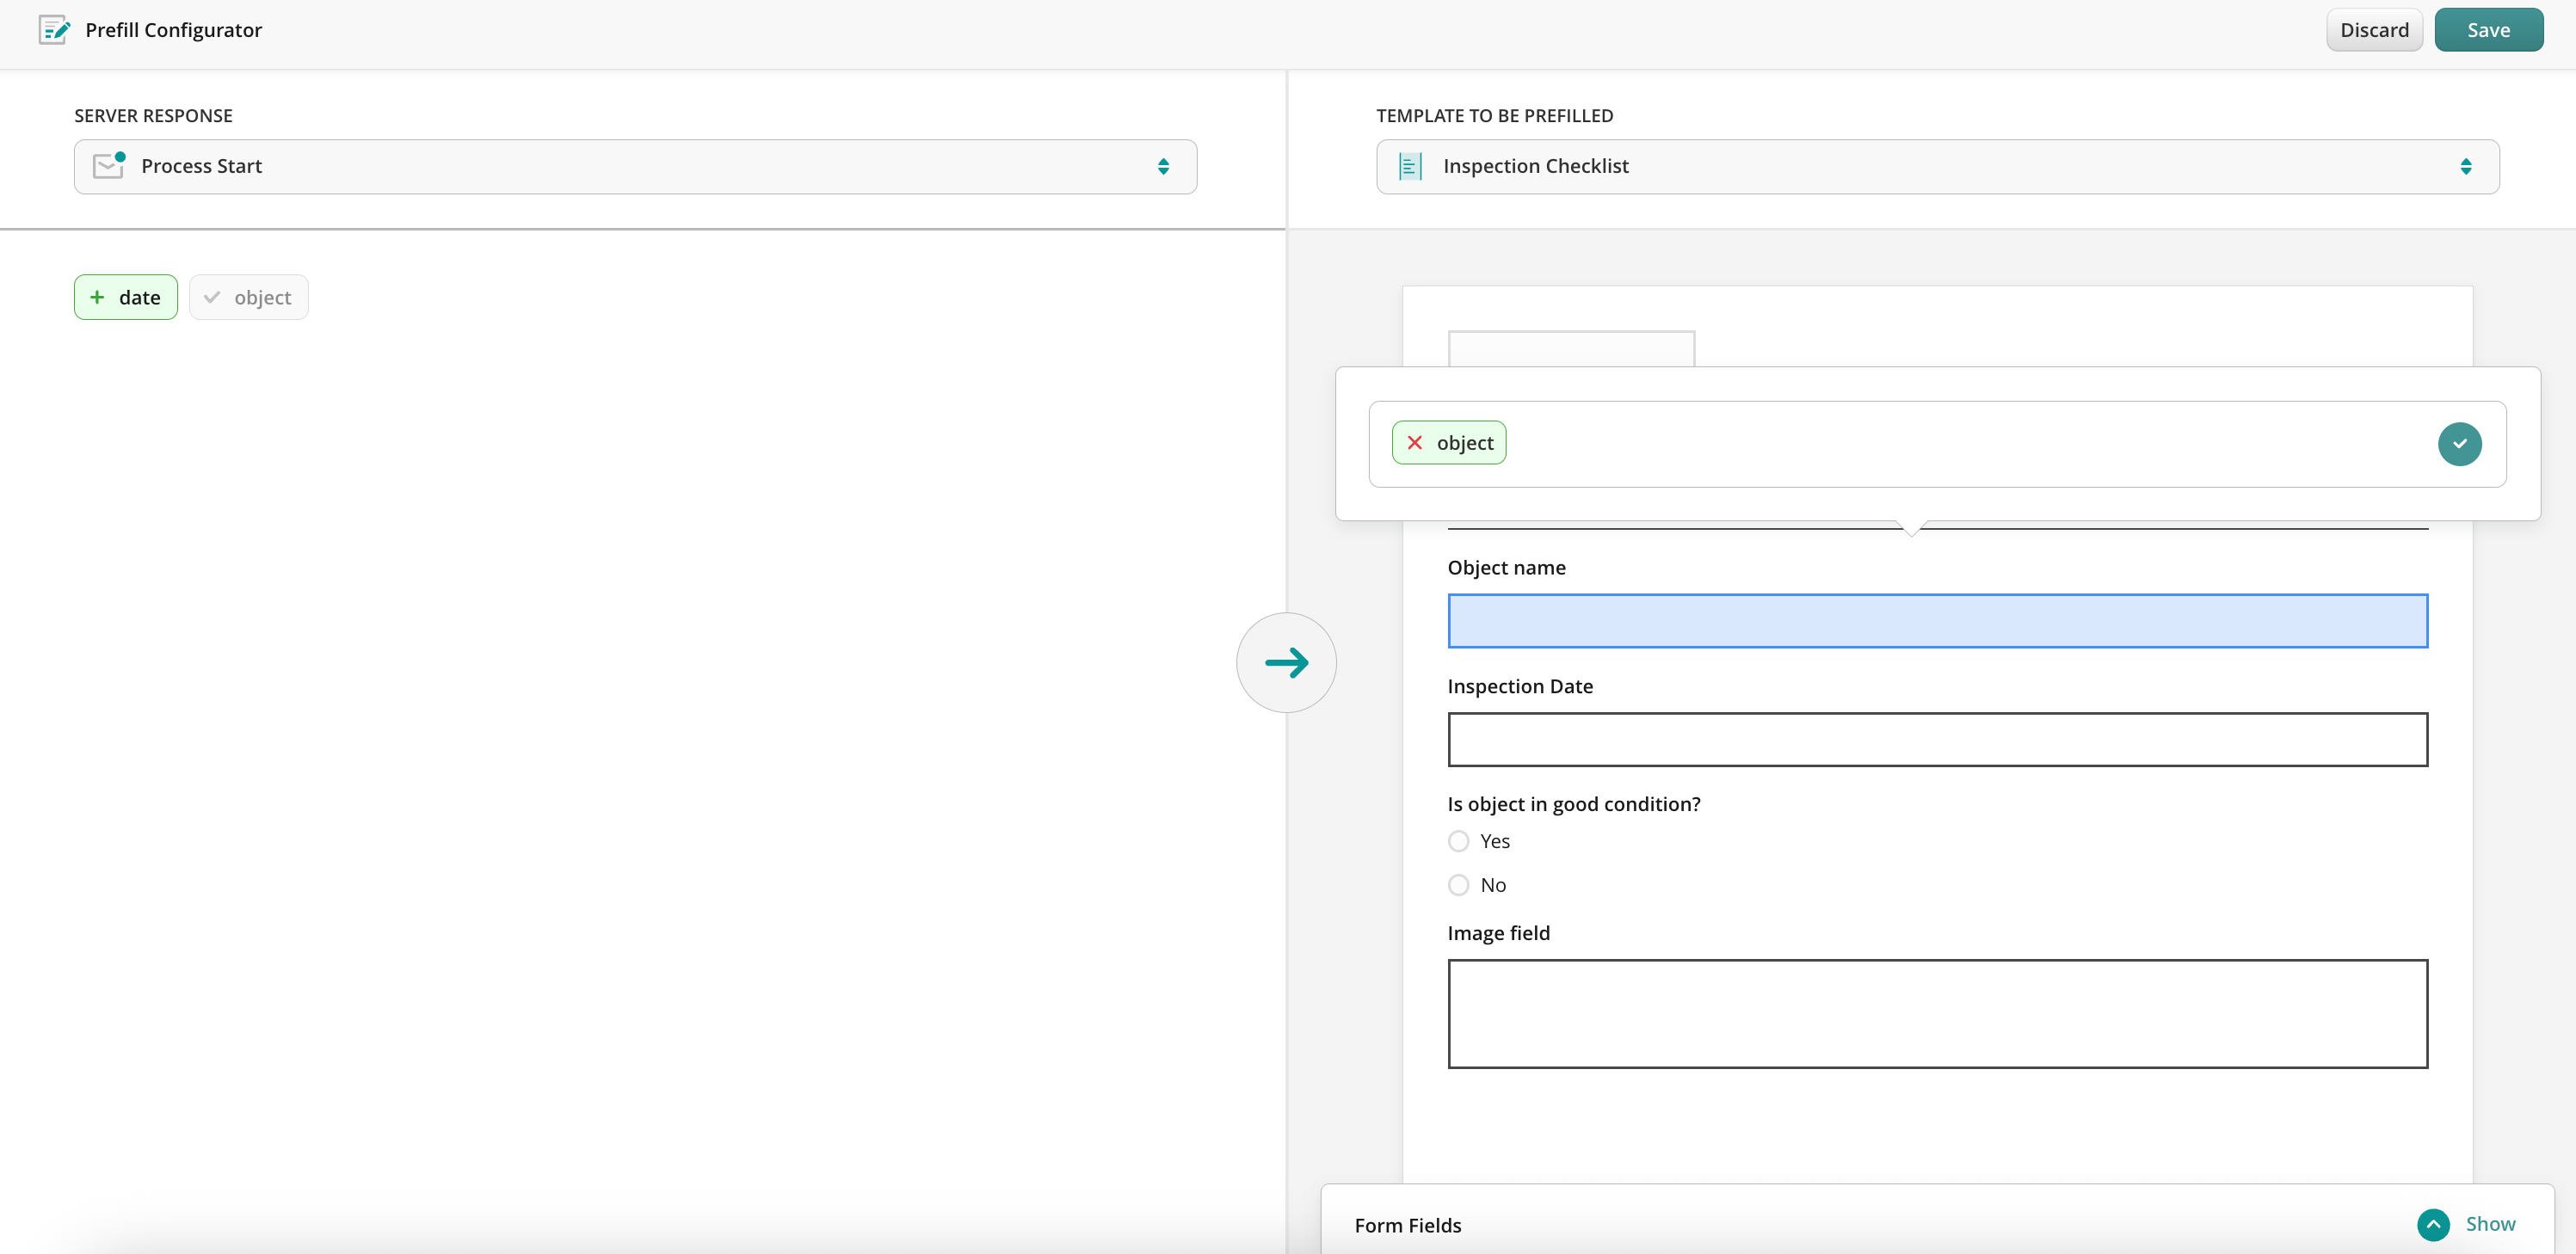
By clicking on the field, in a server response, you will be suggested to match it with the field in the template form.
Step 3. Create User or Guest Task
Drag and drop the User or Guest task, connect the task with the previous action, and configure it:
For the User task: add the description of the task, and add the Group to whom this task will be assigned. In the Forms and Attachments section, add the form by selecting the Used in the workflow option.
For the Guest task: add the description of the task that will help the Guest to understand what they need to do with the form from the task and configure the way the Guest will receive the form in the Recipient section.
Step 4 – Configure the final destination for the form
When the User/Guest completes the task, it will be automatically pushed down the process. For example, the document can be sent for approval, and after that, it can be uploaded directly to the Cloud Storage or any Third-party Storage. Alternatively, the data from the completed forms can be shared to the third-party tool or the completed document can be simply shared by email.
Once configured, save and publish the workflow, to make the data flow seamless and accurate.
Scenario 3: Fluix initiates prefill from Third-party Tool
In this case, form prefill is performed using the data from the third-party tool. The prefill is done in the middle of the process and should be followed by any other submit action.
To set up such a flow in Fluix, you’ll need to follow the steps below.
Step 1 – Create a workflow in Fluix
Create a workflow with a process that includes a series of repetitive User tasks for your teams, and Forms Prefill action between them. Each team will be assigned a task containing fillable forms.
Step 2 – Create a form prefill from external tool
To configure the prefill from an external tool to the form, in the Forms Prefill action, select Fluix initiates prefill from external tool and click Configure to set up API integration.
Note: Supported response format is JSON
In the Advanced HTTP Builder, specify the requests and the required parameters needed to perform prefill to the form. If you require any assistance during this step, please reach out to Fluix team at support@fluix.io and we’ll help you set up the integration taking into account your project-specific requirements.
After configuration is completed add a form to be prefilled and open Prefill Configurator. There you will map the fields from the server response to a template to be prefilled.
Step 3. Create User or Guest Task
Drag and drop the User or Guest task, connect the task with the previous action, and configure it:
For the User task: add the description of the task, and add the Group to whom this task will be assigned. In the Forms and Attachments section, add the form by selecting the Used in the workflow option.
For the Guest task: add the description of the task that will help the Guest to understand what they need to do with the form and configure the way the Guest will receive the form in the Recipient section.
Step 4. Configure the final destination for the form
When the User/Guest completes the task, it will be automatically pushed down the process. For example, the document can be sent for approval, and after that, it can be uploaded directly to the Cloud Storage or any Third-party Storage. Alternatively, the data from the completed forms can be shared to the third-party tool or the completed document can be simply shared by email.
Once configured, save and publish the workflow, to make the data flow seamless and accurate.
In case you have any questions or difficulties with setup, contact our support at support@fluix.io and we’ll be happy to help you.