


After the source is added, the next step is to add a submit rule for the document.
The first Submit rule is configured with Choose action button. Depending on the selected document source, the relevant submit rules are available:

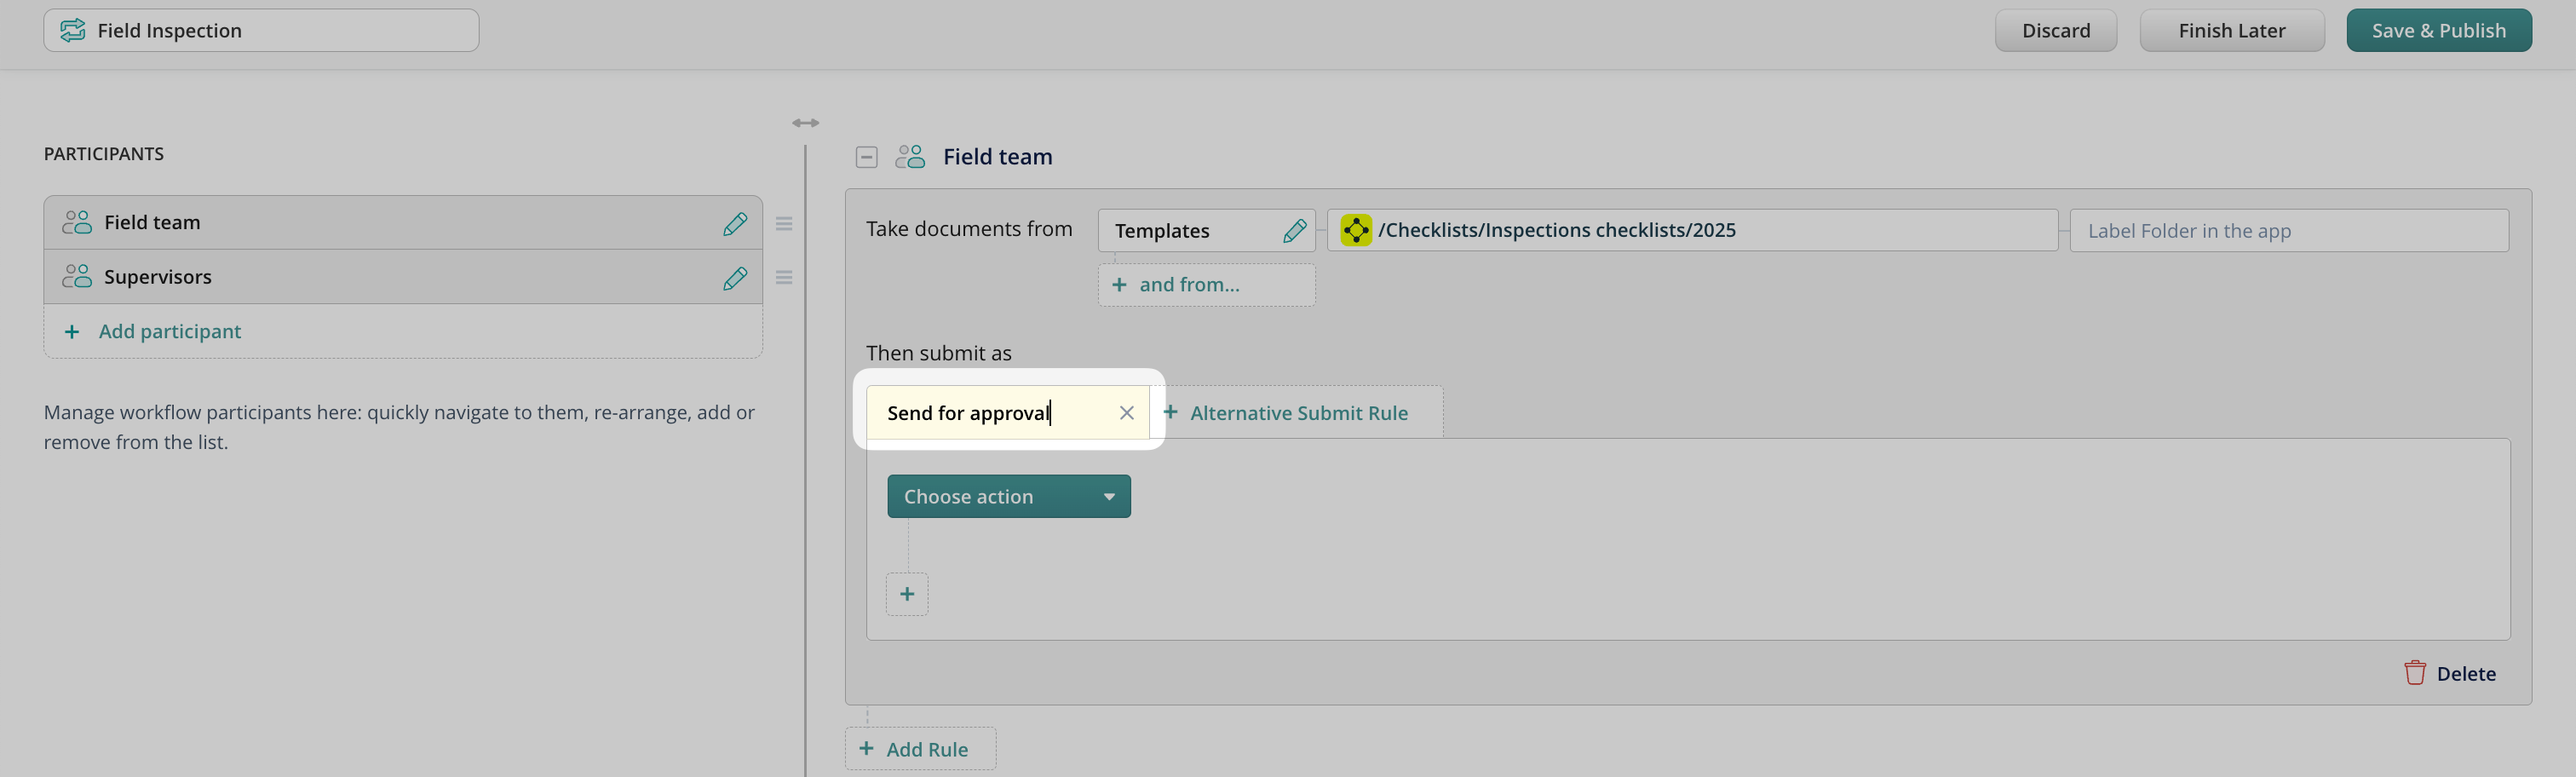
To customize the name of the Submit button for the end-user on the device and web app, tap on the Submit rule button to edit it:
Reassign
This action is used to move documents from one user/group to another within the same workflow. Such routing does not require additional saving to the storage or sending over email. You can preconfigure to whom the documents will be reassigned from the drop-down list of workflow participants.
Additionally, if a user needs to be able to choose a recipient, then choose the Select manually option.
The reassigned documents arrive in either the My Inbox (for a user) or Group Inbox (for groups) section on the device.
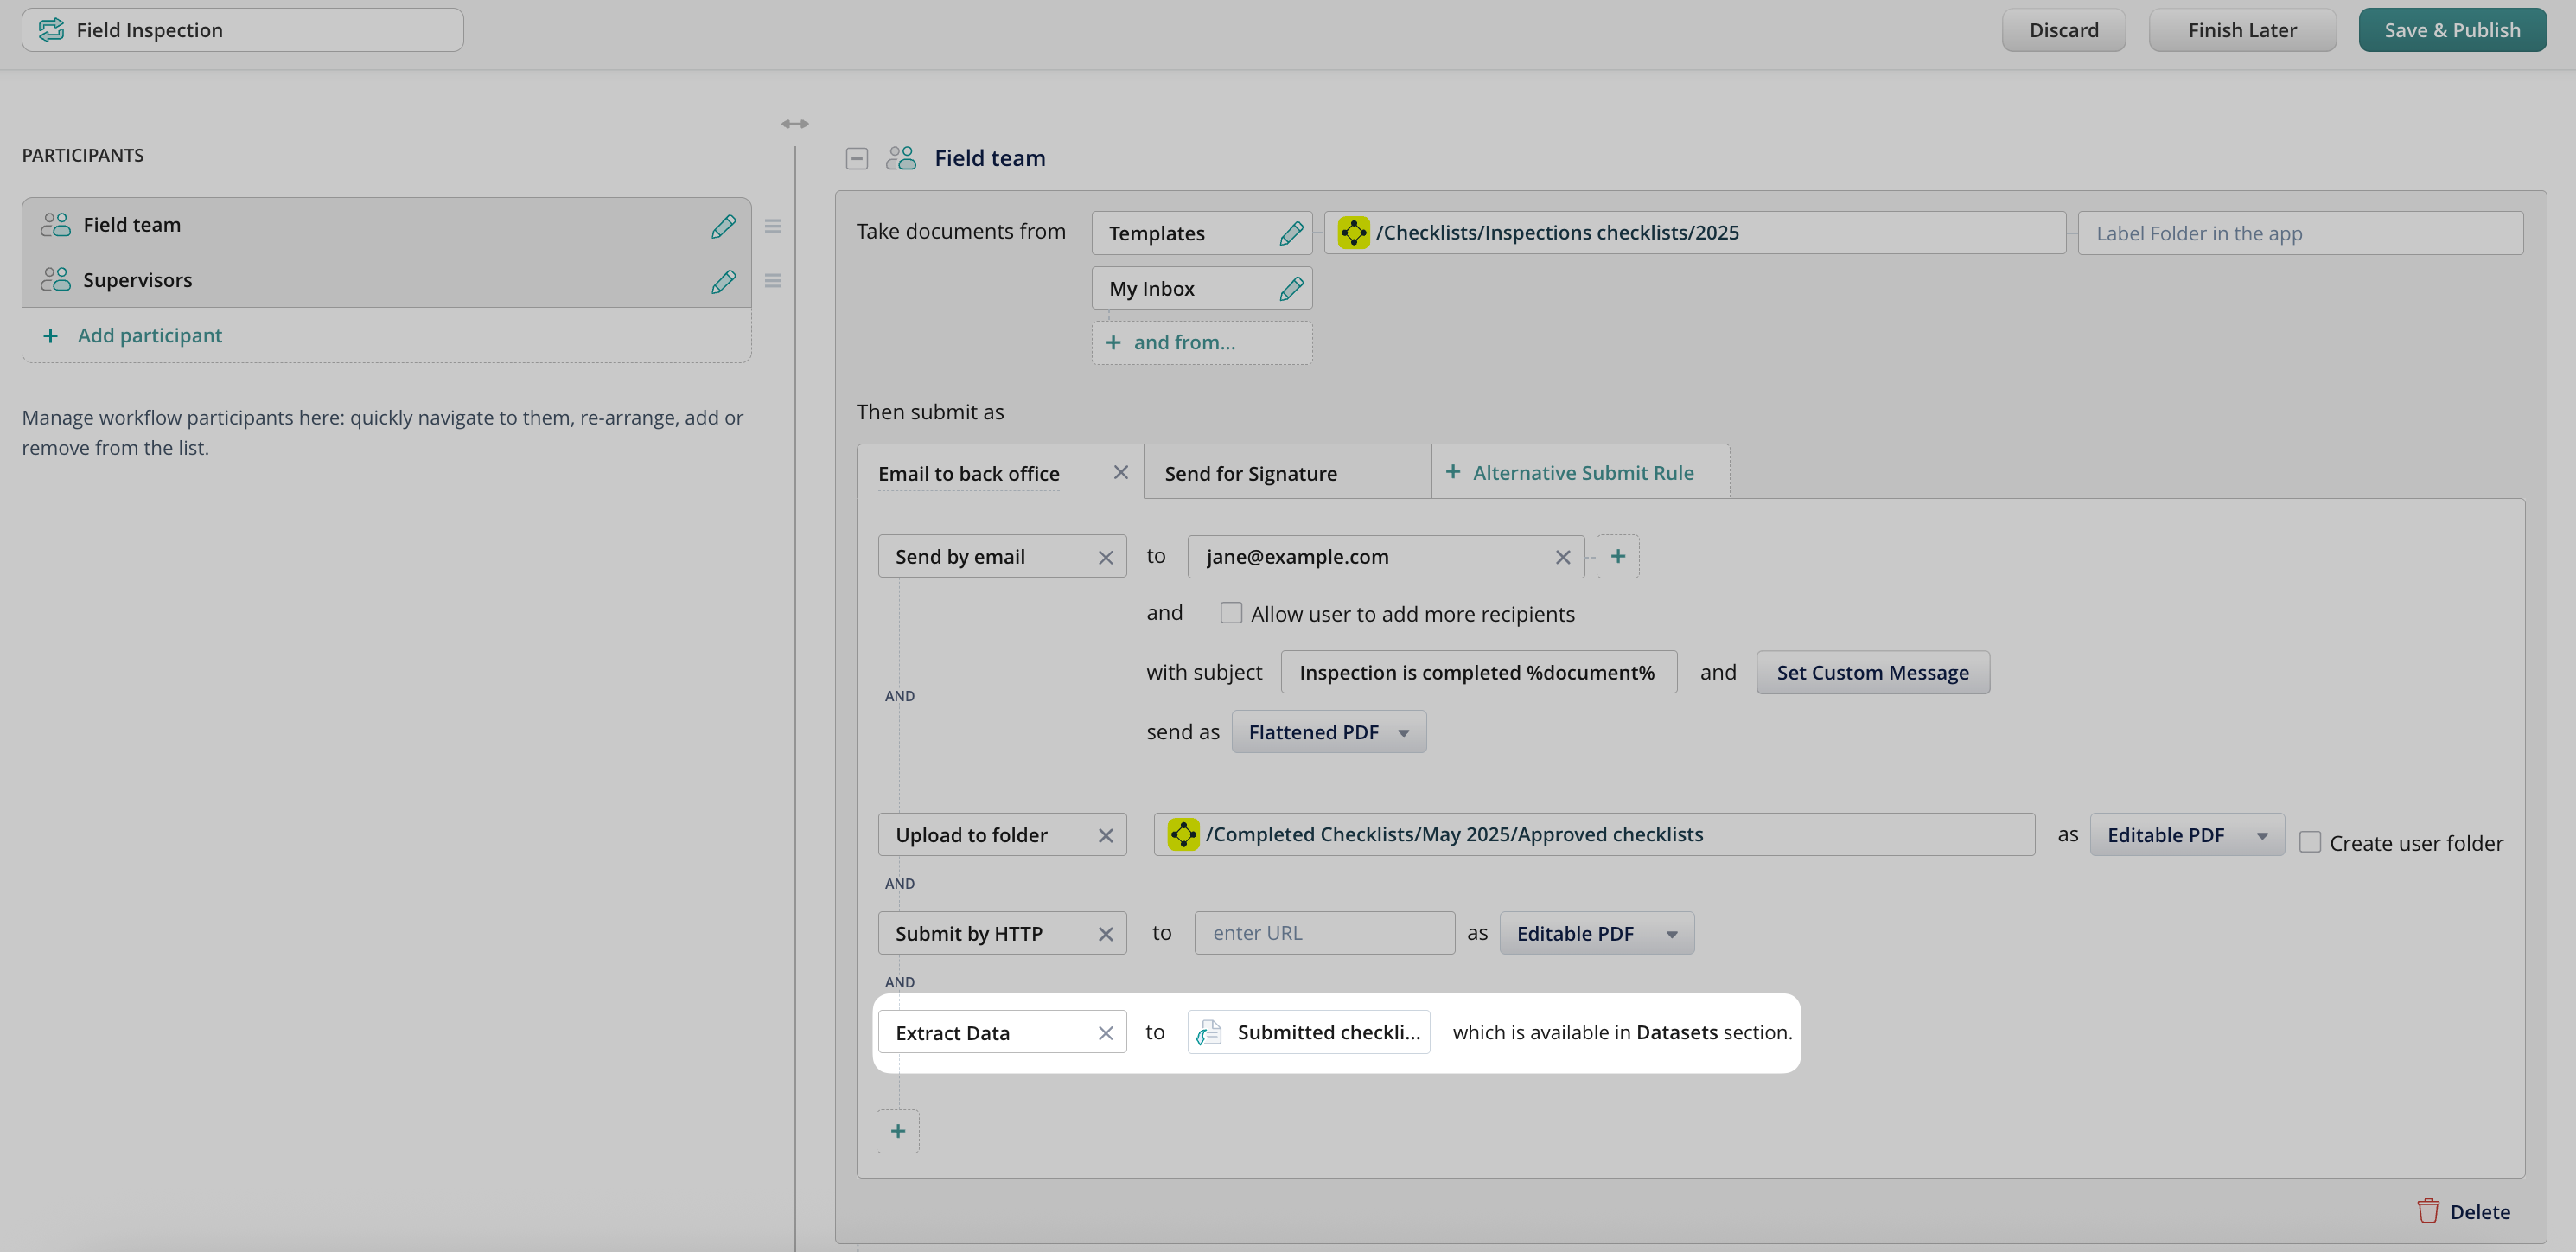
Send by Email
This action is used to send documents from Fluix to any email without wasting time manually entering the email address and message in the field. You can preconfigure the recipients’ addresses, email subject, custom message, and the document format:
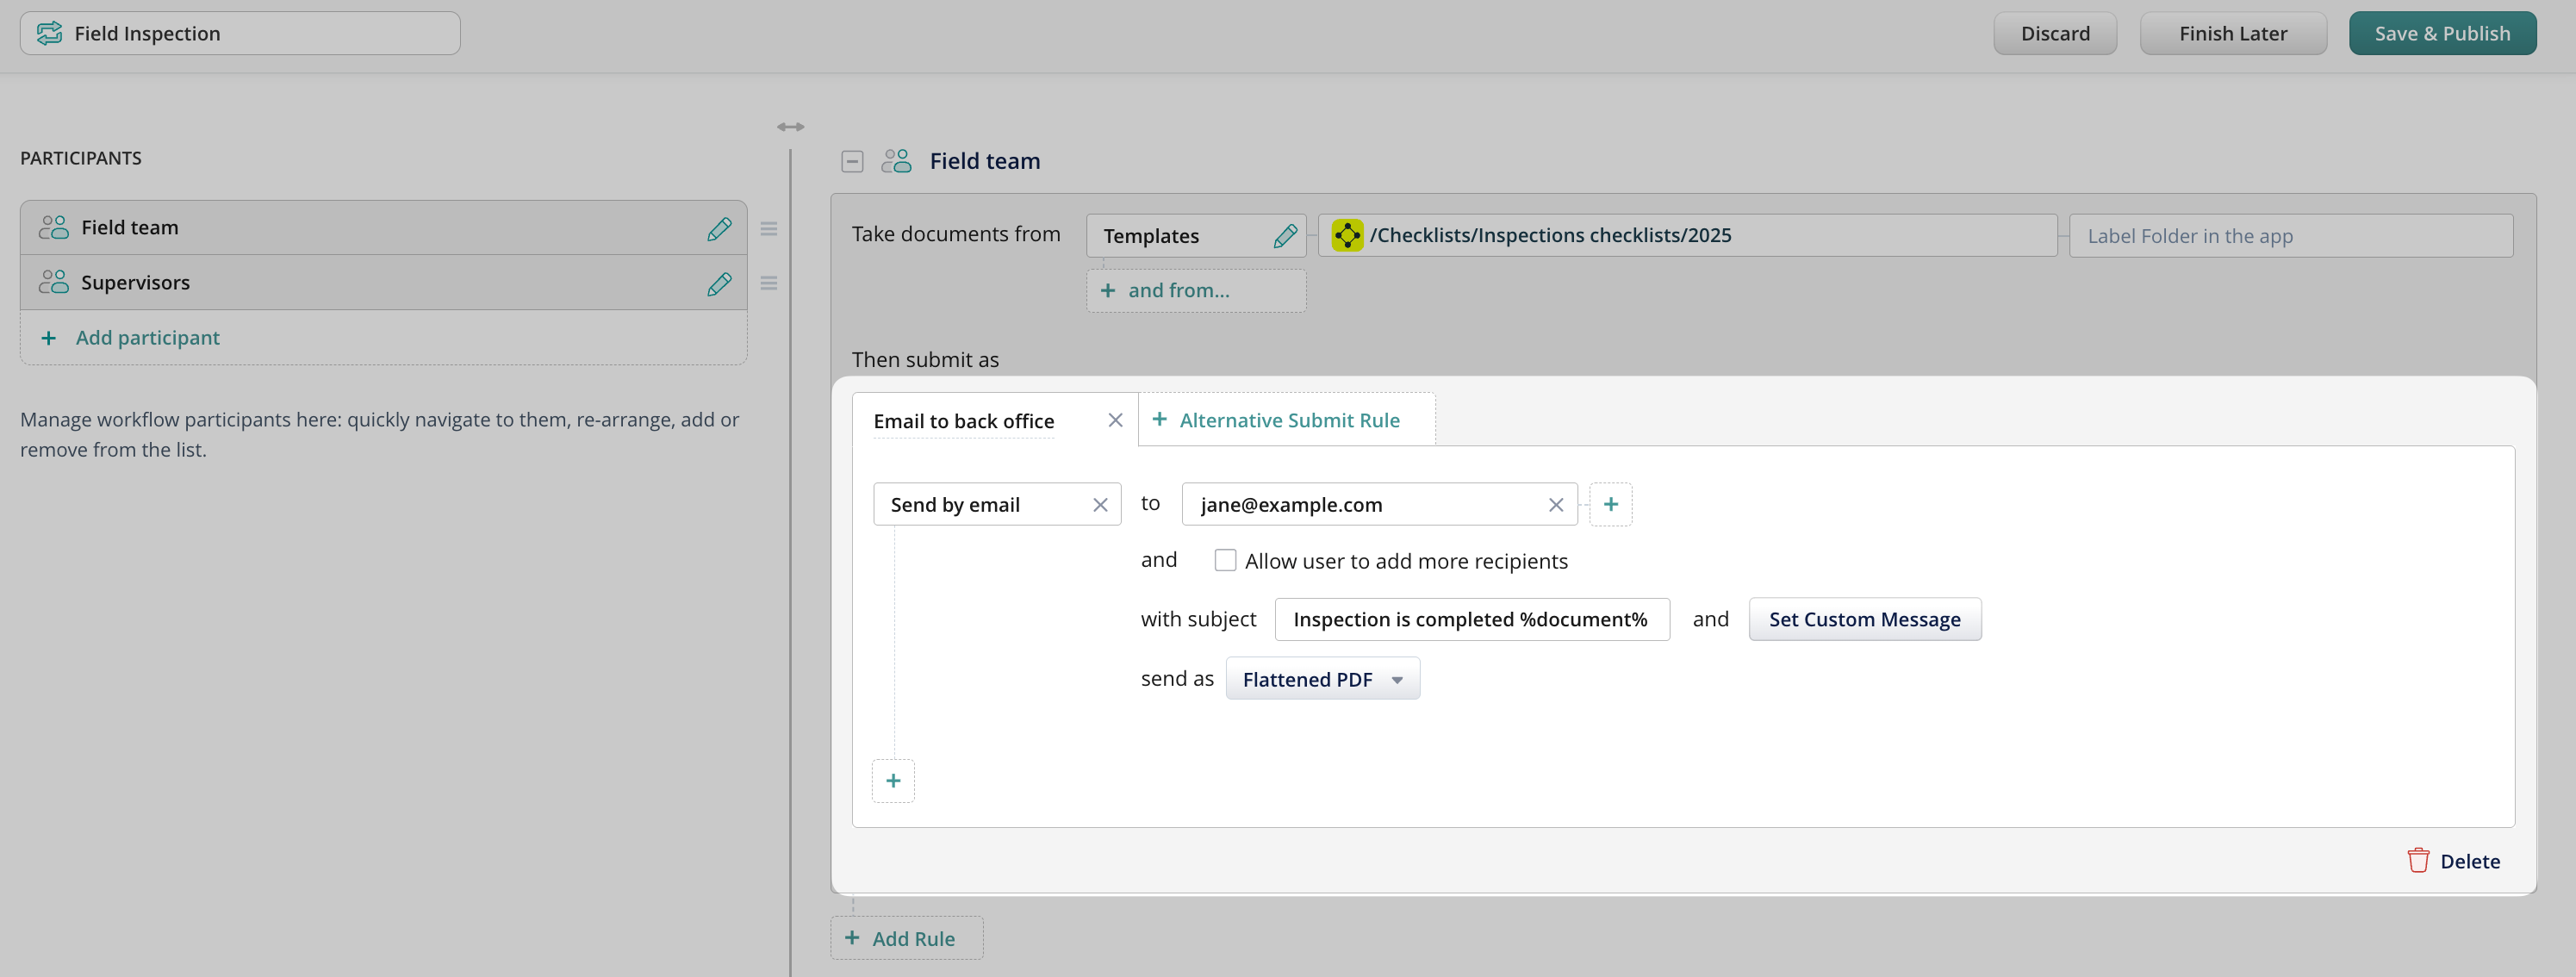
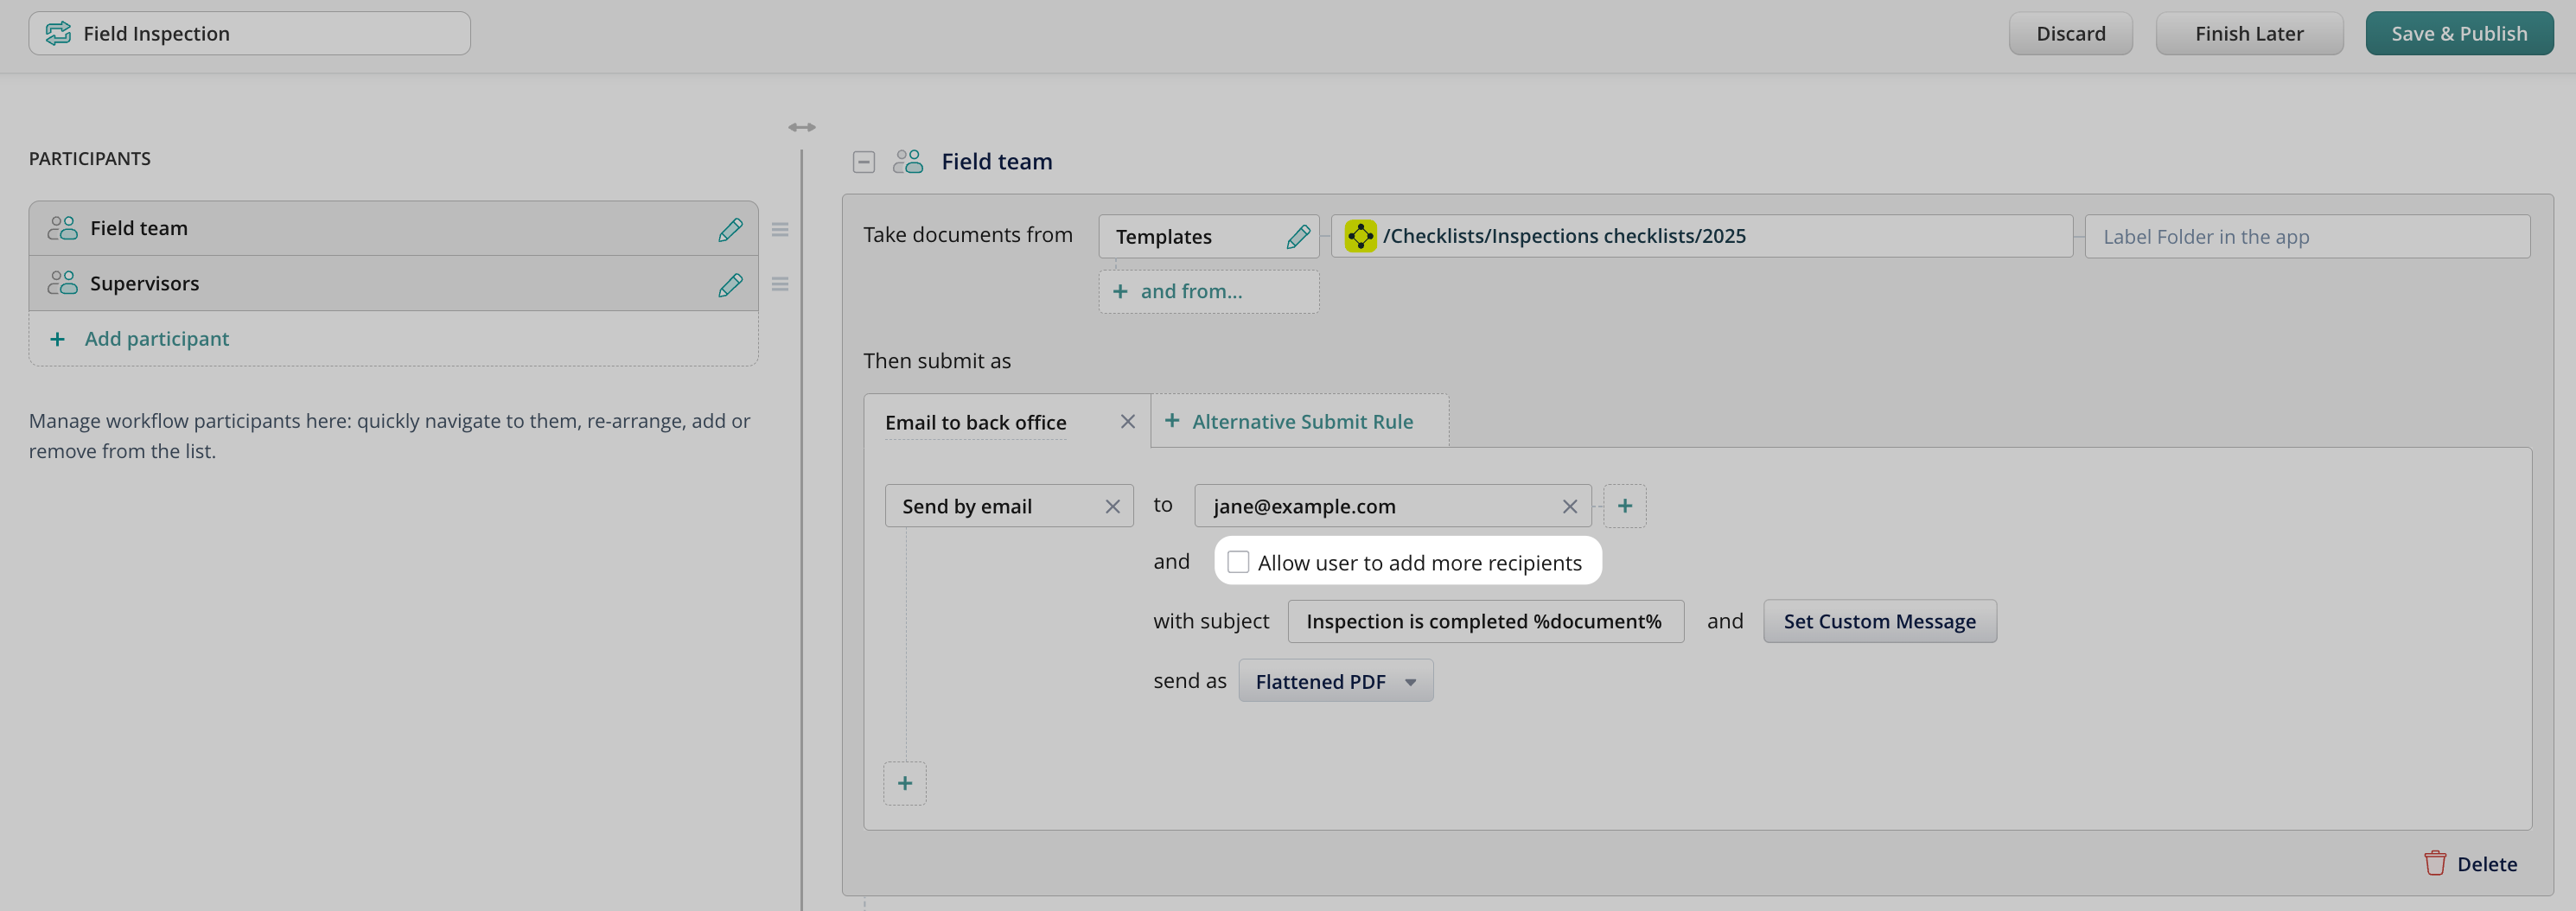
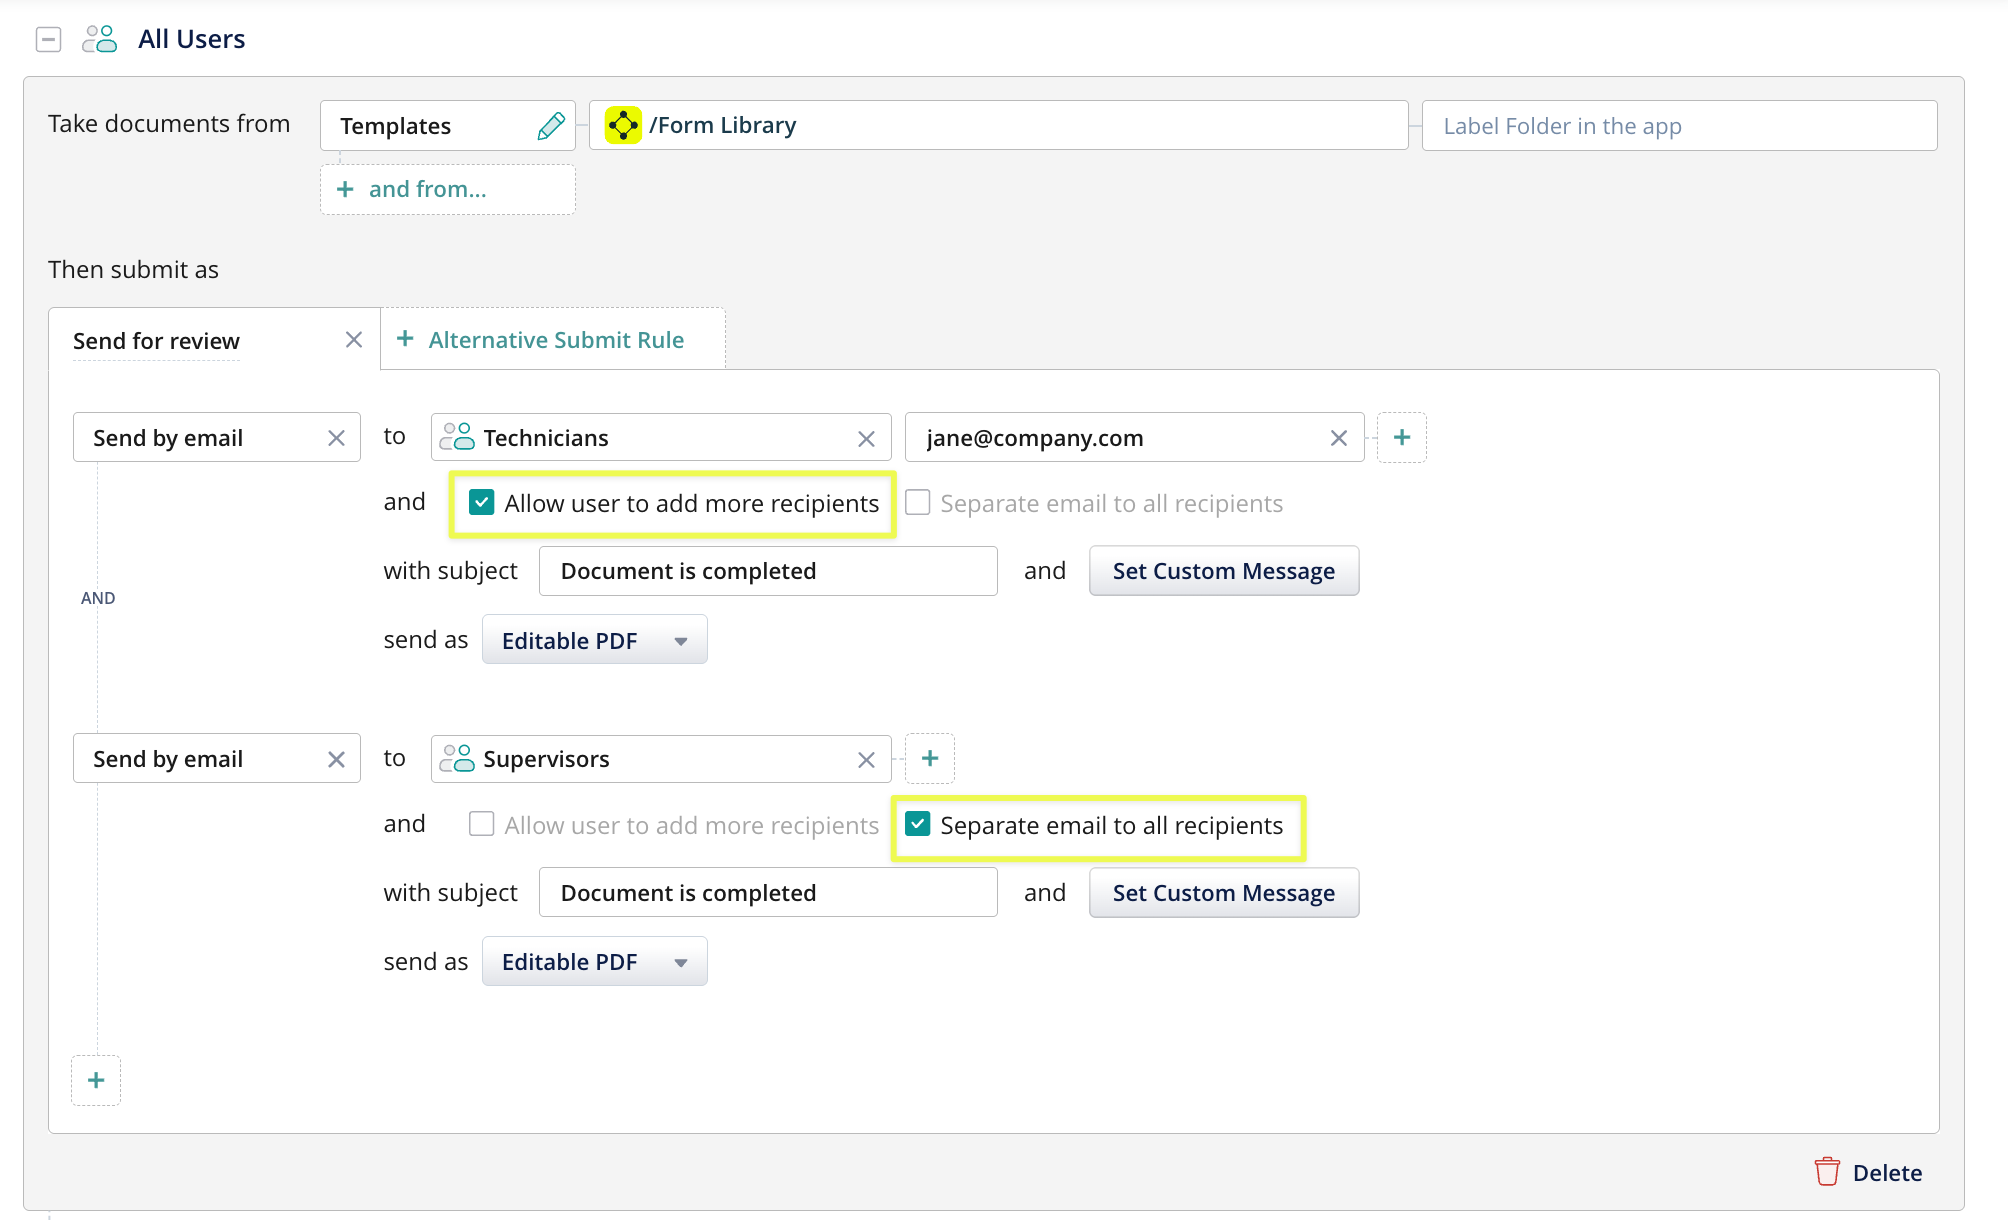
To add preconfigured recipients, enter their e-mails into the ‘to’ field. After each email address, press the ‘+’ button to add the next recipient. Enable Allow user to add more recipients if your users need to add all or some recipients by themselves.
Additionally, you can configure to send documents to entire user groups. A group can be selected from the available list using the “Select Group” option, or email addresses can be entered manually. Use the Search option to locate the respective group. There are no limits set on the number of groups that you can define as recipients. The “Separate email to all recipients” option is enabled by default, meaning that each recipient, including all users within selected groups, will receive an individual email. If this option is not enabled, all recipients will instead receive the document in a single email.
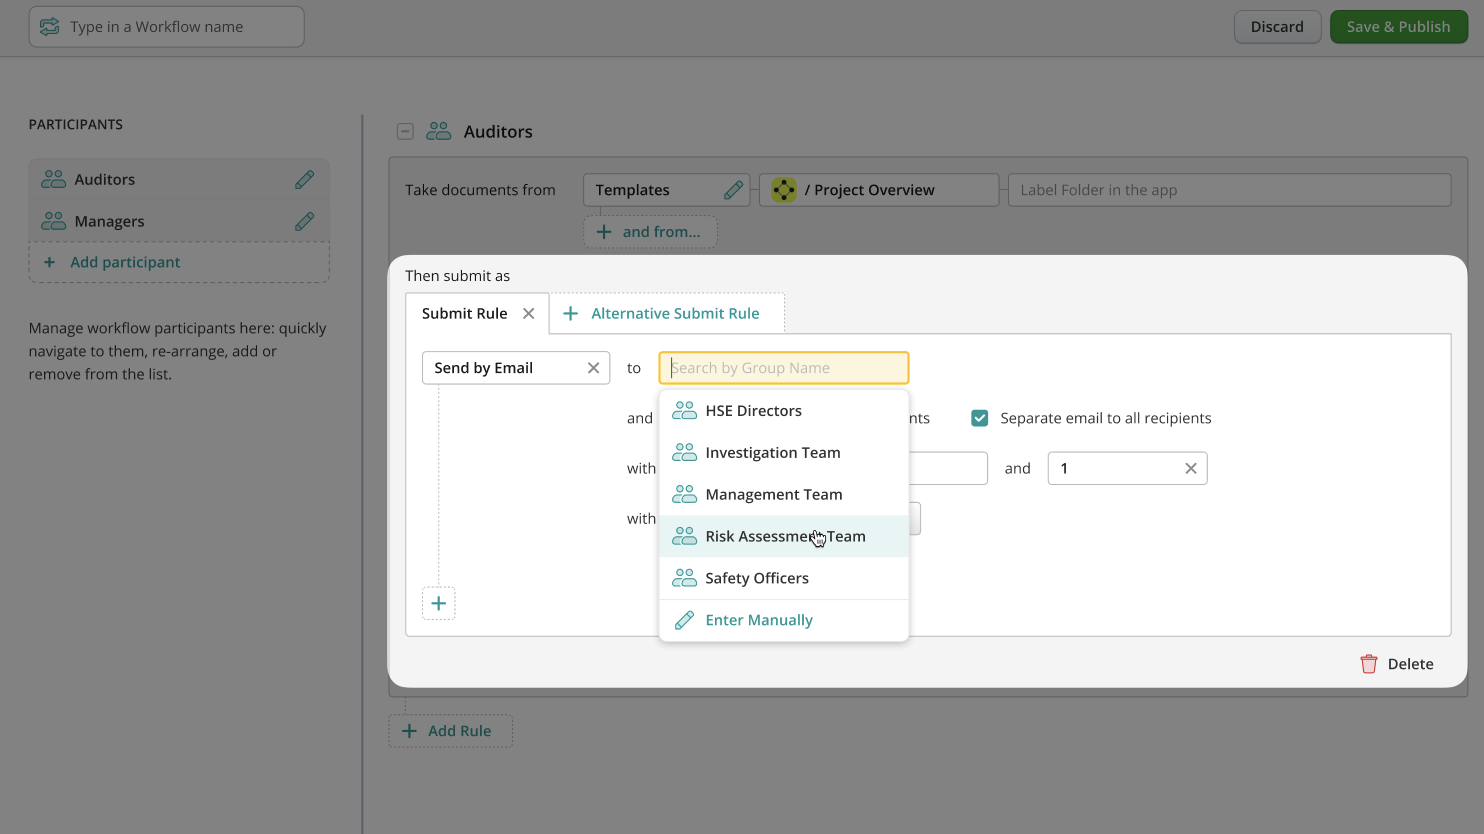
Note: The options “Allow users to add more recipients” and “Separate email to all recipients” cannot be enabled at the same time. If you want to send to a group and also allow users to add recipients, these actions need to be set up as separate submit actions within the same submit rule, as demonstarted on the example below:
The following file formats are available:
- Editable PDF: The entire document is submitted as one editable PDF file
- XFDF: the form field data is extracted and submitted, while the whole PDF form is not
- Flattened PDF: The entire document is submitted as a non-editable PDF file (digital signature data is also lost once a file is flattened).
To have the document name included in the subject of the email, add %document% in the subject field.
Note: If a workflow submit rule contains an incorrect pre-defined email address when a user submits files from this workflow, a delivery failure notification will be sent to the user, the admin, and the owner of the Fluix account.
Upload to Folder
This action is used to move documents to a folder on your remote storage.
Data can be saved to storage in the following formats:
- Editable PDF: the entire document is submitted as one editable PDF file
- XFDF: the form field data is extracted and submitted, while the whole PDF form is not
- Flattened PDF: the entire document is submitted as a non-editable PDF file (digital signature data is also lost once a file is flattened)
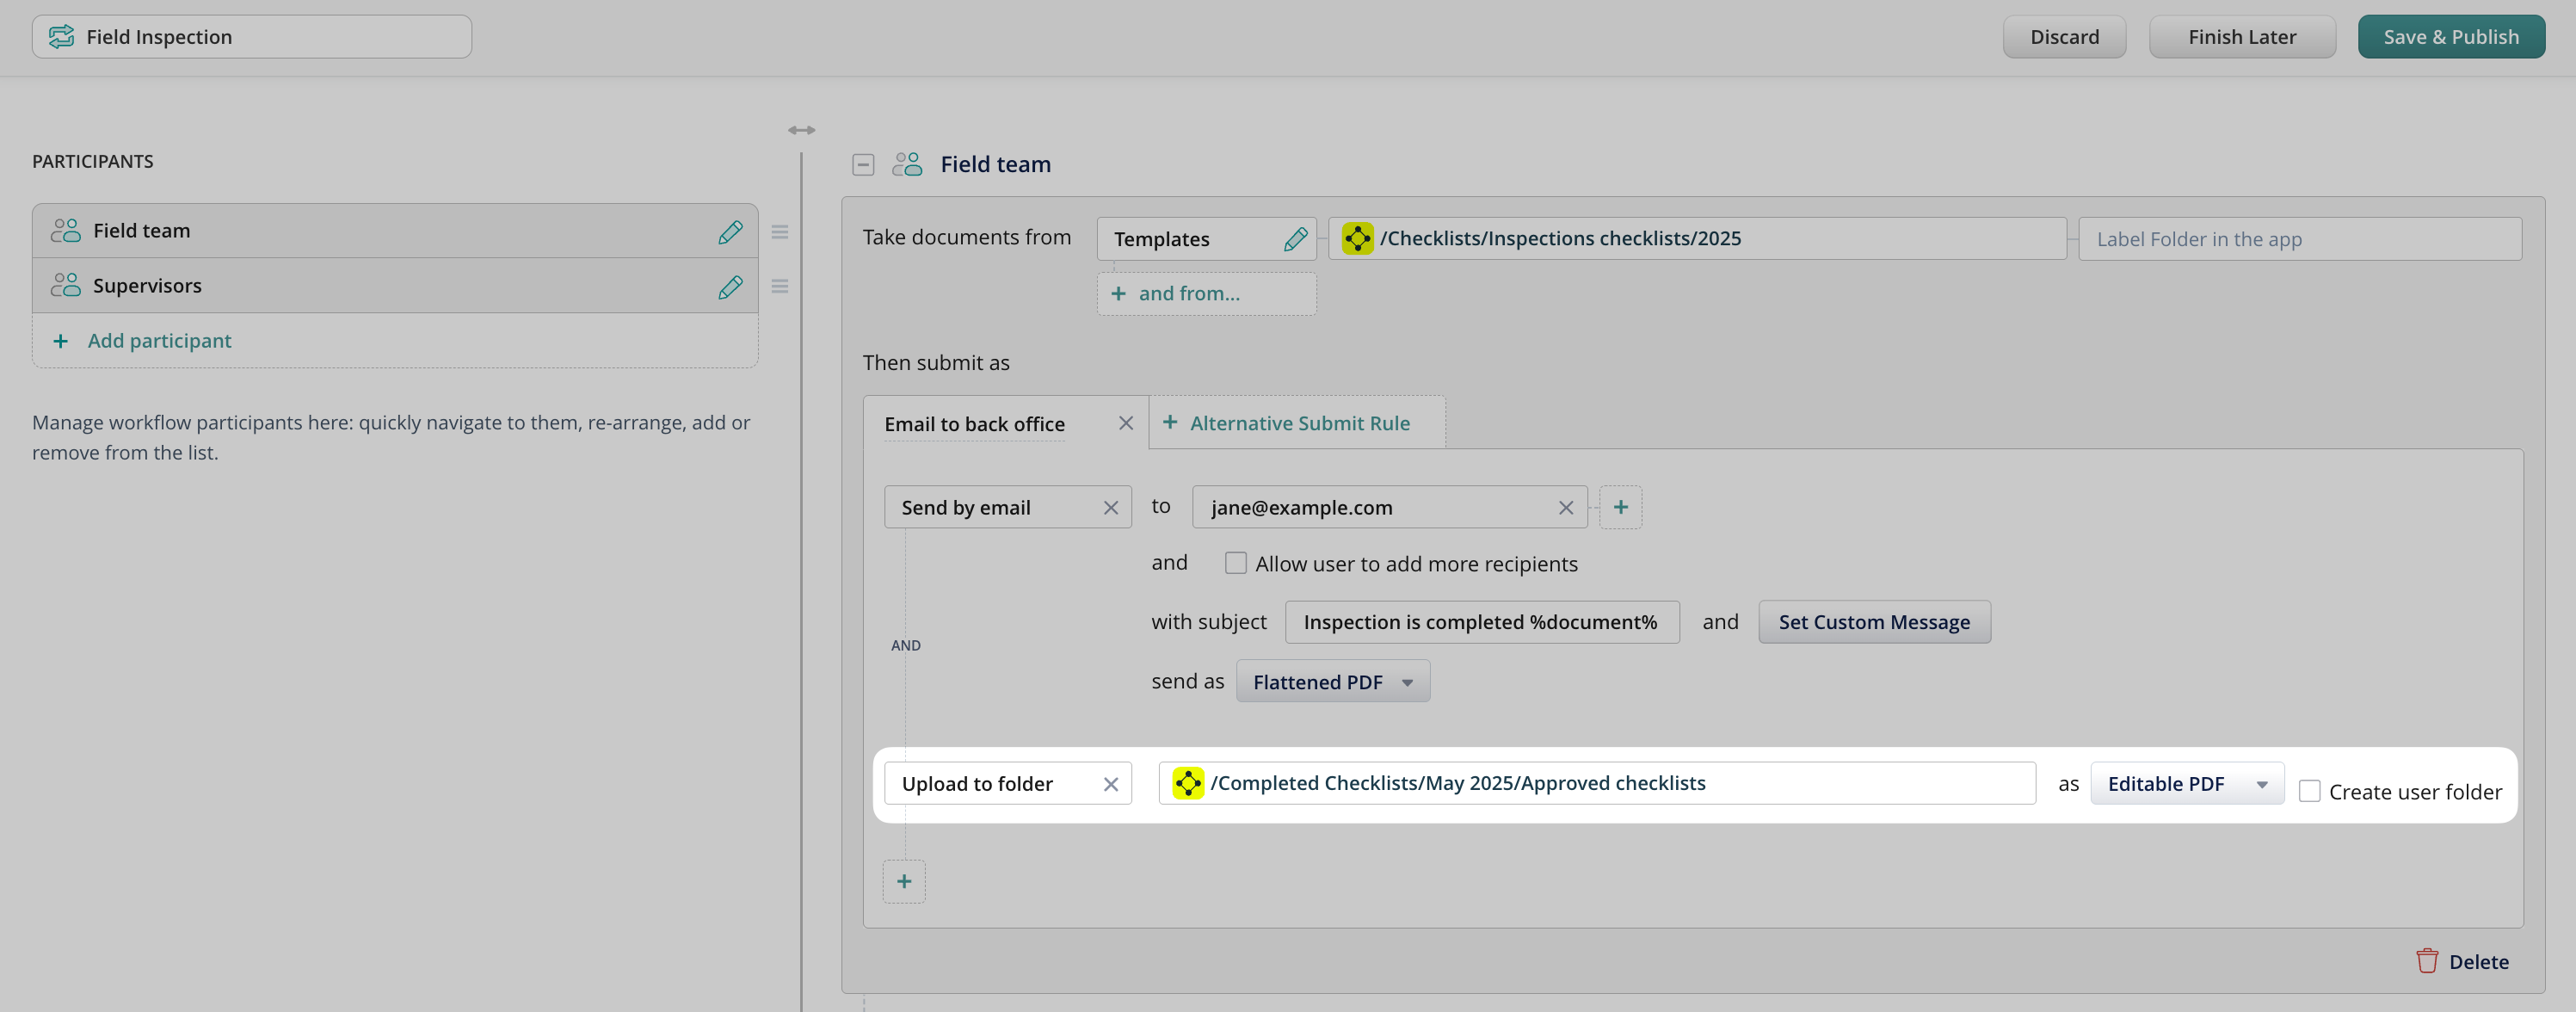
You can also have subfolders labeled with the user’s e-mail automatically created within the destination folder. Check Create user folder to enable this option. The folder is created once the user submits to the storage for the first time.
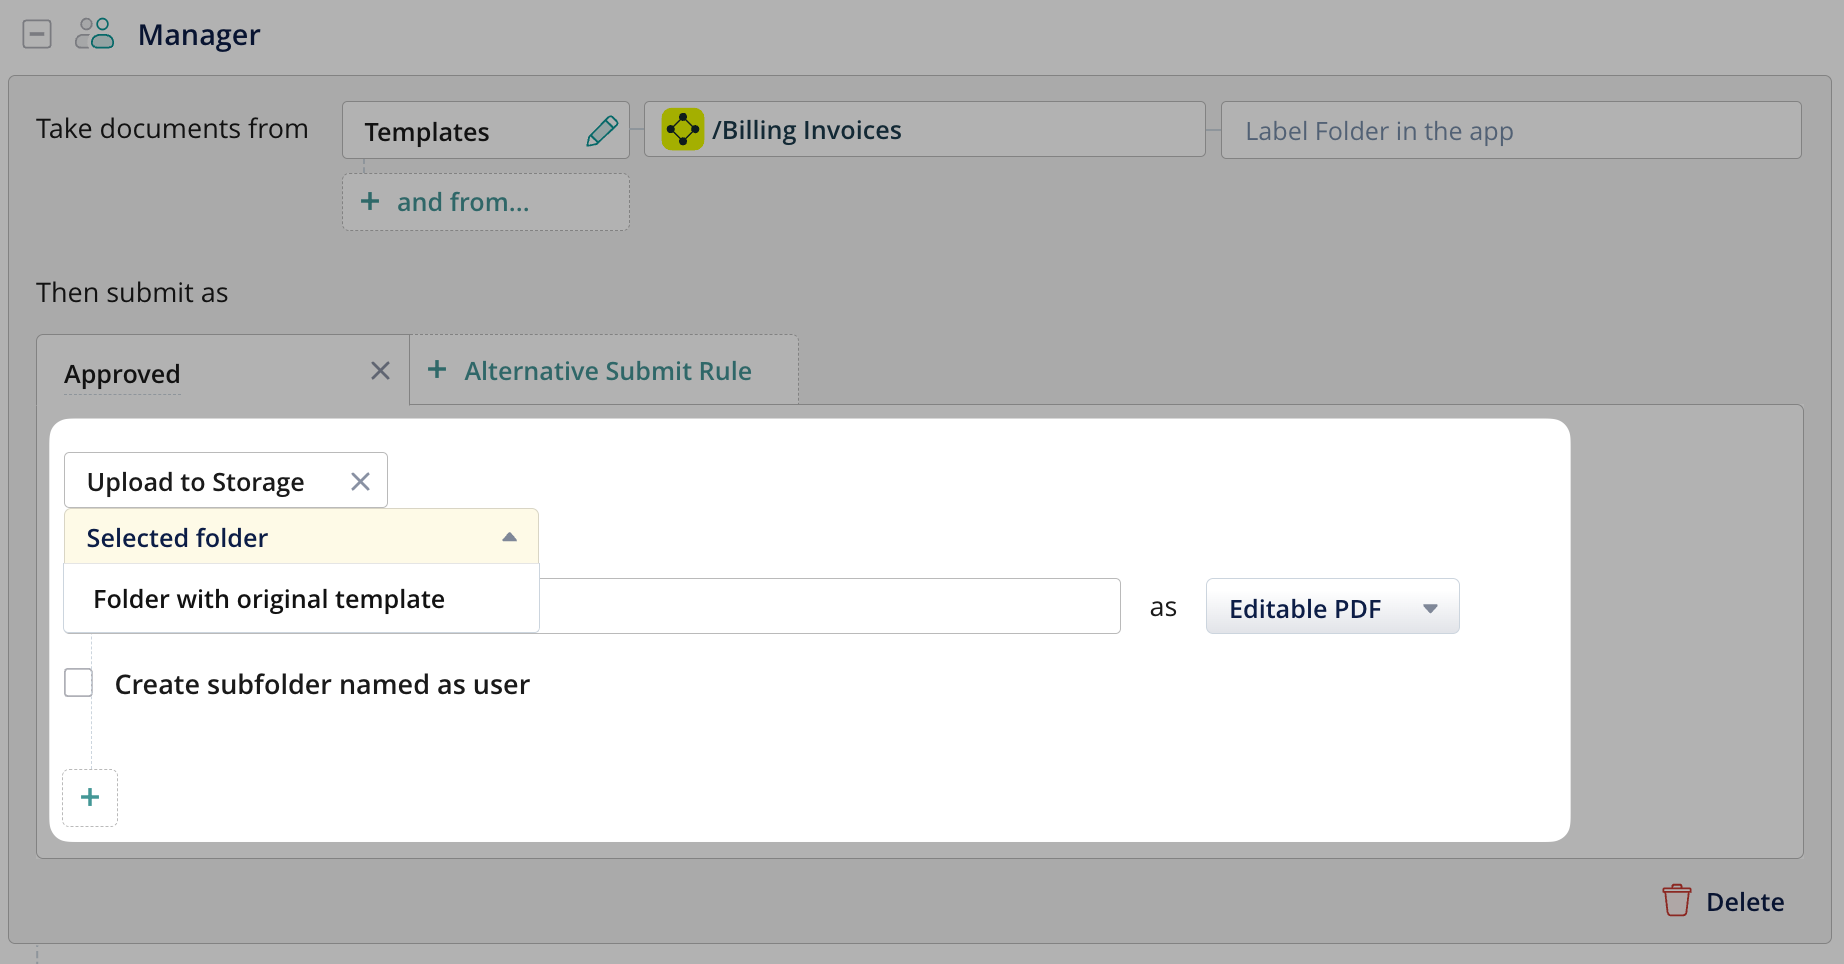
Upload to Storage
This action moves documents to a folder in Fluix storage or your remote storage. There are two options how you can route the completed files:
- Upload to the selected folder gives you an option to map the path with subfolders where the completed document will land.
- Upload to the folder with the original template allows you to automatically upload a submitted document to the same storage folder where the template was originally located. This creates a copy of the submitted document directly in the template’s source folder. This option is available only for the Templates document source.
Note: You can select Upload to Folder with the original template only once per submit rule and document source. This ensures that duplicate copies are not created within the same rule.
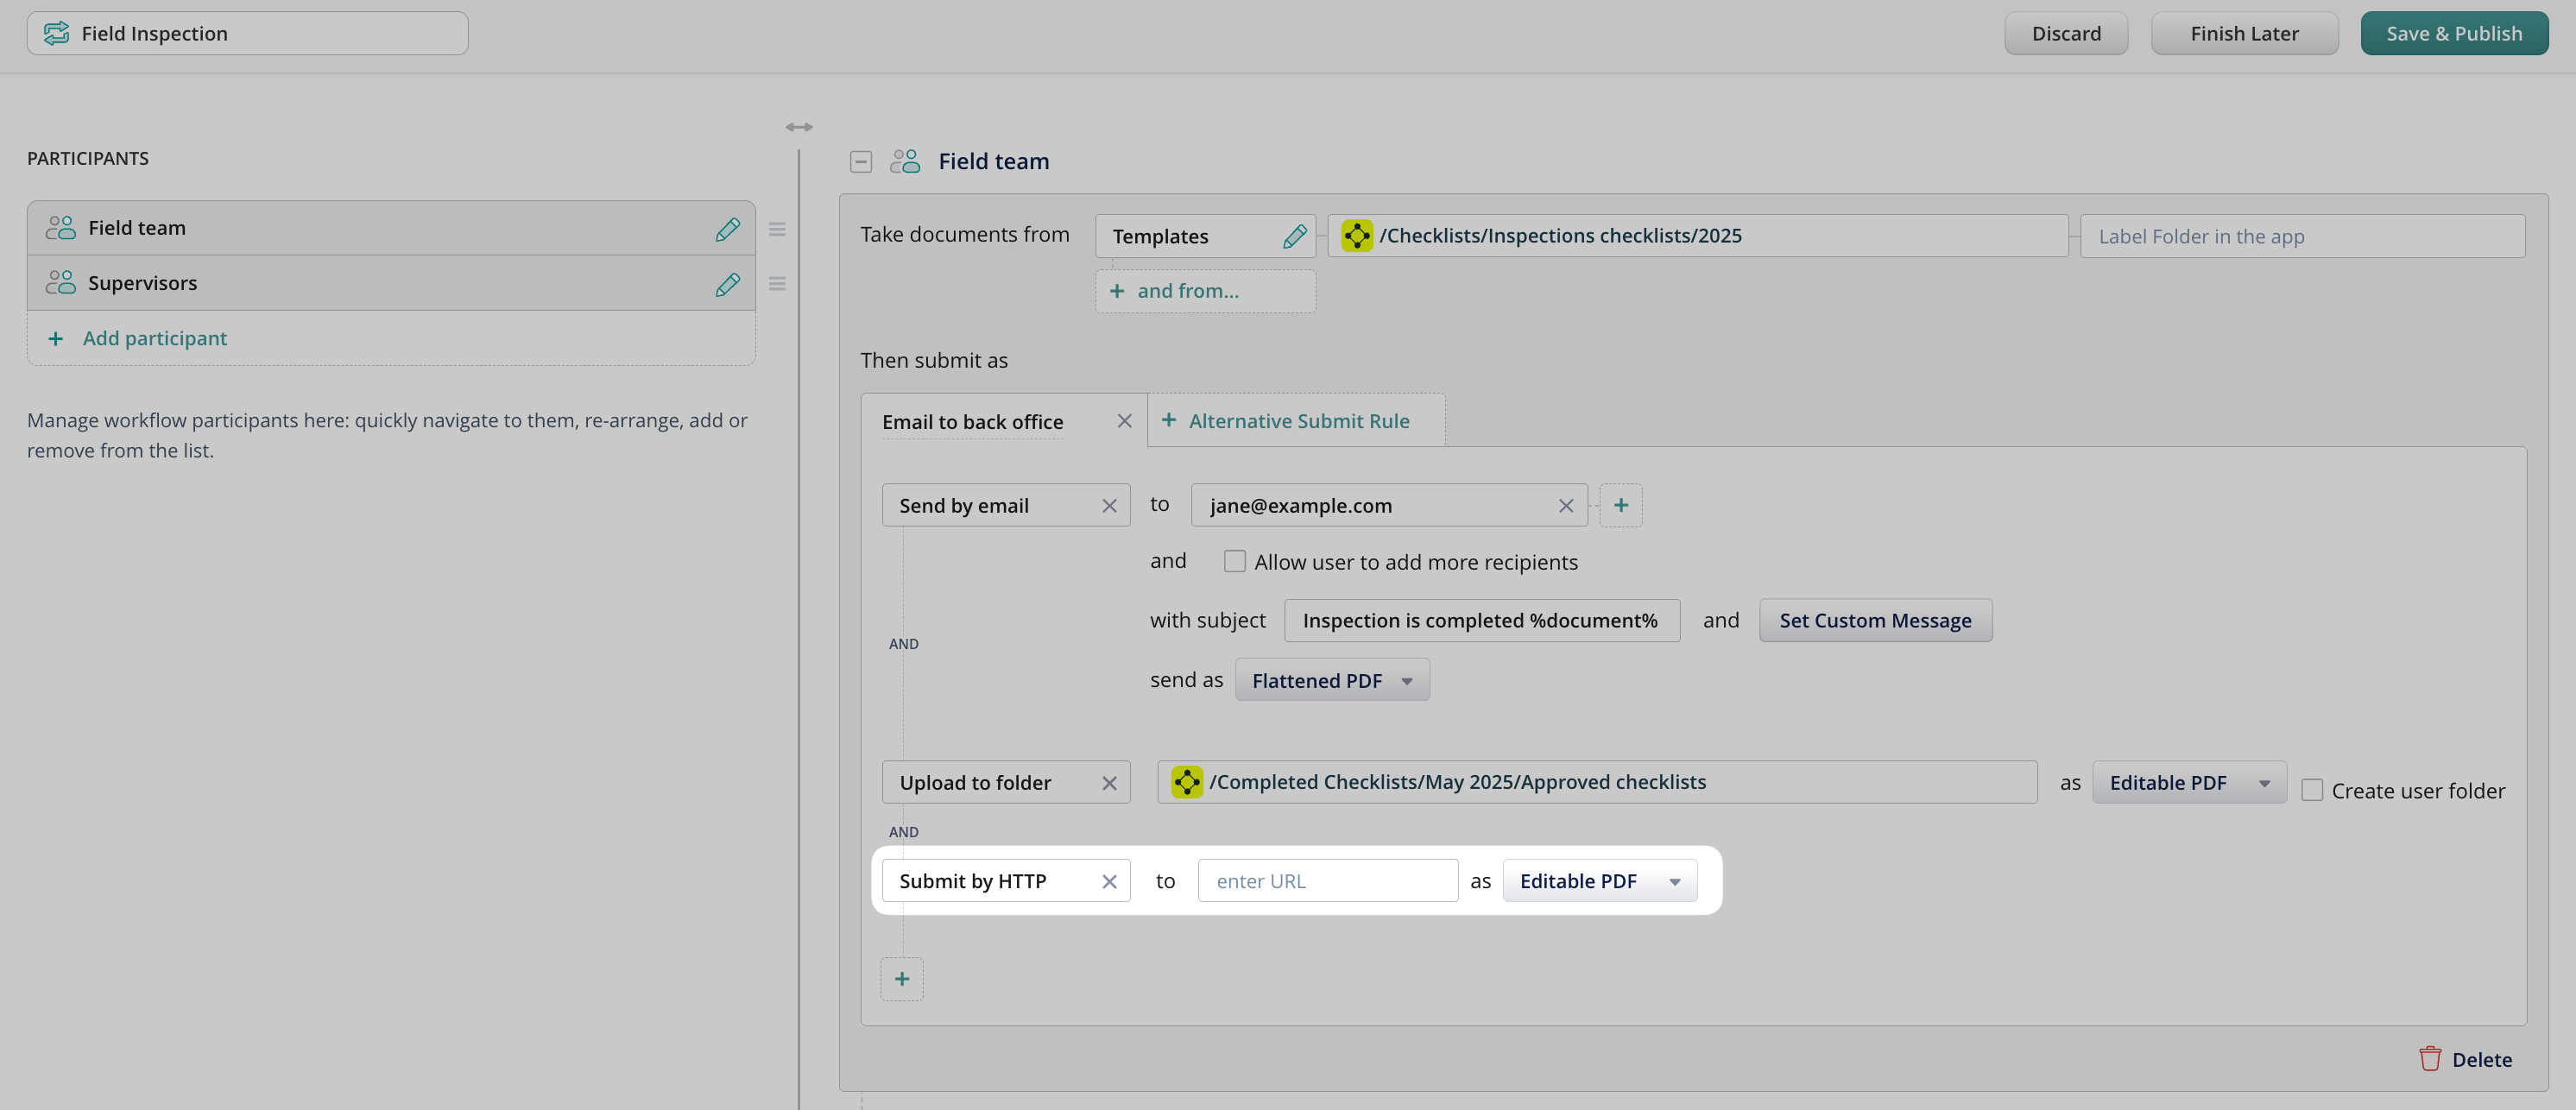
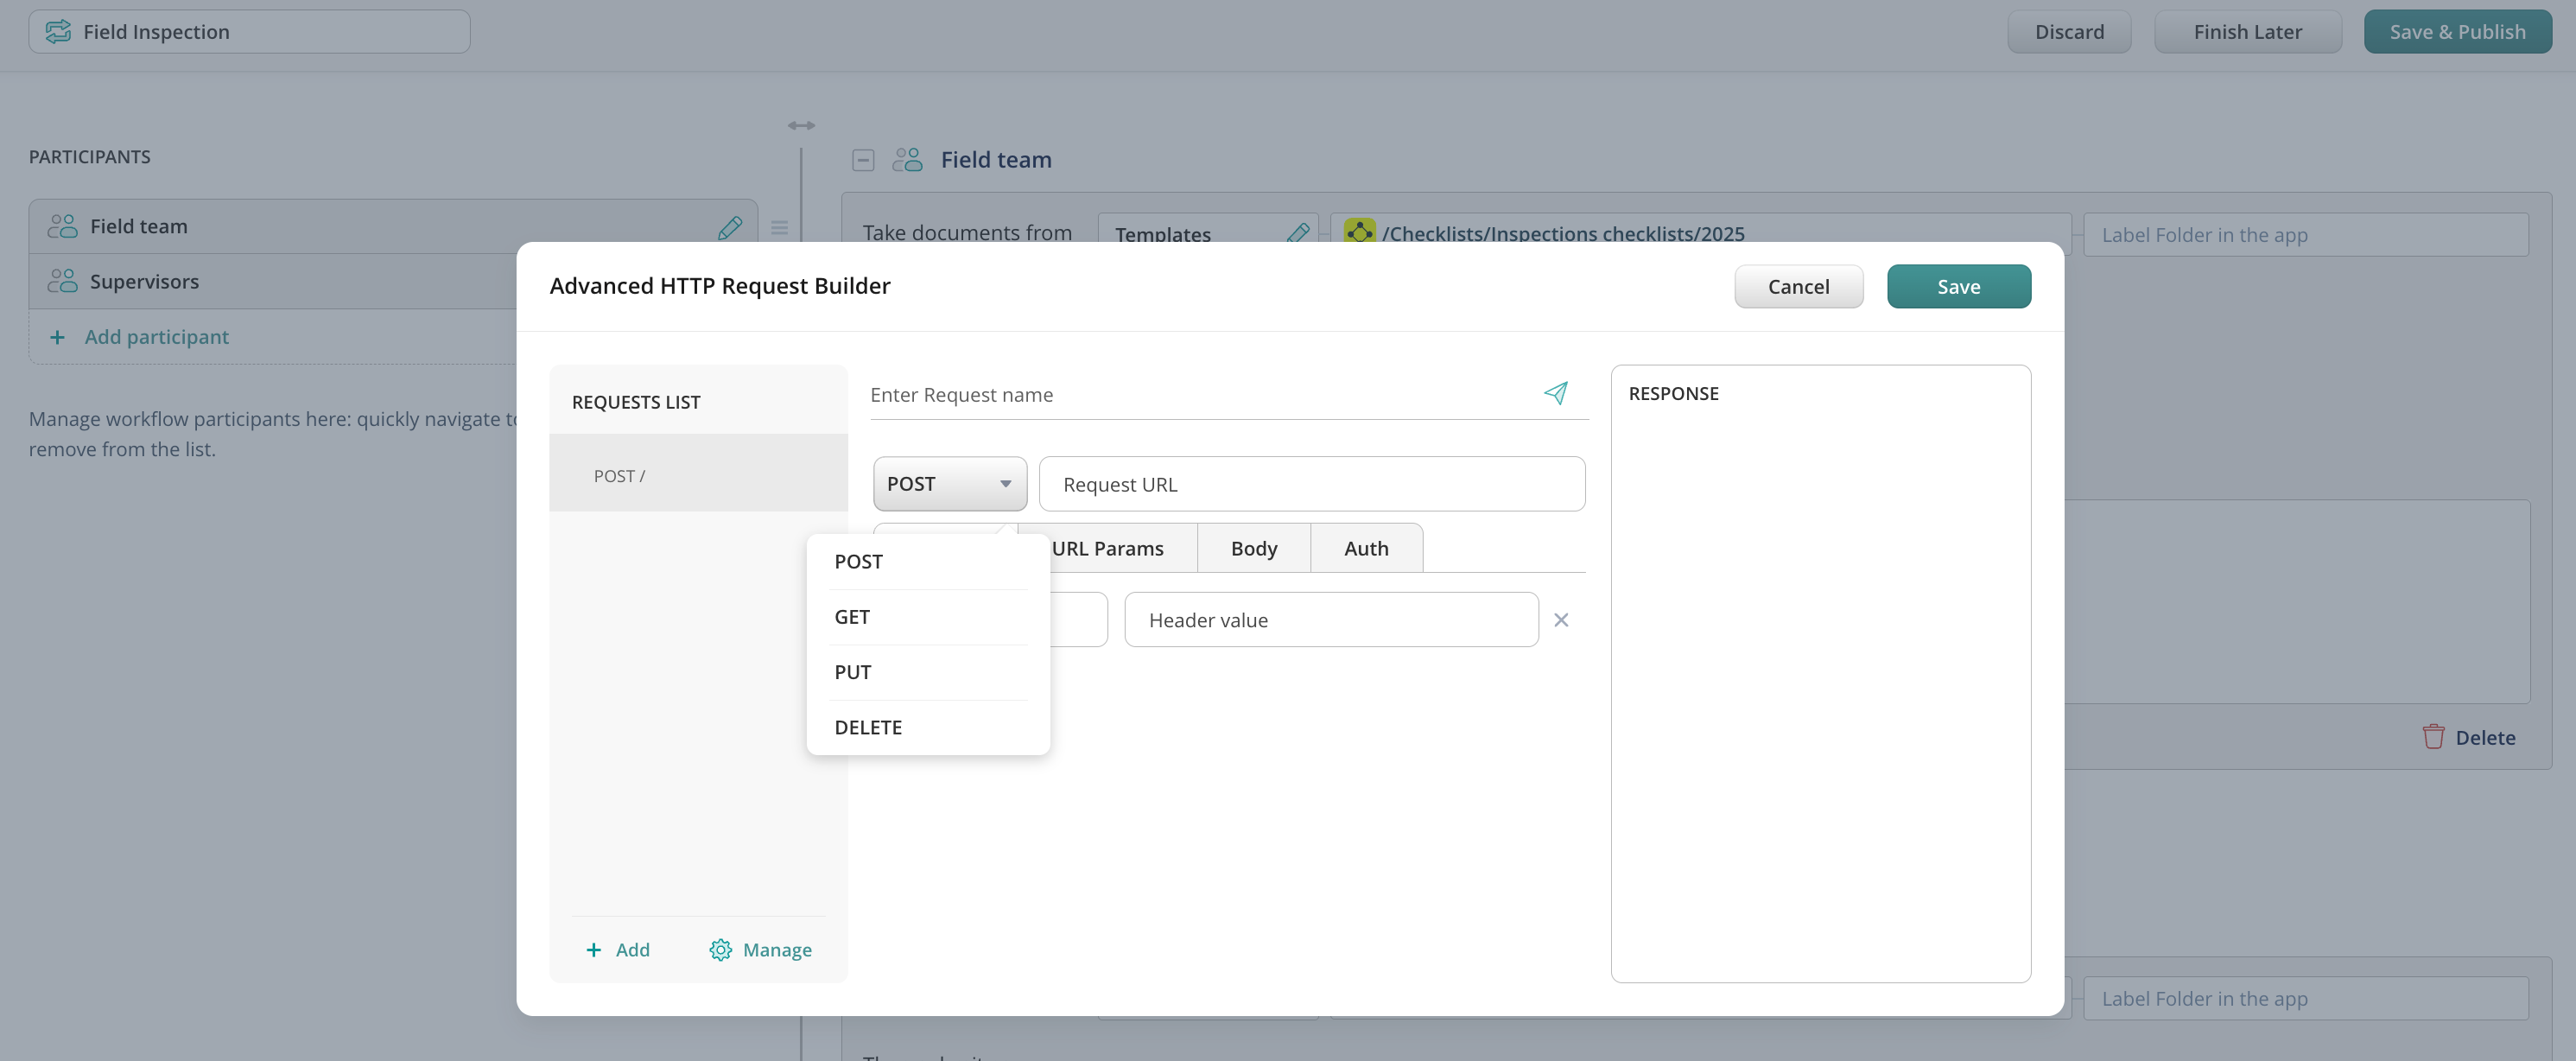
Submit by HTTP
This action transfers data to a preconfigured URL. Enter the destination URL and select the file format in the corresponding fields.
Submit by HTTP can be performed in the following formats and methods:
- Editable PDF: The entire document is submitted as one editable PDF file
- XFDF: the form field data is extracted and submitted, while the whole PDF form is not
- POST values: key-value pairs are extracted from a form and submitted to the HTTP URL as POST request attributes
- Flattened PDF: the entire document is submitted as a non-editable PDF file (digital signature data is also lost once a file is flattened)
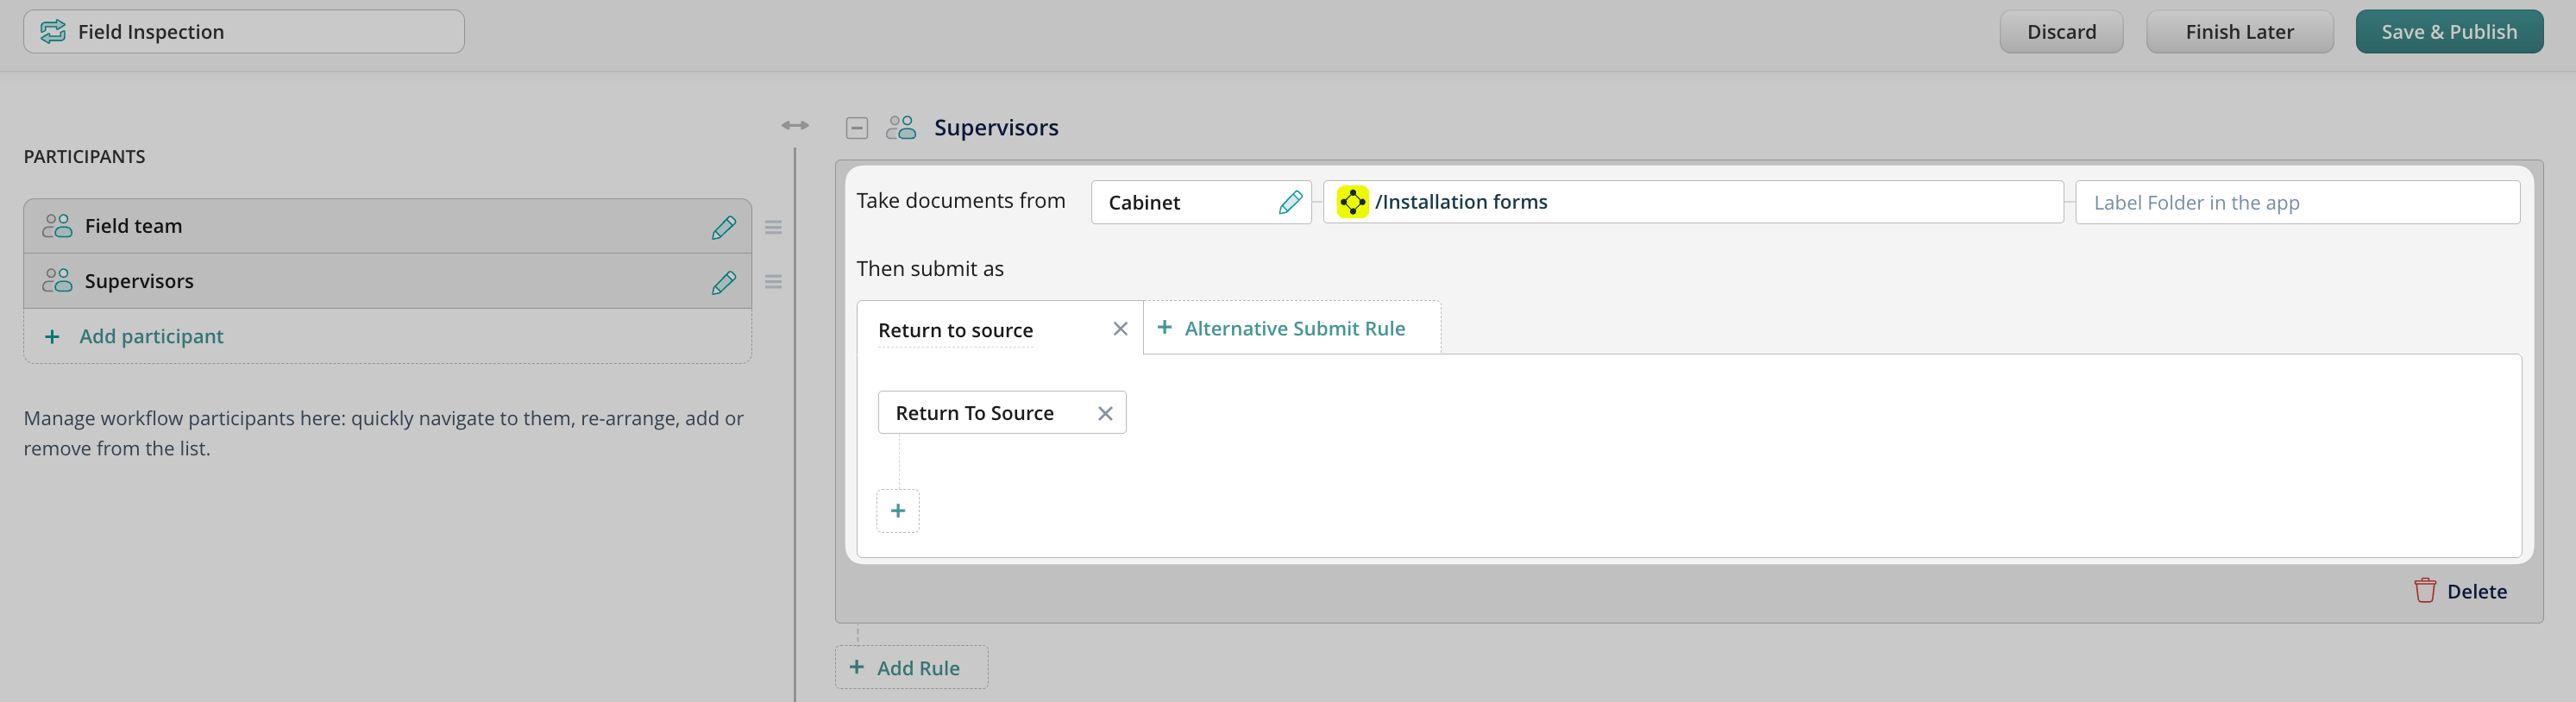
Return to Source
This action is used when the Cabinet is selected as a document’s source:
Once users submit a document, it will be automatically uploaded back to the source from which it was initially distributed.
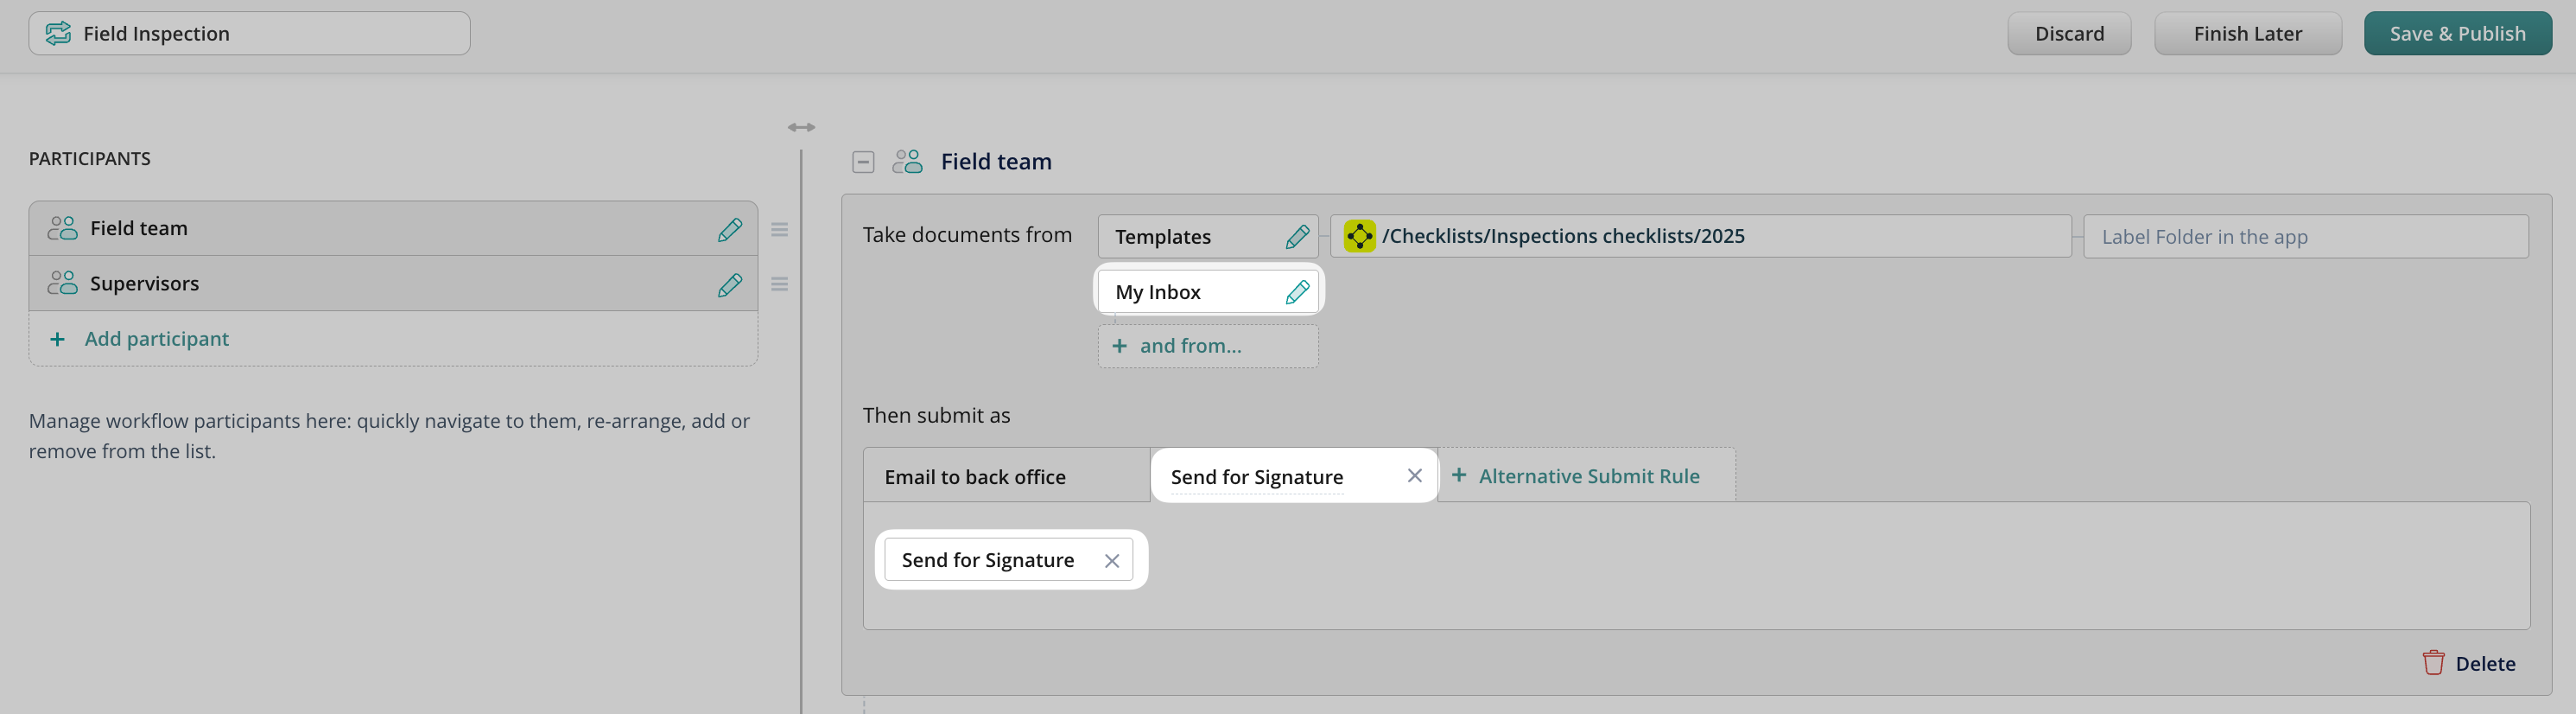
Send for Signature
This action is used when documents need to be emailed and digitally signed by a user outside of Fluix.
For this action, make sure to add Inbox as a document source. This way, once a document is signed and returned to Fluix, it will reside under the Inbox tab and can then reach its final destination.
Extract Data
This action will extract the data from the completed PDFs into reports available to the admin in the Data section.
The submit may contain several actions, e.g., send by email and save to storage, that happen simultaneously once triggered.
Upload to CRM/ERP
1. First, you will need to navigate to the workflow builder in the Fluix admin portal (Configurations –> Workflows –> New workflow) and create a new Upload to CRM/ERP submit rule.
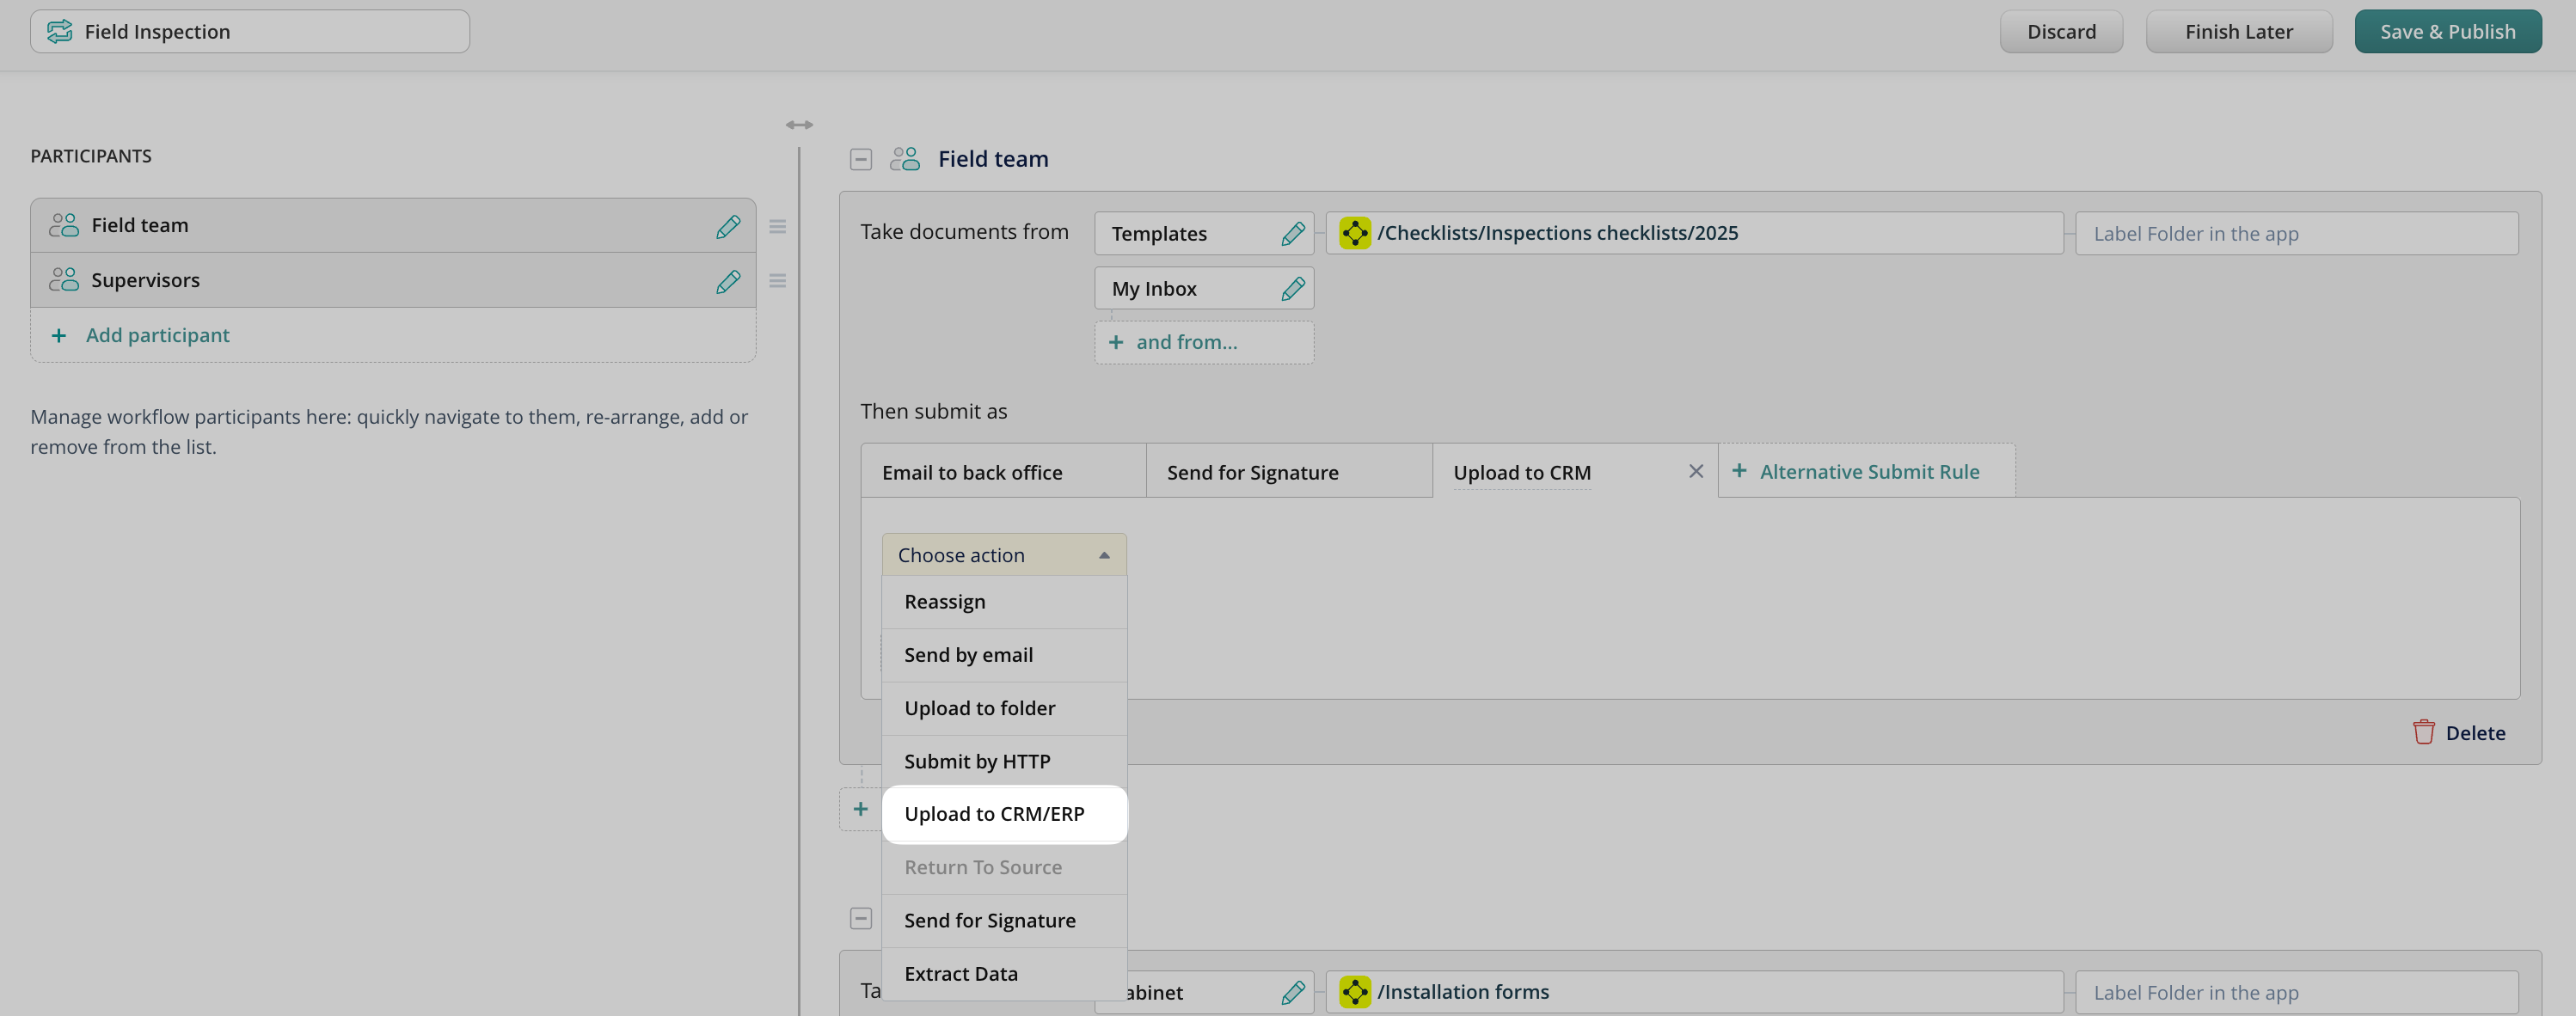
2. After you have it in place, you will have to configure its parameters (endpoint URLs, header values, HTTP methods, etc.) based on your needs and the API integration requirements of the service in question. Please note that these requirements differ based on the service you would like to integrate with. Therefore, this is the right place where your inbound IT specialist may join or when to reach out to our support team for assistance.
3. Save changes in the workflow. From that moment, the data will be automatically uploaded to the system upon every document submission.
Alternative submit actions
When a workflow requires a user to be able to choose how a document moves, alternative submit actions are needed. Once the first submit action is created, press the Alternative Submit Rule button to begin creating an alternative one.
After the submit action is selected, the workflow can be published. For details, please proceed to the next article Publishing a Workflow.