


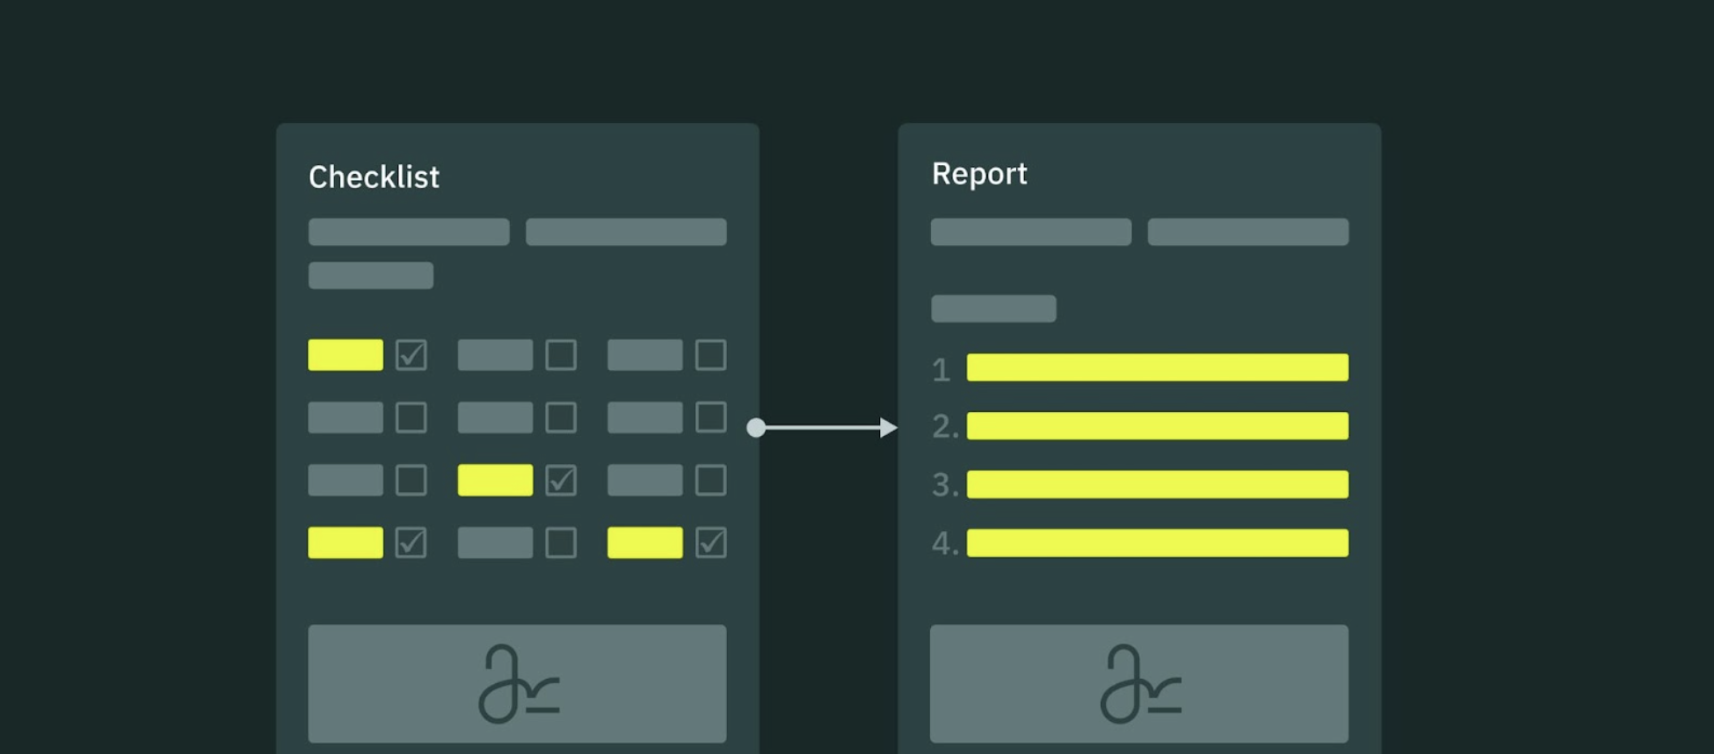
Issue Report helps field teams automatically turn completed inspection checklists into clear, shareable summary reports. Instead of manually creating reports after every inspection, field inspectors can generate them in seconds and share the results with customers, supervisors, or internal teams.
In this article, you will learn how to set up and use Issue Report in Fluix.
Note:
- The Issue report is available starting from the Operations Plan.
- The Issue Report can be generated based on the Fluix Dynamic form.
Why Use Issue Report?
- Save admin and field inspector time by eliminating manual report creation and reducing double data entry.
- Quickly share findings and summaries with customers.
- Enhance and accelerate collaboration between field and office teams.
- Ensure that findings and resolutions are consistently documented.
How to Set Up an Issue Report
Step 1: Create a Dynamic Form
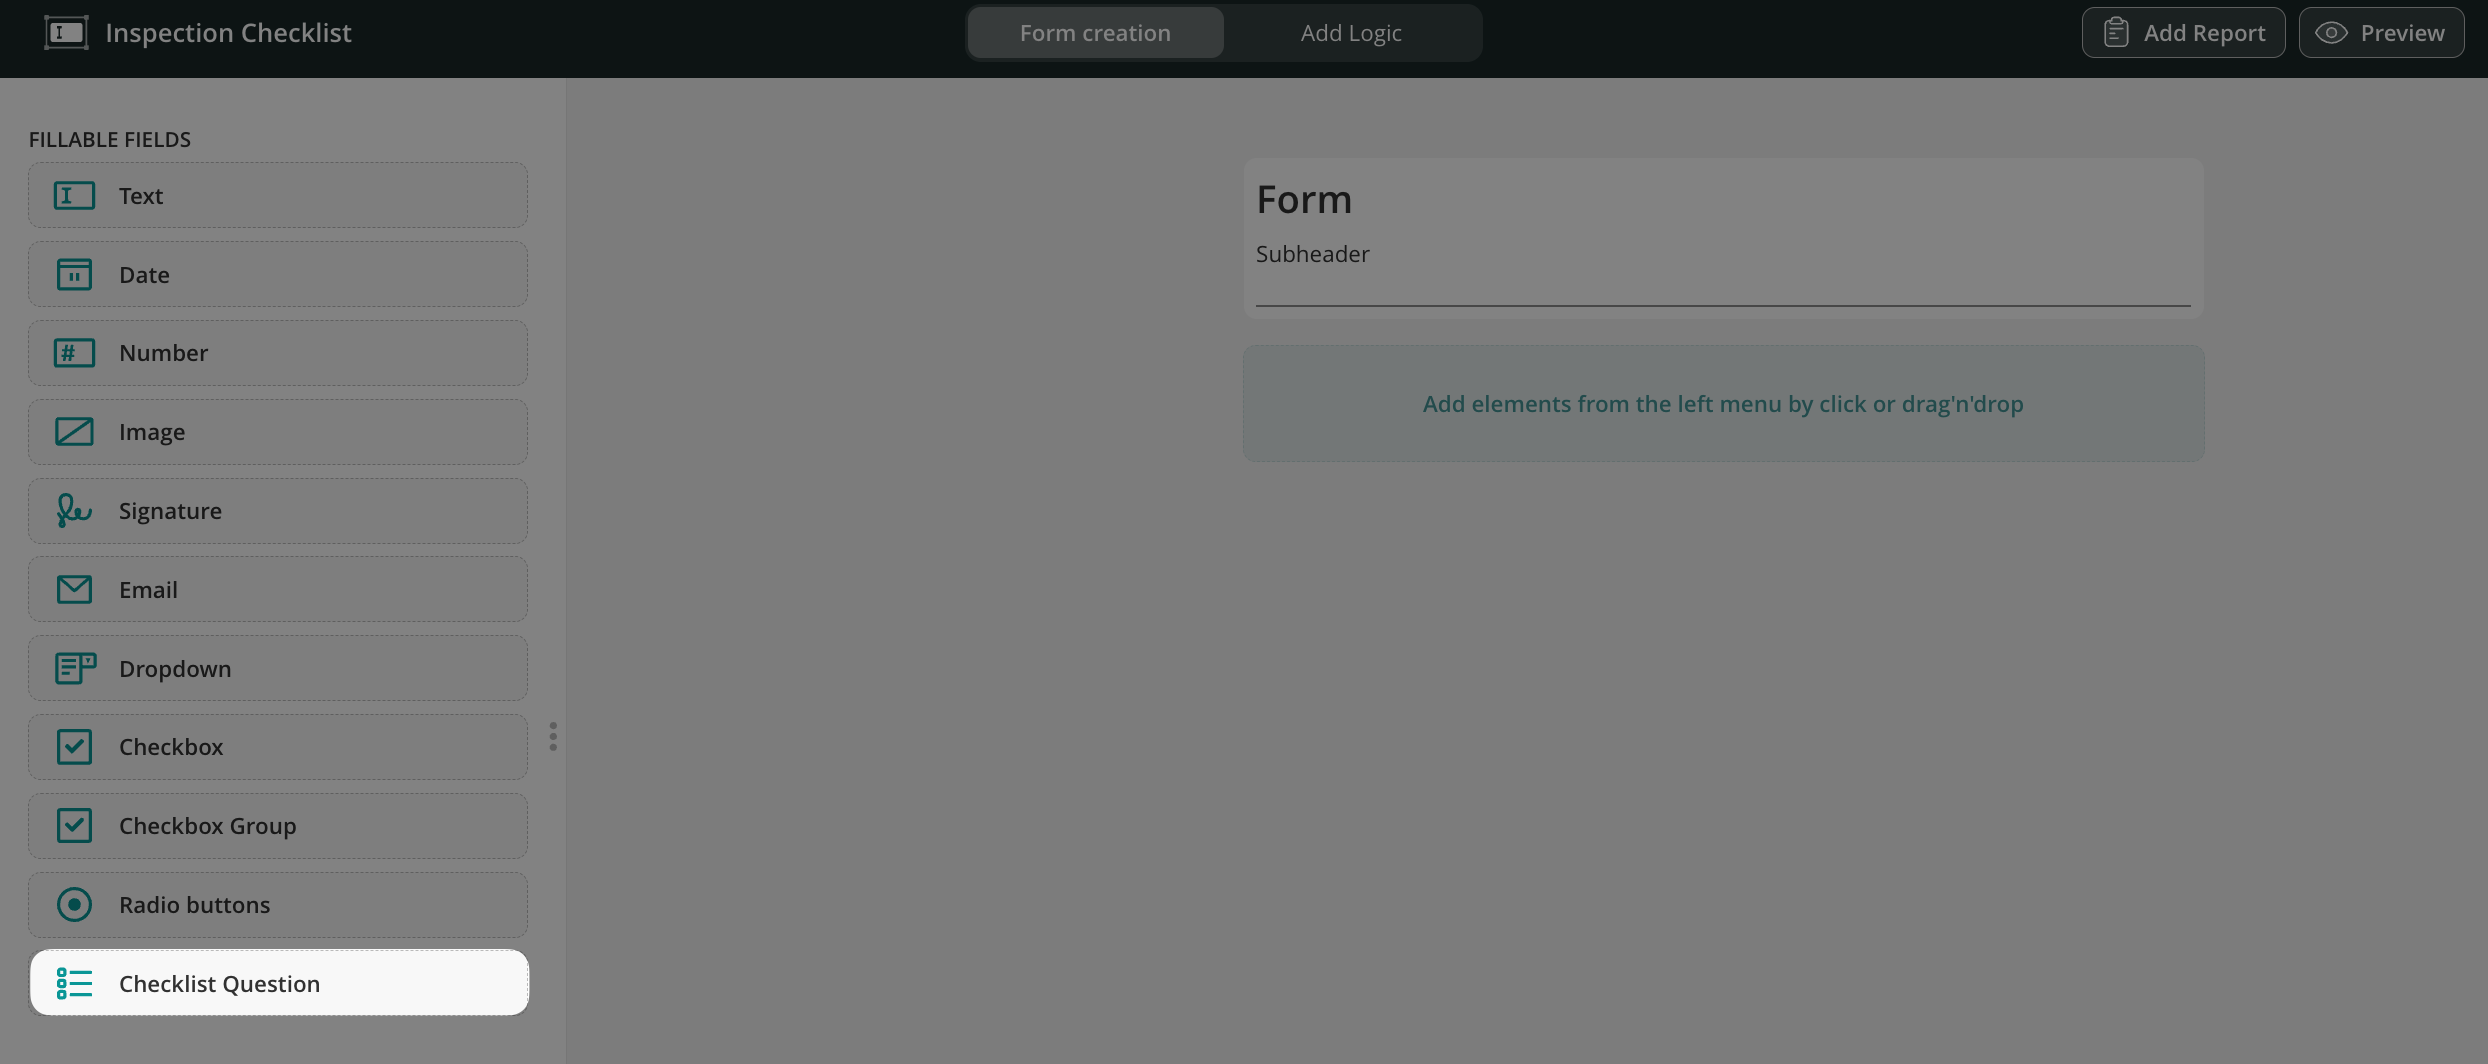
1. Go to the Forms section in the Admin Portal.
2. Start creating a Dynamic Form. Check the full tutorial on how to build a Dynamic form from scratch.
3. Include Checklist Question elements in the form.
4. For each question: define which answers should be treated as flagged items (e.g., “No”, “Fail”, “Needs Attention”)
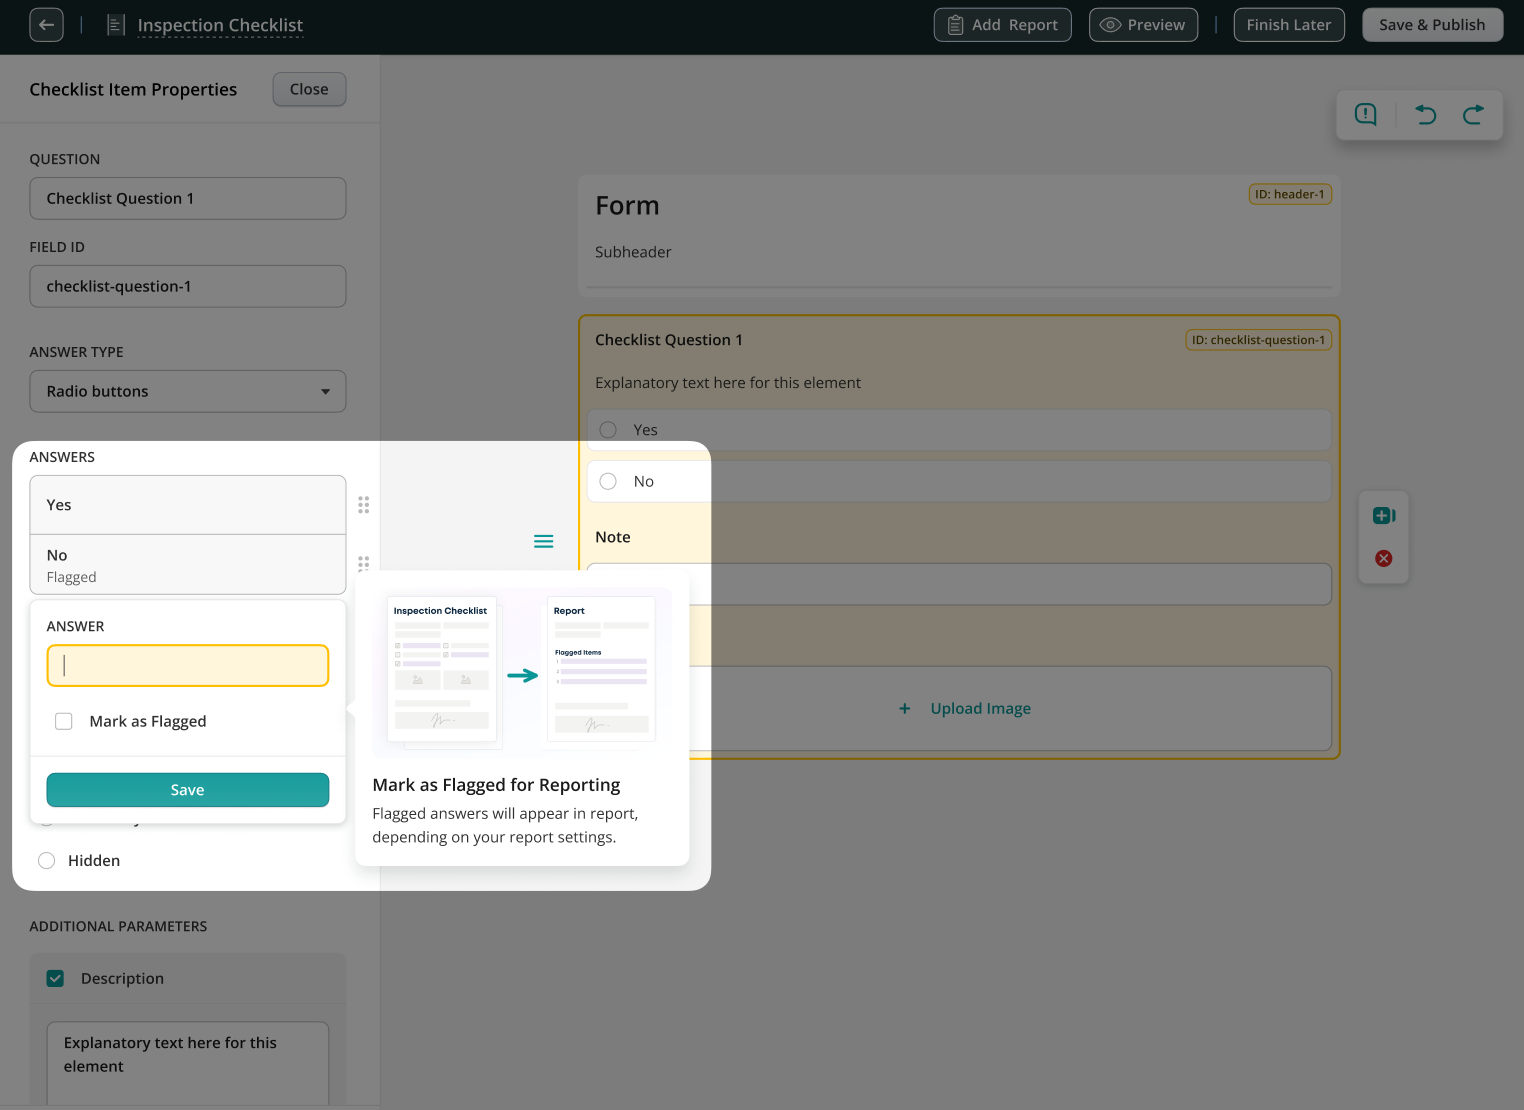
Flagged answers will later appear automatically in the Issue Report.
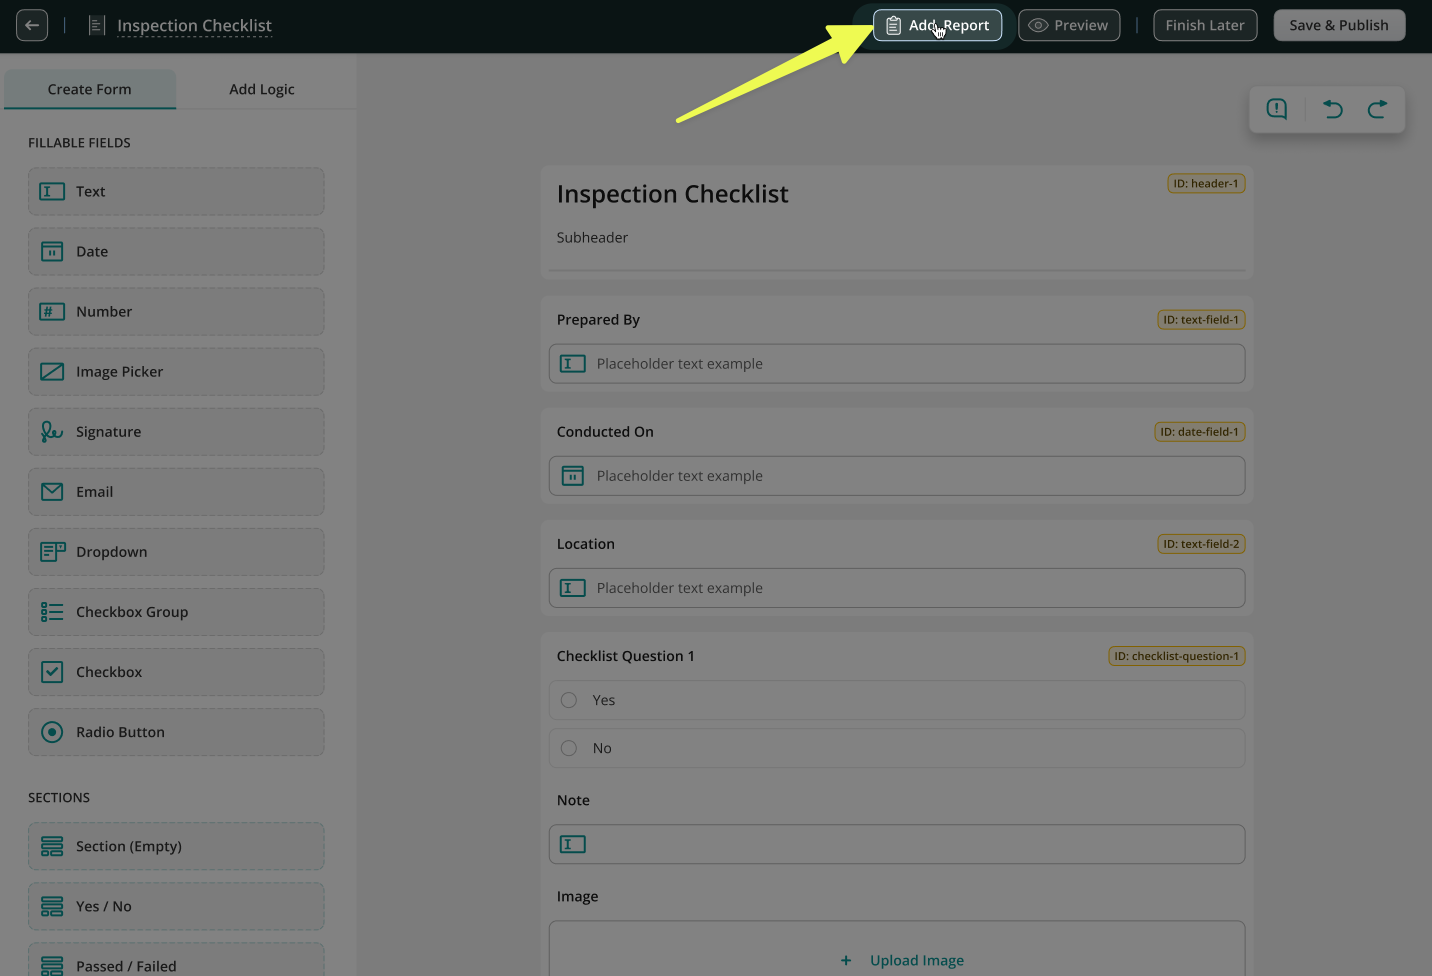
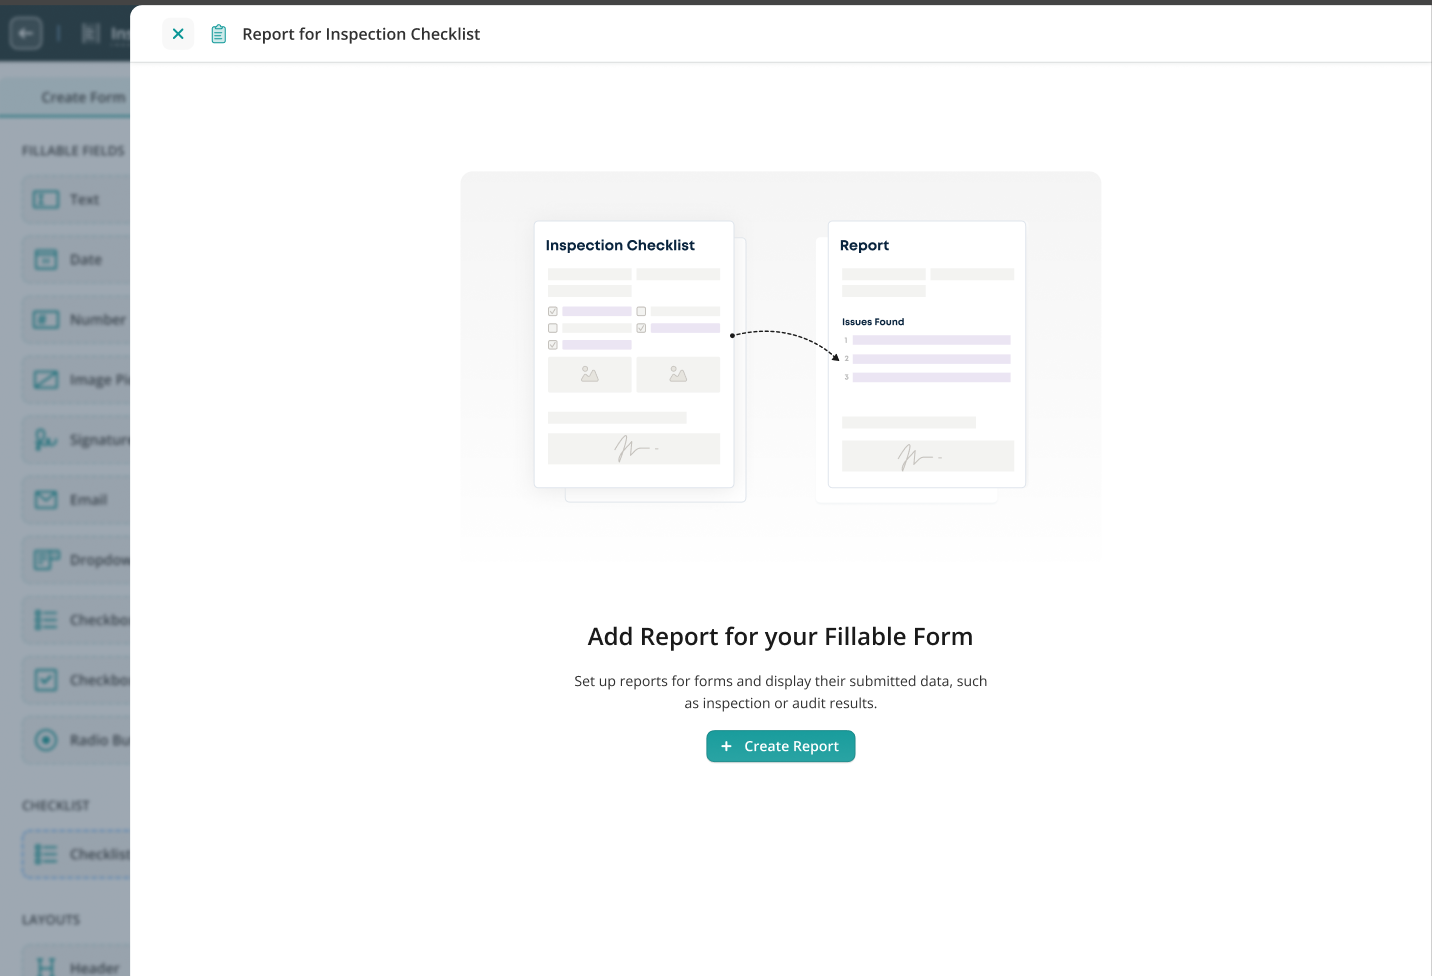
Step 2: Configure an Issue Report
1. Click the Add Report button.
Note: The dynamic form should be saved and published before proceeding with the report creation.
2. Create a new report by clicking the Create Report button.
3. Select which data from the form should be prefilled in the report. Choose whether to include:
- Flagged – checklist points marked as flagged
- Passed – checklist points not marked as flagged
- Unanswered – checklist points without a response
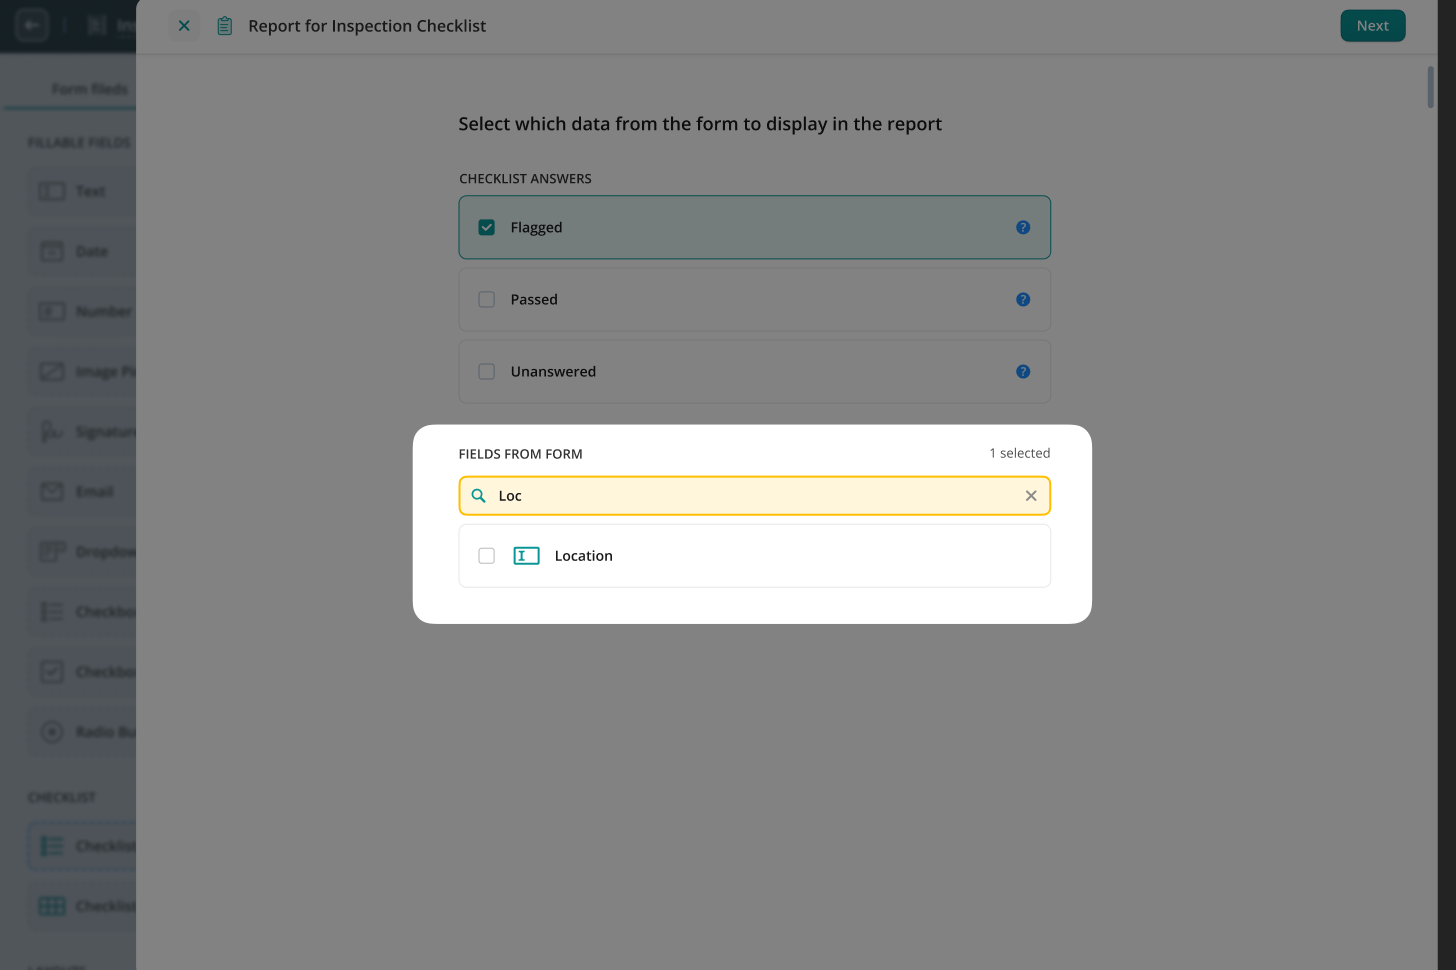
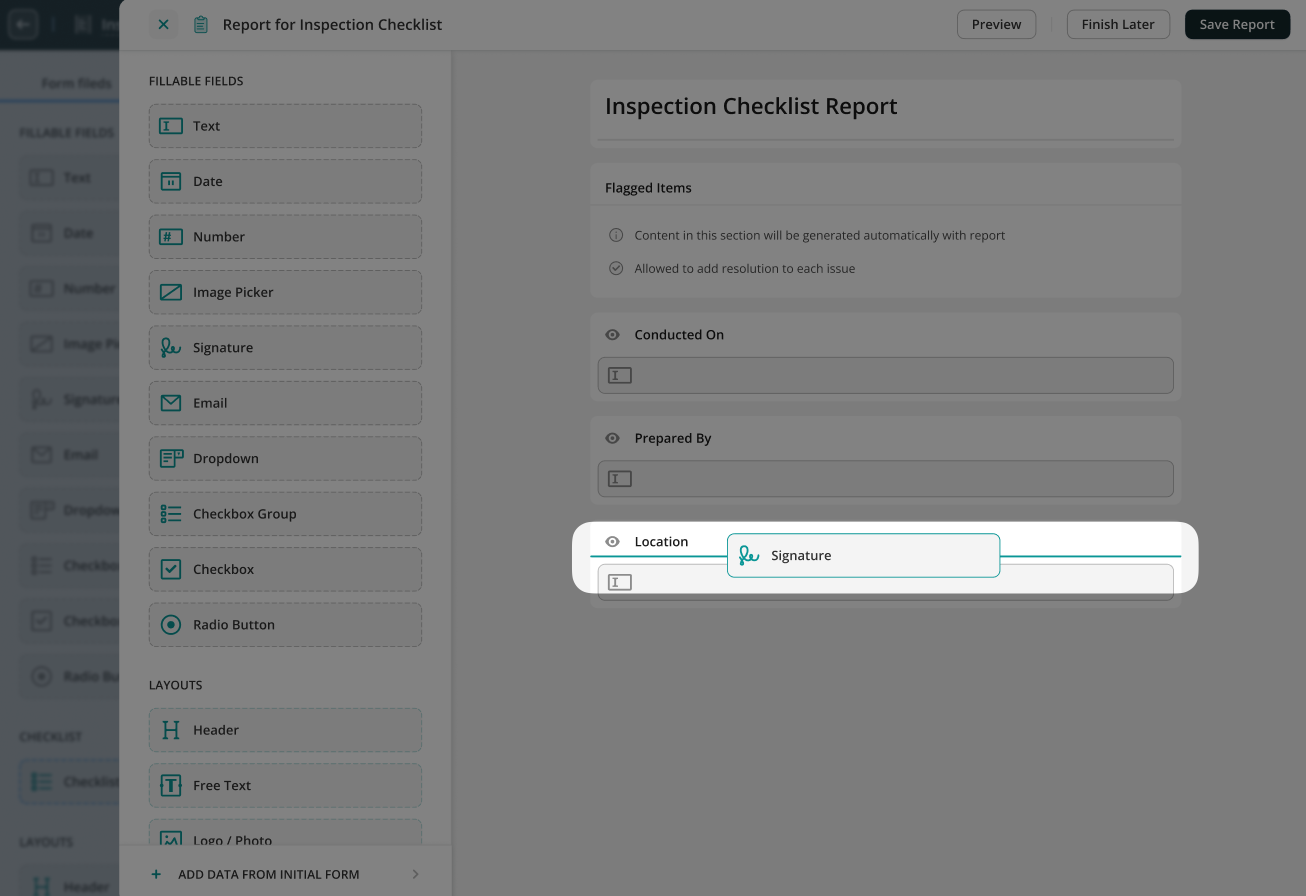
- Additional form data: add other fields as needed, such as text entries, images, checkboxes, or signatures.
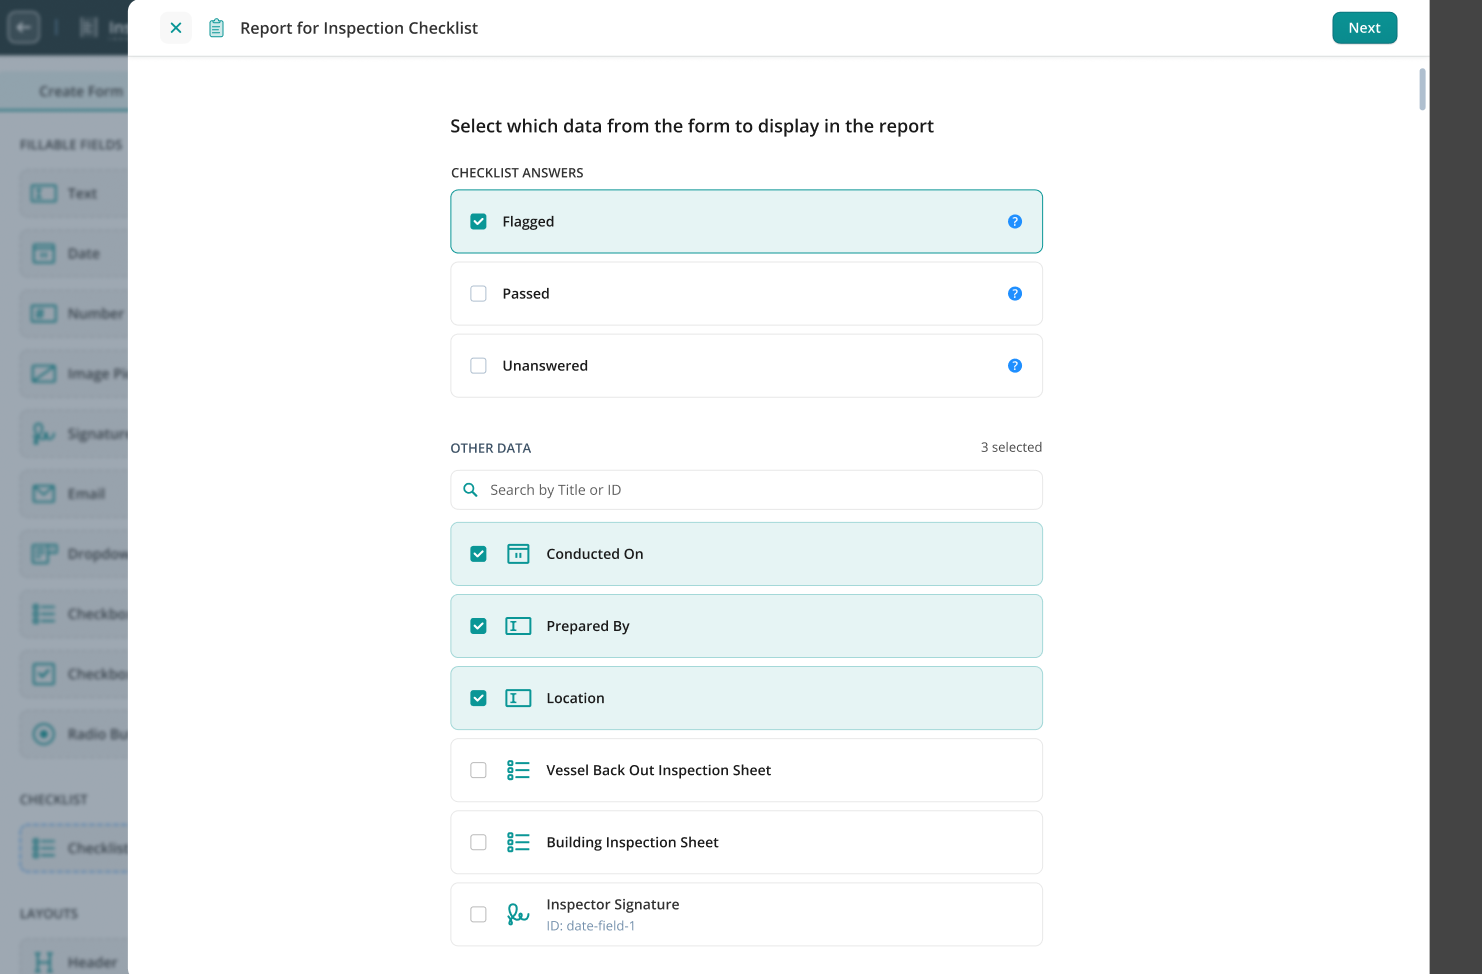
For faster search of the fields, you can use the Search Bar.
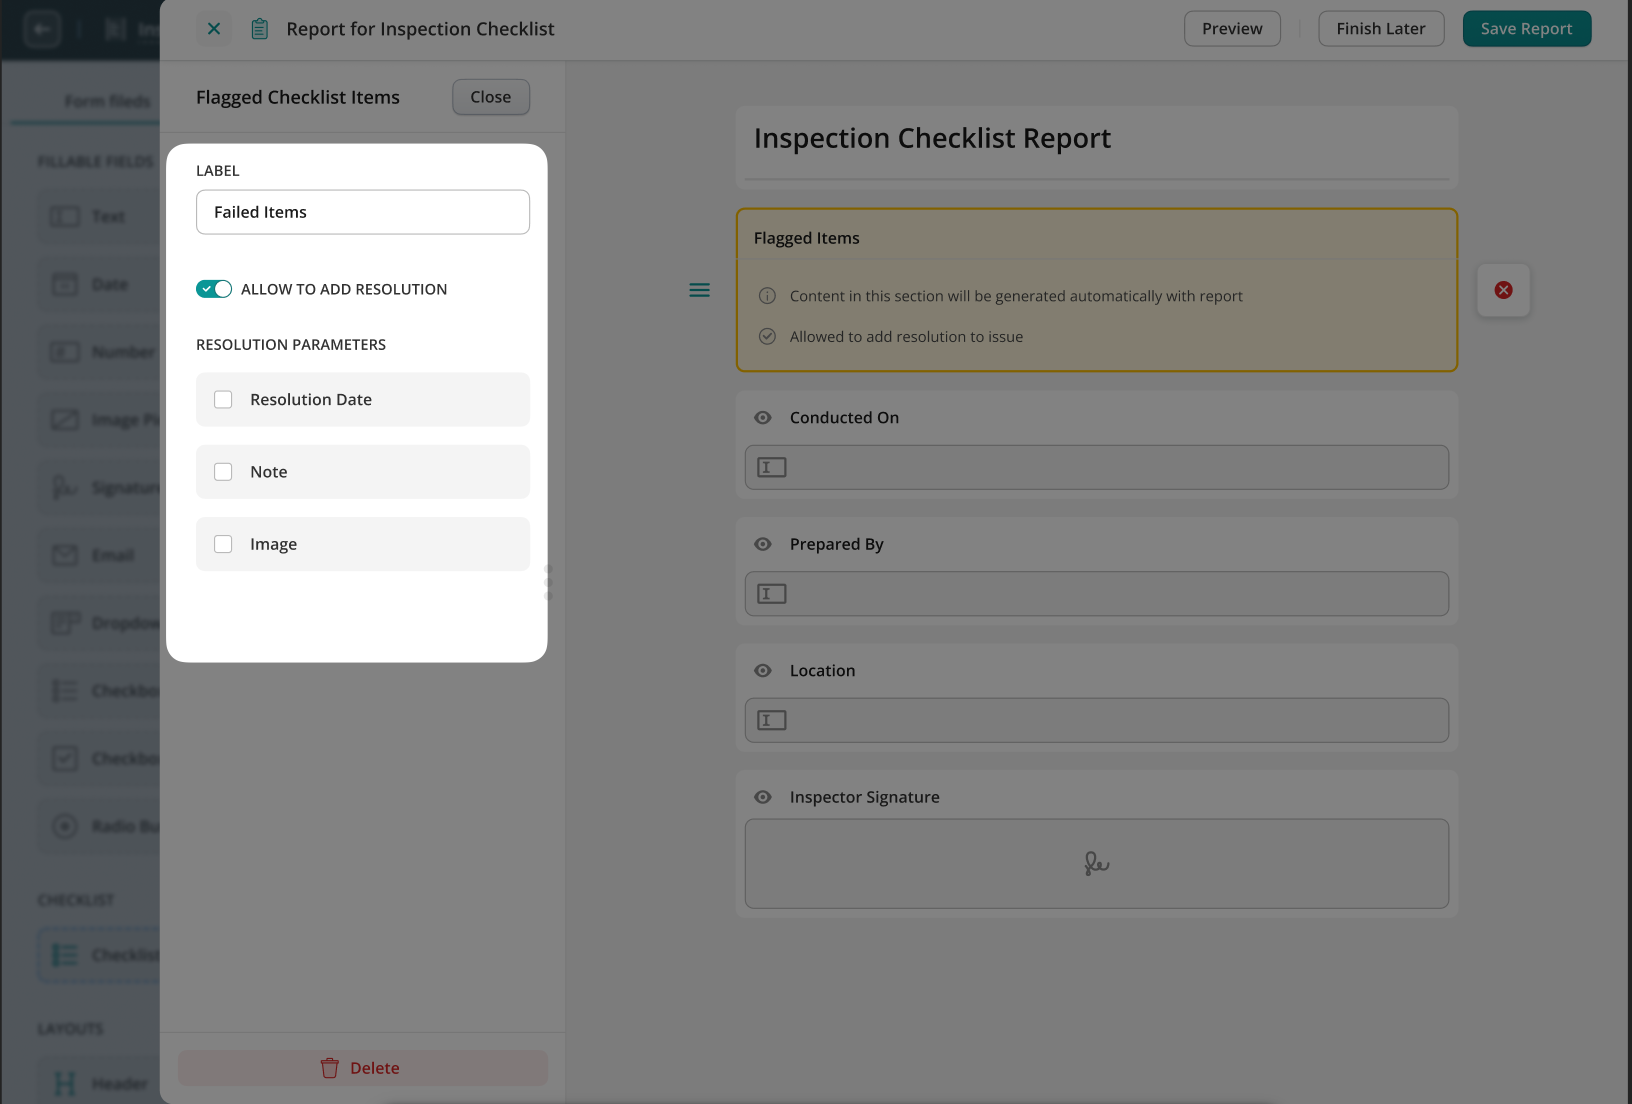
4. Configure whether resolutions can be added for flagged items and choose which resolution parameters to include:
- Resolution Date – track when the issue was resolved
- Note – add descriptive comments
- Image – attach photos as proof or reference
5. Customize the report by changing the report header or subheader, or adding a logo.
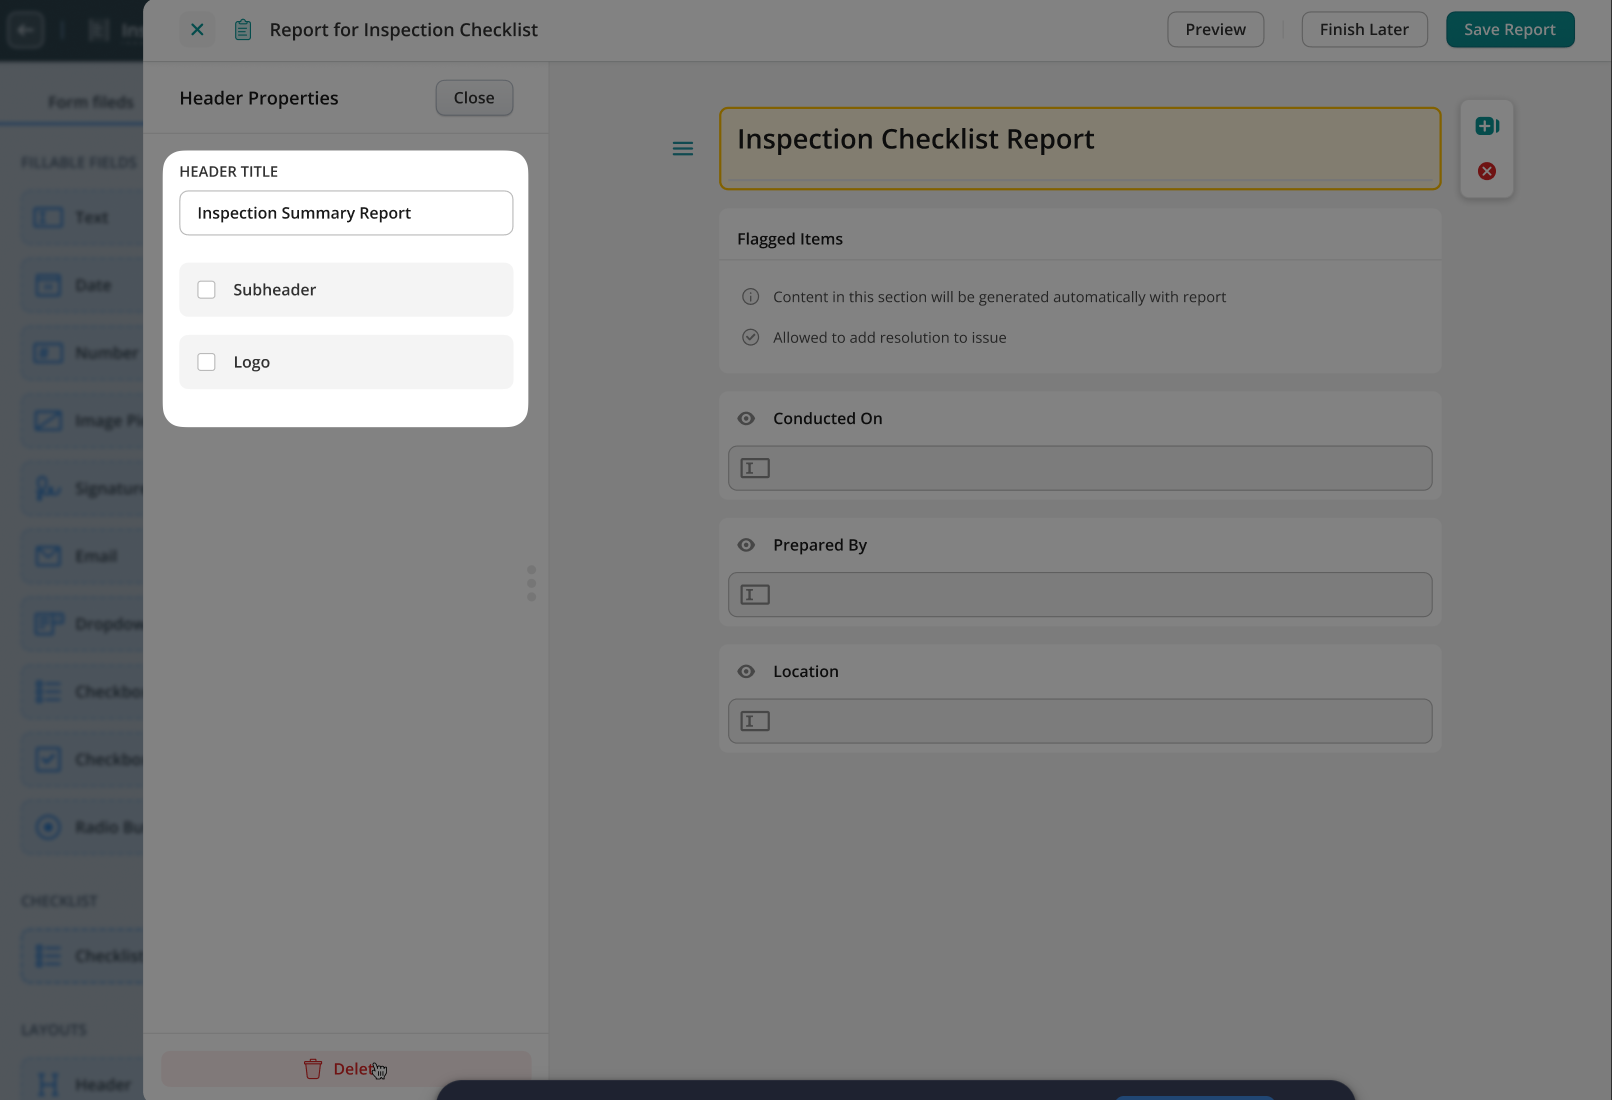
6. Add additional fields, such as signature or other custom elements.
7. Click Save Report.
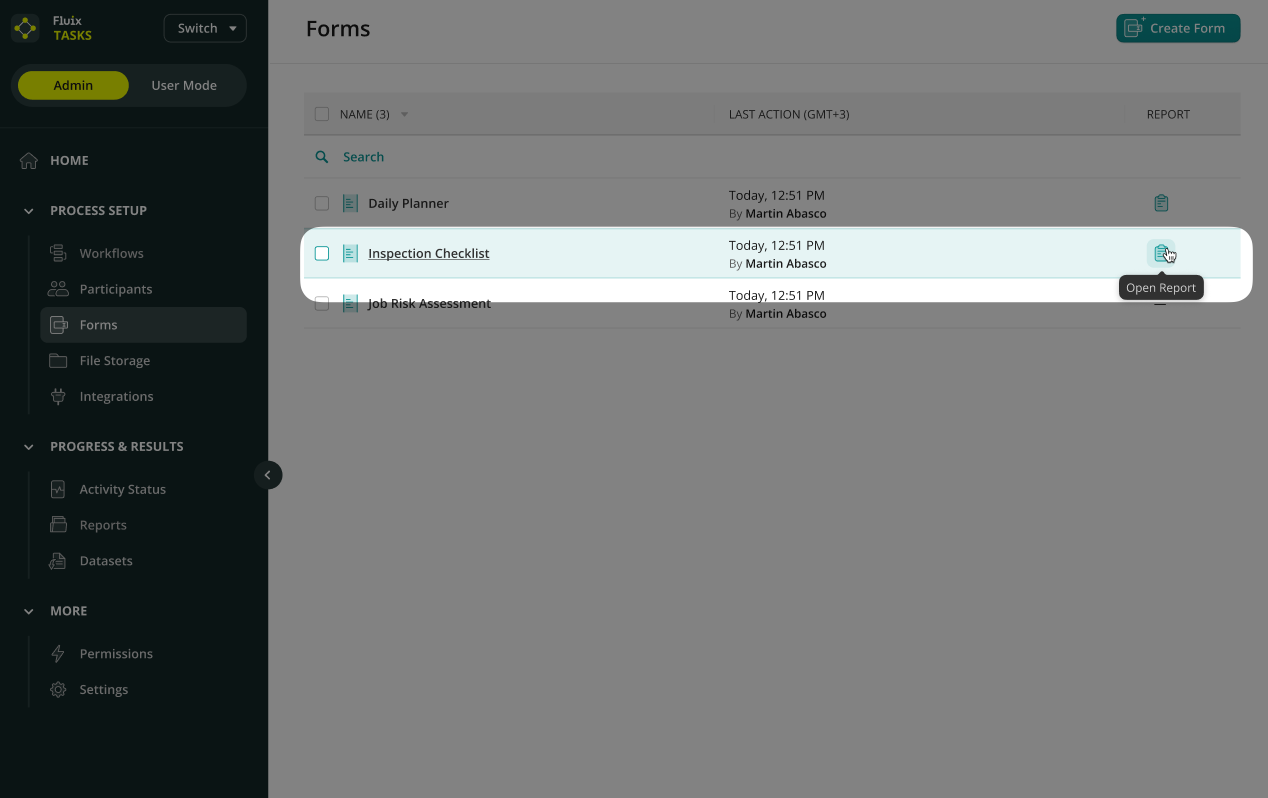
The saved report, along with its associated form, will appear in the Forms section.
Step 3: Add the Report to a Workflow
1. Open the relevant Workflow or create one from scratch.
2. Click to open the task where the Issue Report should be generated or processed. For example:
- The engineers have completed the Inspection Checklist at the beginning of the workflow.
- The next participant of the process, e.g., the supervisor, will receive the Issue Report that was generated based on the data that they filled out in the Inspection Checklist.
3. In the Forms & Attachments section:
- Select the respective form.
- Fluix will automatically suggest the Issue Report that belongs to this form.
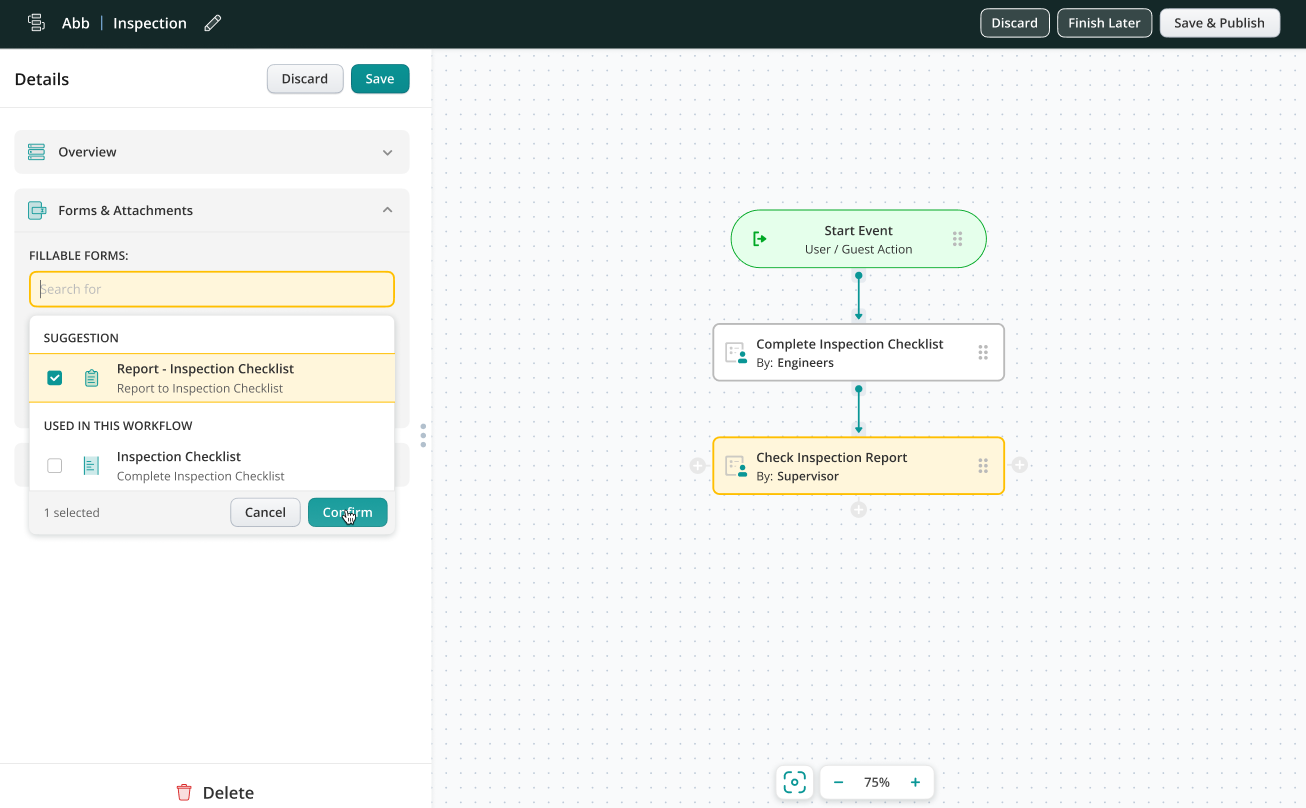
4. Select the required report and finish configuring the workflow.
5. Test the setup.
Once assigned, the Issue Report will be generated automatically after the checklist is completed and can be shared according to the workflow configuration.
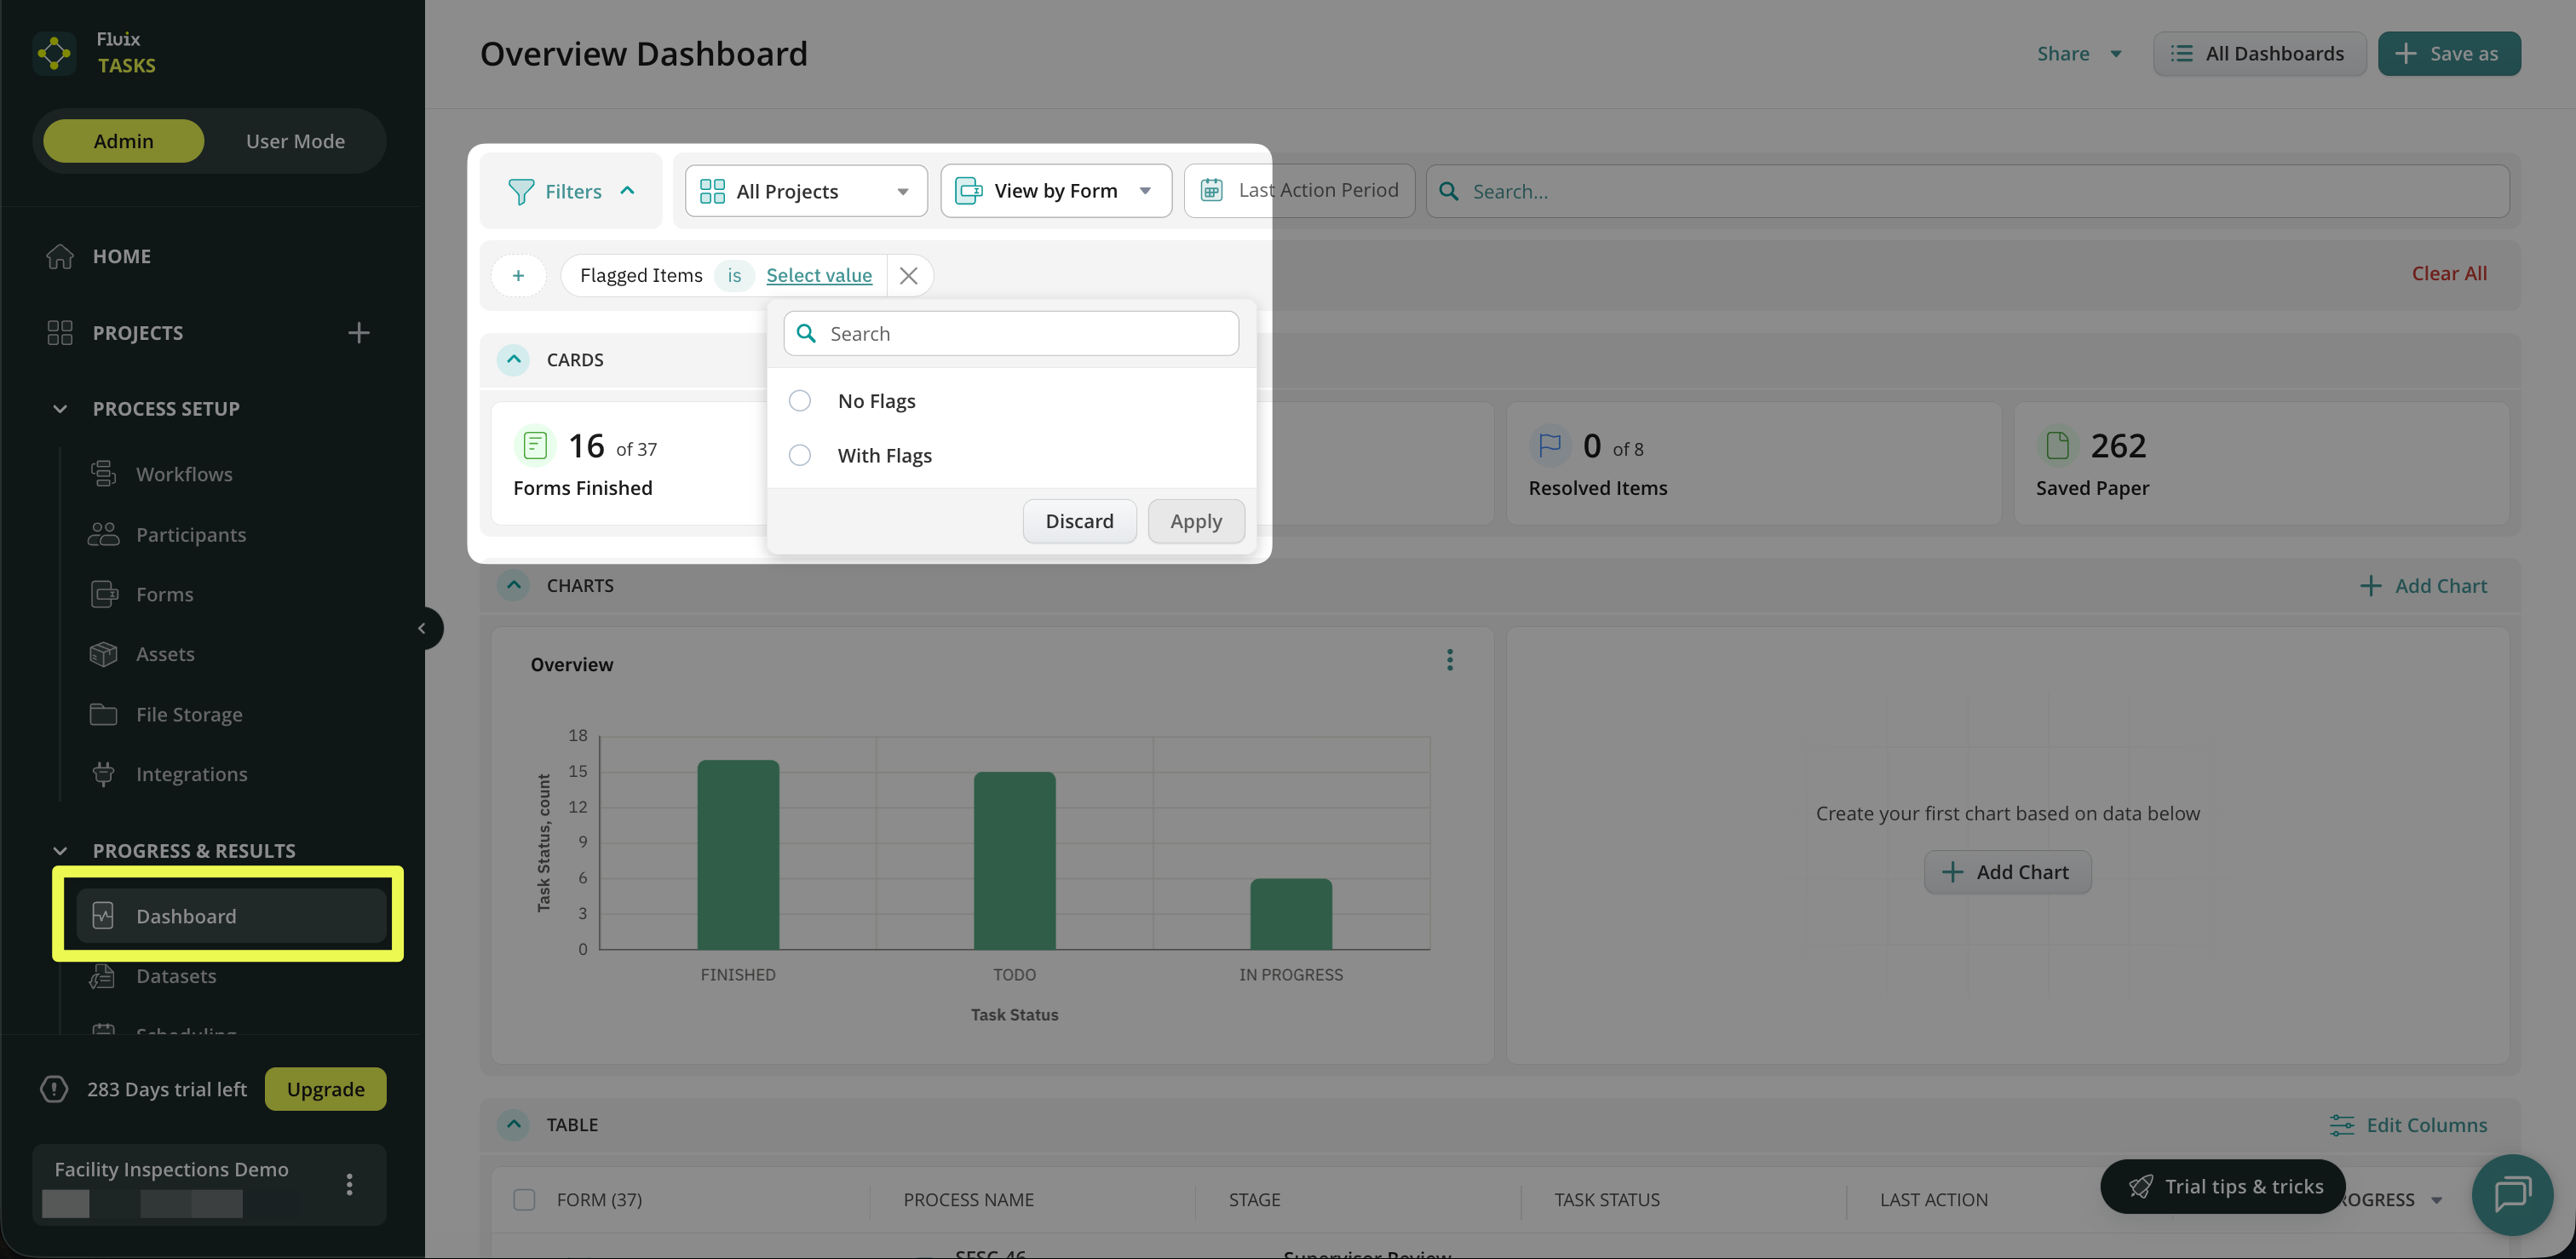
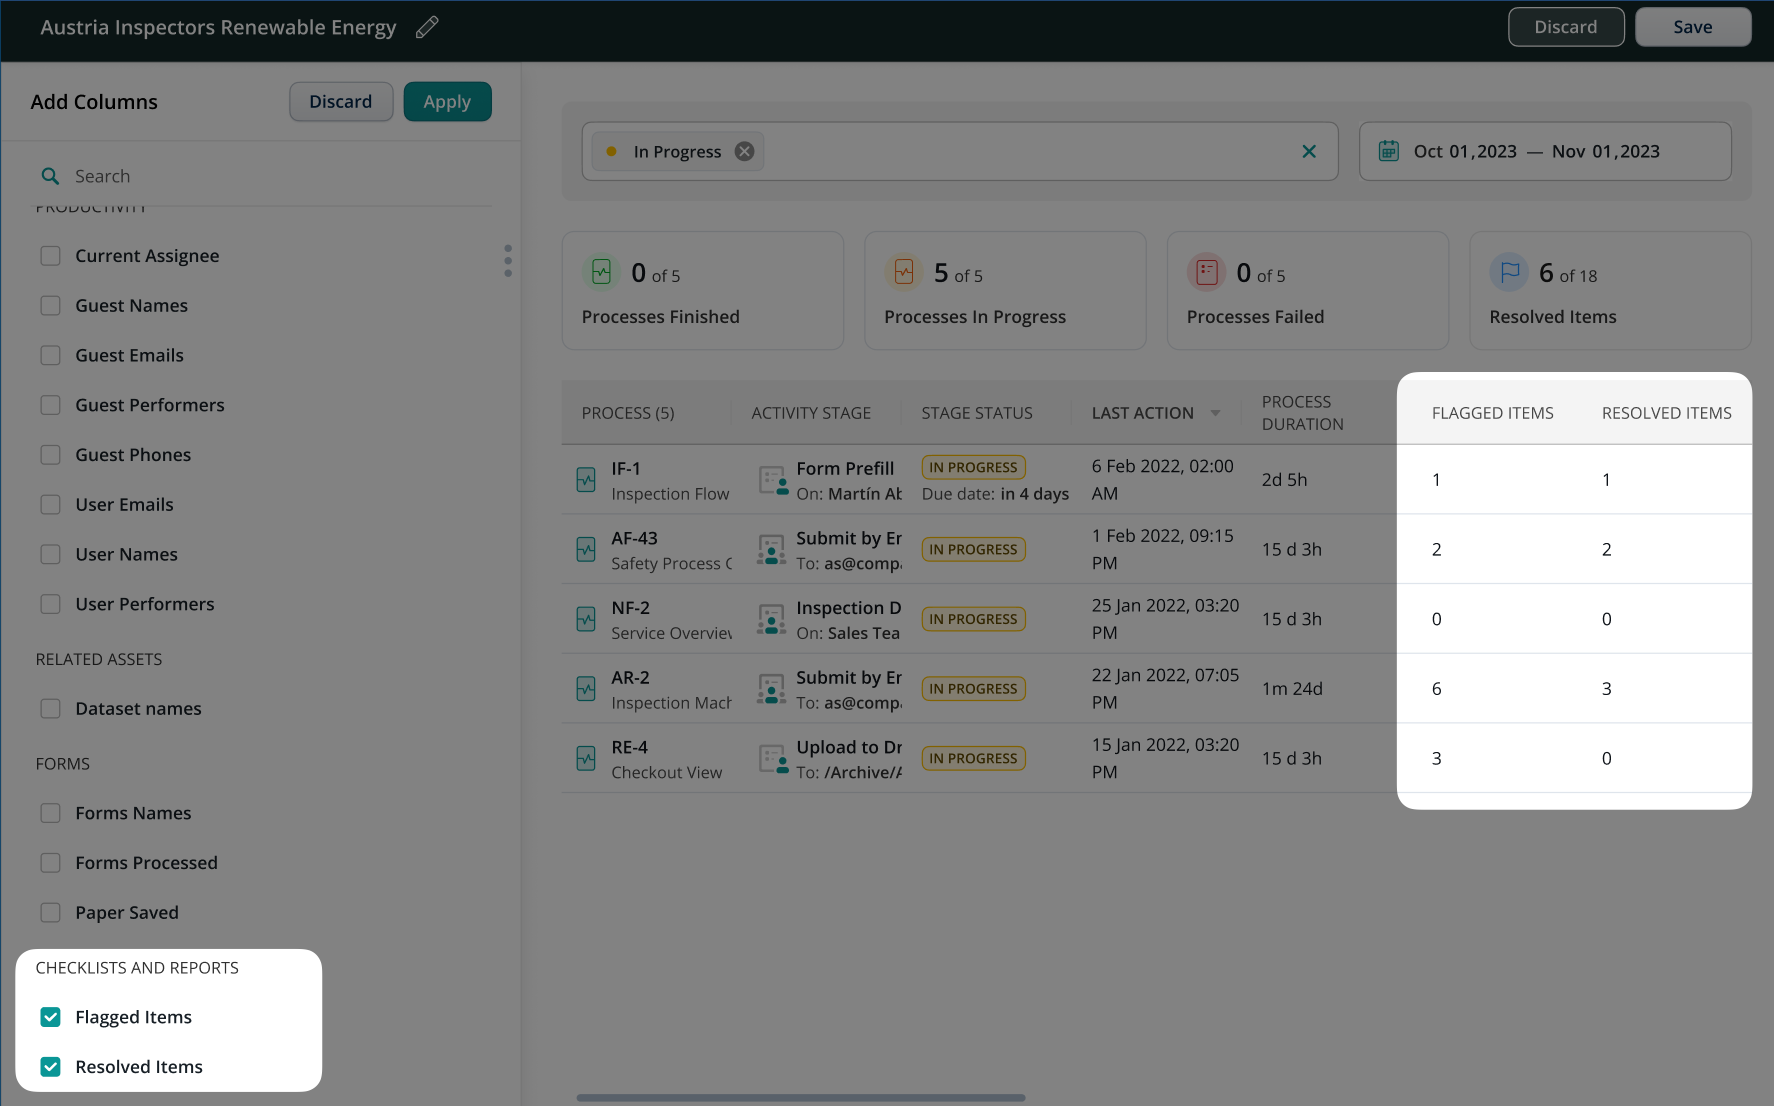
Admins can filter processes using Issue Reports in the Dashboard to make it easier to track flagged items and their resolutions across workflows. Depending on the selected Dashboard view (View by Forms or View by Process), admins can filter results to focus on Issue Reports using the Is Report or Flagged Items filters.
Admins can also control what information is displayed in the Dashboard by clicking Edit Columns in the top-right corner.
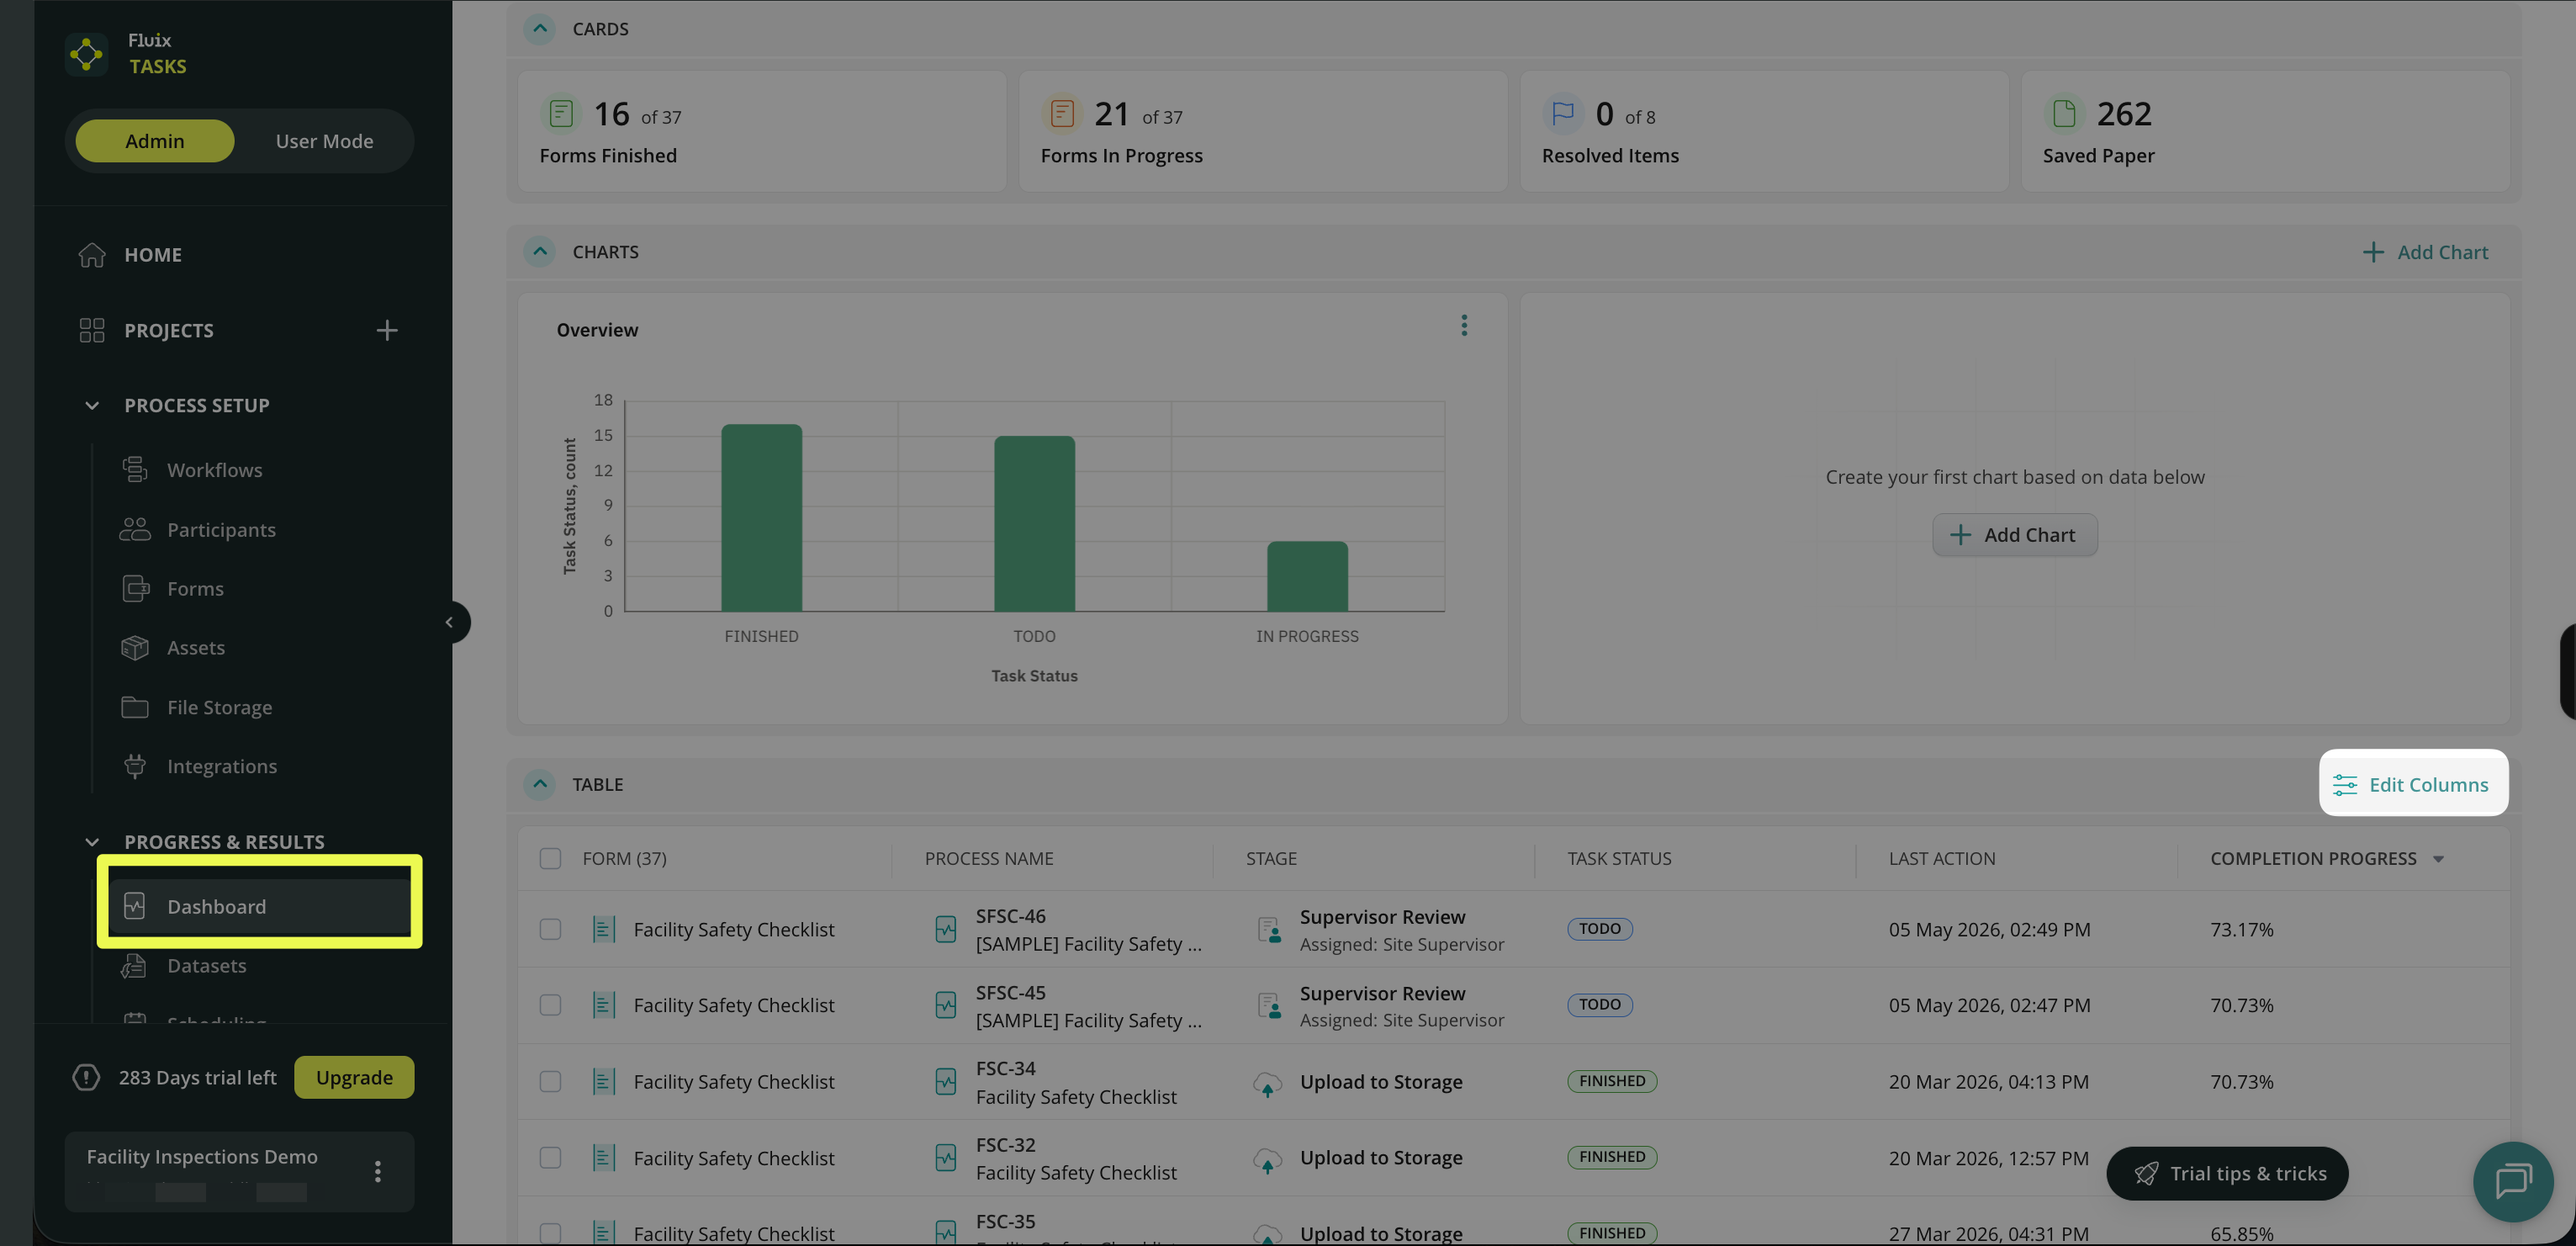
From there, they can add or remove Dashboard, including Resolved Items and Flagged Items.
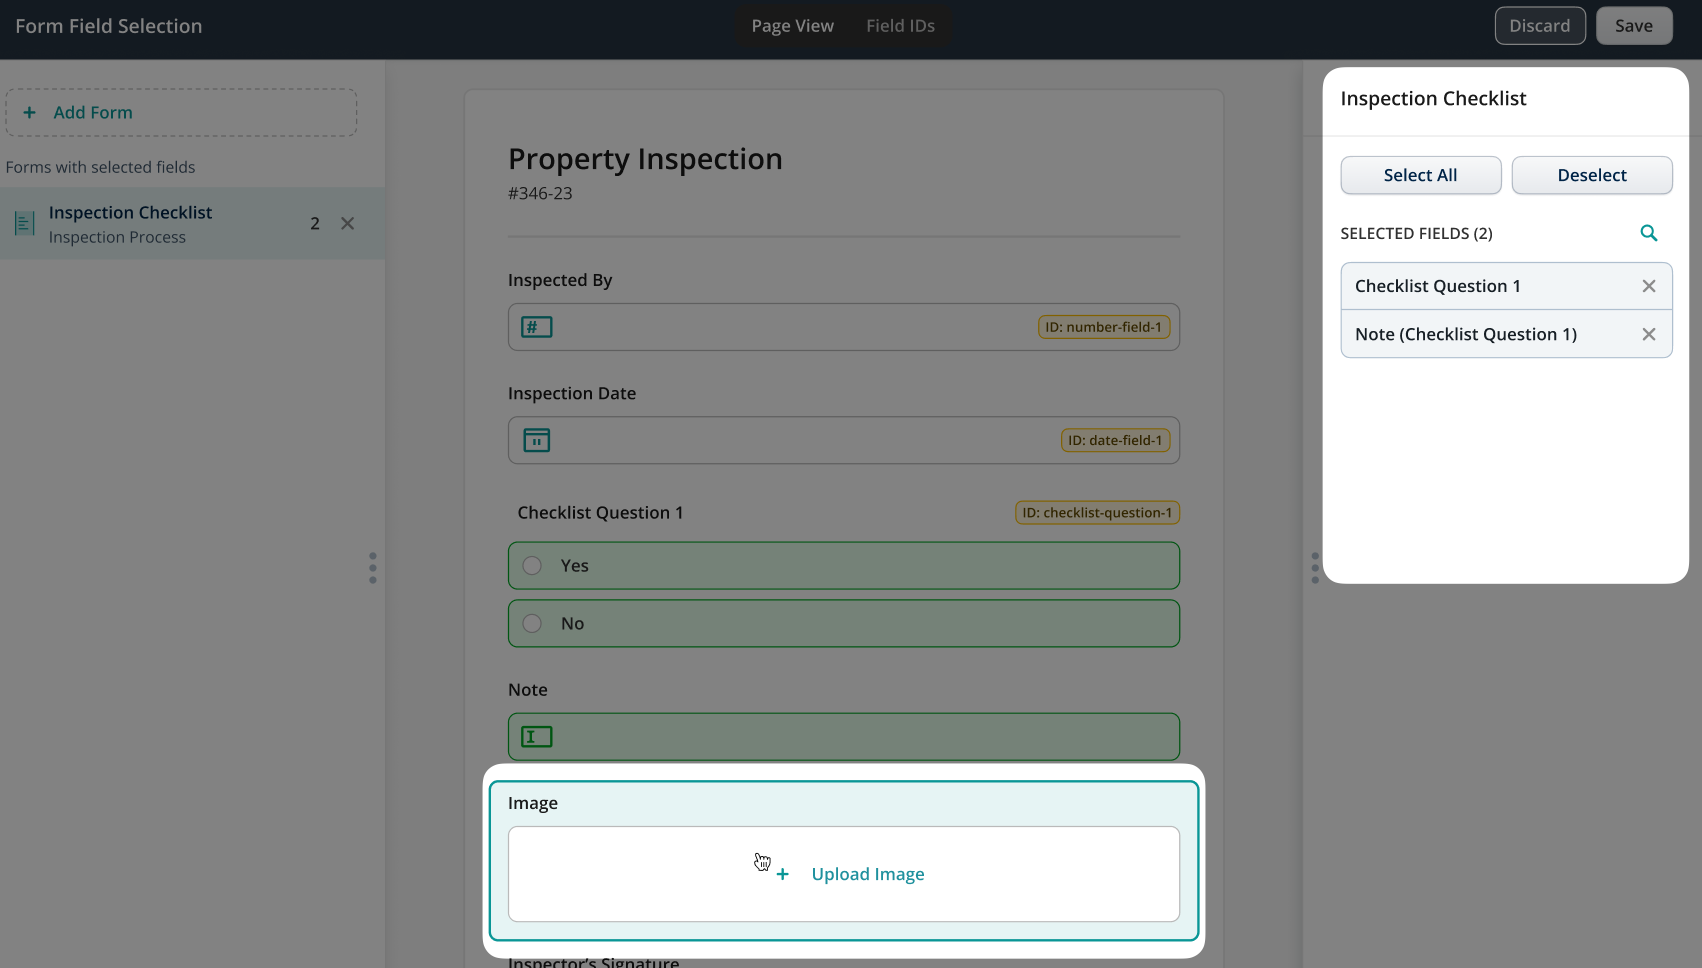
Additionally, it is possible to add Form Field Data, including checklist components such as:
- Answers
- Notes
- Images
Admins can also track progress and actions in Process Details. Here, you can see who completed each task, who reviewed the report, and how long each step took. This provides full visibility into both activity and the issue-reporting process, making it easier to monitor performance and turnaround time.

Check the full video tutorial on how to automatically create Issue Reports below:
If you have any questions, feel free to contact us at support@fluix.io.