


Fluix is a web and mobile-based cloud platform that enables teams to digitize document management and automate workflows across various industries.
With Fluix, you can:
- Automate collaboration between pilots undergoing training and their reviewers.
- Efficiently manage and distribute training materials,
- Accelerate qualification processes.
Use Case Example
- Upload, organize, and manage training materials in Fluix.
- Automate the distribution of training forms to trainees.
- Track trainee progress and ensure standardized training procedures.
- Facilitate trainer reviews and approvals within workflows.
Option 1: Upload and Organize Training Materials in Fluix Storage
Step 1: Upload Training Materials
- Log into your Fluix Admin account.
- Navigate to Workflow setup > File Storage in the Fluix Admin Portal.
- Click Upload Files to add the training materials. The files can be incorporated into workflows and distributed among users.
Fluix’s built-in cloud storage simplifies document organization and management. You may utilize it as a source for document templates and a destination for submitted documents in workflows.
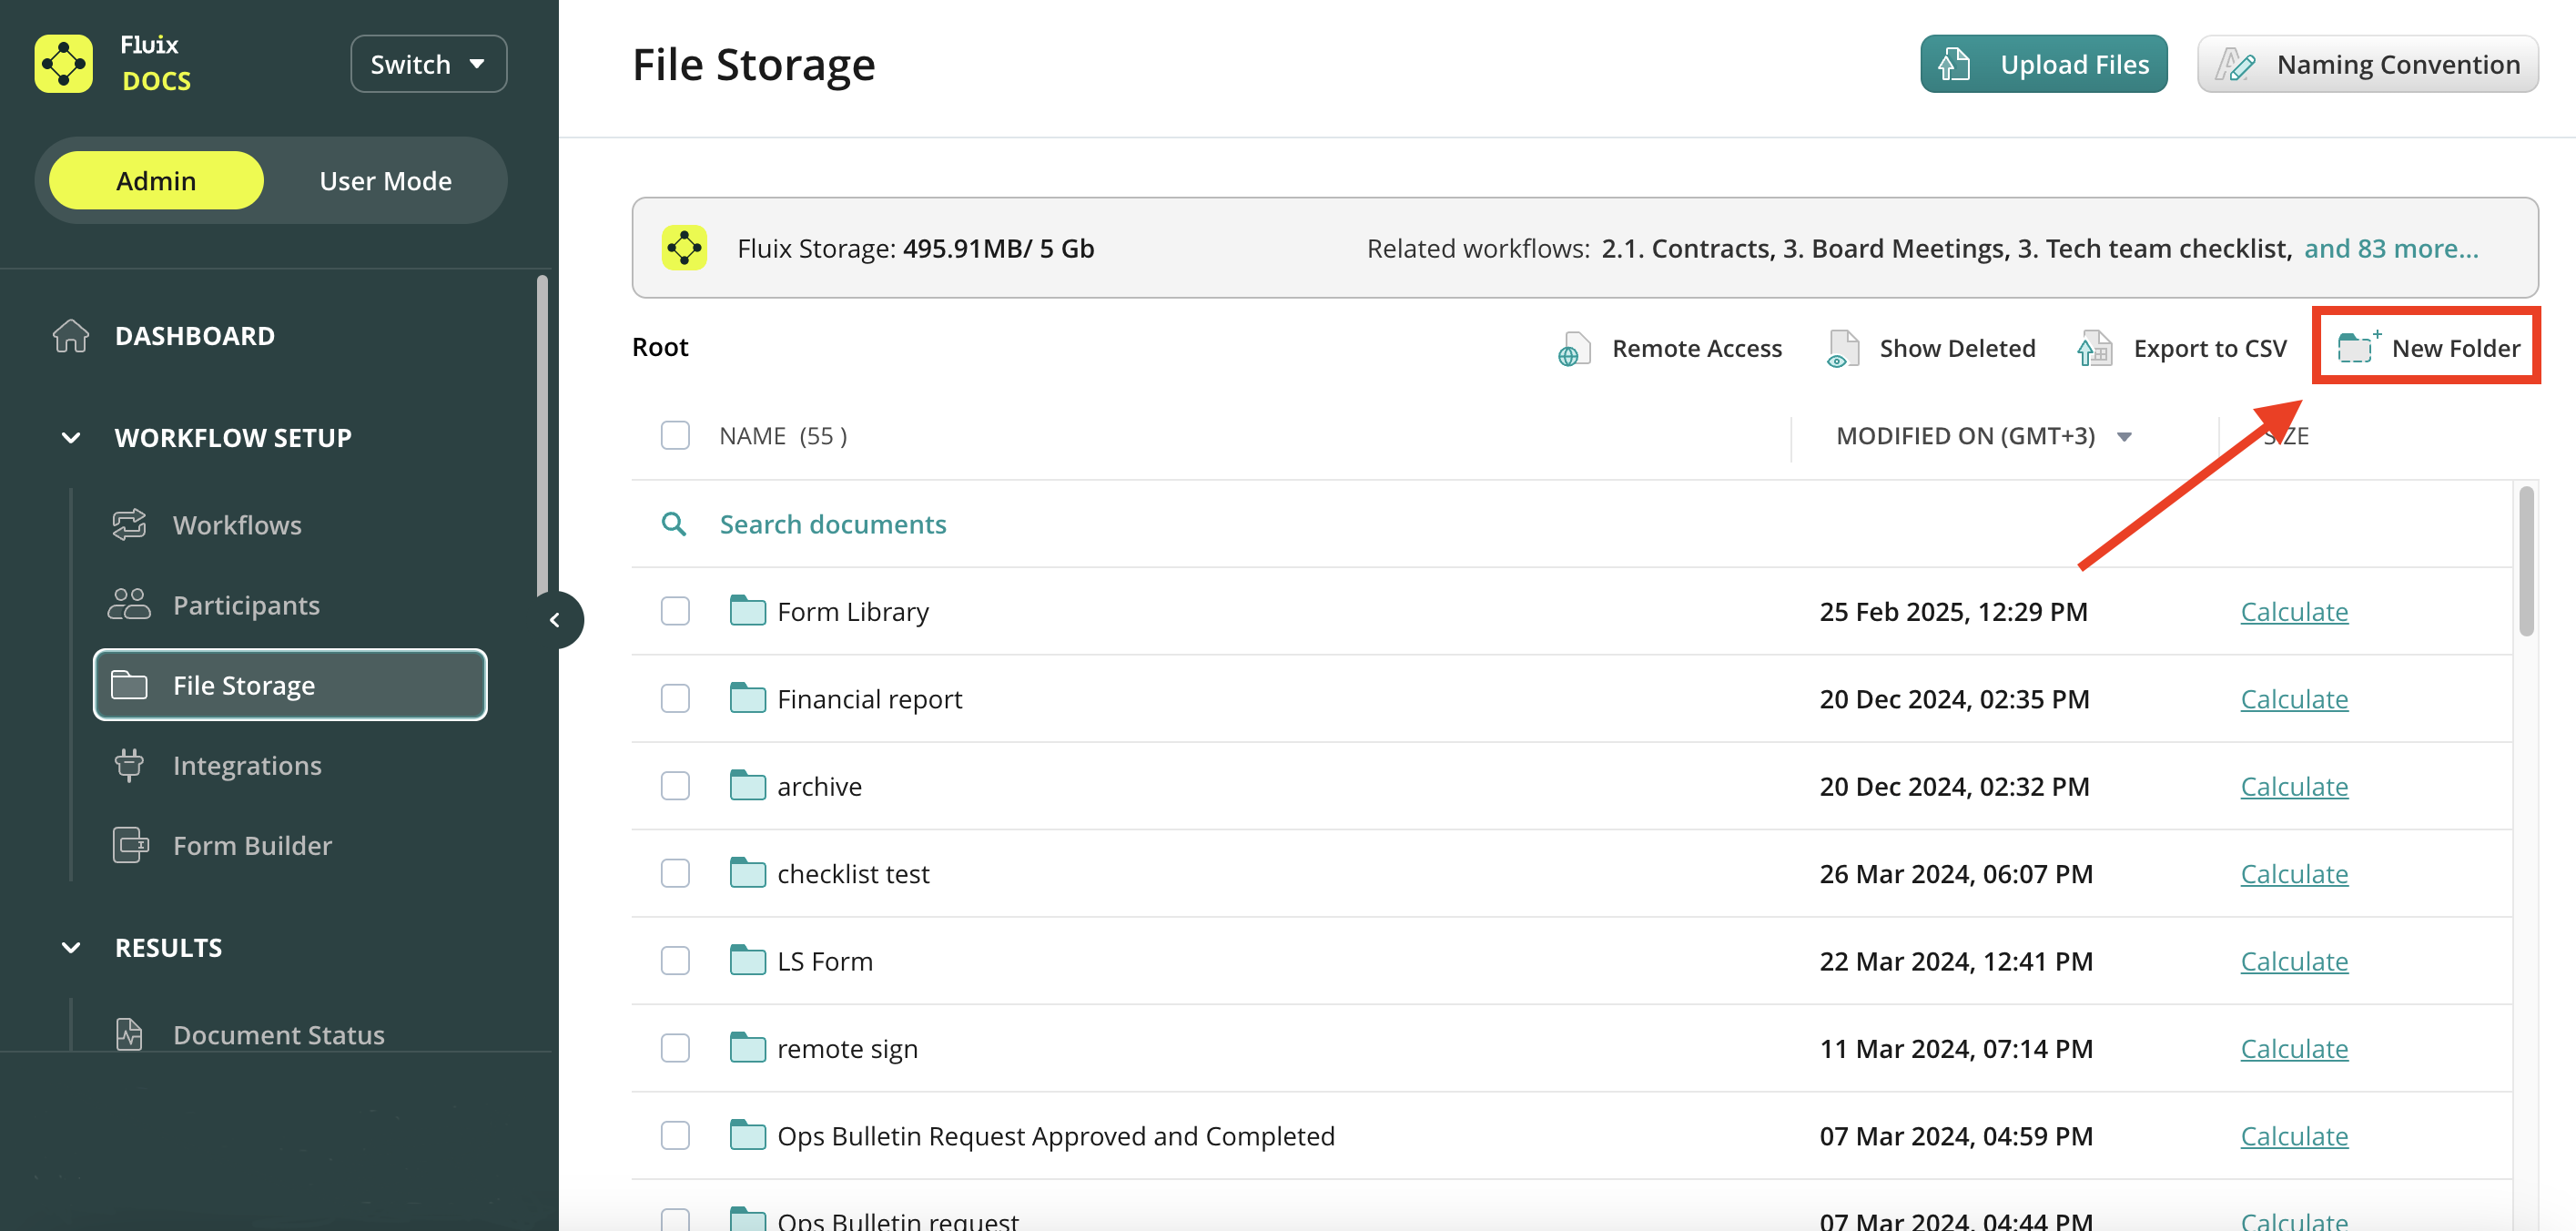
Step 2: Organize Materials into Folders
Create folders for different training programs with the New Folder button in the top right corner.
Option 2: Connect your company storage to Fluix.
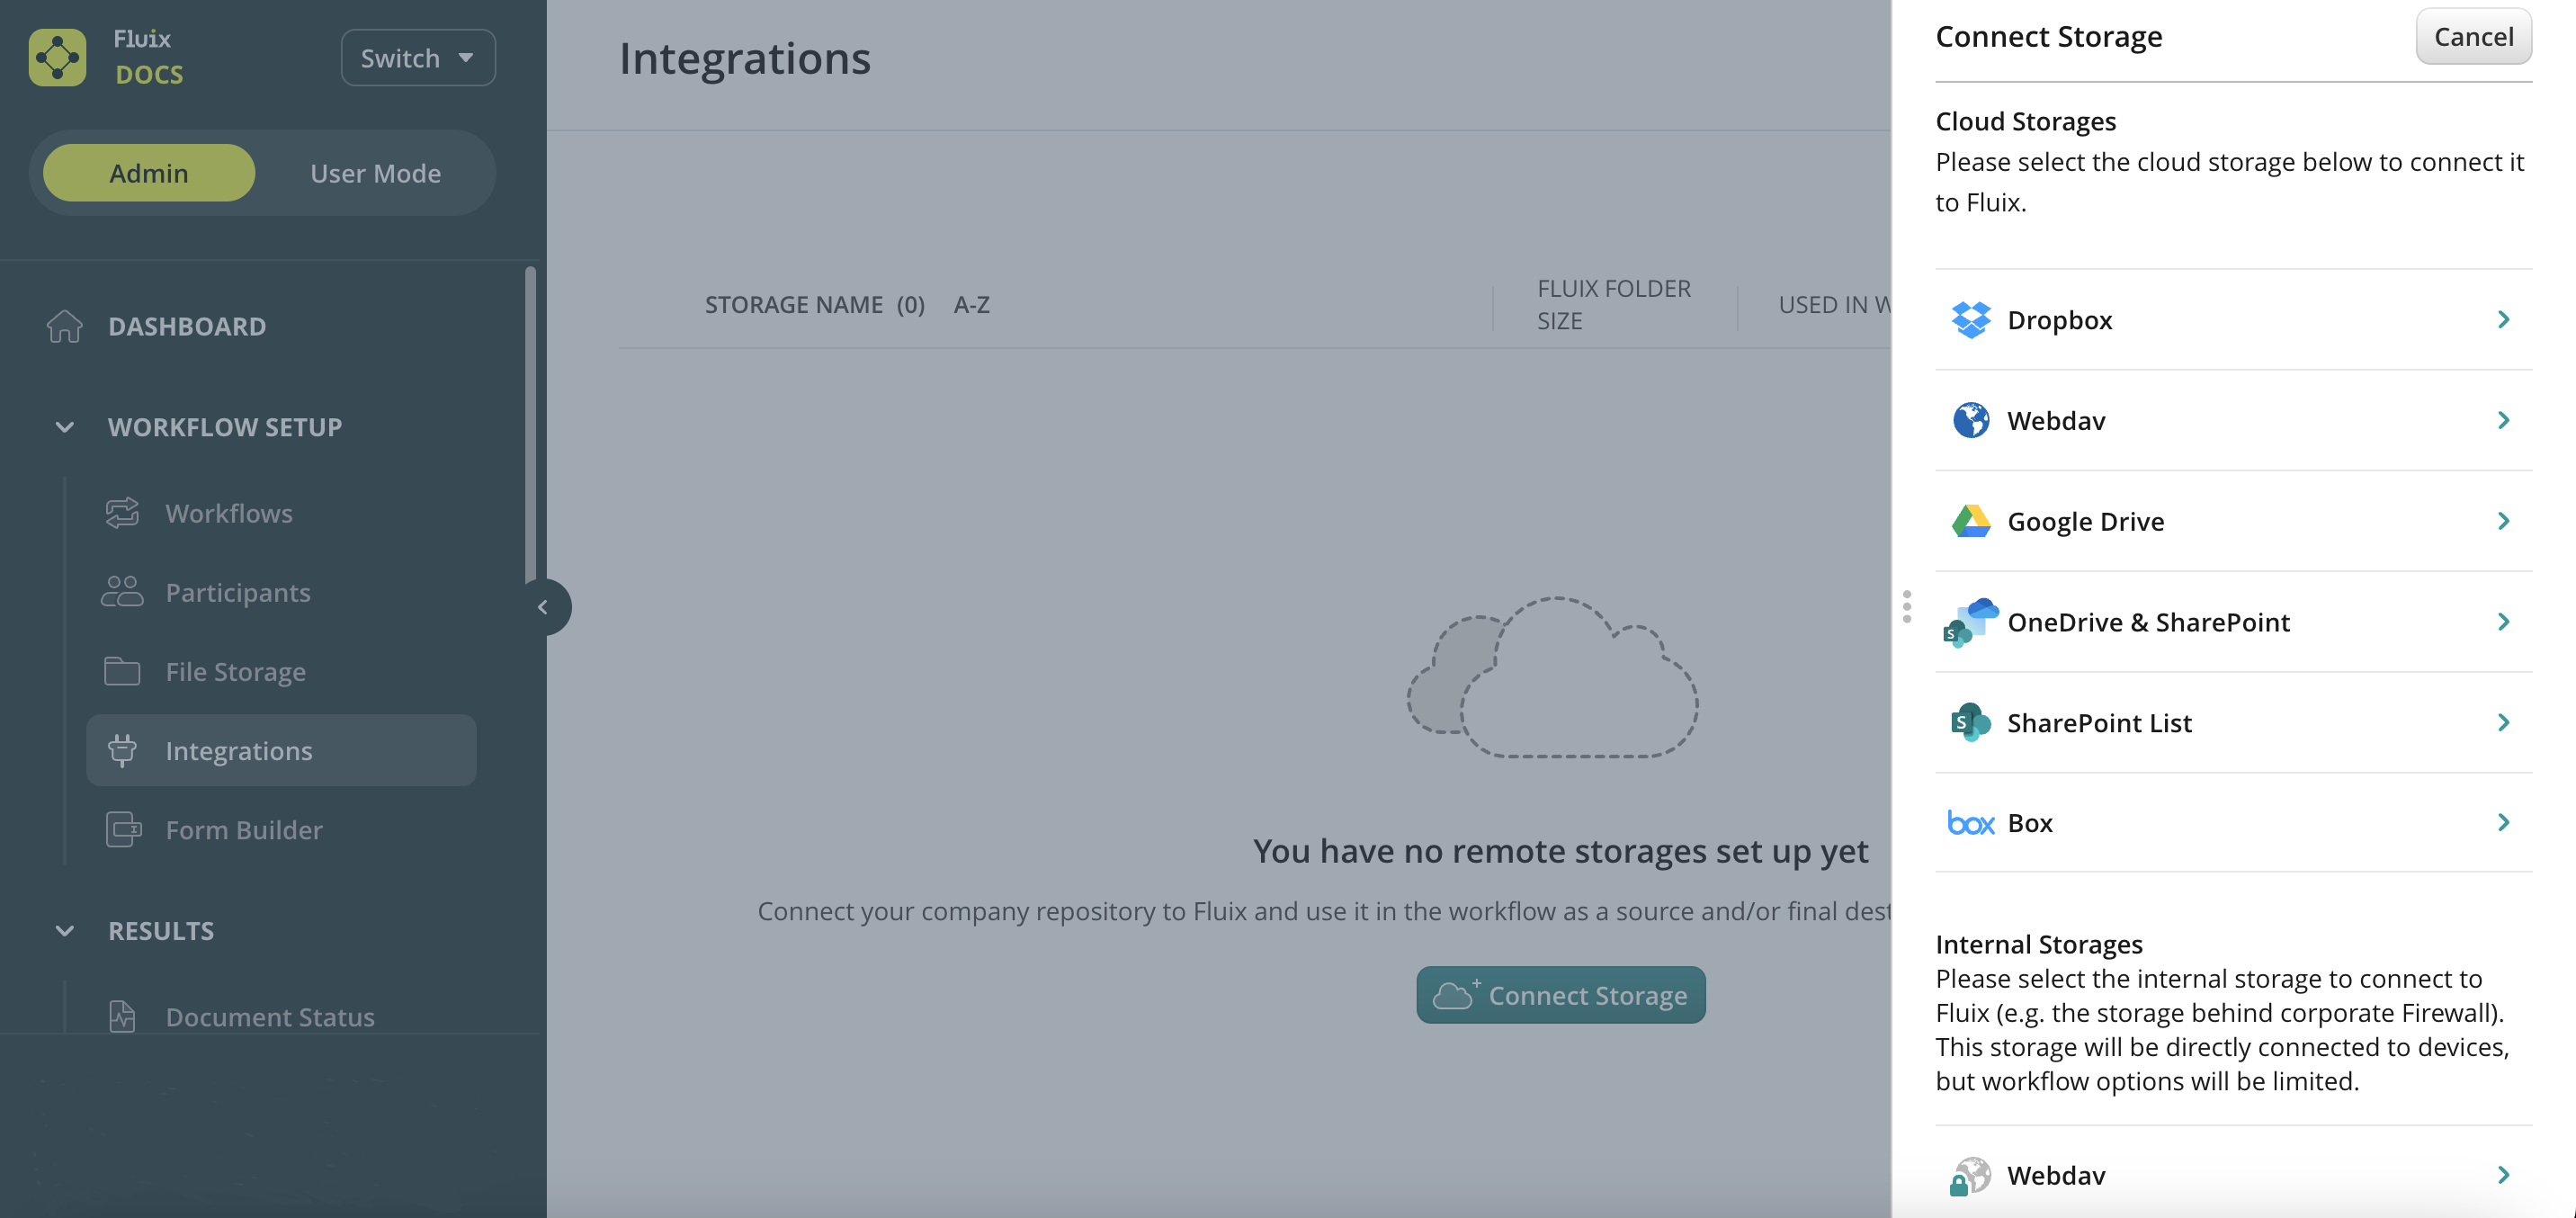
Step 1: Connect your company storage
- Log into your Fluix Admin account;
- Navigate to Workflow setup > Integrations section;
- Click on Connect Storage button, and select the storage you want Fluix to grant access to. You will see a sidebar with all the available storages to connect:
Step 2: Configure Remote Storage
Once connected, storage may have different statuses:
- Not in Use: The storage is not yet assigned to a workflow. Create a workflow and add the storage as a document source or destination.
- Error: Indicates connectivity issues. Check and resolve the error before proceeding.
- OK: Storage is active and properly configured.
- Reauthorization Required: The storage has been disconnected. To restore access, select the storage and click Reauthorize.
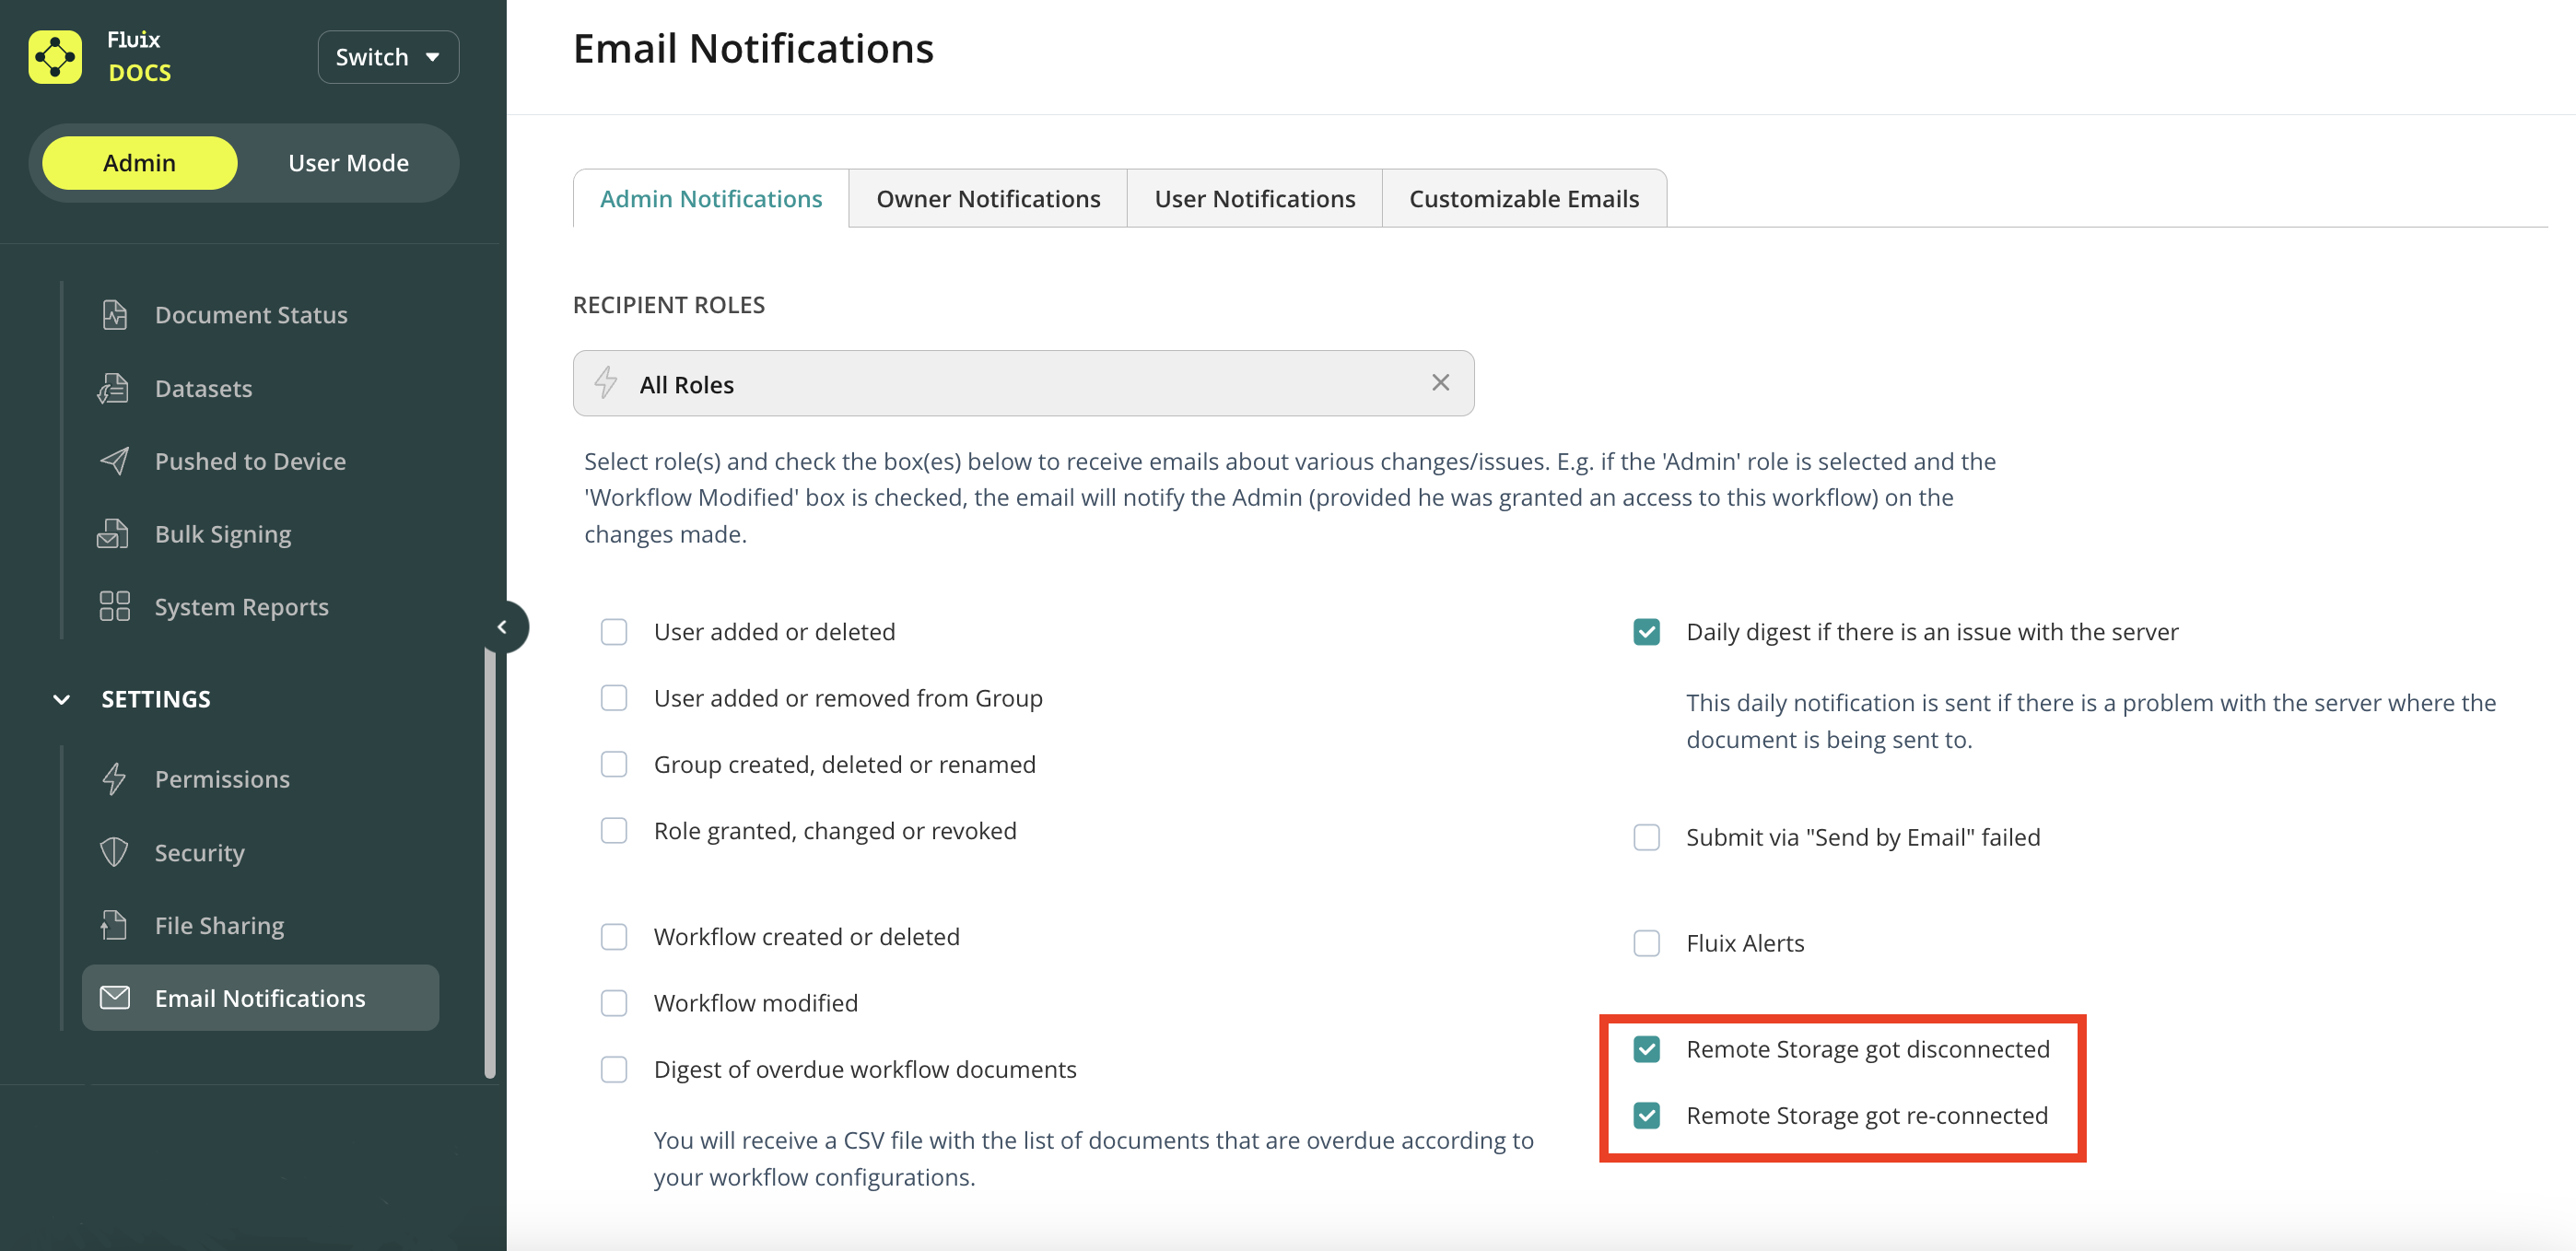
Enable email notifications under Settings > Email Notifications section to receive notifications if storage disconnects.
Step 3: Create a Workflow and Add Participants
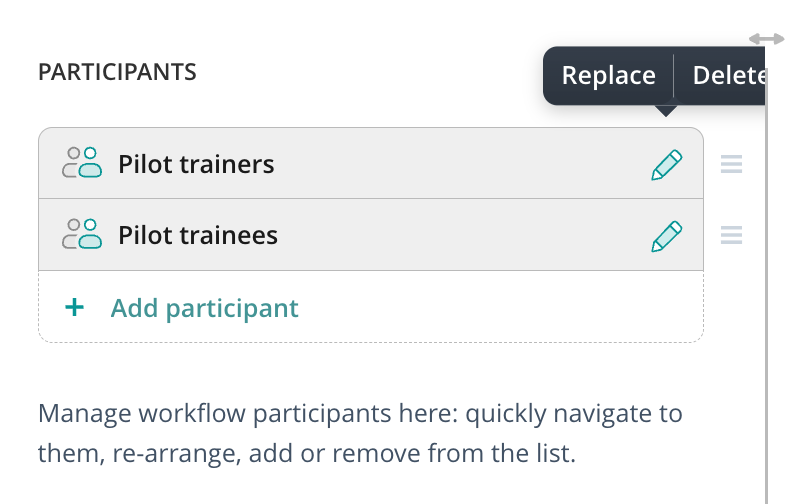
You can assign workflows to individual users or groups. In this case, two groups will participate:
- Pilot Trainees
- Pilot Trainers
Once participants are added, a list will appear in the left-hand sidebar. You can rearrange, replace, delete, or add new participants as needed.
Document Distribution to Pilot Trainees
The training forms are distributed to the Pilot trainees to ensure they receive the necessary educational materials. This process helps standardize training procedures and guarantees all trainees have access to the same information.
The Cabinet document source is ideal for distributing the files that are stored on remote storage, making them accessible for a group of users. When documents appear via Cabinet, they are available for viewing to the entire group, however, only 1 user can start working on it by assigning it to himself. Once assigned to a particular user, the document becomes unavailable to the rest of the group.
Step 4: Configure the Cabinet Document Source
- Select Cabinet as the document source.
- Choose the connected storage and specify the root folder.
- The selected path will be displayed next to Cabinet.

Step 5: Define Submission Actions
Configure how documents are handled once completed:
- Return to Source: Automatically uploads submitted documents back to their original storage location.
- Reassign: Transfers documents from Pilot Trainees to Trainers for review. Reassigned documents appear in the Group Inbox.

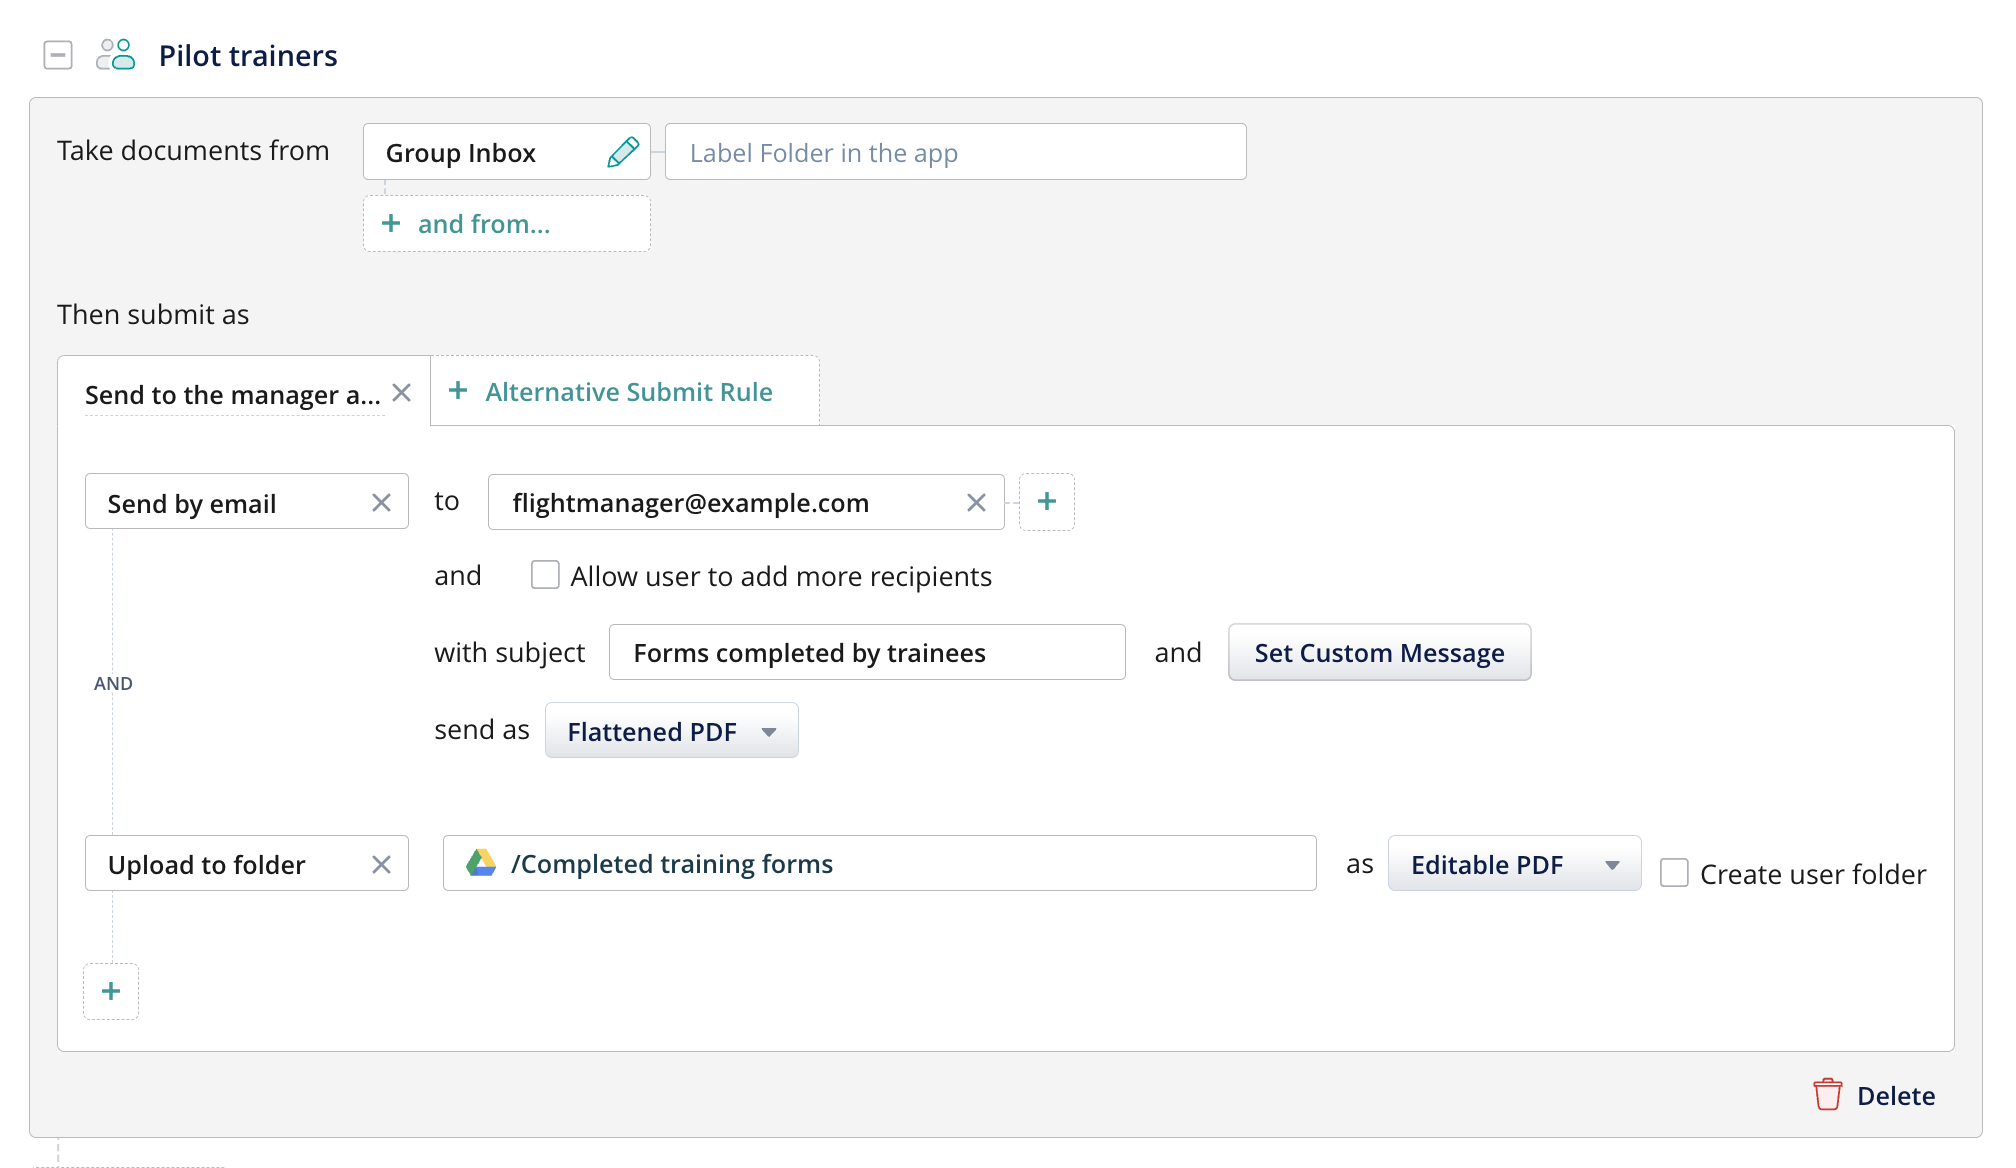
Step 6: Final Submission Actions
After the Pilot Trainer reviews the training form, it can be sent to a manager and archived.
- Upload to Folder: Stores completed training forms in the designated company storage folder.
- Send by Email: Automatically emails documents to specified recipients without requiring manual input. Preconfigure recipient addresses, subject, custom messages, and document format.
- Consider selecting Flattened PDF to prevent further edits after submission.
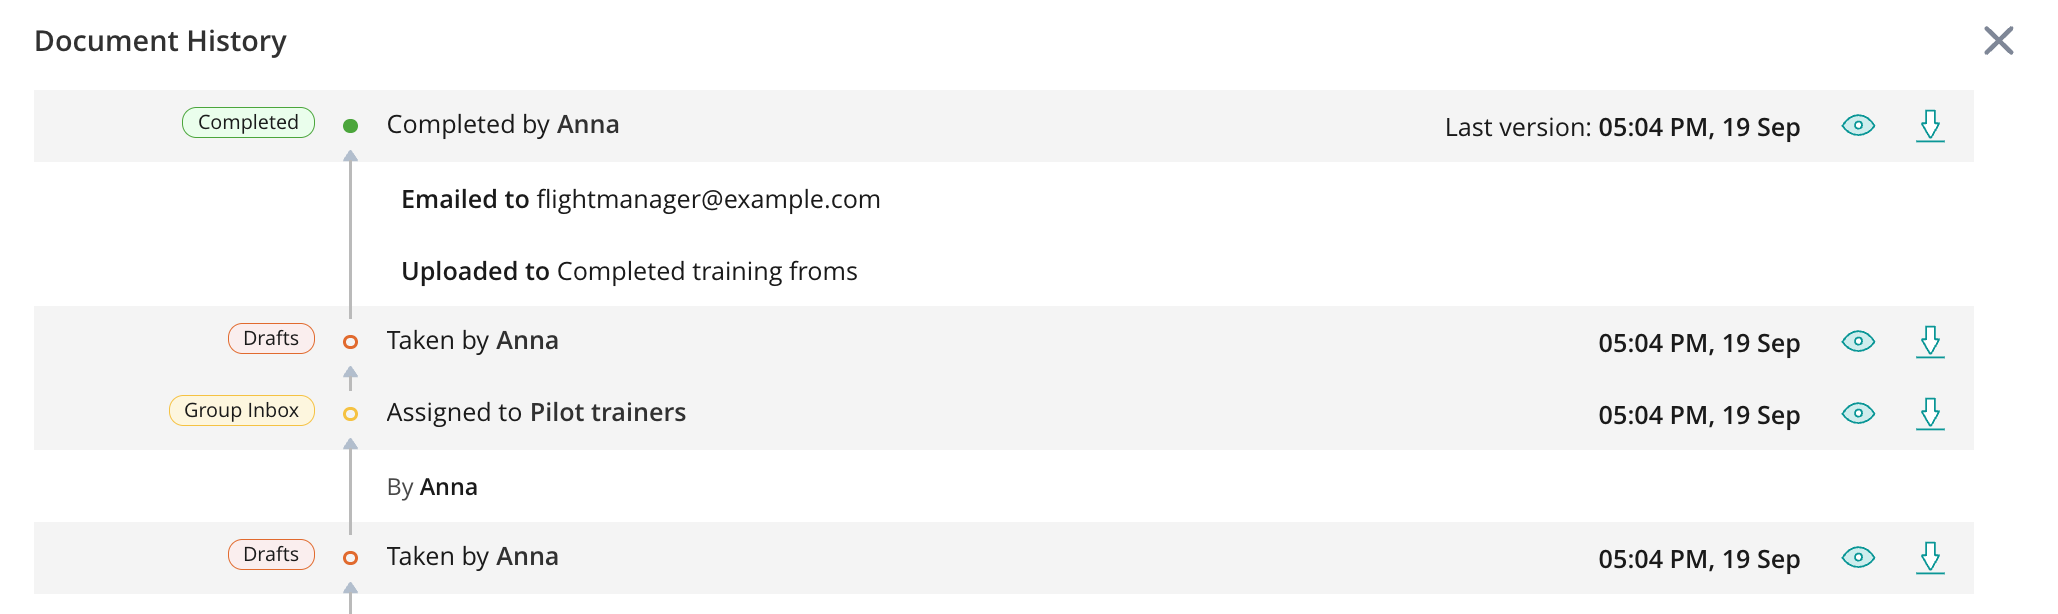
Step 7: Track Document Submissions
In the Document Status section of the workflow, you can monitor document progress and have access to the following information:
- Identify who worked on the document.
- View submission dates and times.
- Access previous versions of the document if necessary.
Was it helpful? Feel free to contact us at support@fluix.io if you have any questions or comments.