


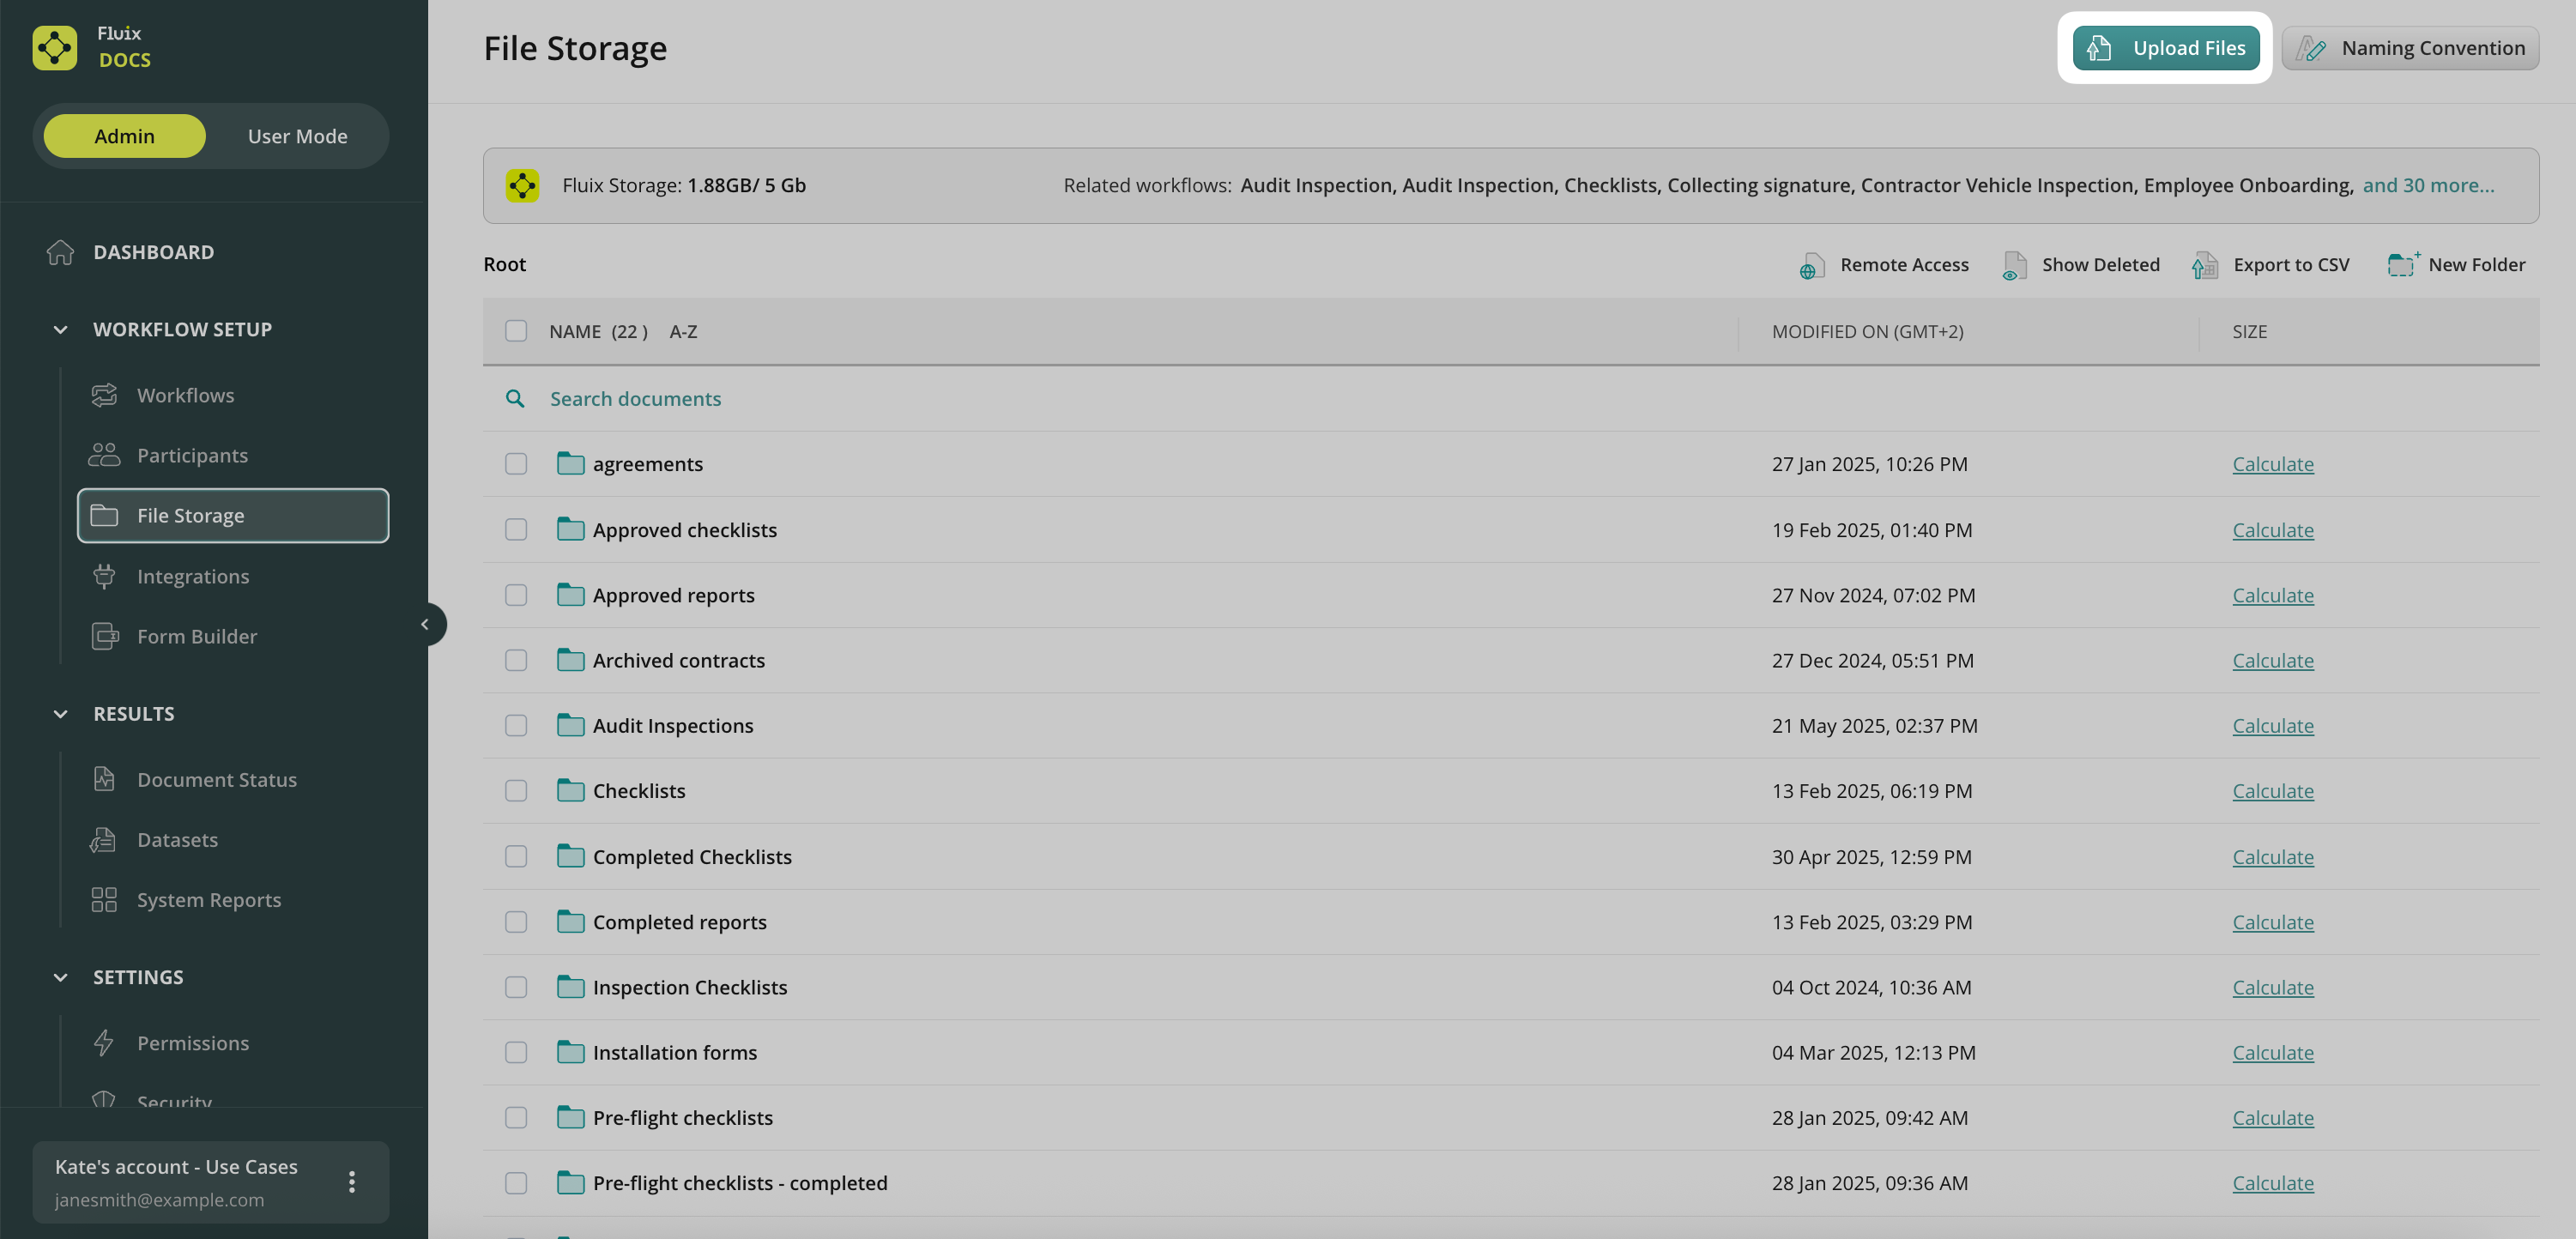
Fluix’s built-in cloud storage makes it easy to organize and manage documents in your department or the entire organization. You can use Fluix storage in the workflows as a document source for templates and as a destination for submitted documents.
Fluix storage is managed directly via the Fluix Admin Portal under the Workflow Setup -> File Storage section.
First, you can use the template forms in the Form Library folder or upload your documents, which will later be used in the workflows and circulated between users.
How to Upload and Manage Documents
To upload your files, click the Upload Files button in the top right corner or drag & drop them from your computer. To build your folder structure, create different folders with the New Folder button in the top right corner.
Please note that upon folder renaming, its modification date will be changed accordingly, along with other folders and files inside the renamed folder.
The maximum allowed file size is 400 MB. If a file exceeds the maximum allowed size limit (400 MB), it will not get synced to the users’ app.
How to Restore Deleted Documents
Click on the Show Deleted button to see the documents or folders with the deleted documents, either by the admin or the user with the respective access rights. The deleted documents or folders will appear greyed out on the list. To restore the deleted document, select it and click Restore. You can also delete it permanently:
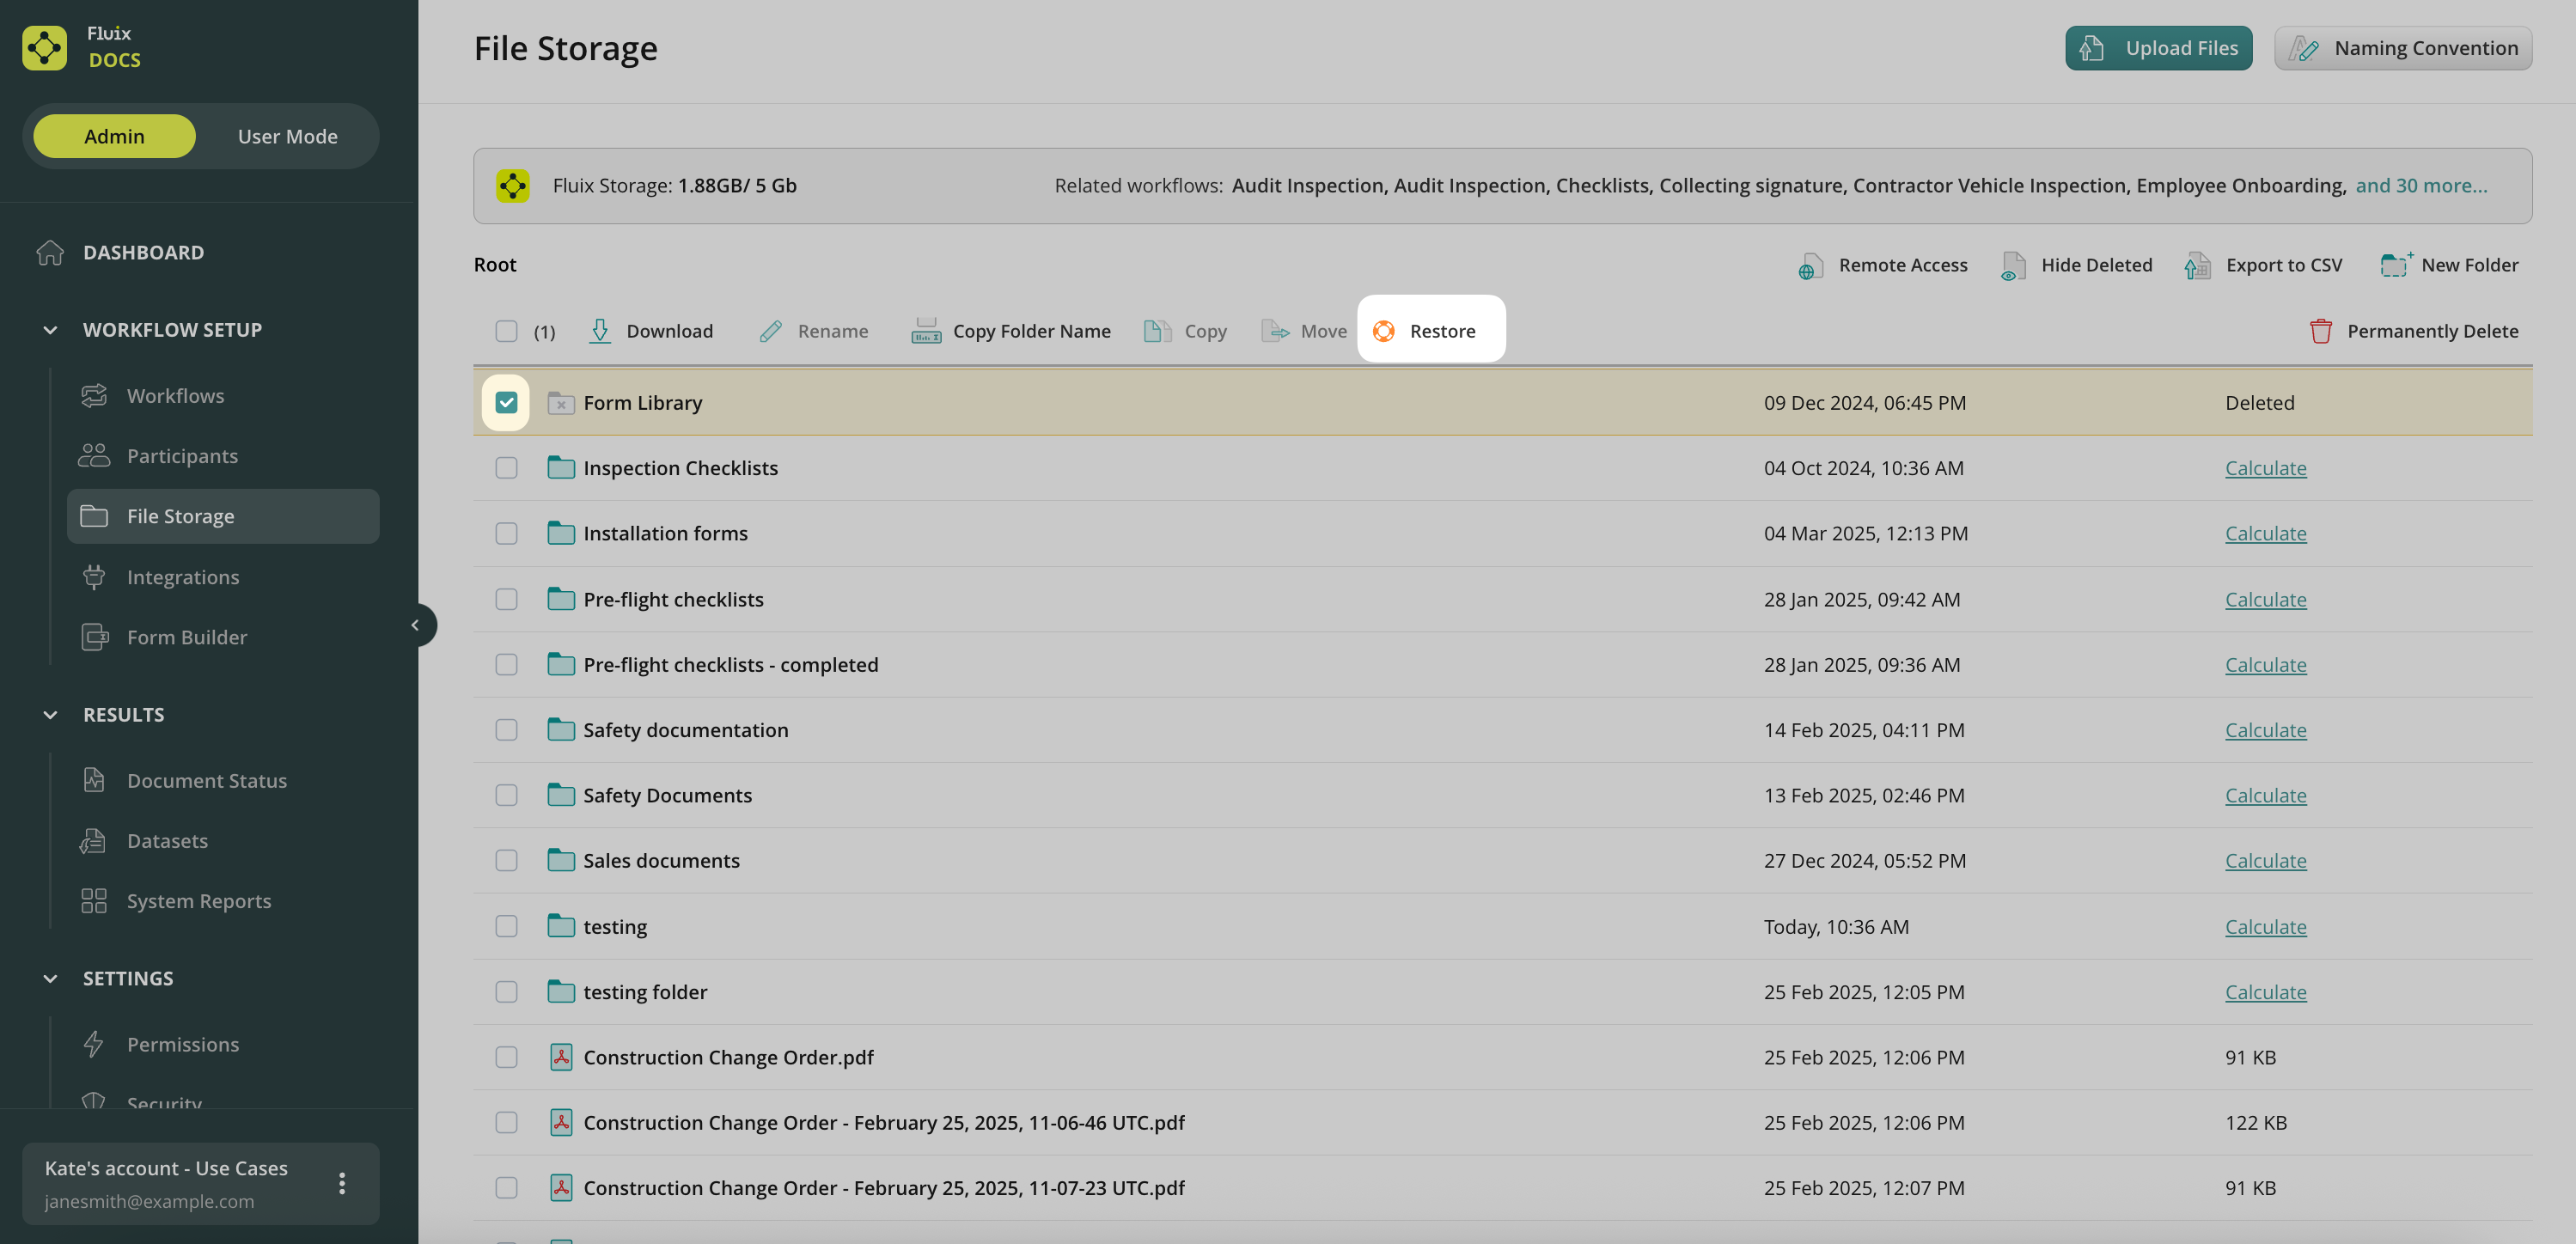
The deleted documents are stored on Amazon servers for a number of days, configured in your account’s Security Settings (under the Configuration section). By default, they are stored for 365 days. Caution: permanently deleted documents can not be restored.
Access to Storage
Access to the Fluix Storage is regulated in the Roles tab under the Configuration section of the admin portal. Simply add a New Role -> select Storage Manager from the list -> select a user -> choose whether the user will have access to the entire storage or just particular folders, check the actions the user will be authorized to take, and save the change.
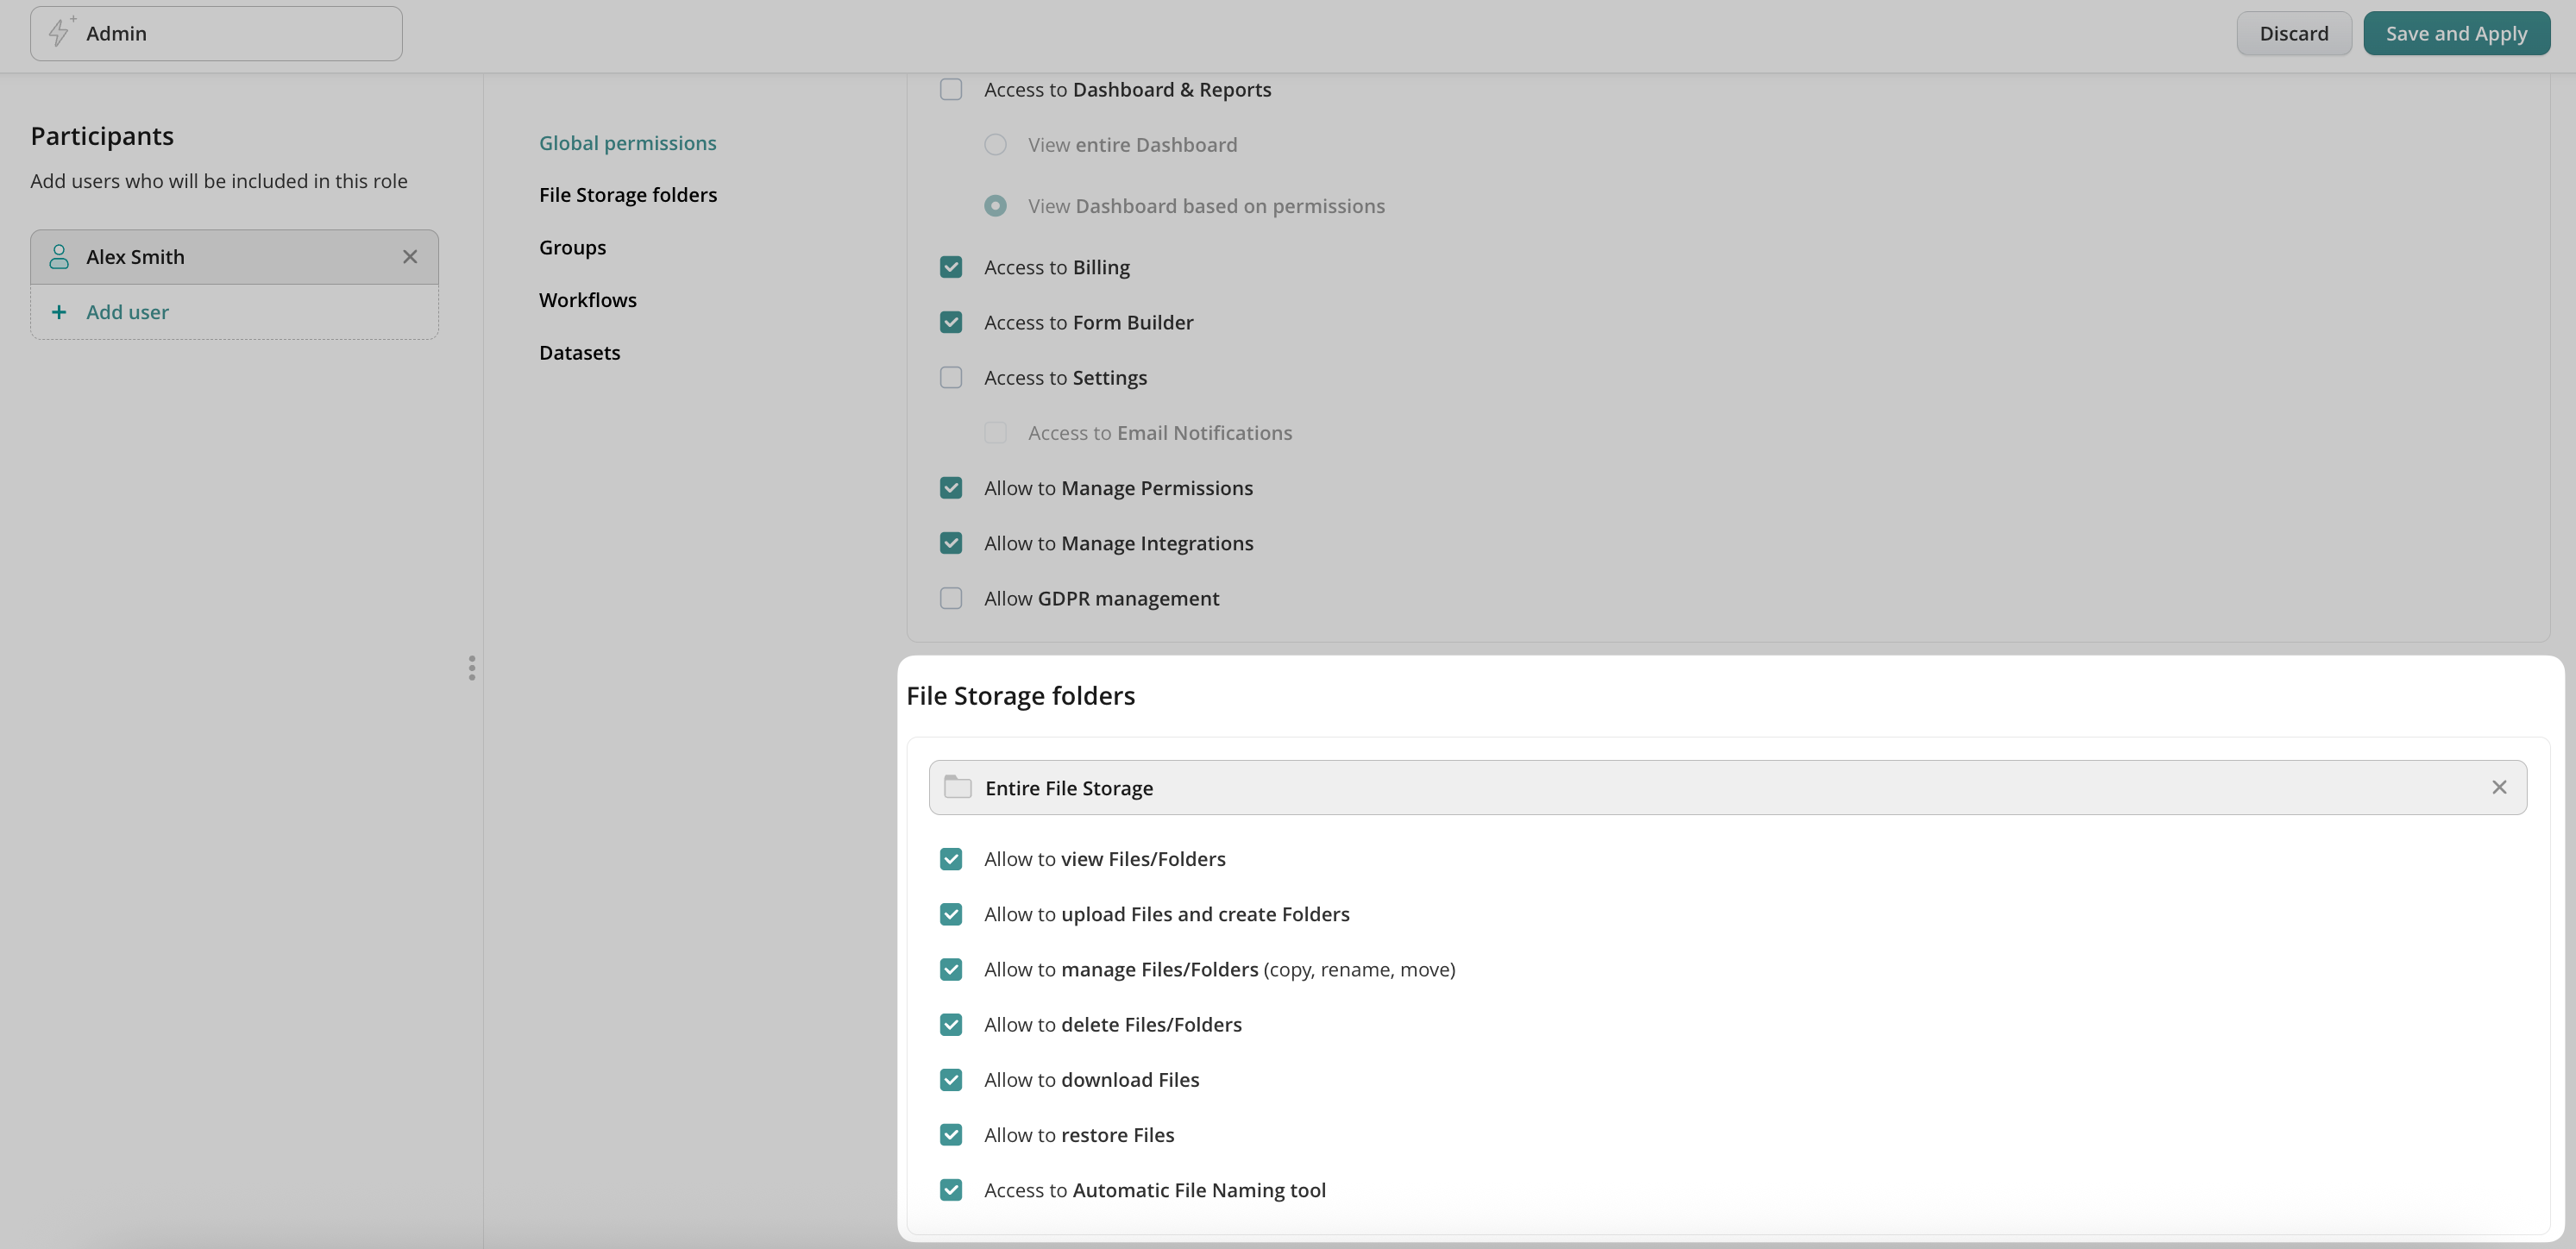
Users provided with the rights above can access Fluix Storage by logging into the Fluix browser version at fluix.io.
Pricing
Storage space is part of our solution and is included in all plans, so you can actually save money on paying for external cloud storage. The Starter plan has 5 GB of available space, the Core plan has 10 GB, and custom terms are agreed upon in the Advanced plan. The space used can be checked in the Remote Storage tab under the Configuration section. You can get more space if needed; just drop us a line at support@fluix.io.