


By integrating Fluix and Azure storage the data flow in your company becomes fully automated. In the Fluix app your remote teams collect data on mobile forms, that are then sent to the Azure cloud storage in an aggregated structured way.
It is possible to connect Fluix to Azure Files and Azure tables. In this article let’s look at the first type when the forms completed in Fluix are then uploaded to the Azure storage.
Note. Integration requires a Core account in Fluix and an account in Azure Storage. To try the option, you can register for a free trial account in both tools.
Step 1 – Setting up Azure account
In your Azure account, go to All services→ Storage accounts→ Choose the required storage account→ Click on the Containers tab, and choose the required container. Choose the folder inside the container to which you want to upload documents from Fluix. In Step 2 you will need the information from these sections:
1.1 Storage account name

1.2 Container name

1.3 Destination folder path inside the container

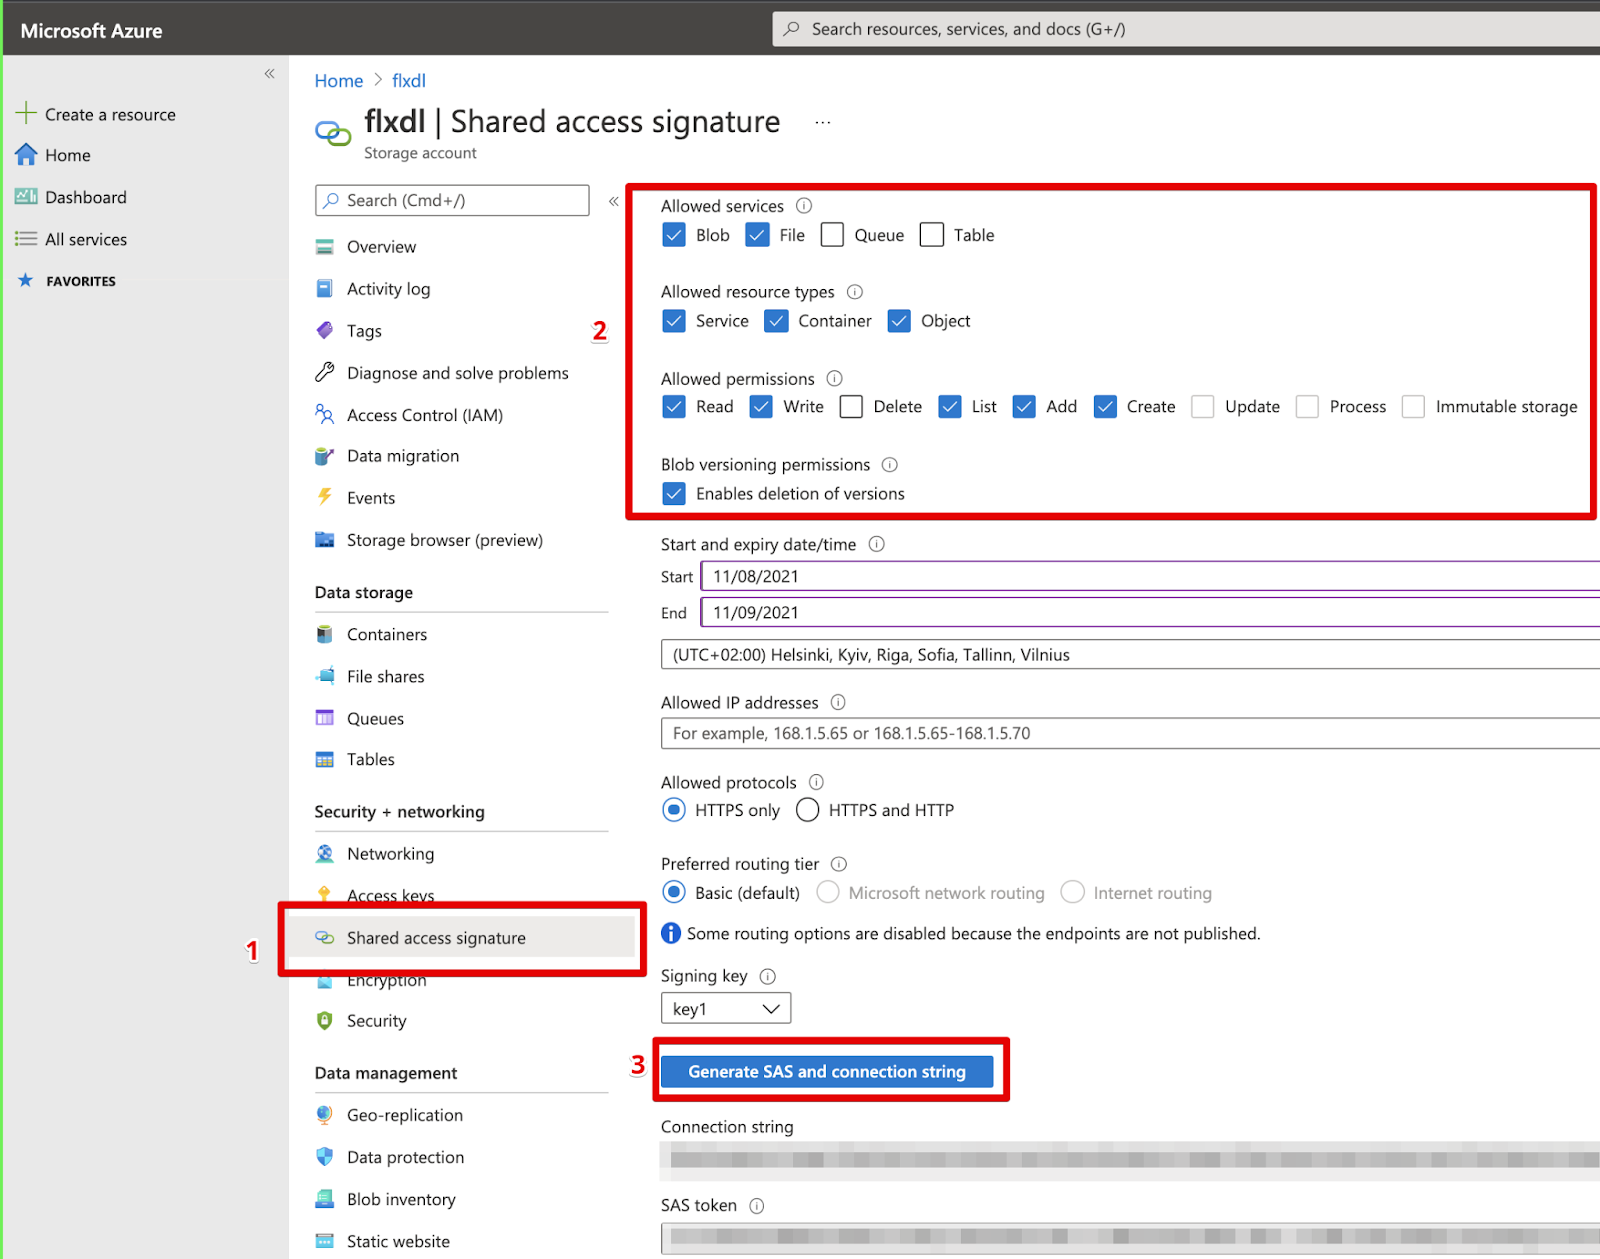
1.4 Navigate to Shared access signature in your storage account→ put the checkmarks as shown on the screenshot and click Generate SAS and connection string:
Step 2 – Configuring a Fluix workflow
In your Fluix account, go to the Configuration section → Workflows tab. Select the workflow or create a new one for the documents that need to be filled out and then appear in Azure.
Important note:
Reach out to support@fluix.io in order to obtain the request URL and the Secure value.
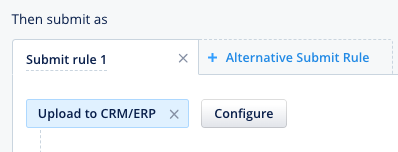
2.1 In the selected workflow, add a submit action called Upload to CRM/ERP and click Configure:
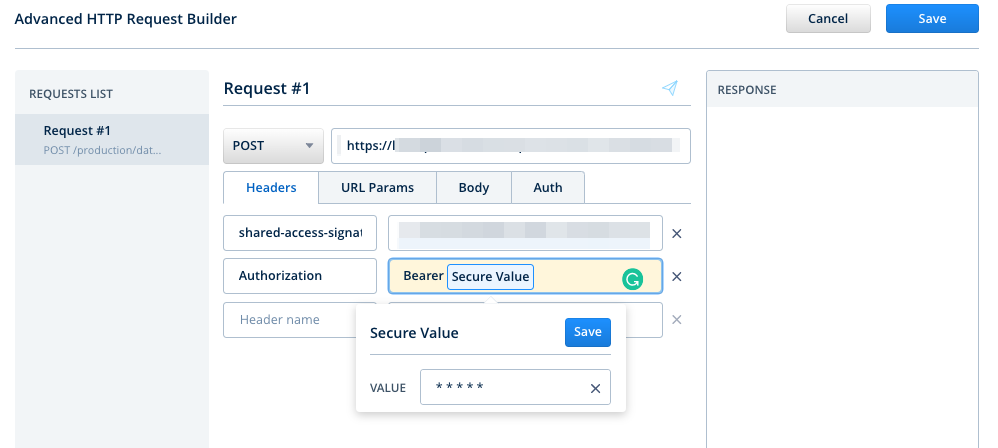
2.2 In the opened HTTP request builder, configure the request name, let’s say “Request #1”, select ‘POST’ as the request type, and add the request URL. Then create 2 headers as follows:
1)
- Header name – shared-access-signature
- Header value – refer to paragraph 1.4 and insert here the generated SAS token.
2)
- Header name – Authorization
- Header value – Bearer ”Secure Value”
Configure the Secure value parameter by clicking on it and entering the value provided by the Fluix team.
2.3 Go to the Body tab, choose “Multipart”and enter the parameters as follows:
1)
- Part name – path
- Part value – your folder path in the Azure container/Document name
2)
- Part name – accountName
- Part value – your Azure storage account name
3)
- Part name – filesystem
- Part value – your Azure container name
4)
- Part name – file
- Part value – Document file
Configure the Document File parameter by clicking on it and selecting the necessary document type.
5)
- Part name – overwrite
- Part value – 1 or 0 (1 – will overwrite documents having the same name, 0 won’t allow to have the document with the same name, submit will fail as a result)

2.4 Click the Save button to save the workflow.
Step 3 – Testing
Go to the Fluix app on the iOS device or User App in the web browser version. Open a test form, fill it out and submit it through the workflow.
In Azure, you will see that the file has appeared in the specified folder.
In case you have any questions or difficulties with setup, contact our support at support@fluix.io and we’ll be happy to help you.
Check other Fluix integrations here.