


Ensure the right people fill out the right parts of the form and nothing else. With smart field assignment in Fluix, you can control which fields are editable, read-only, or required for each person involved in a workflow.
Why Use Field Assignment?
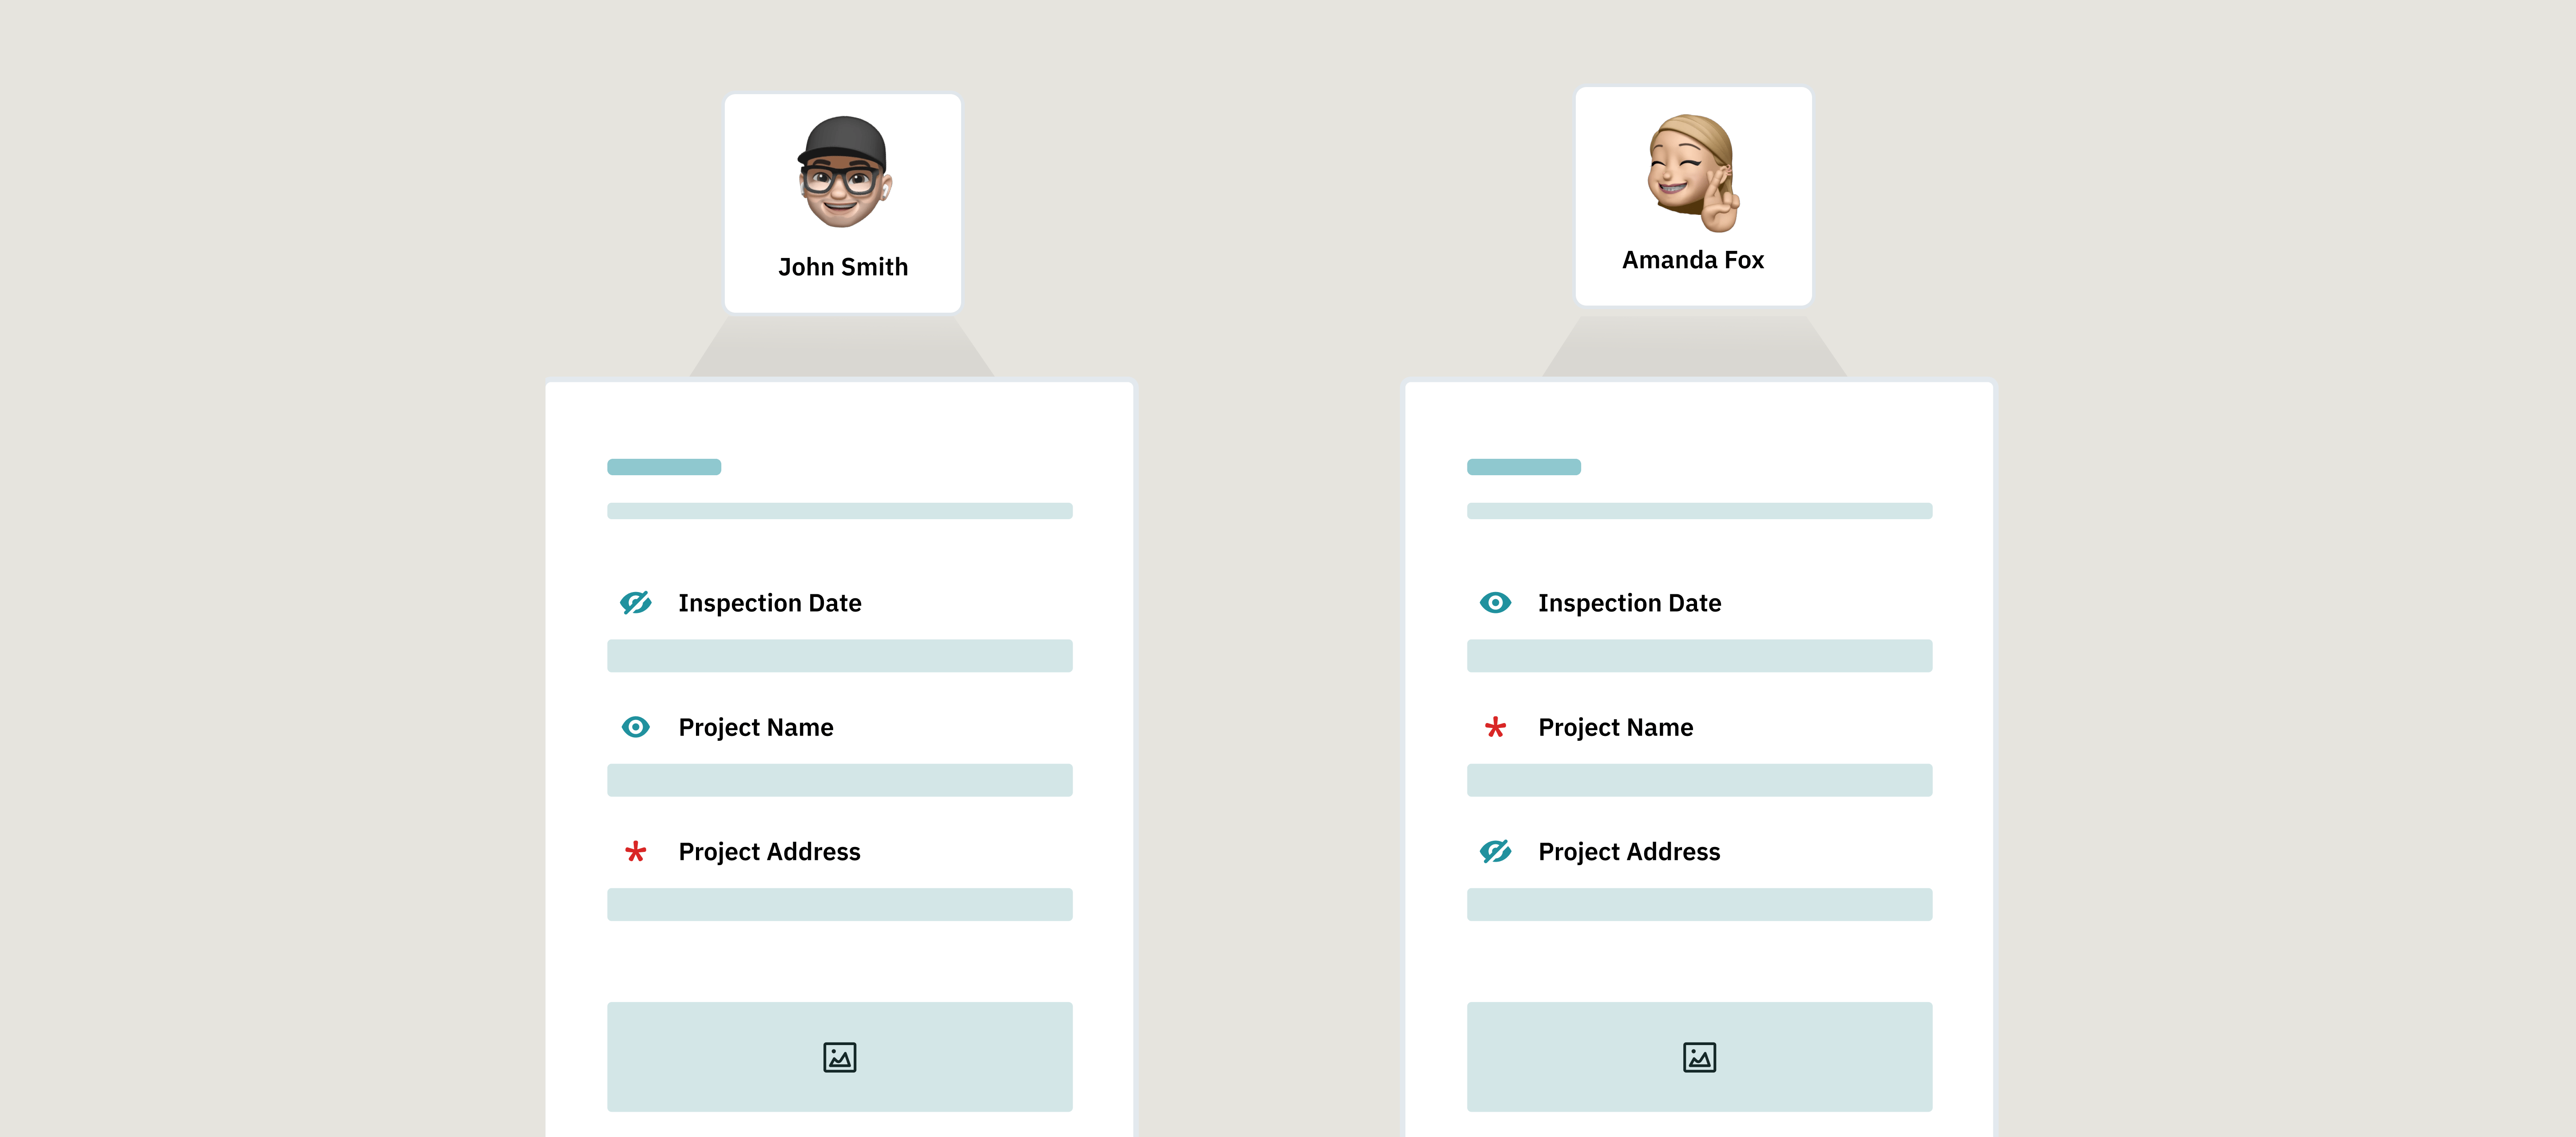
Let’s say you have one form that needs to go through several people, but not everyone should be able to change everything. With field assignment, you can:
- Decide which fields each person can fill in
- Prevent unwanted edits
Make sure key information is completed before moving forward
Example Workflow
Imagine a remodeling project with three participants using the same form:
Participant 1: Sales Manager
- Fills in customer details and agreement terms
- Can only edit the section for customer preferences
- Cannot change installation dates or leave comments
Participant 2: Supervisor
- Reviews the contract completed by the Sales Manager
- Can edit the entire form, including what the Sales Manager entered
- Can send the form back for updates if needed
Participant 3: Installation Specialist
- Gets the form once everything is agreed upon
- Can view the signed contract, but not edit it
- During the customer visit, must collect a signature and any required confirmations — those fields should be marked as required.
How It Looks in Fluix
Here’s an example of how the full setup will look in Fluix’s workflow builder:
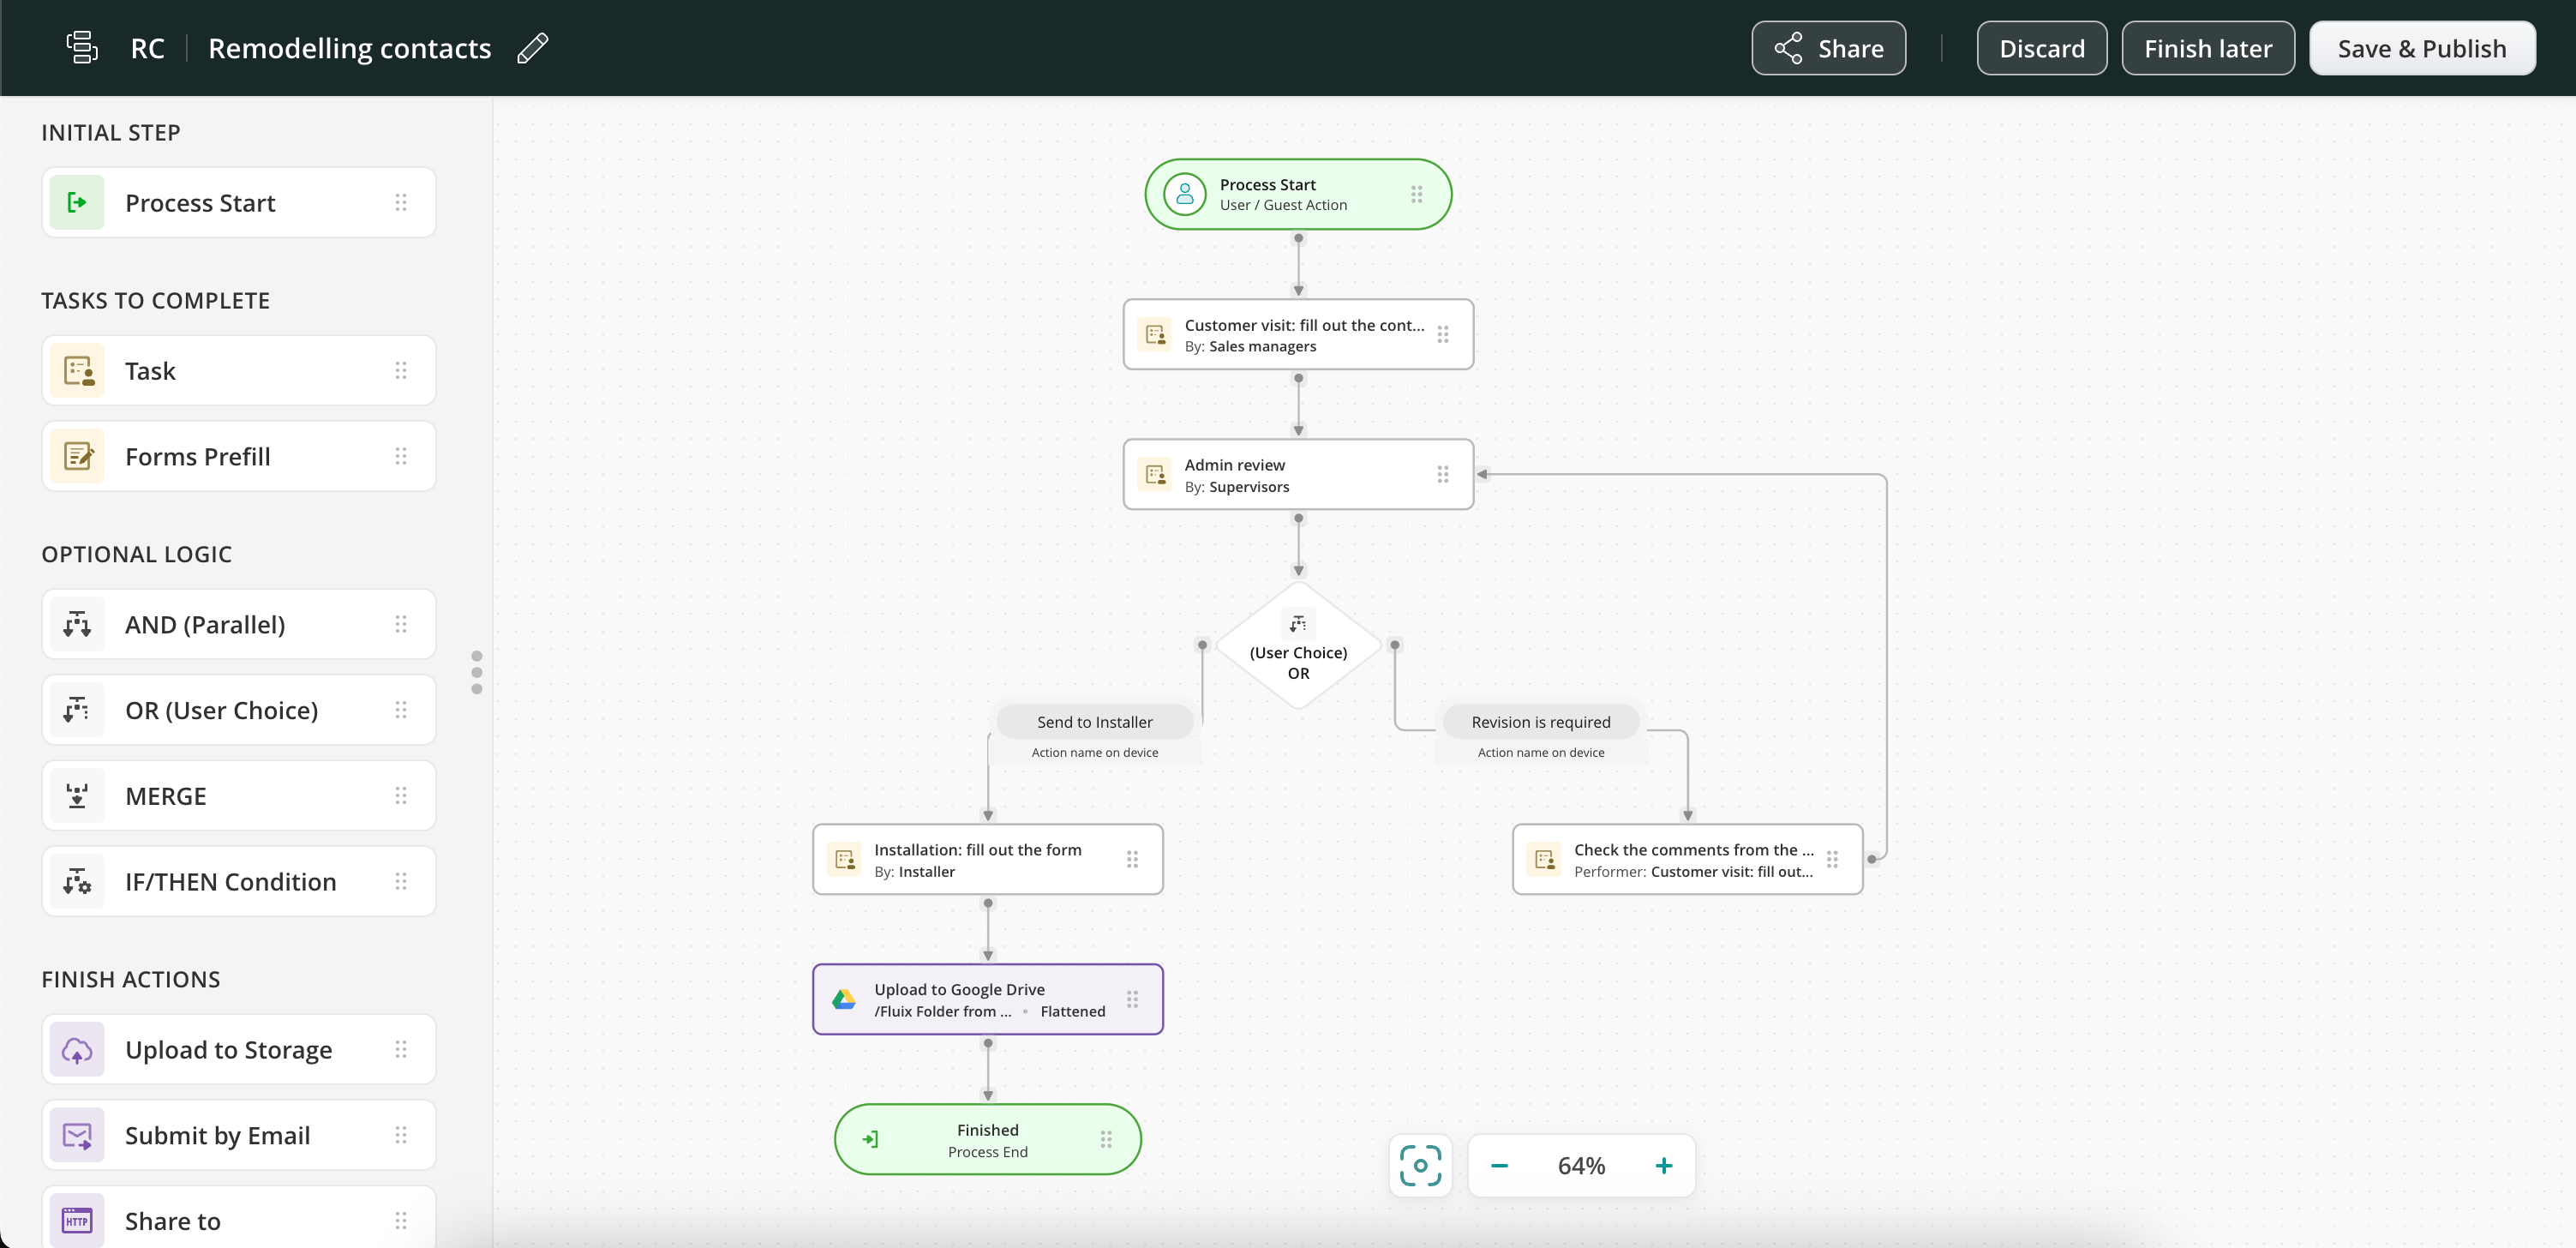
Each person in the process has a task. But what makes this workflow powerful is that each participant can only work with the form fields meant for them. Let’s walk through how to set this up.
How to Set Up Field Assignment (Step-by-Step)
1. Go to the Admin Portal and open your workflow under the Workflows section.
2. Click on the first task in your process (e.g., the Sales Manager’s task).
3. In the Forms & Attachments section, click the Assign form fields icon next to your form.
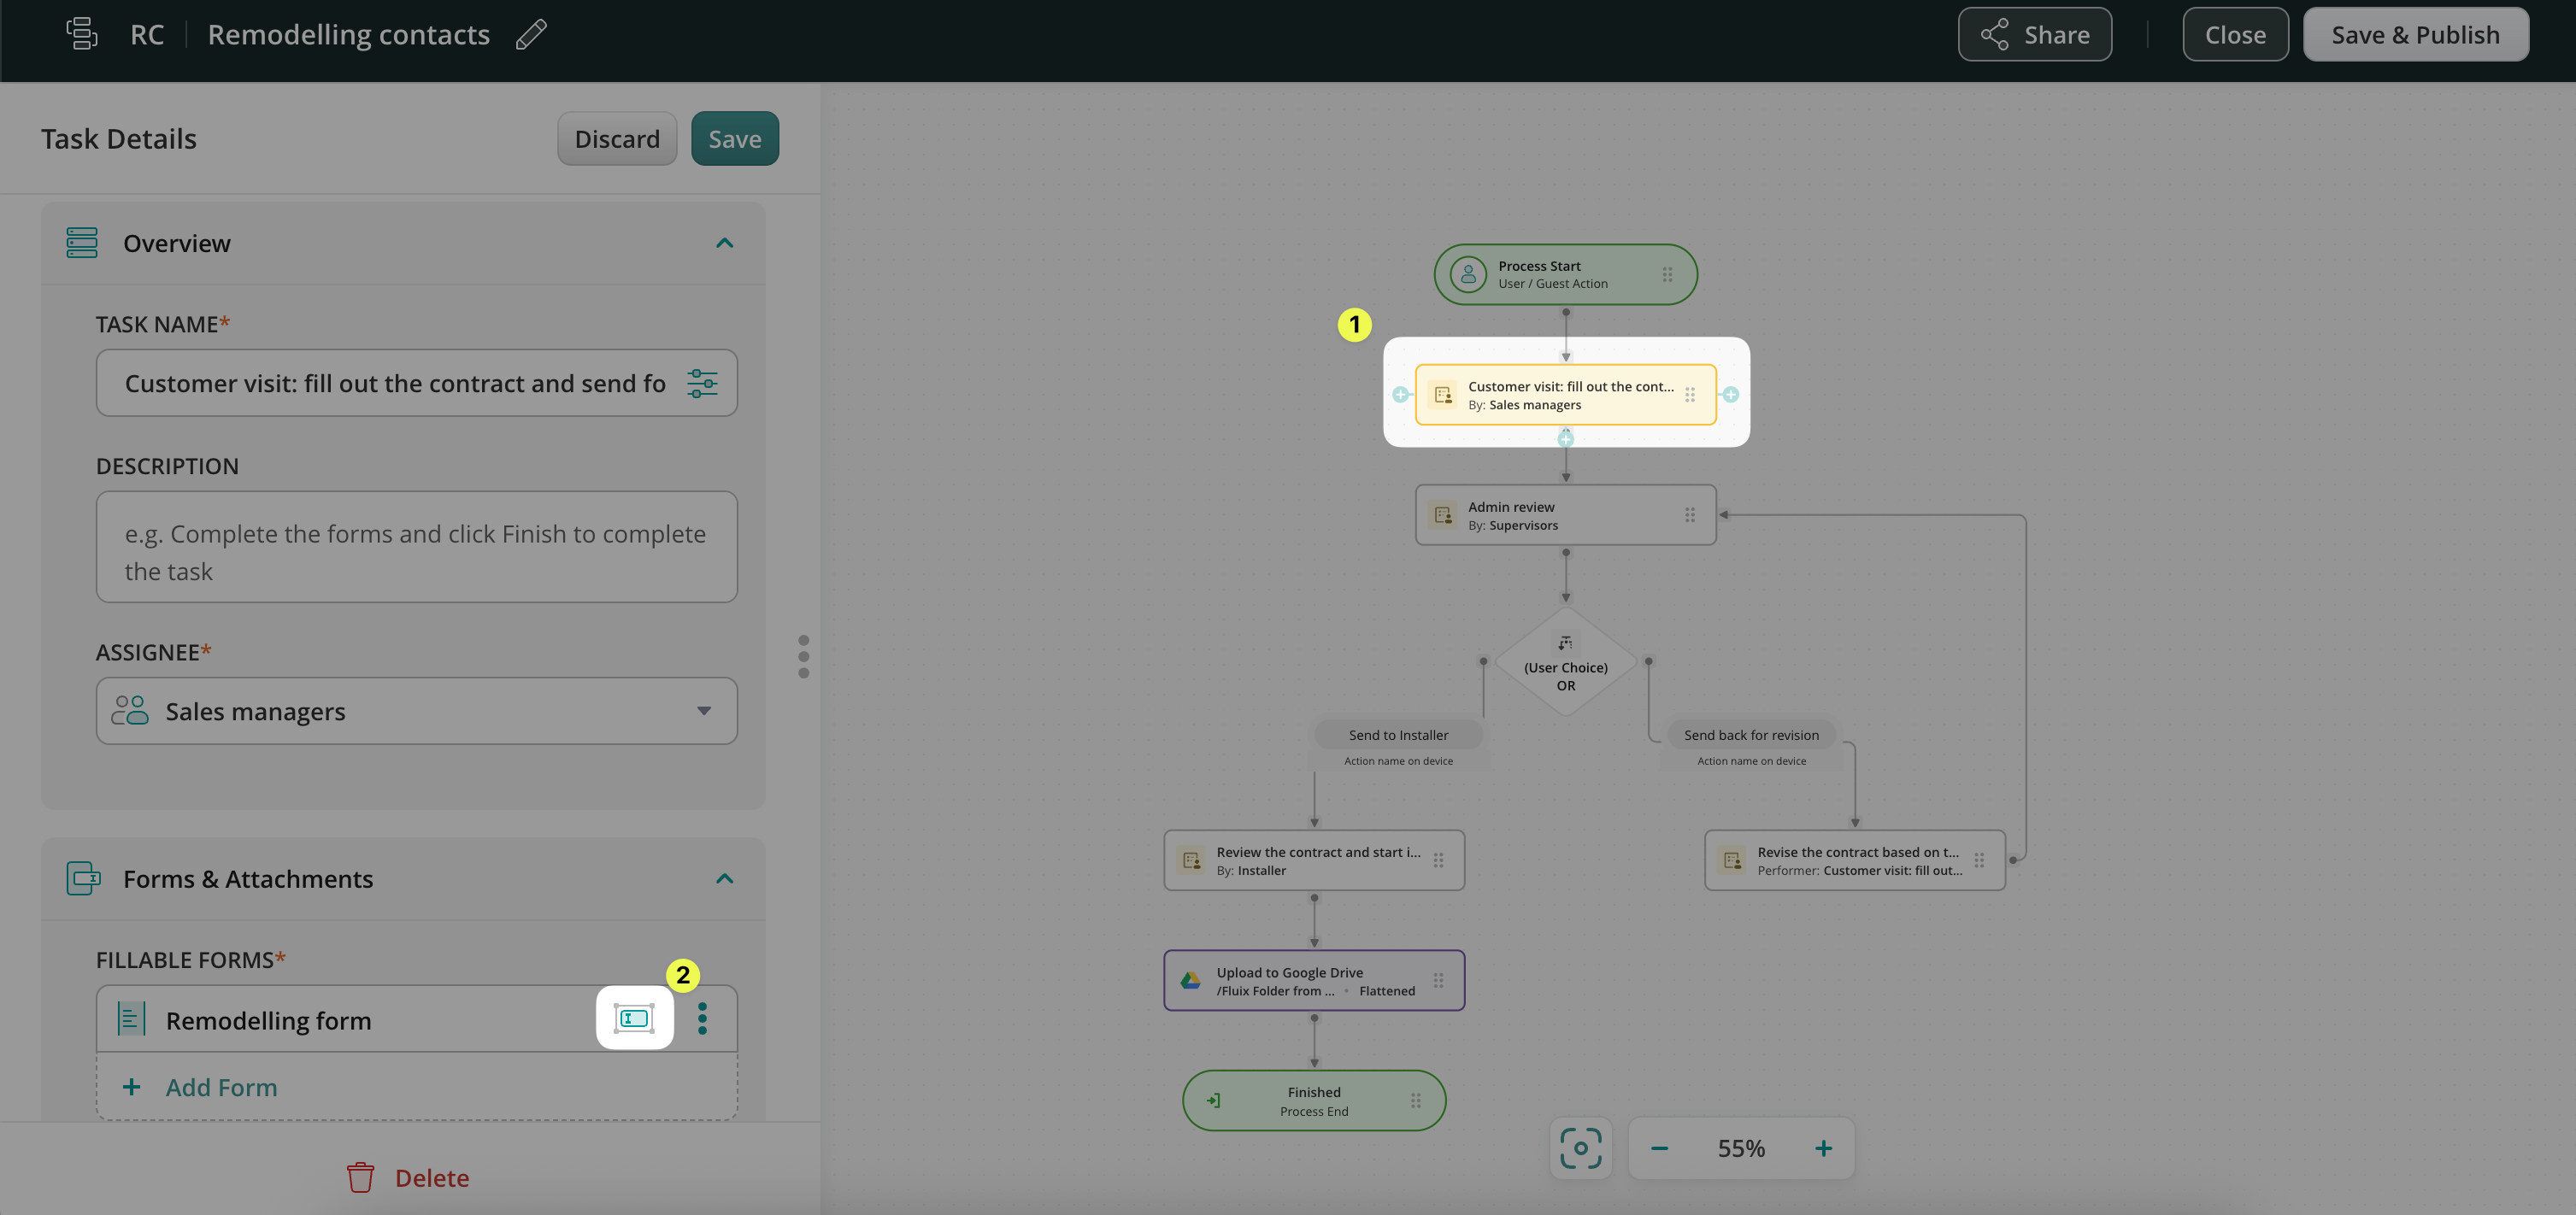
4. In the form preview, click on the fields you want to configure:
- Mark fields as Required (they must be filled out)
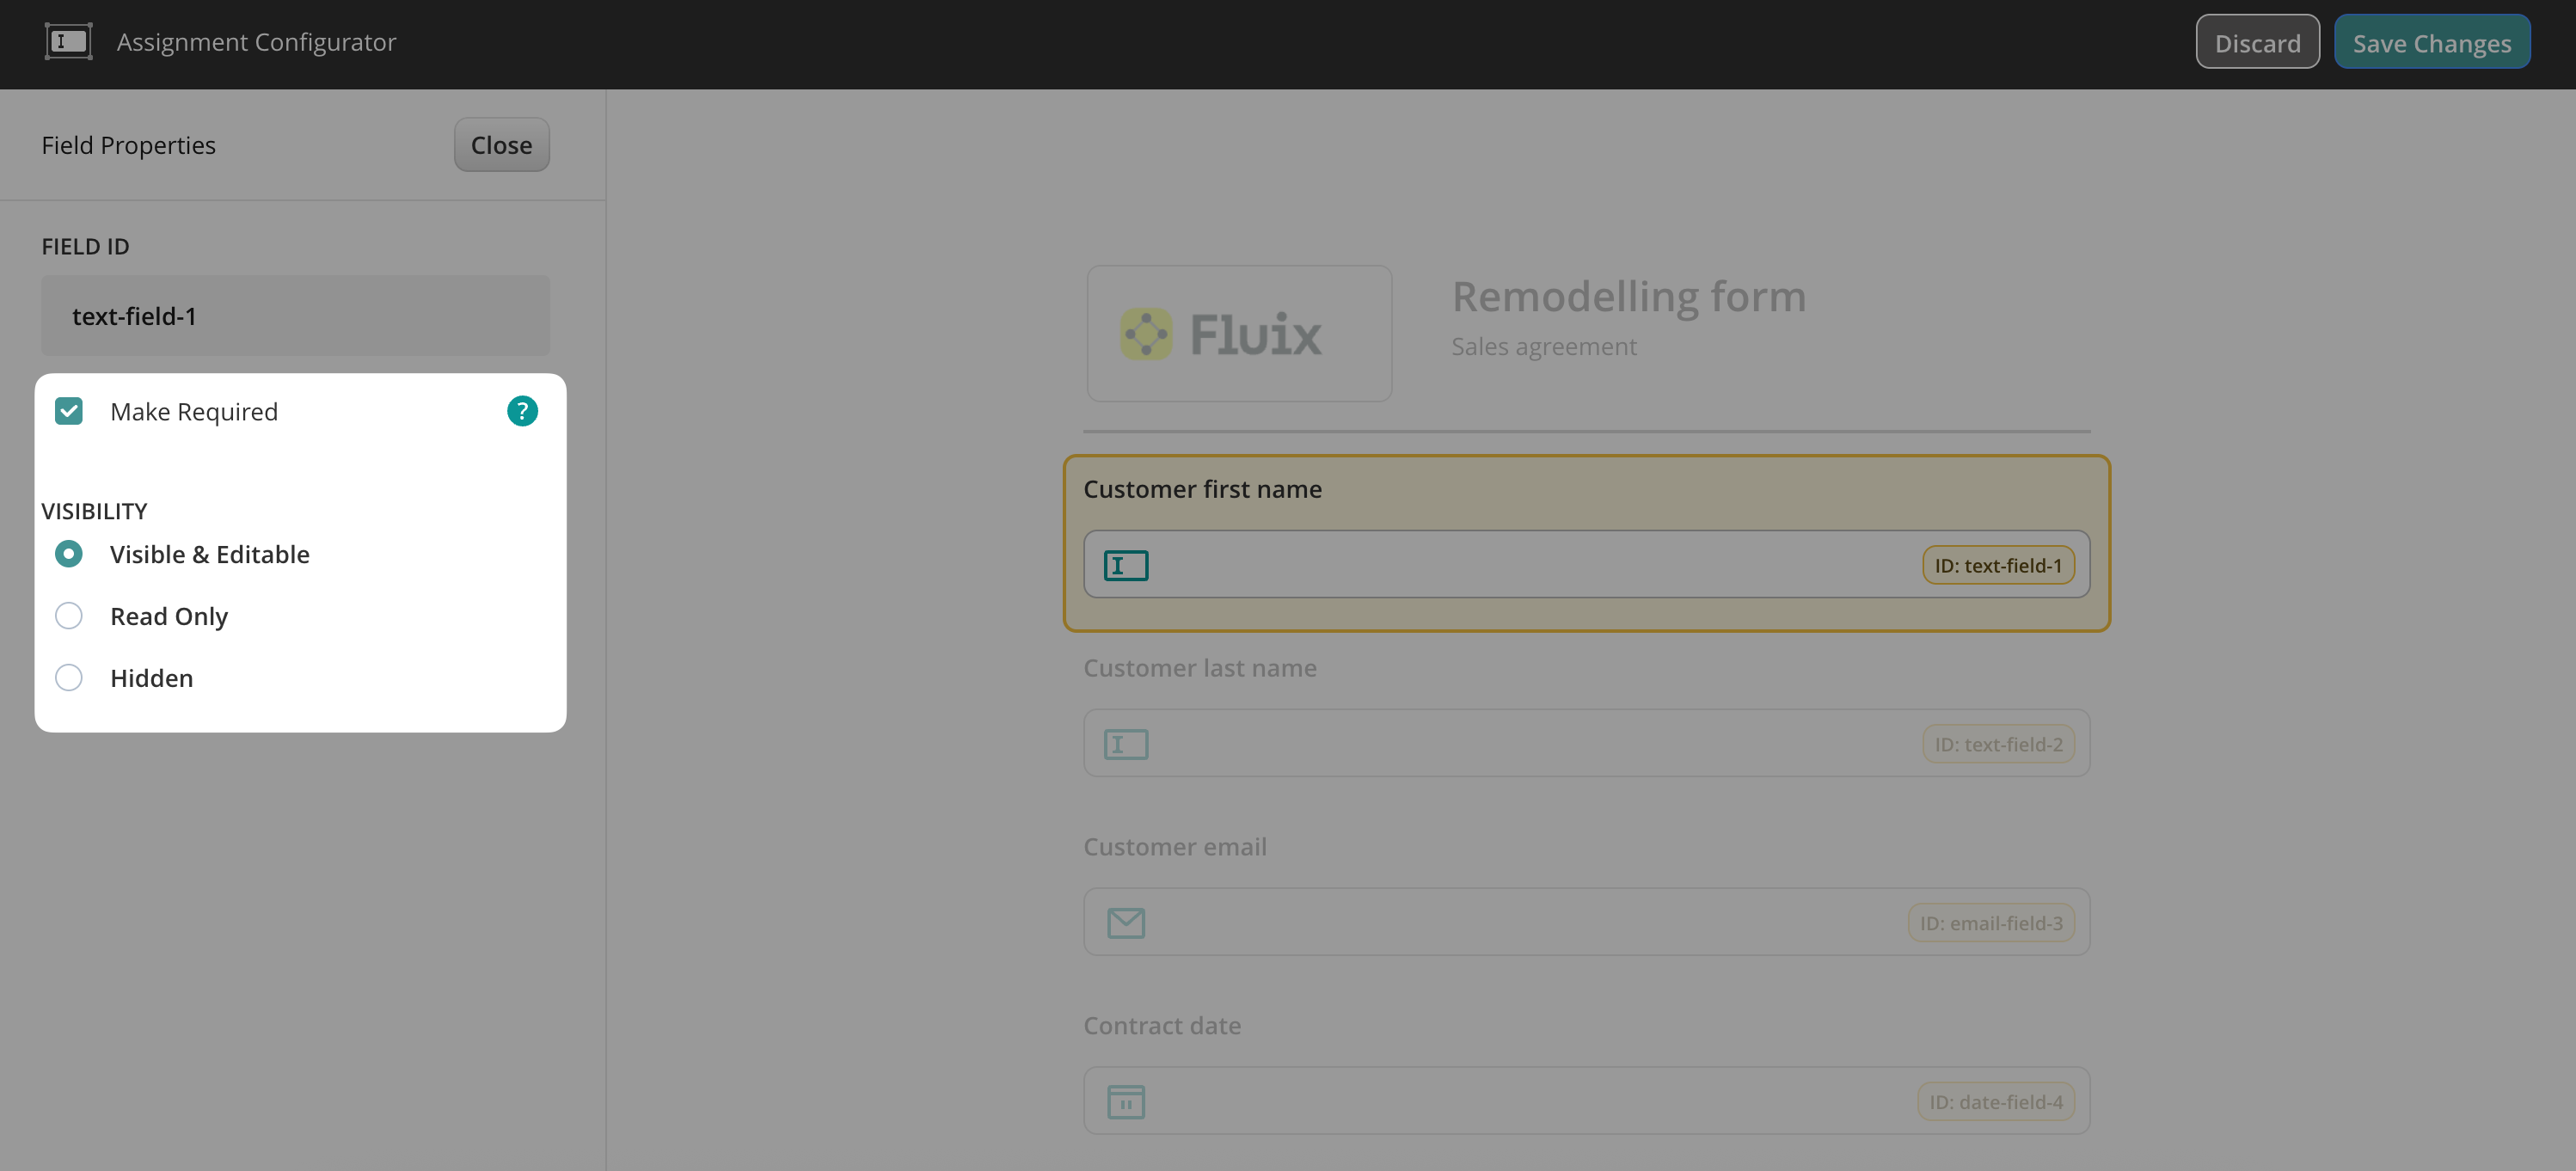
- Or set them as Read-only (they can be viewed but not changed)
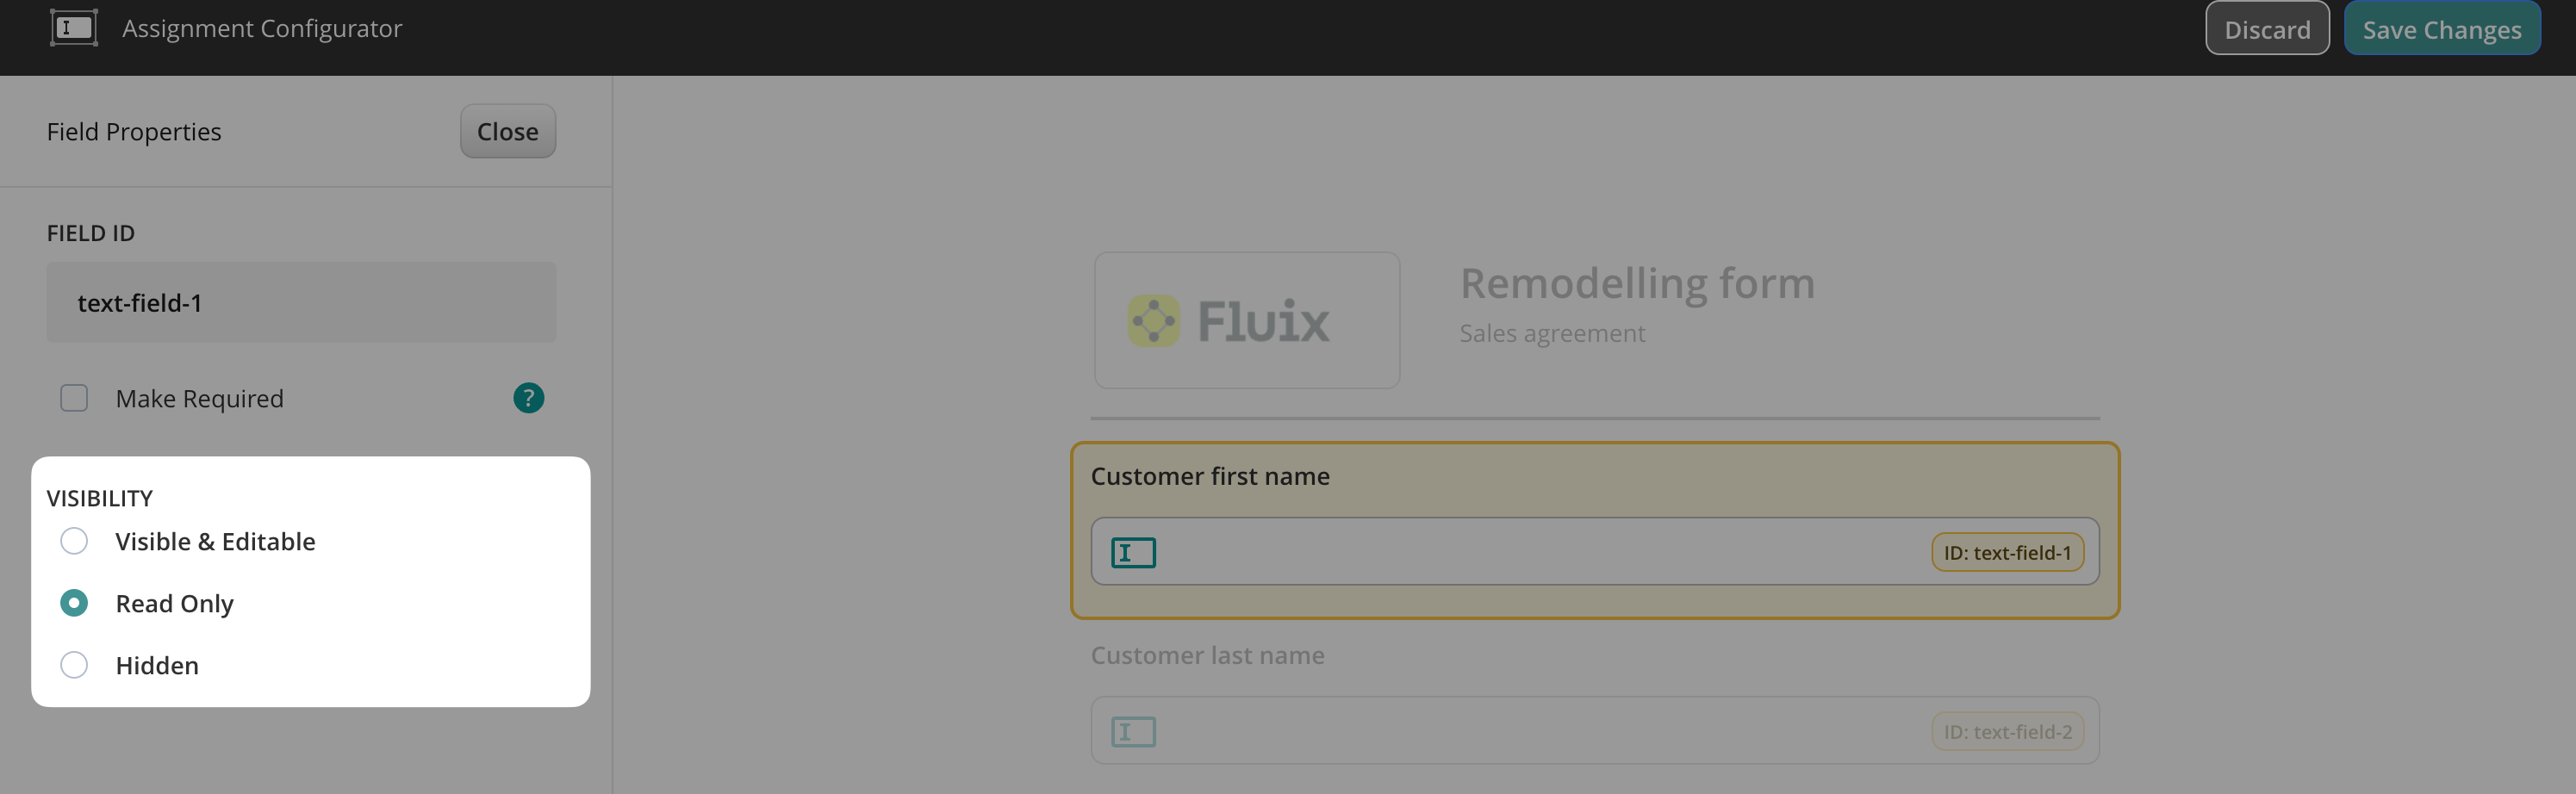
Example: Make “Customer First Name” and “Customer Last Name” required for the Sales Manager.
5. Repeat the same steps for any other fields this participant should fill out.
Note: Field assignments apply only to the workflow you’re currently editing. If you want a similar setup in another process, repeat the steps in that workflow or duplicate the workflow and customize it accordingly.
Setting Up Fields for Other Participants
Now let’s configure the fields for the next person in the workflow.
1. Go to the task for the Installation Specialist (or any other participant).
2. Open the Forms & Attachments section and click the Assign form fields icon.
3. Set fields as read-only where necessary; for example, the contract fields are already filled out by others.
4. Mark new fields as required, like the customer’s signature, after the job is done.
Save and Test
Once all fields are configured:
- Click Save in the Assignment Configurator
- Then click Save & Publish your workflow.
To test the setup:
- Add yourself to the user group assigned to this workflow
- Open Fluix Tasks app on your device or go to User Mode in the web app
- Open the task and try filling out the form. You’ll see that:
- Required fields must be completed before moving forward
- Read-only fields can’t be edited
- Everyone sees only what they need to
If you have any questions or need help setting things up, our team is just a message away.
Email us at support@fluix.io — we’re happy to assist!