


To save time on adding users to Fluix one by one, we recommend doing it by uploading a CSV file.
Here’s a detailed guide:
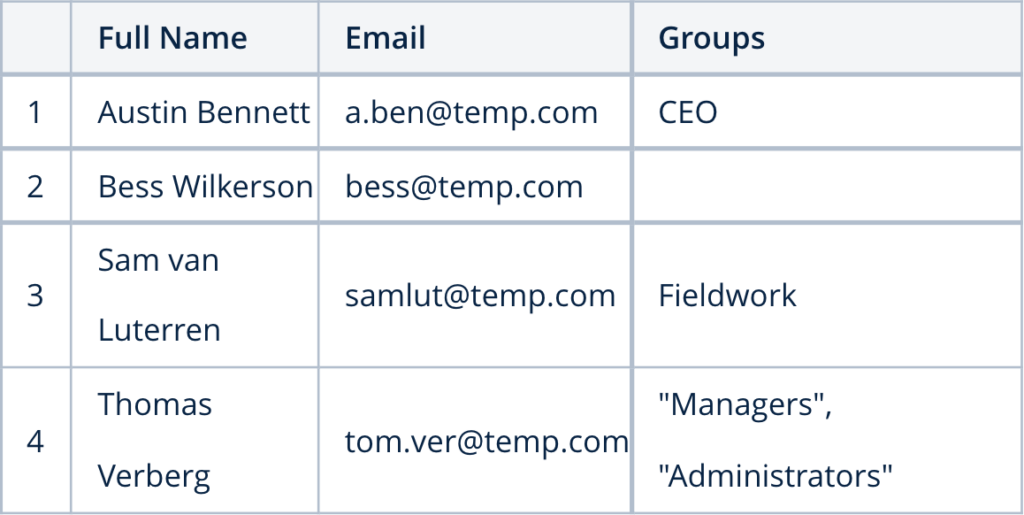
1. Collect users’ names and last names, email addresses, and groups they have to belong to (optional).
2. Open a Google Spreadsheet (or any other tool that can export this file in a CSV format) and create 2 columns: Full Name and Email. If you would like to assign users to groups automatically, add a third column – Groups (optional). Fill out the document with users’ information.
3. Download the file in CSV format (in Spreadsheets via File -> Download As – CSV)
4. In Fluix admin portal go to the Admin Tab -> Process Setup -> Participants section. Import/Export dropdown -> Import Users via CSV button:
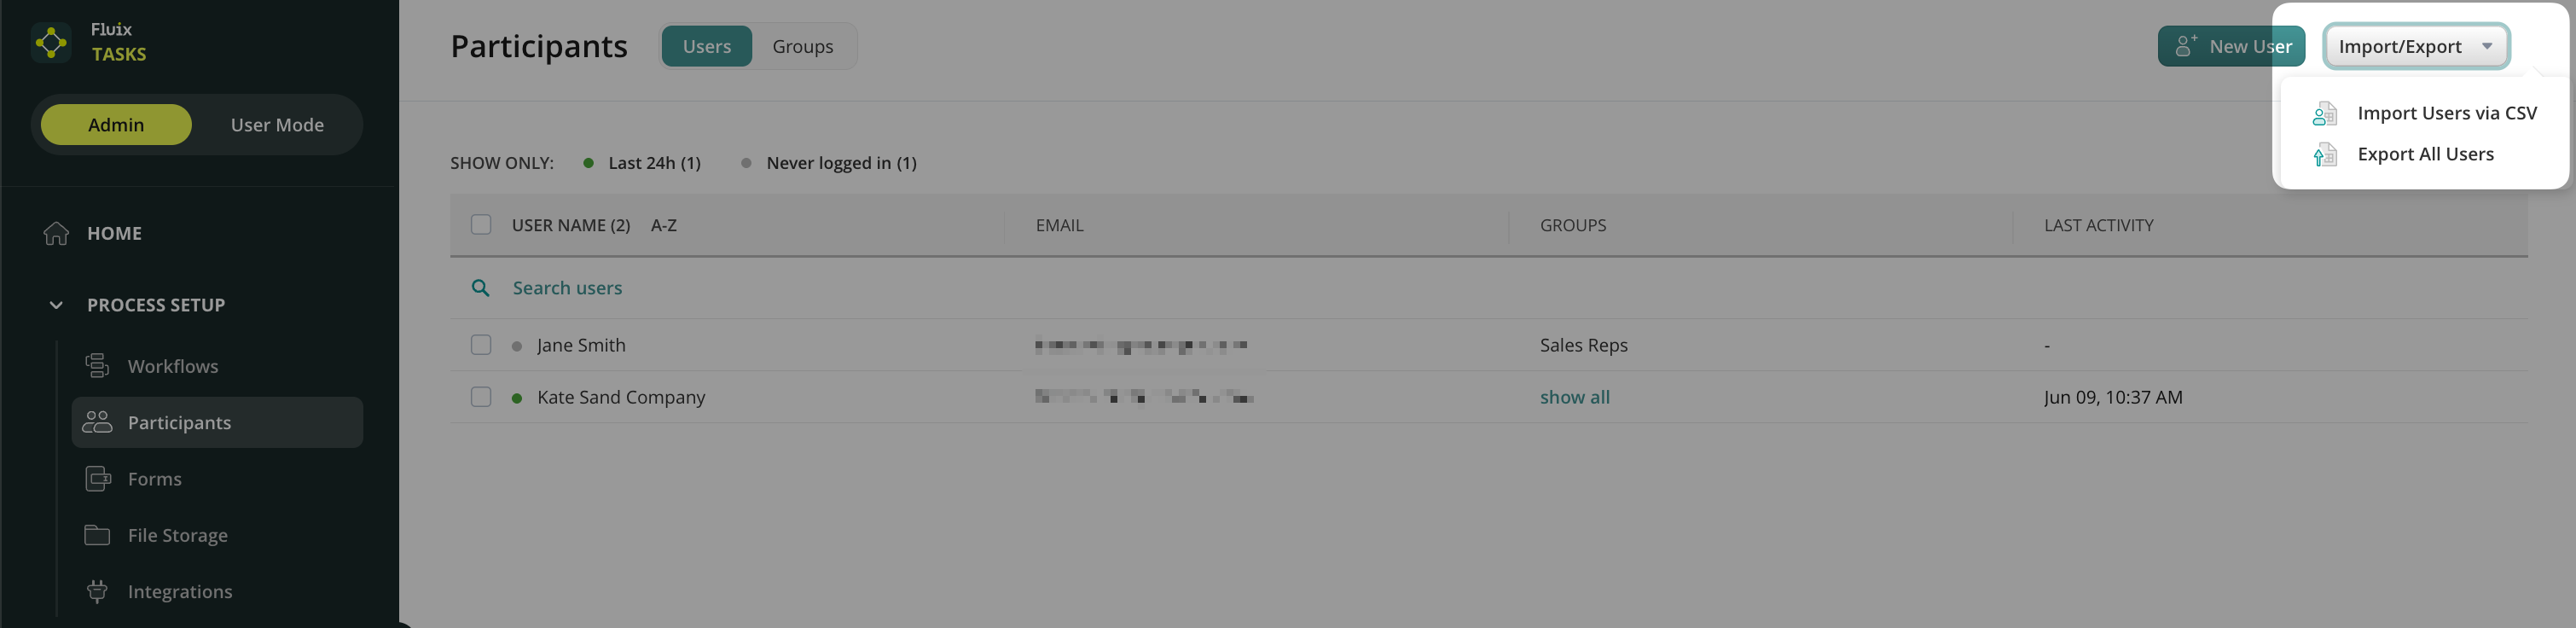
5. In the right sidebar, upload the CSV document by clicking on Browse CSV File.
6. Once the CSV file is uploaded, you will see a list of users from the document, select the ones you want to add or click on Import all.
Learn more about User Details in the next article or contact us at support@fluix.io if you have any questions or comments.