



Connect ChatGPT to Fluix by signing in with your regular Fluix account — no API tokens to copy or manage. Once connected, you can ask ChatGPT about your Fluix task reports, form submissions, and document statuses in plain language.
Before you start
You need:
- A Fluix account with access to at least one company.
- The MCP Server feature is enabled for your company’s Fluix plan. It is off by default — contact your Fluix admin or support@fluix.io. Without it, sign-in works, but the connection fails right after you approve access.
- A ChatGPT plan that supports custom MCP connectors — Business, Enterprise, or Edu. On Business, only admins and owners can add custom apps — ask your admin to publish Fluix for the workspace. On Enterprise and Edu, admins grant access to selected members.
What ChatGPT can access in Fluix Tasks
| Permission | What it allows |
| Tasks | Read task reports |
Access is read-only, limited to the one company you picked at sign-in, and limited to what your own Fluix account can already see. ChatGPT cannot create, change, or delete anything in Fluix, and connecting does not give it more access than you have yourself.
Step 1 — Turn on Developer mode
Open Settings → Security and login, and switch on Developer mode.
The toggle is labeled ELEVATED RISK. This is expected — it is ChatGPT’s standard warning for any connector that OpenAI has not verified, and it appears no matter which service you add. Fluix access stays read-only either way.
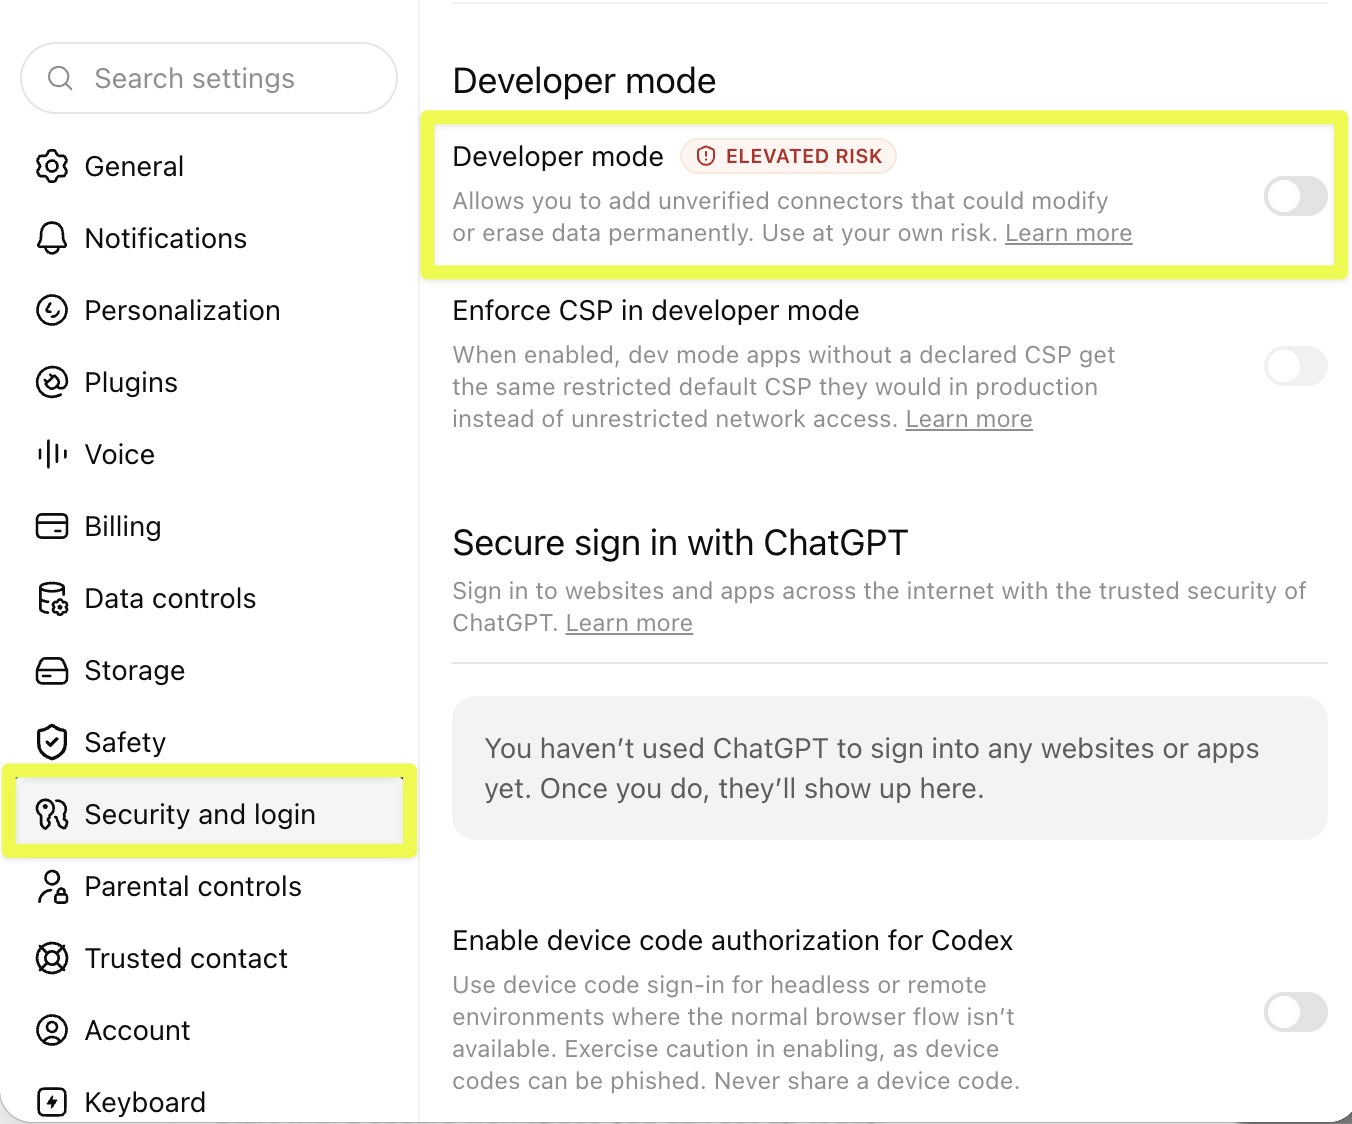
Note: You can only set up and use the Fluix plugin in ChatGPT on the web version.
Step 2 — Add the Fluix plugin
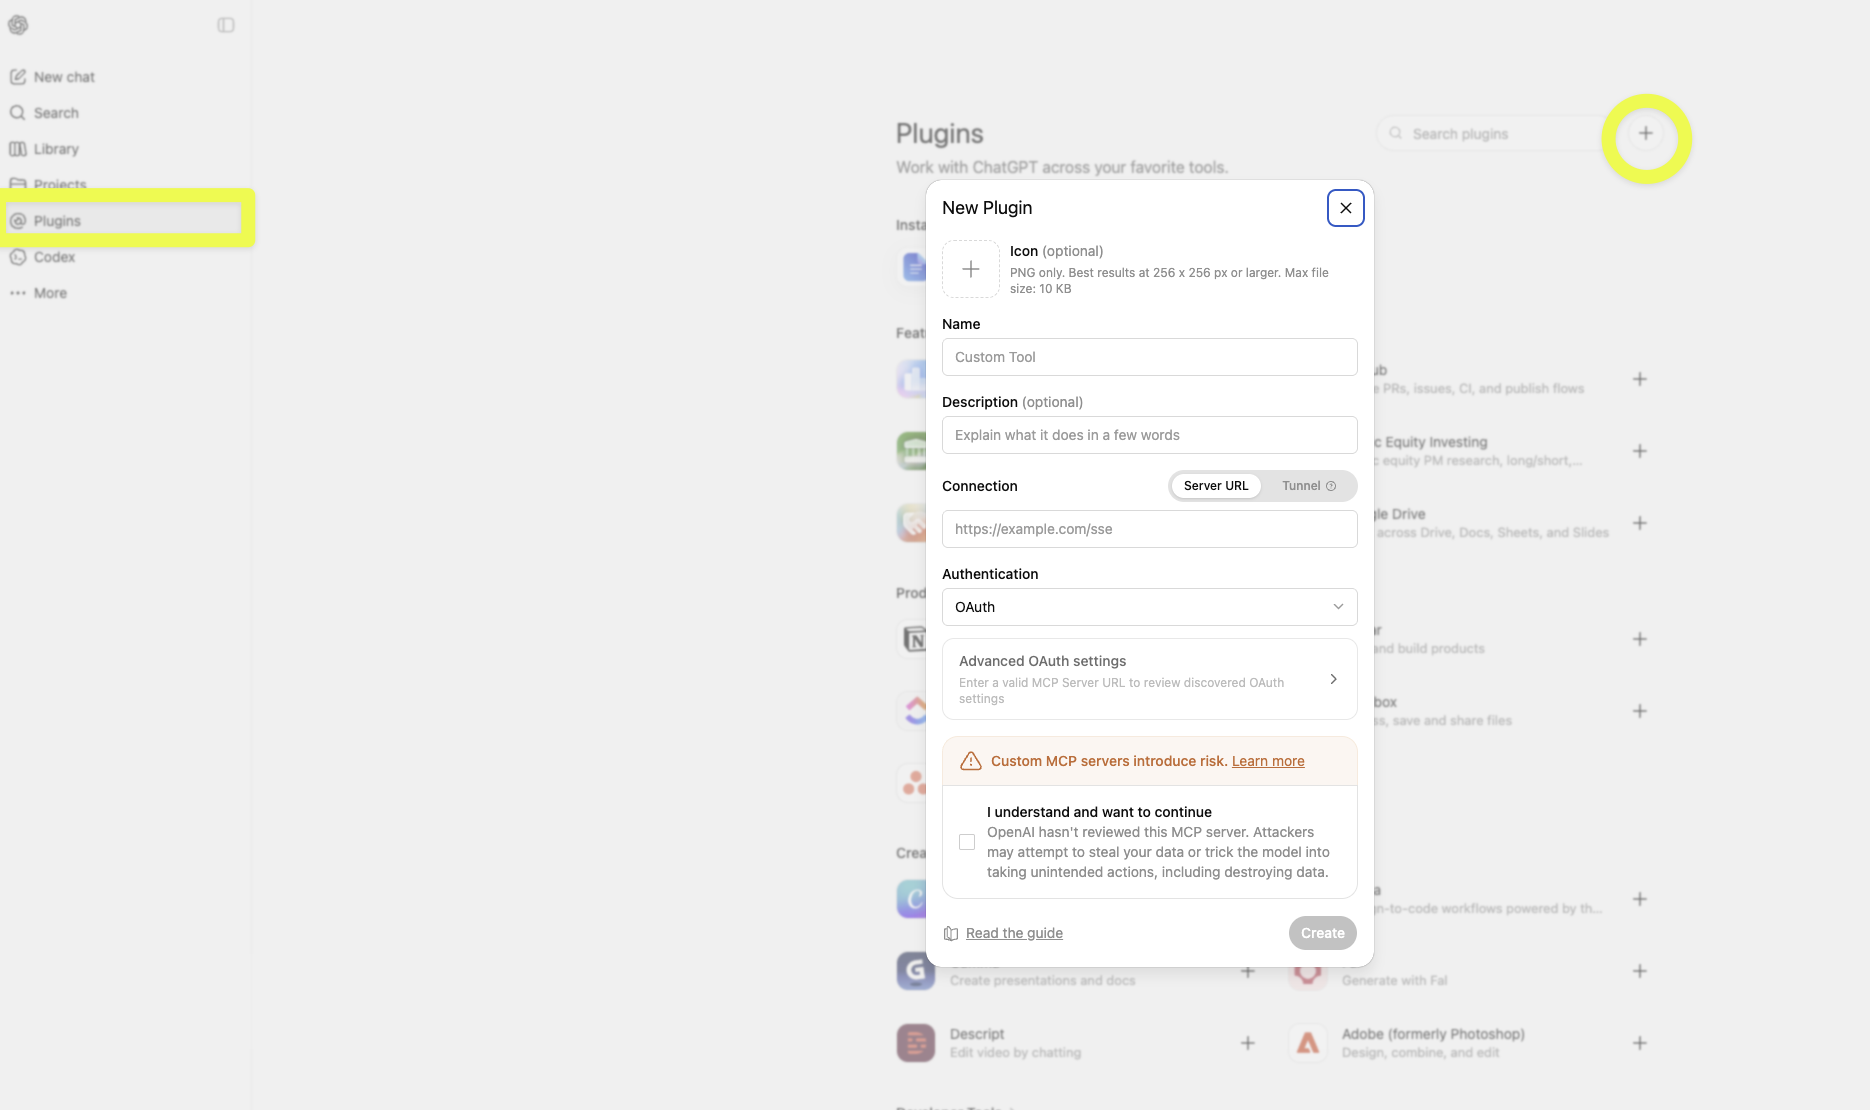
Go to Plugins in the left sidebar and click +. In the New Plugin dialog:
- Name: Fluix
- Connection: Server URL (not Tunnel)
- Server URL: https://mcp.fluix.io/mcp
- Authentication: OAuth
Step 3 — Sign in and approve
ChatGPT opens the Fluix sign-in page.
- Sign in with your Fluix email and password, plus two-factor authentication if your account has it.
- If you belong to more than one company, pick the one you want ChatGPT to access.
- Check the permissions on the consent screen and press Allow.
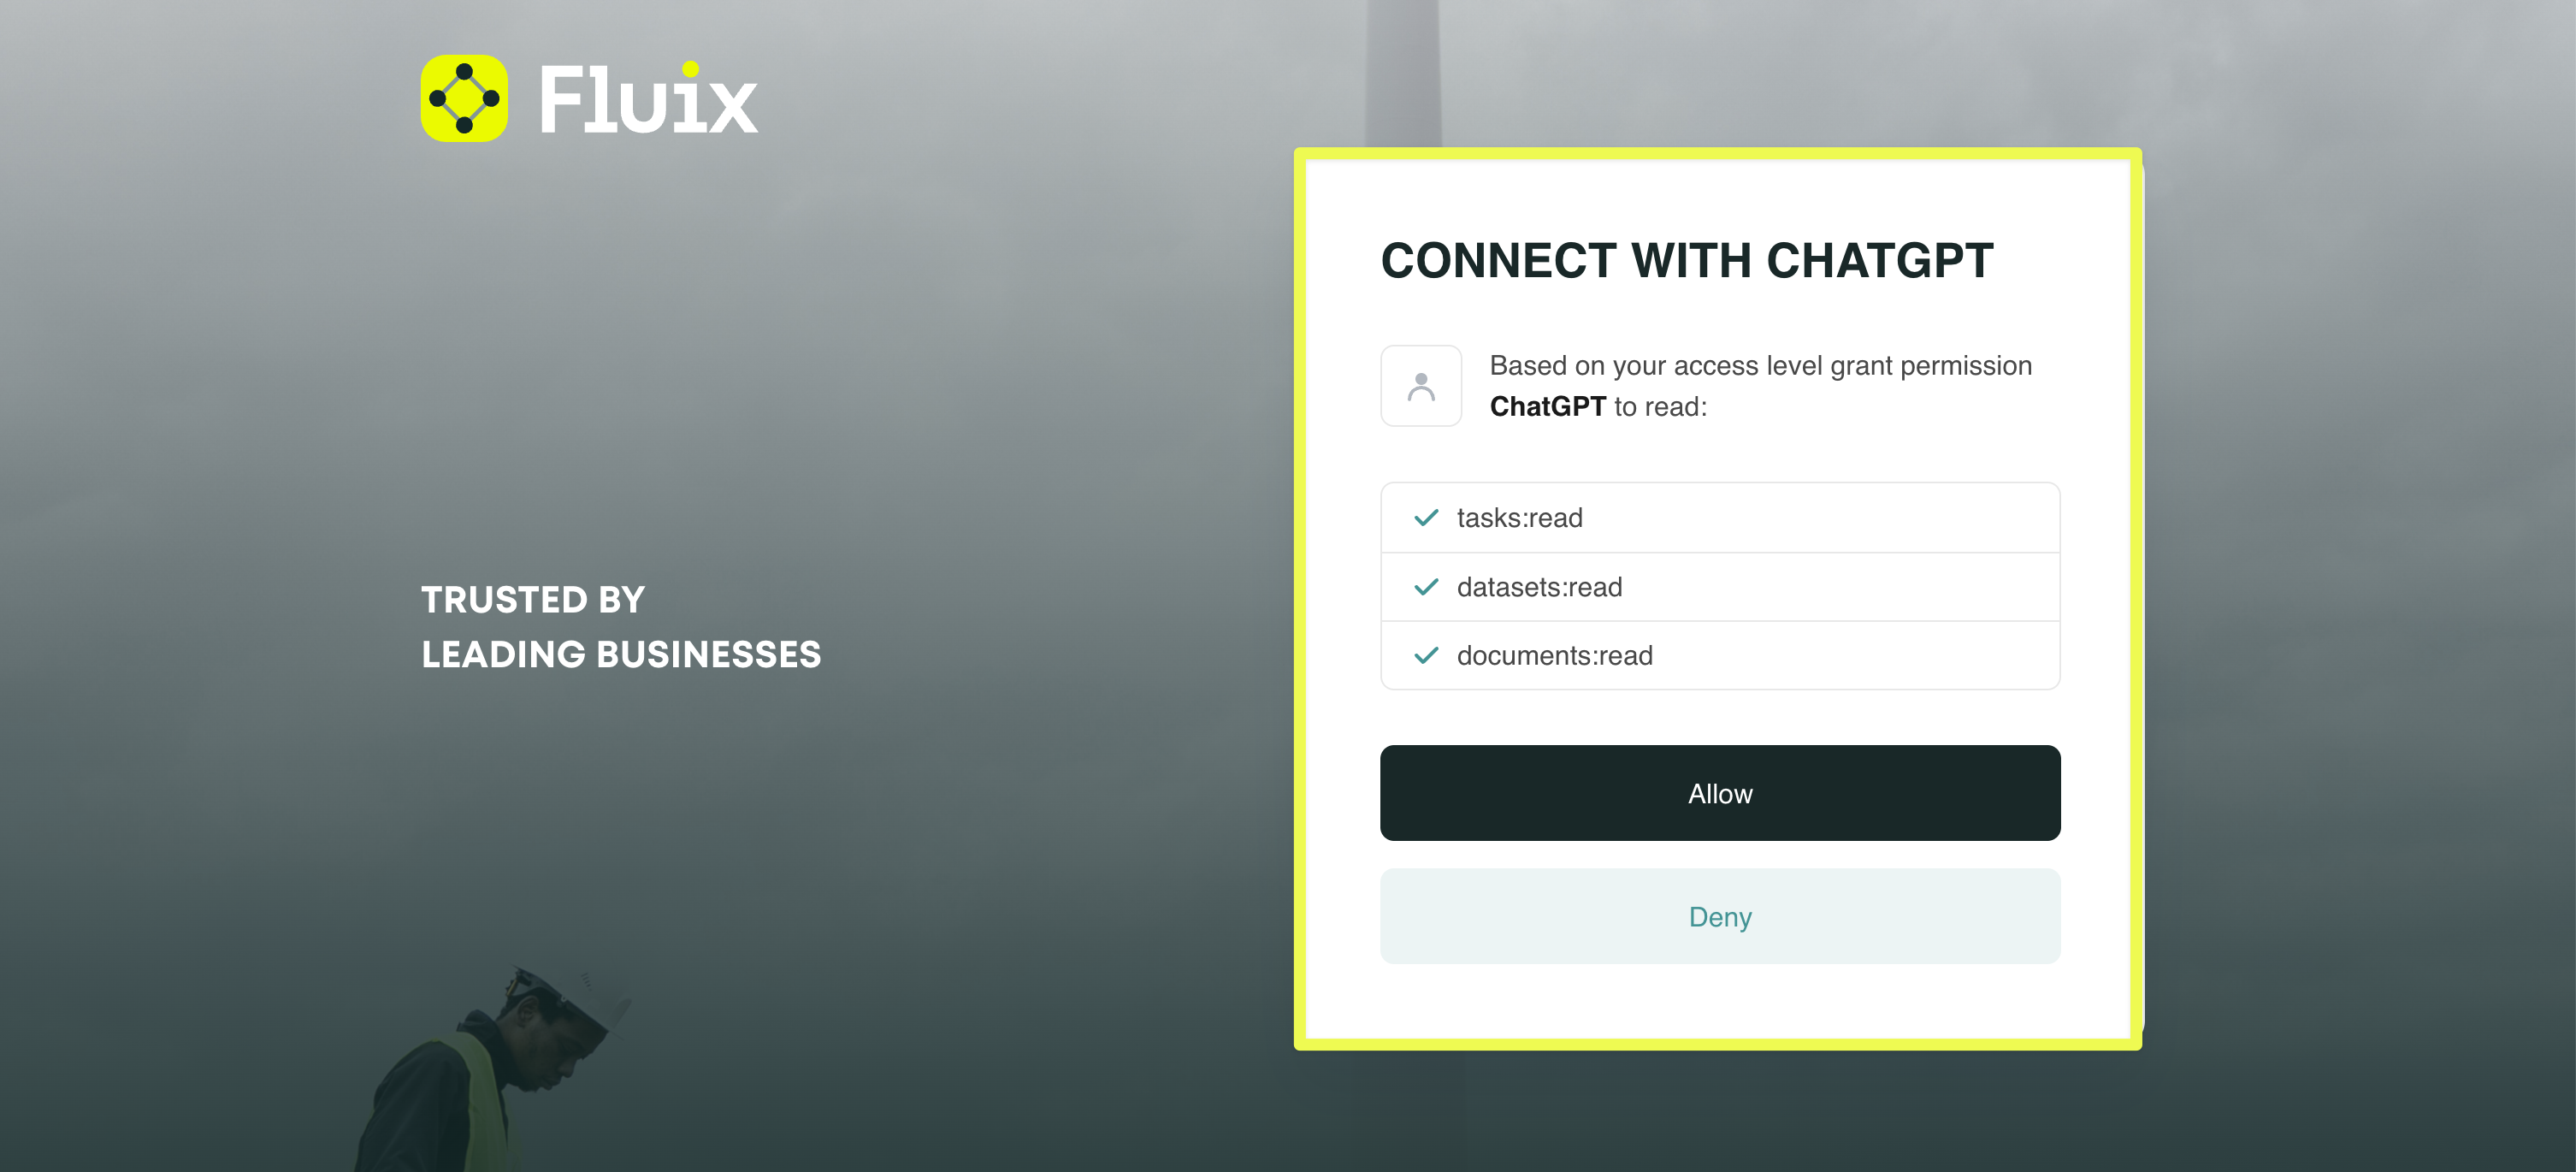
Pressing Deny cancels the connection and shares nothing.
That’s it — Fluix now appears in your Plugins list, and ChatGPT can answer questions about your Fluix data.
Using it
Point ChatGPT at Fluix. There are two ways, and either works:
- Name it in your prompt — start the message with the plugin name, for example, “Fluix, list my task reports.”
- Select it from the tools menu — click + in the message composer and choose Fluix for that conversation.
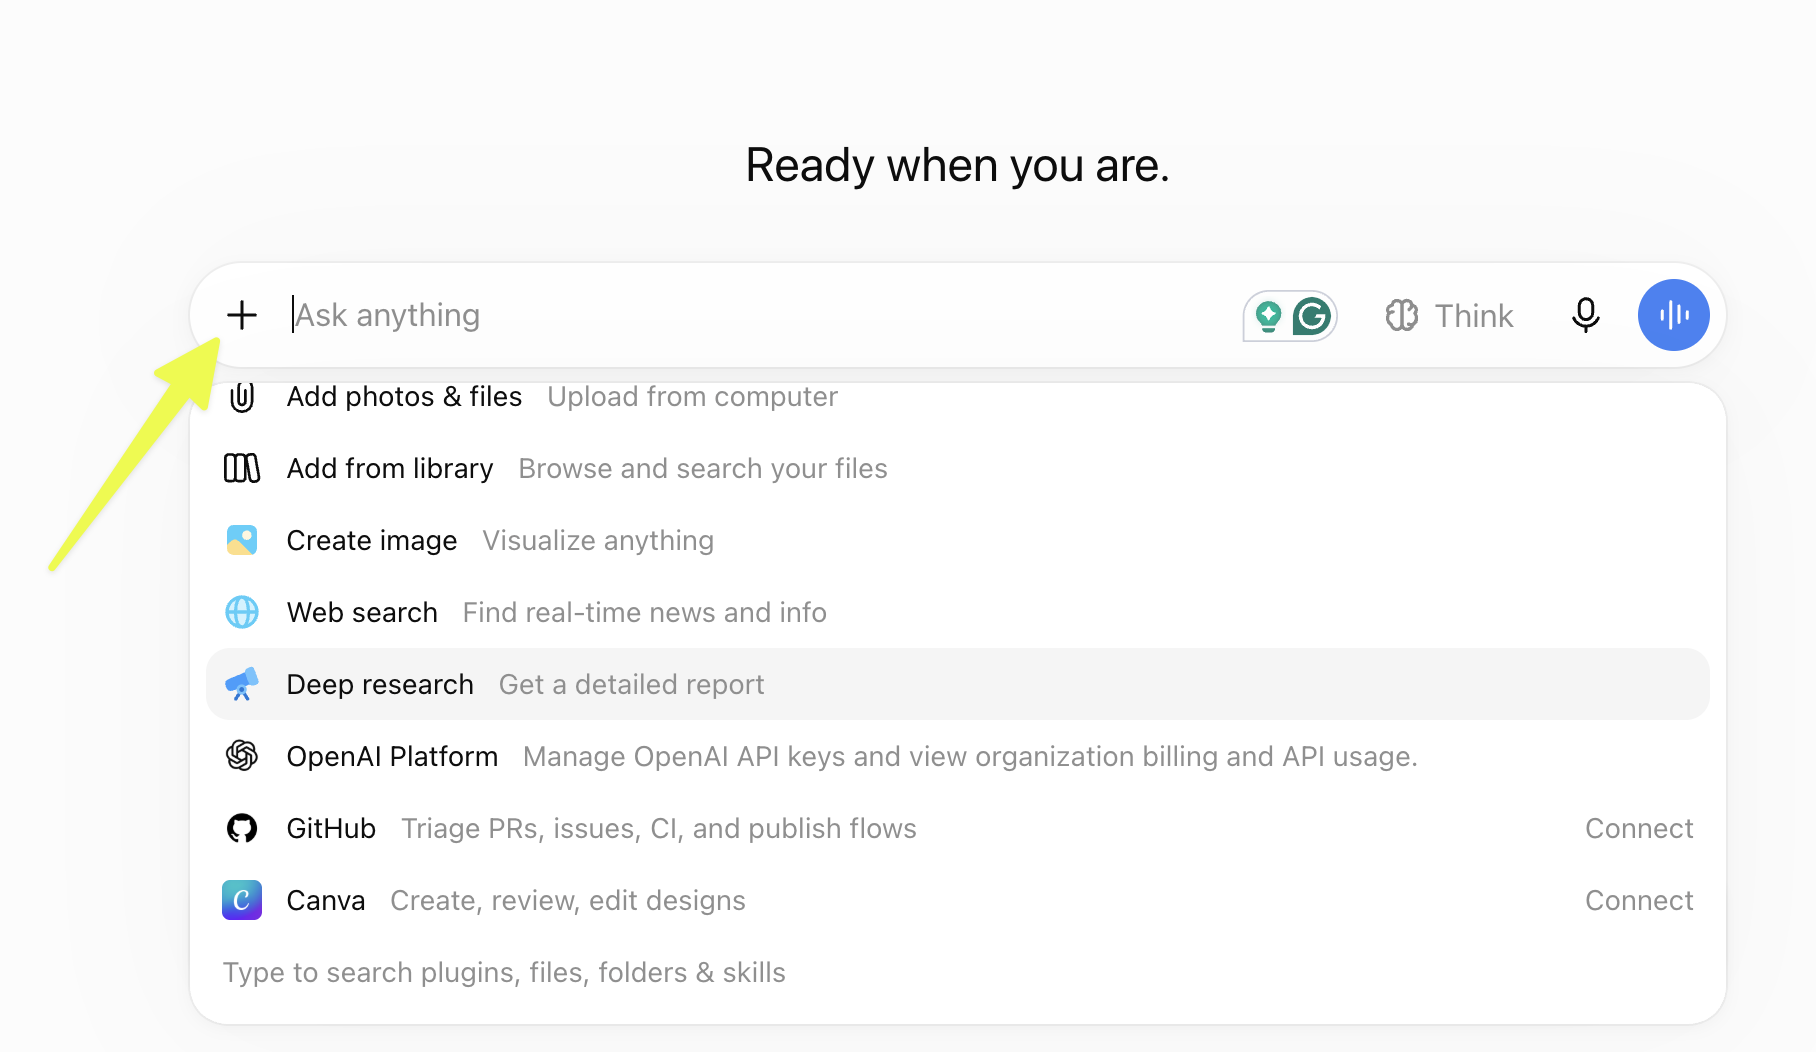
Selecting it from the tools menu applies it to the current chat rather than to your account, so you would need to repeat it in a new conversation. If Fluix does not appear in that list straight after you connect it, start a new chat and look again.
Ask in plain language — ChatGPT picks the right Fluix data for the question. You do not need report IDs or field names.
A few examples:
- “List my Fluix task reports, then show me the overdue tasks from the safety checklist report.”
- “Anything missing a signature or required field before someone flags it? Summarize my own pending work in the Site Safety report.“
- “Which sites or forms in the Site Safety report produce messy or inconsistent data?”
- “How many documents were completed last week versus the week before?”
For a fuller set grouped by what you are trying to do, see What to ask your AI assistant about your Fluix data.
What happens behind the scenes
To answer those questions, ChatGPT has three read-only capabilities:
| Permission | What it does |
| Task reports | List the task reports you can access; inspect a report’s columns; read its rows |
Large results are read page by page, so narrowing the time range or naming the report usually gives a faster, tidier answer.
How long the connection lasts
The connection renews itself as long as you keep using it. After 30 days without use, you will be asked to sign in again.
To disconnect, remove the Fluix plugin in ChatGPT (Plugins → Fluix → remove), or ask your Fluix admin to revoke the connection. Either way, any live session stops working within 15 minutes.
Privacy and Data Handling
- Credentials are entered only on the Fluix sign-in page in your own browser — never in ChatGPT.
- The connection uses OAuth 2.1. You never create, copy, or store a token.
- The Fluix MCP server keeps no copy of your data. It reads from the Fluix API on demand for each request.
Full details are in the Fluix Privacy Notice.
Troubleshooting
| Symptom | What it means and how to fix it |
| Error right after you press Allow | The MCP Server feature is almost certainly not enabled for your company. Contact your Fluix admin or support@fluix.io. |
| Developer mode is switched on, but you cannot add the plugin | Adding a custom plugin is not available on some plans, even though the toggle itself can be switched on there. Upgrade to a paid ChatGPT plan (Business, Enterprise, or Edu). On Business, only admins and owners can add custom apps. On Enterprise and Edu, you can ask the admin to grant access to you. |
| ChatGPT can’t reach the server when you click Create | Confirm the URL is exactly https://mcp.fluix.io/mcp, Server URL is selected rather than Tunnel, and Authentication is OAuth. |
| ChatGPT ignores Fluix in a chat | Enable the Fluix plugin for that conversation, or name it: “Using Fluix, list my task reports.” |
| Data from the wrong company | Disconnect, reconnect, and select the right company at sign-in. |
| Asked to sign in again mid-conversation | The session expired or was revoked — reconnect from the Fluix plugin. |
| A request fails with a permissions error | The connection was approved with reduced permissions. Reconnect and press Allow on the full list. |
| No reports visible | Your Fluix user may not have access to any — check in Fluix directly, or confirm the company you selected. |
In case you need our assistance, feel free to contact us at support@fluix.io. We are always here to help!