


Fluix is a web and mobile-based cloud platform that enables teams to digitize document management and automate workflows across various industries.
With Fluix, you can:
- Automate collaboration between technicians undergoing training and their reviewers.
- Accelerate qualification processes.
- Collect and analyze data related to training outcomes.
Fluix supports working with PDFs, Web Forms, and Dynamic Forms. You can use existing PDFs or create custom Web or Dynamic Forms using the Form Builder in the Fluix Admin Portal.
This guide will walk you through creating a Taskstream that facilitates collaboration between technicians during their training and reviewers who approve their certifications.
Example Use Case
- Technician’s Input: The technician starts by completing questionnaires and uploading their existing qualification certificates.
- Reviewer’s Validation: Reviewers assess the completed questionnaires and certificates to determine whether the technician passes the certification.
- Completion: Finalized materials can be emailed to relevant recipients (e.g., the technician, their manager) and archived in Fluix File Storage, third-party cloud storage, or the company’s CRM.
Step 1 – Determine the participants of your process
The first thing to do in Fluix setup is to add users and organize them into groups for further participation in Taskstream.
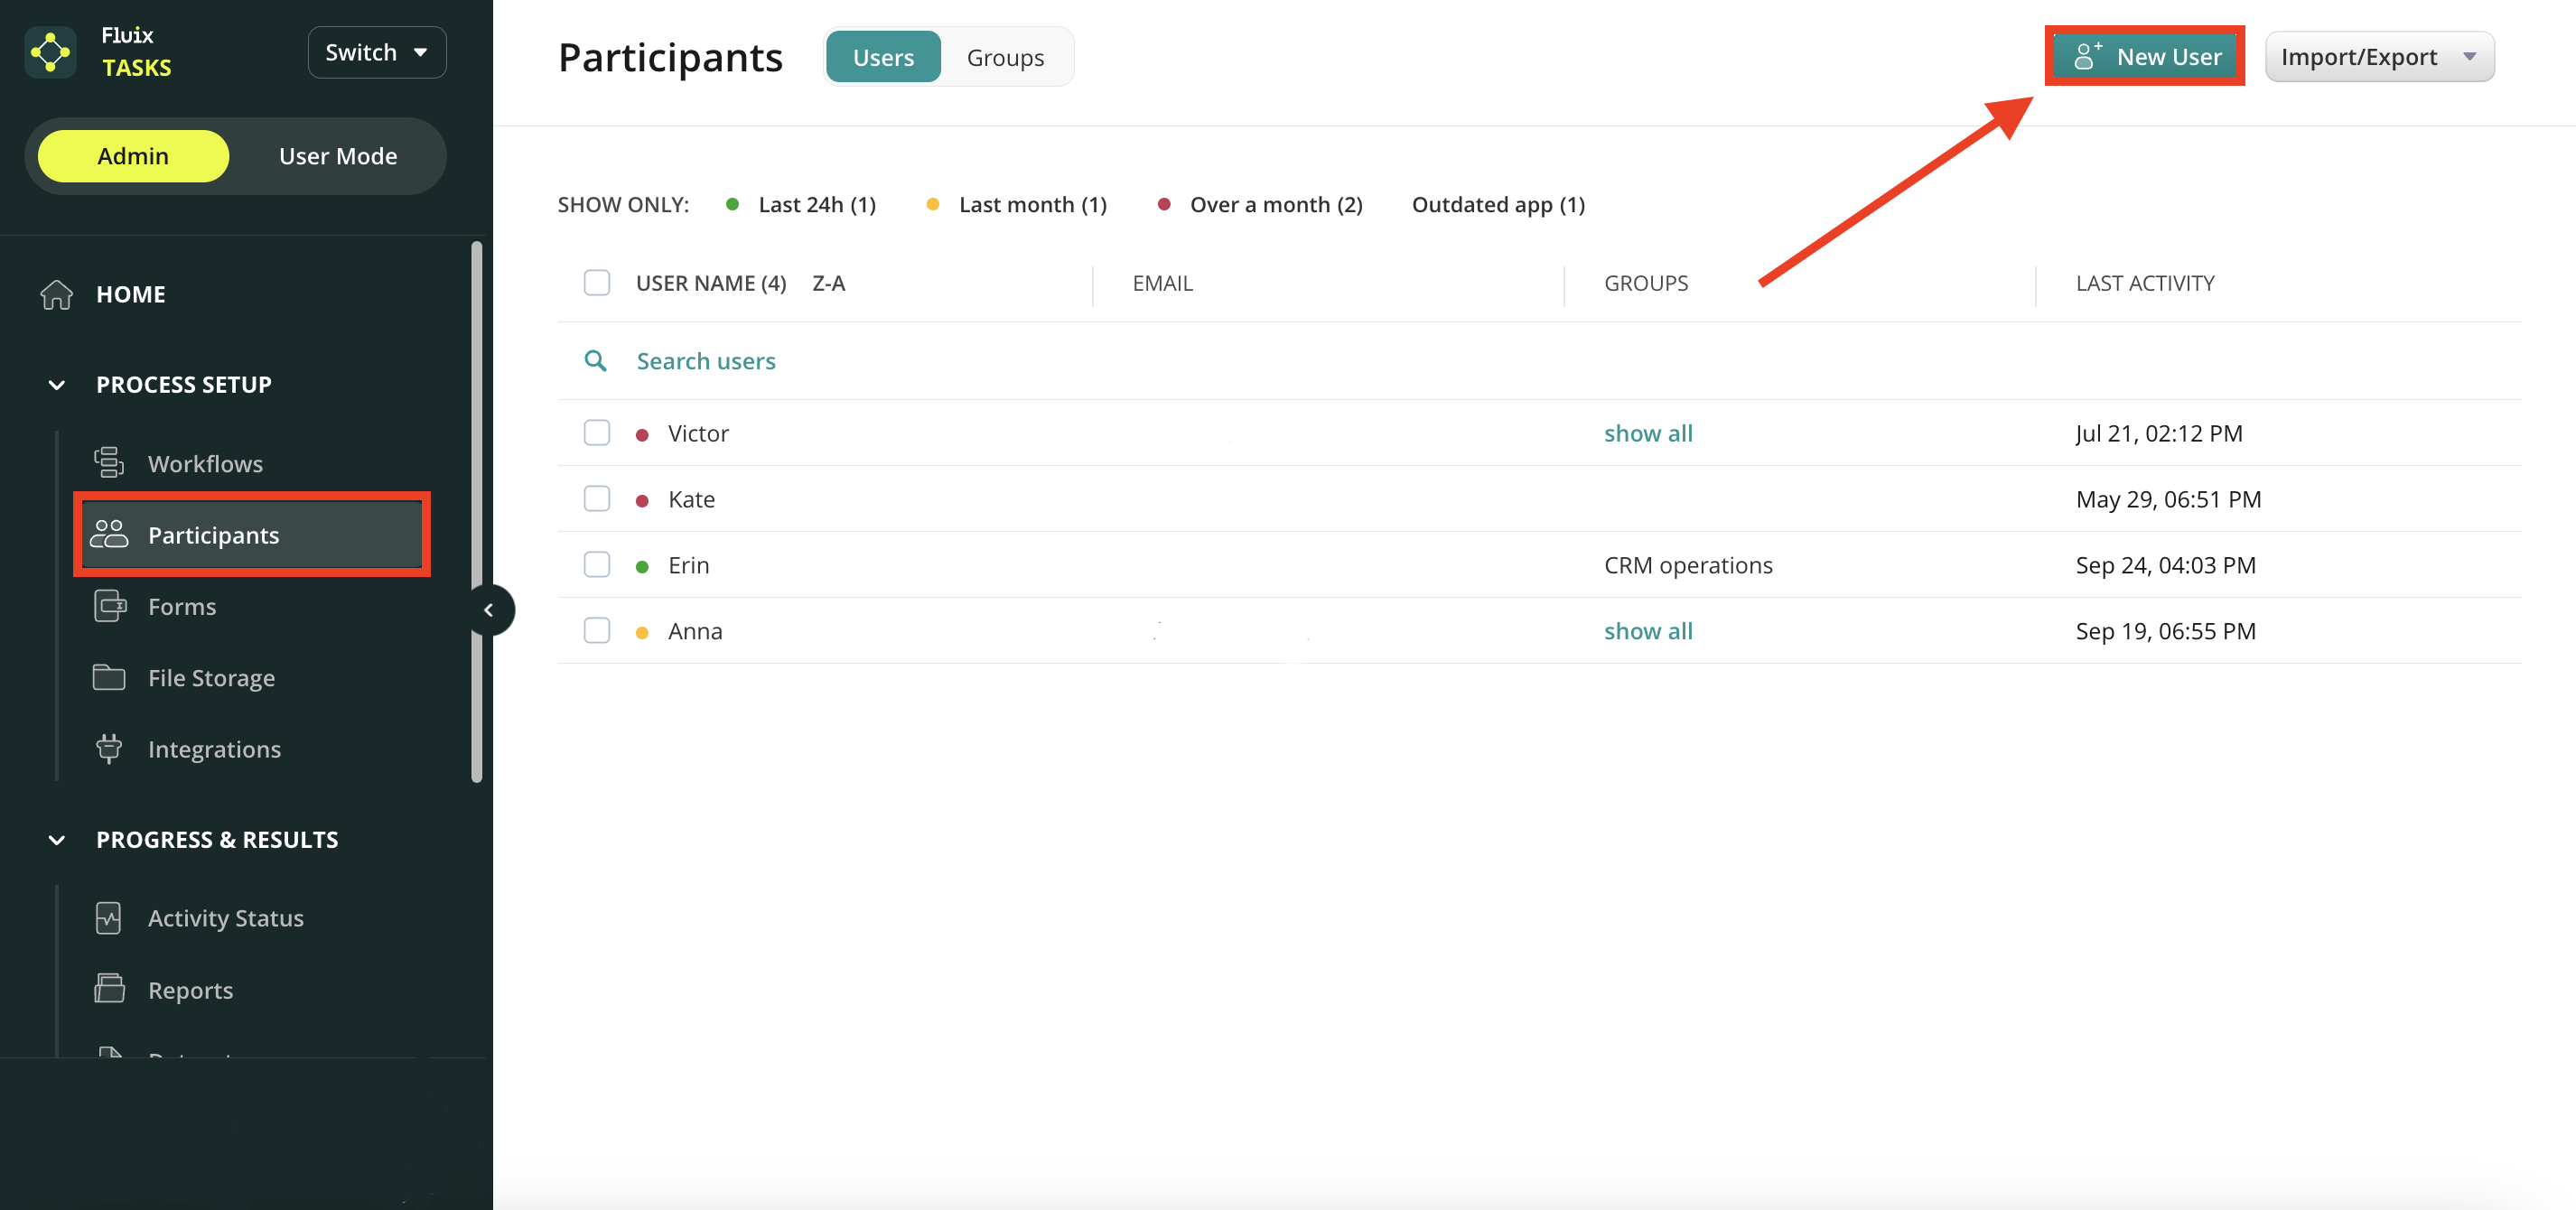
- Navigate to the Participants section in the Admin Portal.
- Open the Users tab and click New User.
- Enter the user’s name and email, then click Create. The user will receive an email invitation to set up their password.
- Go to the Groups tab and click New Group. Add a group name and assign users to the group.
Please note: by adding a user to the Groups in your Fluix account, you give the user access to all the documents that will be configured for this Group. To learn more about how to add users to groups, please follow this link.
Step 2 – Create the repetitive process in Fluix
Decide how to start the process:
- By user: The process begins when a user initiates it in Fluix.
- By third-party trigger: A third-party tool can trigger the process in Fluix. To learn more about how to configure the start of the process in Fluix from the Third-party platform, check Scenario 2 in the Forms Prefill in Fluix article.
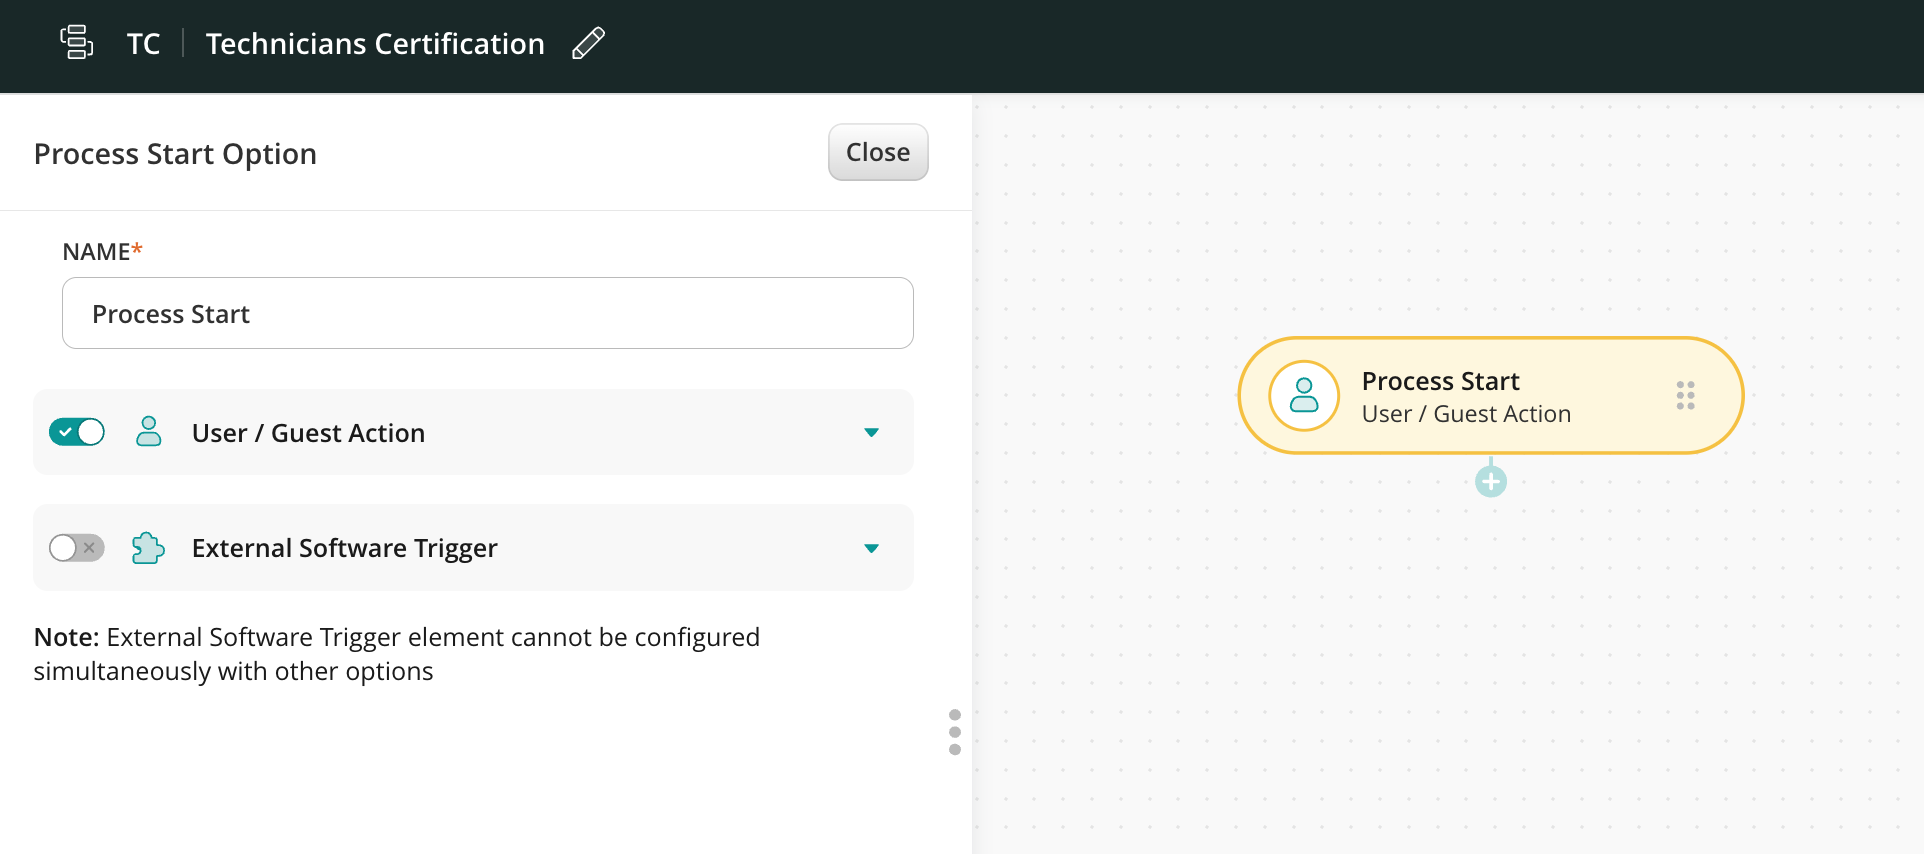
- Drag and drop a Process Start event to the working area and select User / Guest Action.
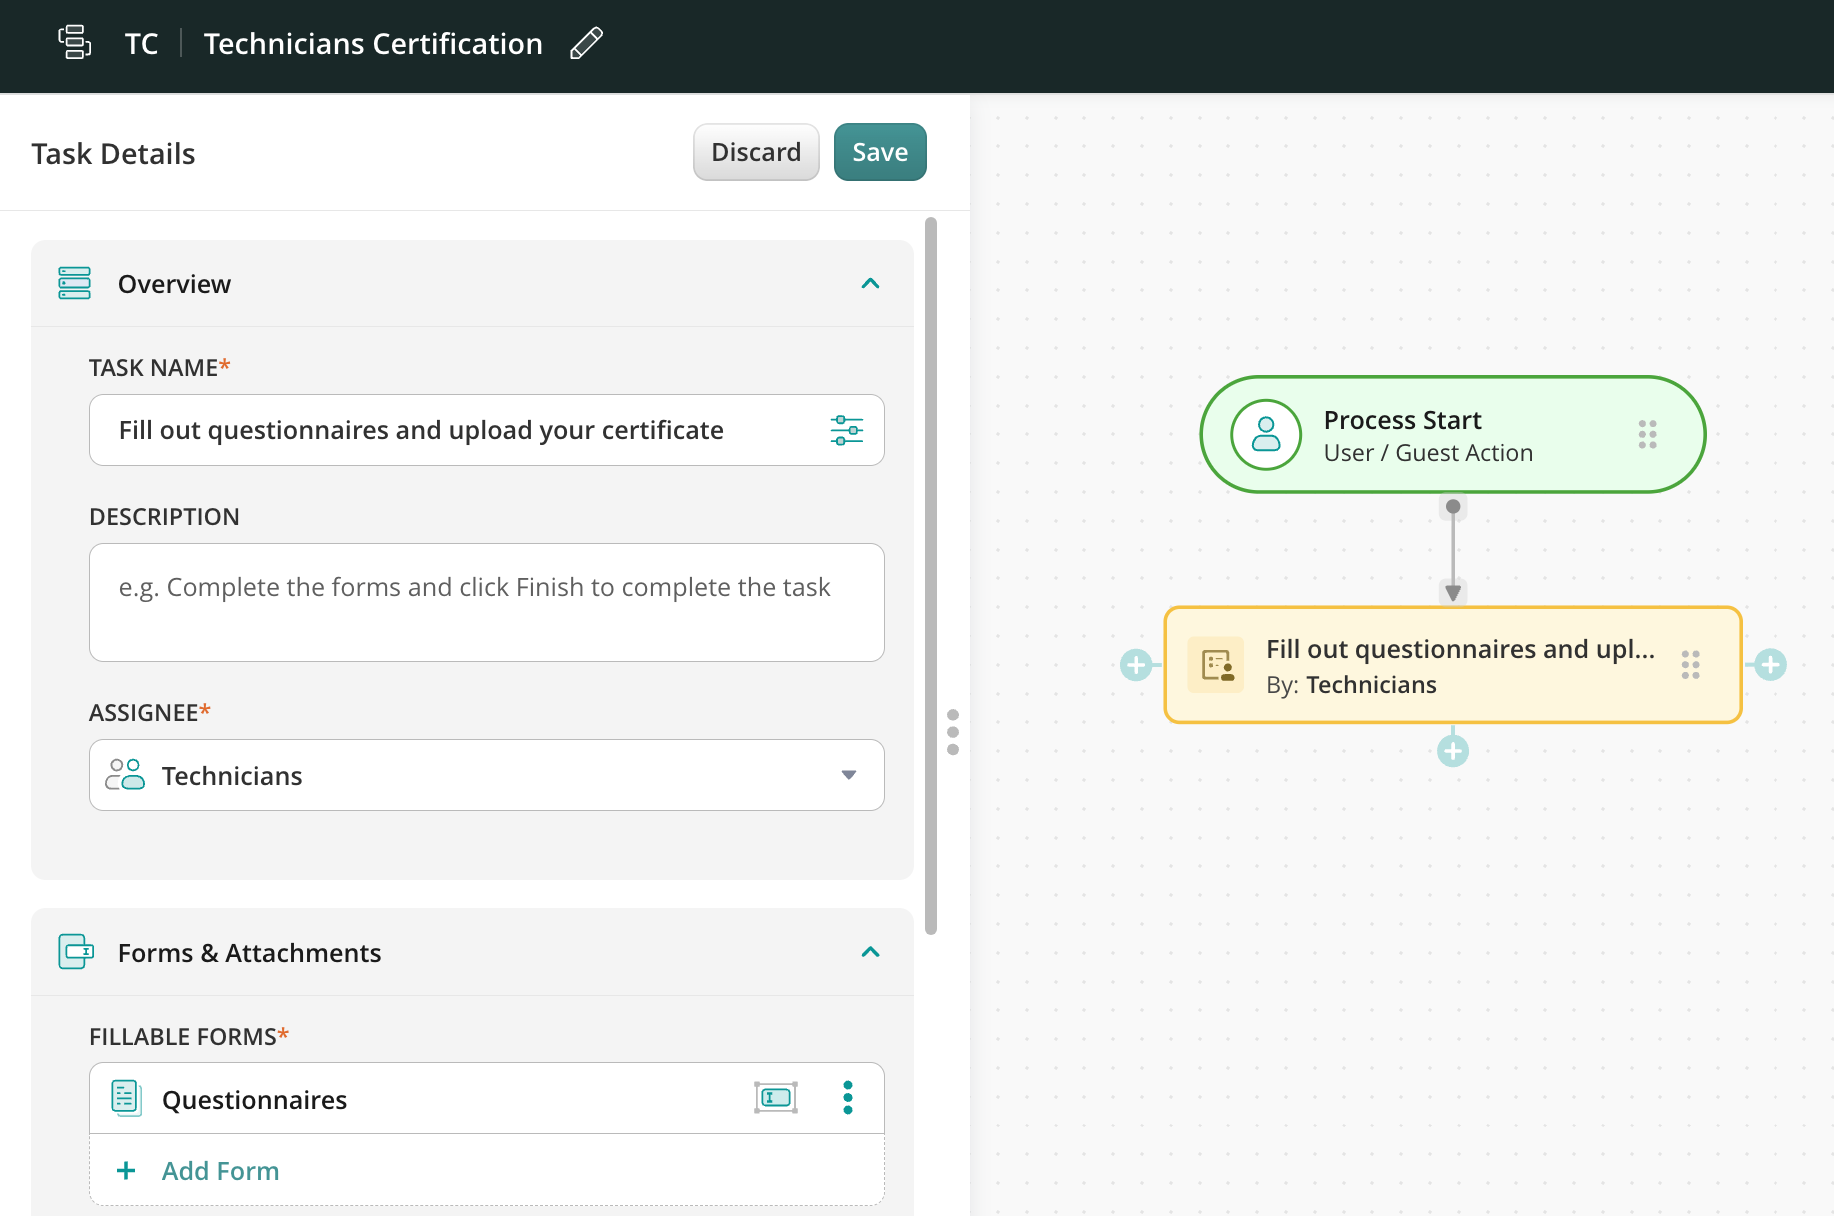
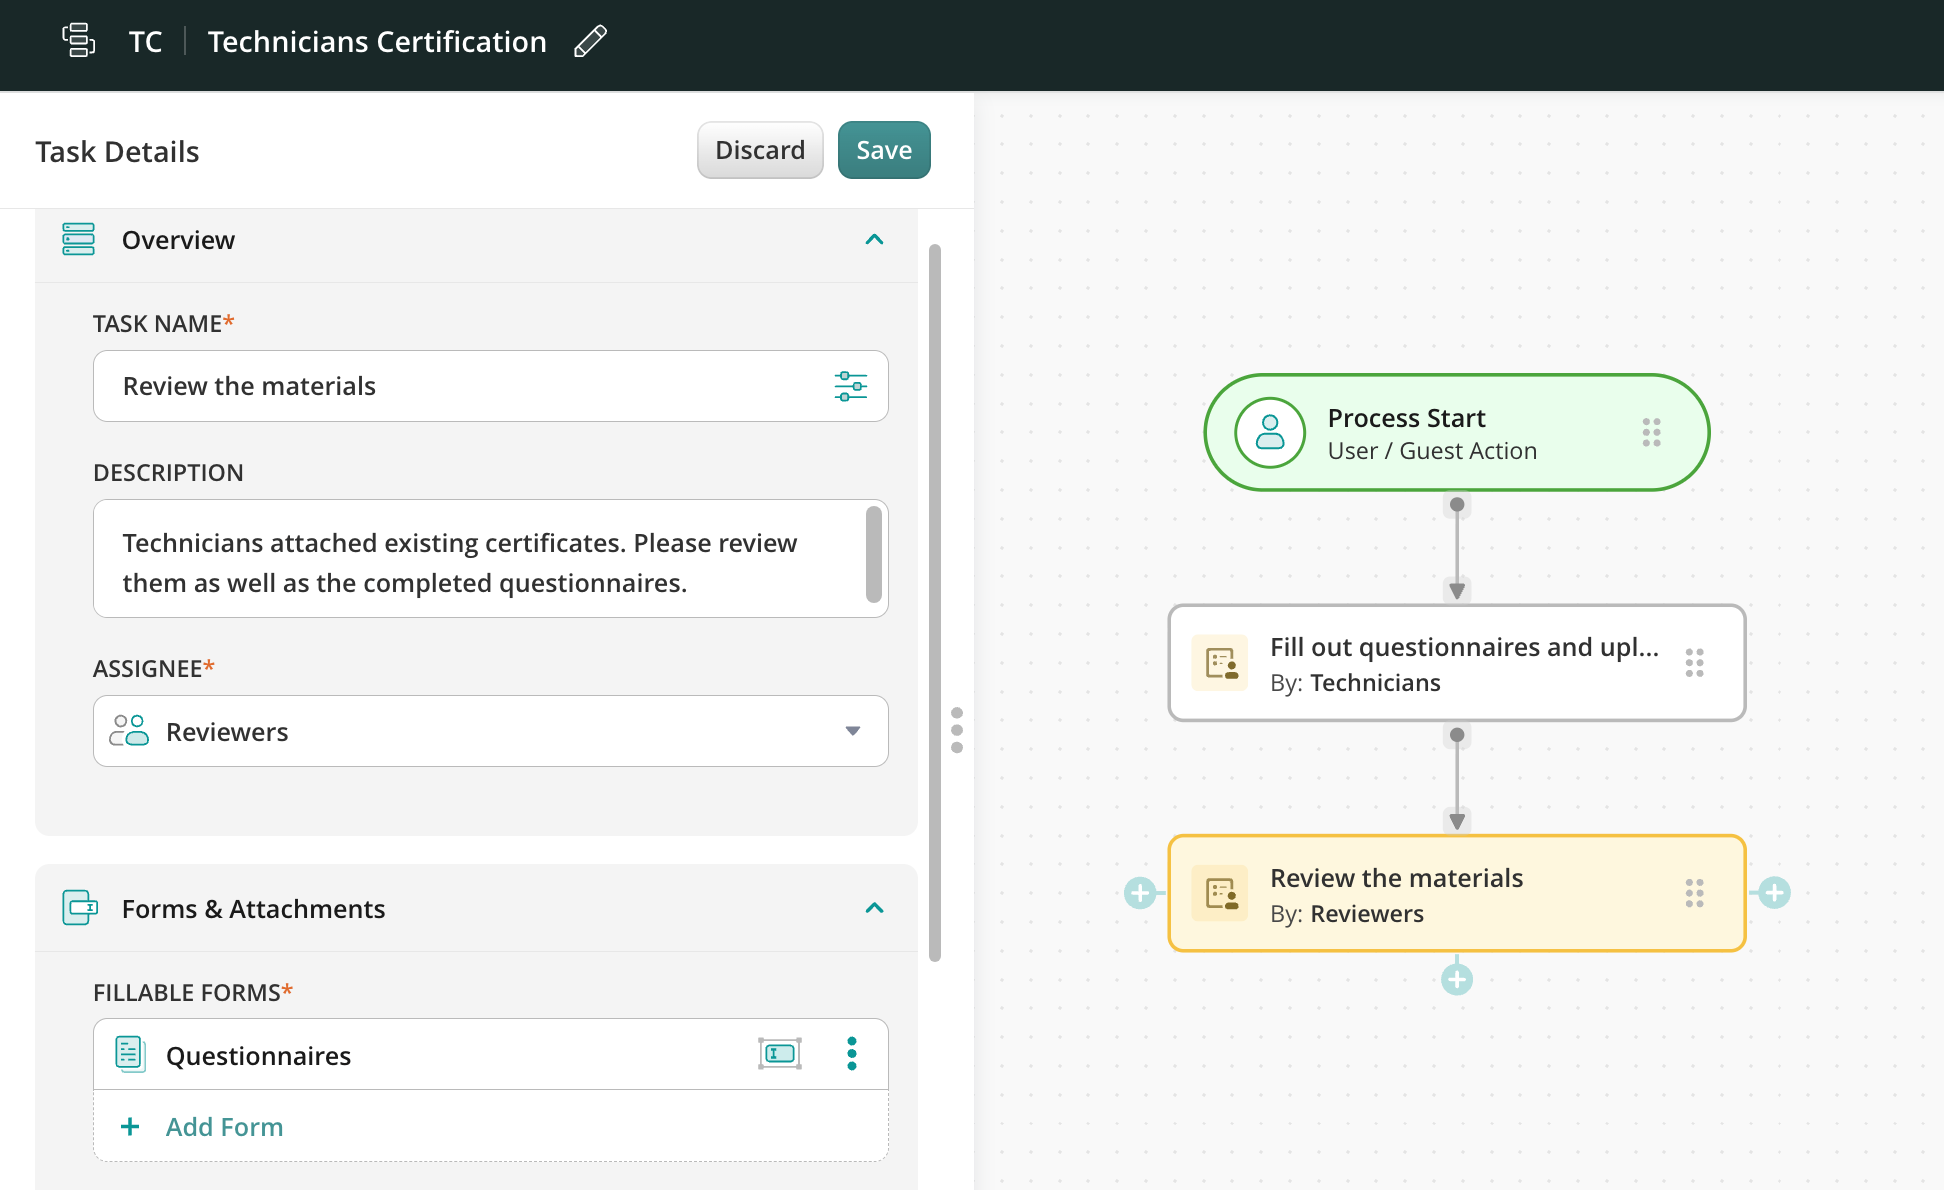
- Add a User Task, including its name and what you would like Technicians to do within this task.
Note: This description will later be available for the users working on this task in the Fluix Tasks app or Web User app.
- In the Assignee who will perform the task, select the Technicians group from the list or click on the Create New Group button and add this group from scratch.
- In the Forms & Attachments section, add the questionnaires and other documents you want Technicians to complete during their certification. You may upload them from your computer as PDFs, select the necessary form from the Forms section, or even create new questionnaires from the Taskstream builder.
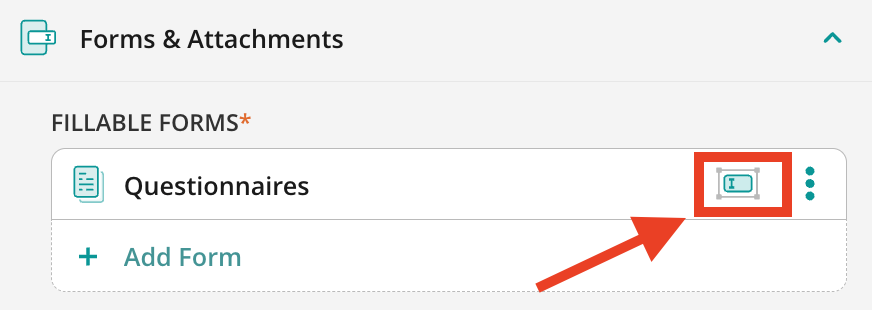
Note: Use the built-in Assignment configurator to mark specific fields in the attached form as required, read-only, or editable for participants of this flow.
While technicians can work with the files configured for them on the Taskstream level, they may also attach additional documents (certificates in this case) using the Files to review functionality in the Fluix Tasks app.
- Drag and drop the next User task and configure it for the Reviewers group. In this task, the reviewers can quickly review the files that technicians filled out and attached in the previous task.
Step 3 – Configure the Approval process and submit actions
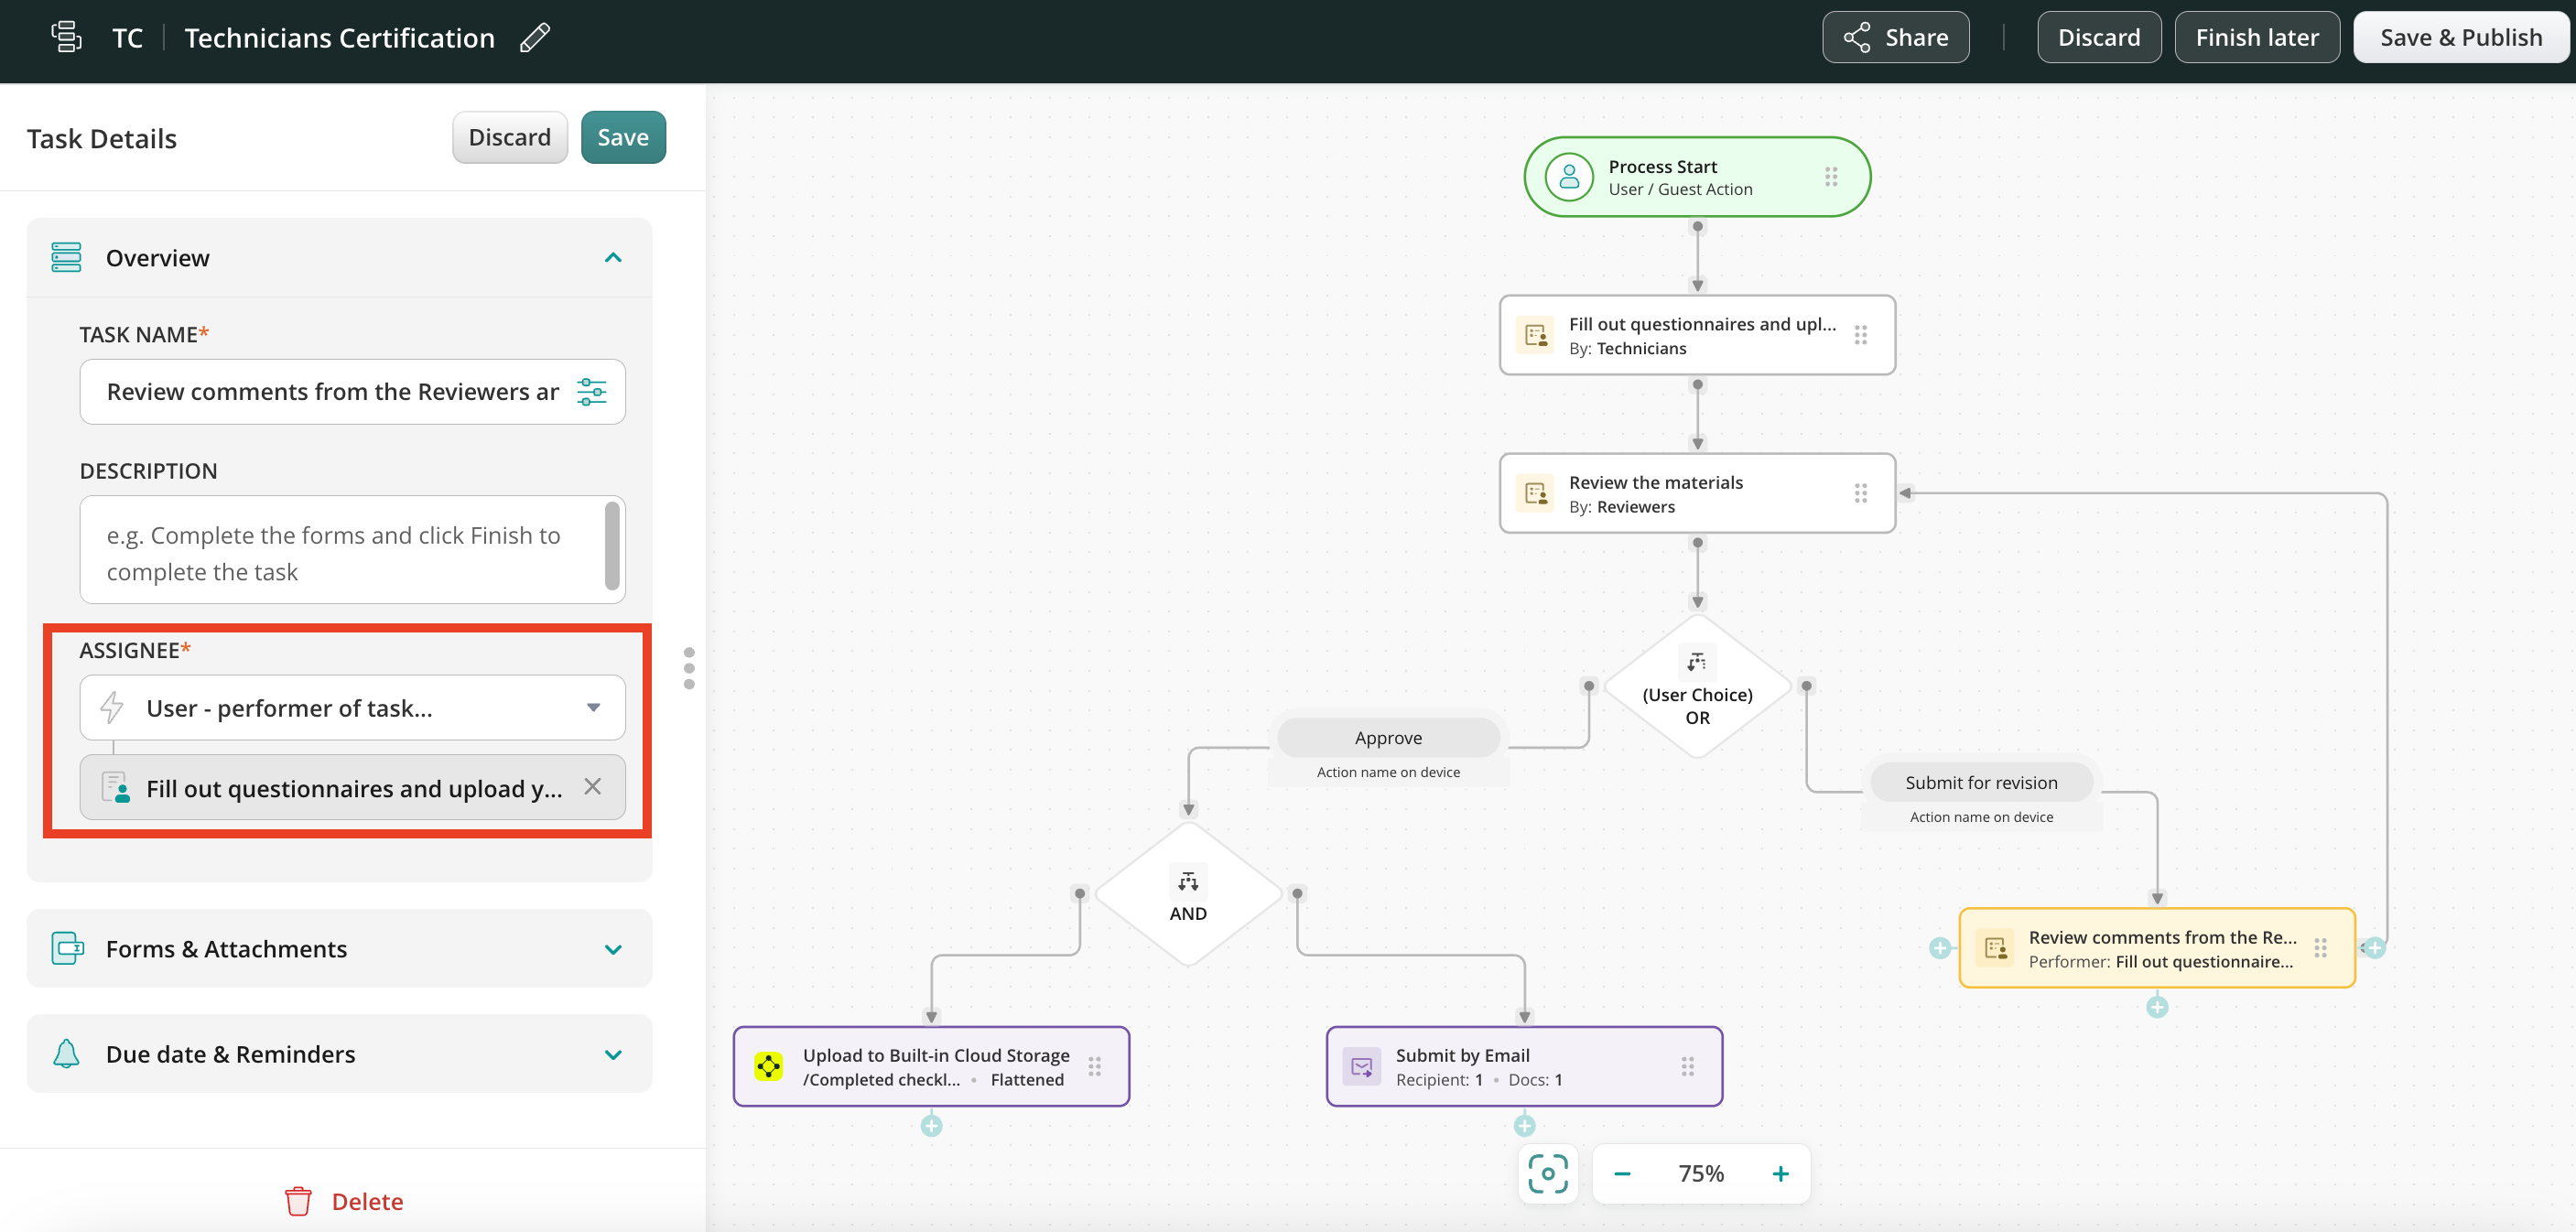
Drag and drop OR (User Choice) branch in the Taskstream chart to handle approvals and corrections, for example:
- Approve action:—The Reviewer confirms the questionnaire has been passed.
Submission to Cloud storage
Use the Upload to Storage action to let the reviewer archive the documents and the provided earlier certificates in Fluix File Storage or third-party Cloud Storage.
Email submission
Drag and drop the Send by email action and configure it using the Dynamic values functionality to customize email content and/or recipients (e.g., the technicians, their managers, and whoever else needs to be informed about this) to auto-populate data from form fields. - Submit for revision:— The Reviewer gives the comments and submits the task back to technicians for additional consideration and edits.
Add one more user task for the revision. In this task, the user from the Technicians will correct the checklist if the Reviewer submits it back for revisions. Connect it with the previous task Review the materials to allow the technician to submit the form for edits again.
Use the User – Performer of the Task option to ensure corrections are sent directly to the original technician rather than the entire group.
Once you finish setting up your chart, click Save & Publish to activate the Taskstream.
Step 5: Configure Data Extraction
Extract and analyze data collected within this Taskstream and other forms:
- Open the Datasets section and click New Dataset.
- Name the dataset, select the Taskstream, tasks, and forms from which you would like the data to be extracted upon submitting the tasks.
- Click Create.
You may then export collected data from datasets to BI platforms such as Power BI, Tableau, and many others.
Step 6: Test Your Setup
- Add yourself to all participating groups for testing in the Participants section of the Admin Portal.
- Use the Fluix app on your iOS or Android device, or test in the Web User App by switching to User Mode.
- Locate the task in the Templates section, fill in the form, and complete it.
Feel free to contact us at support@fluix.io if you have any questions.