


Fluix is a web and mobile-based cloud platform that helps teams set up digital document management and workflow automation. In this integration, Fluix serves as an electronic data capture system.
HubSpot is an all-in-one marketing, sales, and customer service platform that helps businesses attract, engage, and delight customers. It includes tools for website design, email marketing, social media management, lead generation, customer relationship management (CRM), and more.
What Fluix + HubSpot integration does
By integrating Fluix with HubSpot, you’ll create a solution that will help bridge the gap between marketing, sales, and document management. It streamlines lead and contact data management, document distribution, and workflow automation, leading to more efficient processes and improved customer interactions. With this integration, you may automate your sales process by setting up the flow when the completed agreement is extracted automatically to the relevant HubSpot Deal record.
Additionally, you may also configure the setup when the flow is started in HubSpot by prefilling the form and pushing it to Fluix. In order to set up such an integration, please follow this guide.
Example of Fluix + HubSpot integration
Let’s check a real-life scenario that you may cover within your company processes.
Imagine the case when a new Deal is created in your company HubSpot account and your salesperson receives the Deal ID in order to prepare the respective sales agreement. The salesperson opens up the document in Fluix and fills out the required information along with the Deal ID to the preconfigured field in the form. Upon finishing the process in Fluix, the sales agreement is submitted to the Attachments section of the respective Deal in the HubSpot account for further processing and data storage.
Note. Integration requires a Core account in Fluix and an account in HubSpot. To try the option, you can register for a free trial account in Fluix and register the account in HubSpot.
In order to set up HubSpot integration in Fluix Taskstream, please follow the instructions below.
Step 1 – Create the repetitive process in Fluix
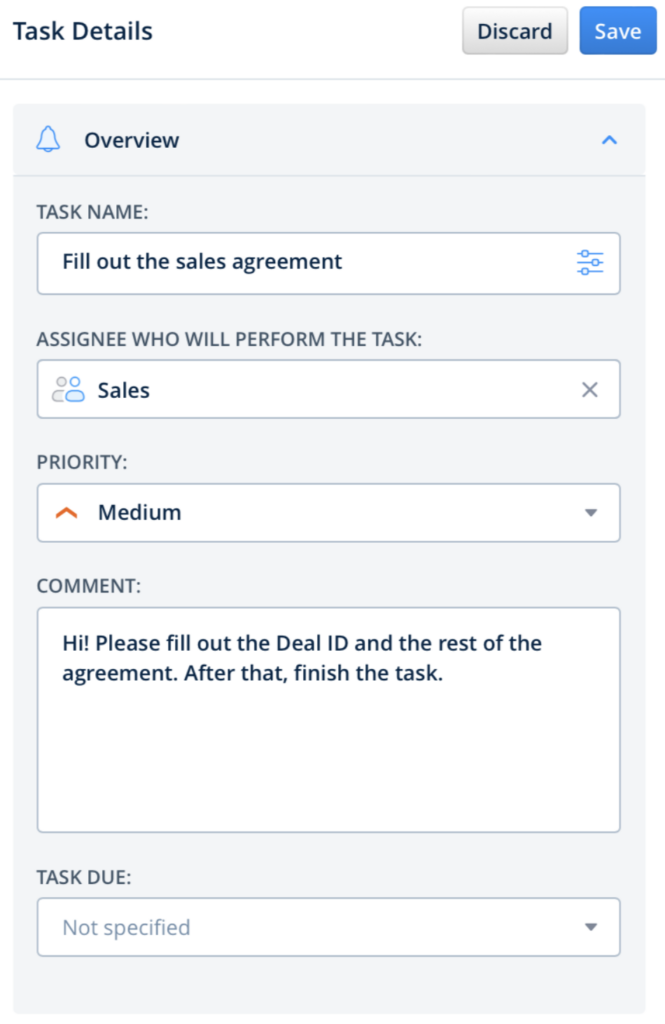
Navigate to the Fluix admin portal, Taskstreams section, to create a new Taskstream. Drag-n-drop a User task to the working area and configure it by adding fillable forms and assigning it to the team that will work on it on a regular basis. Ensure you have added yourself to the group of users to test the setup later.
Step 2 – Connect Fluix with HubSpot
Drag and drop Share to submit action to the Taskstream chart and connect it with the User task that your team will be working on.
Click on the Share to element and select HubSpot among the list of third-party tools. You’ll be redirected to the authorization page to log in to your HubSpot account.
Step 3 – Configure the data extraction
At this step, map the field in the form where the salesperson will be filling out the Deal ID using the Dynamic Values so that the form can be shared further from Fluix directly to your HubSpot account.
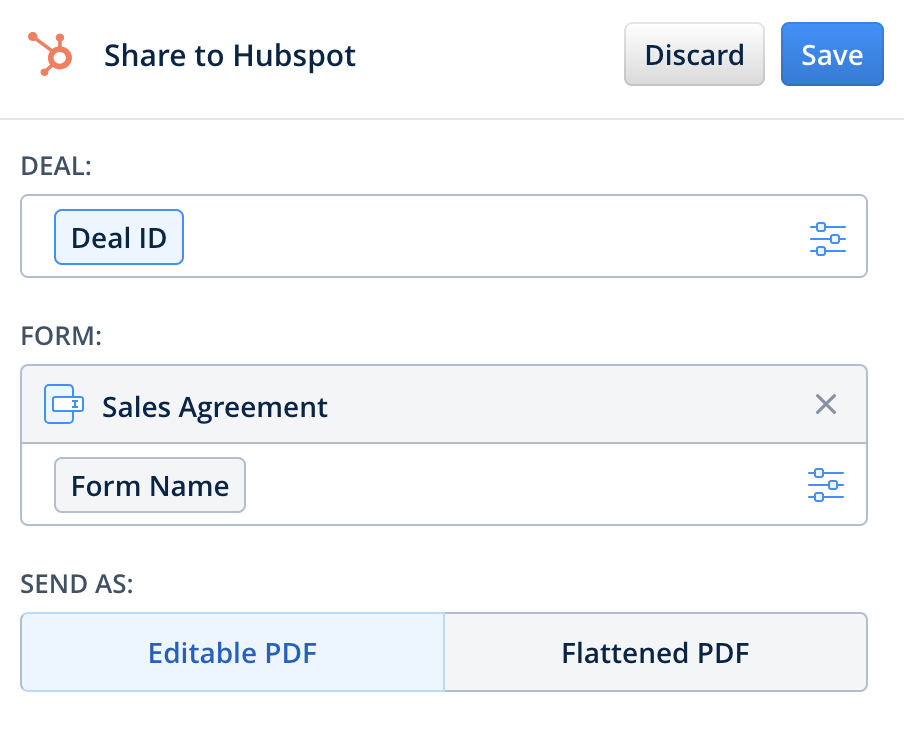
In the Form field, add a form that you’d like to upload to the Deals tab in HubSpot by clicking the Add a form button. Consider adding the Dynamic Values to the name of the form as well to make it easier to distinguish them. Confirm your actions by clicking Save in the upper right corner of the sidebar.
Step 4 – Save and test the setup
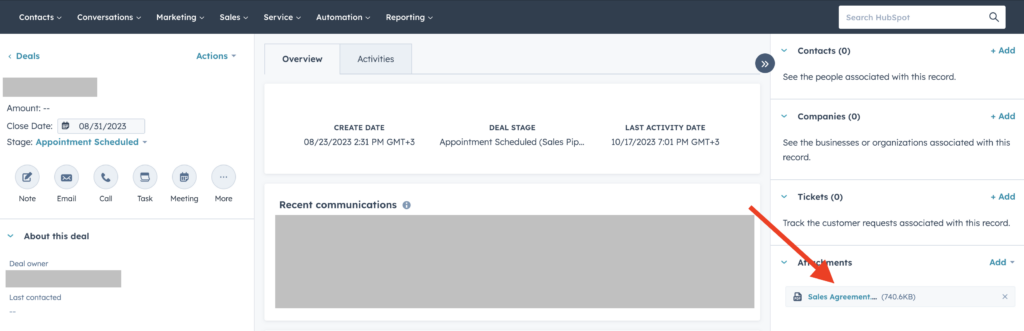
Once you fill out all the fields, click Save&Publish to activate the Taskstream. Open the user app on the mobile device, or click User App in the right corner of the admin portal. Navigate to the task that you created, fill in the form, and finish it. Once the task is submitted in Fluix, entered data automatically appears in your company’s HubSpot database, under the Attachments section of the respective deal that the salesperson filled out in the form.
In case you have any questions or difficulties with setup, contact our support at support@fluix.io and we’ll be happy to help you.