


Fluix is a web and mobile-based cloud platform that helps teams set up digital document management and workflow automation. In this integration, Fluix serves as an electronic data capture system.
Pipedrive is a web-based customer relationship management (CRM) platform that helps businesses to manage their sales activities and monitor contacts, leads, and deals and automate the sales process.
What Fluix + Pipedrive integration does
Fluix and Pipedrive integration is the perfect solution to seamlessly automate your business flow. With Fluix, your sales teams can easily fill out and sign documents such as quotes, contracts, and proposals, and all the data along with the documents is automatically pushed to Pipedrive for smooth data management. This eliminates the need for manual document handling and minimizes the chance of human error.
This integration simplifies the sales documentation process, ensuring that everyone on your team has access to the latest information, improving communication and collaboration across teams. Save time and effort, allowing your sales teams to focus on what they do best – selling and closing deals.
Note. Integration requires a Core account in Fluix and an account in Pipedrive. To try the option, you can register for a free trial account in both tools.
In order to set up Pipedrive integration in your Taskstream, please follow the instruction below.
Step 1 – Create the repetitive process in Fluix
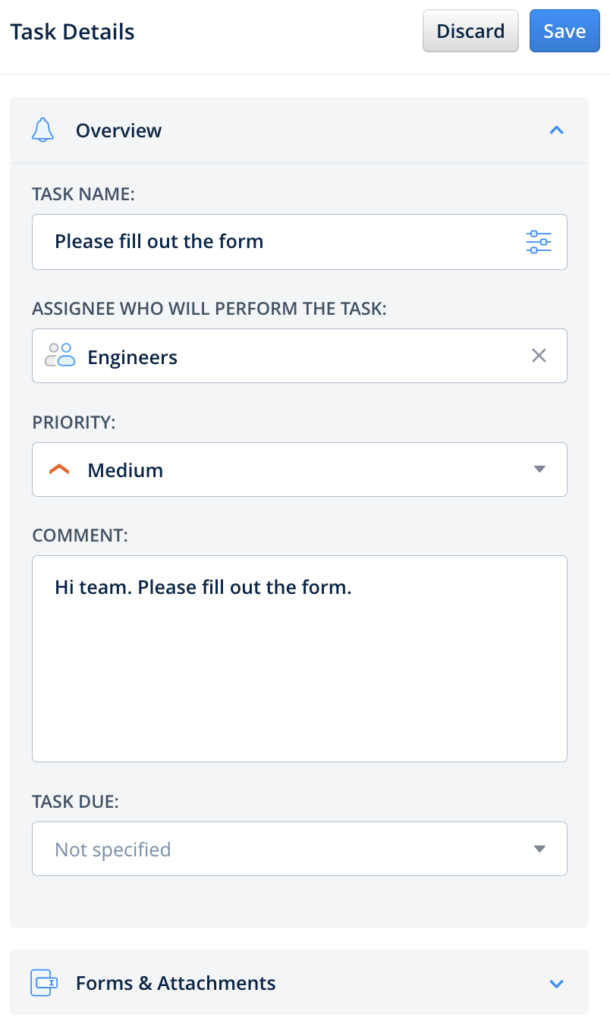
Navigate to the Fluix admin portal, Taskstreams section, to create a new taskstream. Drag-n-drop a User task to the working area and configure it by adding fillable forms and assigning it to the team that will work on it on a regular basis. Make sure that you have added yourself to the group of users in order to test the setup later.
Step 2 – Connecting Fluix with Pipedrive
Drag and drop Share to submit action to the Taskstream chart and connect it with the User task that your team will be working on.
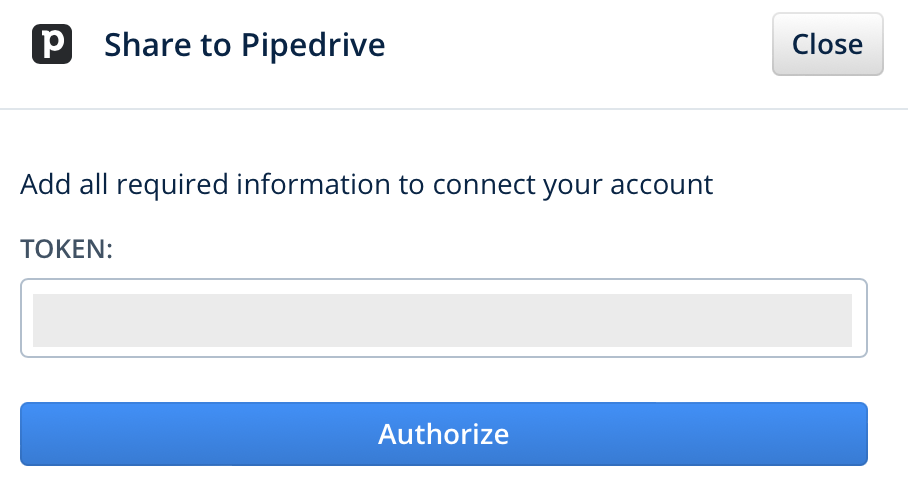
Click on the Share to element and select Pipedrive among the list of third-party tools. To authorize your Pipedrive account in Fluix, you will need to enter the API token from Pipedrive.
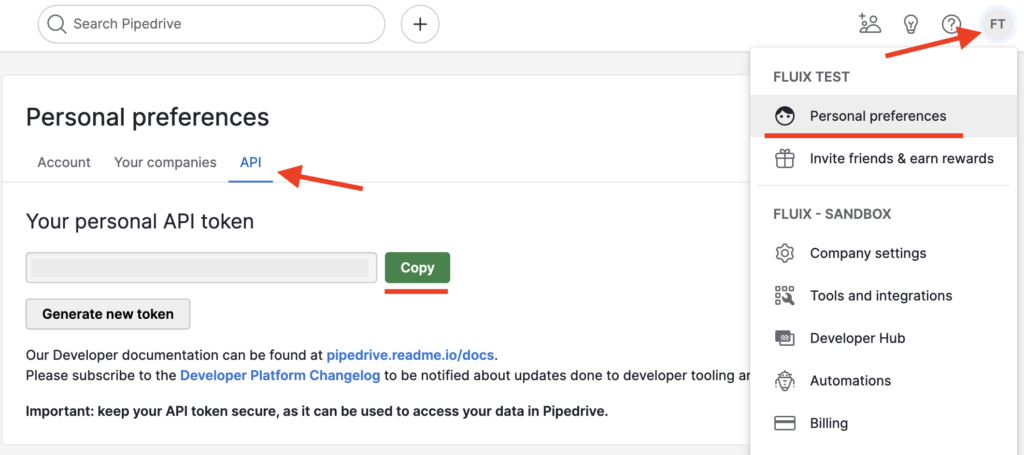
To get an API token, log into your Pipedrive account. Click on your account name in the top right corner, go to the Personal Preferences section, and open the API tab. Copy your personal API token that is going to be used to authenticate your Pipedrive account in Fluix.
Go back to Fluix, paste it to the token field in the Taskstream, and click Authorize.
Step 3 – Configure the data extraction
At this step, you will need to map the fields data from which will be collected and shared from Fluix directly to your Pipedrive account.
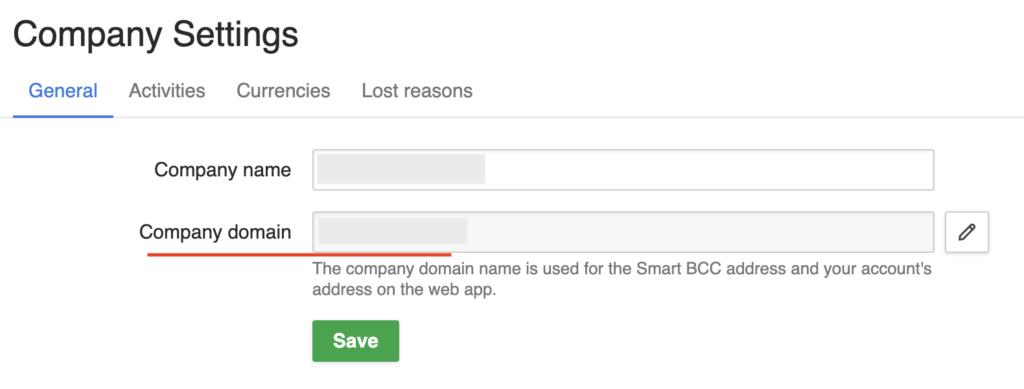
Let’s start by filling out the Company Domain field which stands for your Pipedrive account name.
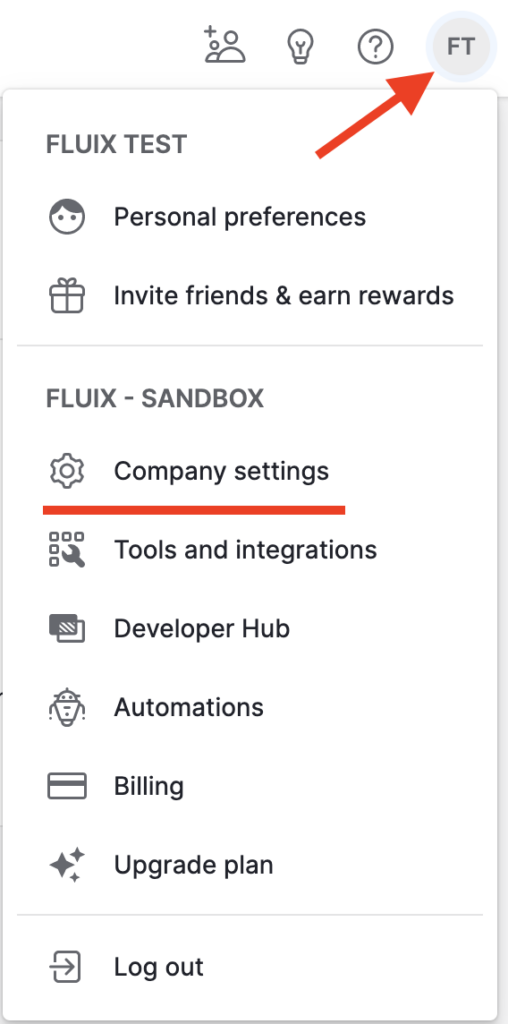
This information can be found by clicking on your account name in Pipedrive in the upper right corner and navigating to the Company Settings.
In the General tab, you will see the Company domain that is assigned to your company’s account, ensure to copy and paste this information without any spaces since the incorrect company domain may influence on extraction of the respective data during the submission of the form in the Taskstream.
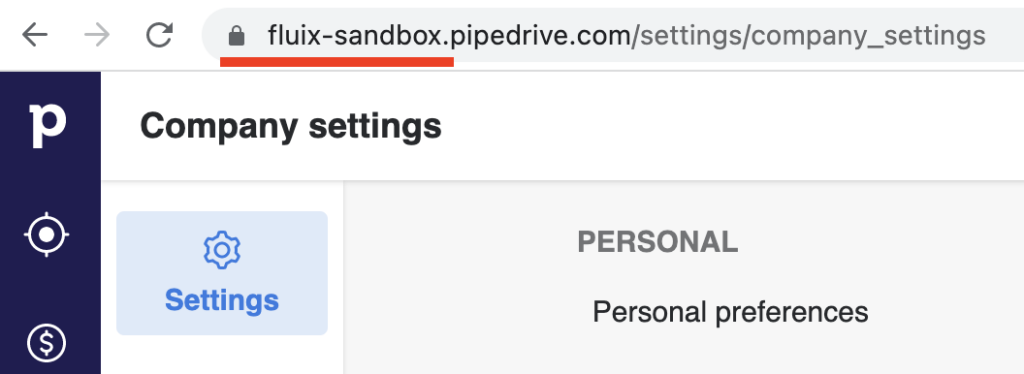
Alternatively, the company’s domain can be copied from the address bar when the Pipedrive tab is opened:
Person Name, Email, Phone, and Title can be configured using the dynamic values, by selecting the values from the suggested list.
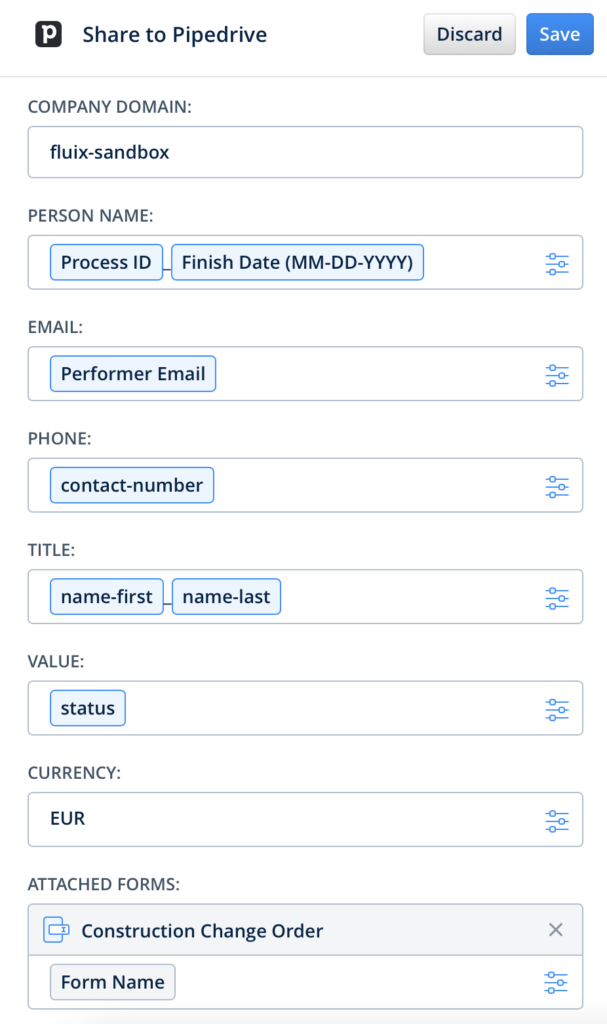
In the Attached Form field, add a form that you’d like to upload to the Deals tab in Pipedrive by clicking Add a form button. Consider adding the Dynamic Values to the name of the form to make it easier to distinguish them.
Confirm your actions by clicking Save in the upper right corner of the sidebar.
Step 4 – Save and test the setup
Once you fill out all the fields, click Save&Publish to activate the Taskstream. Open the user app on the mobile device, or click User App in the right corner of the admin portal. Navigate the task that you created, fill in the form, and finish it.
Once the task is submitted in Fluix, entered data automatically appears in your company’s Pipedrive database.
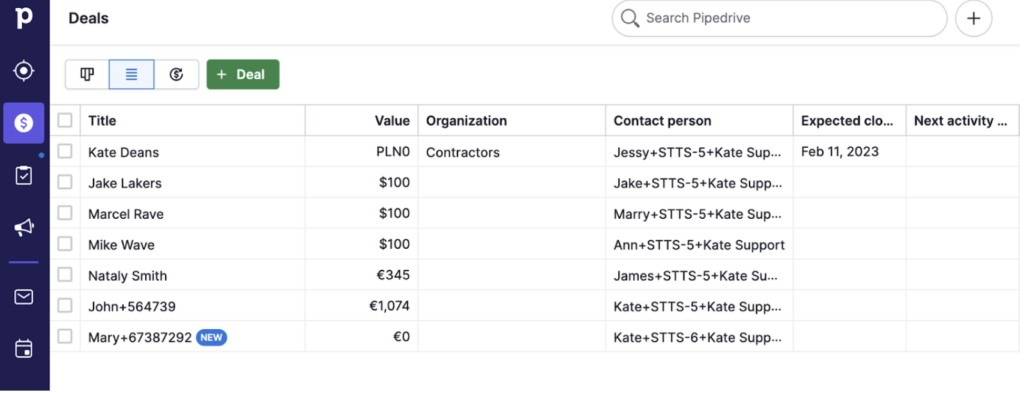
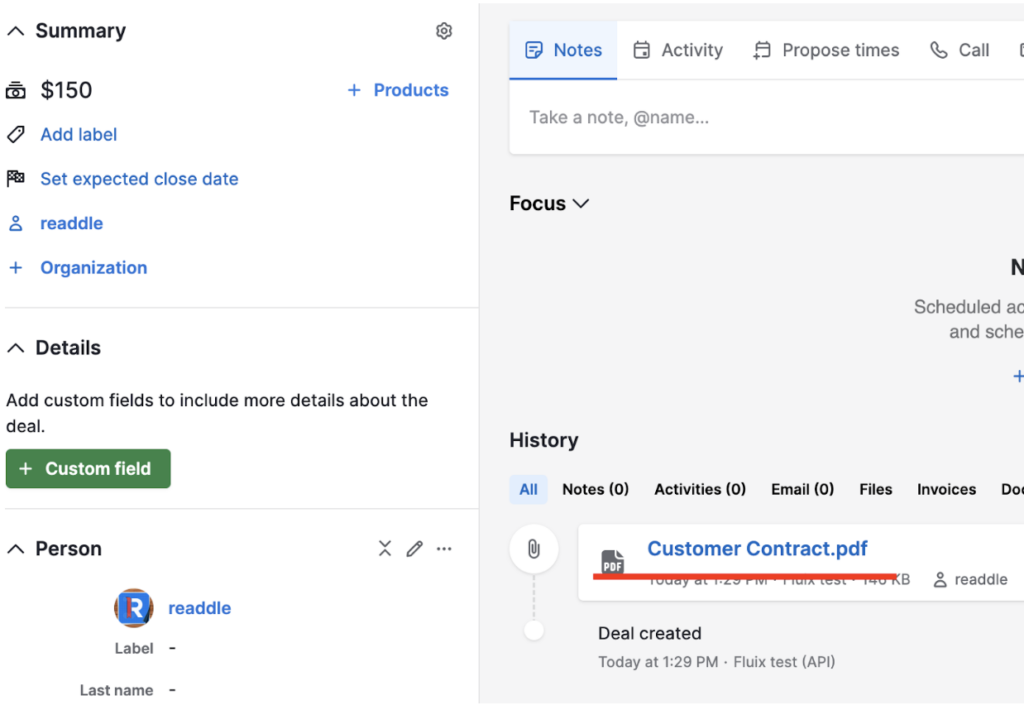
The submitted form will be attached to each deal that is recorded in the table. In order to check the form, click on the respective cell with the Deal name to open it. The form can be located in the Files section.
In case you have any questions or difficulties with setup, contact our support at support@fluix.io and we’ll be happy to help you.