


Fluix is a web and mobile-based cloud platform that helps teams set up digital document management and workflow automation. In this integration, Fluix serves as an electronic data capture system.
improveit 360 – is a business management software platform that is based on Salesforce specifically designed for home improvement and remodeling companies. It is meant to streamline various aspects of the business, helping companies manage their operations more efficiently.
What Fluix + improveit 360 integration does
The integration between Fluix and improveit 360 enables the smooth exchange of information, ensuring a seamless synchronization of data across both platforms. It promotes data consistency and accuracy, eliminating the necessity for manual data entry and minimizing the potential for errors. Through this integration, businesses can automate their remodeling and renovating processes and enhance the efficiency of document workflows. Sales representatives can effortlessly upload finalized documents directly to the Notes&Attachments section of the respective project, streamlining operations and facilitating a more persistent workflow.
Note. Integration requires a Core account in Fluix and an account in improveit 360.To try the option, you can register for a free trial account in Fluix and register the account in improveit 360.
To set up improveit 360 integration in the Fluix taskstream, please follow the instructions below.
Step 1 – Create the repetitive process in Fluix
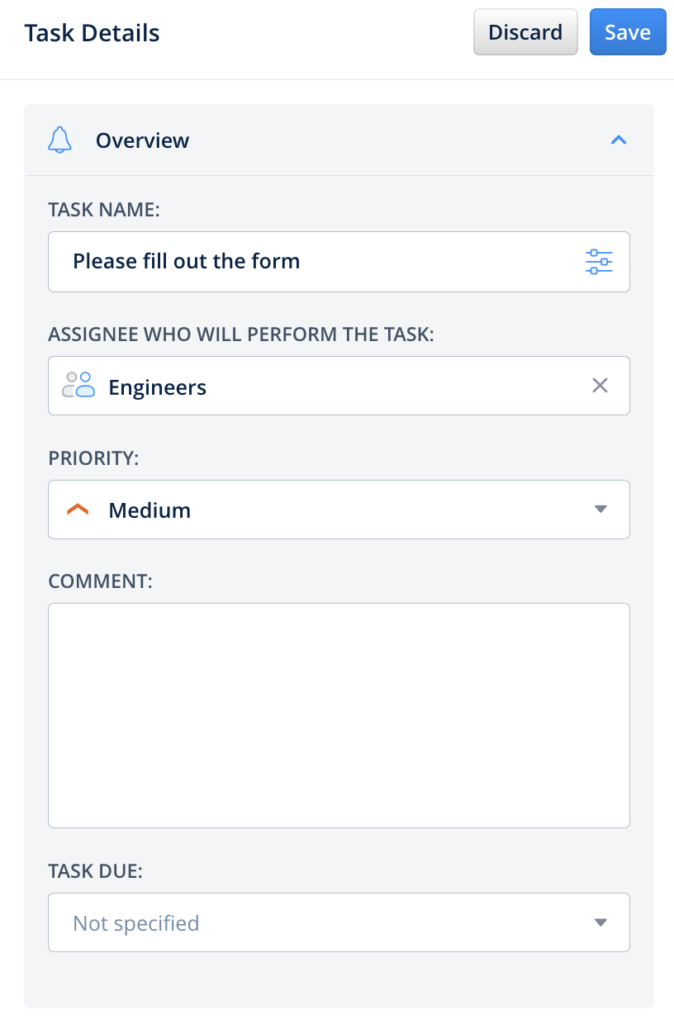
Navigate to the Fluix admin portal, Taskstreams section, to create a new taskstream. Drag-n-drop a User task to the working area and configure it by adding fillable forms and assigning it to the team that will work on it regularly. Make sure that you have added yourself to the group of users to test the setup later.
Step 2 – Configure Share to Integration in Fluix
Drag and drop Share to submit action to the Taskstream chart and connect it with the User task that your team will be working on.
improveit 360 is a software platform based on Salesforce hence the authorization to improveit 360 is configured under the Salesforce tool. Click on the Share to element and select Salesforce among the list of third-party tools. You will be redirected to the Salesforce authorization page where you’ll need to provide Fluix with the permissions to access it.
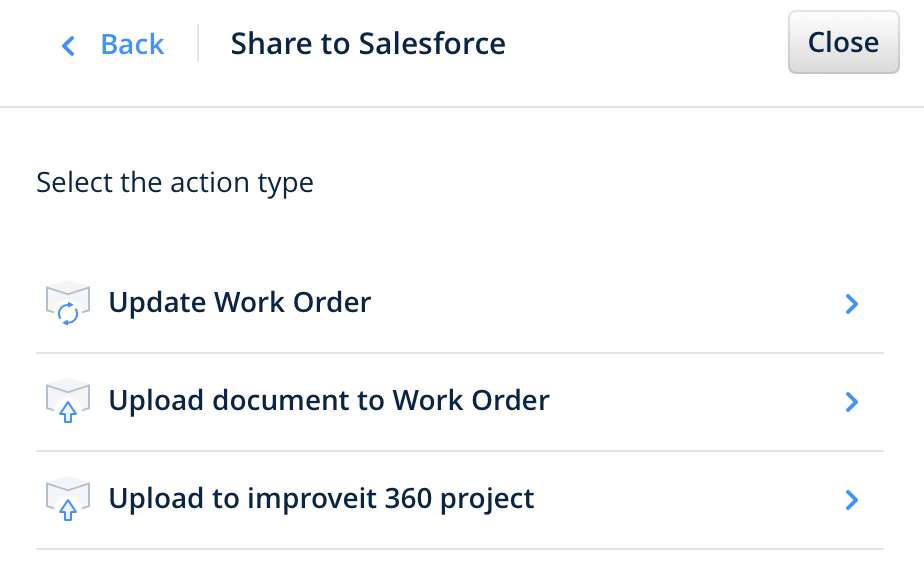
Once done, select the action Upload to improveit 360 project that you would like to be triggered upon completion of the respective process in Fluix.
Step 3 – Uploading the documents from Fluix in the specific project
Let’s look into a real-life scenario as an example of configuring the automation of processes between Fluix and improveit 360.
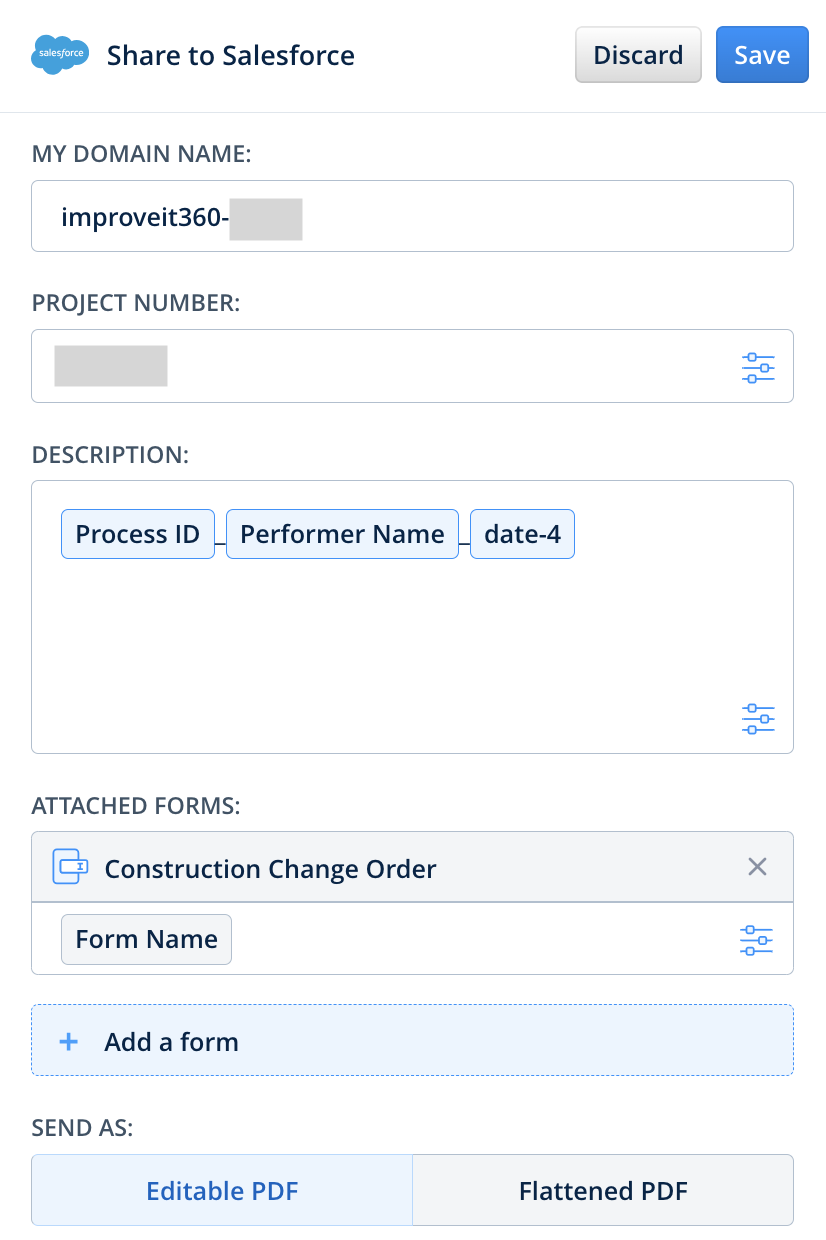
Firstly, to integrate improveit 360 with Fluix, you’ll need to know the domain name and the project number in your improveit 360 account.
To find the domain name, please open your improveit 360 account, and copy your improveit 360 company name and ID (e.g. improveit360-2453) before my.salesforce.com from the web address (URL section).

The project number can be found in the Projects tab of your account. When you open the specific project, its number will be written right under the project’s name.
Scenario example
Click on the connected Salesforce account, and select the Upload to improveit 360 project option from the list.
Fill out My domain name and Project number fields. In the Description section, configure the text that will be added along with the finished form in Fluix. We suggest using the dynamic values to configure the Description.
Upon form submission in Fluix, it will be automatically attached to the Notes&Attachments of the pre-configured Project in improveit 360 account.

Step 4 – Save and test the setup
Once you fill out all the fields, click Save&Publish to activate the Taskstream. Open the user app on the mobile device, or click User App in the right corner of the admin portal. Navigate to the task that you created, fill in the form, and finish it.
Once the task is submitted in Fluix, entered data automatically appears in the pre-configured project in your company’s improveit 360 account.
In case you have any questions or difficulties with setup, contact our support at support@fluix.io and we’ll be happy to help you.