


What are Datasets?
Data collected by your field teams in checklists, time sheets, work orders, and other forms in the Fluix app can be automatically aggregated and extracted into datasets for further export and analysis. To start collecting data, please follow the steps below or watch the video tutorial.
How to start extracting data?
Data is extracted from documents that are filled out and submitted by your end users within Fluix workflow. The data is saved to a report called Dataset and can be then downloaded in Excel/CSV format, sent directly to third-party data visualization software services, such as Power BI, Tableau, Domo, Qlik, etc, or exported via Zapier, Integromat, or any other integration platform, or to your database via API.
To start extracting data:
- Navigate to the Workflows tab under the Workflow Setup section of the Fluix Admin Portal
- Open the workflow where you’d like to extract data from and click Edit Workflow
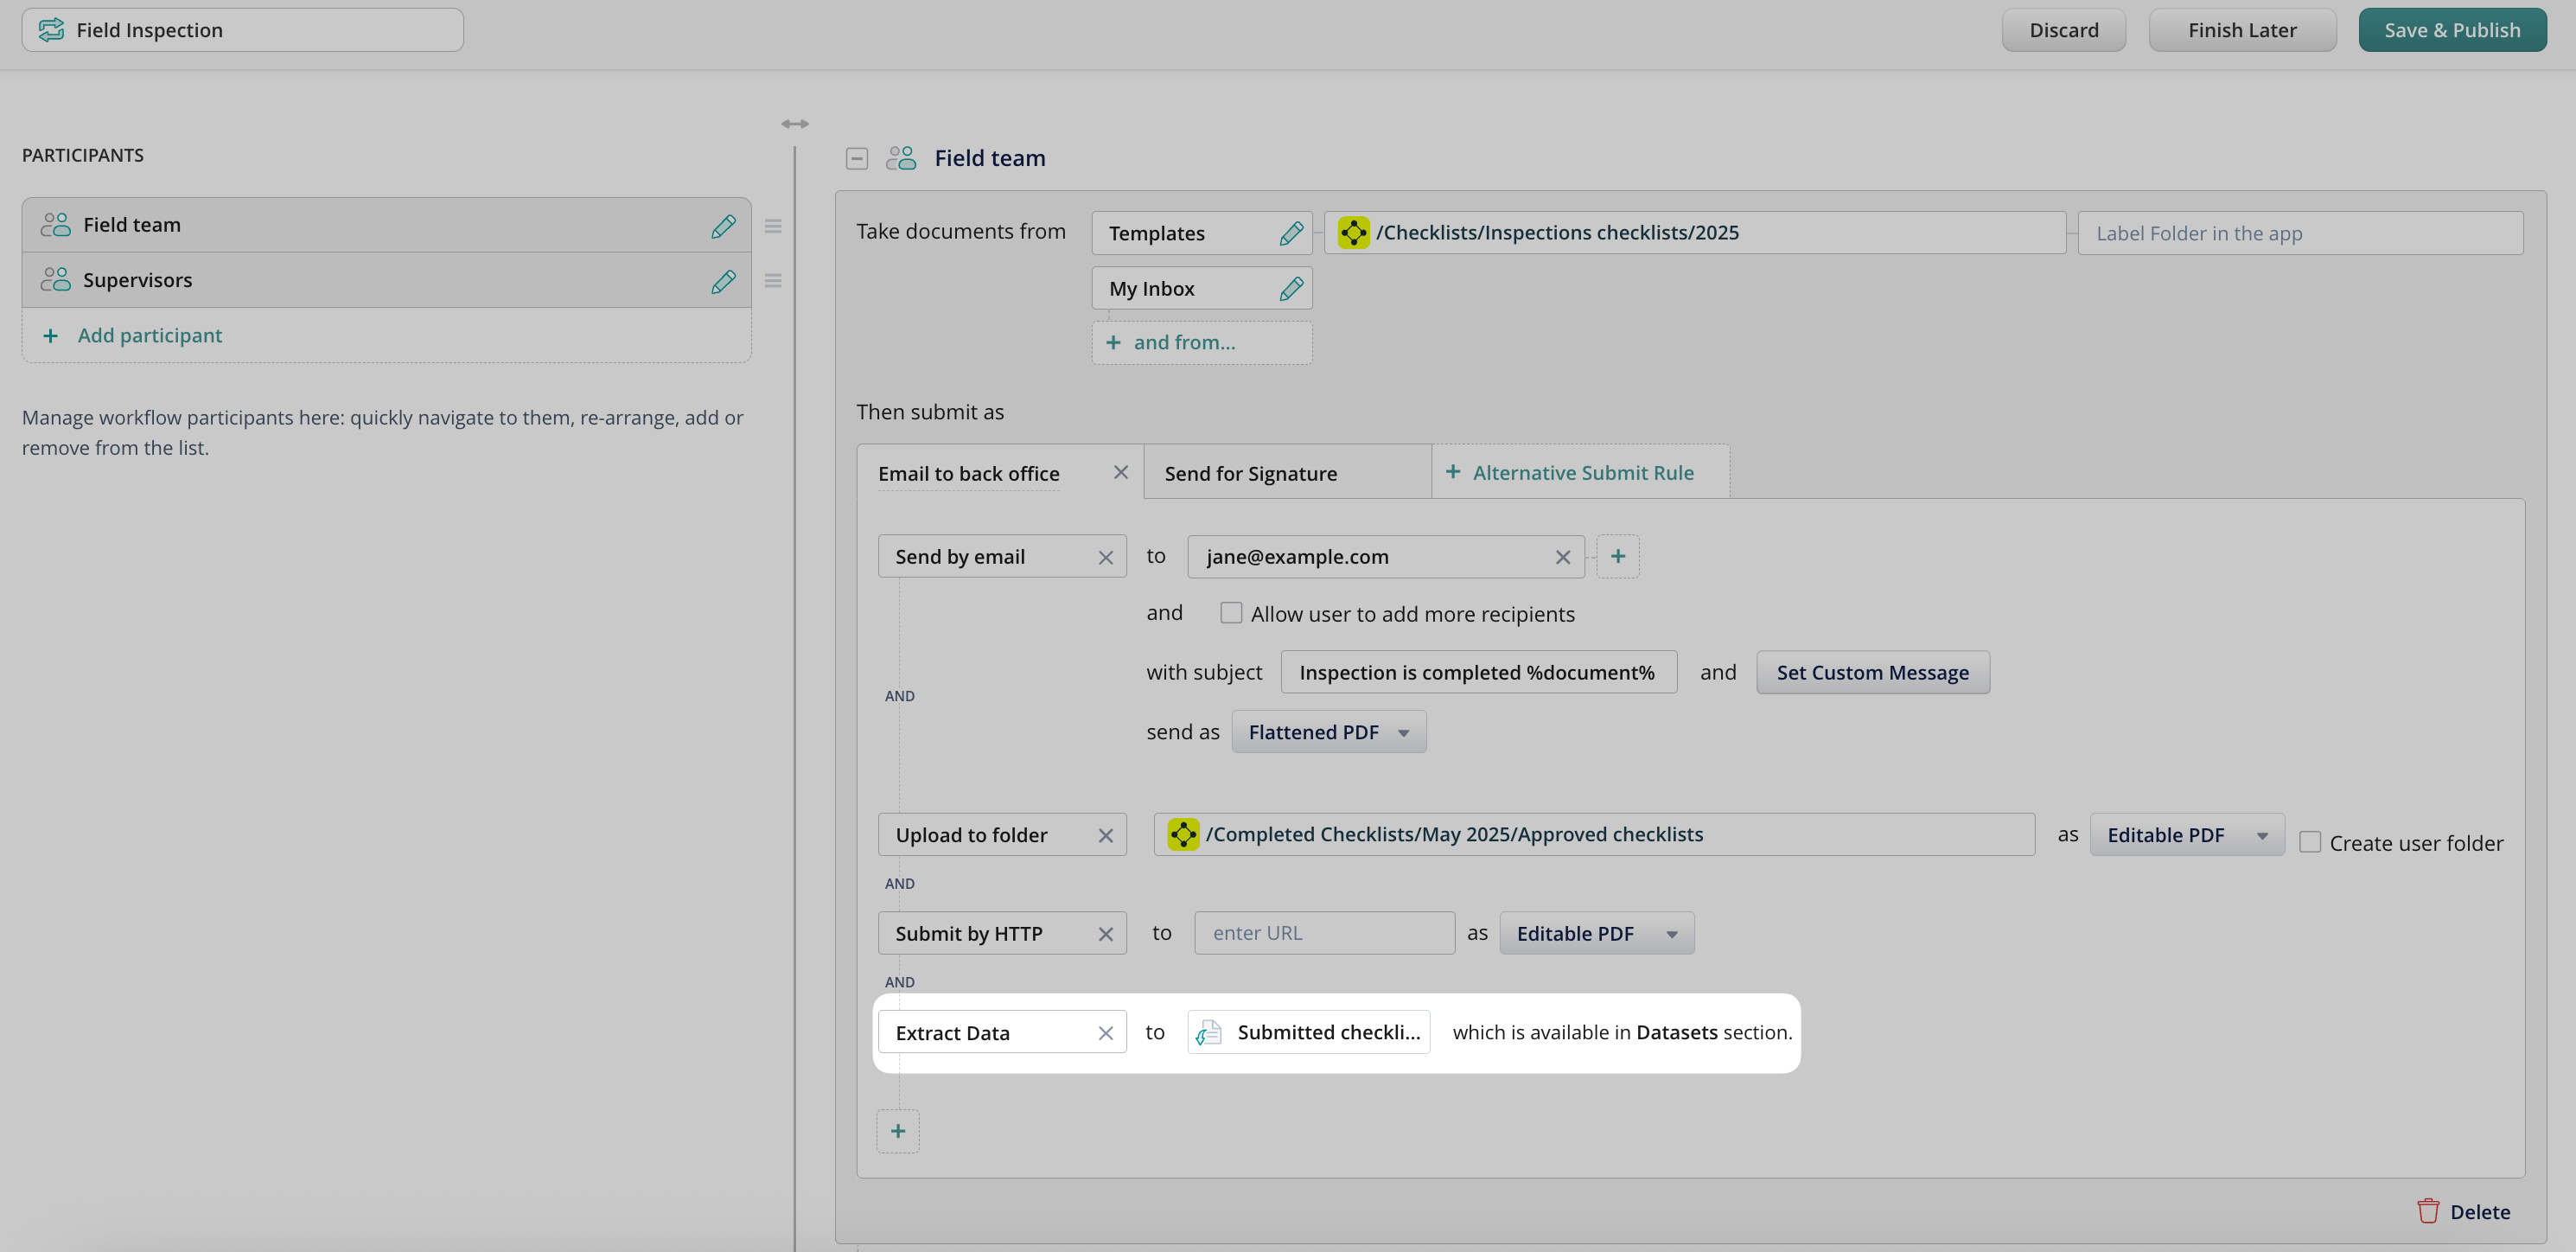
- Find the final submit rule for the documents (e.g. ‘Upload to folder’) and click ‘+’ to add a parallel submit action Extract Data:
4. Add a new dataset (or select an existing one) where the data will be extracted to, and click Done:
5. Save changes to the workflow.
From now on all the data that is entered into fillable PDF forms within this workflow will be saved into the dataset each time the document is submitted. Photos that were inserted into the image fields in your form will be also saved into the dataset as a download link.
Each dataset will include the list of submitted documents, columns with the fields and data that was filled out in the documents:

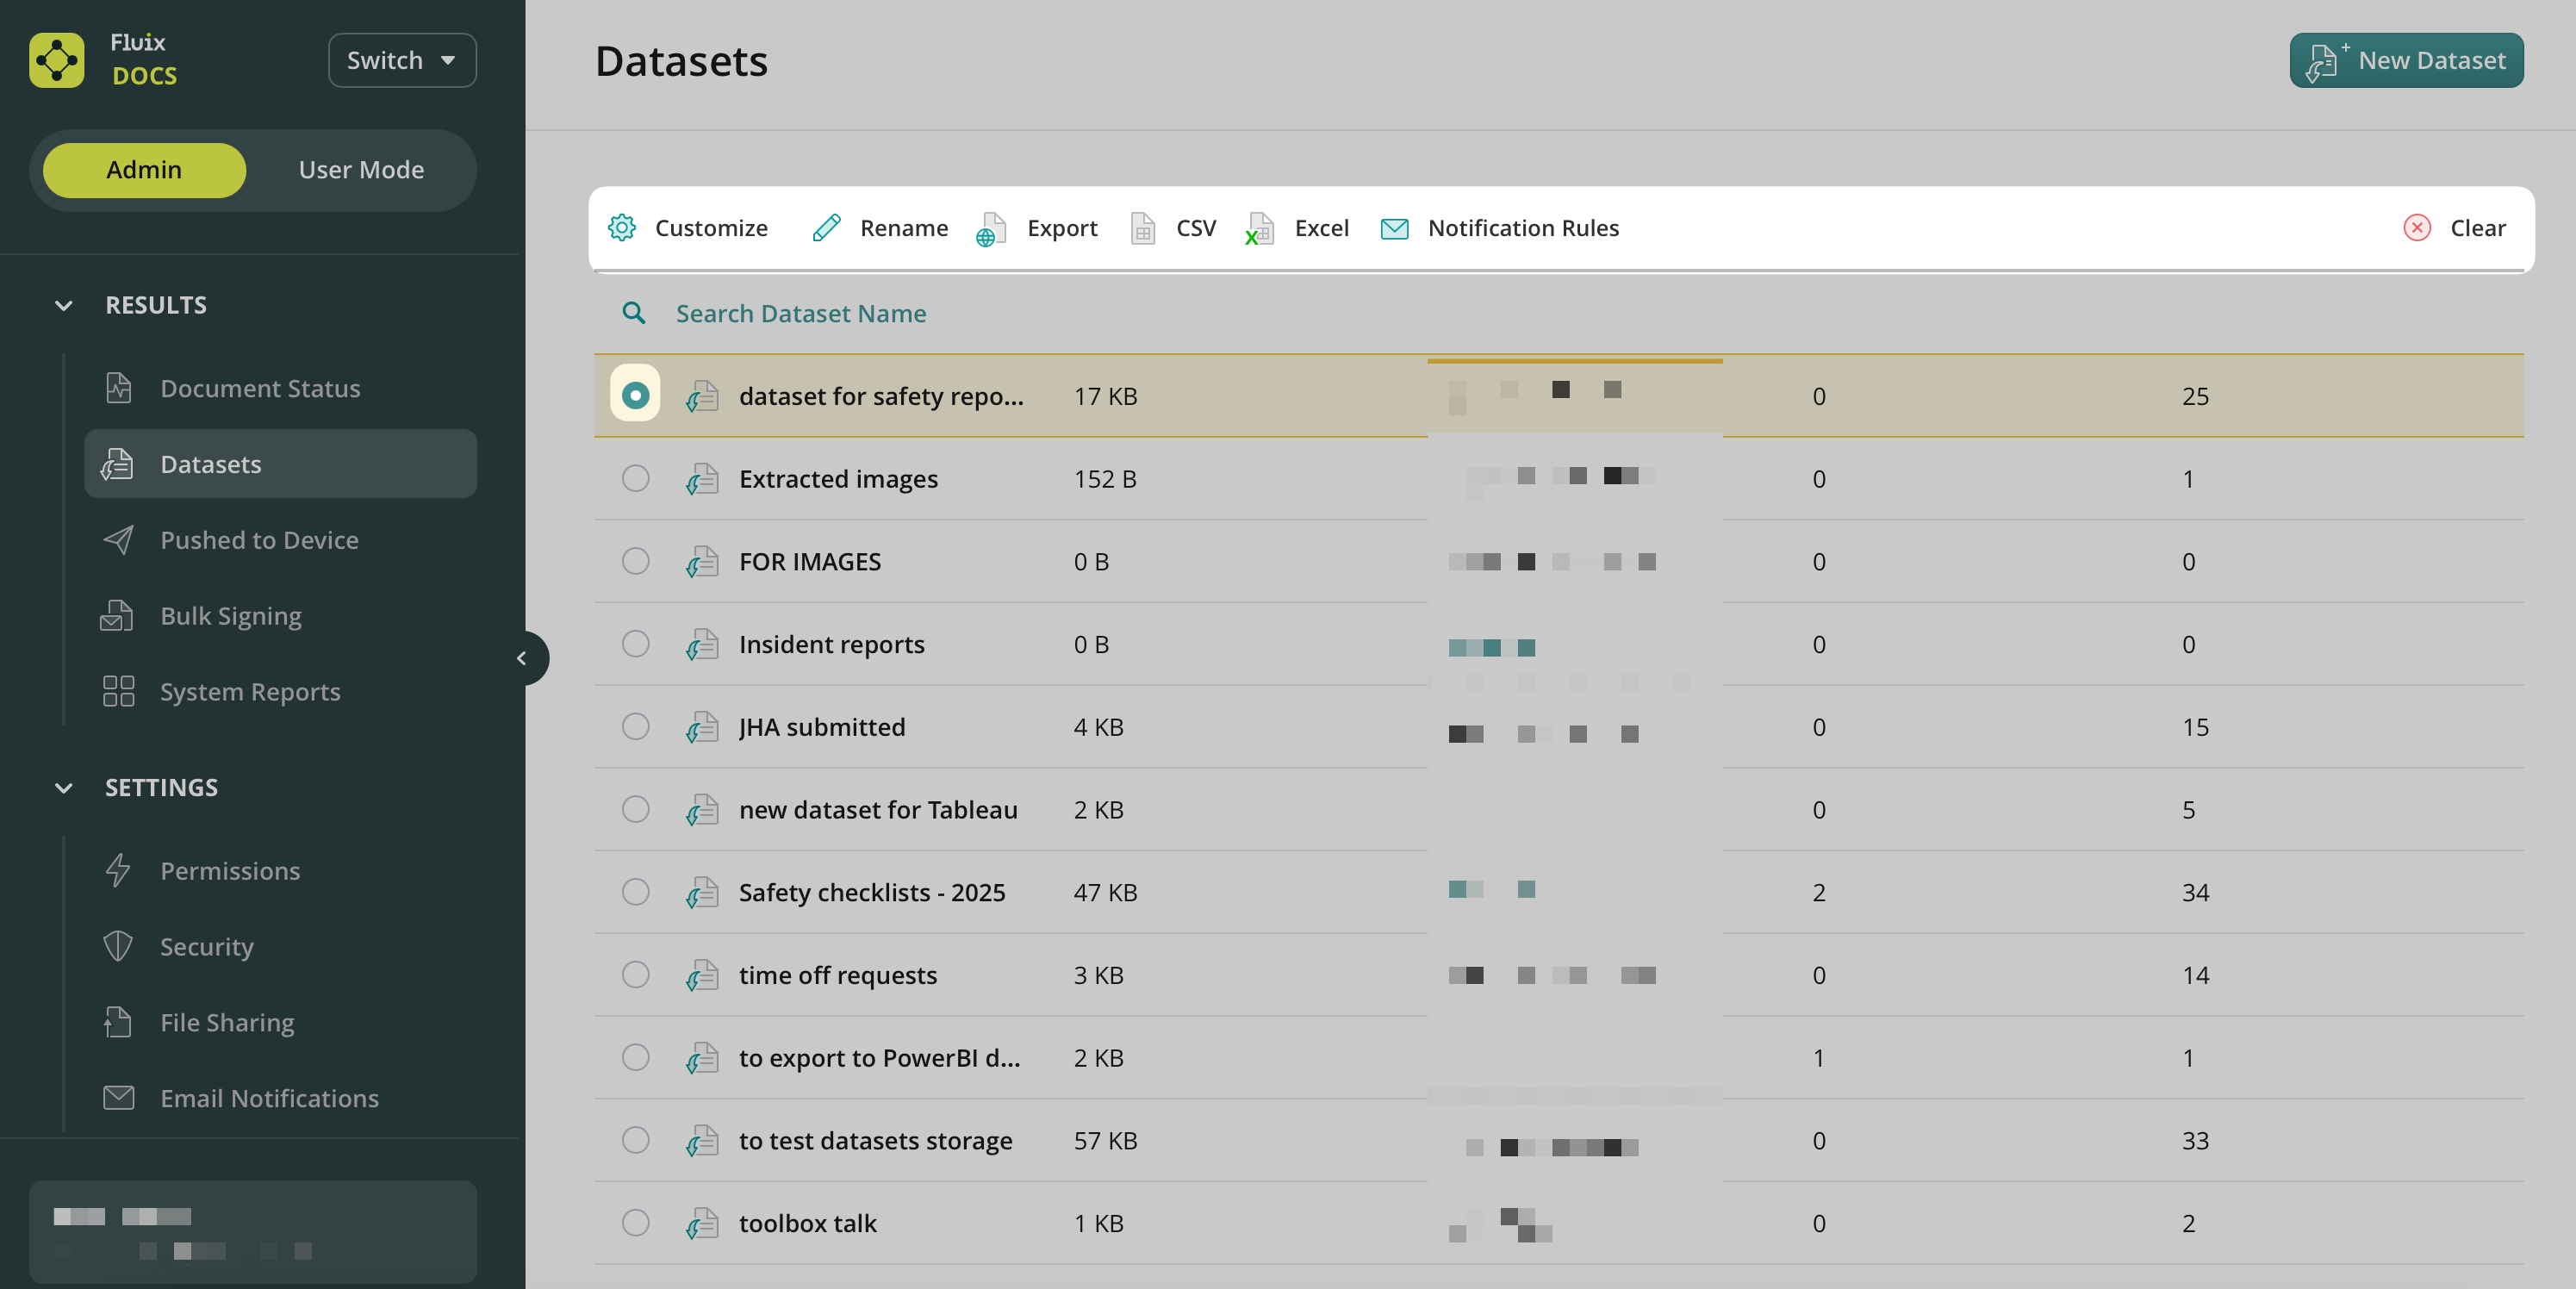
The list of datasets can be found in the Datasets tab of the Results section:

To create a dataset to be used in a workflow, click the New Dataset button in the top right corner.
Subsets with Filtered Views
By default, the dataset includes all the fields that are present in the submitted documents and the fields are named exactly as in PDFs. By creating filtered views (subsets), you can configure what fields to extract and rename them in a way you prefer.
Here are the steps:
1. Select the dataset and click Customize
2. Create New Subset and name it
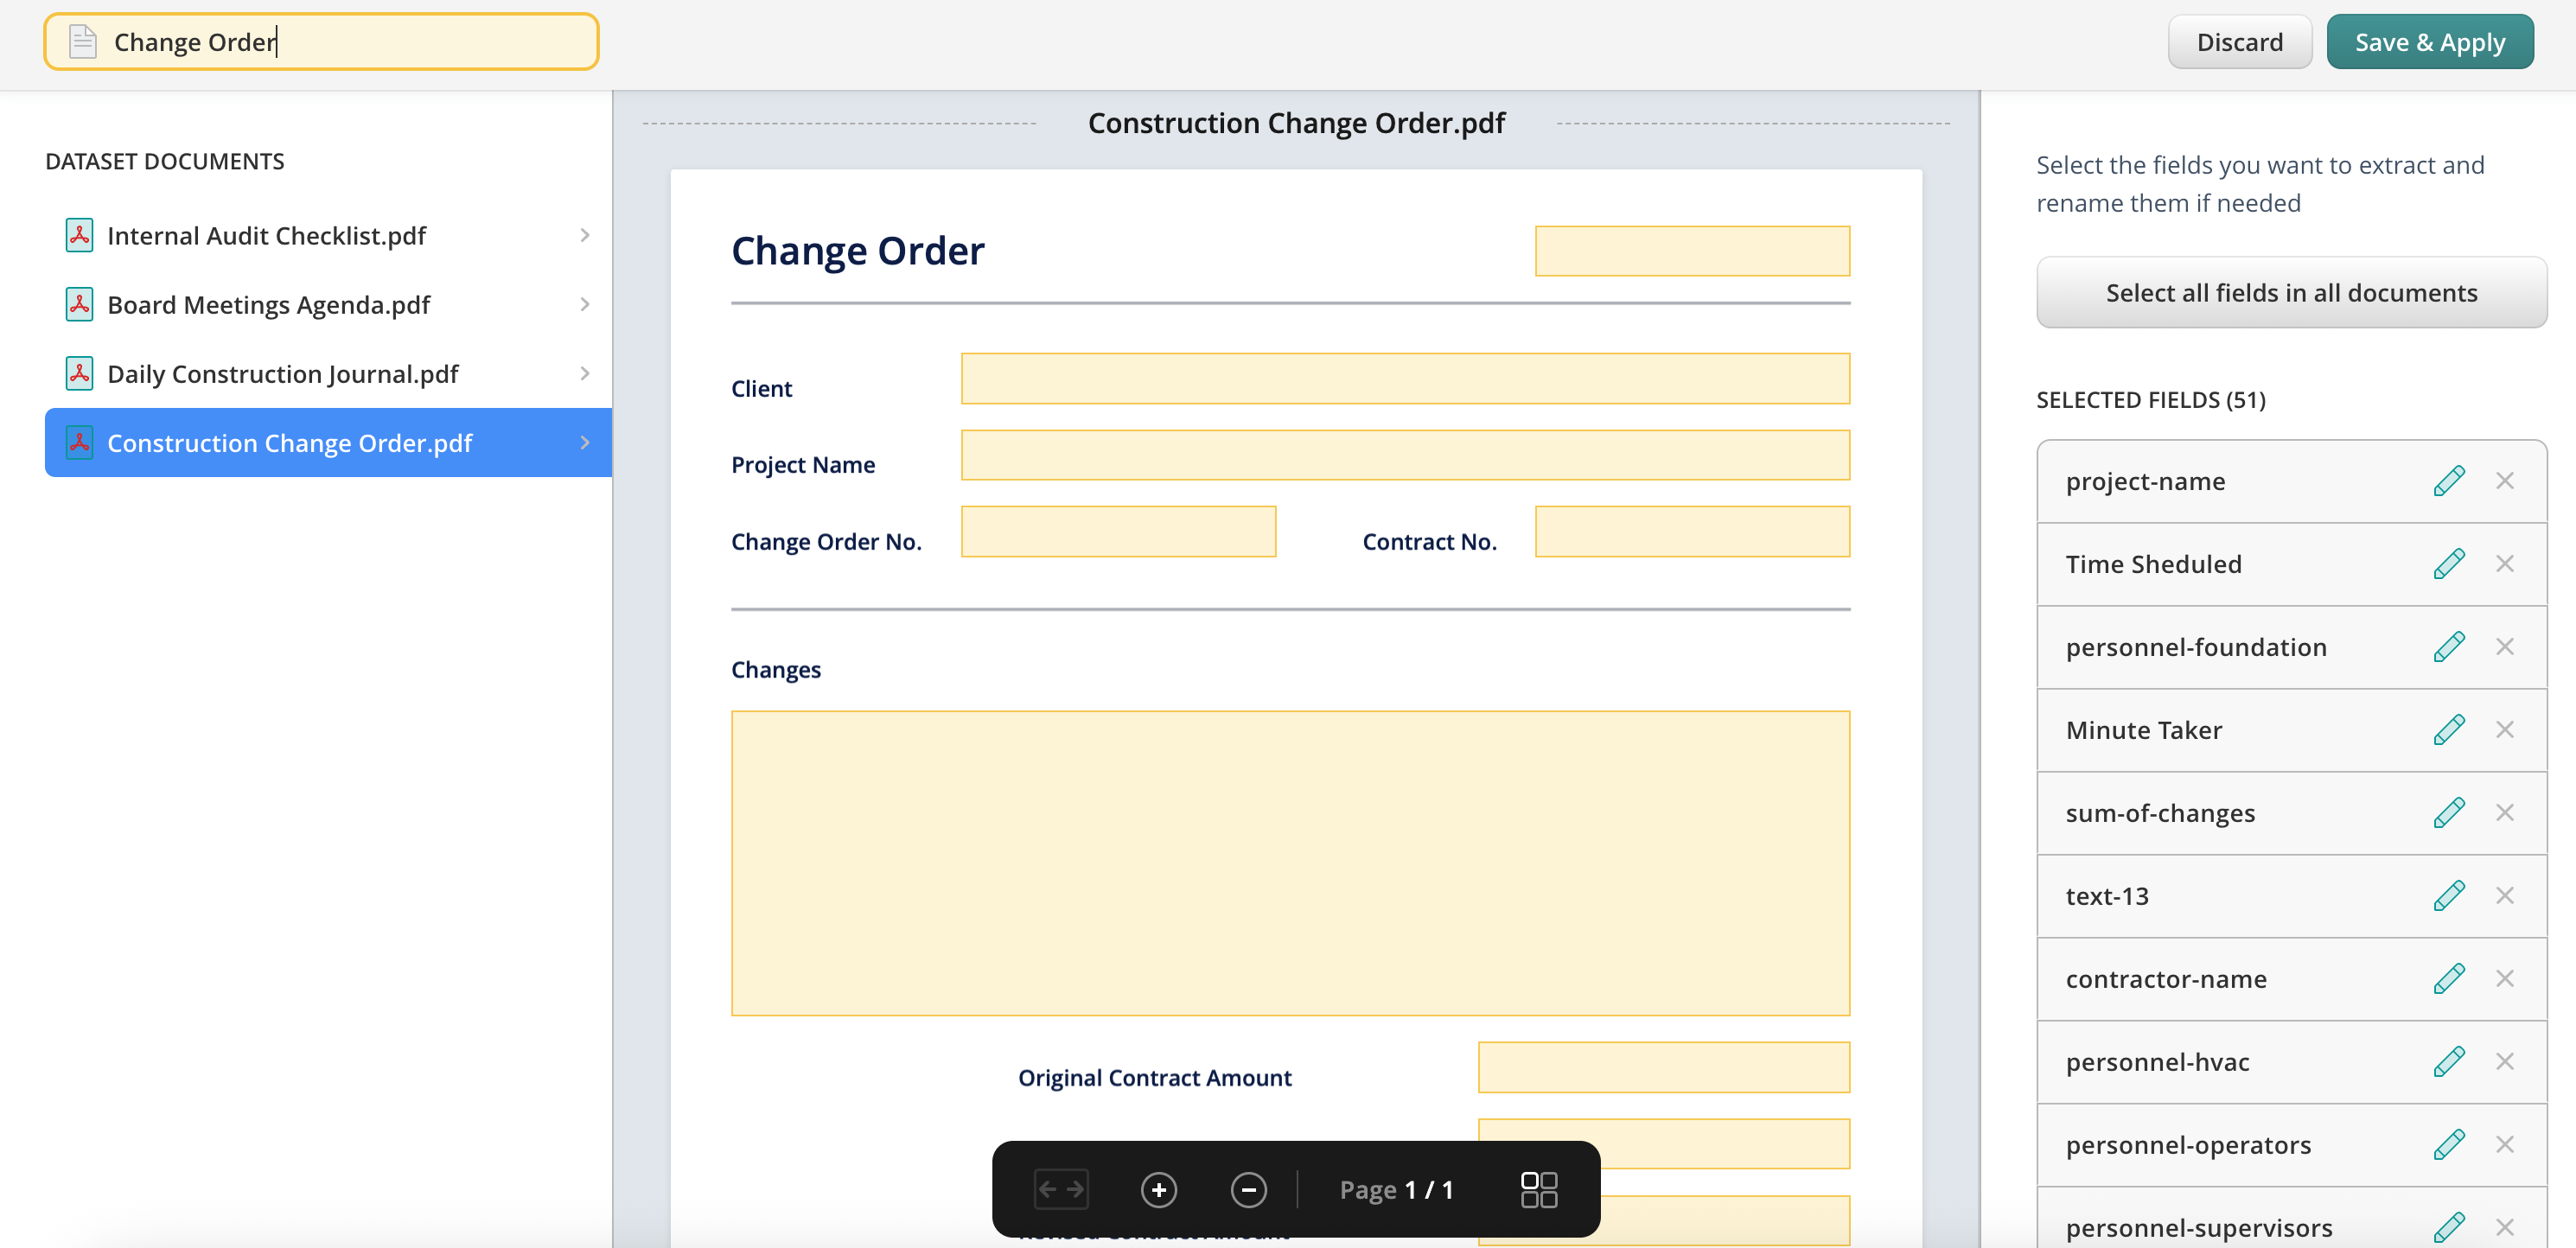
3. On the left, you will see the list of documents that have already been collected in the dataset. On the right, there will be a list of fields from the collected documents. By default, all fields are deselected. You can select them by clicking on the button ‘Select all fields in all documents’ in the menu on the right.
4. To select a particular field, simply click on it on the document preview.
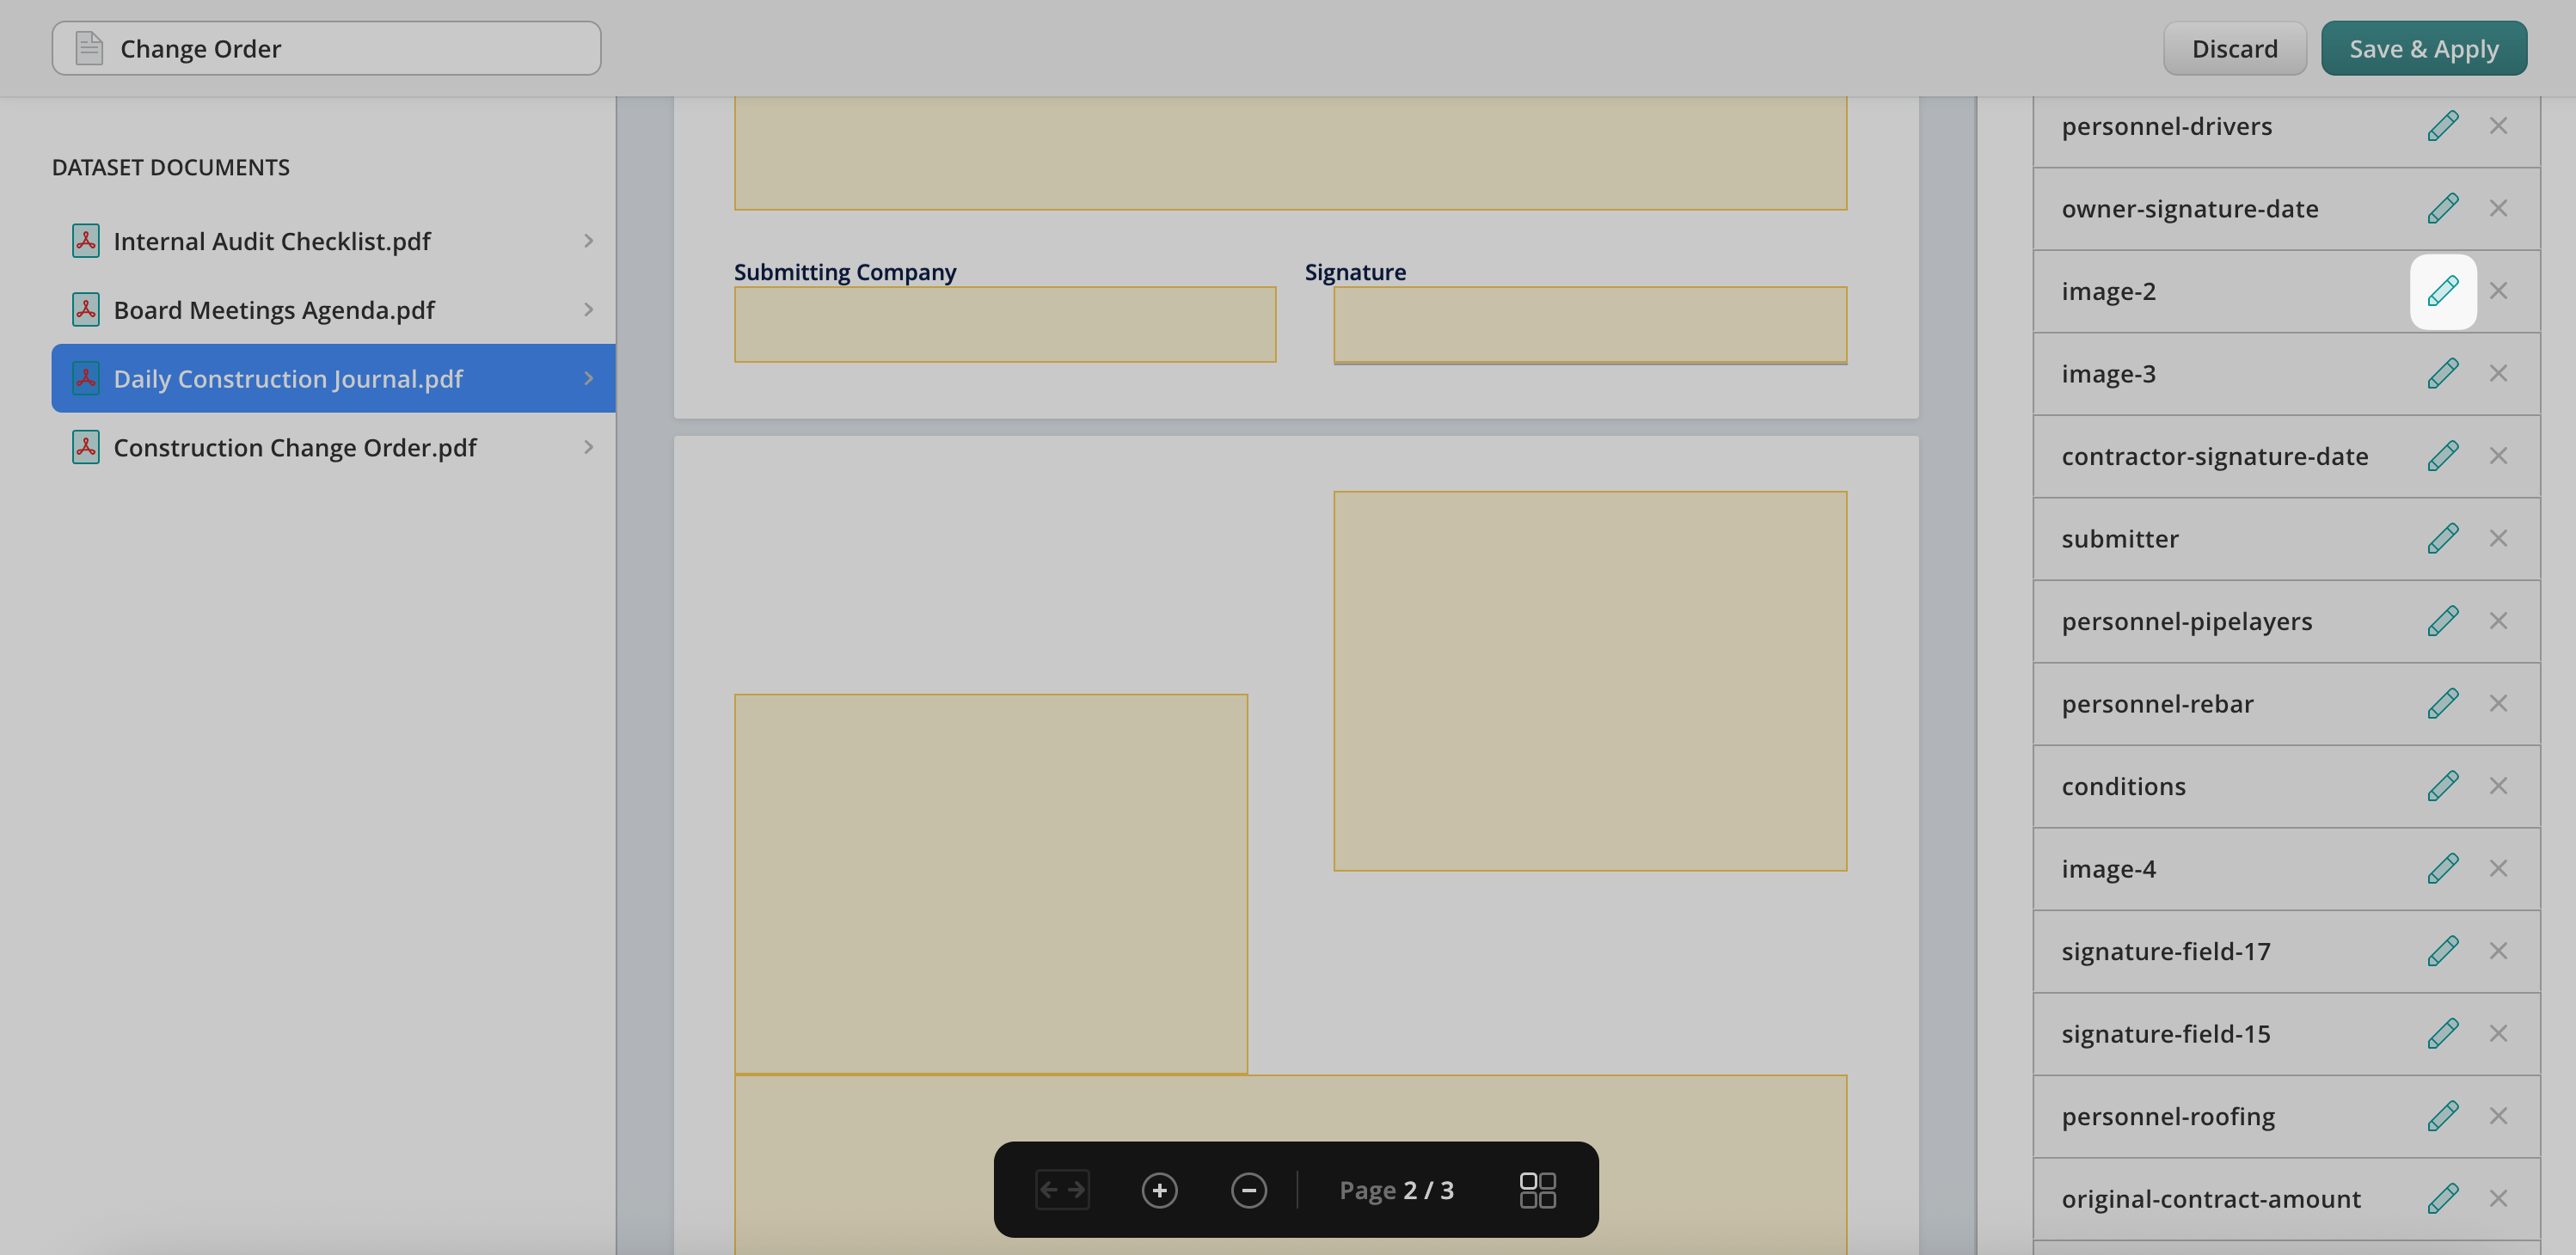
5. If the field names are generic (e.g., Text1, text2, etc.), navigate on the field to see its name, or navigate on its name in the list on the right, and it will be ‘linked’ to the right field in the document:
5. Here, you can also rename the fields by clicking on the pencil:
6. Type in a report name in the top left corner and save changes.
Filtered views can be exported, edited, or deleted.
Notification Rules
Besides extracting data, you can also track the deviations from the expected values in your documents and receive email alerts in real time. To proceed, you need to create rules for email alerts:
1. Select the Dataset and click on Notification Rules
2. On the left sidebar, add recipients of the email alerts
3. Click on Add Rule to create a rule for email alert
4. Add a field name, select the condition More, Less, or Equal to and specify the value
5. Add a message to be emailed
6. Save changes
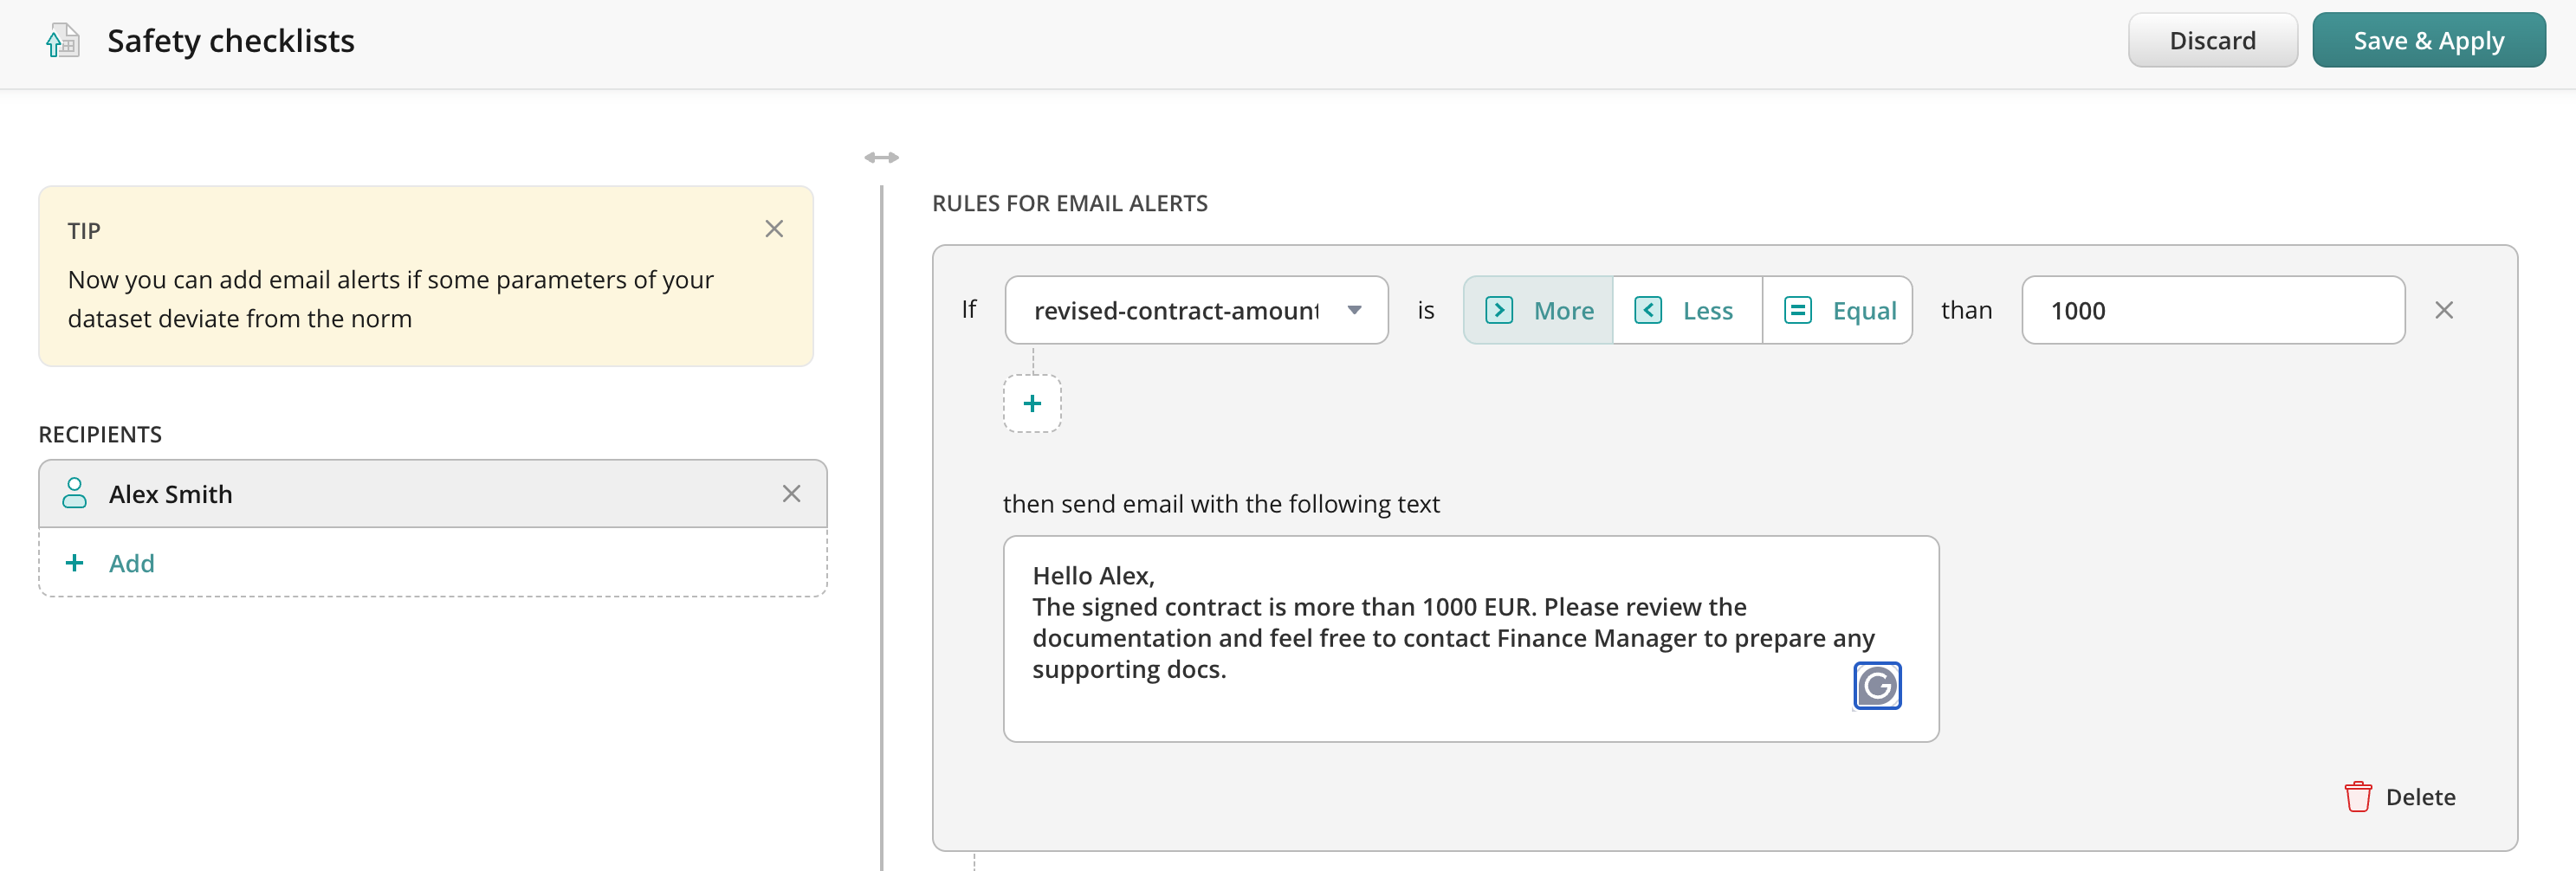
Once the specified values deviate from the norm you expect, the respective email will be automatically sent to the recipients.
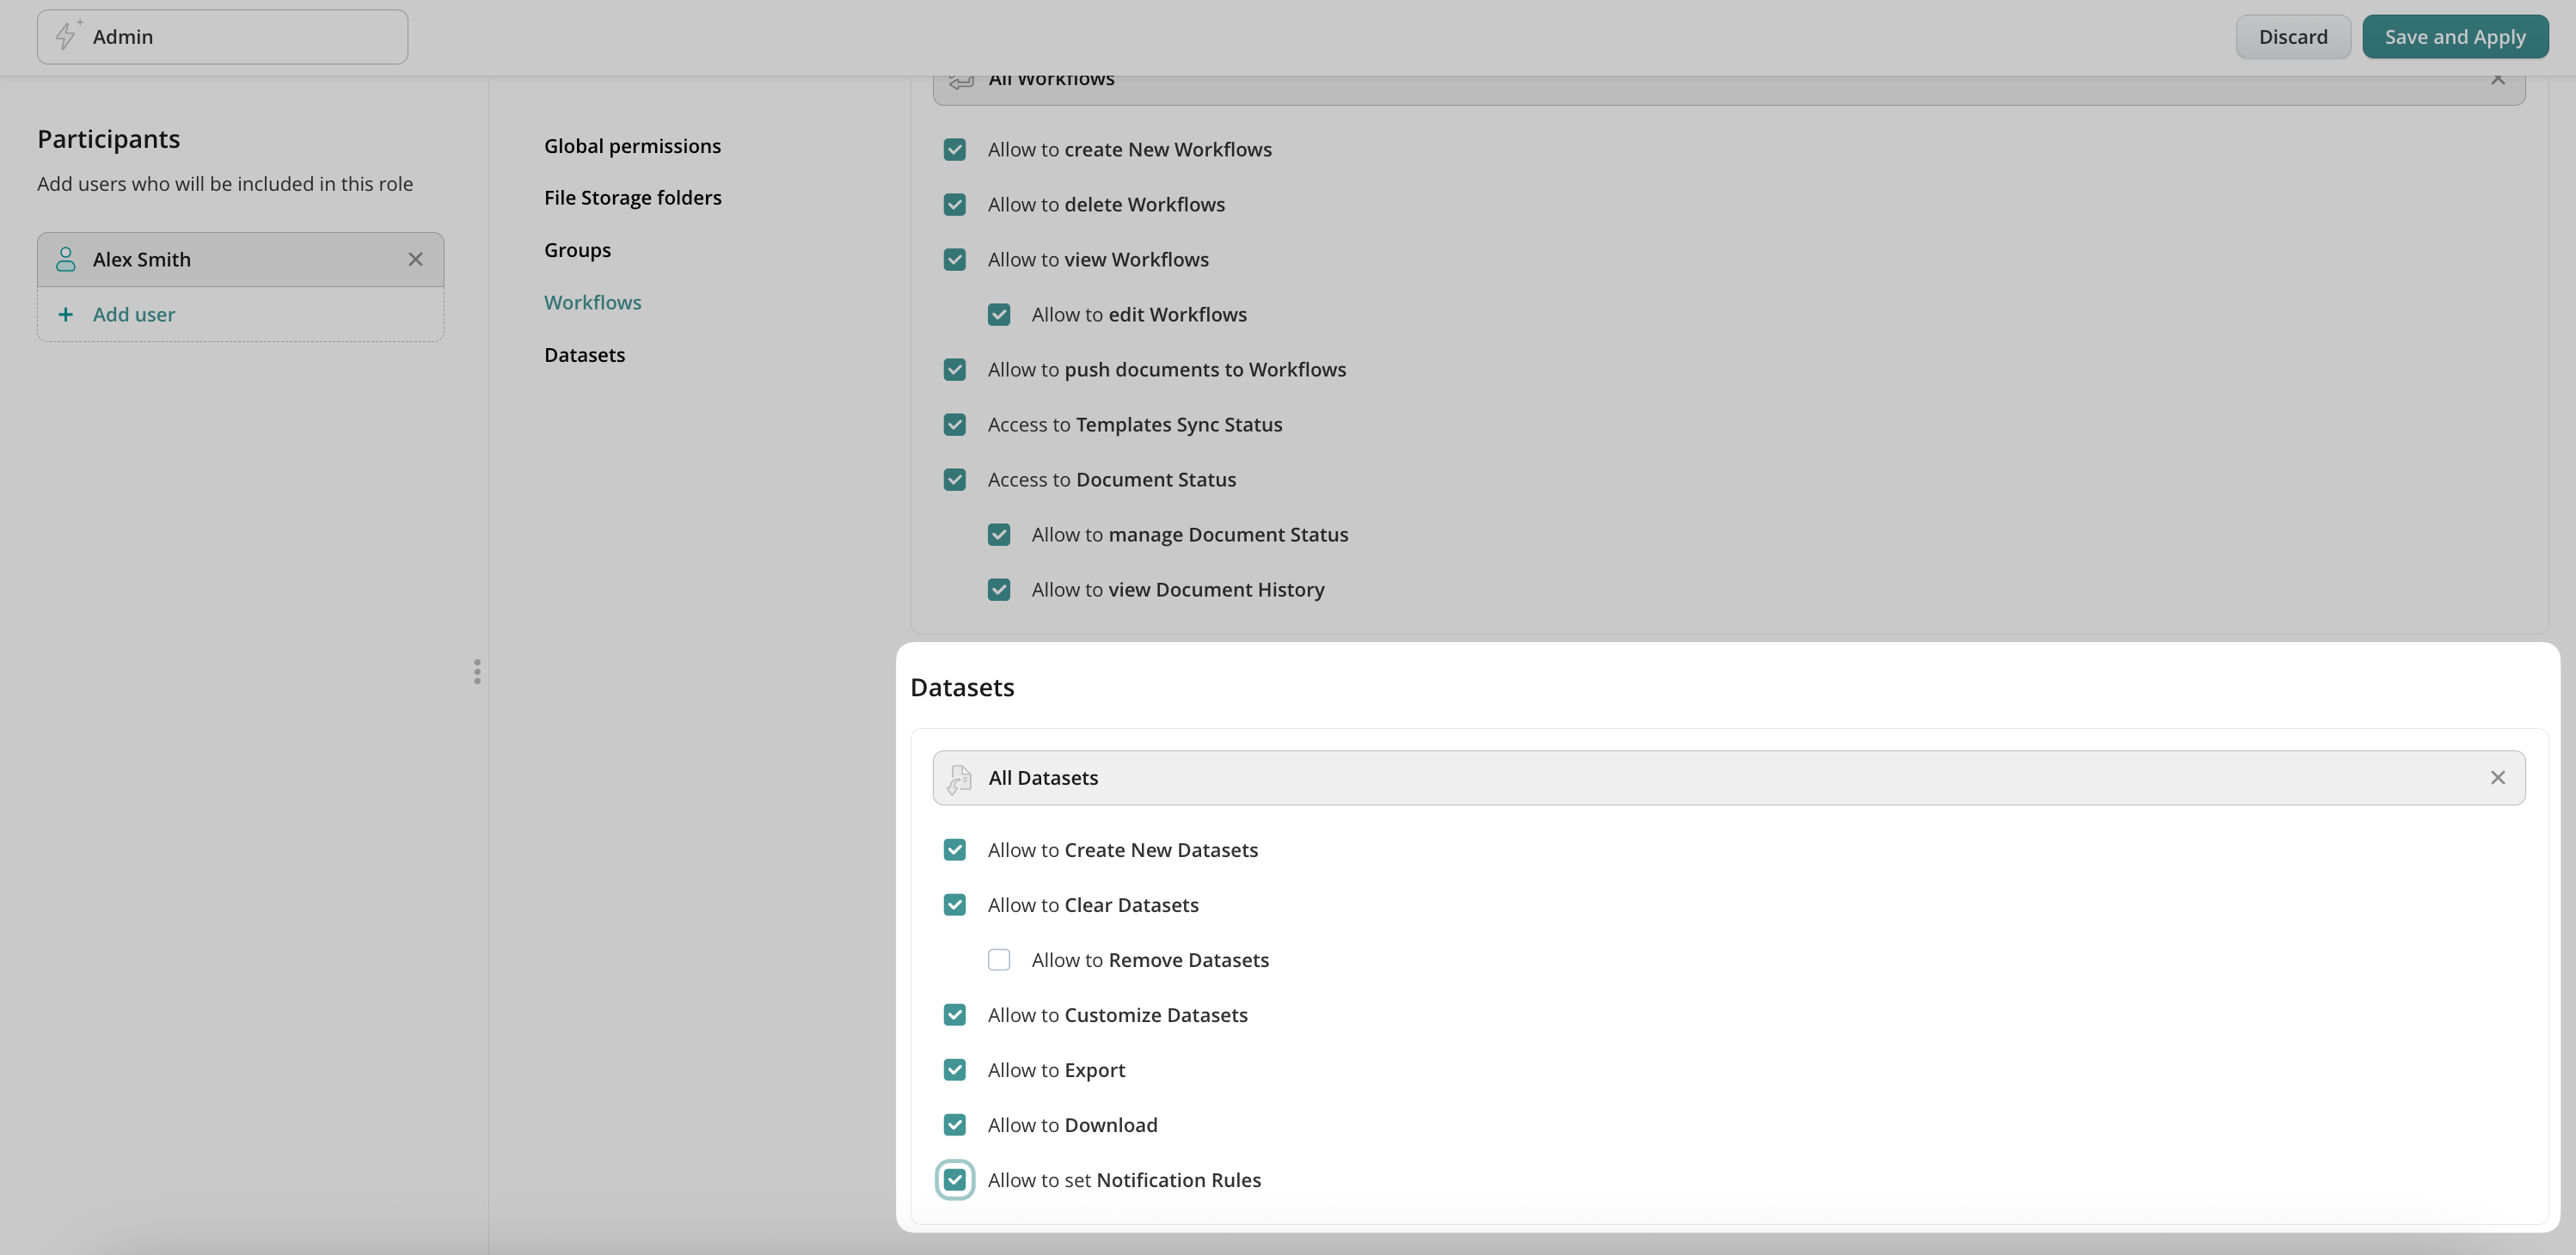
Access to Datasets
In case you do not see some of the options mentioned above, you can request access from your account owner. The permissions are regulated in the Permissions tab under the Settings section of the Admin Portal:
Finding bottlenecks and benchmarking in your business processes is now very easy.
Feel free to contact us at support@fluix.io if you have any questions or comments.
Check what you can do with Fluix. Explore features >