


Qlik is a business analytics platform that helps companies deliver active, real-time data intelligence.
Fluix and Qlik integration automates data collection, processing and analysis. Your team members will stop printing out documents to compare numbers, there will be no need for manual data copying from one tool to another, and finally you will get business insights from the daily operations.
Fluix will automate the process of data collection in digital fillable forms and extraction of the aggregated data into Qlik for further visualization, analysis and sharing the results with the team and customers.
Let’s set up the integration between these tools and look at the benefits together.
Note. Integration requires a Core account in Fluix and an account in Qlik. To try the option, you can register for a free demo in Fluix and free trial in Qlik.
How to integrate?
Step 1 – Configuring workflow in Fluix
1. Go to the Fluix admin portal, Workflows section, and choose an existing workflow or create a new one for the business process where the data needs to be analyzed. Add a submit rule Extract data and create a Dataset for the data that will be extracted from the completed forms. You can also watch the video on how to create a workflow here

2. Fill out and submit a test form using a User app on a web or iOS device.
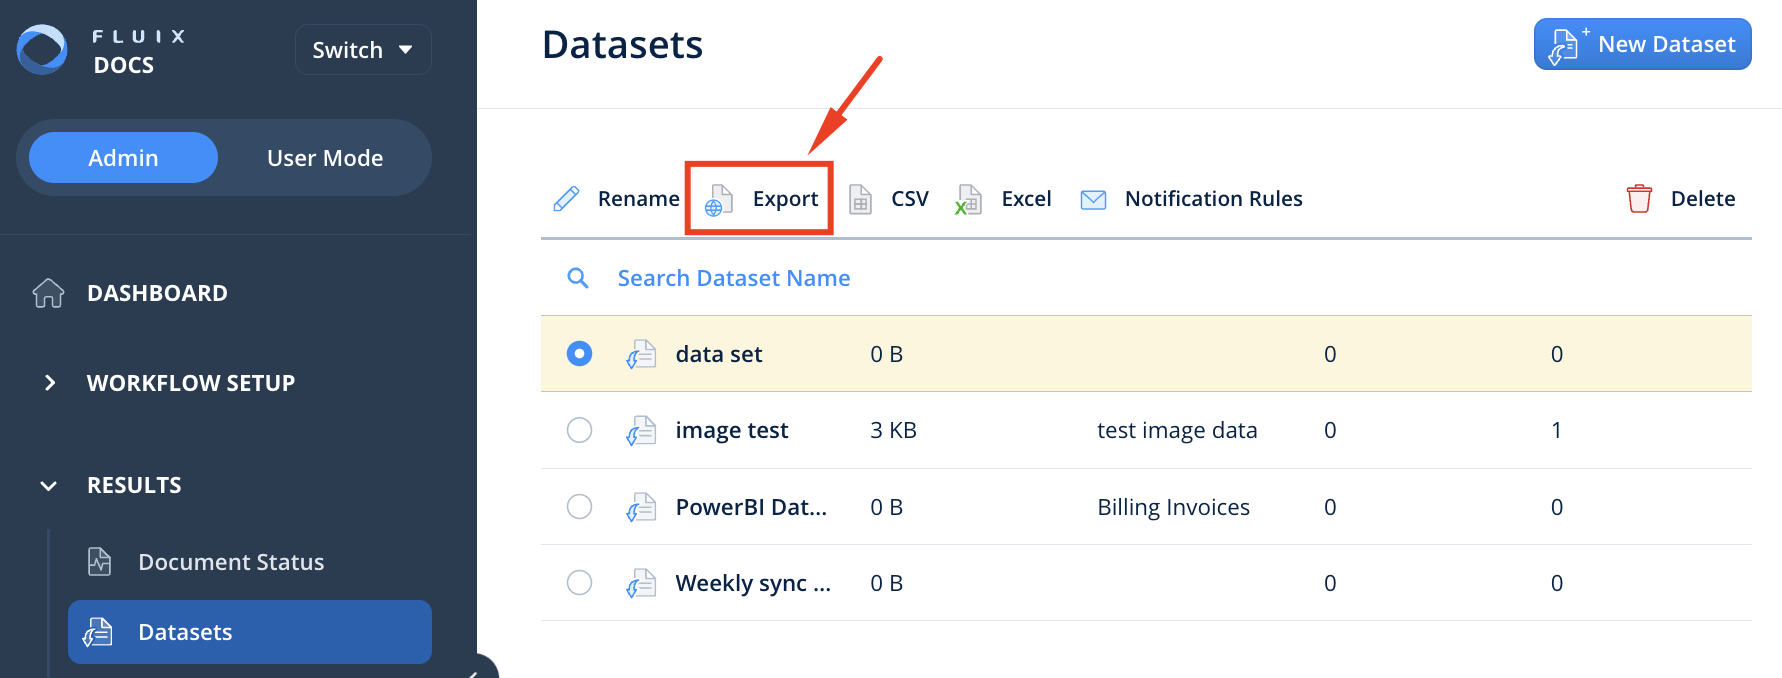
3. Go to the Results tab, choose Datasets, pick the one you’d want to export to Qlik and click the Export button on the toolbar to see the authorisation details.
Step 2 – Connecting Fluix and Qlik
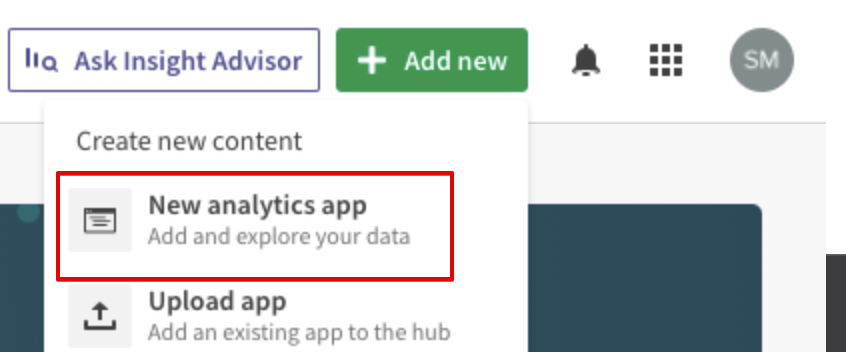
1. Log into your Qlik account, press Add new and choose New analytics app from the dropdown list. Name it and click Create.
2. Choose Add data from files and other sources.

3. Select the REST option from the list of available data connectors.

4. In the appeared window, enter the Power BI URL copied from the authorization details in Fluix.

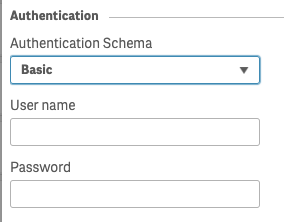
5. Scroll down and choose Basic authentication schema from the dropdown and enter username and password from authorization details in Fluix.
6. Click Test connection and in case it succeeded, rename your connection if needed and press Create.
7. Tick the collection checkbox and click Next.
Step 3 – Starting data analysis
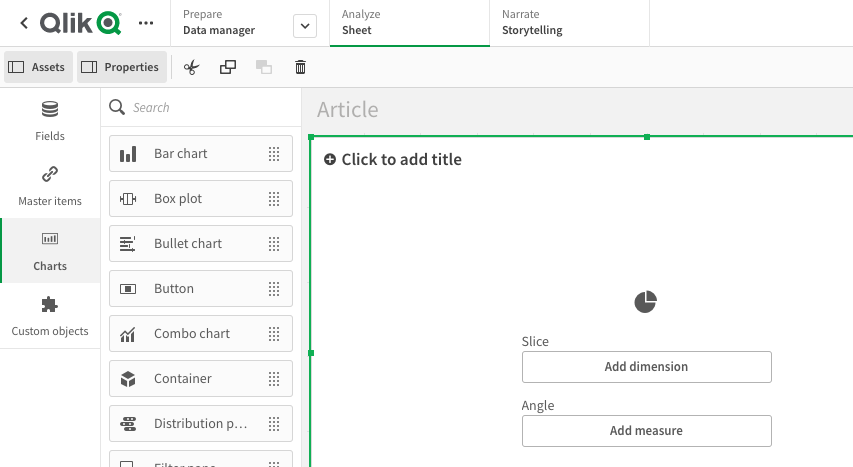
1. Choose Build a sheet option.
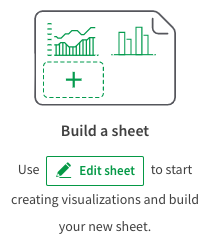
2. Now you can create multiple visualisations and gather business insights from your field data.
In case you have any questions or difficulties with setup, contact our support at support@fluix.io and we’ll be happy to help you.
Check other business integrations here.