


This article gives a full overview of steps on how to configure the Single Sign-On in Fluix through EntraID.
- Go to Microsoft Entra Admin center
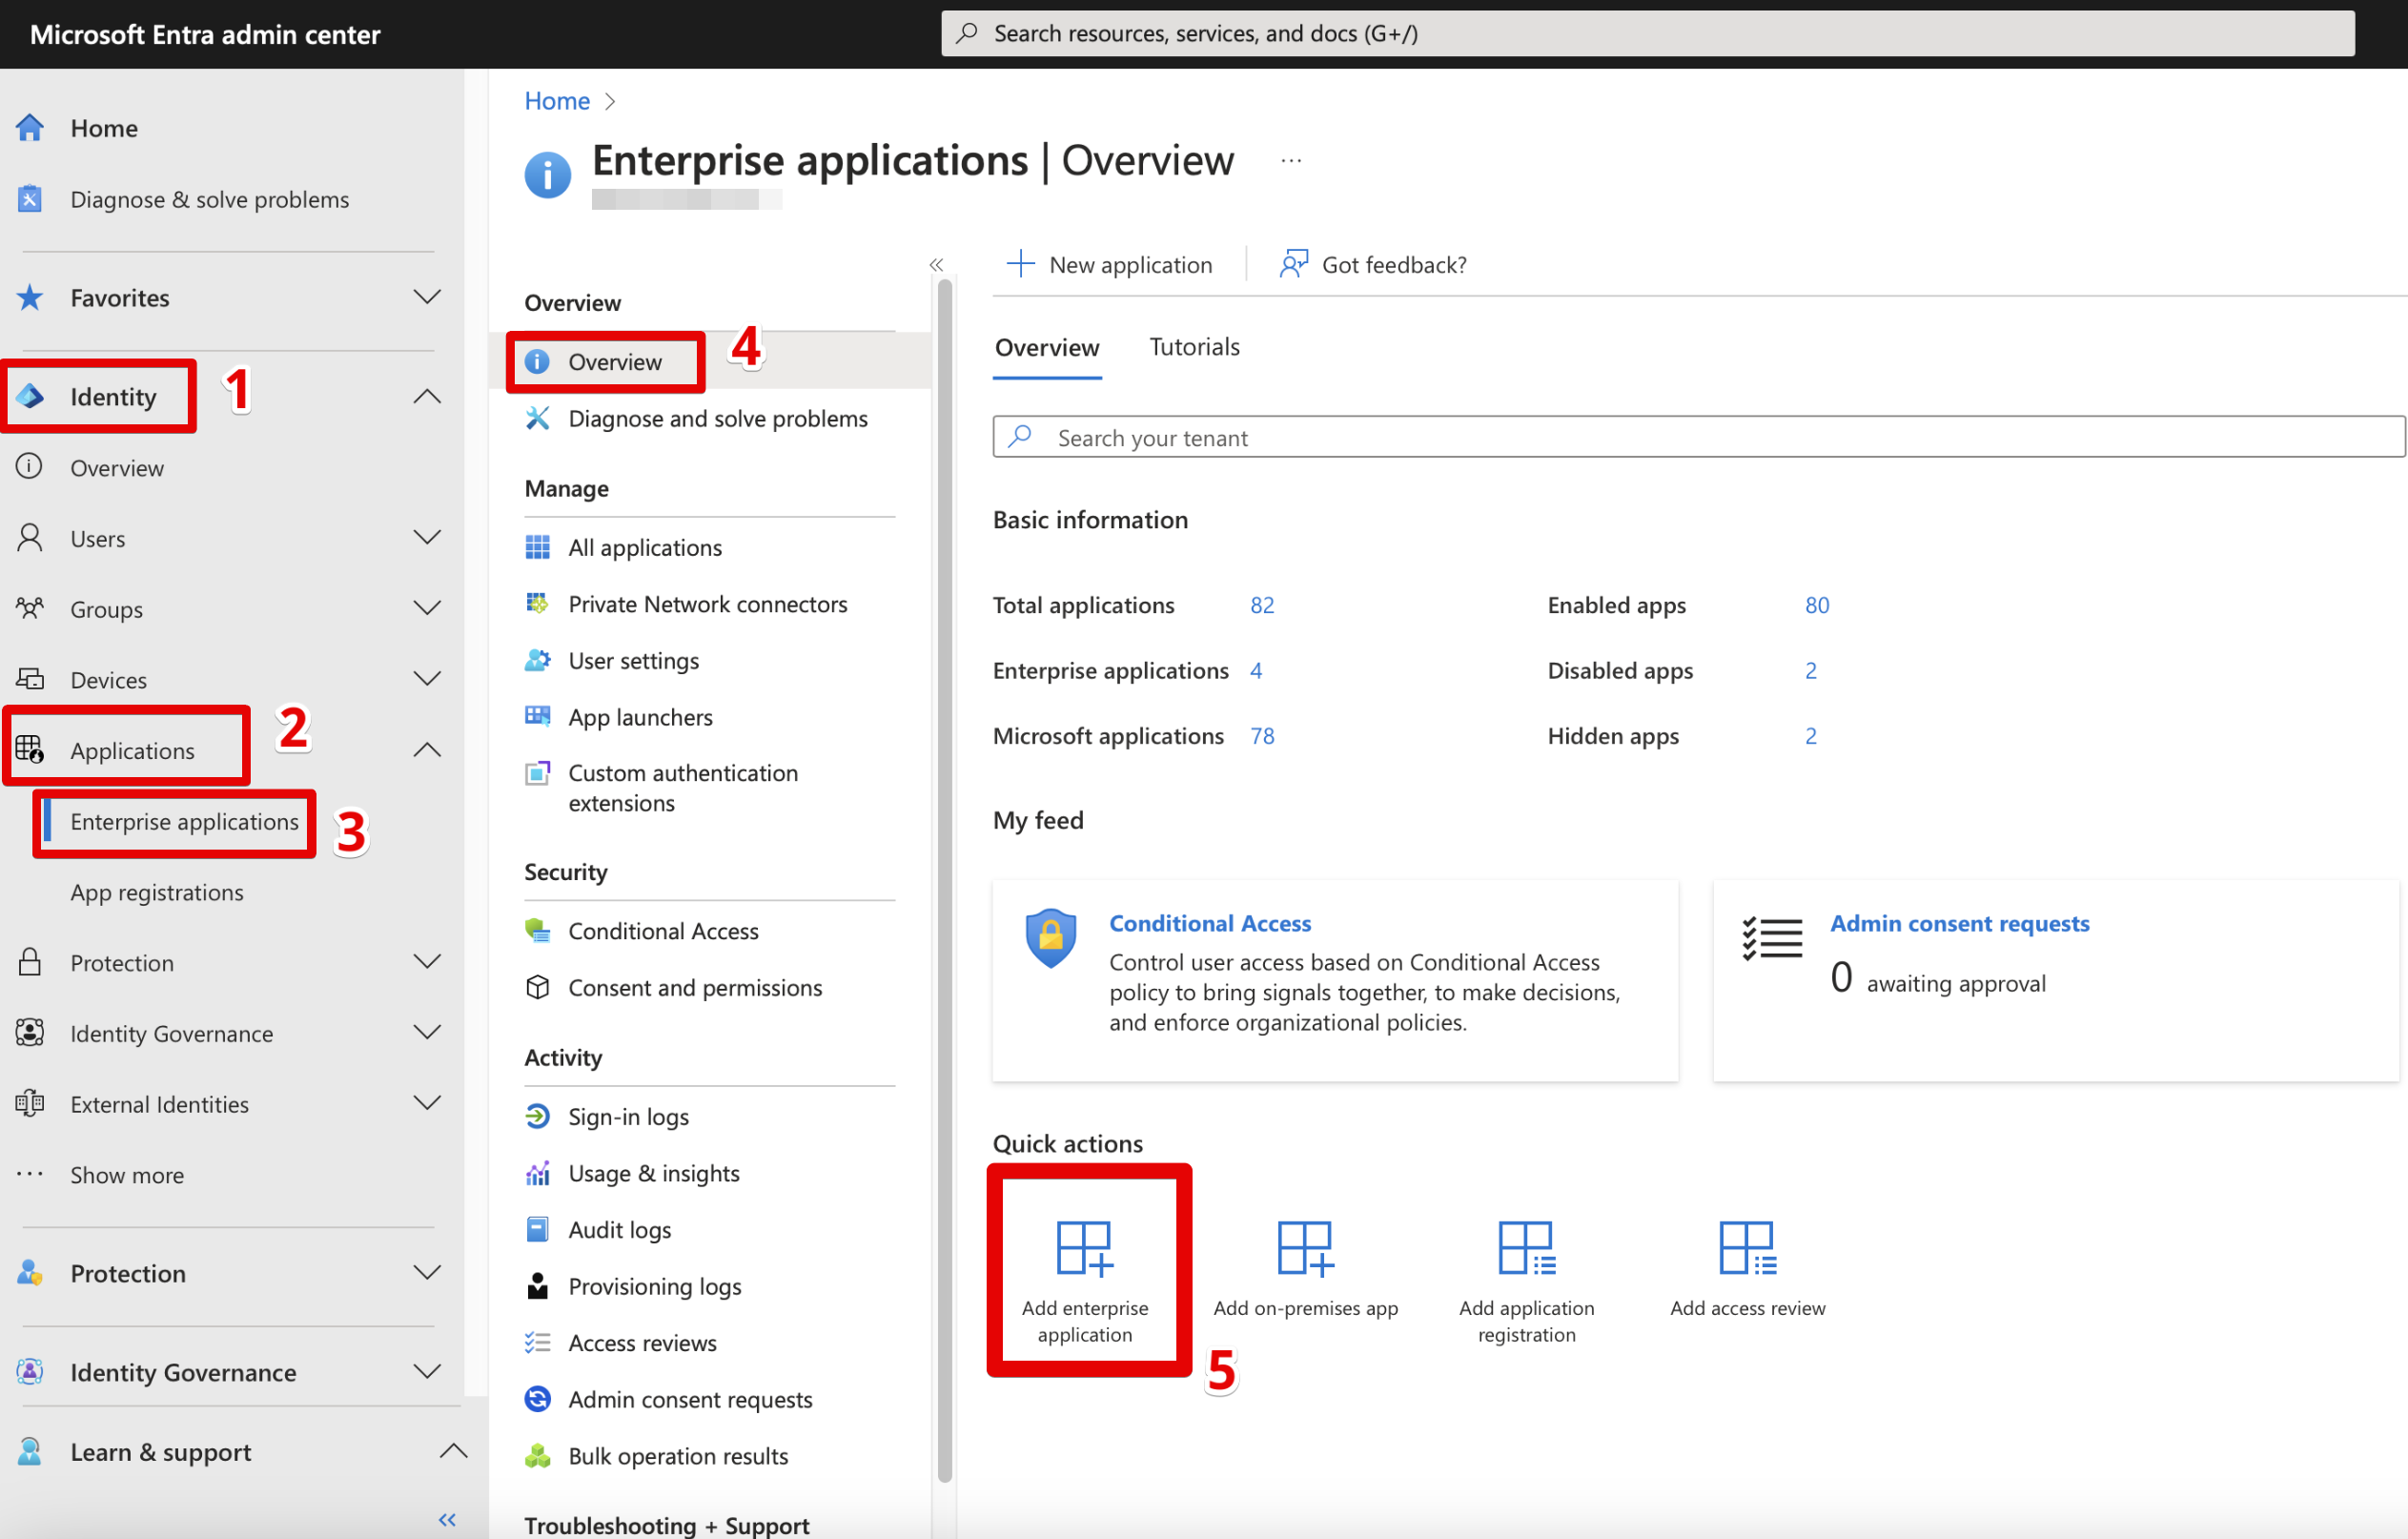
- Open Identity → Applications → Enterprise applications → Overview and choose Add enterprise application.
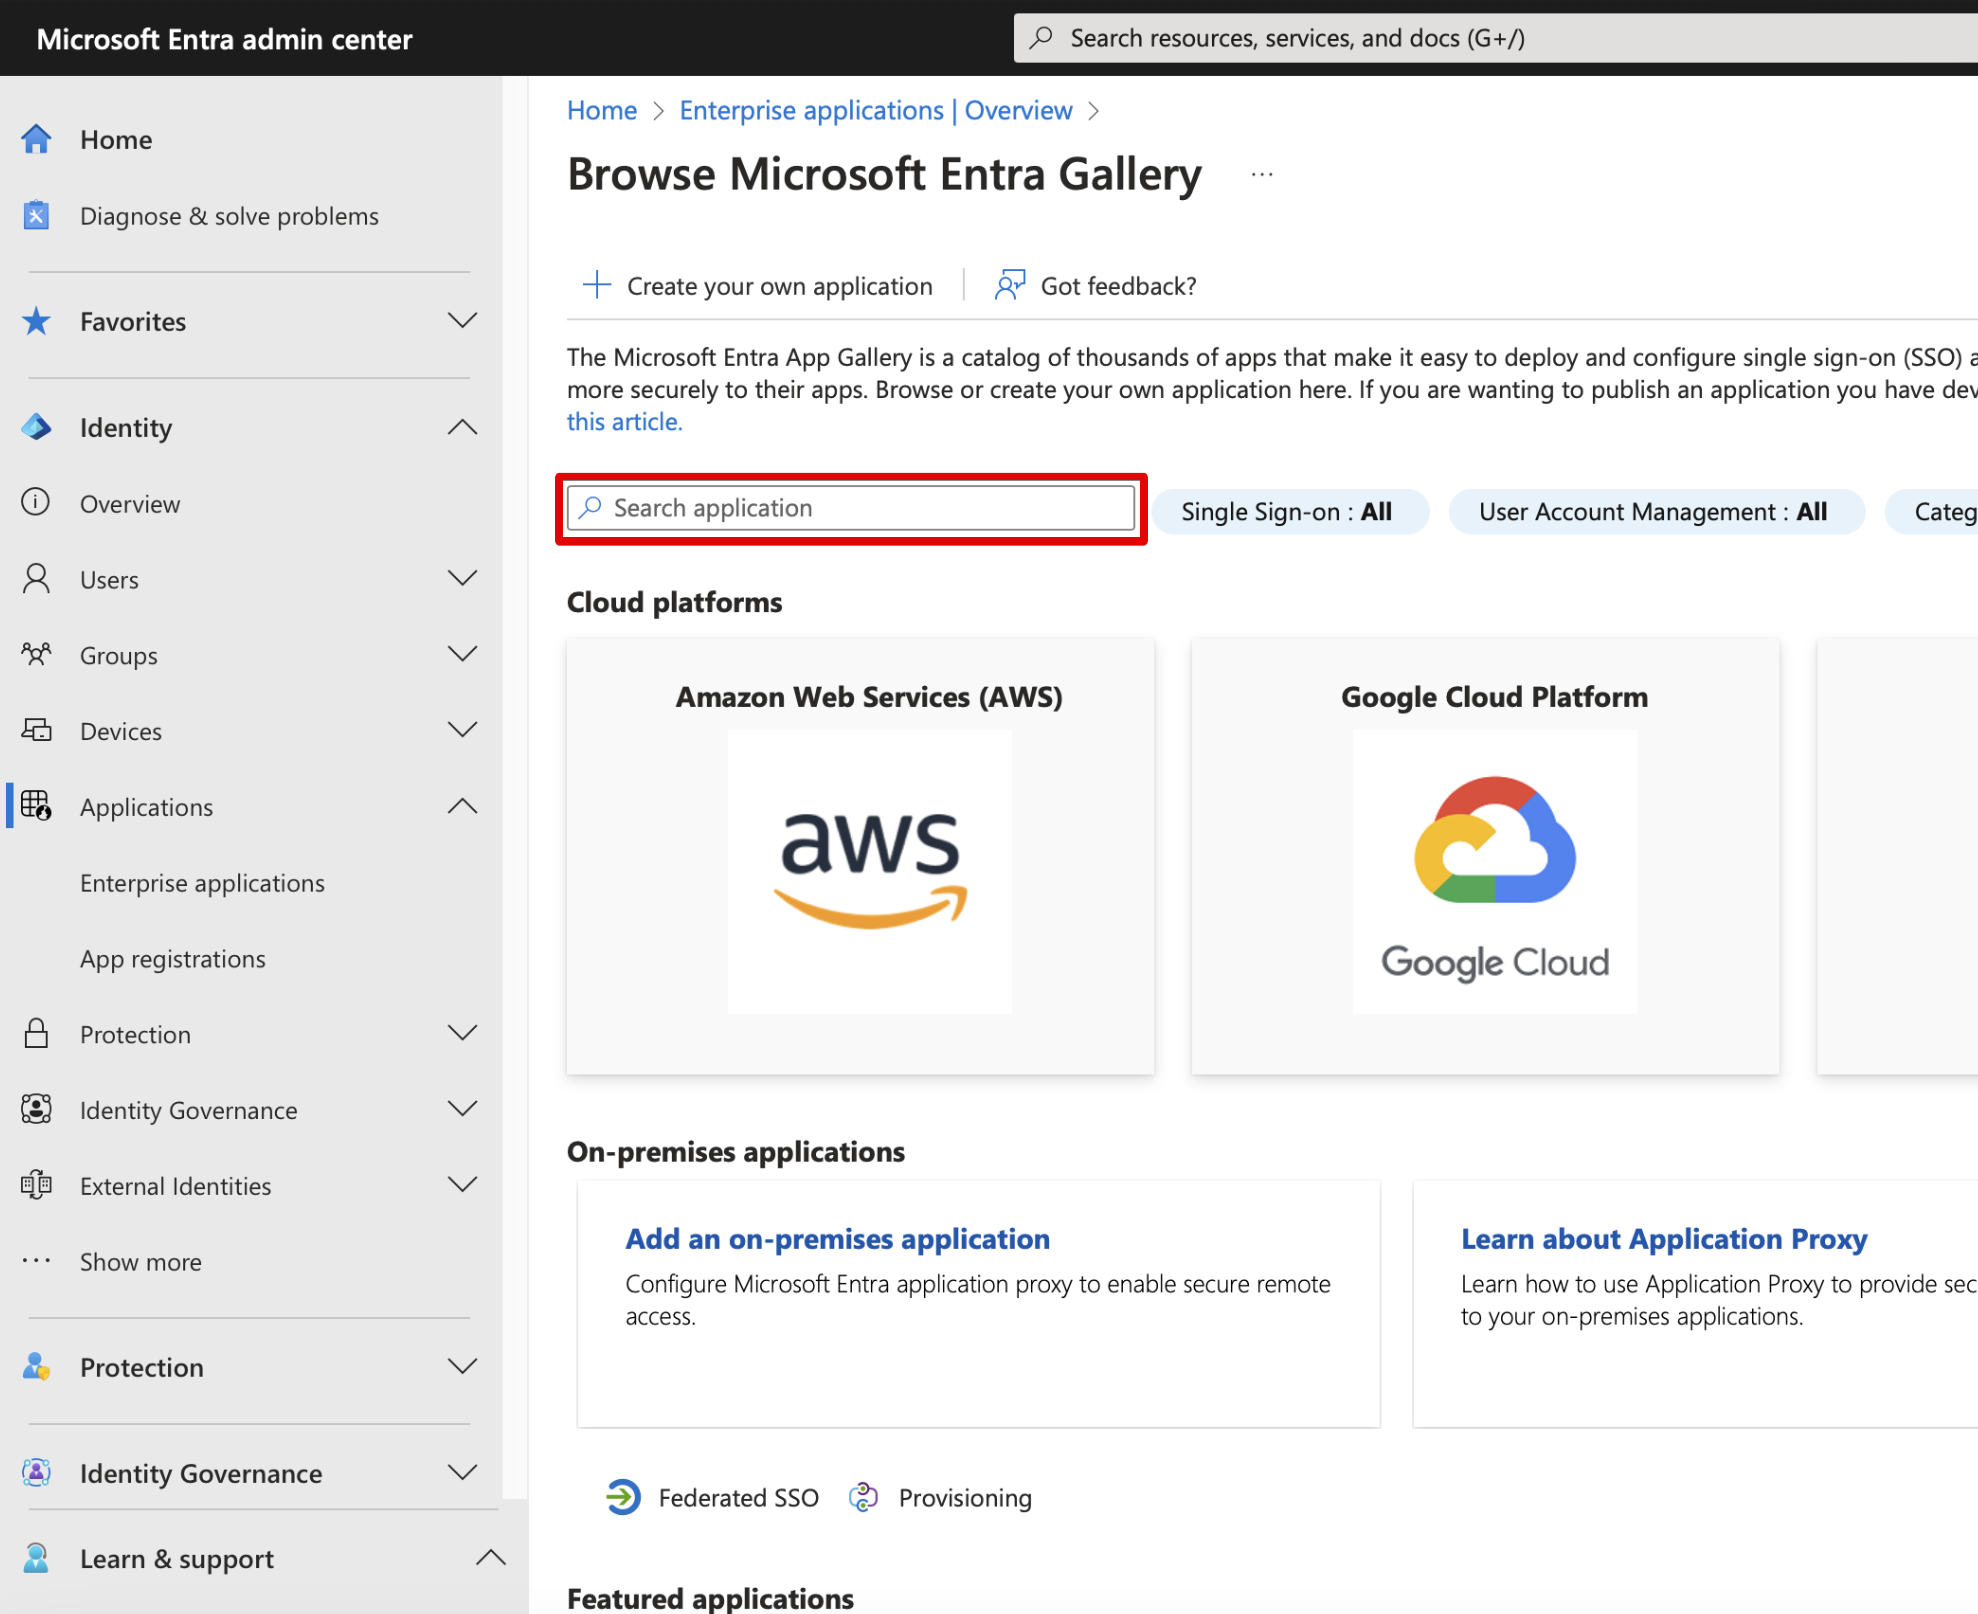
- Type “Microsoft Entra SAML Toolkit” in the Search application.
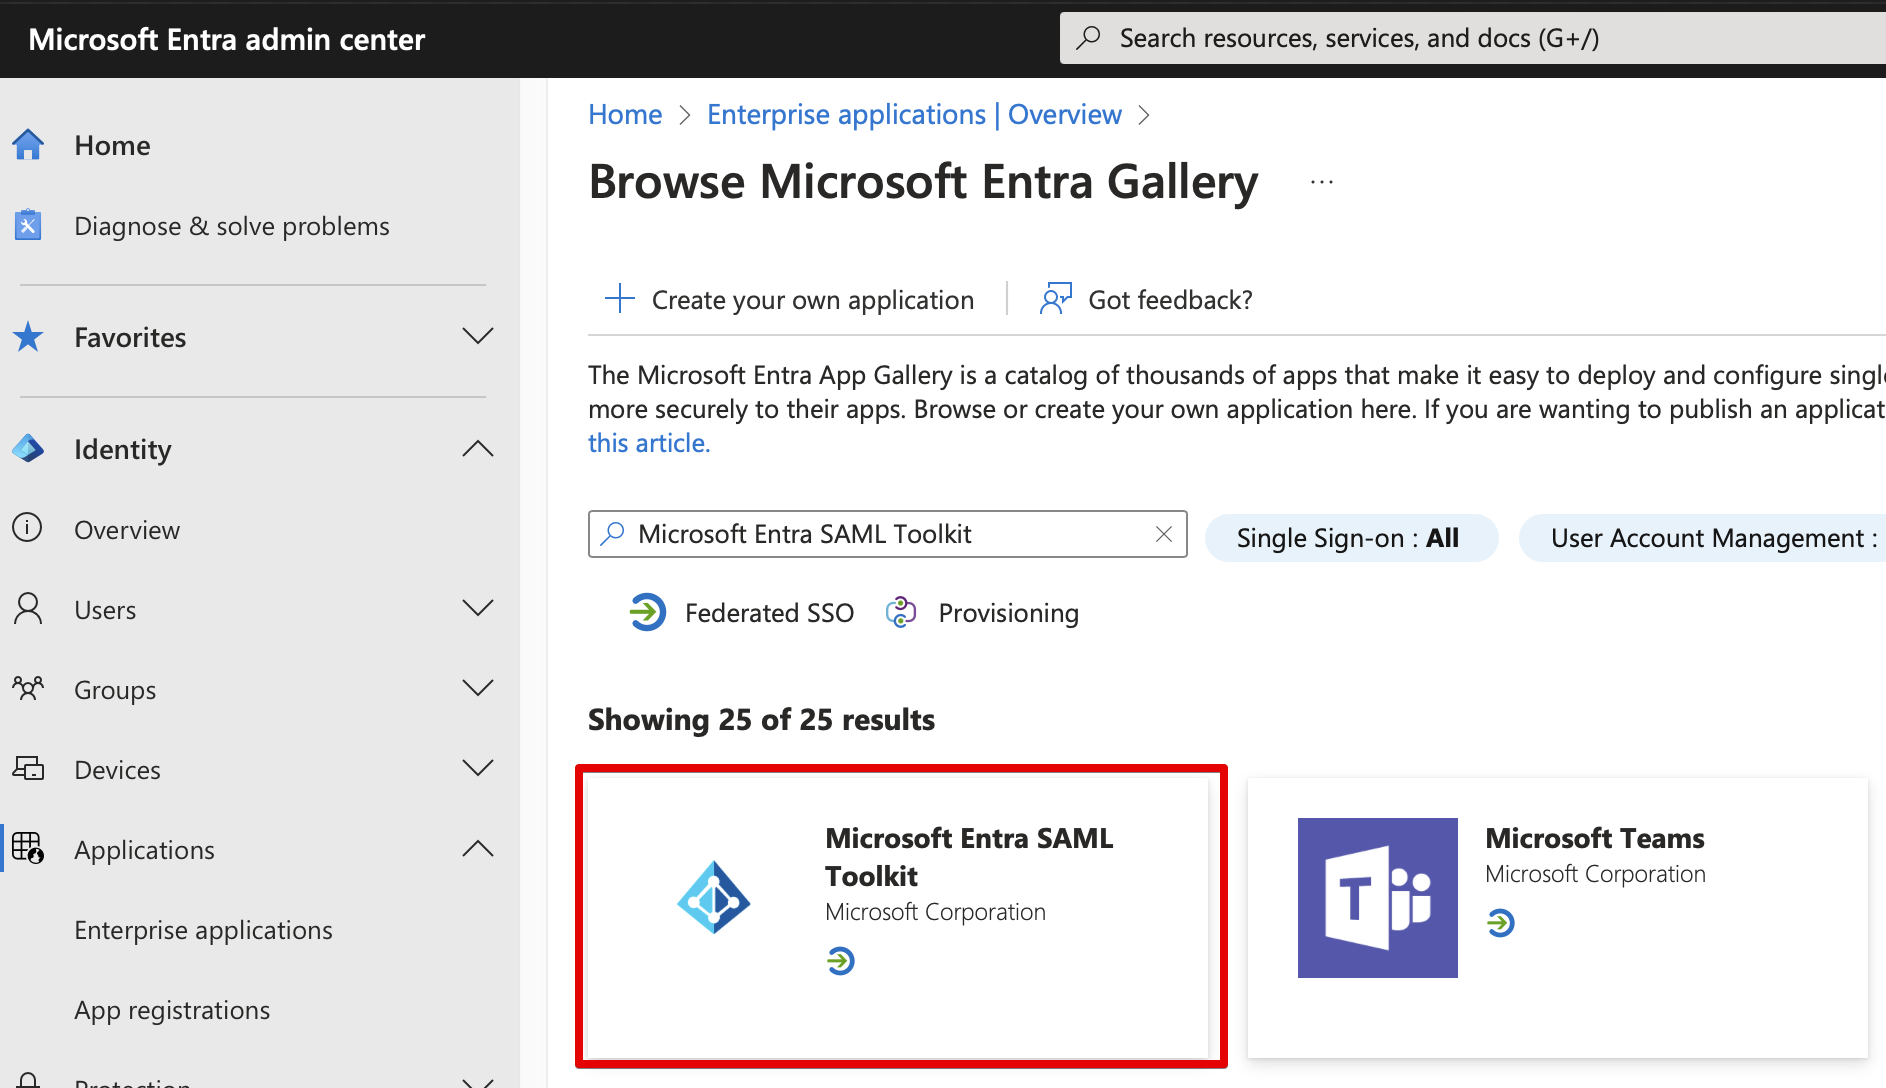
- Click on the founded toolkit:
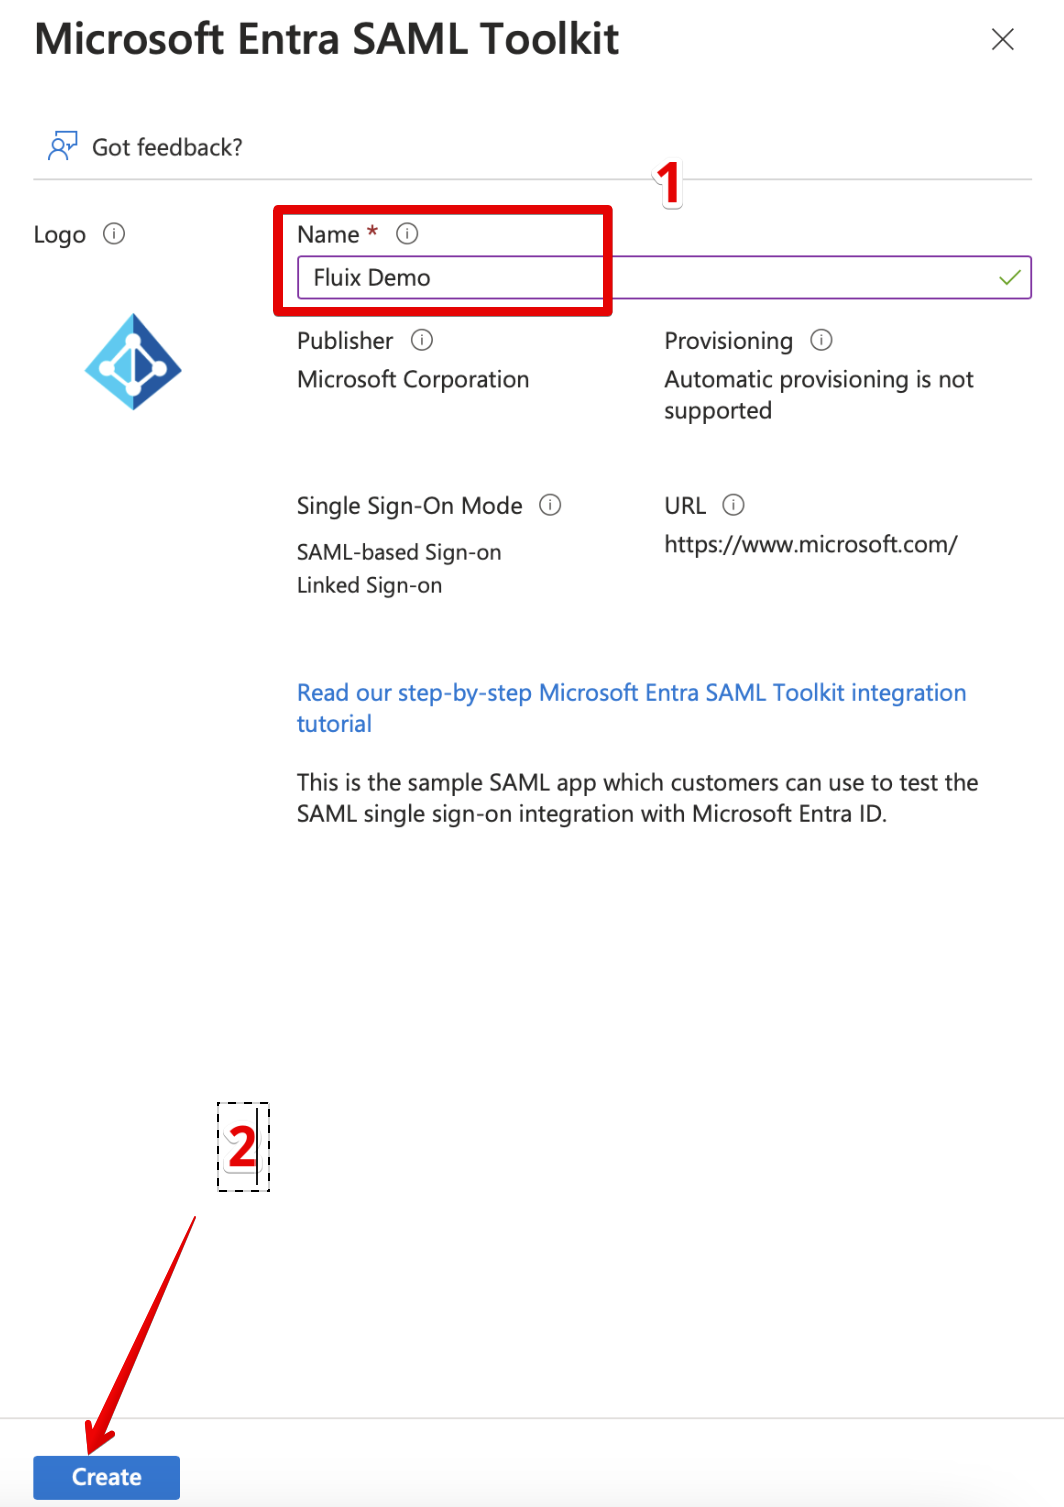
- Type the name in the opened window and press Create.
- After that, open your application page: (It may be opened automatically after pressing “Create” – this step can be skipped)
Identity → Applications → Enterprise applications and selected created by you Application from the list.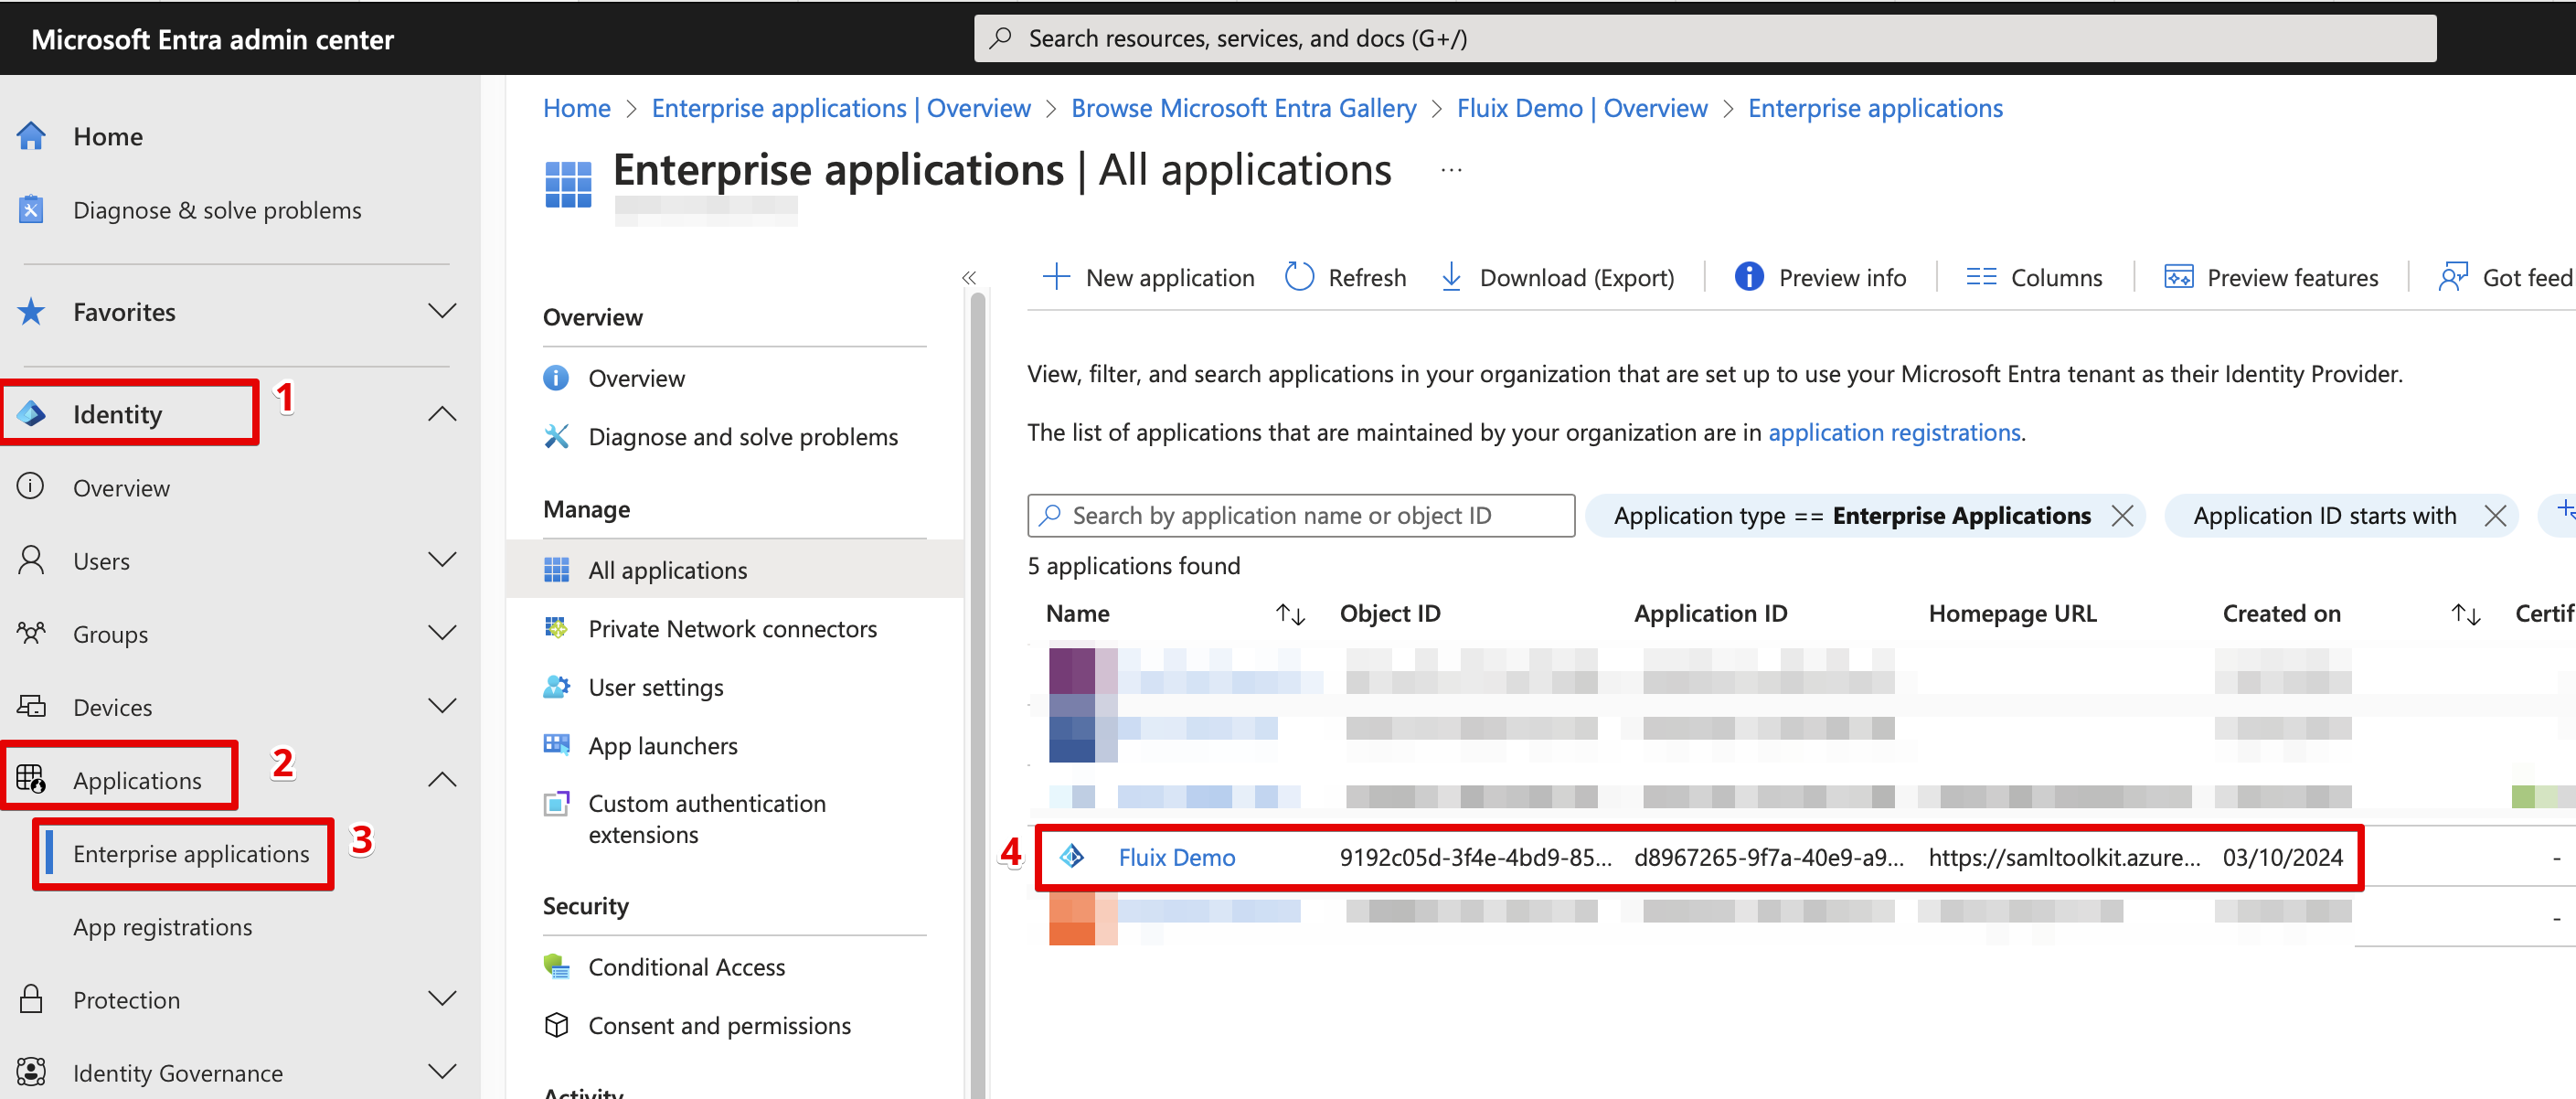
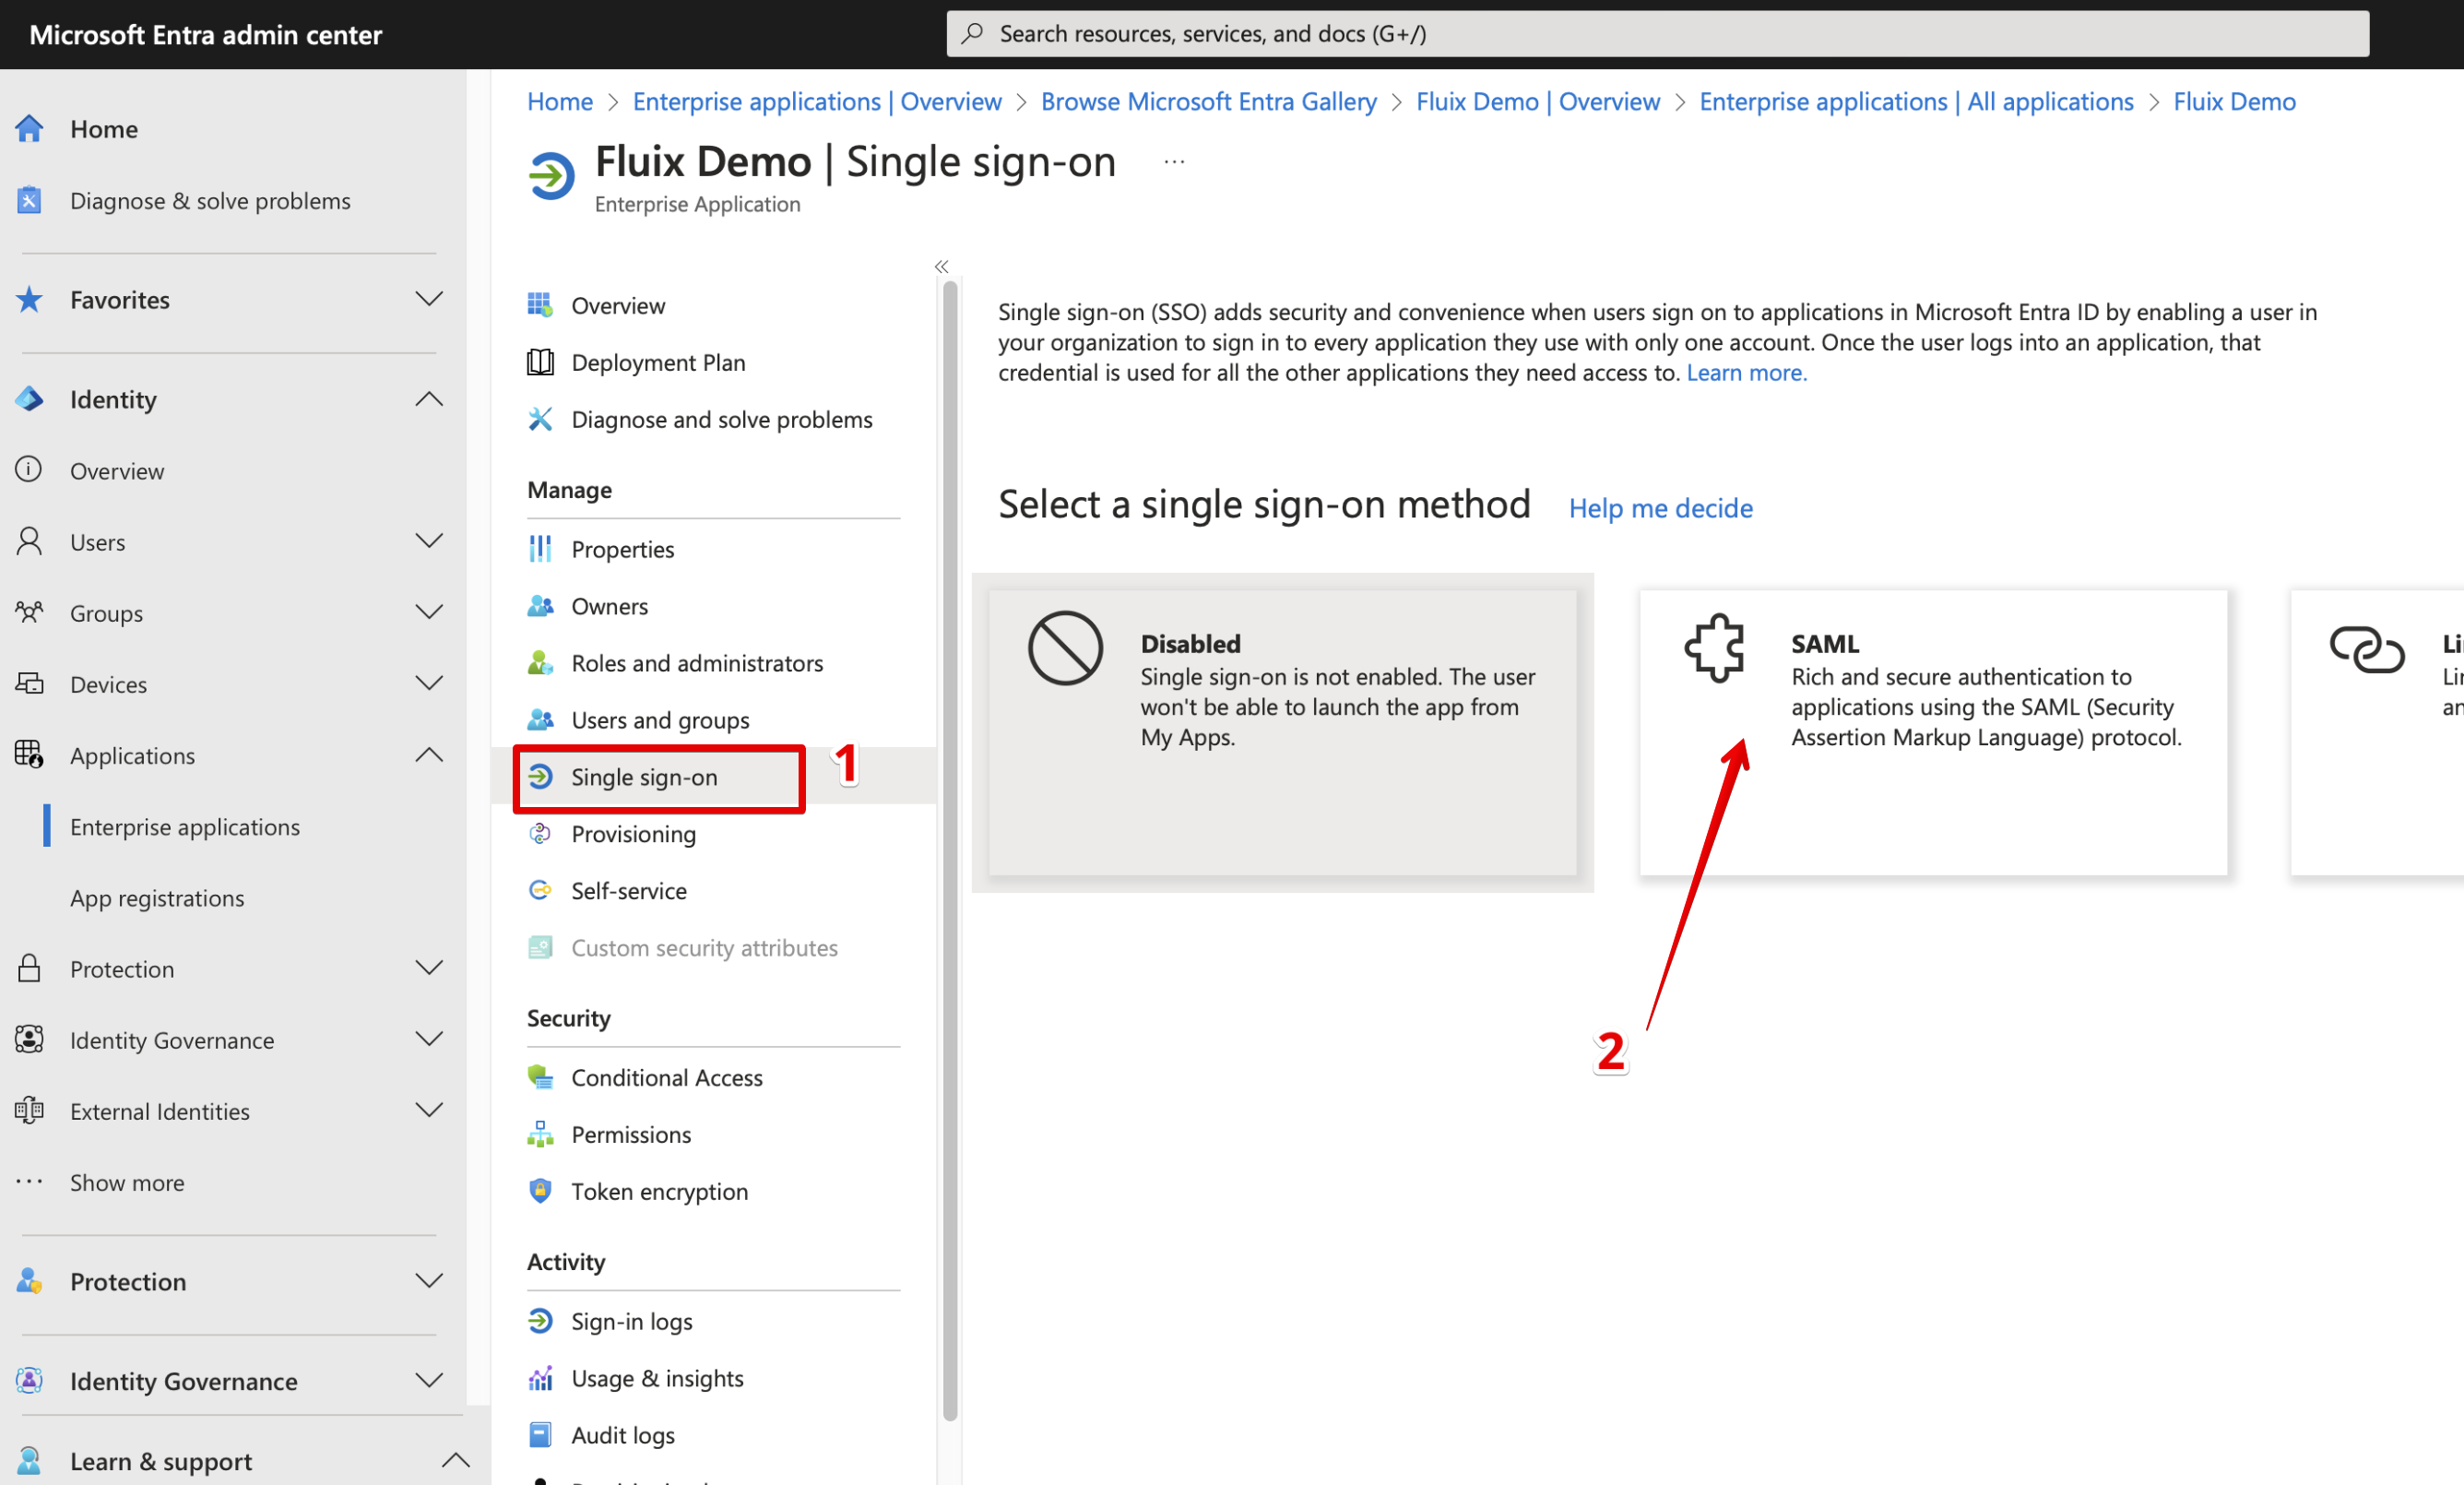
- Navigate to Single Sign On menu and select SAML.
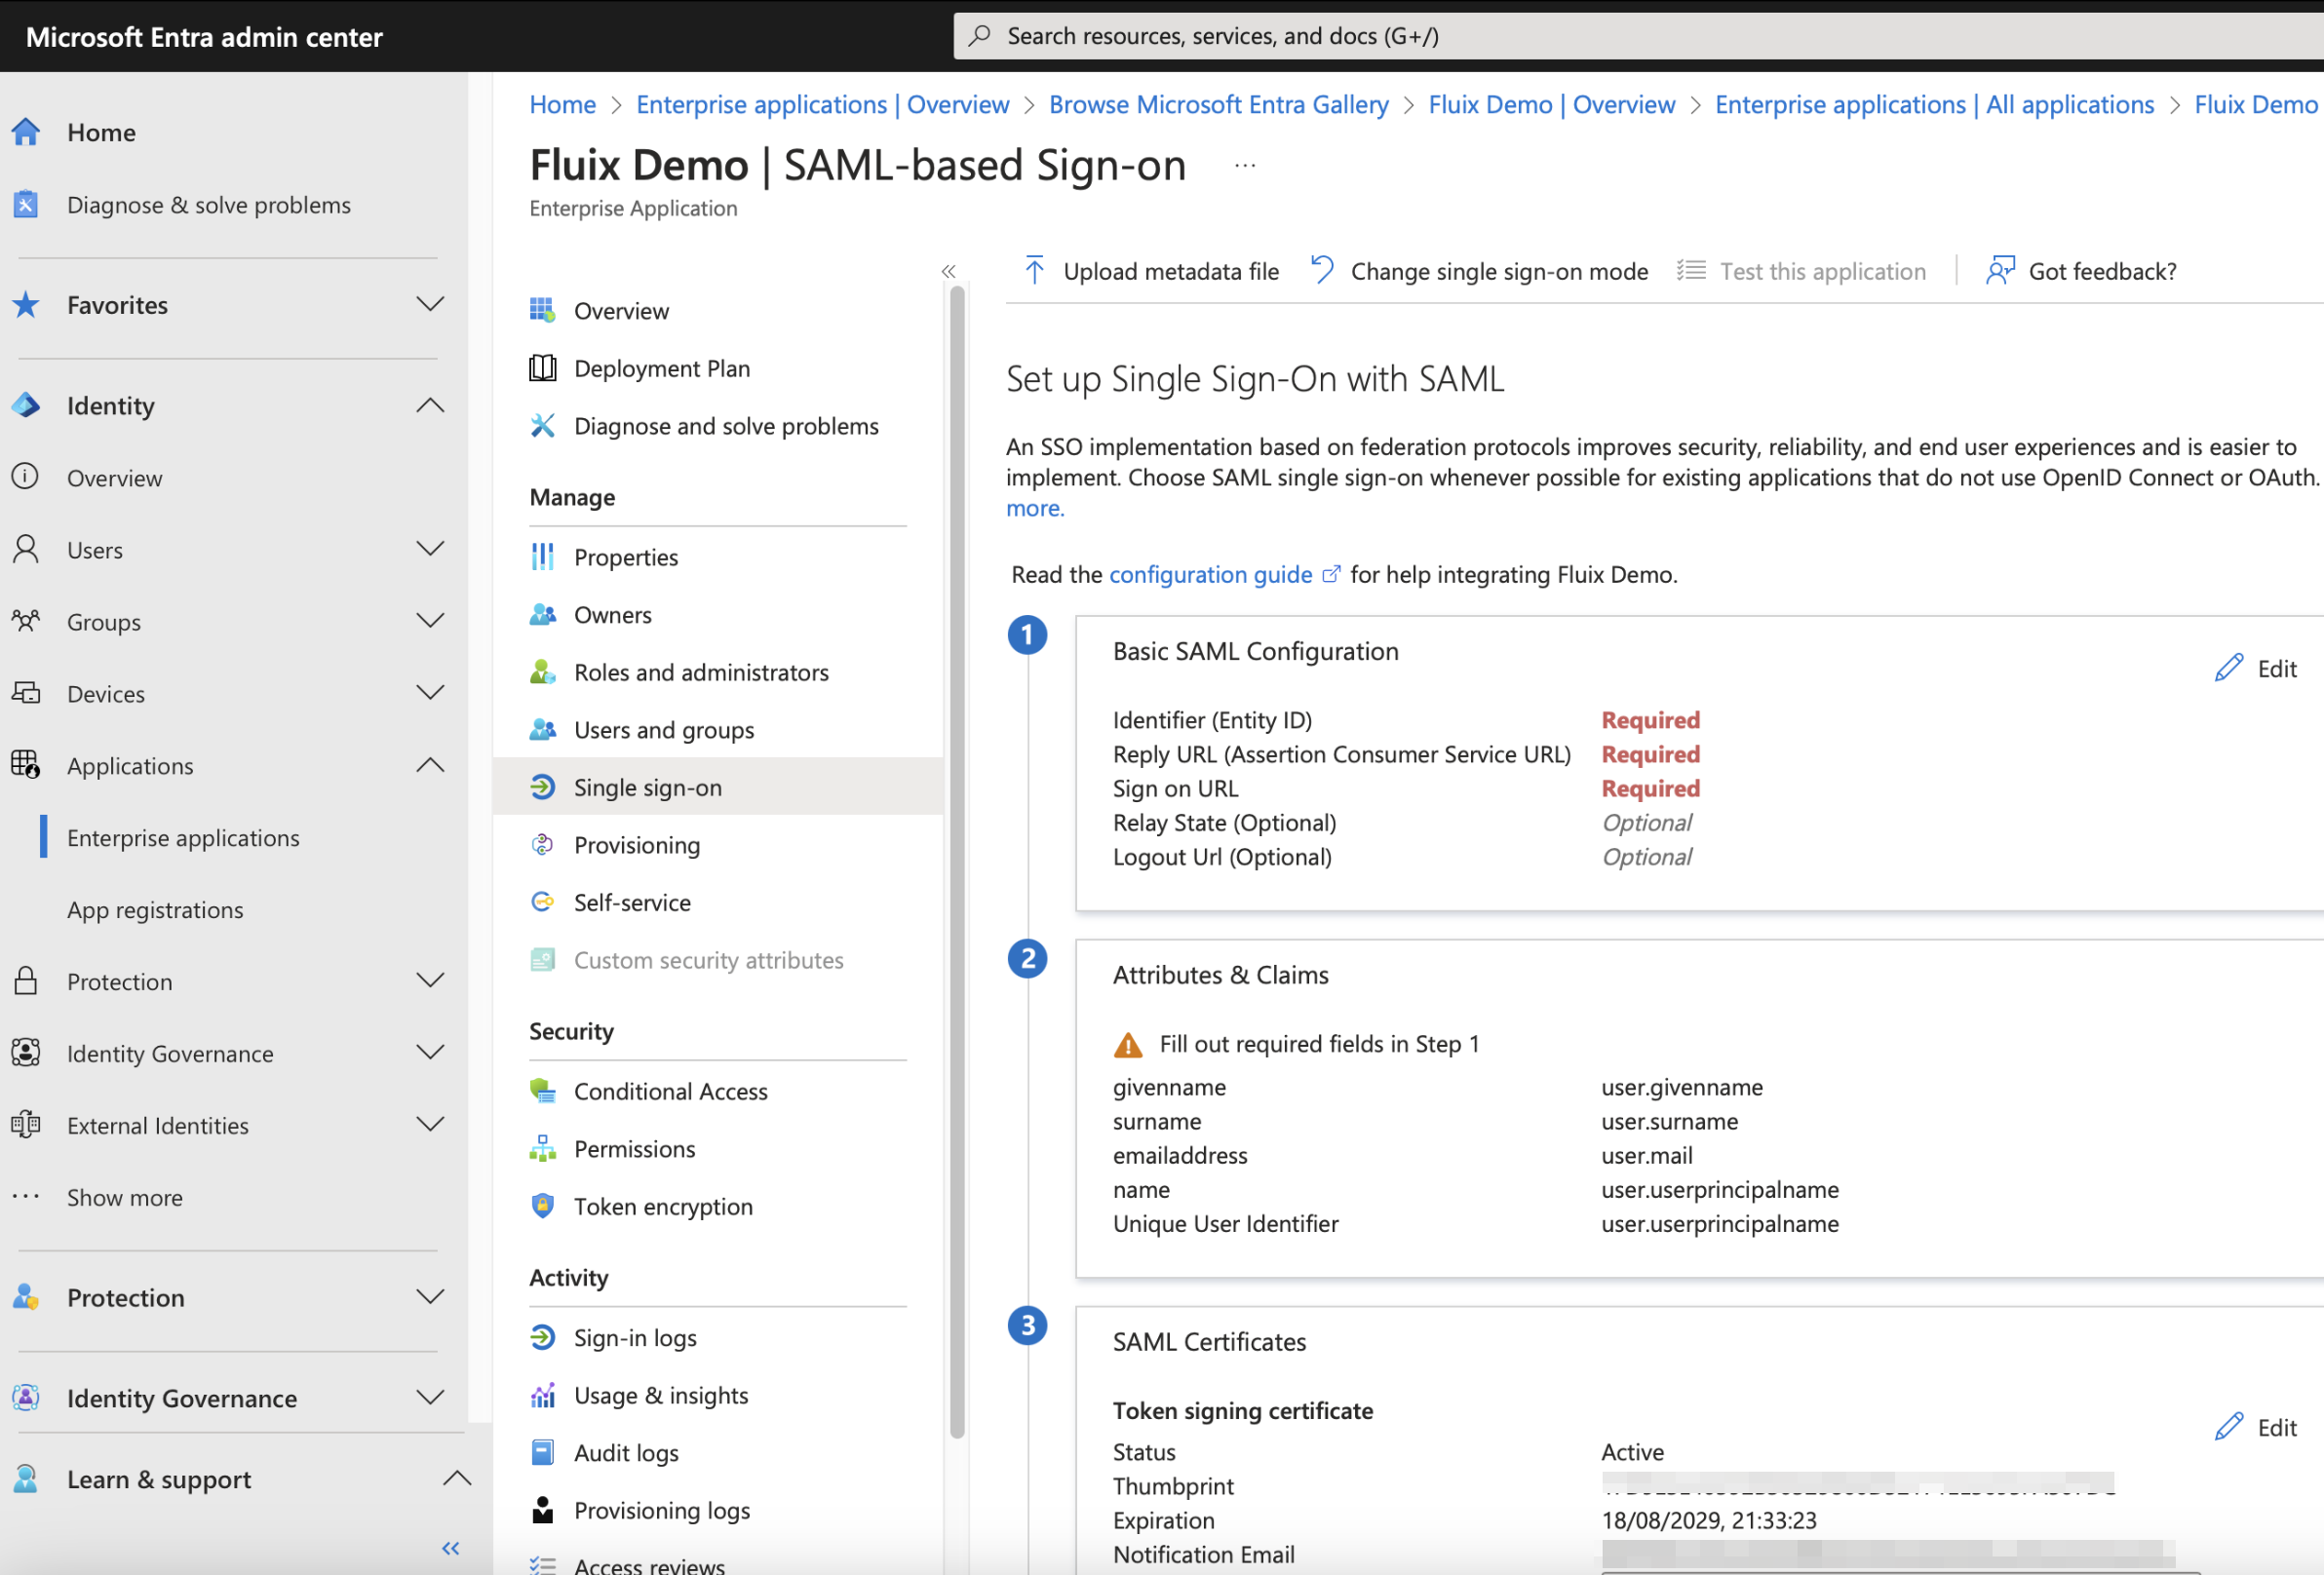
- It will lead you to Application SAML configuration page:
- On this step, open in the separated tab Fluix Admin Portal -> Settings -> Security -> enable Enable Sign On using SAML and fill out Company Email Domain field:
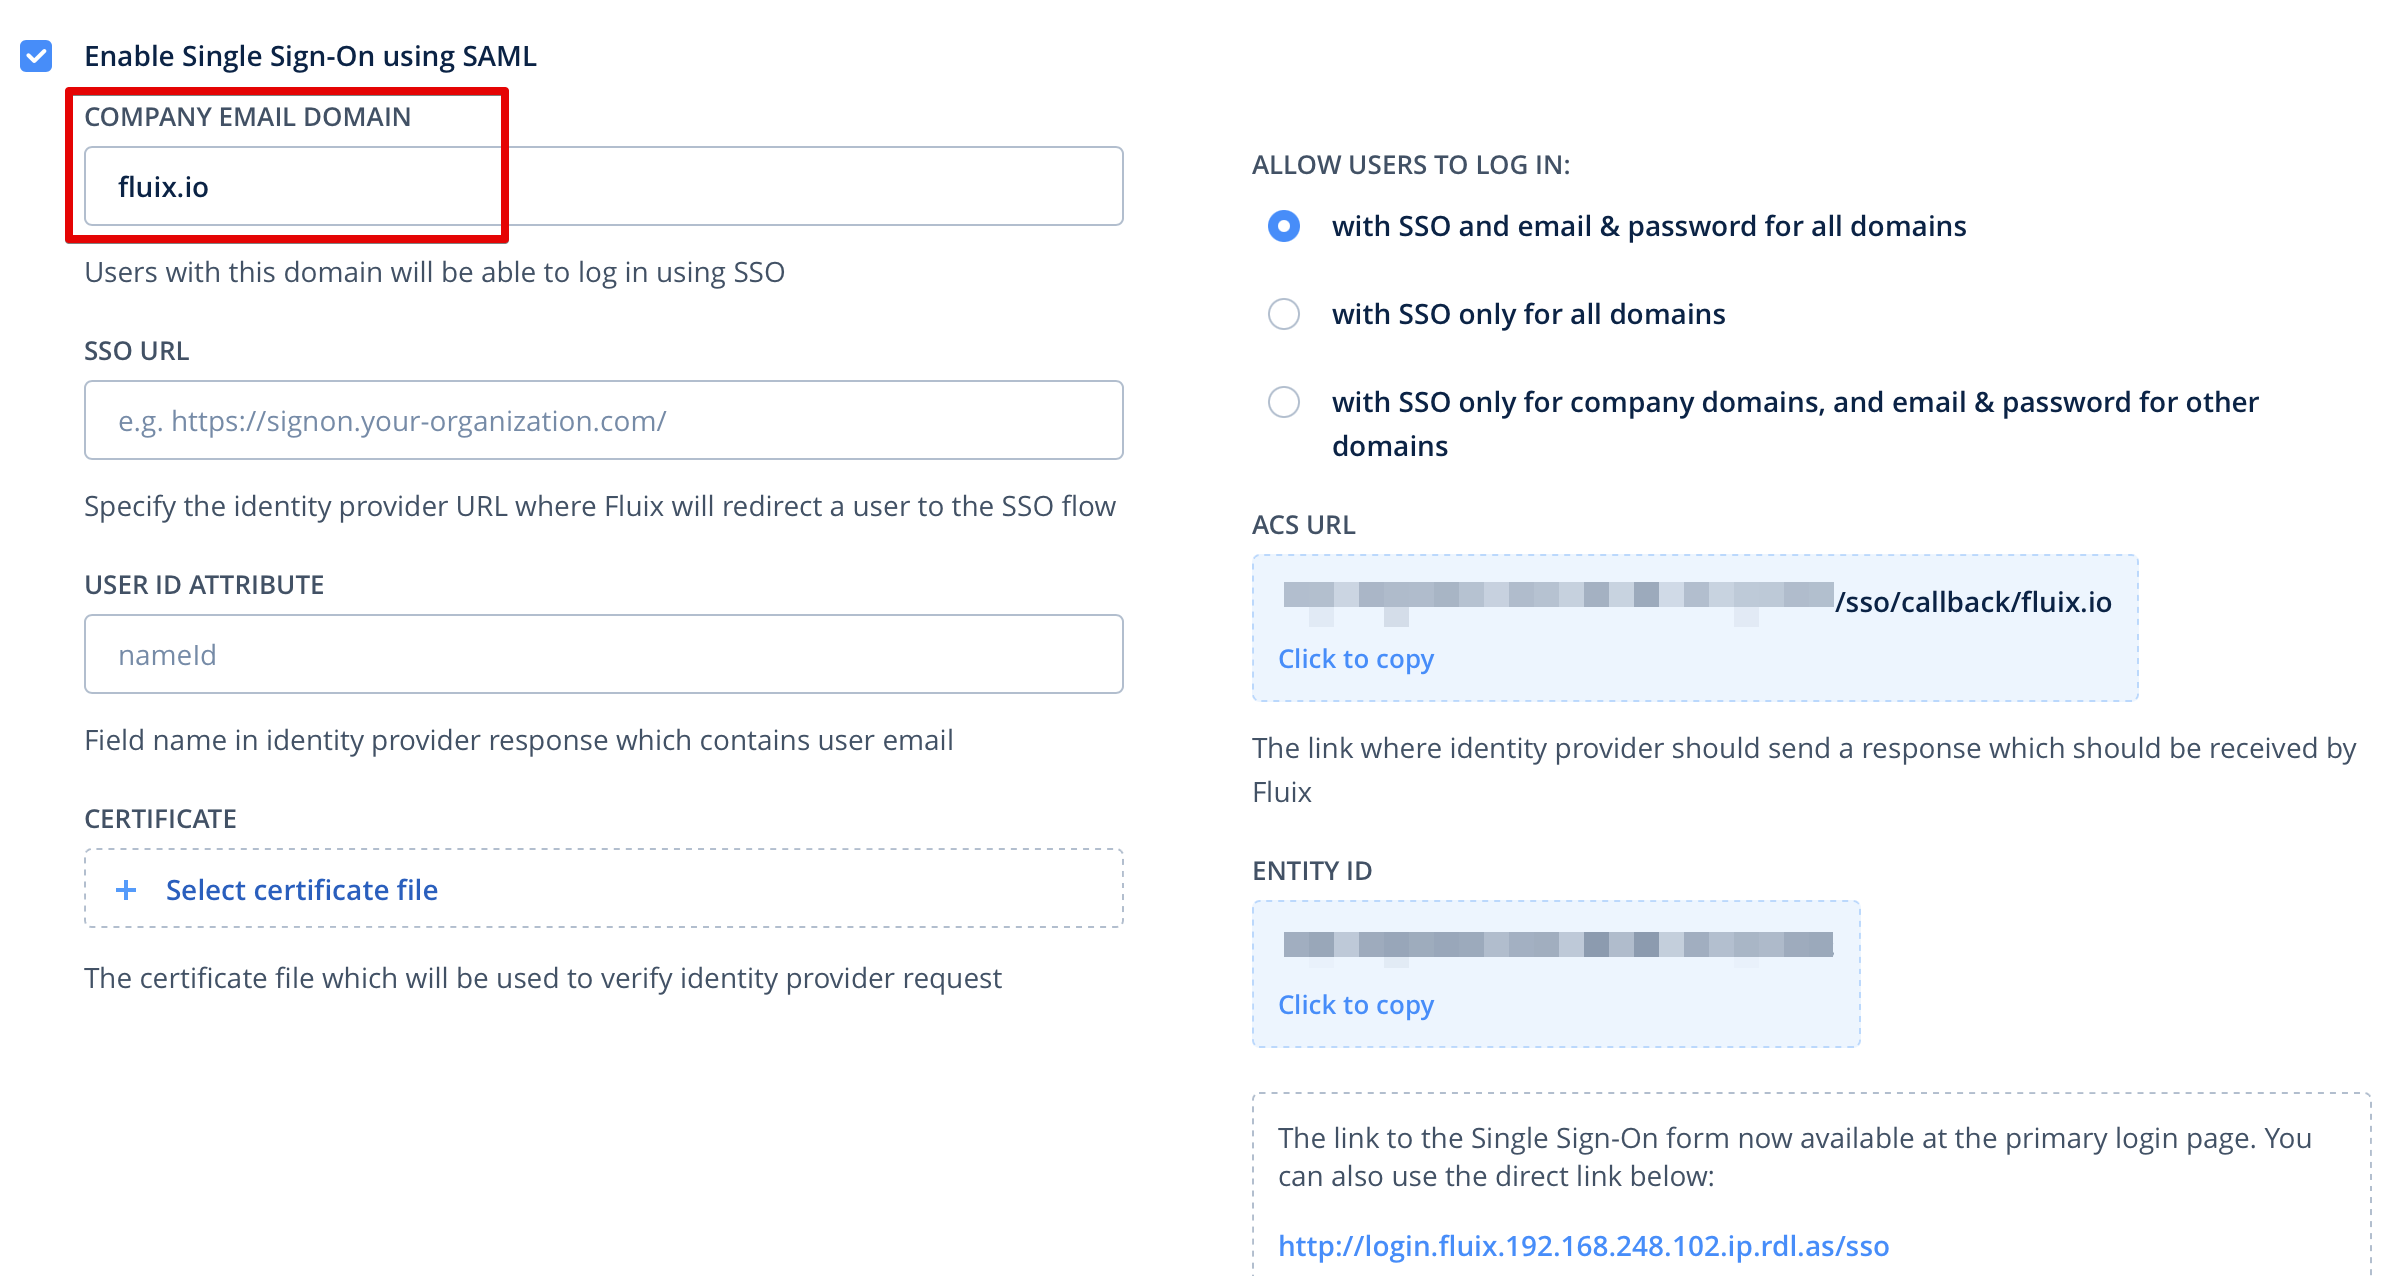
- After that, ACS URL will change and consist of the entered “Company Email Domain”.
- Navigate back to your Microsoft account and click Edit on the first block step:
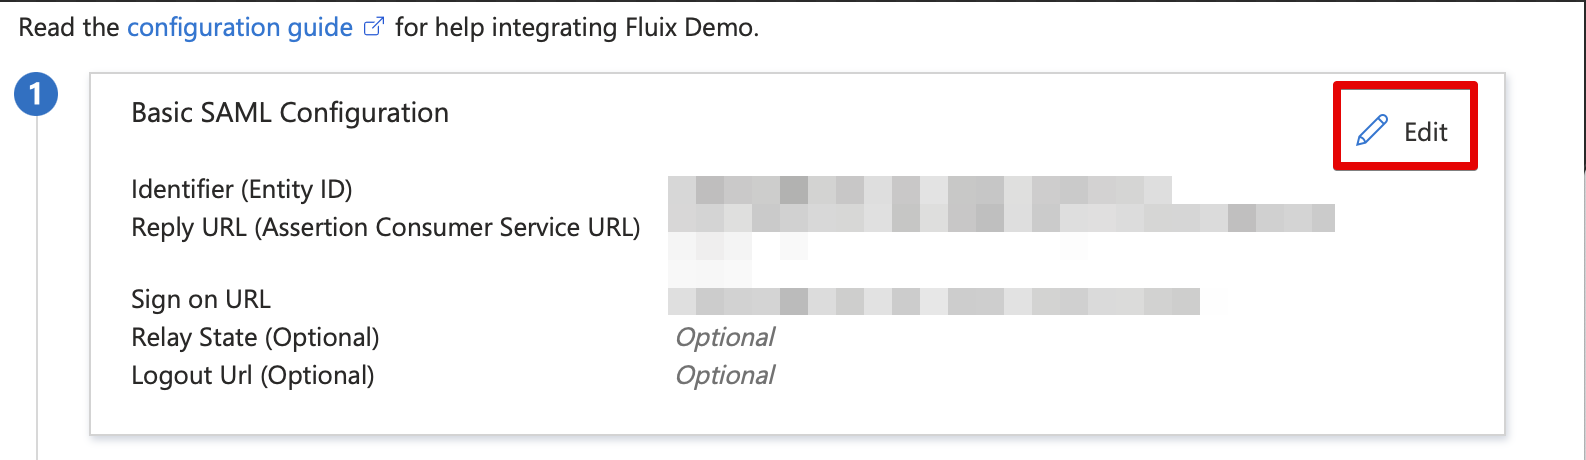
- Add from Fluix to Microsoft the following settings, and click Save:
- ACS URL – https://login.fluix.io/sso/callback/{domain} – instead of {domain}, please substitute your company’s email domain
- Entity ID – https://login.fluix.io
The link to the Sign-On form → Sign on URL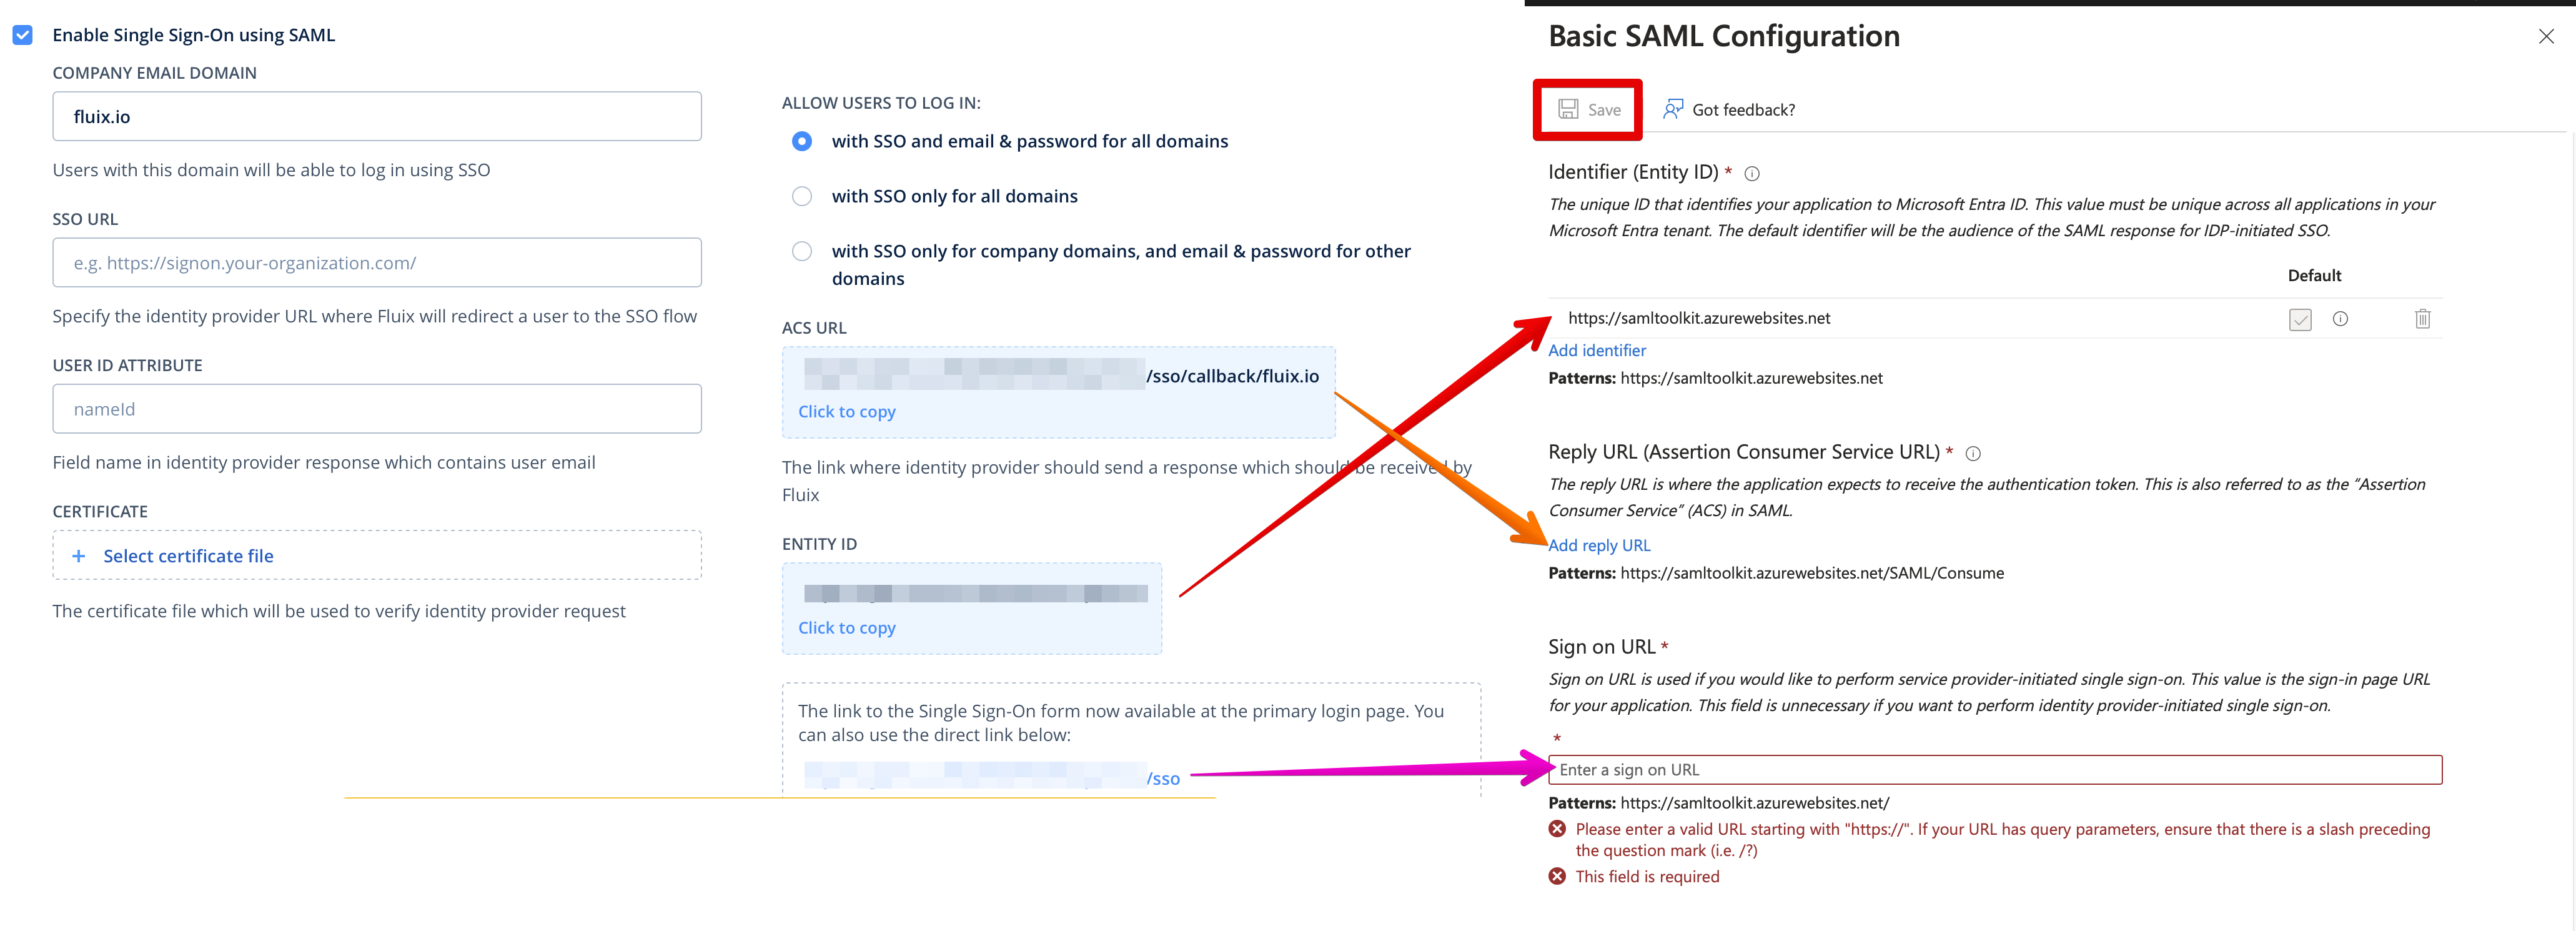
- Navigate in Microsoft to the next block 2 and click Edit:
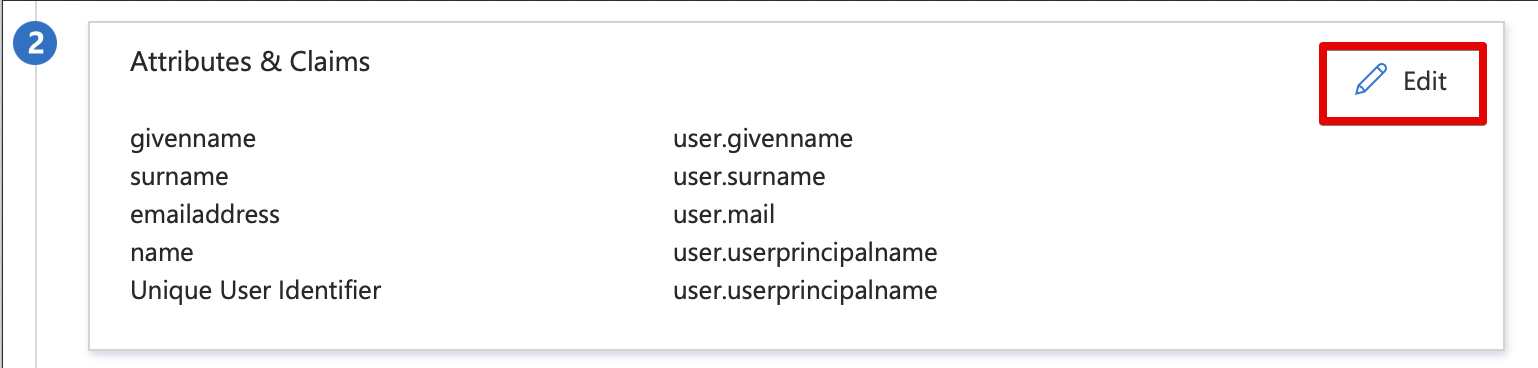
- On the opened page:
delete all additional claims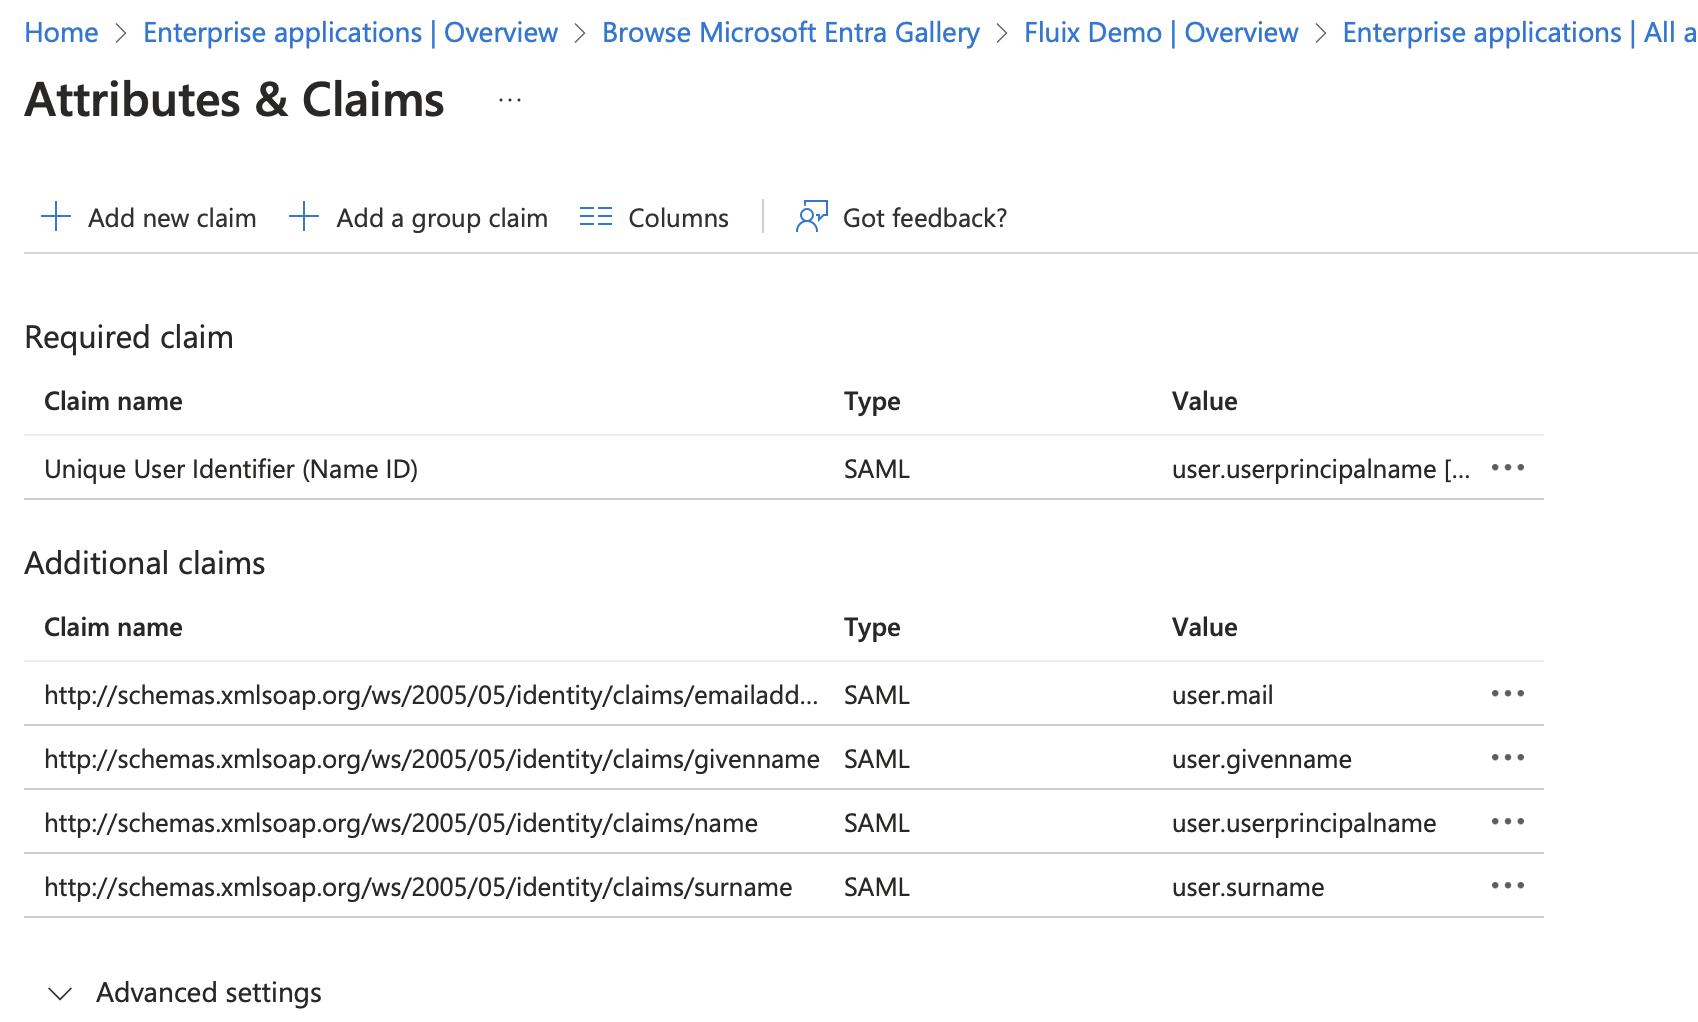
change value of Unique User Identifier (Name ID) to the user.mail or any other source attribute which consists of user email (this email will be used to authenticate a user in Fluix) and press Save.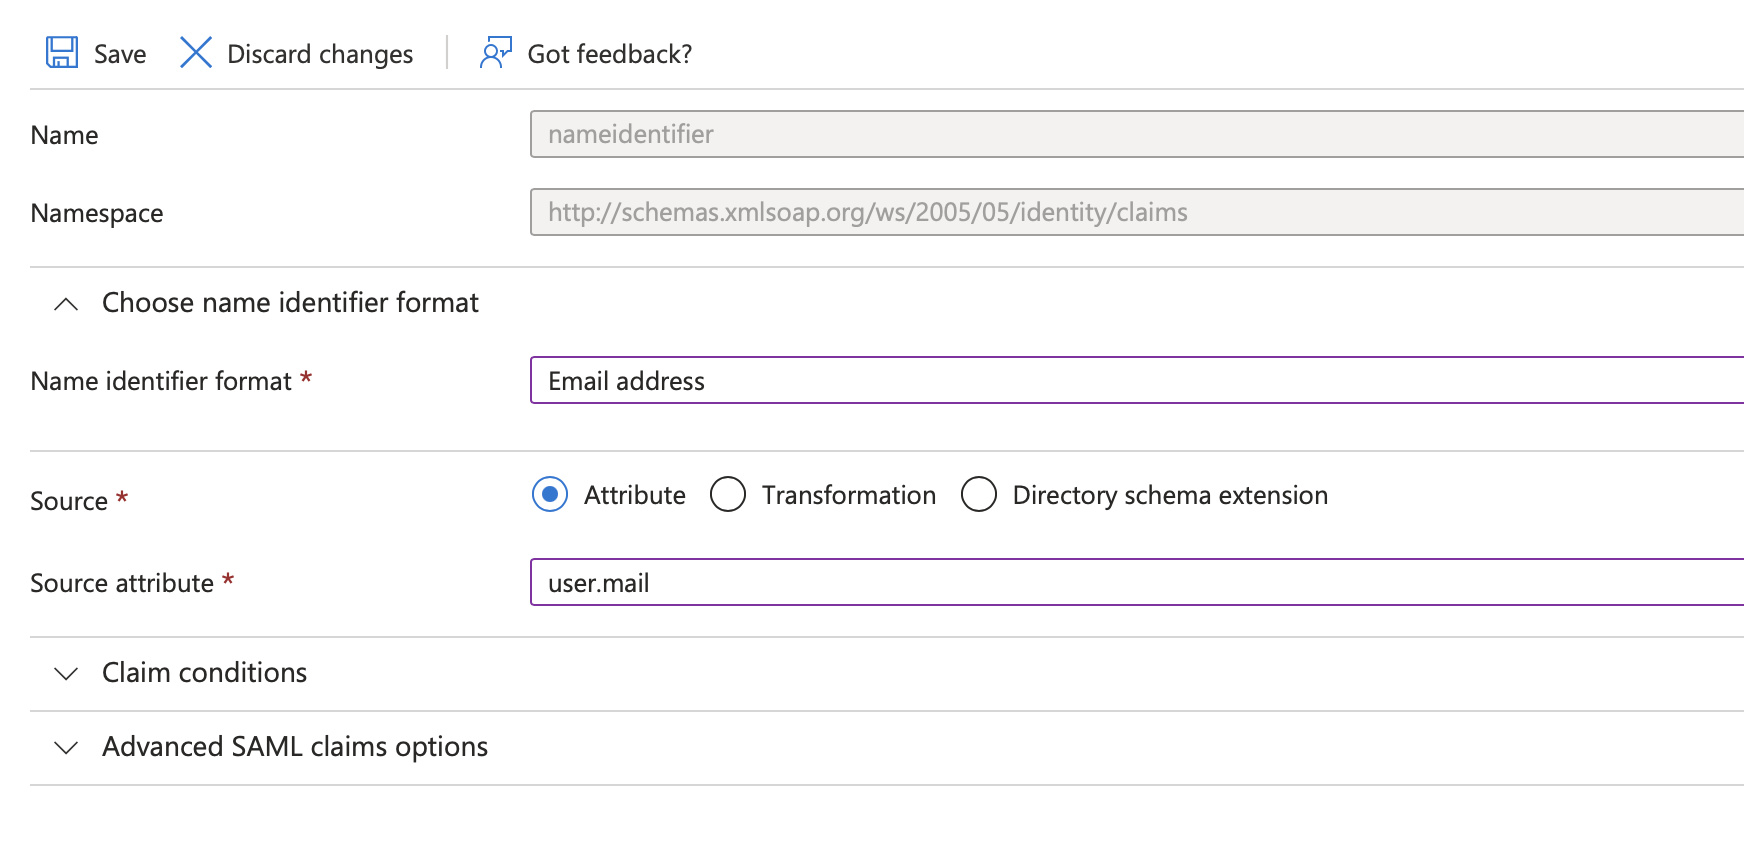
- Return back to Microsoft SAML Configuration:
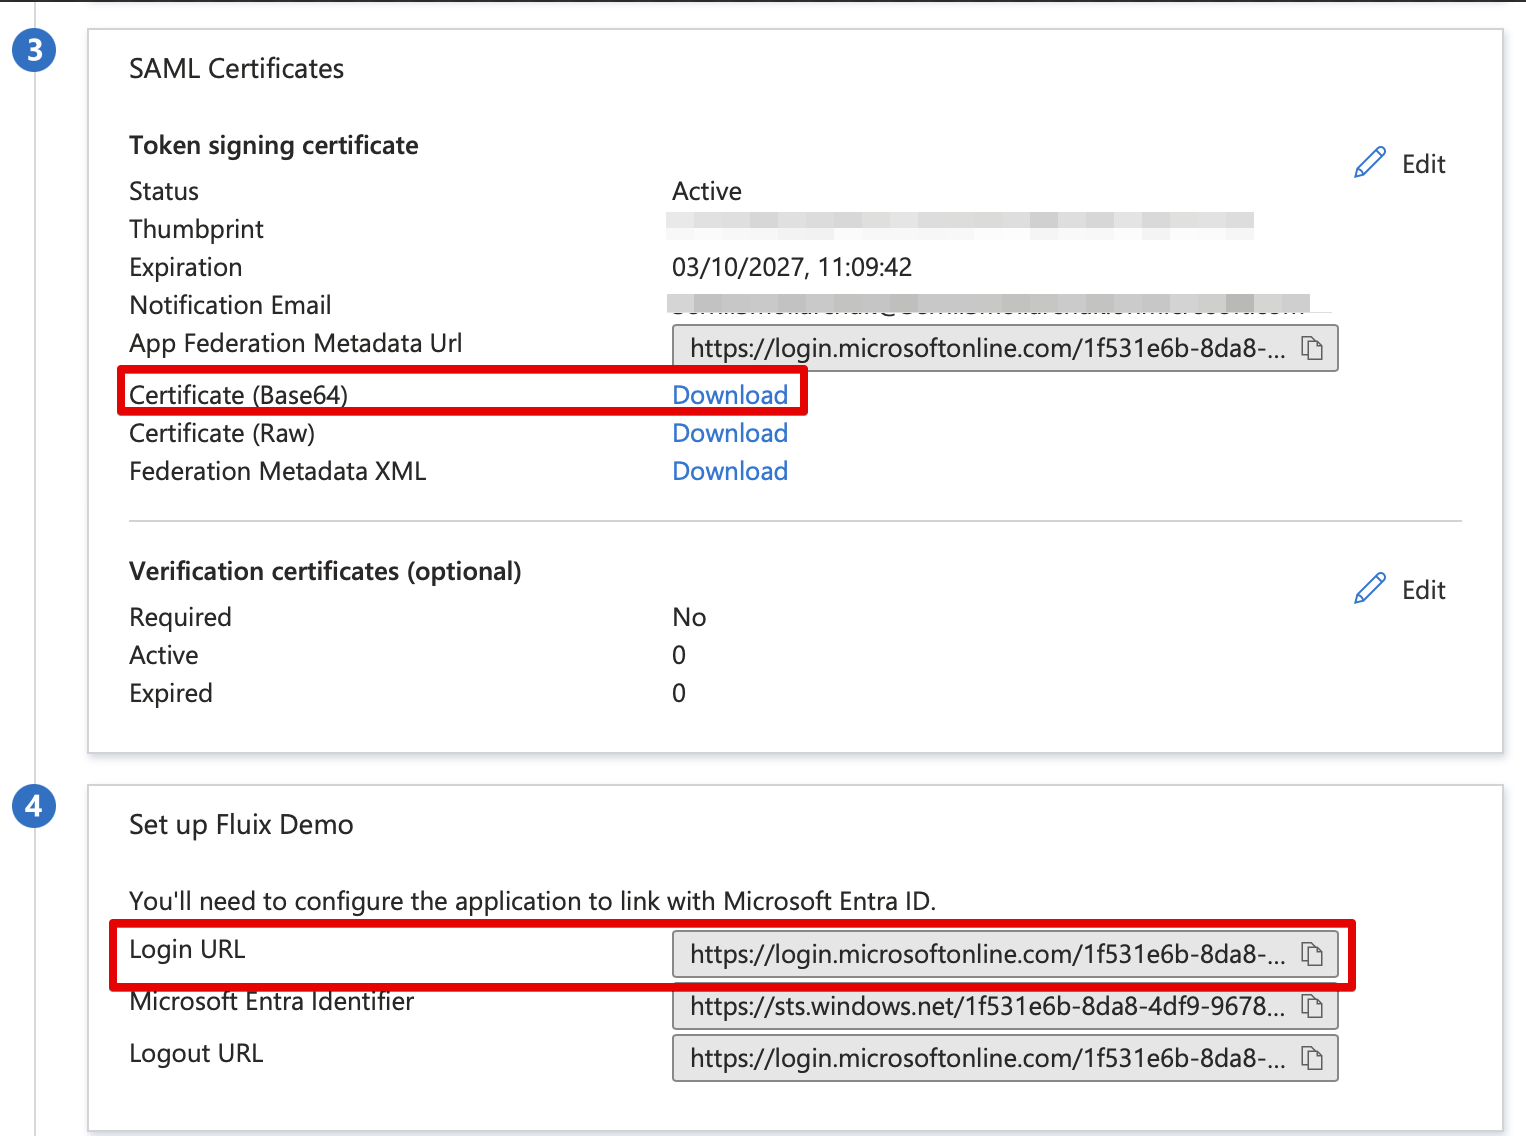
copy Login Url from Microsoft to Fluix SSO Url
download Certificate (Base64) to Fluix certificate
keep USER ID ATTRIBUTE in Fluix empty (it’s an advanced option to receive email from SAML Response using additional claims)
press Save Changes in Fluix.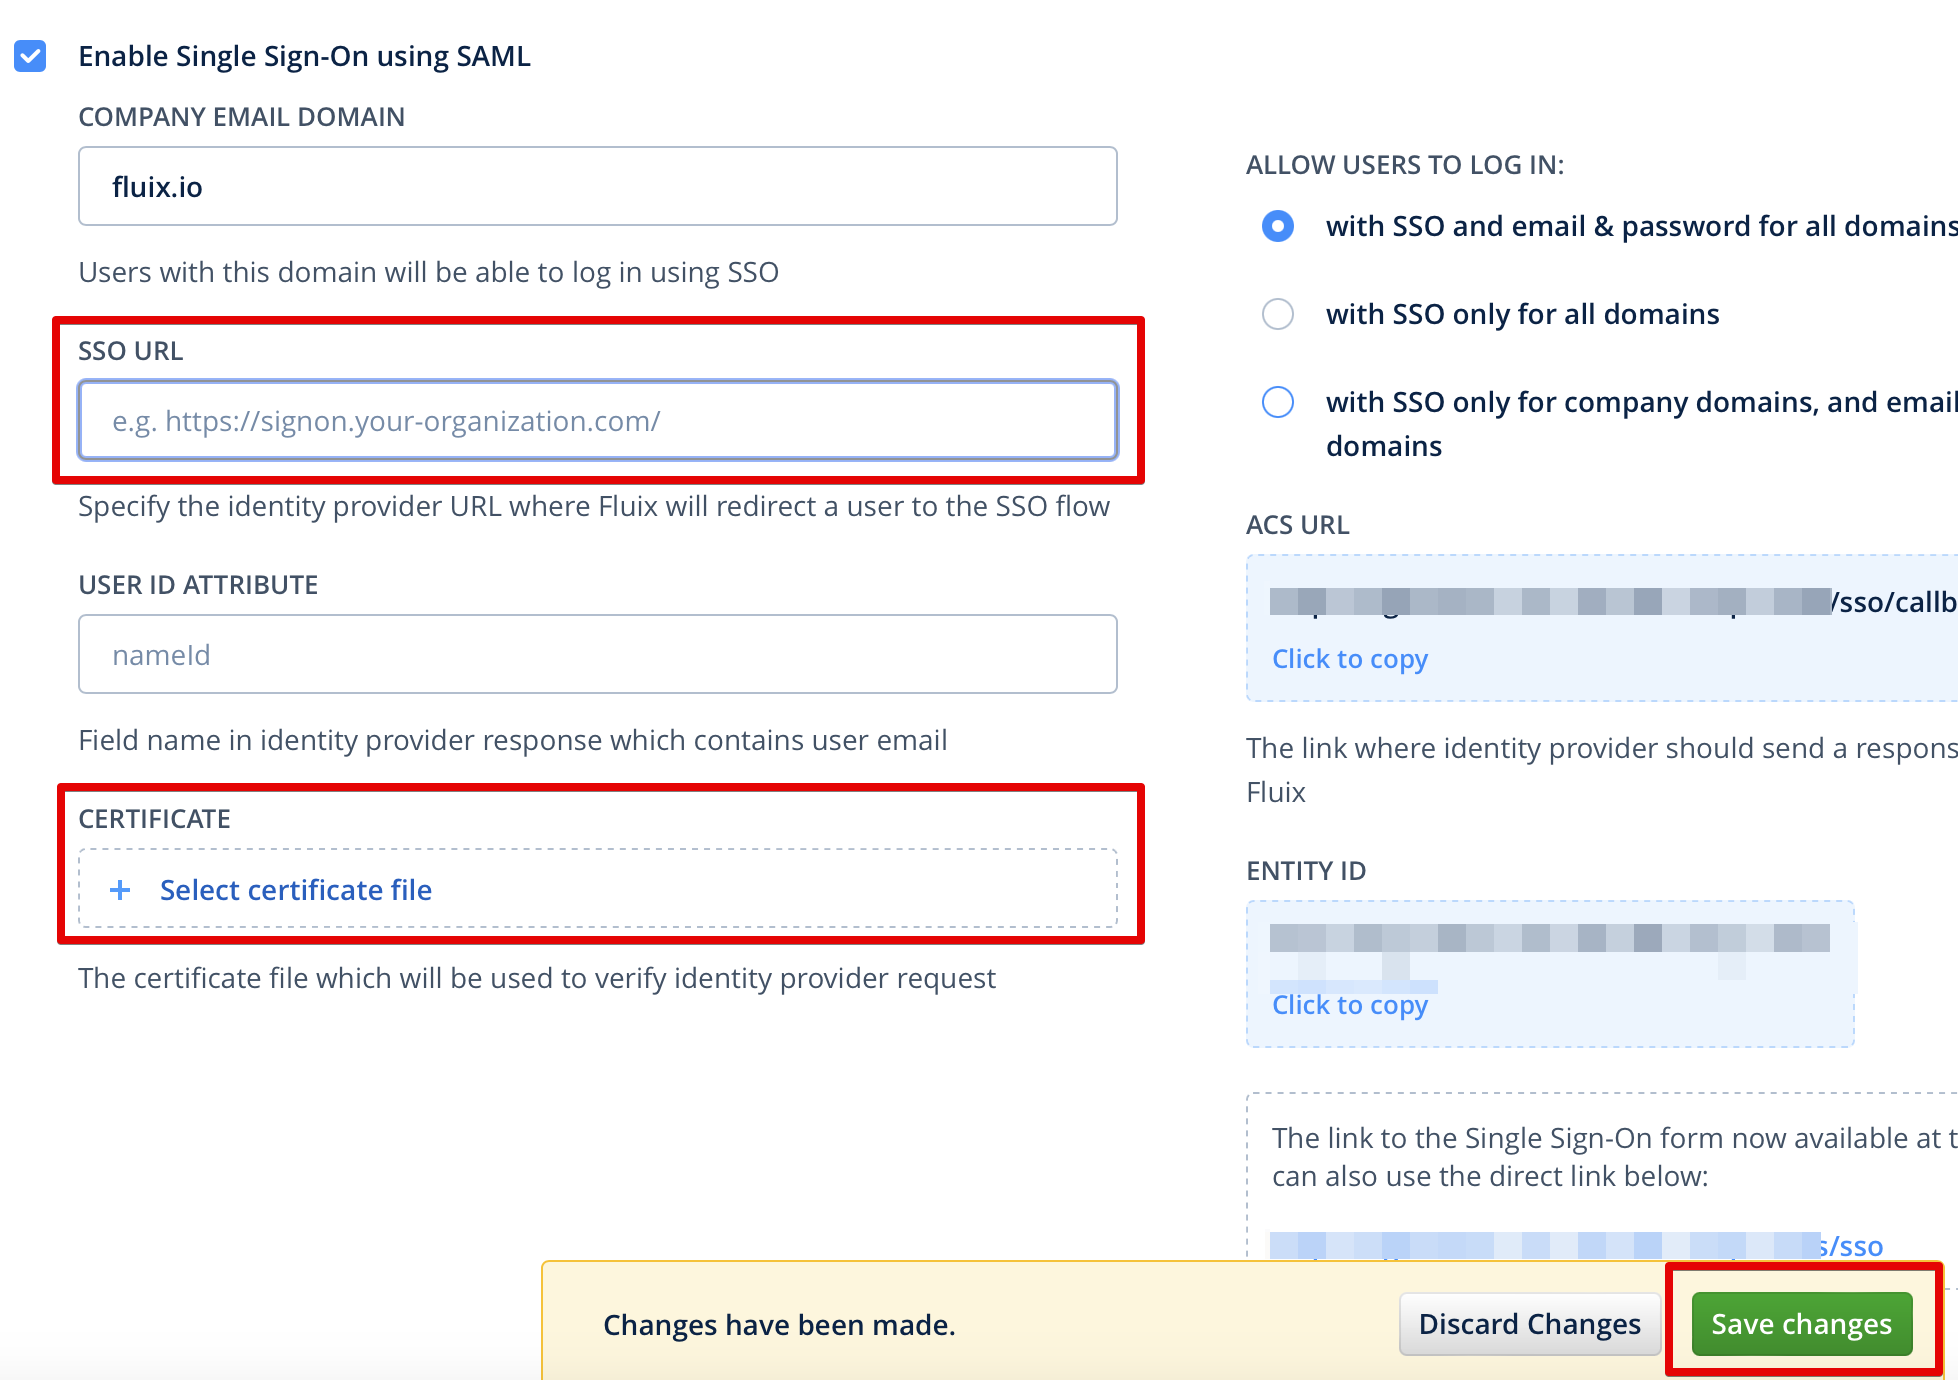
- Once the configuration is done, you should be able to login Fluix using SSO from the page: https://login.fluix.io/sso
Feel free to contact us at support@fluix.io if you have any questions or comments.