


Microsoft Excel is a spreadsheet software that allows users to organize, analyze, and manipulate data using a grid-like interface with a wide range of functions and tools that can perform calculations, create charts and graphs, and generate reports. With Excel, you can efficiently manage and track data, analyze trends, and make data-driven decisions.
What Fluix + Excel integration does
Fluix and Microsoft Excel integration streamlines the data transfer process, reduces manual effort, and ensures data consistency. Once you connect your Microsoft Excel account to Fluix, the data will be automatically pulled from forms that are completed by your team in the Fluix app into datasets in Excel in real-time. When the integration is active, the data export process will automatically transfer the selected Fluix dataset into the designated Excel sheet where the data can then be further analyzed, manipulated, or used for reporting purposes within Excel.
Note. Integration requires a Core account in Fluix and an account in Microsoft Excel. To try the option, you can register for a free trial account in both tools.
Before you start
The first step would be setting up the automated data extraction from the completed forms into the Fluix datasets. Here you can check how to configure them in Fluix Workflows and Taskstreams.
How to connect Fluix to Excel and start pulling data
1. In the Fluix admin portal, navigate to the Results section, Datasets tab. Select a dataset or subset in Fluix, and click on the Export button (in case you selected a subset, click the Export button there).
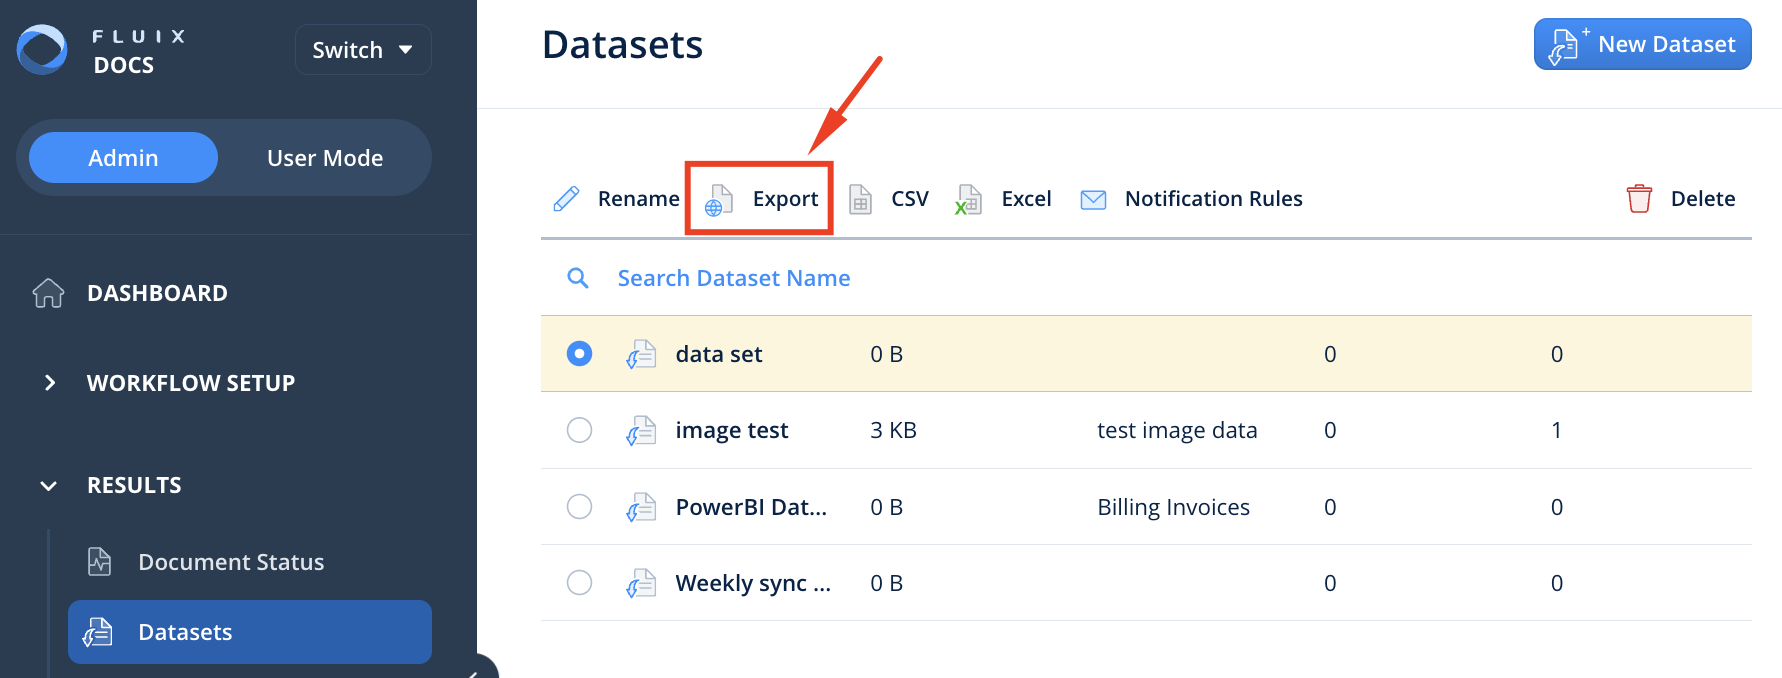
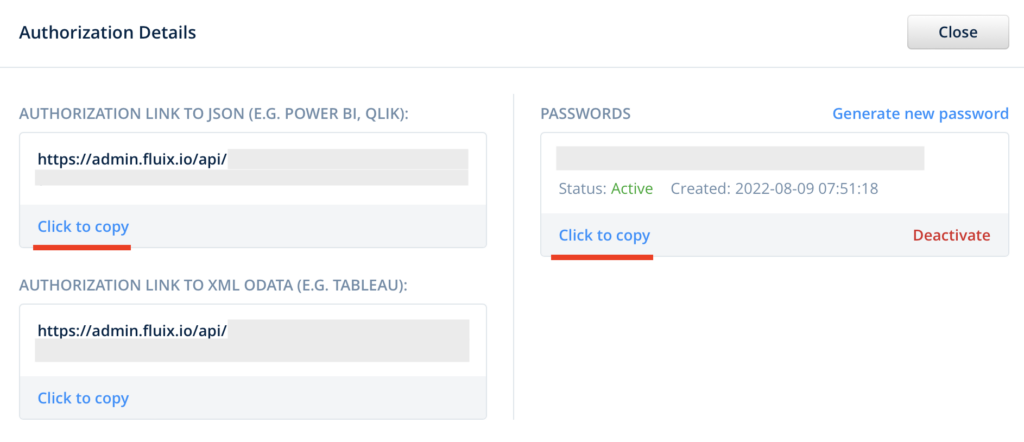
2. Copy the authorization link and password.
3. Open Excel, click on the Data section -> click on the Get Data button -> From Other Sources -> click the Blank Query option.
4. After that, a new page for Query 1 should be opened, click the Advanced editor button.

5. In the opened window paste the code below.
let
    datasetUrl = "{{ export url from admin portal }}",
    getData = (url as text) =>
        let
            source = Web.Contents(url),
            json = Json.Document(source)
        in
            json
    ,
    data = List.Generate(
        () => [hasNext = true, result = getData(datasetUrl)],
        each [hasNext] <> false,
        each [
            result = getData([result][nextUrl]),
            hasNext = [result][hasNext]
        ],
        each [result][collection]
    )
in
    data
6. Replace {{ export url from admin portal }} with the authorization link copied from Fluix ( from the 2nd step).
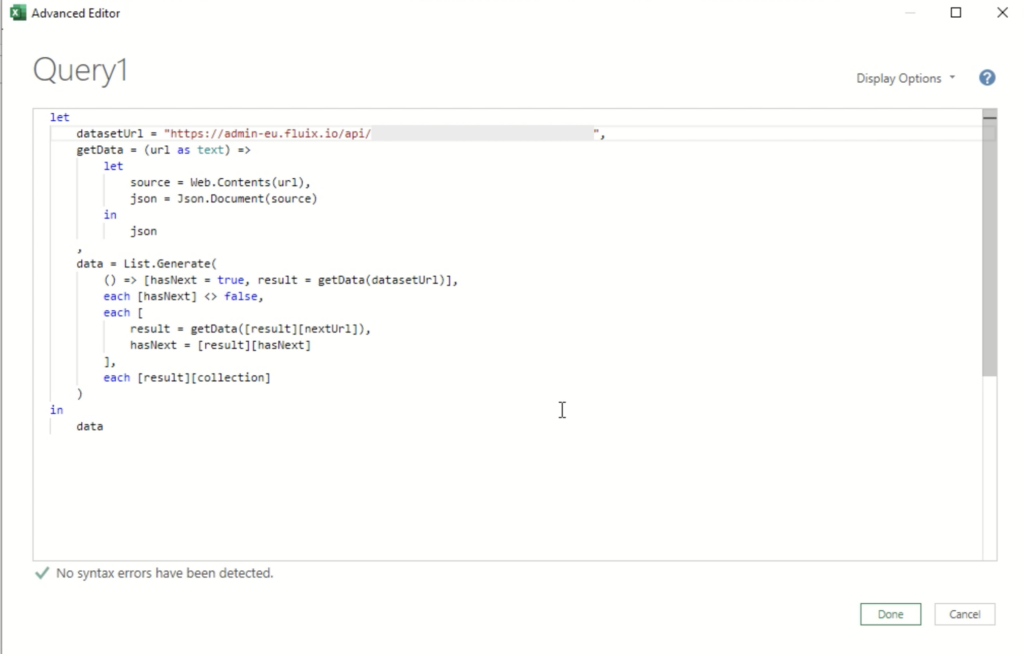
7. Click Done.
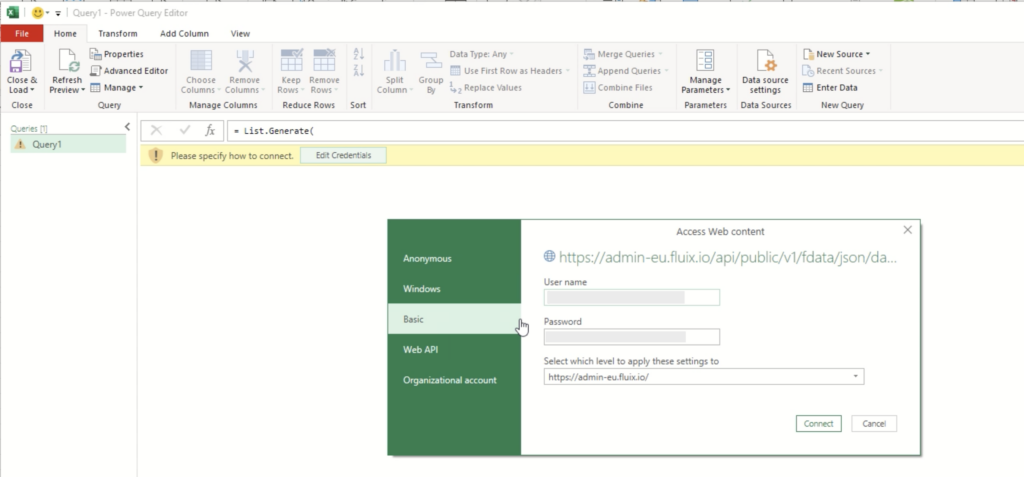
8. In the line Please specify how to connect, click on the Edit credentials button.
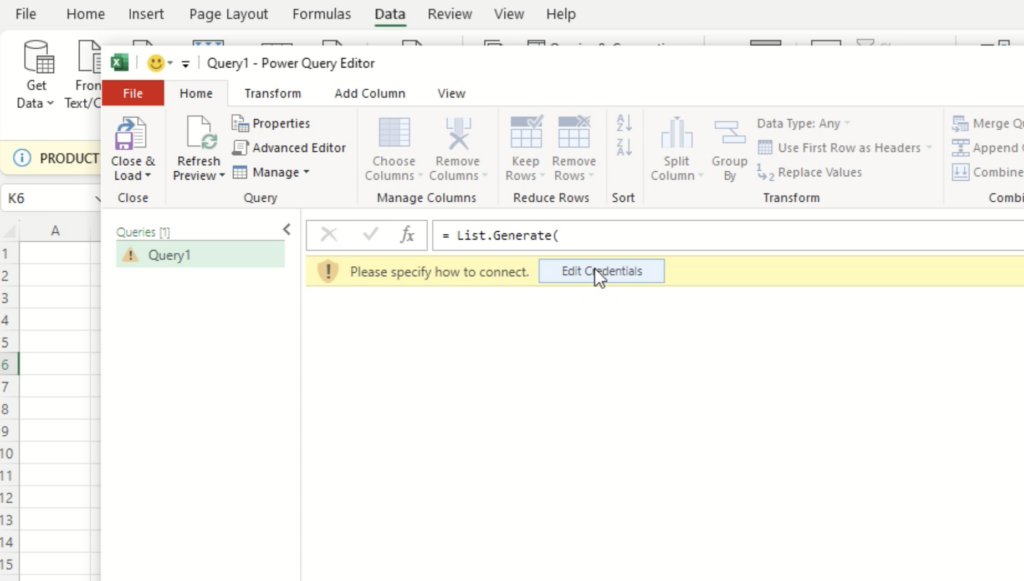
9. In the opened window, click on the Basic section, enter your user email from Fluix and the password copied from the authorization details, and click Connect.
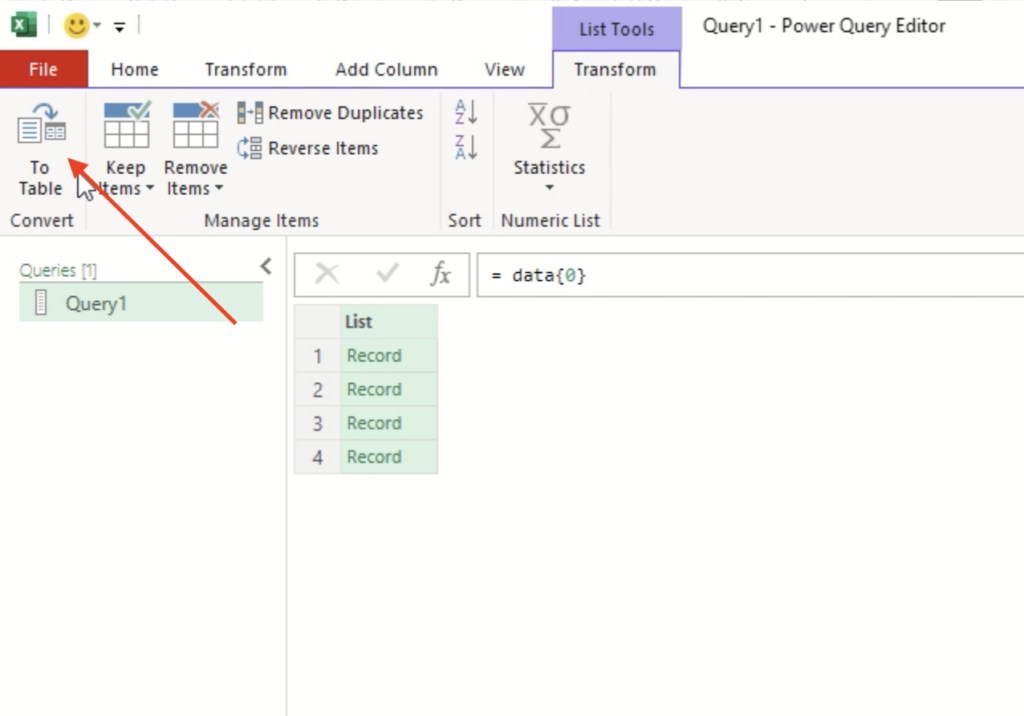
10. After that, click on the List that appeared on the page Query 1:

11. The list of the data contained in the dataset will be shown -> click on the To Table button:
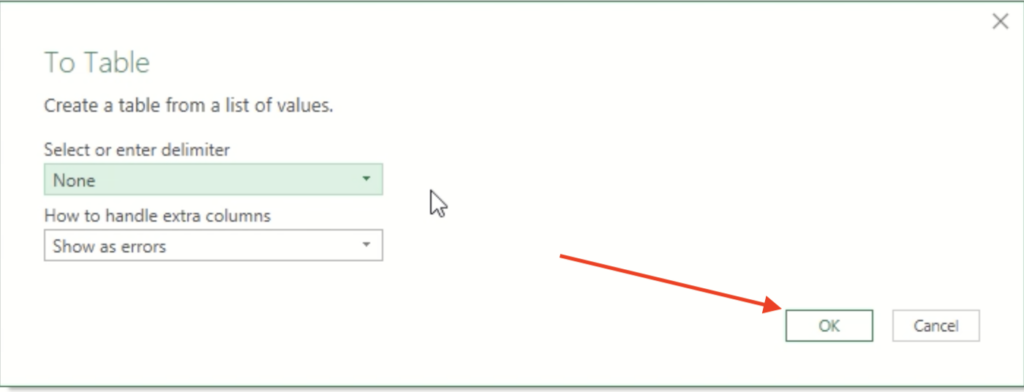
12. In the opened window To Table, just click OK:
13. After that you’ll see Column1 where you’ll need to click on two arrows.
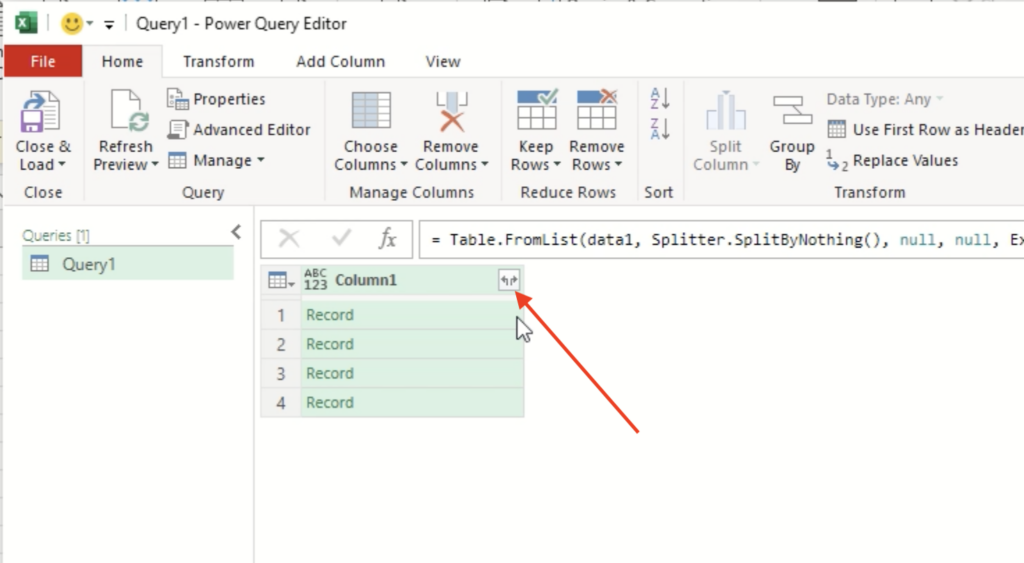
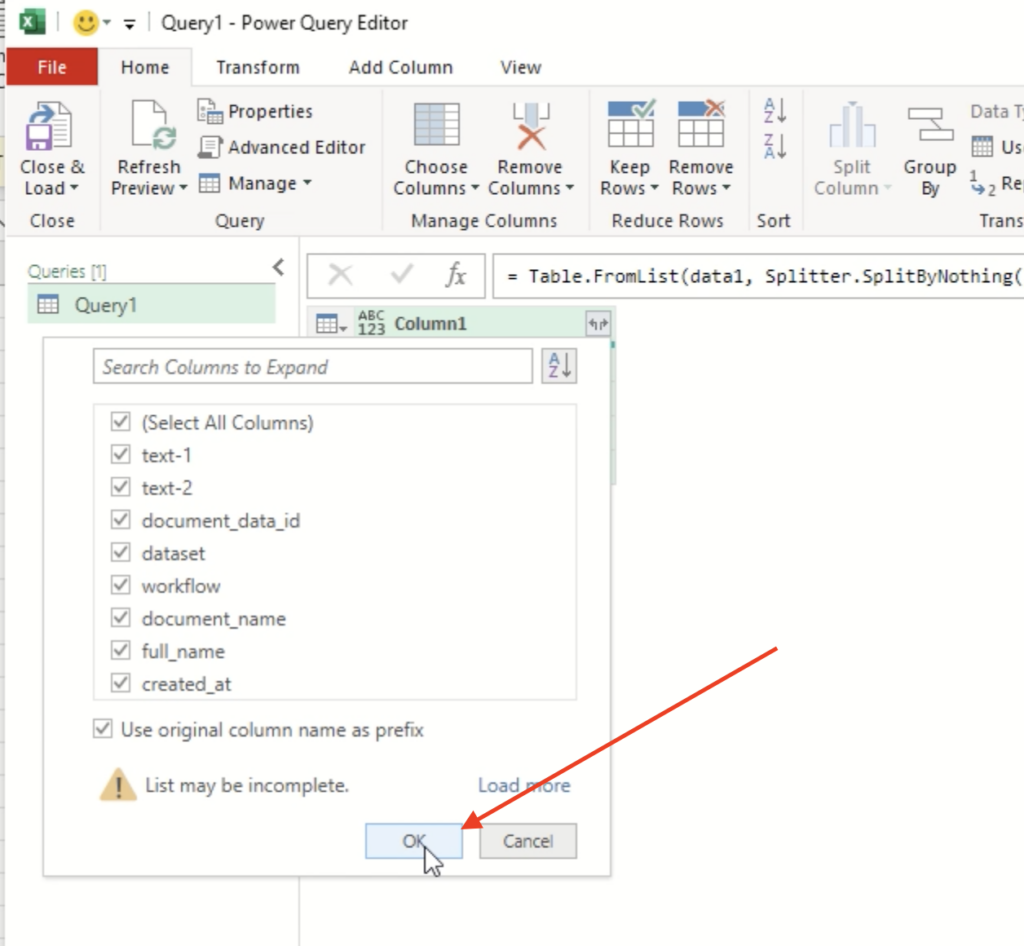
14. In the opened window select all the columns -> click Ok:
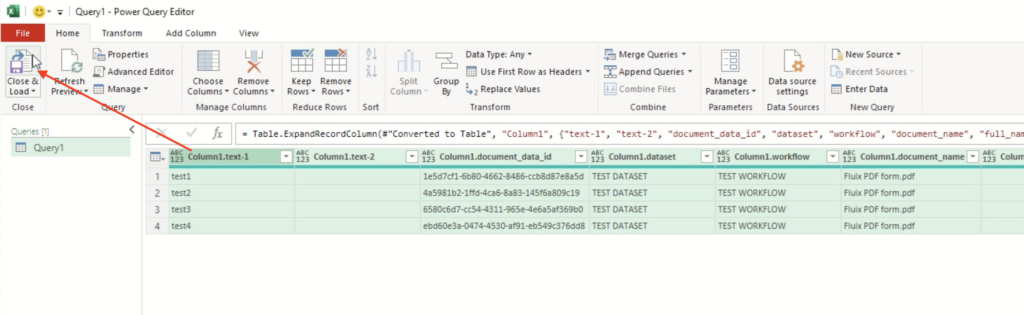
15. After that, click the button Close&Load.
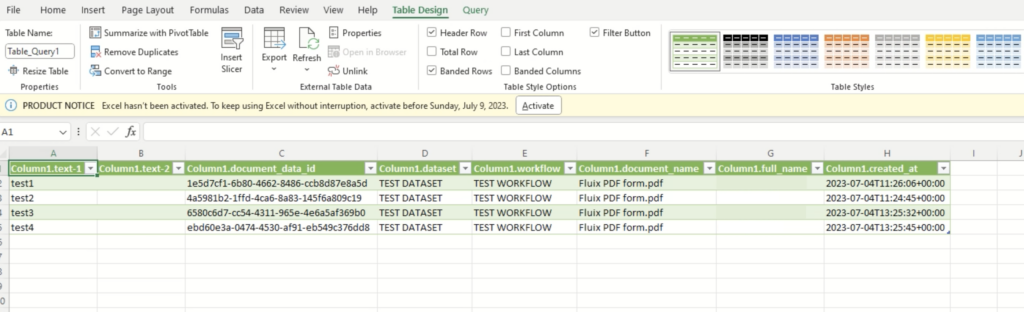
16. As a result, the exported dataset will be loaded accordingly:
In case you have any questions or difficulties with setup, contact our support at support@fluix.io and we’ll be happy to help you.