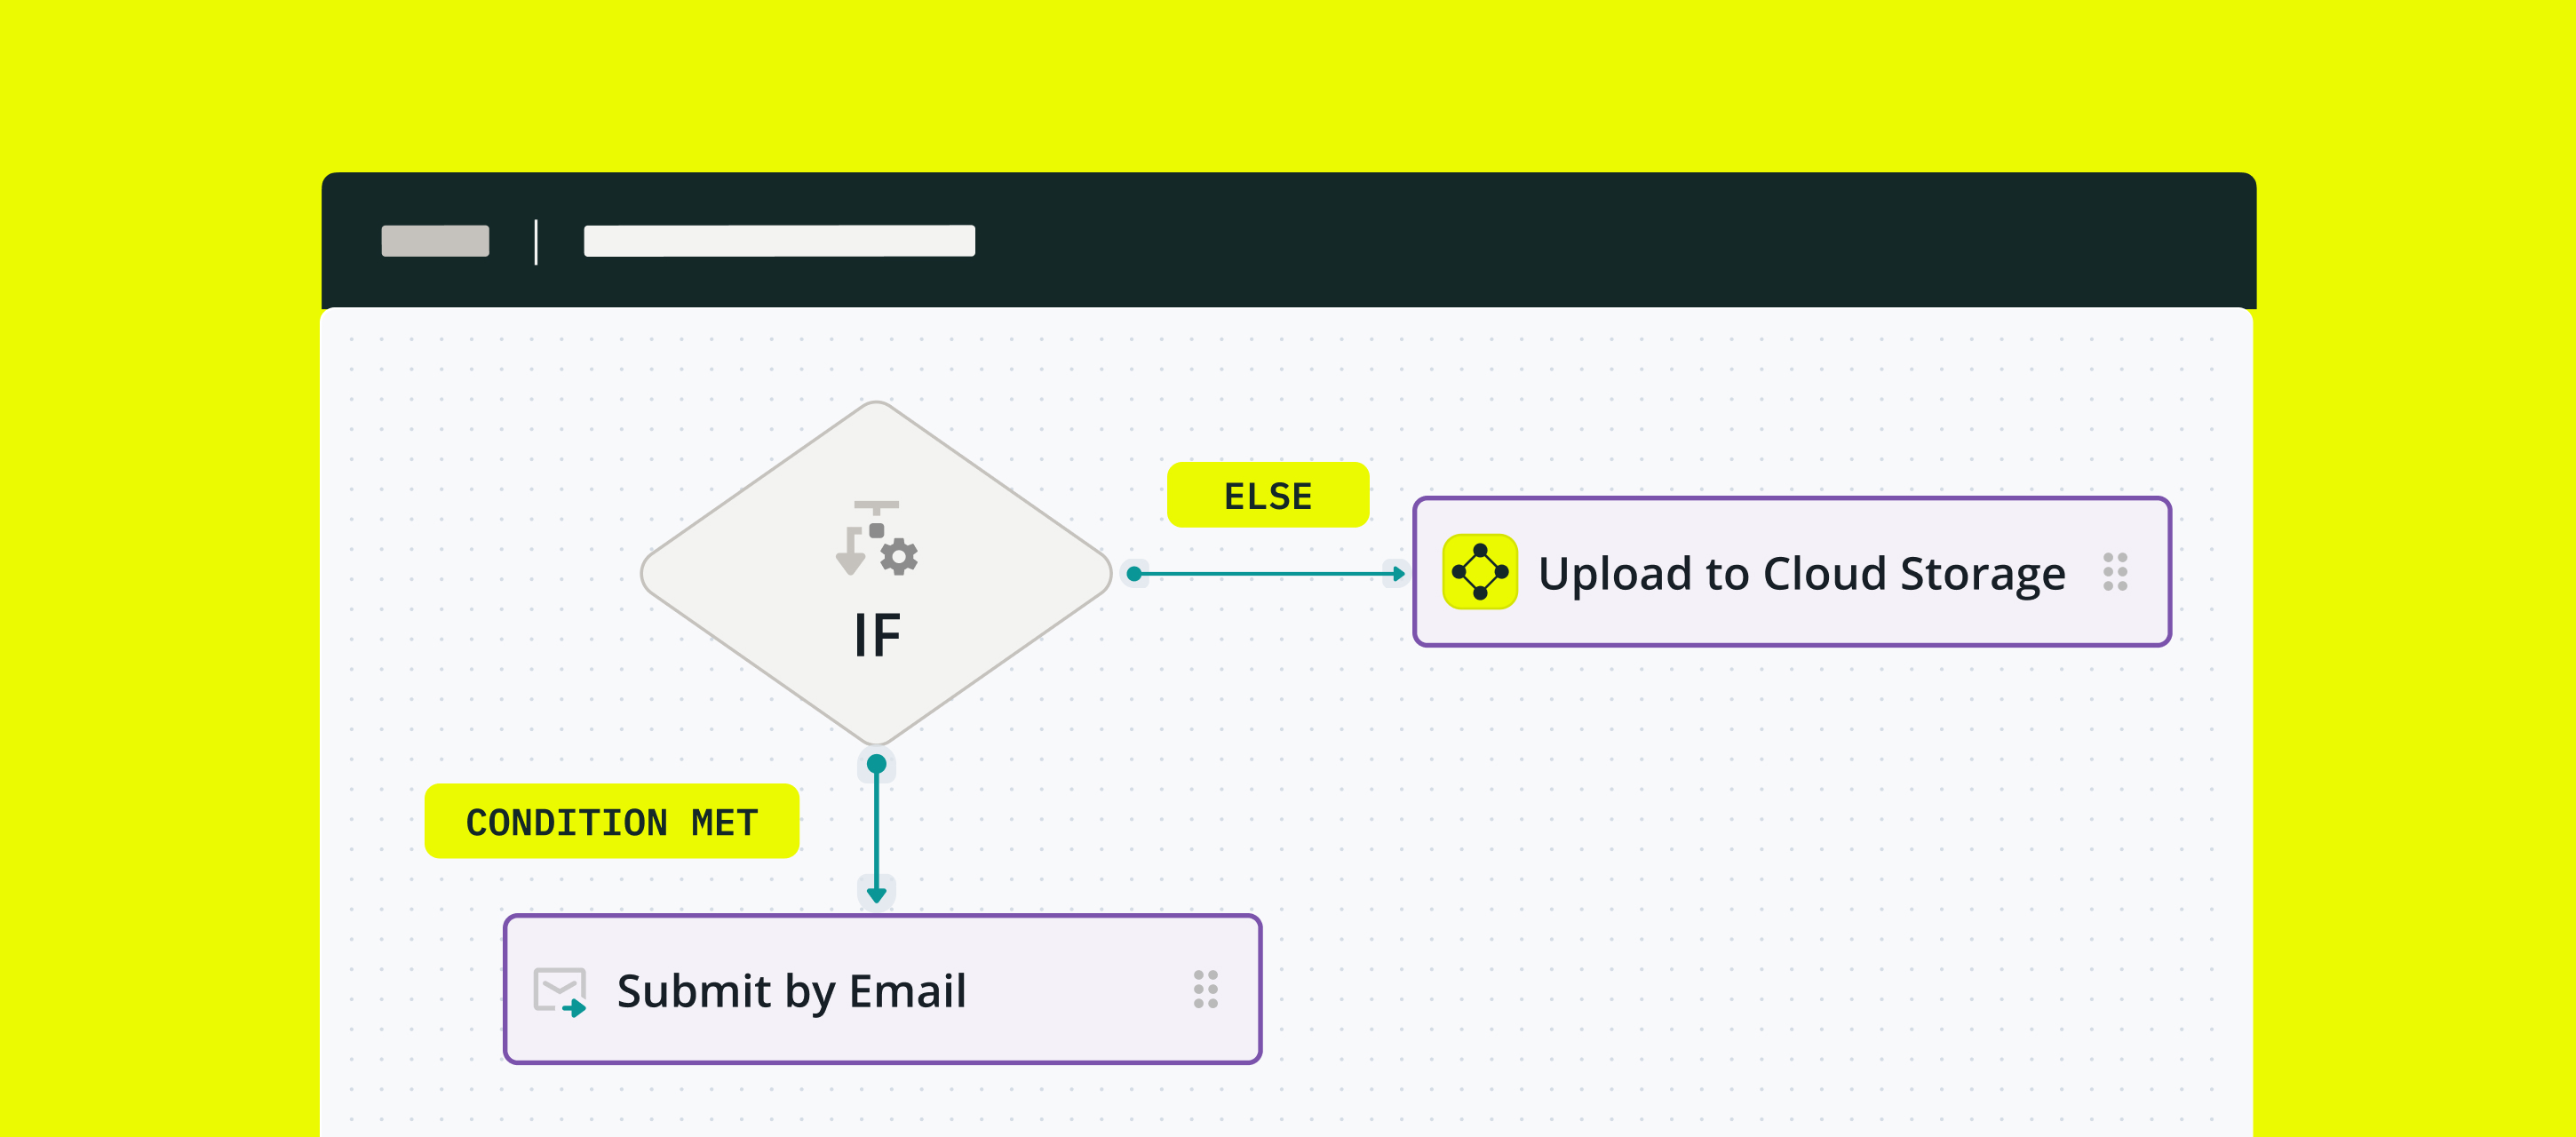
What is conditional routing?
Conditional routing functionality allows you to automate decision-making throughout the business process – based on the values entered in form fields by the field workers.
Example use cases
Conditional routing in Fluix routes completed forms to different emails, cloud storage and a CRM, or returns a task for another round of approval, and many other scenarios. Below we collected a couple examples for your convenience.
- Checklists
Instead of manually checking the checklist content, conditional routing automates the process based on predefined rules. Assuming a checklist has 10 checkpoints, if all 10 are set to be OK or the values are within a predefined range, the checklist will automatically be approved and saved on cloud storage, so no human interaction is required. In case one check is set to Not OK, the checklist will be reviewed.
- Field inspections
A similar case is when a fillable form contains a field Checked with dropdown options, Passed and Failed. If-then logic says: if Failed is chosen, then an email is sent to the responsible person. - Safety accident reports
When an employee is injured on the job, the manager must submit an injury report to the office. If the manager chooses Yes next to Hospitalization required, conditional routing automatically sends the report to a safety director. - Employee COVID screening
Before entering a workspace, all employees fill out a COVID-19 screening form. If a worker checks the Fever box, they need to either WFH or include their submitted report due to the symptoms.
- Employee hiring & onboarding
While hiring and onboarding a new person, each company sets up a list of steps and procedures to make the employee onboarding as smooth as possible. An employee’s new-hire or onboarding checklist would be among those forms that help both a newcomer and their manager to ensure all aspects are covered. For example, if the Info Security Agreement is not signed, the respective task is automatically assigned to the Info Security Director.
How to set up conditional routing in the business process?
Let’s examine a real-life safety injury reporting case as an example of utilizing conditional routing in Fluix workflows. An employee is injured on the job, and the supervisor must submit an injury report to the Safety Director.
Step 1 – Create the first task and a form. Navigate to the Fluix admin portal, create a new workflow, and configure the first task for Supervisors who will fill out a safety incident report.
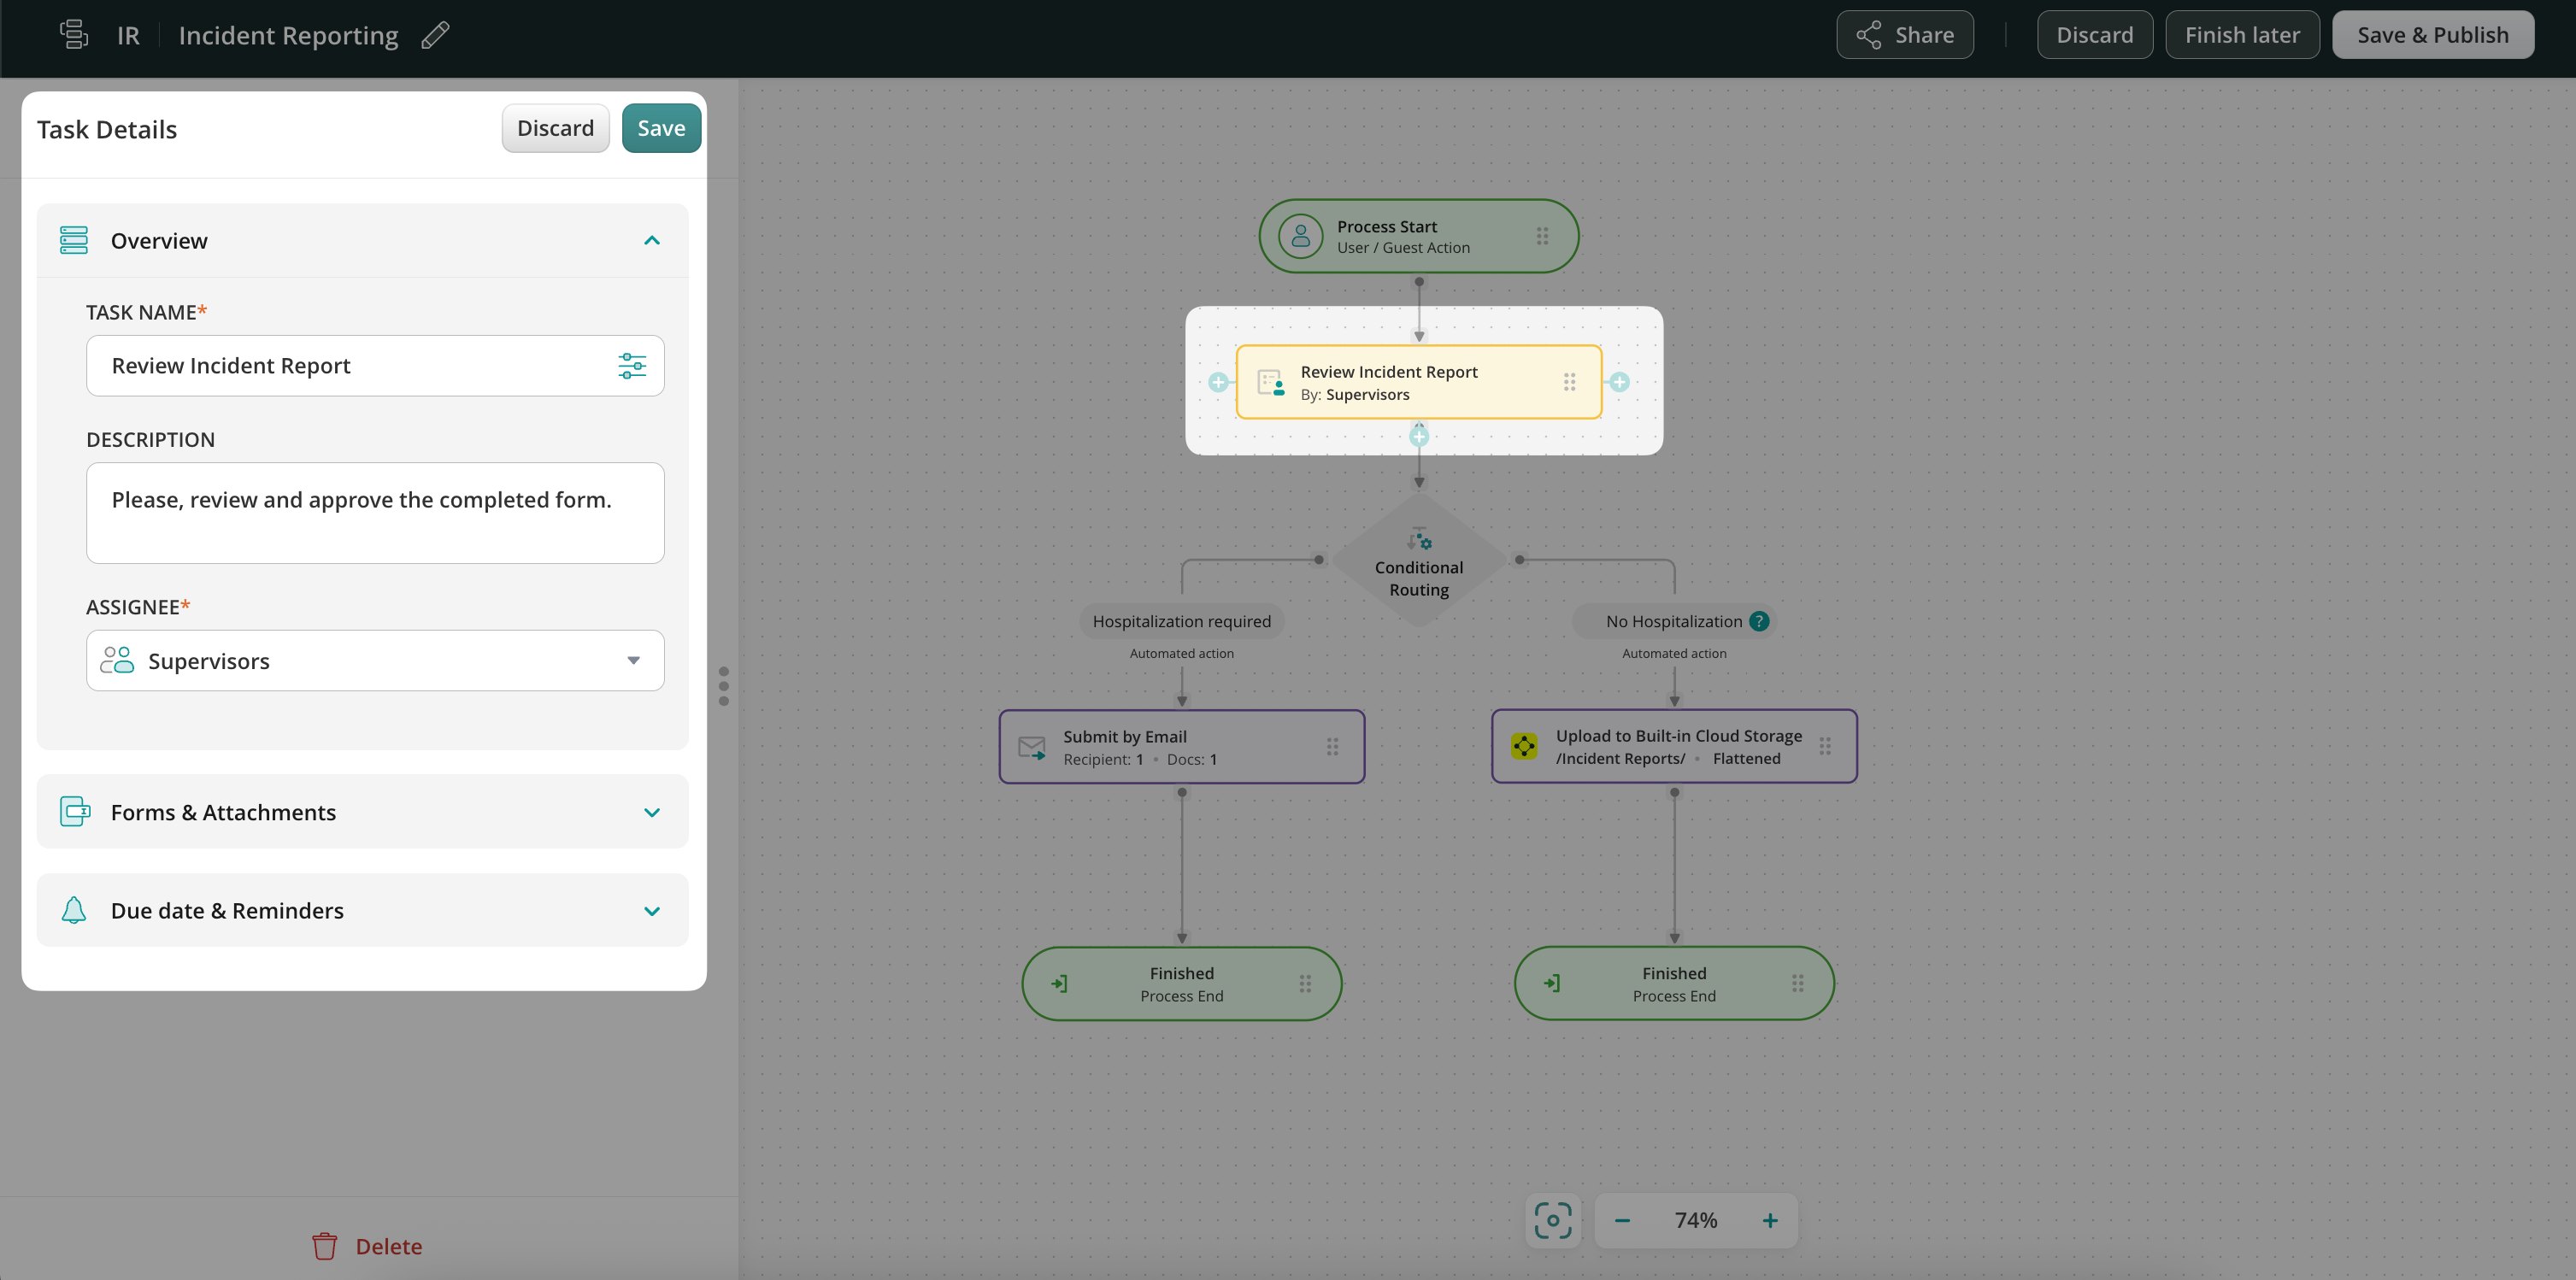
Step 2 – Configure the Conditional routing. Drag and drop the Conditional routing element to the workflow chart and connect it with the Supervisors’ task using an arrow. By default, the Conditional Routing element has two conditions: Condition 1 and Else. You may rename them as needed for more clarity. You can also add more conditions if needed (check the details in Step 3 below).
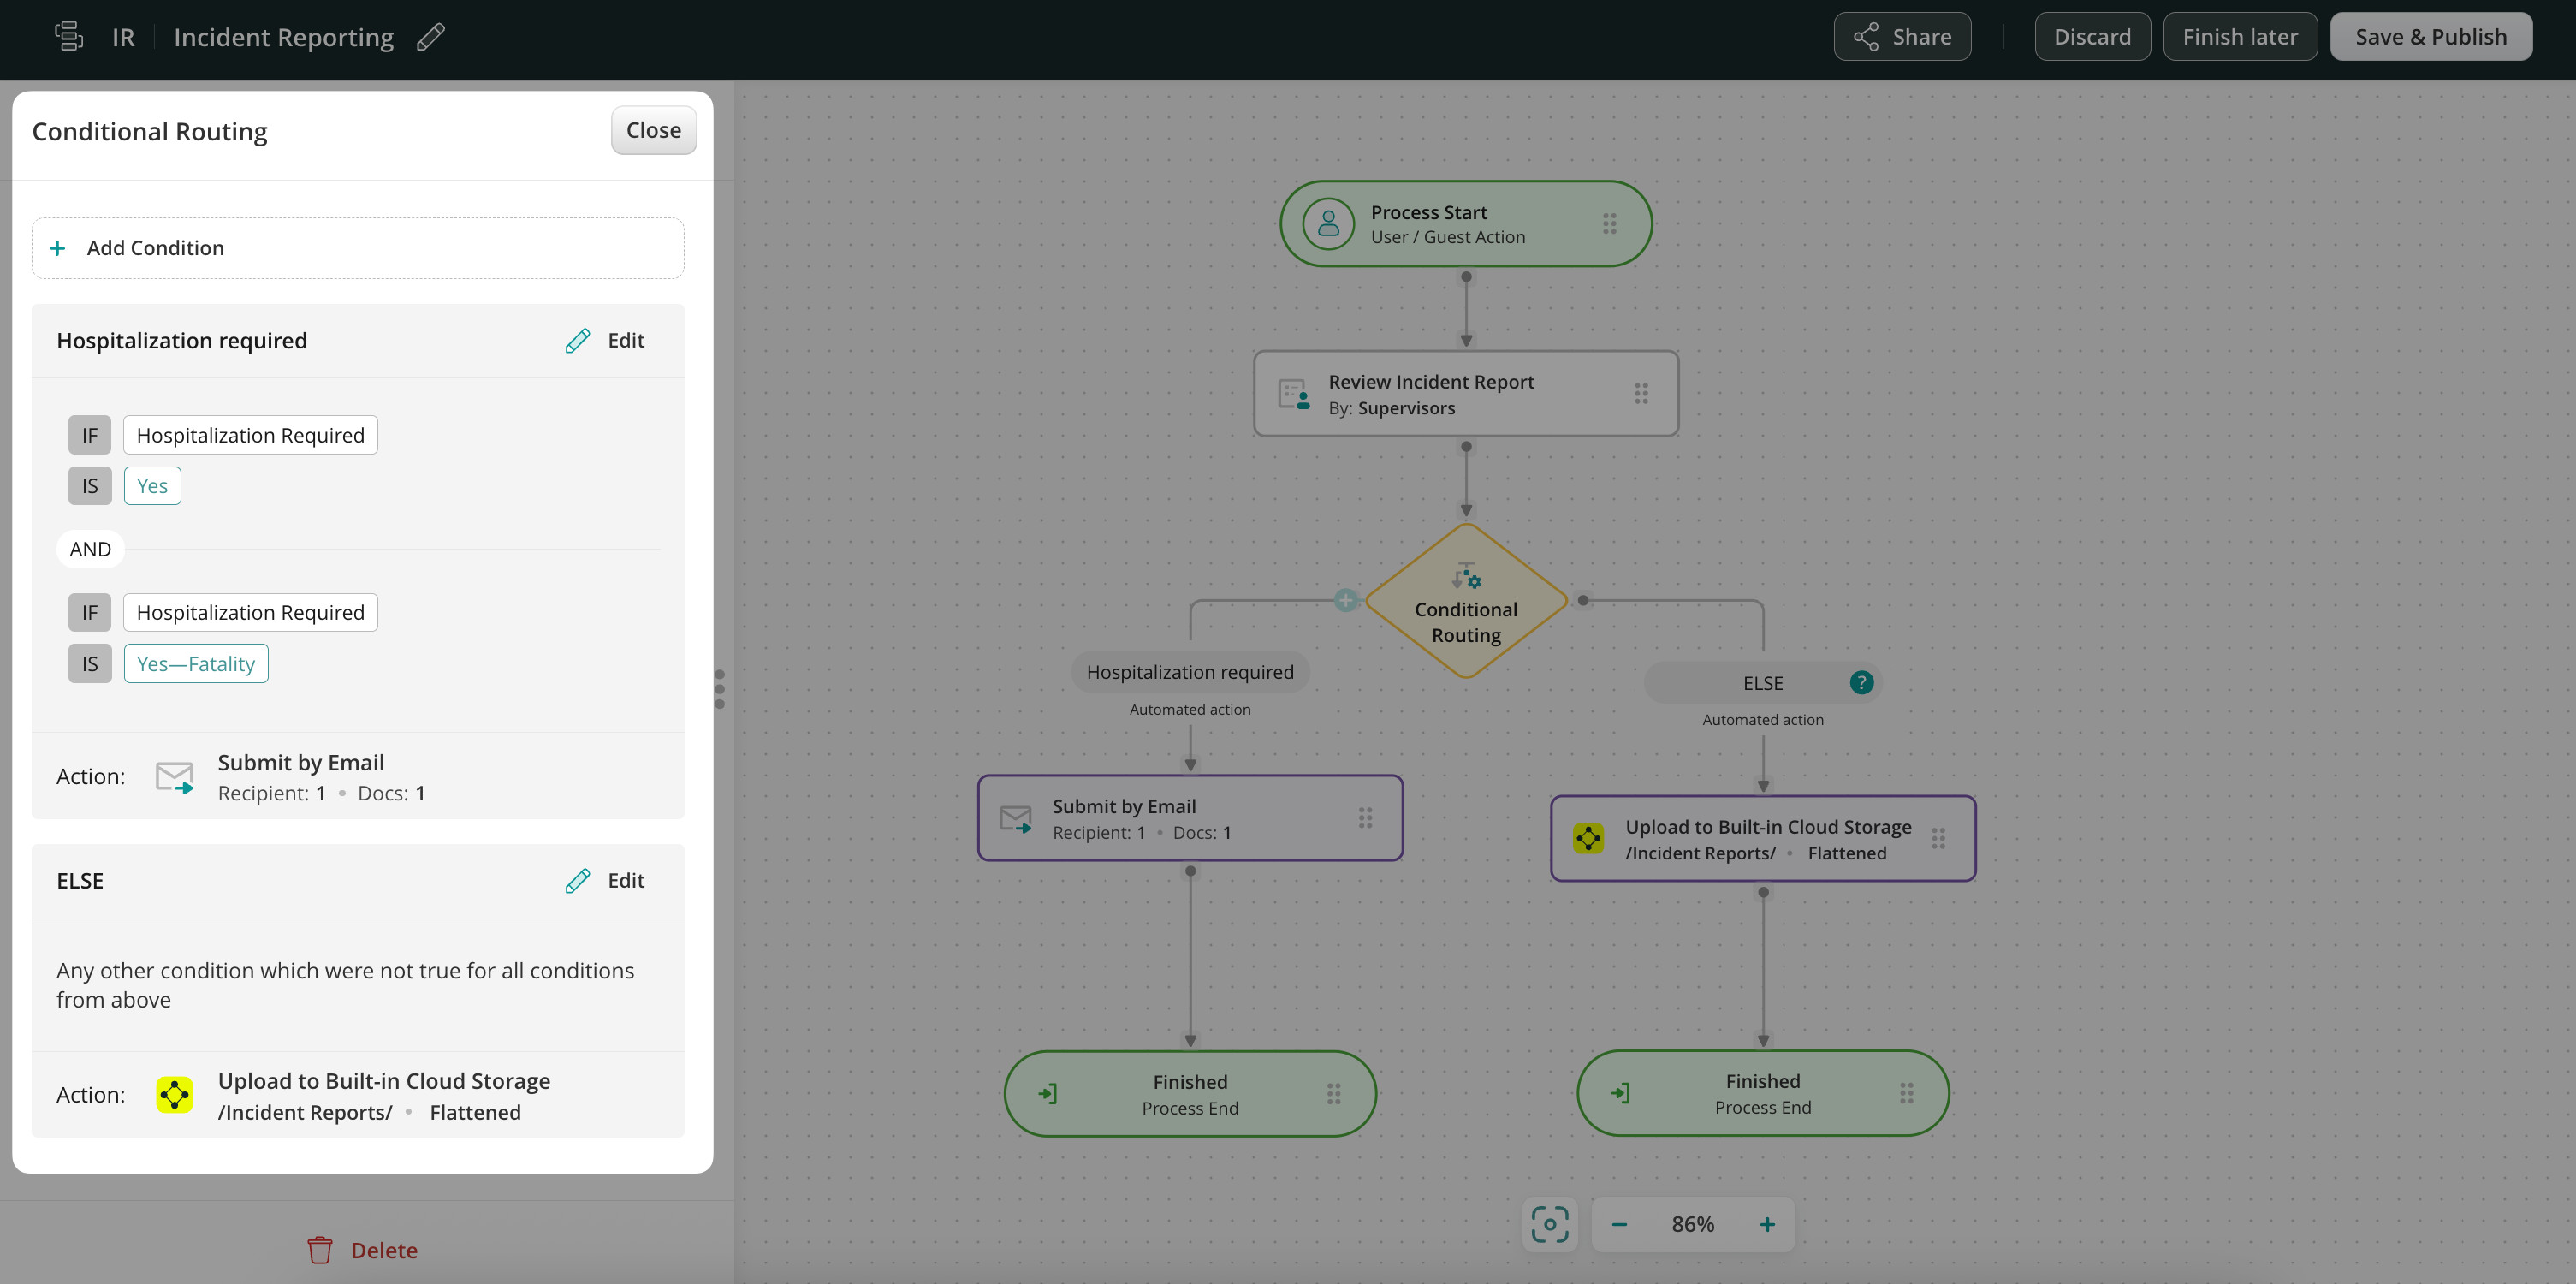
Click on the condition and configure it. In our example, the report will go down this branch of the workflow only if the site Supervisor enters Yes or Yes—Fatality into the hospitalization required field.
To select the field in a form, click on the configuration icon to open a dynamic values configurator. Here is what the preview of the configured condition looks like:
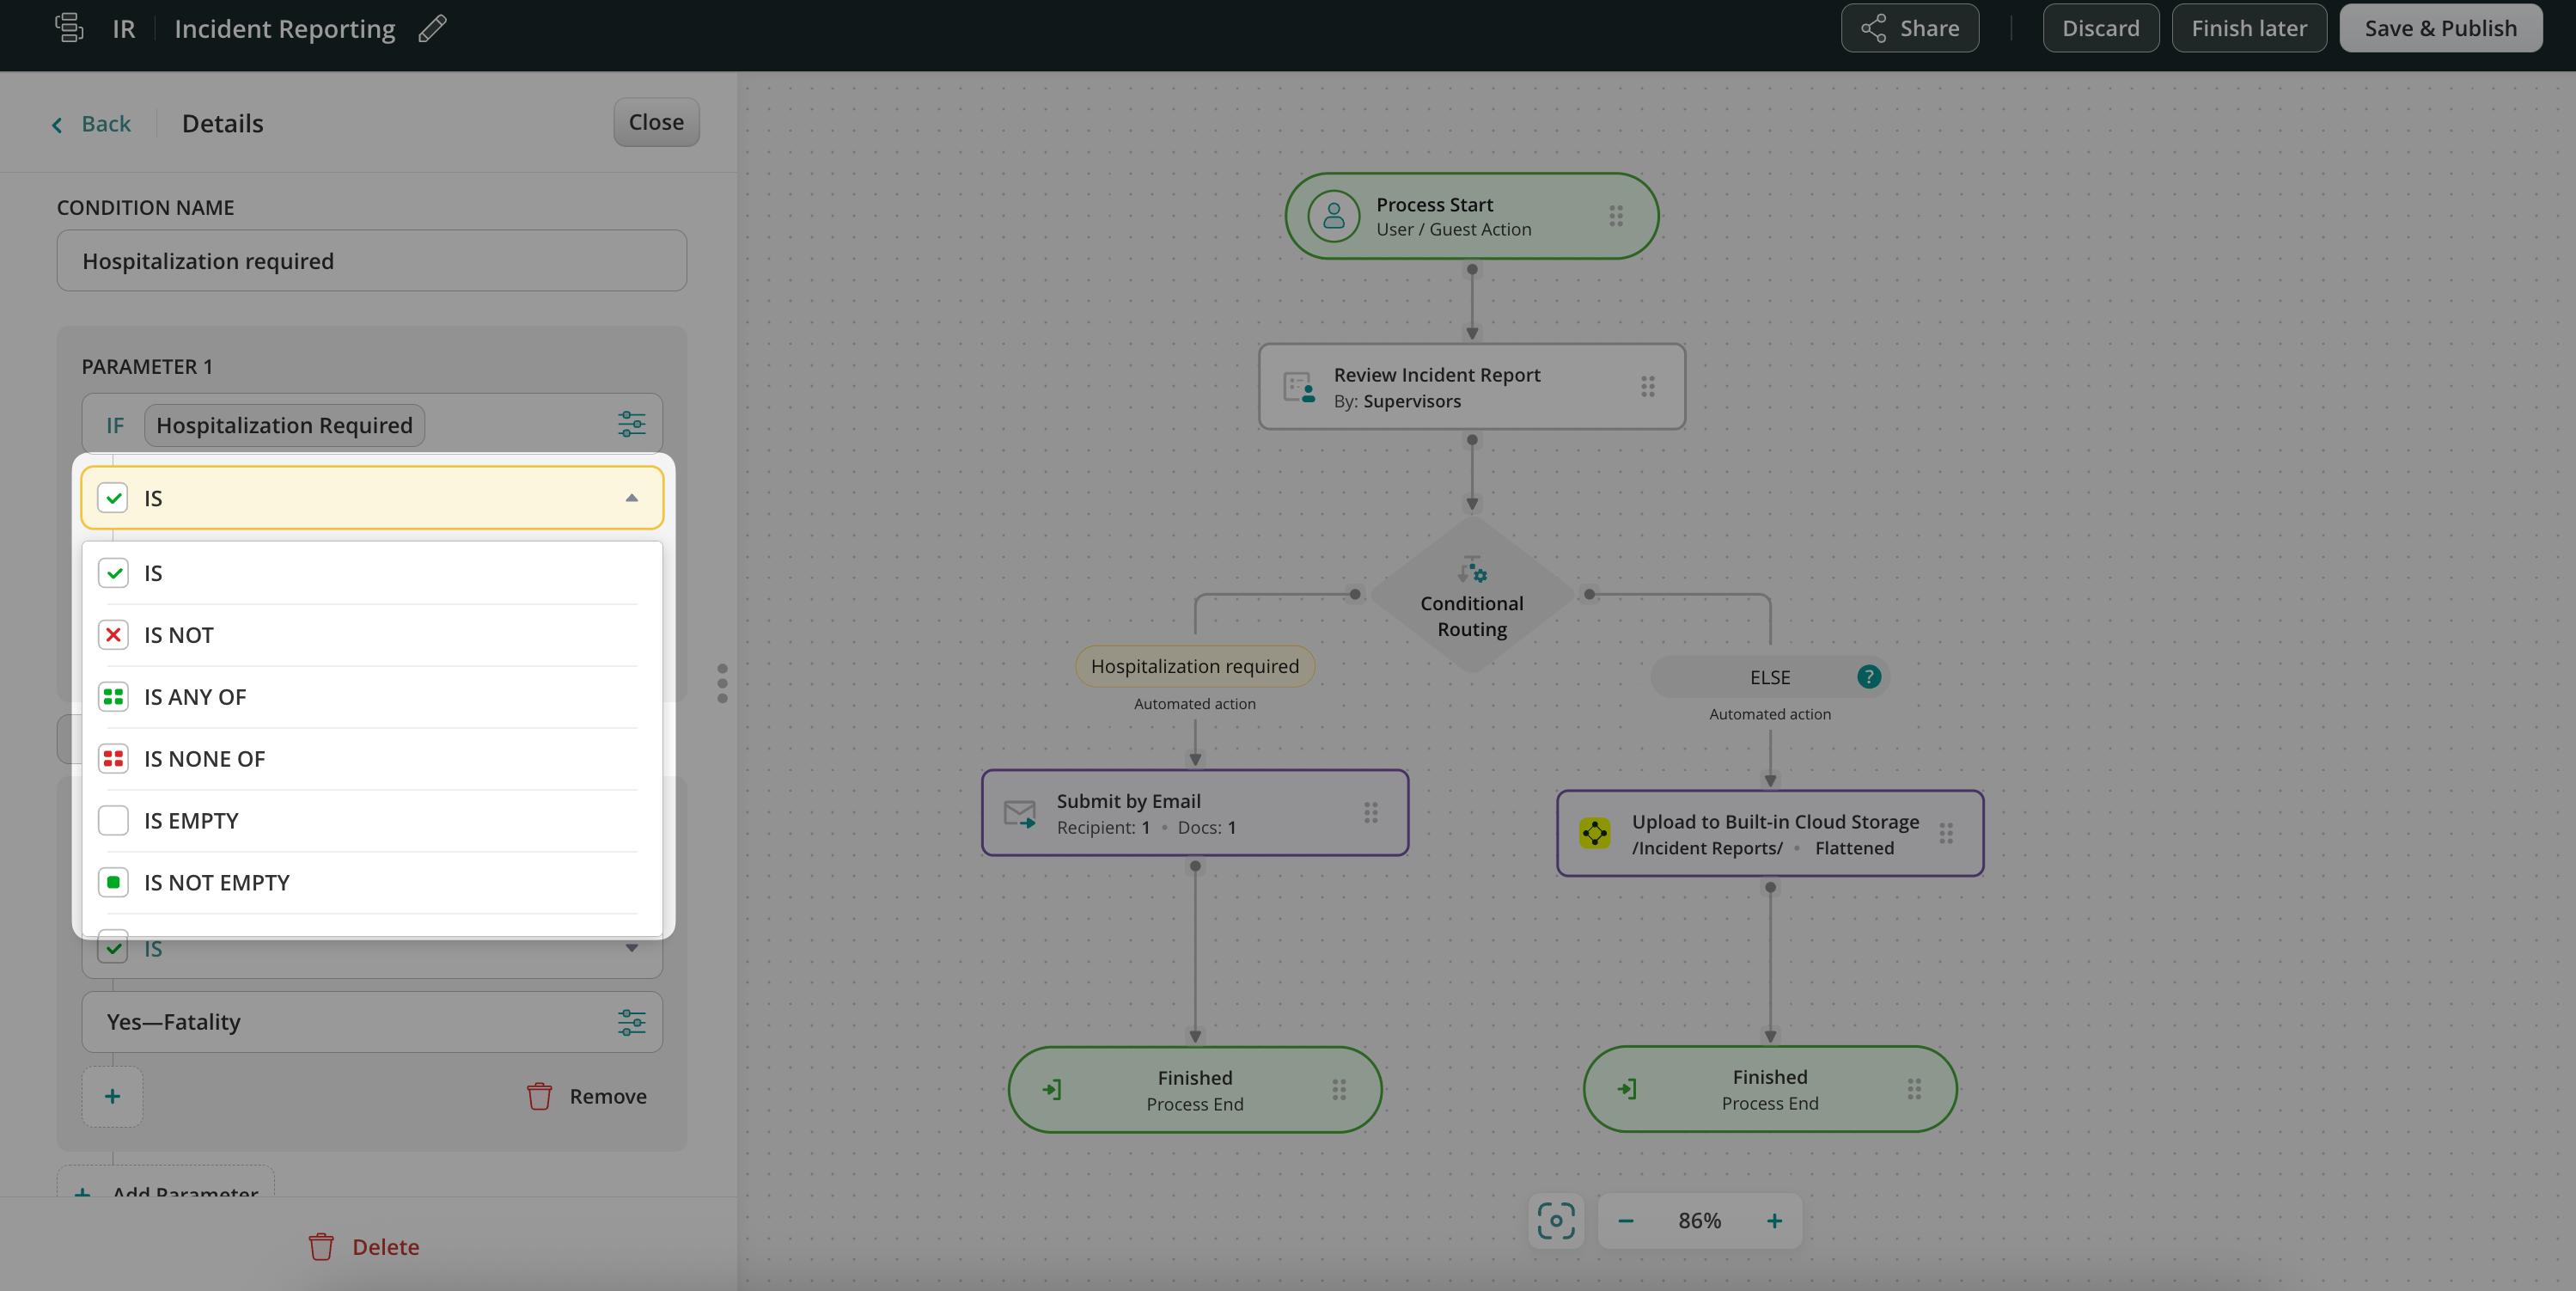
Besides IS the list includes other options:
Step 3 – Decide on actions when the condition is met and not met.
In this example, when the condition is met – we chose submit action Send by Email, therefore, the report will be emailed to the Safety Director.

When the condition is not met, the form will go down the second branch of the conditional routing – in our scenario, the report will be uploaded to another folder on the cloud storage for record purposes.
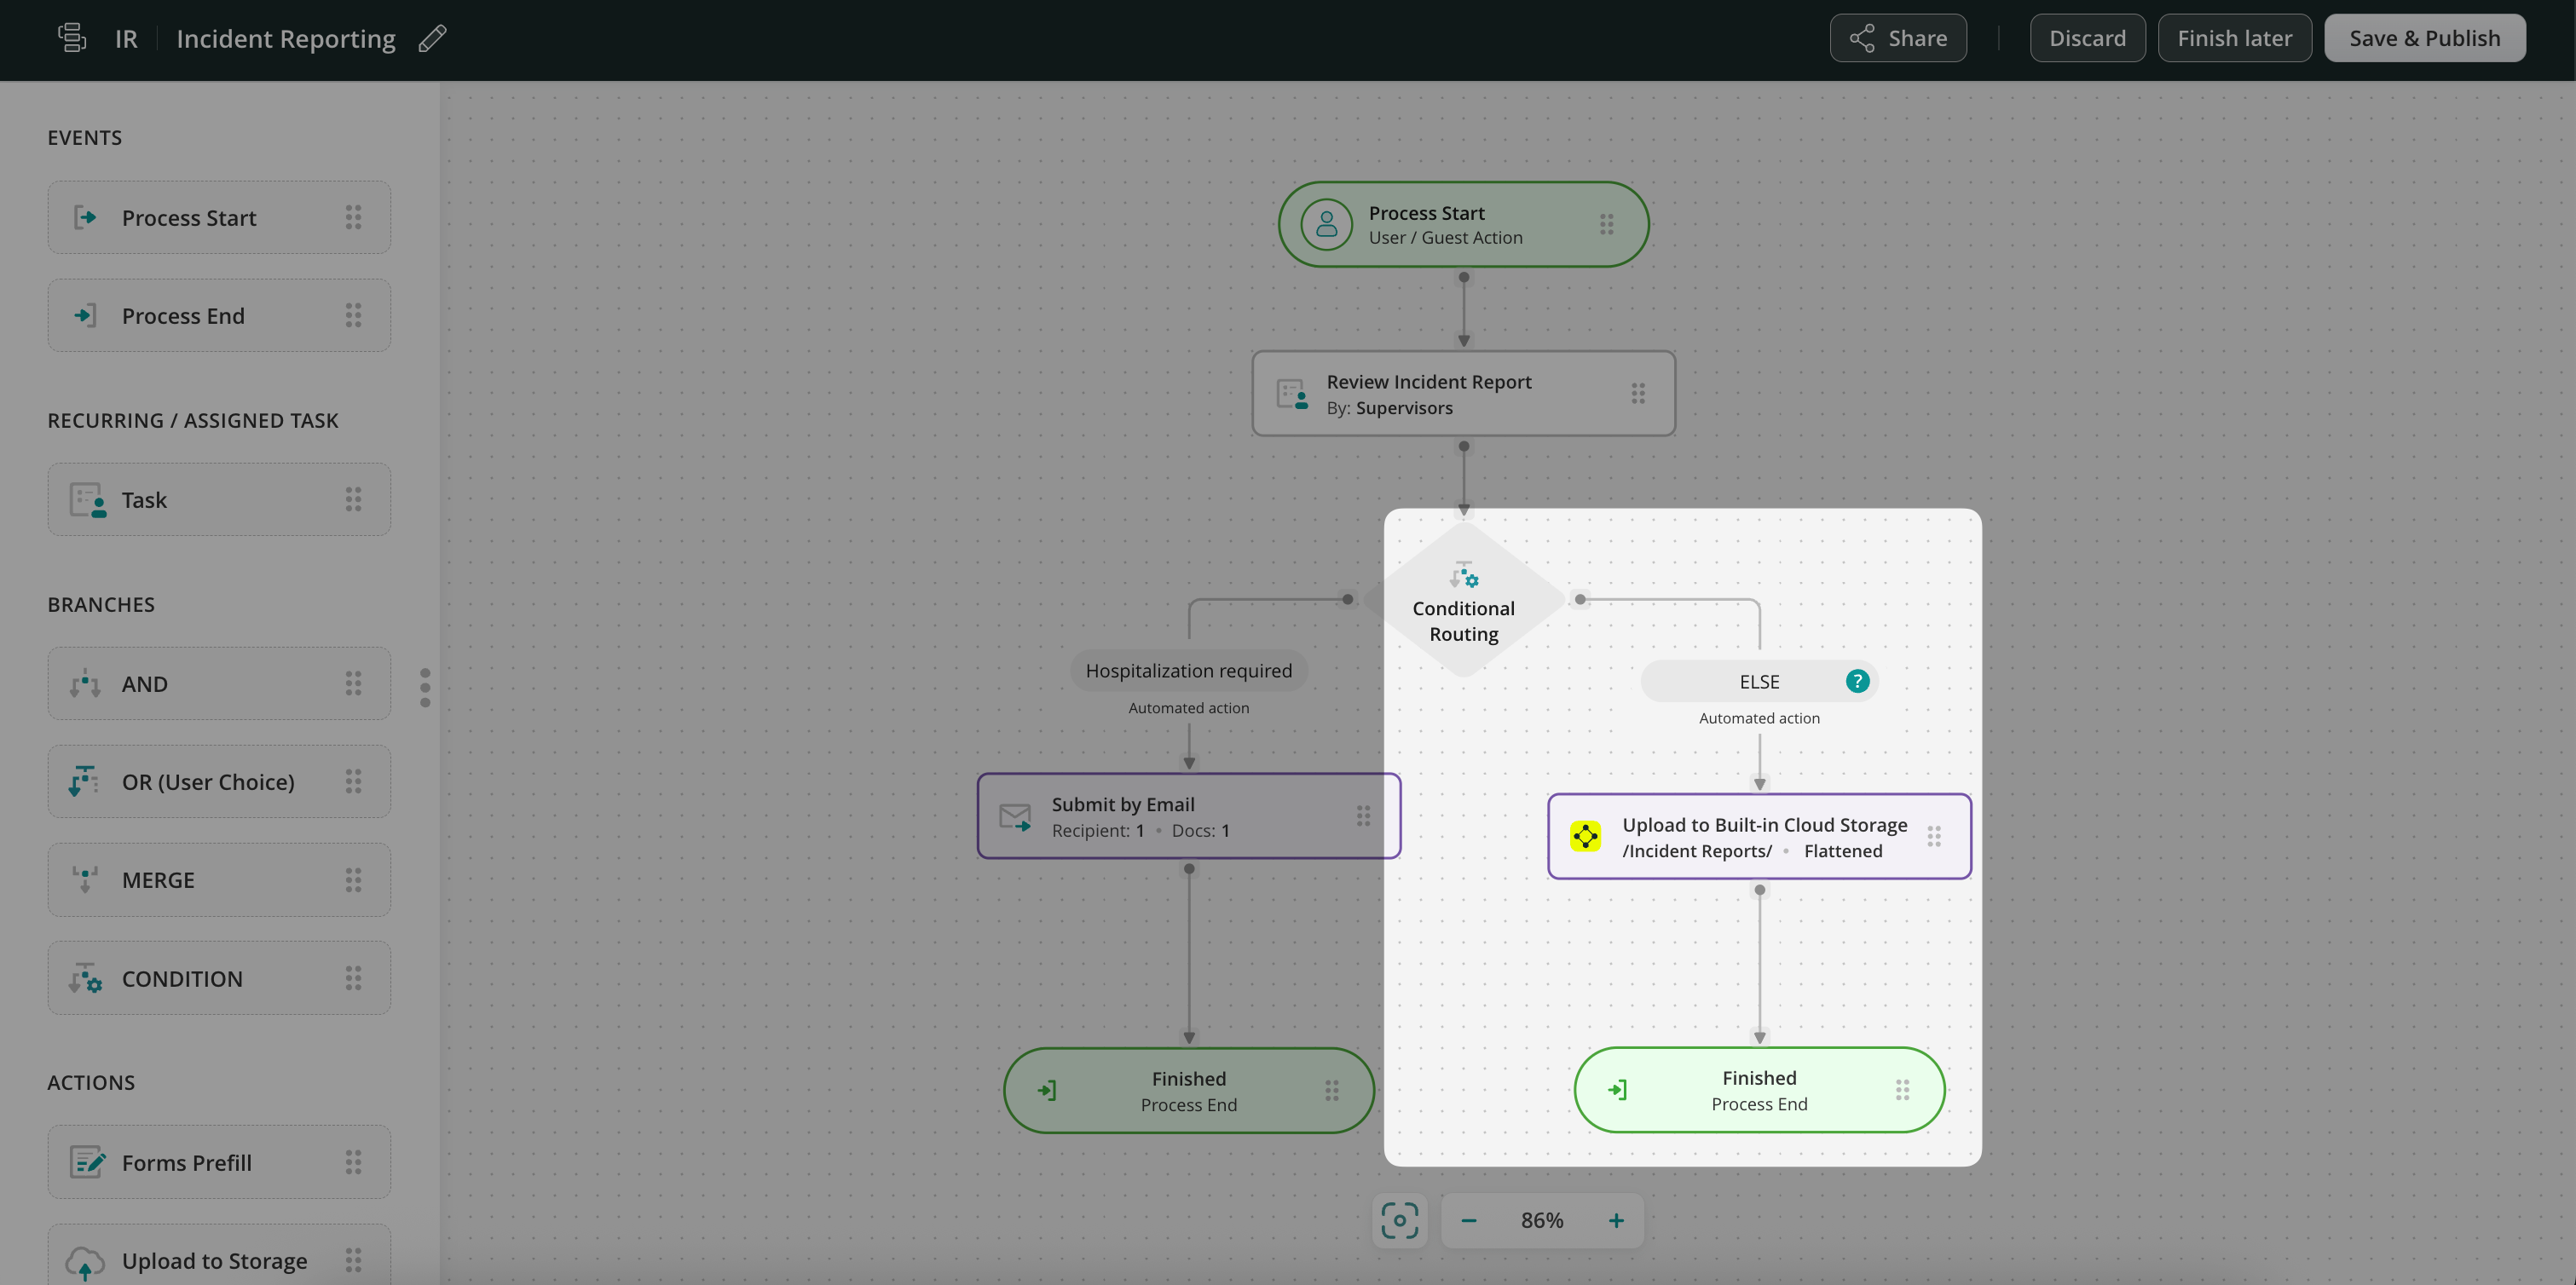
In fact, you may add as many conditions as needed. Drag and drop a task or submit action and connect it with the Conditional Routing element by stretching an arrow from the latter.
Step 4—Save changes and proceed to testing. To try the setup, add yourself to the Group of Supervisors in the workflow, open the app on an iOS or Android device or a web-based User app, and complete the task.
Benefits of Conditional Routing
- Saved time: Conditional Routing in a business process cuts off unnecessary workflow steps, like several rounds of manual review and approval, thus allowing the team to deliver their work faster and reducing the administration effort.
- Streamlined processes: Your users see only the tasks and forms required for their project. The system navigates them to the next workflow steps based on their input in the forms.
- Automated notifications: Conditional routing helps your users receive only relevant notifications based on the data they enter.
- Reduced error: As an admin, you have full control over the route the completed form and task will take down the workflow, which eliminates human error.
Conditional Routing is a powerful tool for streamlining documents, tasks, and workflows. Creating automated branching based on conditional inputs can help you bring the expected logic to a business process of any complexity.
Feel free to contact us at support@fluix.io if you have any questions about the setup.