


Depending on your scenario, there are two ways to use a newly created web form in the workflow. Let’s check both of them more precisely below:
Scenario #1. Add a recently created web form to an existing workflow:
To replace an existing form with the new one in your workflow, follow these steps:
1. Go to the Workflows section and open the workflow where you want to add the form.
2. Select the task where the form needs to be replaced and open it.
3. Navigate to the Forms & Attachments section.
4. Click the three dots next to the current form’s name and choose Replace.
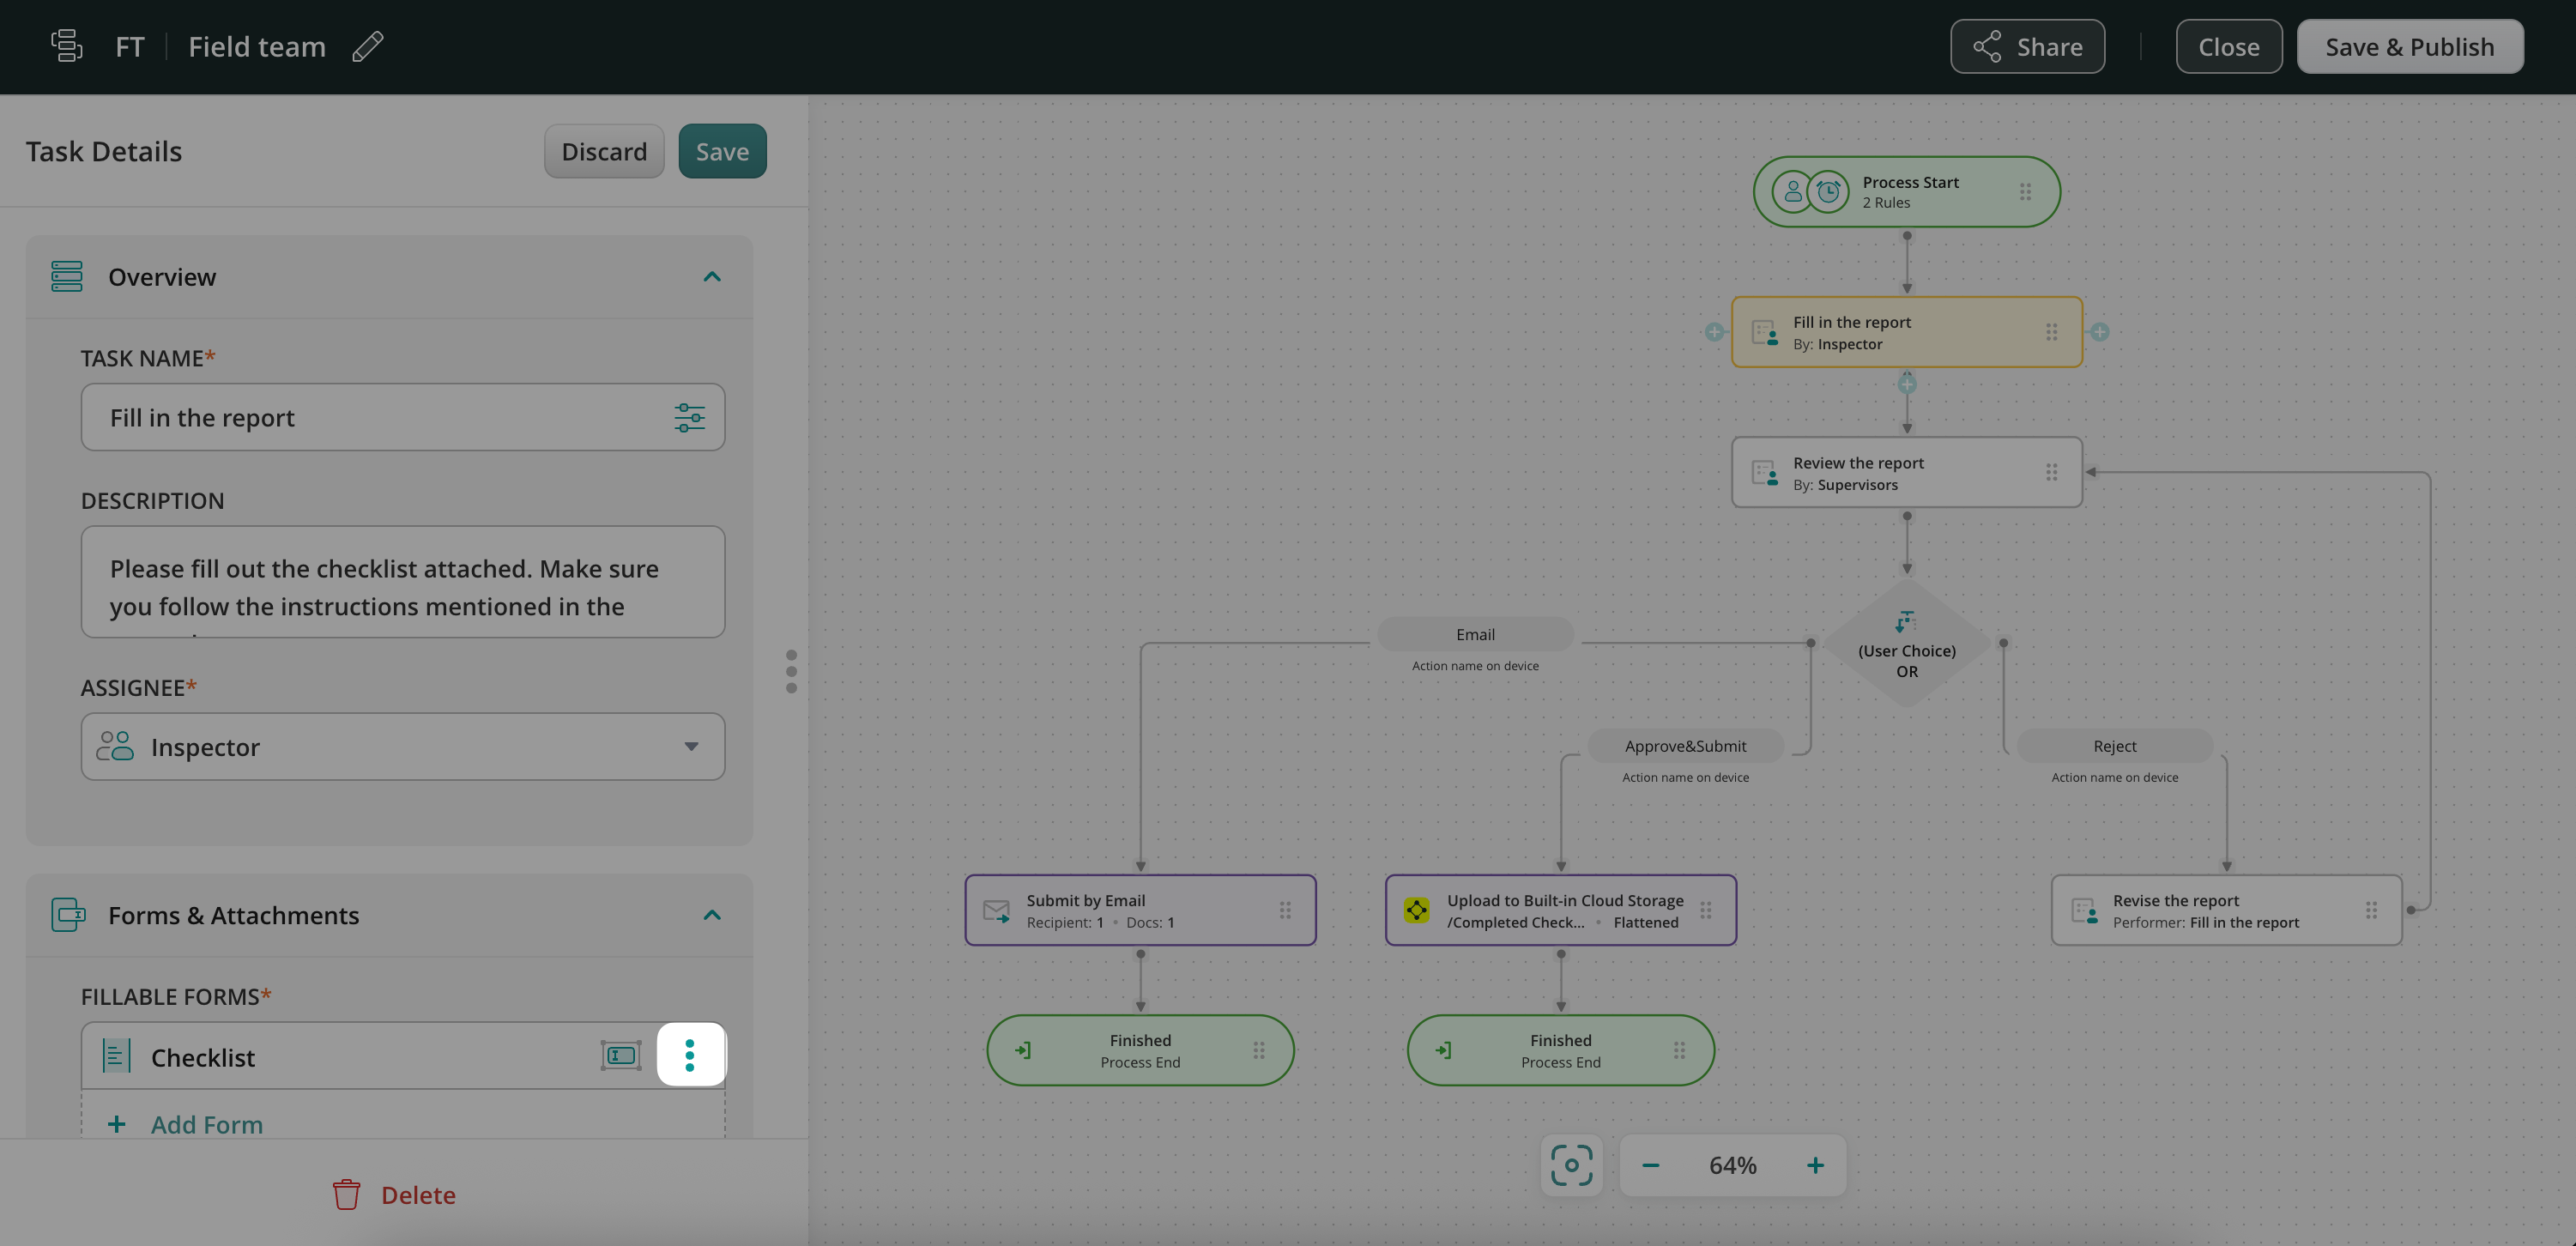
5. In the pop-up window:
- Click Choose from Forms, select the new form from the list, and click Add.
- You will be prompted to confirm whether the new form should replace the existing one in all other tasks within the workflow.
- Check the respective box if you want to apply the change across all tasks.
- Click Replace to confirm.
6. Once done, click Save to confirm the changes on the task level -> click Save & Publish to activate your workflow with a new form.
Scenario #2. Use the recently created form in a new workflow:
If you haven’t set up a workflow yet:
- Refer to our guide in this article for detailed instructions on building one from scratch.
- Alternatively, you can navigate to the Workflows section in your account, click New Workflow, and use one of our ready-to-use workflow templates to get started quickly.
Feel free to contact us at support@fluix.io with any questions.