


In this article, you will learn how to create an Admin role, edit, duplicate, and delete it. To proceed, please go to the Permissions tab under the Settings section of the Admin Portal.
How to Create a Role
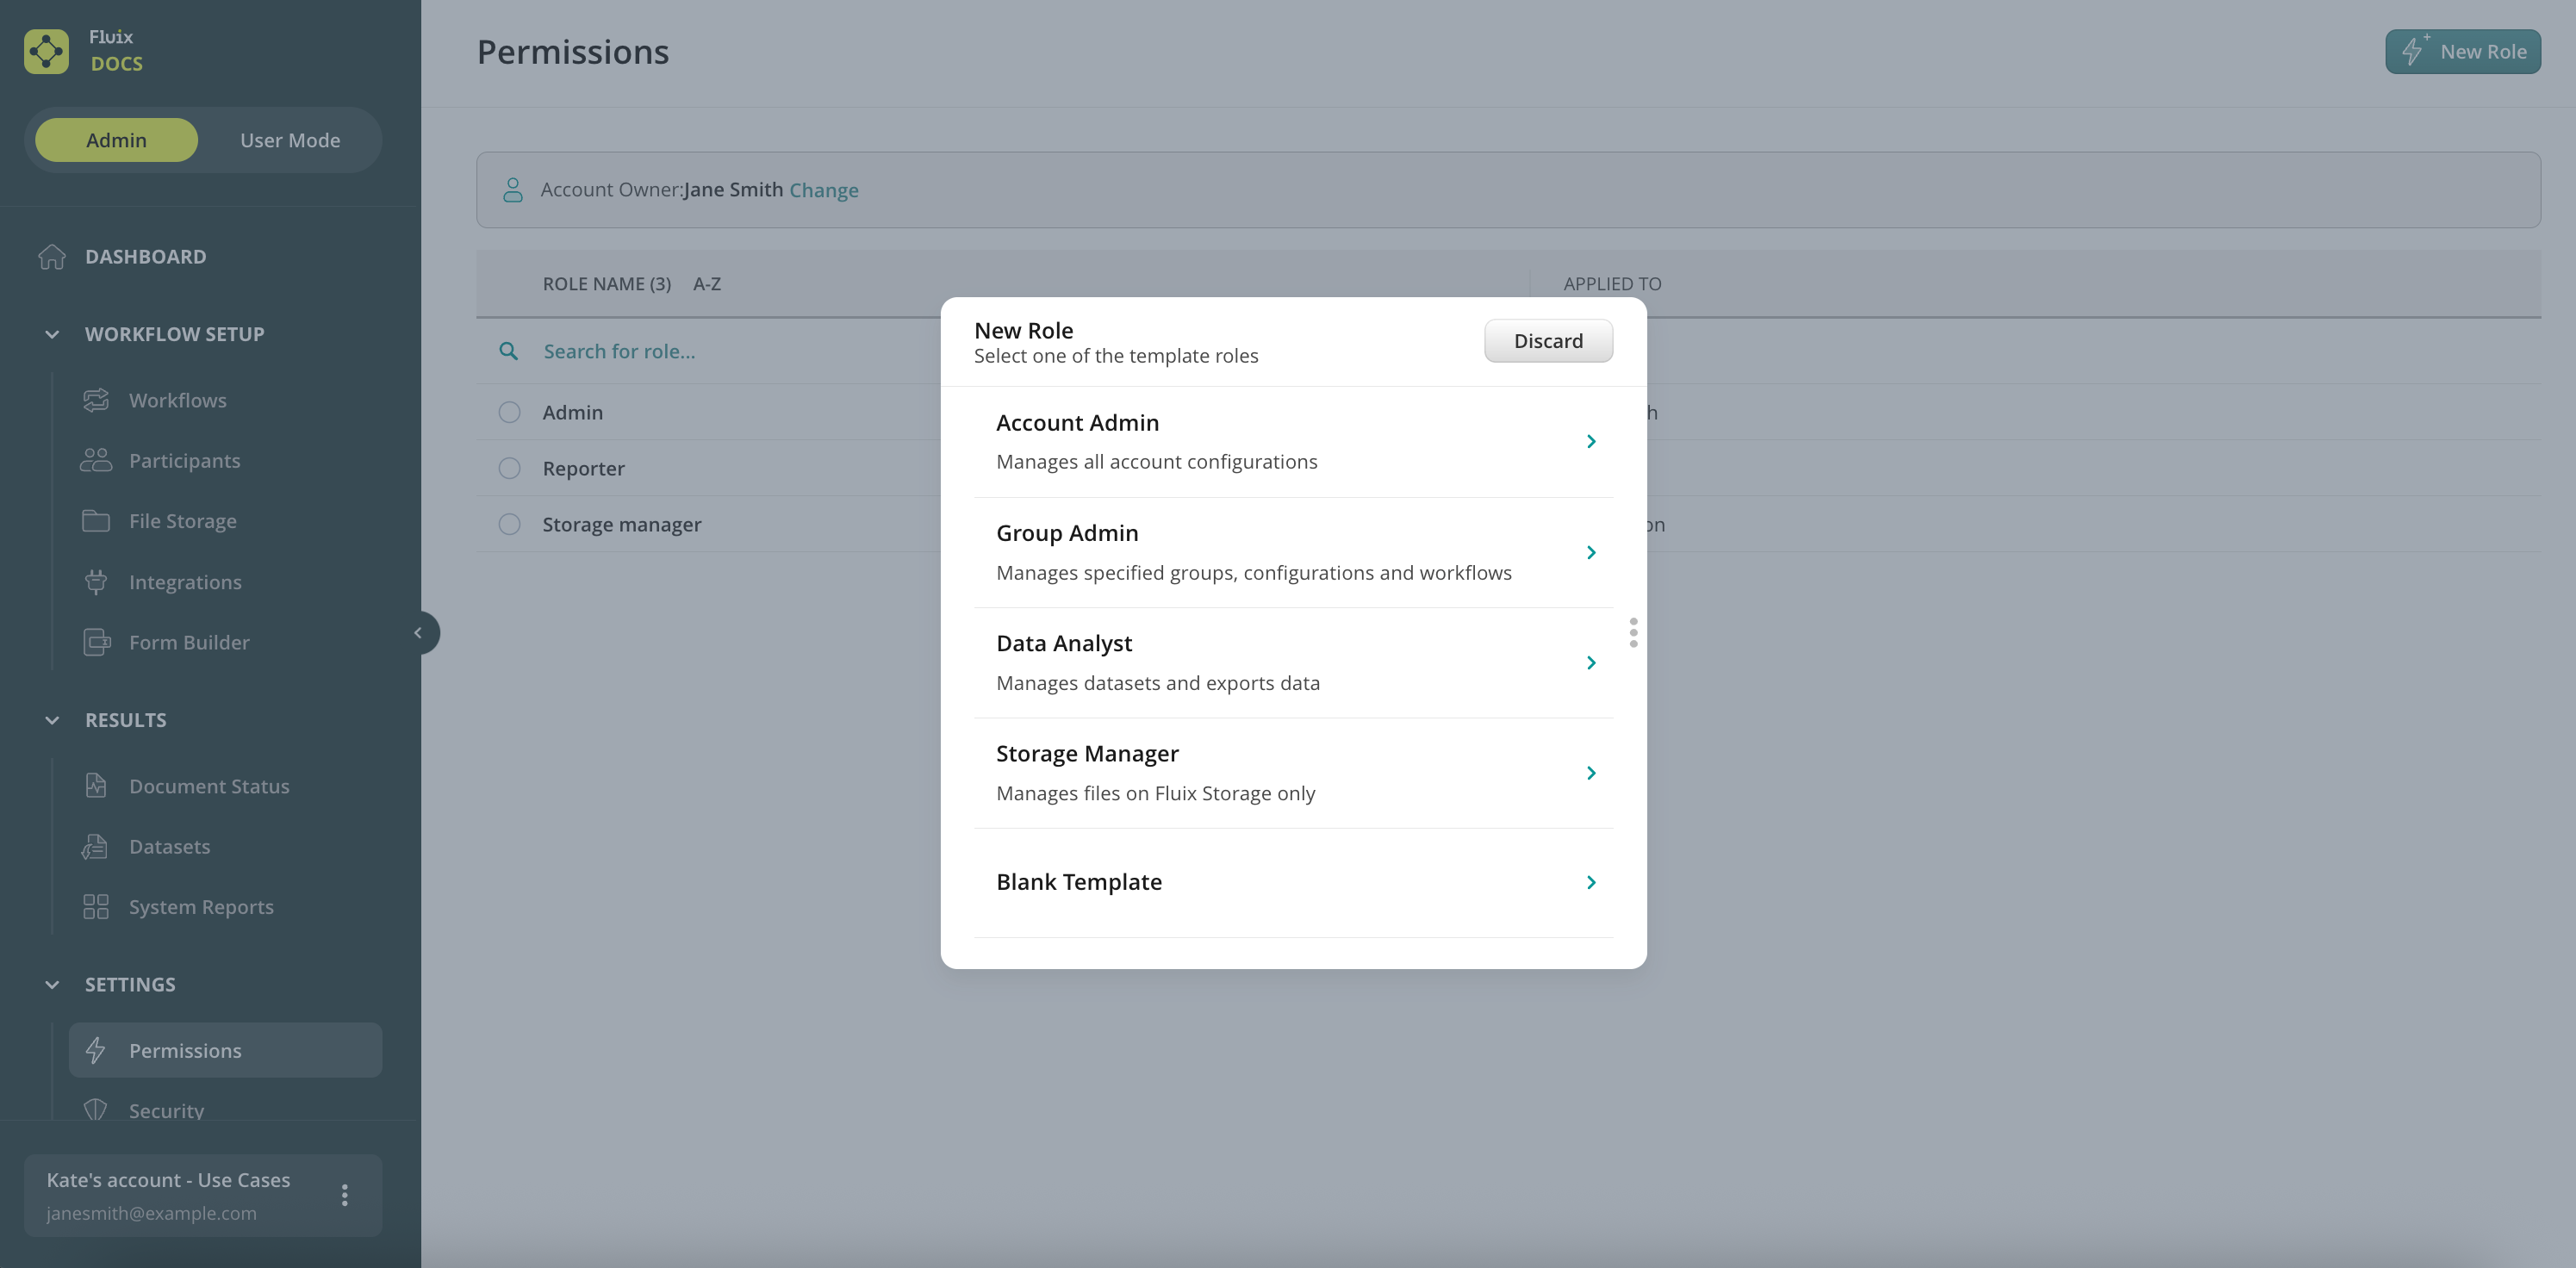
Step 1. In order to create a new role, please navigate to the Permissions tab under the Settings section of the Admin Portal and tap on New Role in the upper right corner of the screen.
Choose a template or create a custom role from scratch by selecting a Blank Template:
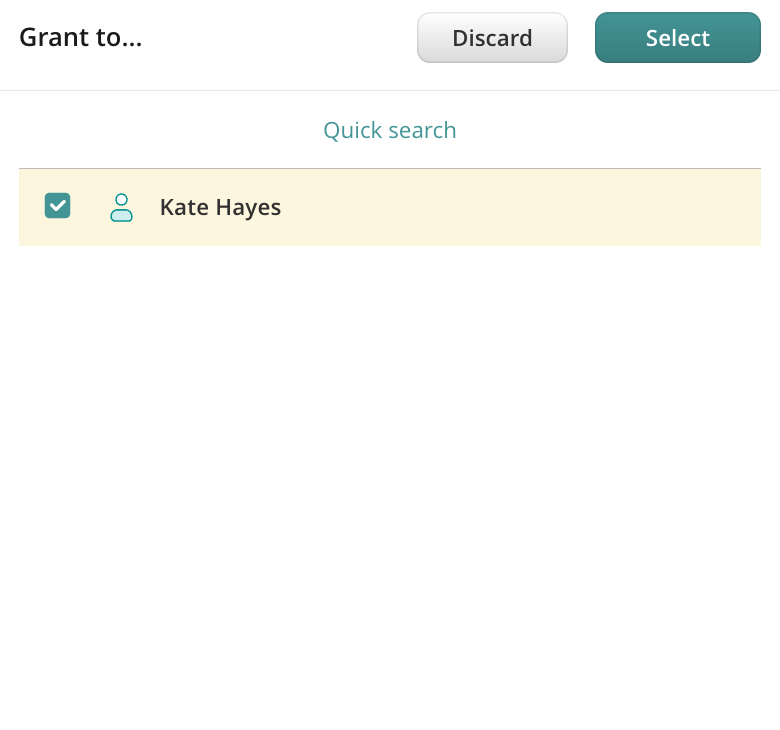
Step 2. Select users for the role; you can choose 1 or multiple users simultaneously.
Step 3. Give a role name in the top left corner
Step 4. Grant access rights. Depending on the role you have in mind, you can select the areas in Admin Portal you want your Admins to have access to.
Global Permissions: This section gives access to the main areas in Admin Portal such as Dashboard, Billing, Settings, Roles, Remote Storages, and GDPR.
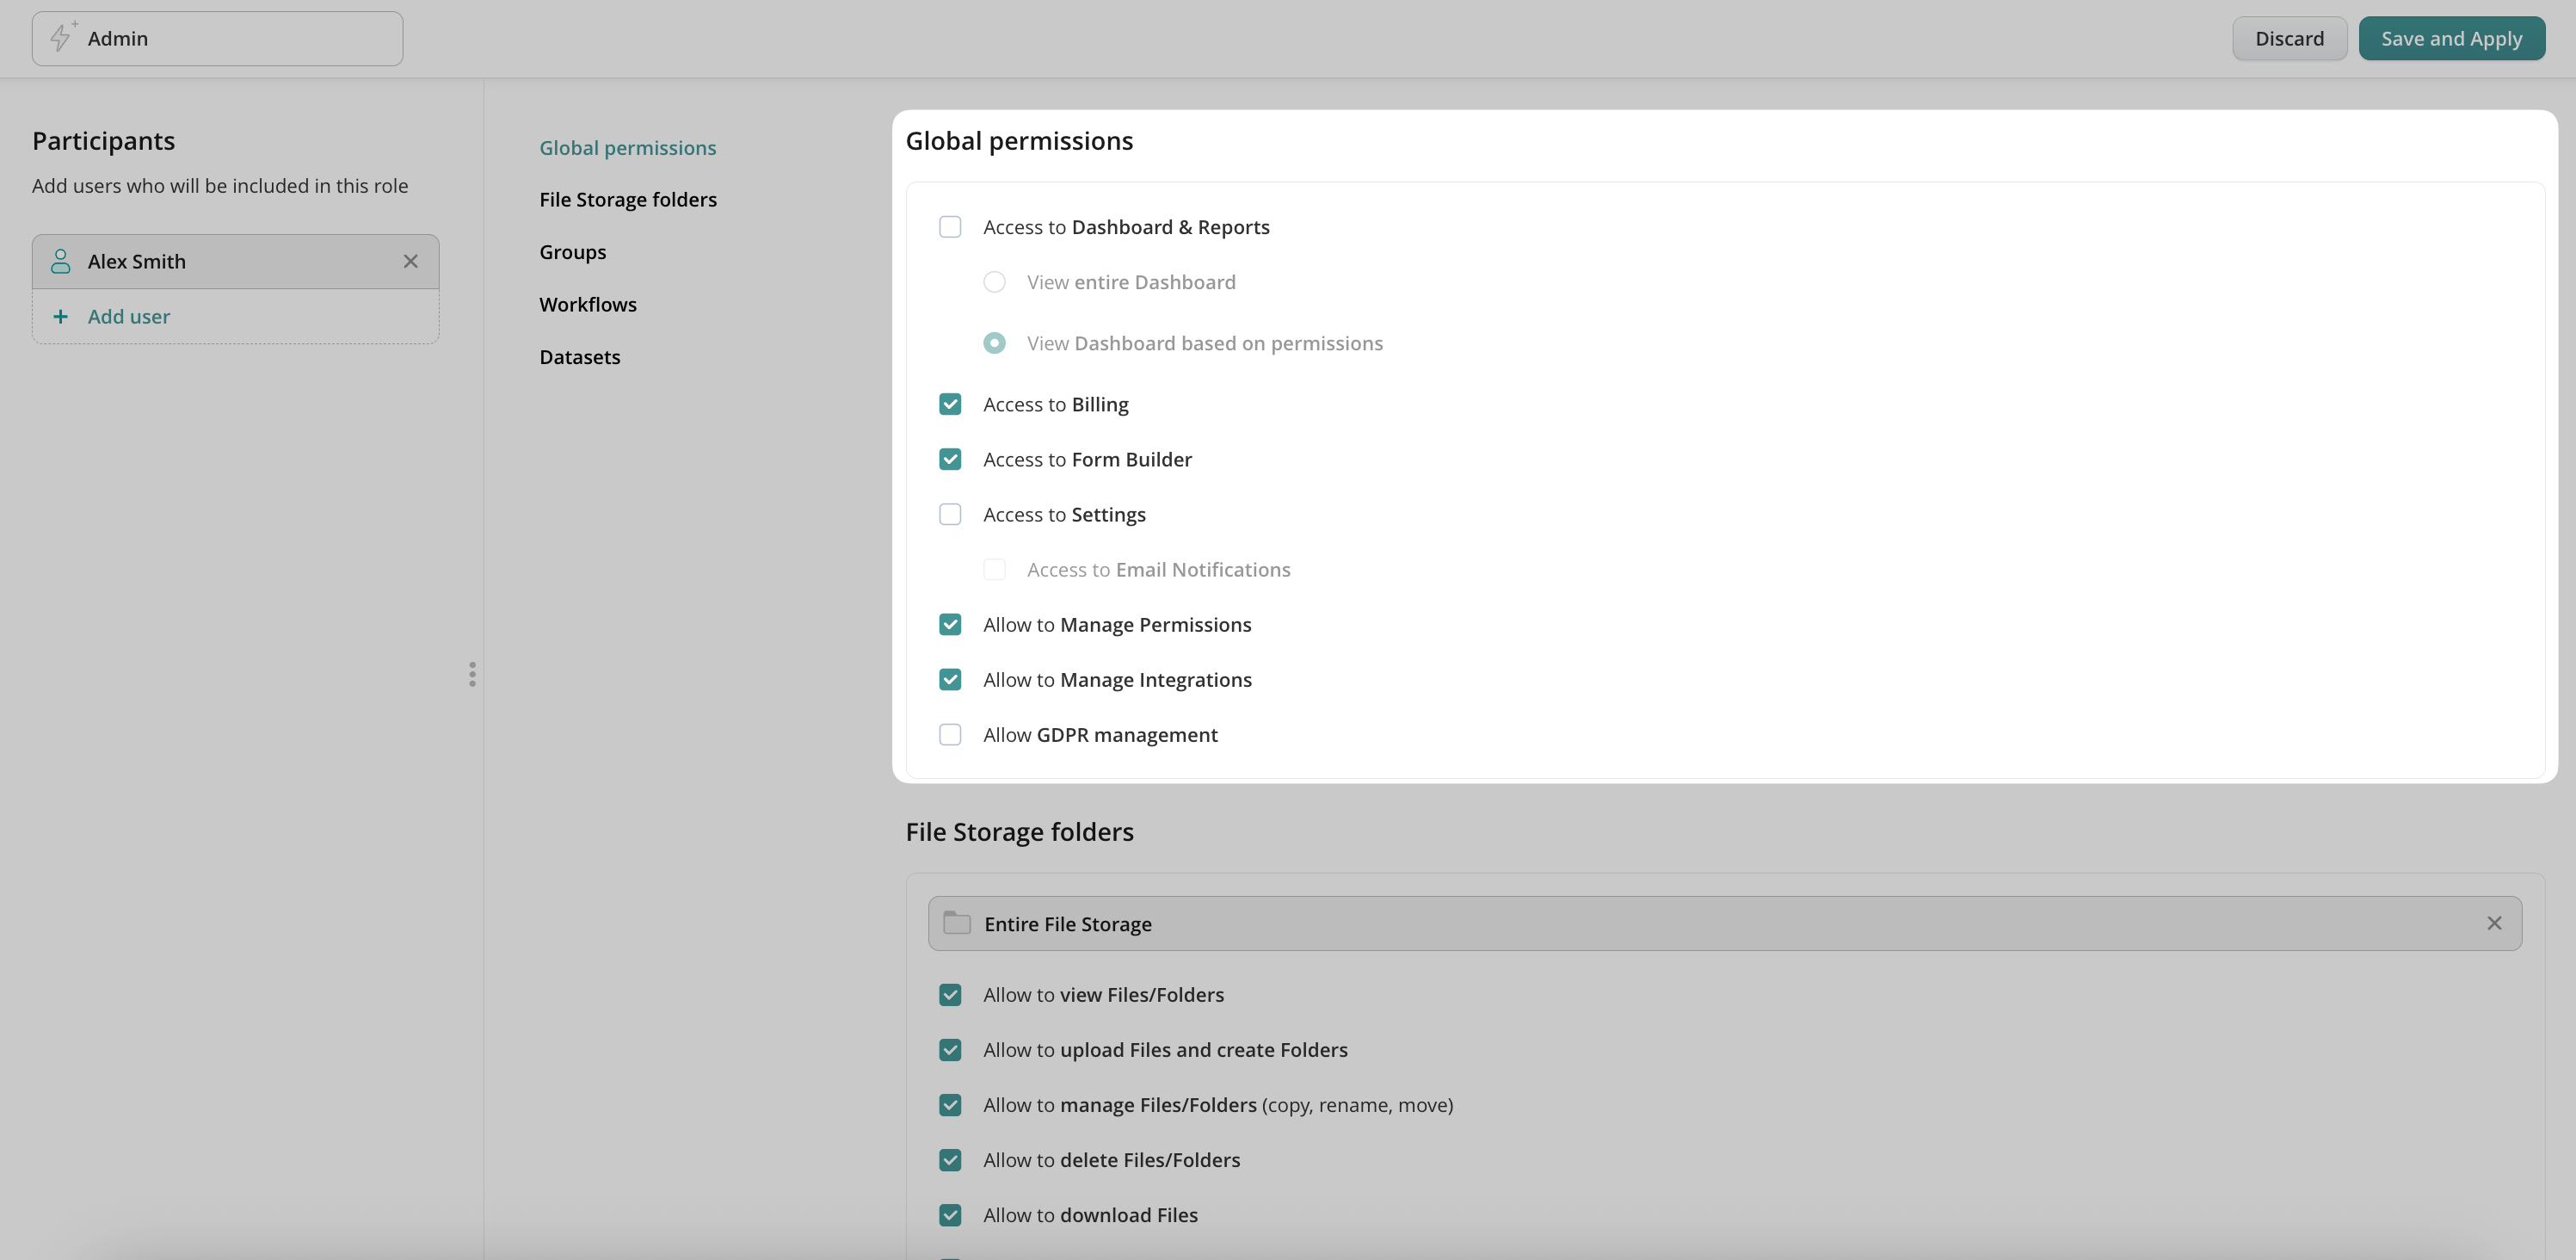
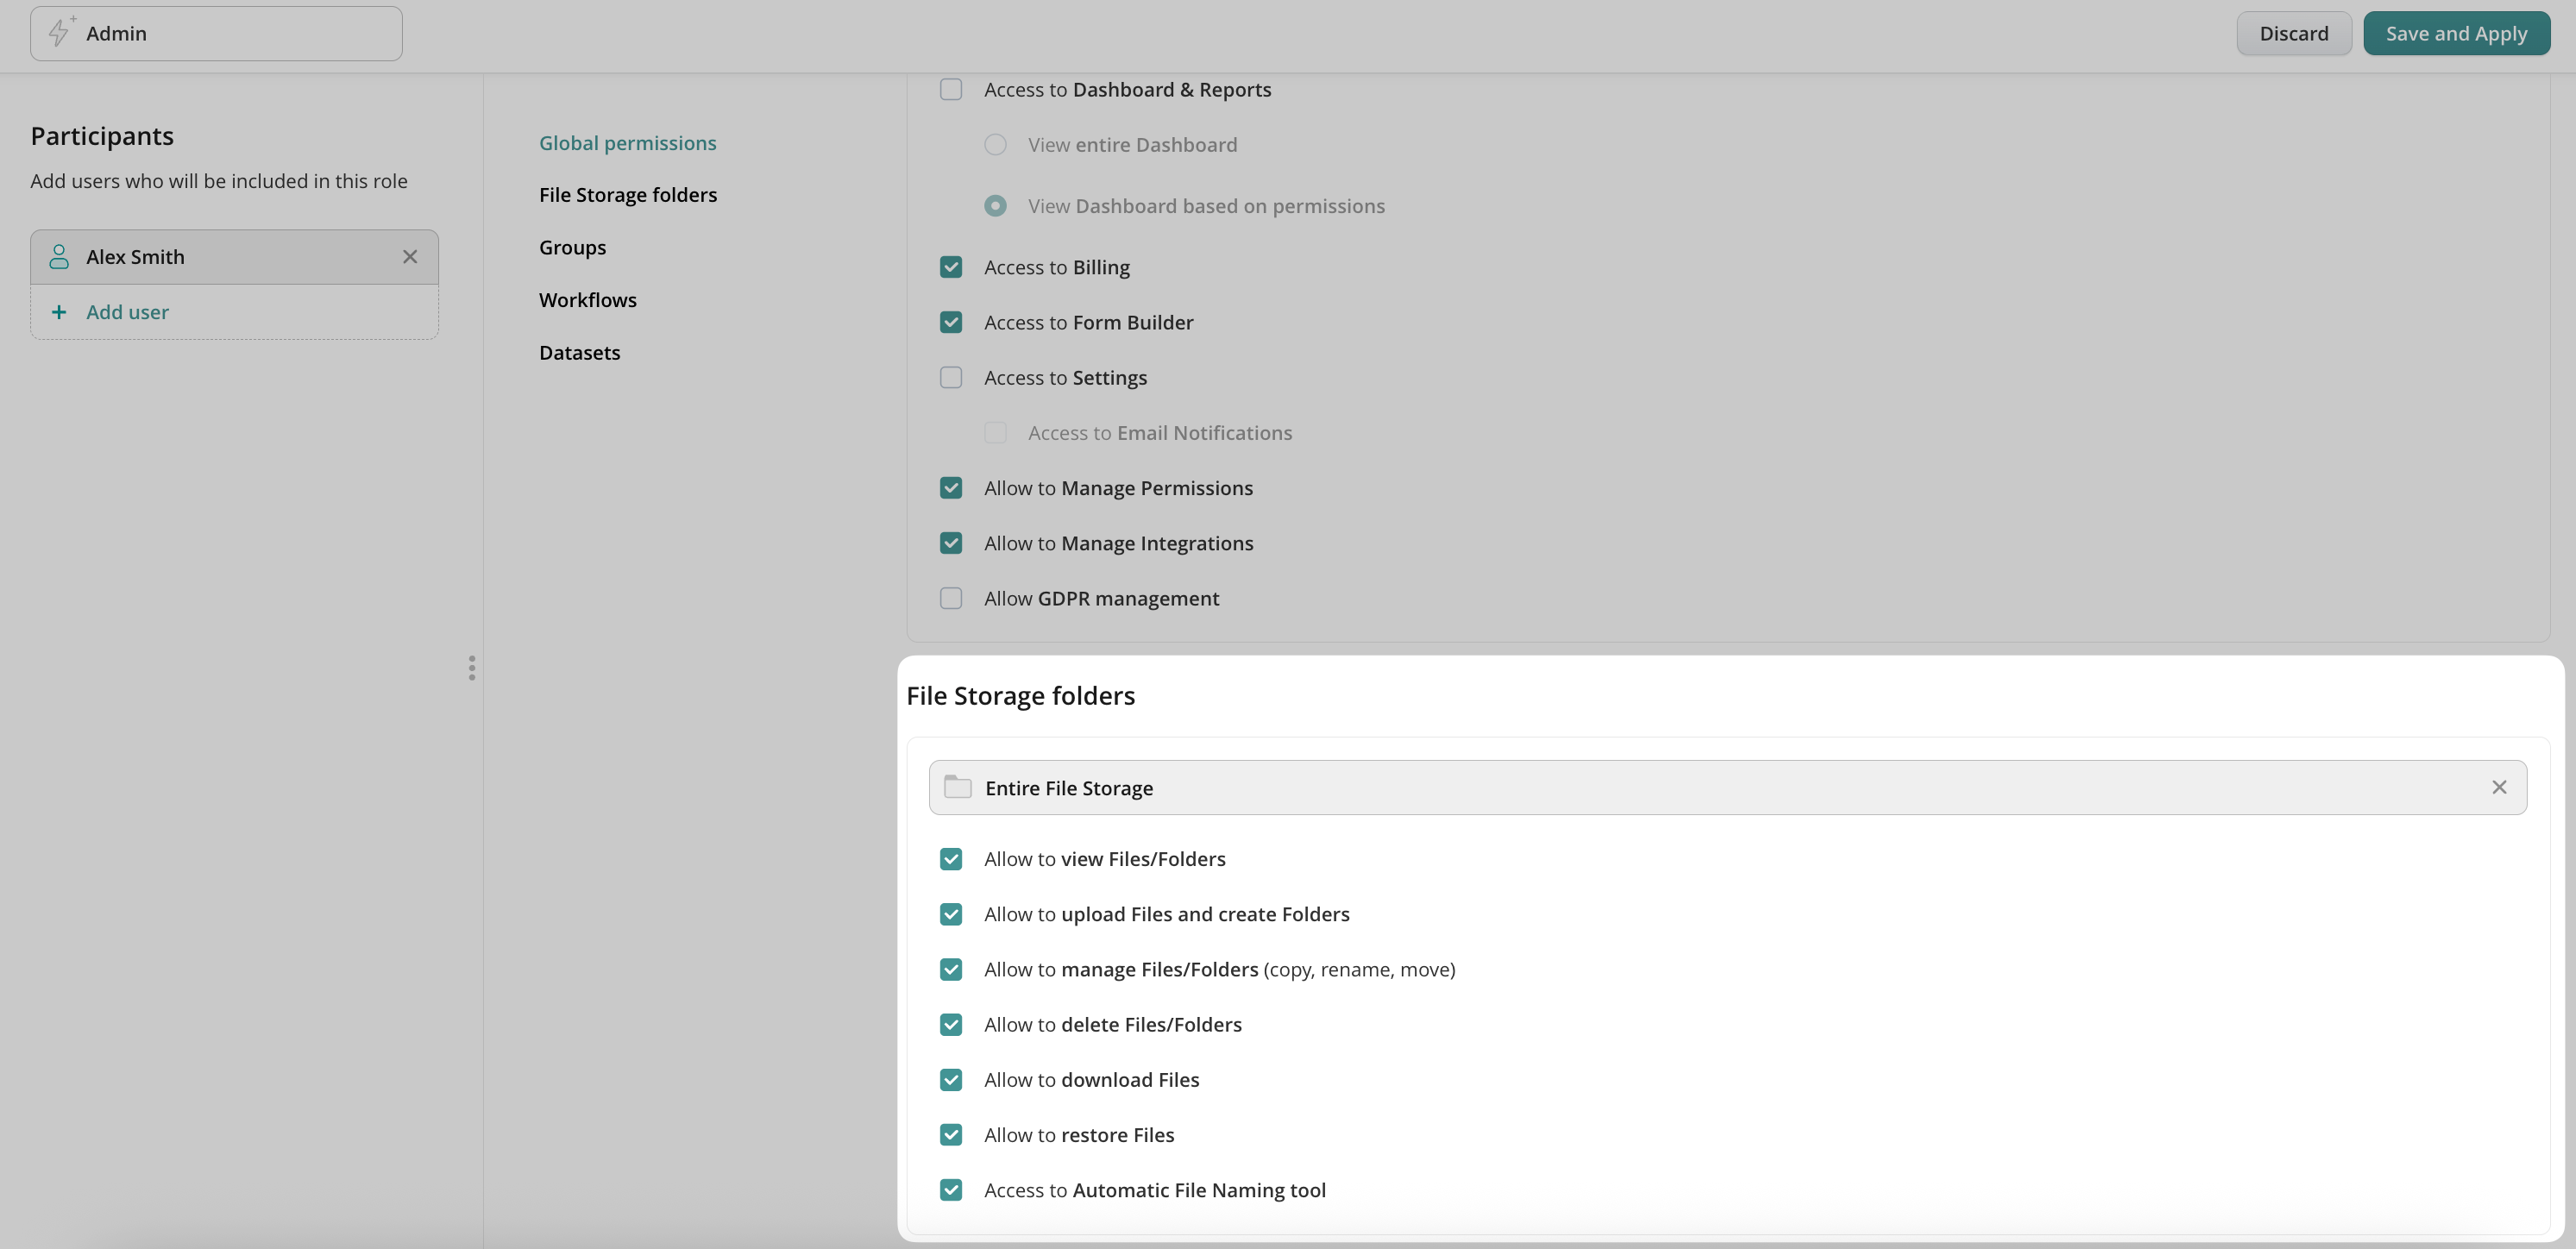
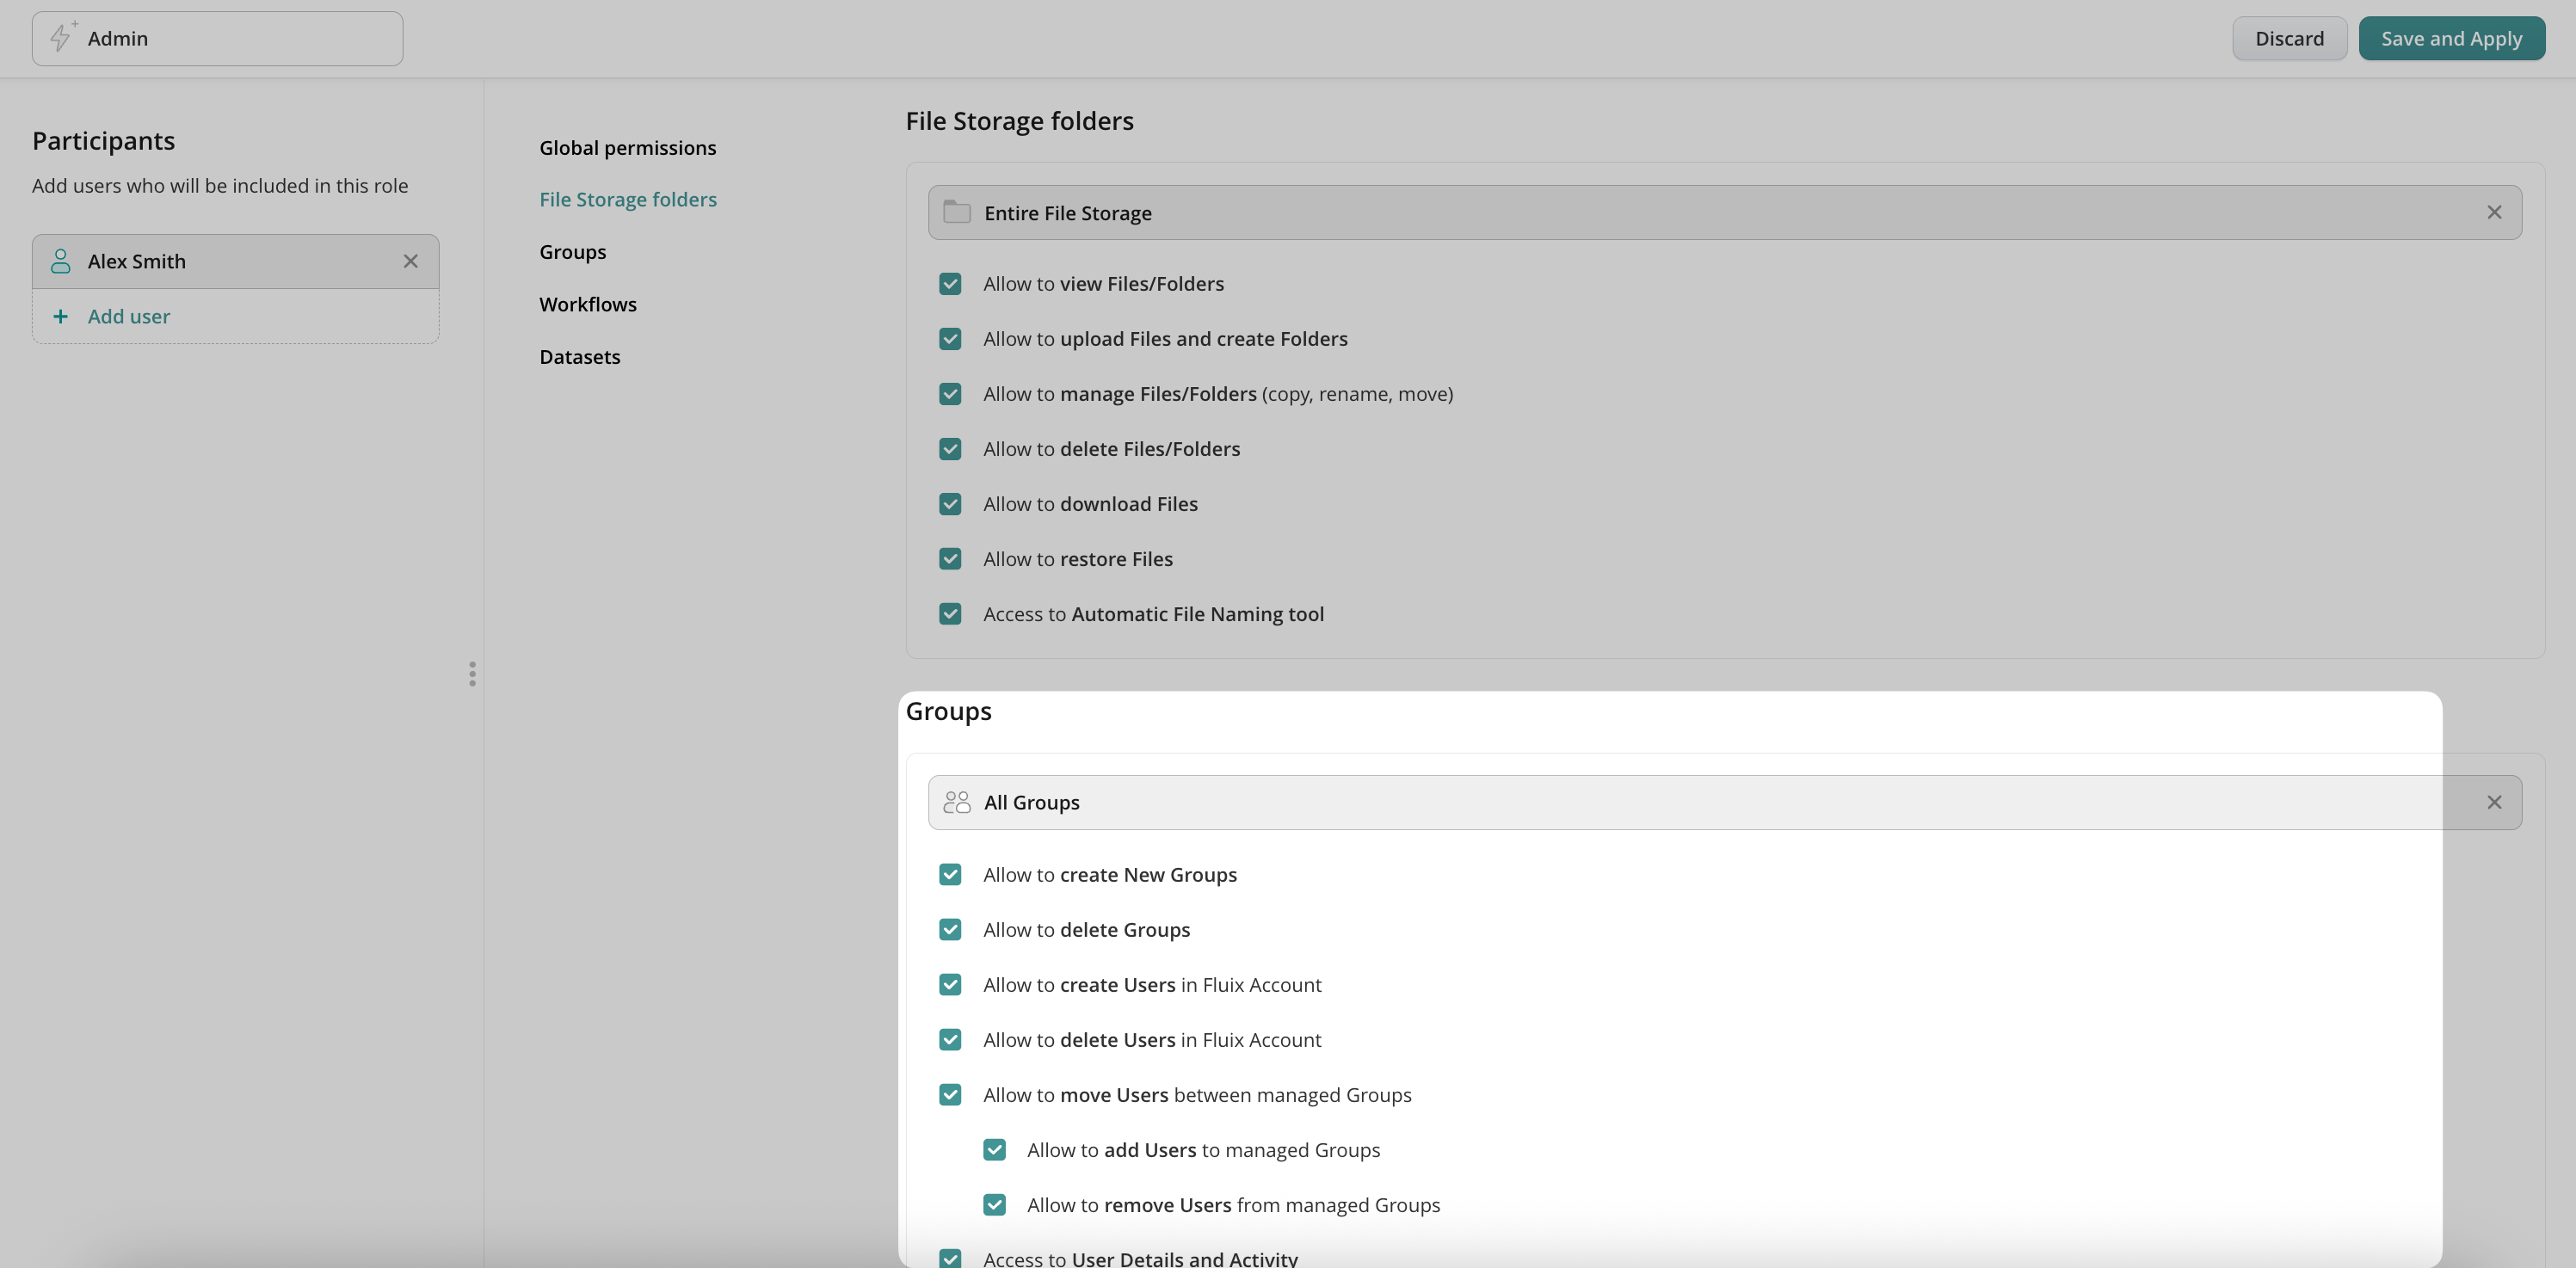
Access to Fluix Storage: If you use Fluix Storage, you can give users access to either the full storage or just certain folders:
Access to Groups: This section provides control over all or selected groups of users that your admins can manage.
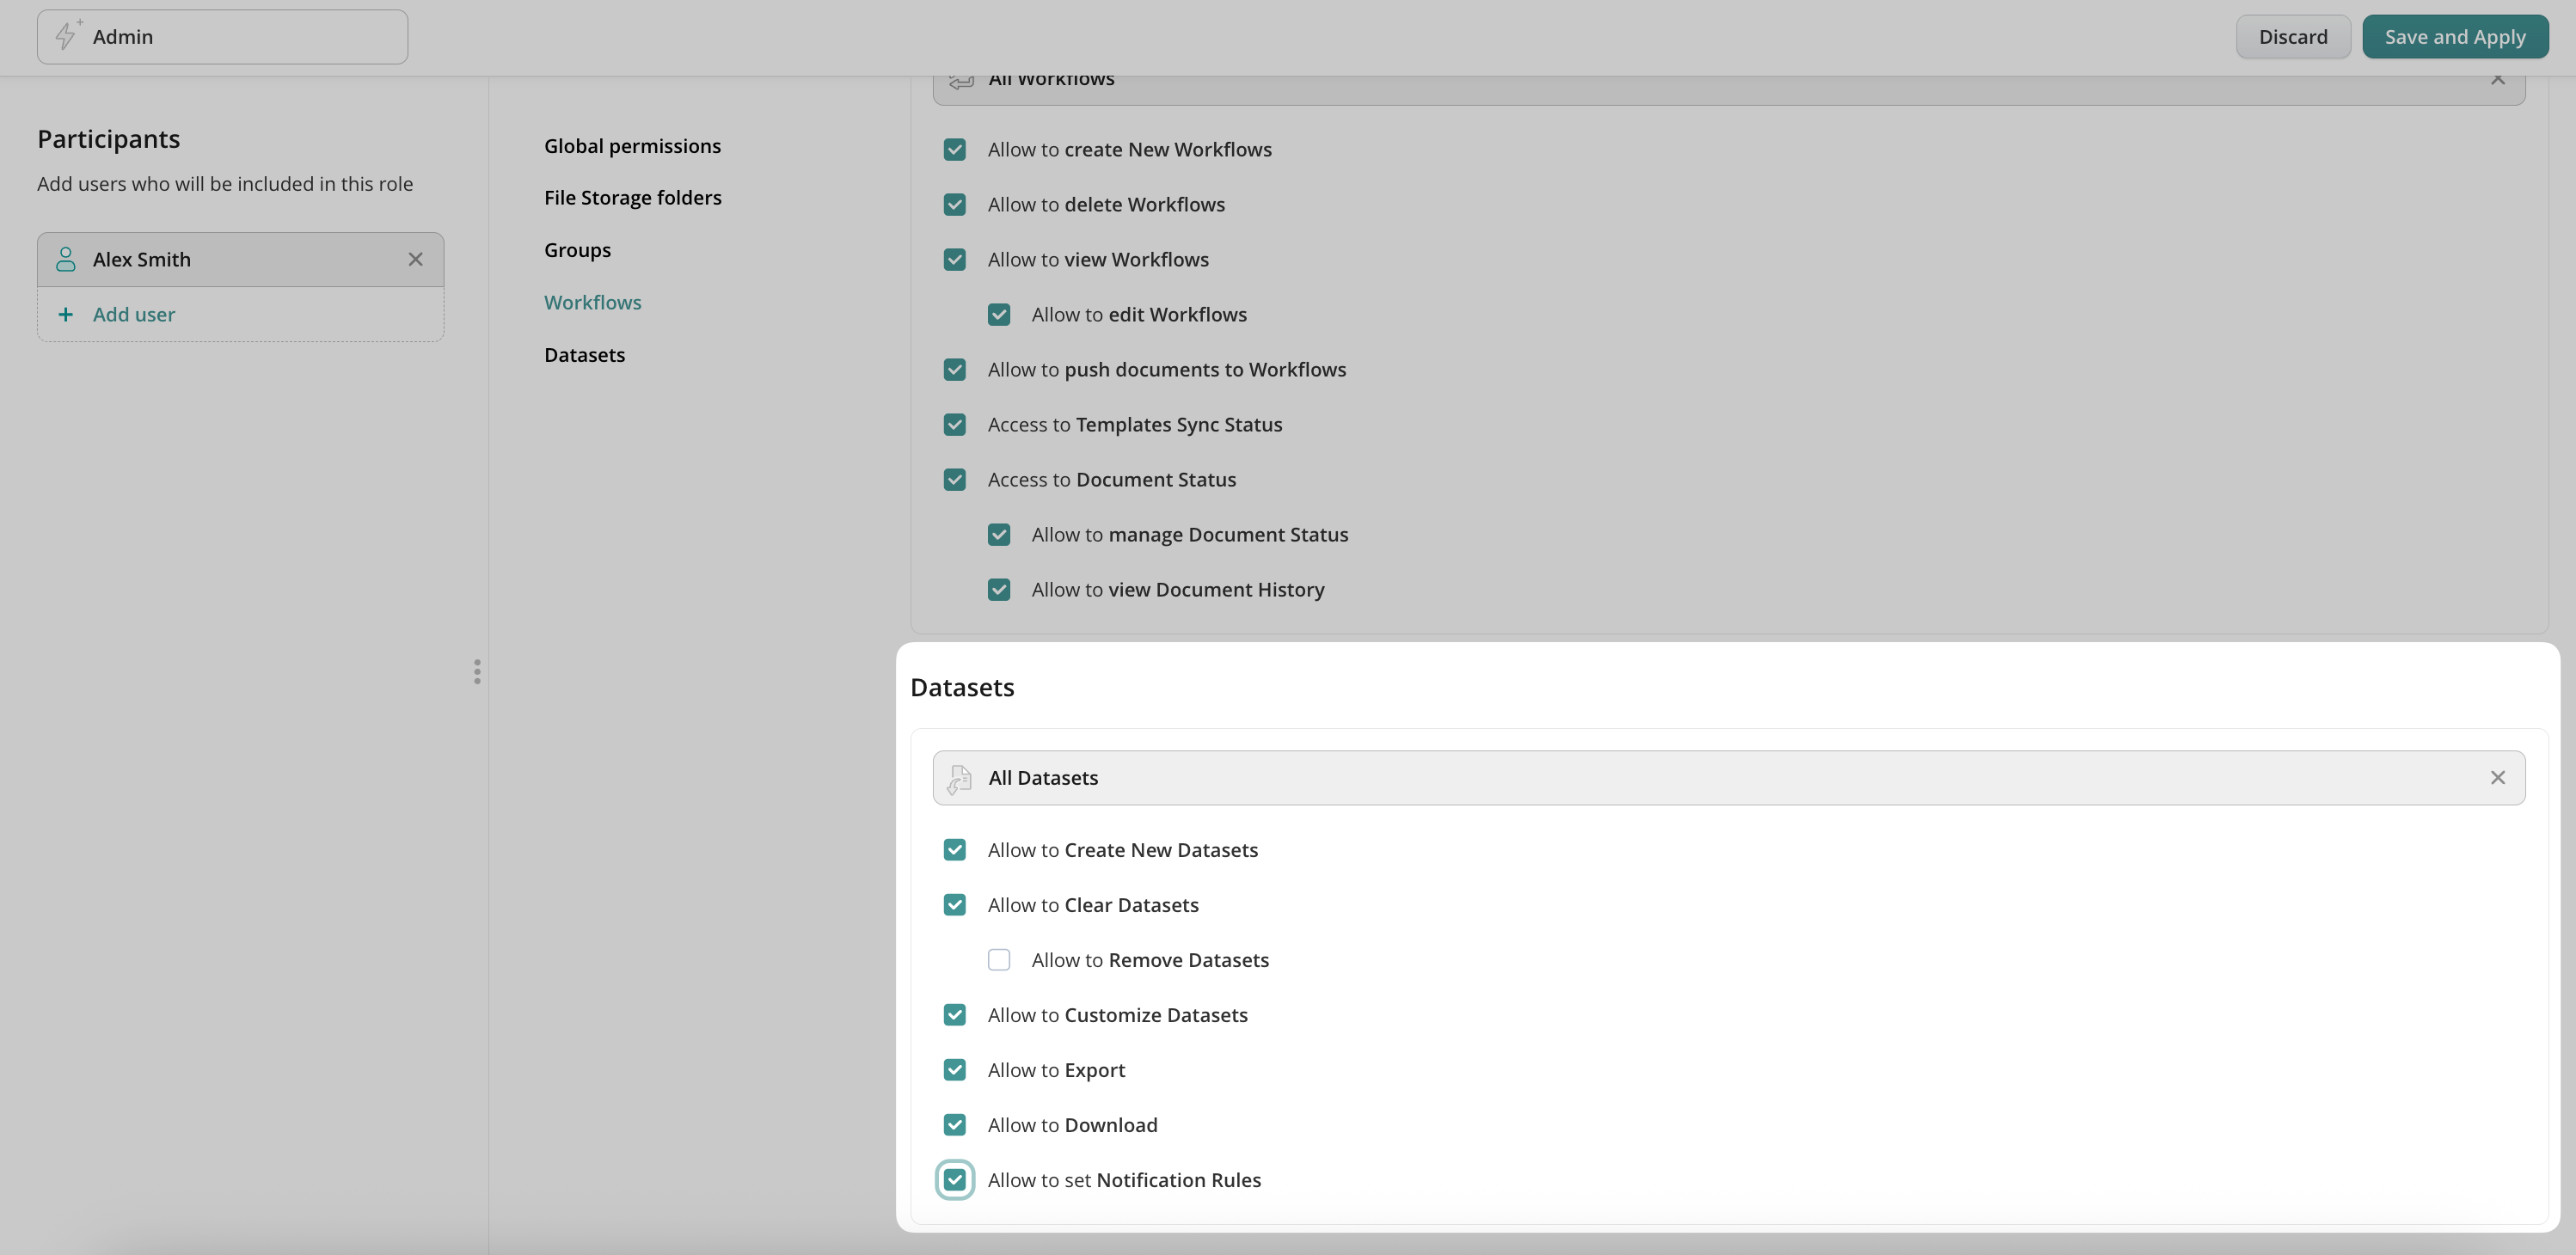
Access to Workflows: This section contains rights for managing workflows of your accounts, as well as viewing and managing the workflow documents. If you want an Admin to be able to create new workflows, select All Workflows as scope, this way giving admins the ability to both create, delete and manage workflows.
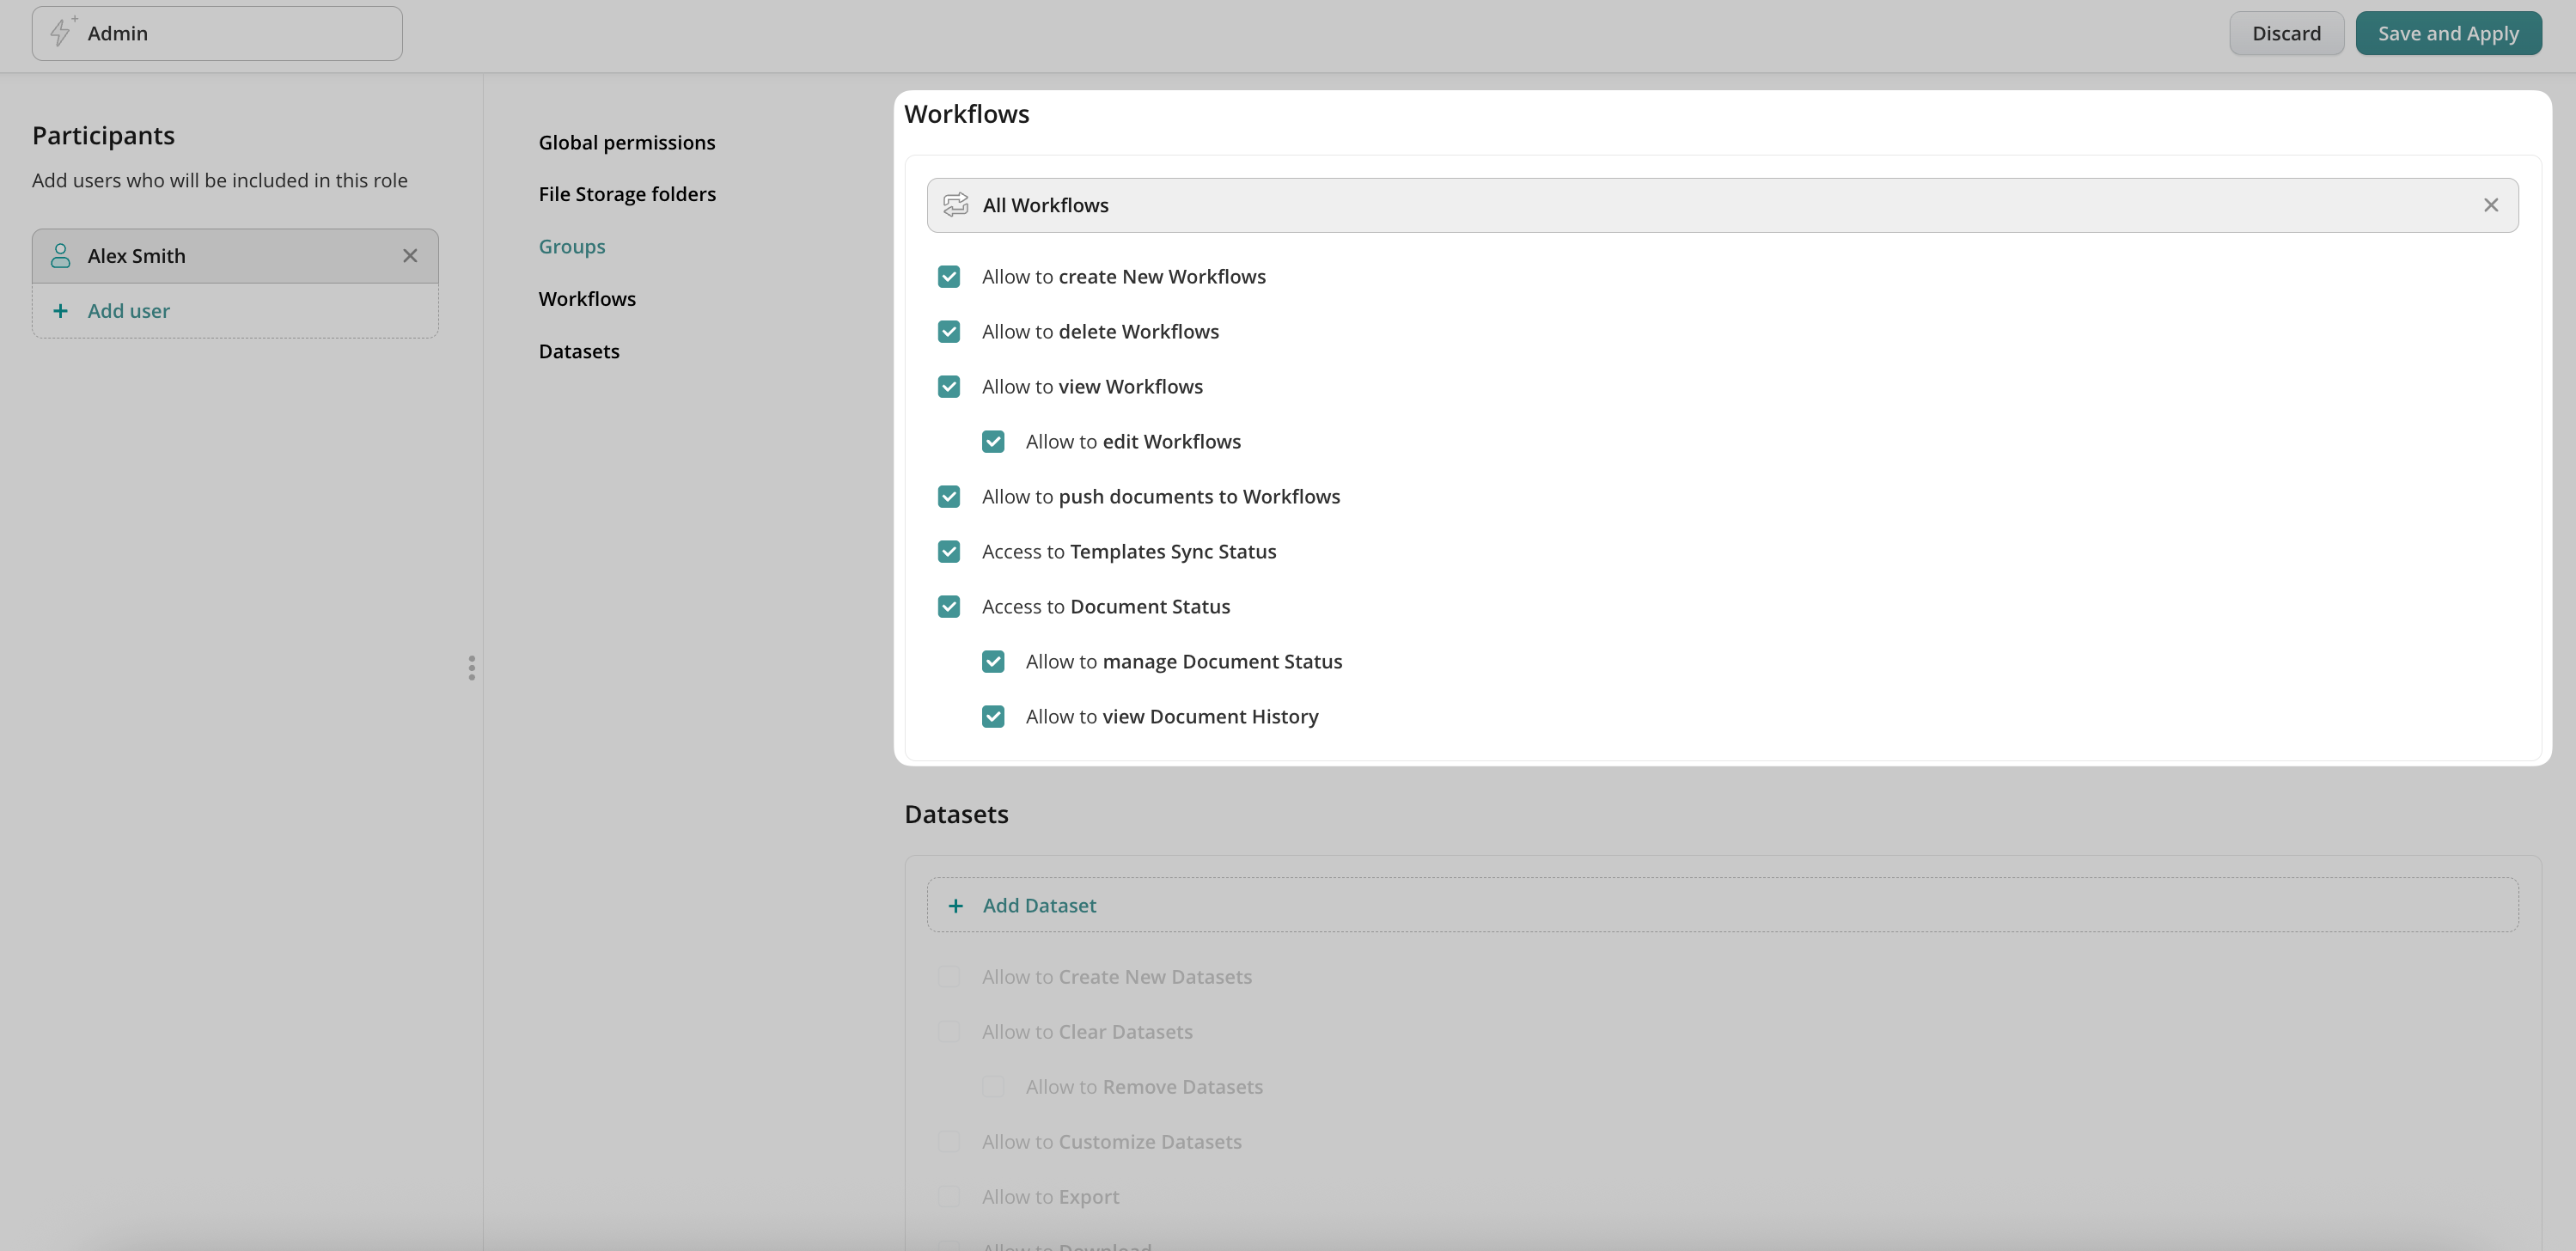
Access to Datasets: Here you can manage access to the Collected Data section, create, edit and export all or selected datasets:
Step 5. Save and apply changes.
How to Edit, Duplicate and Delete a Role
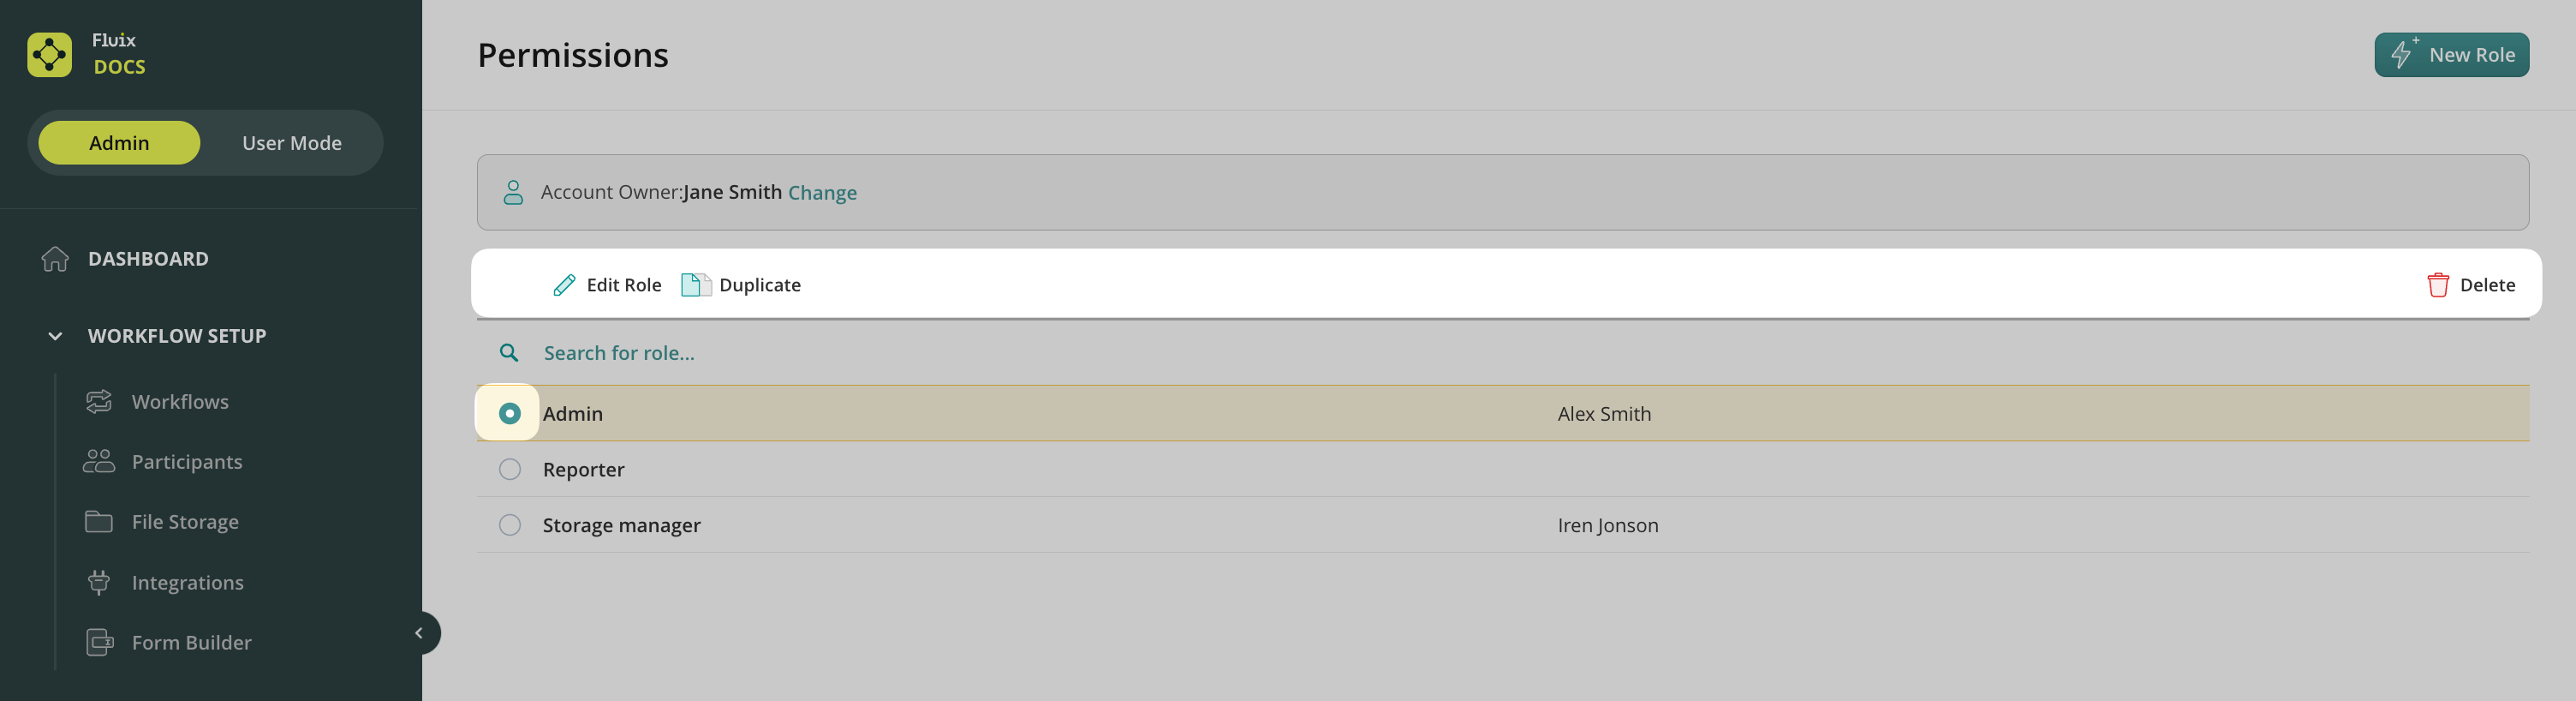
To edit a role, select it and click Edit Role:
To add a user to a role, simply select one on the left-hand side under Add User:

To duplicate a role with the same list of permissions, select it and click Duplicate Role. A new role will be created with the clone tab in the name. Rename it and add users to finish the setup.
To delete a role, select it and click Delete.
Can’t find what you’re looking for? Feel free to contact us at support@fluix.io if you have any questions or comments.