Fluix Airtable Integration | Data visualization

Fluix is a software platform that helps you collect field data on mobile forms, and submit it for review, company storage, email, or any business analytics tools.
Airtable is a cloud collaboration service that allows to aggregate and visualize data extracted from forms.
Integration of Fluix and Airtable allows you to cover the whole flow from data collection to its visualization and further data-driven decisions.
Connecting these two tools will take you 30 minutes and doesn’t require coding. The integration is performed via the webhook – the automatically generated link that connects two services and allows data transfer between them.
Check out our video that displays how this integration is being utilized in the aviation industry.
Note. Integration through a webhook requires a Core account in Fluix and a Pro account with Airtable.
Step 1. Create a Base
Before getting started with integration, you need to create an Airtable base where the data from forms will be exported. If you are going to use the already existing base, go straight to Step 2.
- 1. Go to your Airtable account and click Add a base and select Start from scratch.

- 2. Enter the base name and optionally select the base background color and icon.
- 3. By default, a new base consists of one table, and you can add the necessary amount of tables. To do it, click Add table.
Note. For bases with multiple tables, you need to set the webhook integration individually for each table.
- 4. To edit the table, unroll the settings menu.

- 5. By default, each new table contains 4 fields: Name, Notes, Attachments, Status. To edit them, unroll the settings menu.

- 6. To add a new field, click the plus icon to the right of Status. You need to add as many fields as you are going to export from Fluix forms.

For more details on base management, read a full instruction on how to create a base from scratch.
Step 2. Connect the Webhook
- 1. Click Automations and select Create a custom automation.

- 2. In Trigger type, select When webhook received and copy the generated webhook.
- 3. In your Fluix account, go to Configuration > Workflows. Select the workflow through which form used for data transfer to Airtable is submitted.
- 4. Open the workflow, click Edit Workflow in the upper right corner, and add the submit rule Submit by HTTP. Paste the generated webhook link and select POST values.

- 5. Click Save & Publish in the upper right corner.
- 6. Perform the sample submission of the document that is going to be further used for data extraction into the particular table. Don’t worry that the first submission fails, since it is a test submission to connect with the webhook.
- 7. In the Airtable account, click Run test. The status Test ran successfully means your webhook has been connected. You can’t proceed with selecting fields without the connected webhook.

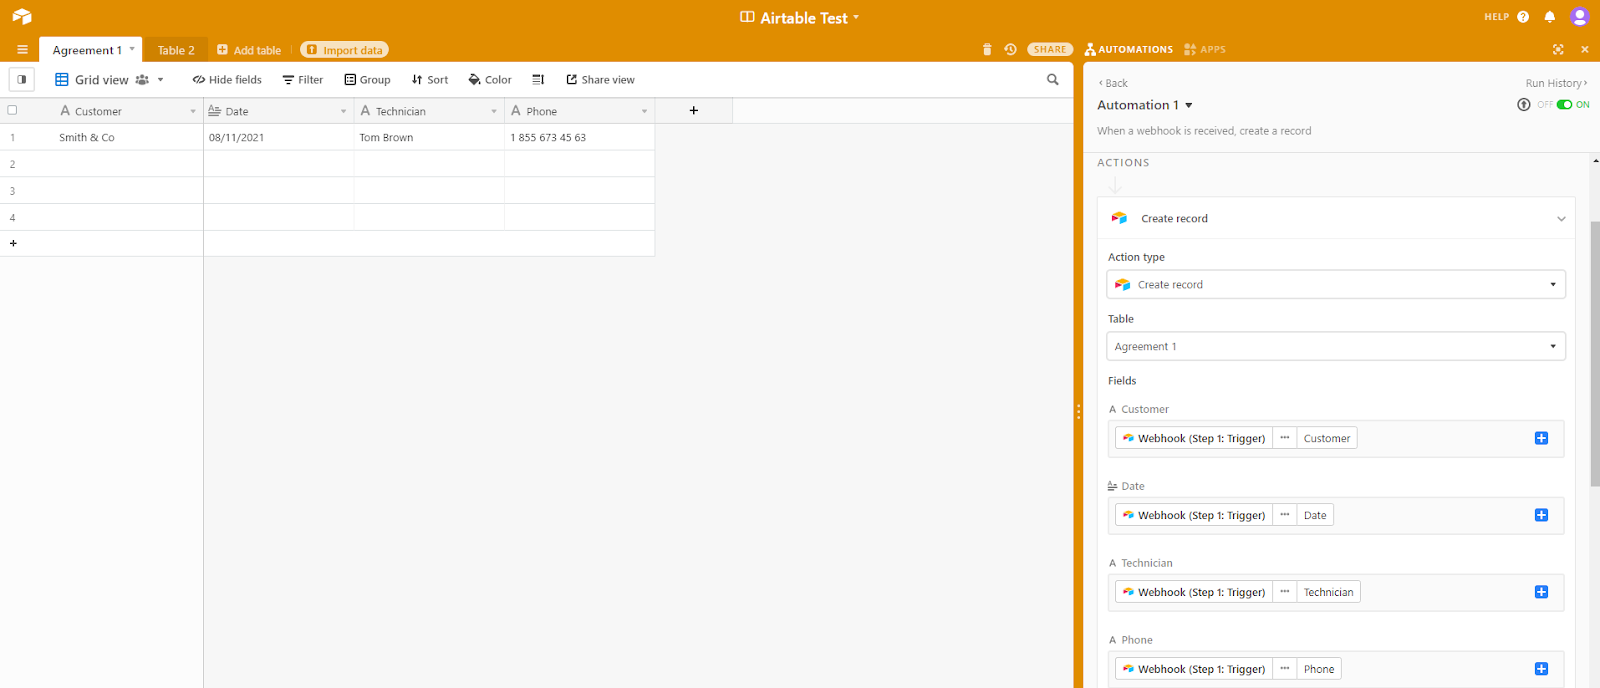
- 8. In Airtable, in Actions, select Create record in Action type and select the necessary table in Table.
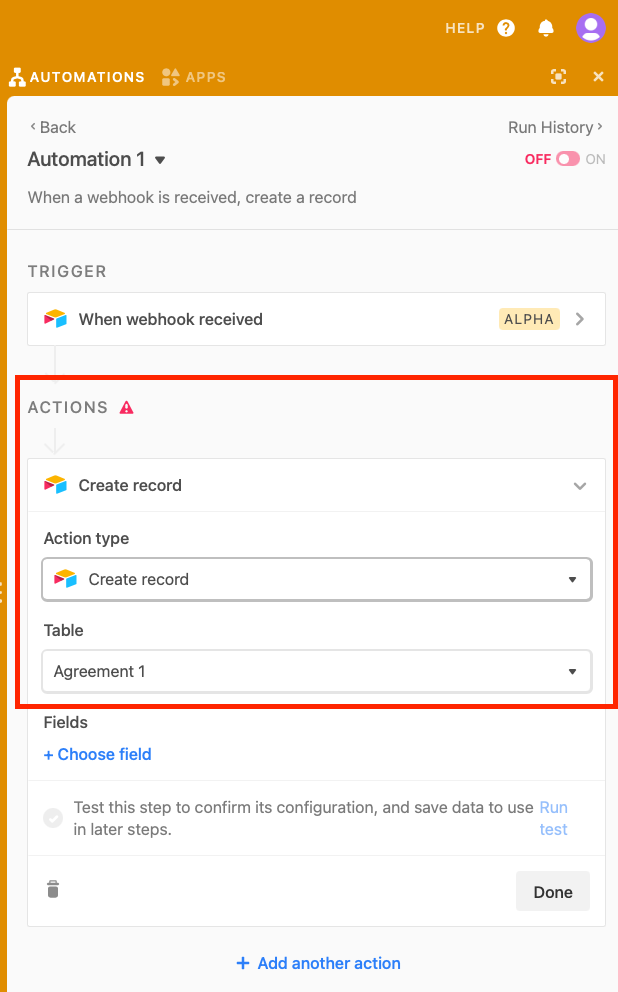
- 9. In Fields, select fields where data will be added.
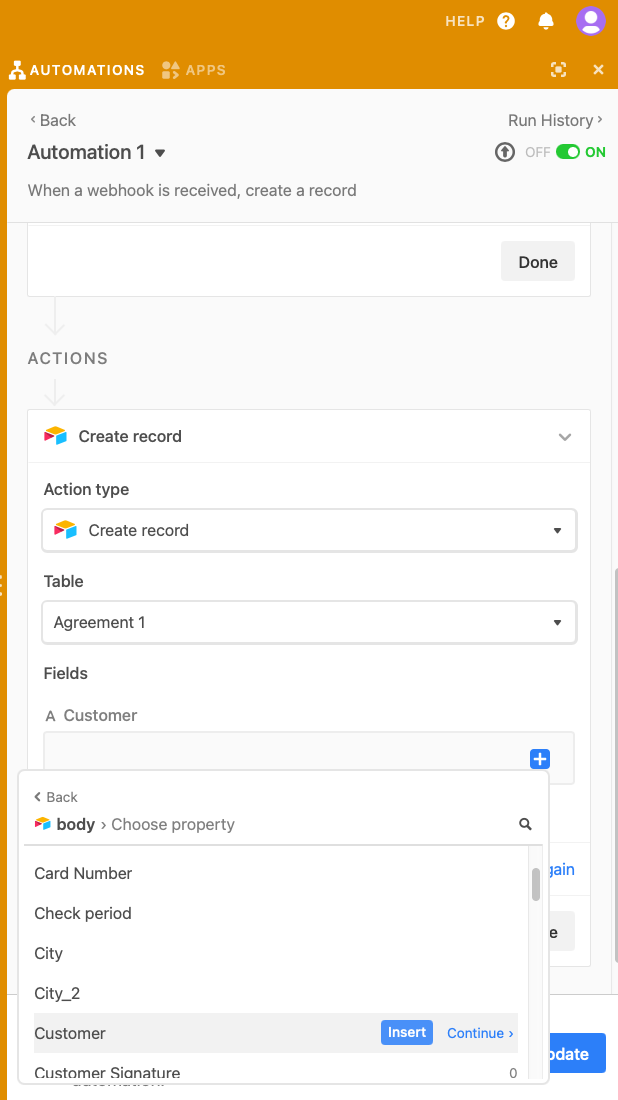
- 10. Map each field to the corresponding field in the Fluix form. Click the plus icon in the input line, select the webhook and click Continue. Select the body, click Continue and insert the necessary form field.
- 11. Switch the toggle to the On position on the top and click Run test.
Step 3. Export Data
- 1. Submit a form in the Fluix app.

- 2. The submitted data will be automatically transferred to the table in Airtable.
Note
You can create several automations for one table. In this case, select the new webhook and insert it into the new submit action in the Fluix workflow. The rest of the process will be similar.
In case you have any questions or difficulties with setup, contact our support at support@fluix.io and we’ll be happy to help you.
Check other business integrations here.
